Feliz día comunidad DIYHub, espero se encuentren muy bien y estén disfrutando de esta semana y por supuesto con más creaciones en mente. Hoy nuevamente quiero compartir con ustedes un lindo organizador que realicé les estaré explicando el paso a paso y los materiales y también el resultado final en fotos.
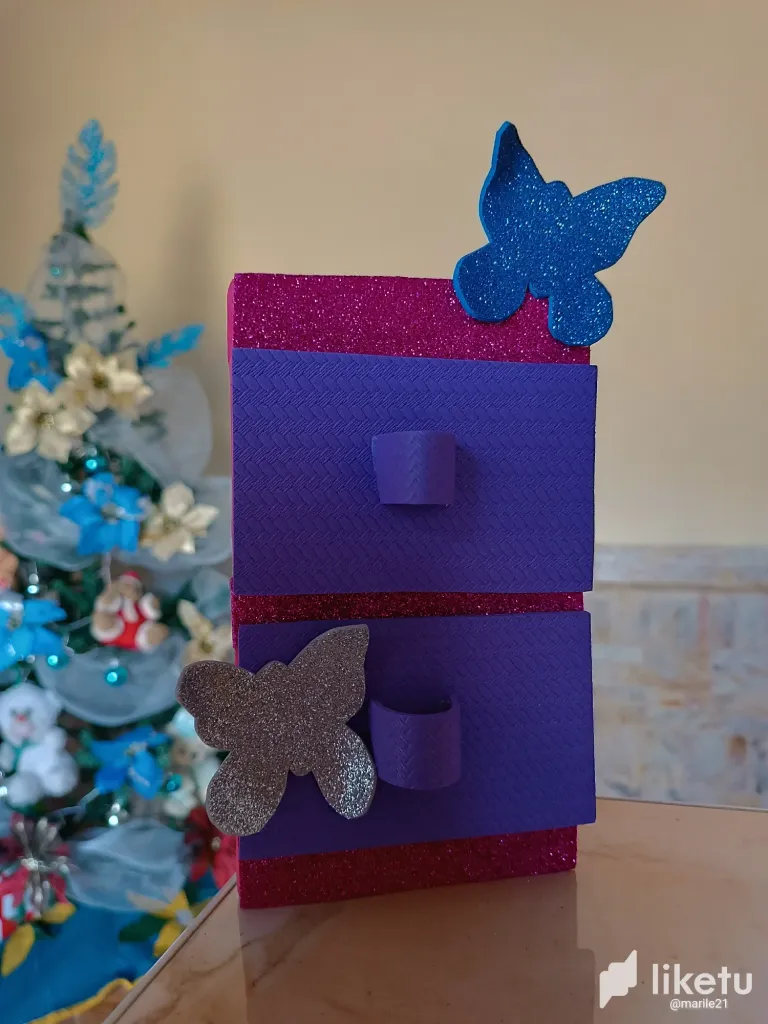
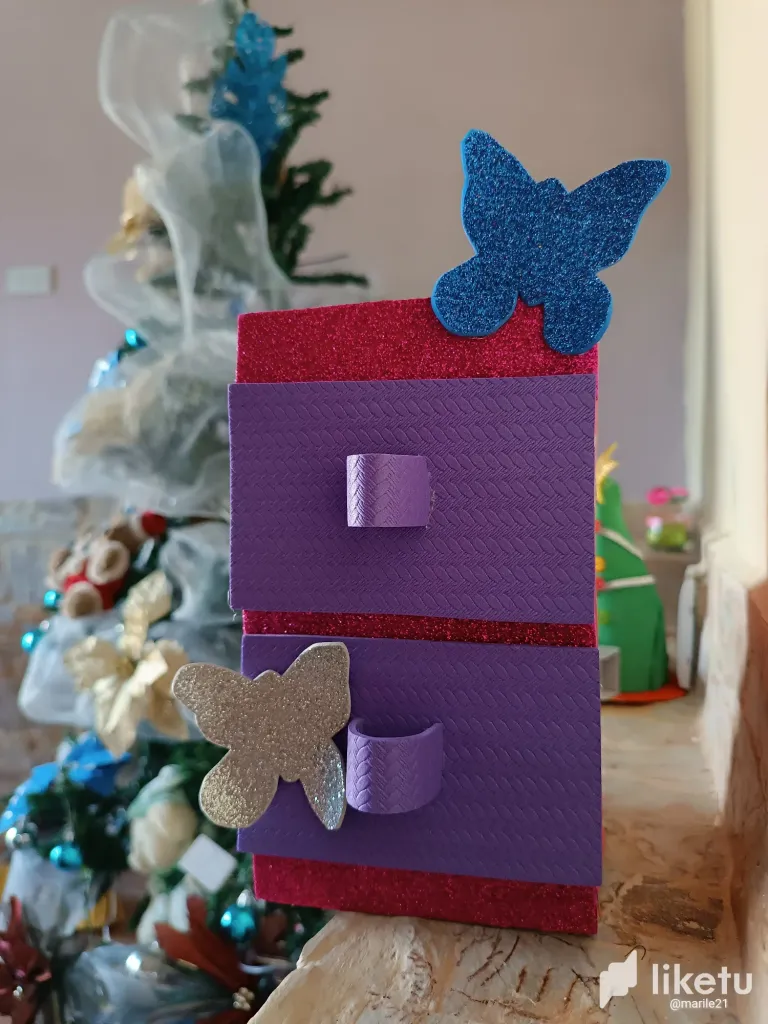
Un organizador para nuestros accesorios y maquillaje es indispensable para mantener en orden y ahorrar más espacio, el organizador que realicé es con una base de cartón, es sencillo de realizar y la parte favorita es al momento de decorarlo puedes aplicar el color y diseño que más te guste a mí por ejemplo me encanta el fucsia y morado, a continuación les explico como lo realicé.

Materiales: 🖌️
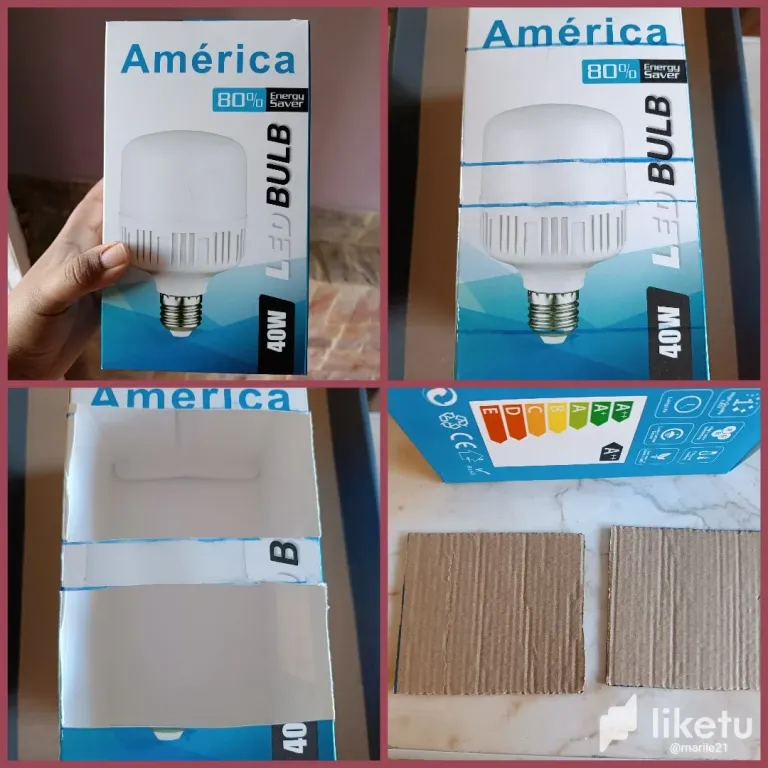
✅Caja de cartón.
✅Foami fucsia, plateado y azul con escarcha.
✅Foami morado texturizado.
✅Tijera.
✅Silicón.
✅Hojilla.
✅Pintura.
✅Pinceles.
✅Hoja de reciclaje.
Paso a paso:
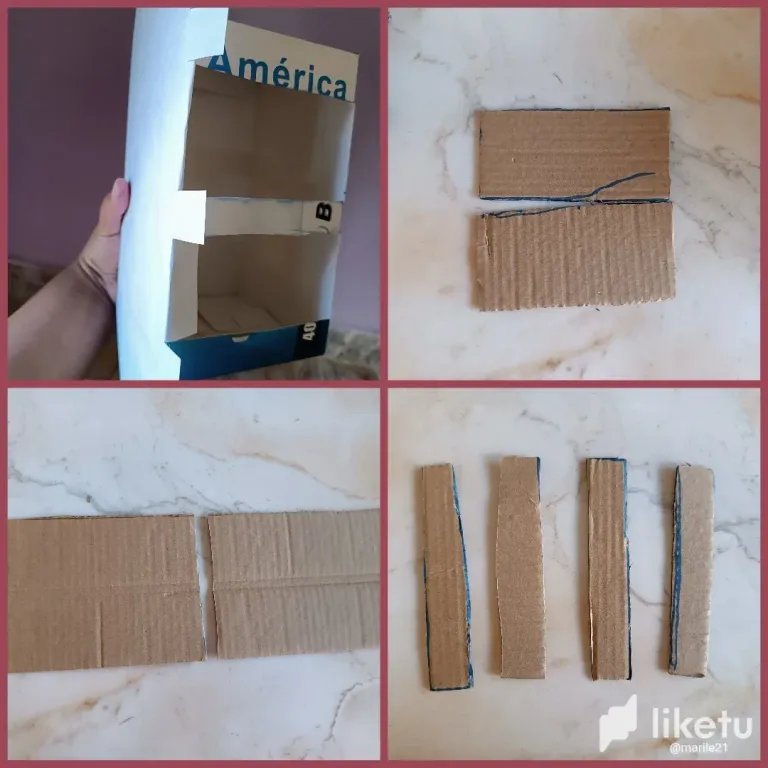
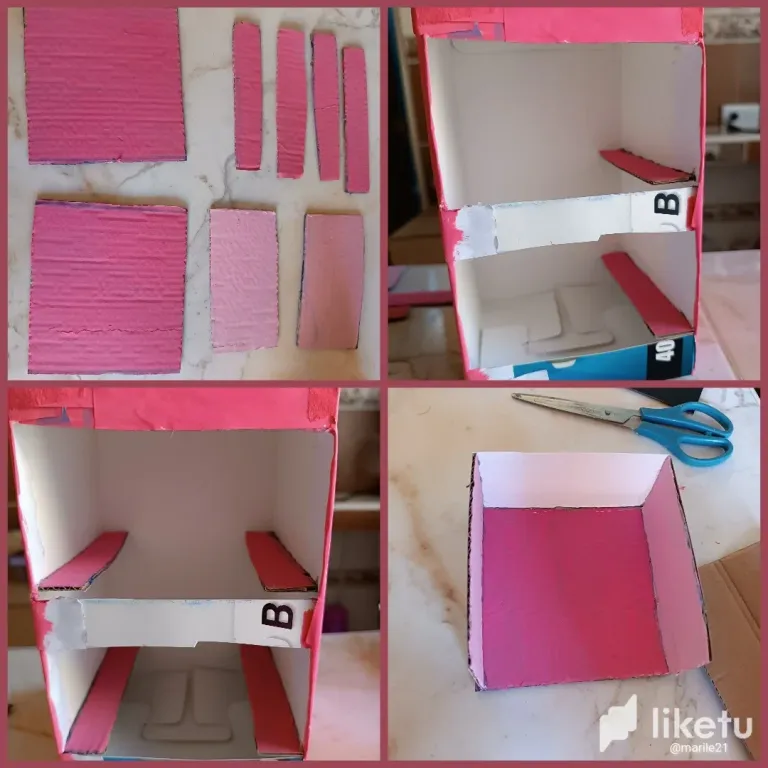
El primer paso es trazar el espacio que vamos a cortar para realizar los cajones, yo lo hice de dos compartimientos marcamos y cortamos con la ayuda de una hojilla. Luego comencé a realizar dos pequeñas cajitas con un cartón más resistente.
Para la cajitas primero se mide el espacio con el fin de que el tamaño sea acorde a los compartimientos, corte la base de la cajita y los laterales con el mismo cartón resistente, esto para ambas cajitas, también corté cuatro tiras de cartón que se ubicarán en ambas paredes de los compartimientos con el fin de que sostenga la cajita.
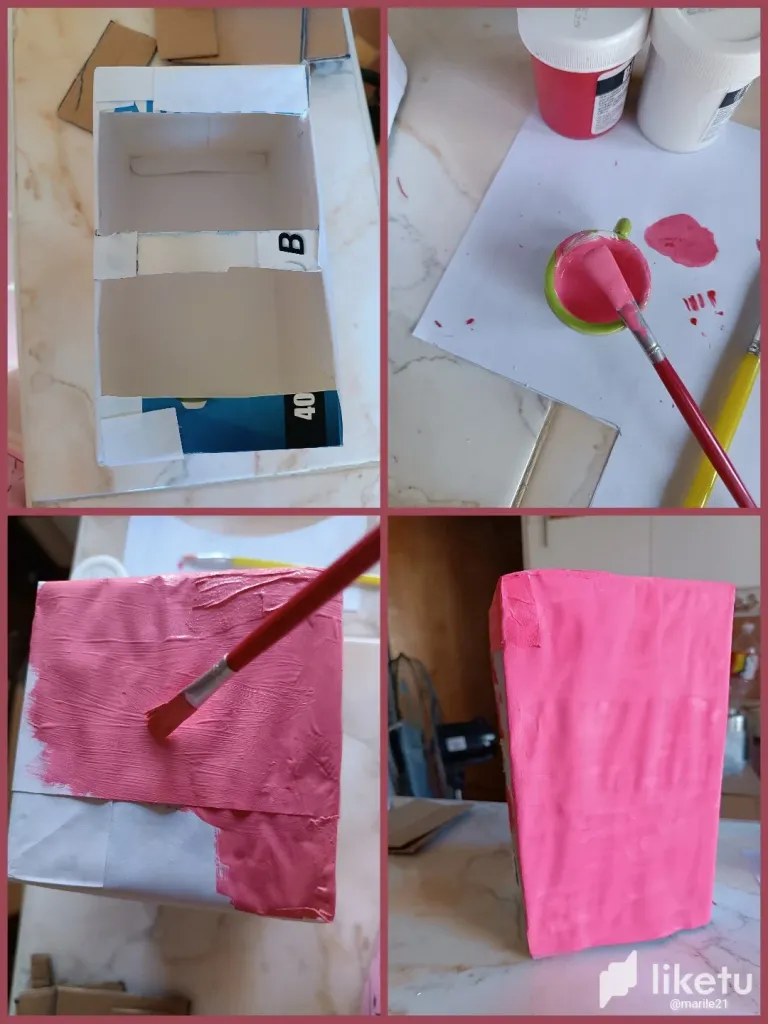
Luego procedemos a forrar la caja 📦 con hoja de reciclaje blanca decidí pintar la caja de color rosado, y como en ese momento no tenía pintura de este color mezcle el color blanco y rojo dando un lindo color rosa.
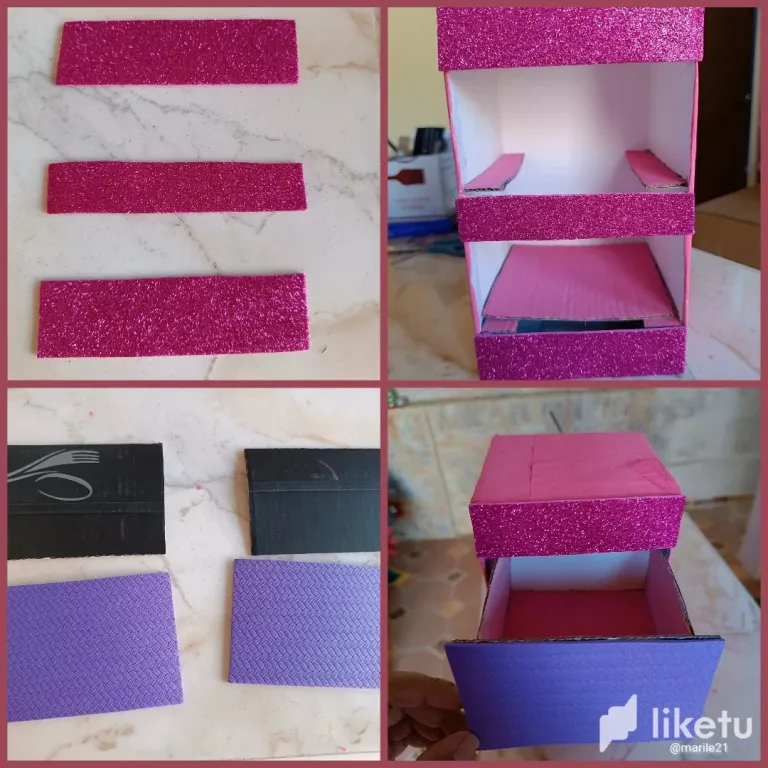
Las partes de la cajita también las pinté del mismo color, luego de haber esperado que se secara y de ubicar las tiras de cartón a los laterales del compartimiento comencé a armar las cajitas y a realizar la decoración con foami. Corte tres tiras de foami escarchado fucsia y dos cuadritos de foami morado texturizado.
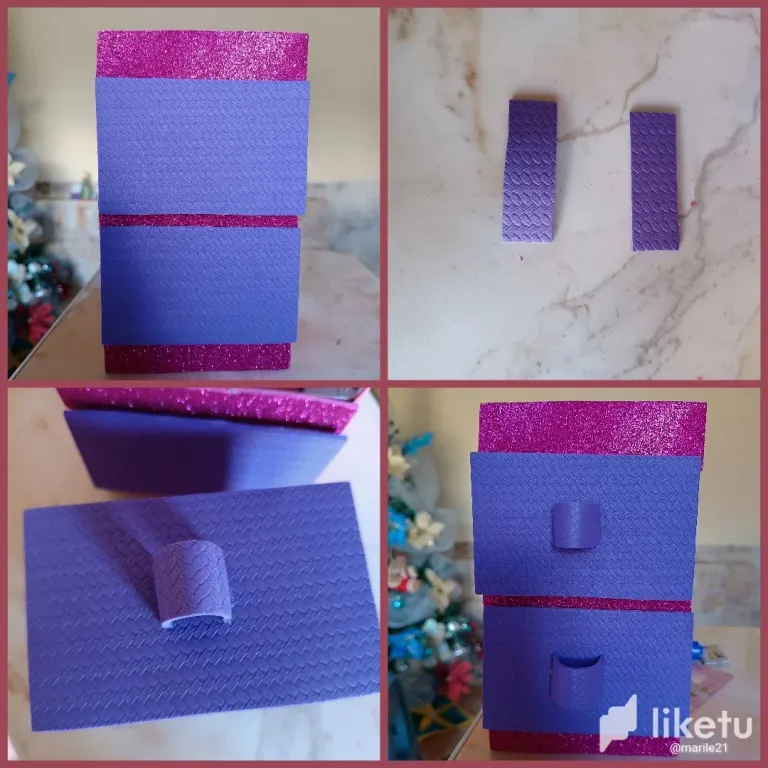
Las tiras de color fucsia las ubiqué en la parte superior, en medio e inferior de la caja, y los cuadros de color morado los ubiqué justo en la cajita que irá en el compartimiento, para reforzar el foami corte dos cuadros de cartón del mismo tamaño. También con dos pequeños trozos de foami realicé un agarradero para ambos compartimientos.
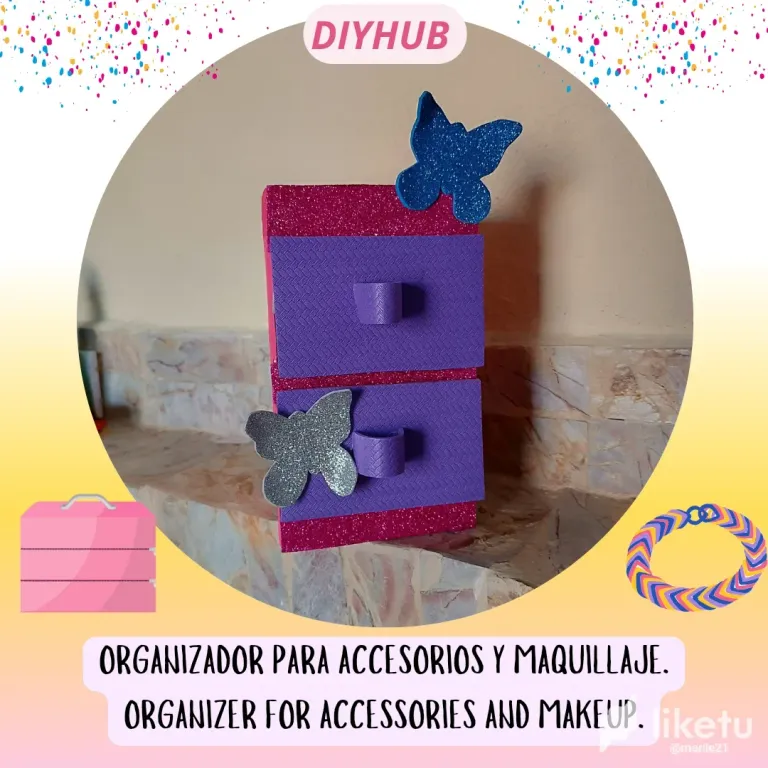
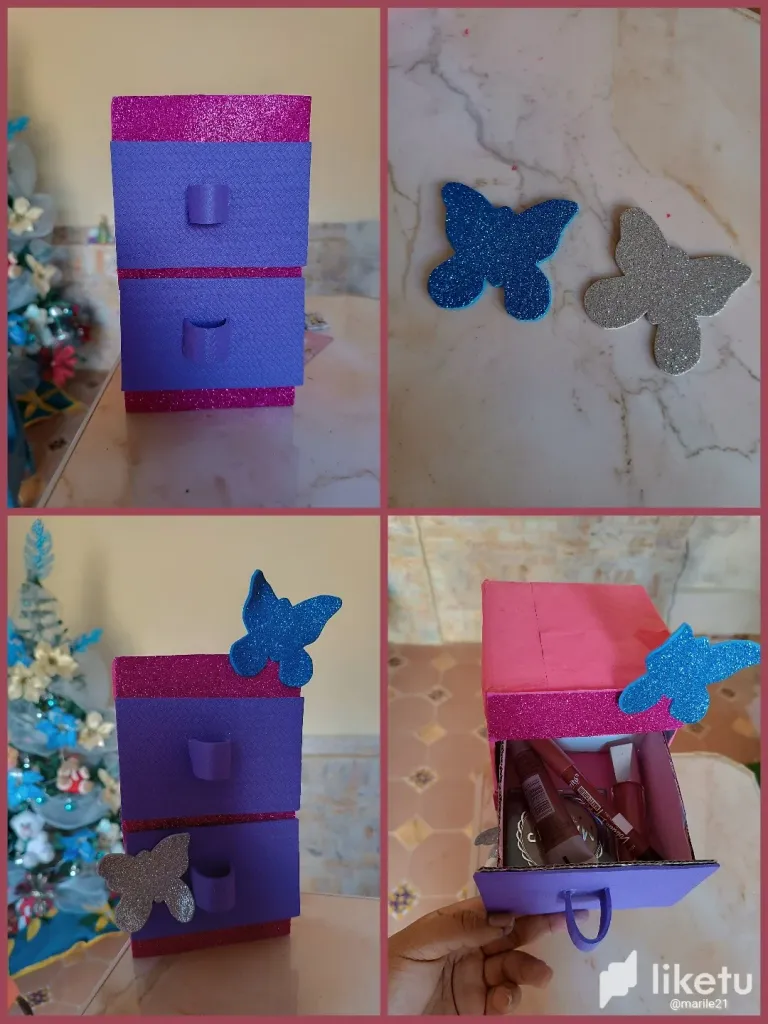
Por último realicé dos mariposas con foami escarchado, apliqué calor con una plancha de cabello y las ubiqué en la parte superior e inferior de la caja y listo nuestro organizador, el resultado me encantó sobre todo los colores 💜💓 personalmente quiero ubicar maquillaje en este organizador, ustedes pueden realizarlo y guardar accesorios, prendas pequeñas, etc.
Muchas gracias por leer mi publicación, nos vemos en una próxima oportunidad con más ideas 💡.
ENGLISH
Happy day DIYHub community, I hope you are feeling very well and are enjoying this week and of course with more creations in mind. Today again I want to share with you a beautiful organizer I made. I will be explaining the step by step and the materials and also the final result in photos.
An organizer for our accessories and makeup is essential to keep it organized and save more space. The organizer I made is with a cardboard base, it is easy to make and the favorite part is that when it comes to decorating it you can apply the color and design that best suits you. If you like it, for example, I love fuchsia and purple, below I'll explain how I did it.
Materials: 🖌️
✅Carton box.
✅Fuchsia, silver and blue foami with frost.
✅Textured purple foami.
✅Scissors.
✅Silicone.
✅Blade.
✅Paint.
✅Brushes.
✅Recycling sheet.
Step by Step:
The first step is to trace the space that we are going to cut to make the drawers, I did it with two compartments, we mark and cut with the help of a knife. Then I started making two little boxes with stronger cardboard.
For the boxes, I first measure the space so that the size is according to the compartments, I cut the base of the box and the sides with the same strong cardboard, this for both boxes, I also cut four strips of cardboard that will be located on both walls of the box. the compartments to hold the box.
Then we proceeded to line the box 📦 with a white recycling sheet, I decided to paint the box pink, and since at that time I did not have paint of this color, I mixed the white and red color giving a nice pink color.
I also painted the parts of the box the same color. After waiting for it to dry and placing the cardboard strips on the sides of the compartment, I began to assemble the boxes and decorate with foam. Cut three strips of fuchsia glitter foam and two squares of textured purple foam.
I placed the fuchsia strips at the top, middle and bottom of the box, and placed the purple squares right on the box that will go in the compartment. To reinforce the foam I cut two cardboard squares of the same size. . Also with two small pieces of foam I made a handle for both compartments.
Finally I made two butterflies with frosted foam, I applied heat with a hair straightener and placed them on the top and bottom of the box and our organizer was ready, I loved the result, especially the colors 💜💓 I personally want to place the makeup . In this organizer you can do it and store accessories, small accessories, etc.
Thank you very much for reading my post, see you next time with more ideas 💡.
Contenido original. - original content.
Los separadores y banner fueron realizados en Canva. - The dividers and banner were made in Canva.
Las fotografias son tomadas con mi teléfono Redmi Note 11s y editadas en PicsArt - The photographs are taken with my Redmi Note 11s phone and edited in PicsArt.
Traducción de: Google traductor - Translation of: Google translator.

For the best experience view this post on Liketu
Te quedó súper lindo amiga 😍 y muy buena manera de reutilizar la caja del bombillo 😁👍
Gracias bella 😗
Me encantó, es una buena idea para reciclar y además me gustó mucho que forraras con foami! 😍🫰🏻
Si amiga, gracias por visitar mi publicación 😊
The organiser would be really useful to keep things well and in other. Bravo
Así es, muchas gracias por el apoyo 💓
Please upvote this comment to support upvote-suggestor @bhattg
Join Our Community Discord: https://discord.gg/5FZZqrz6wj
Una idea de reciclaje muy economica!
Así es, gracias por visitar mi publicación 🤗
Congratulations, your post has been upvoted by @dsc-r2cornell, which is the curating account for @R2cornell's Discord Community.
Enhorabuena, su "post" ha sido "up-voted" por @dsc-r2cornell, que es la "cuenta curating" de la Comunidad de la Discordia de @R2cornell.
Muchas gracias por el apoyo!