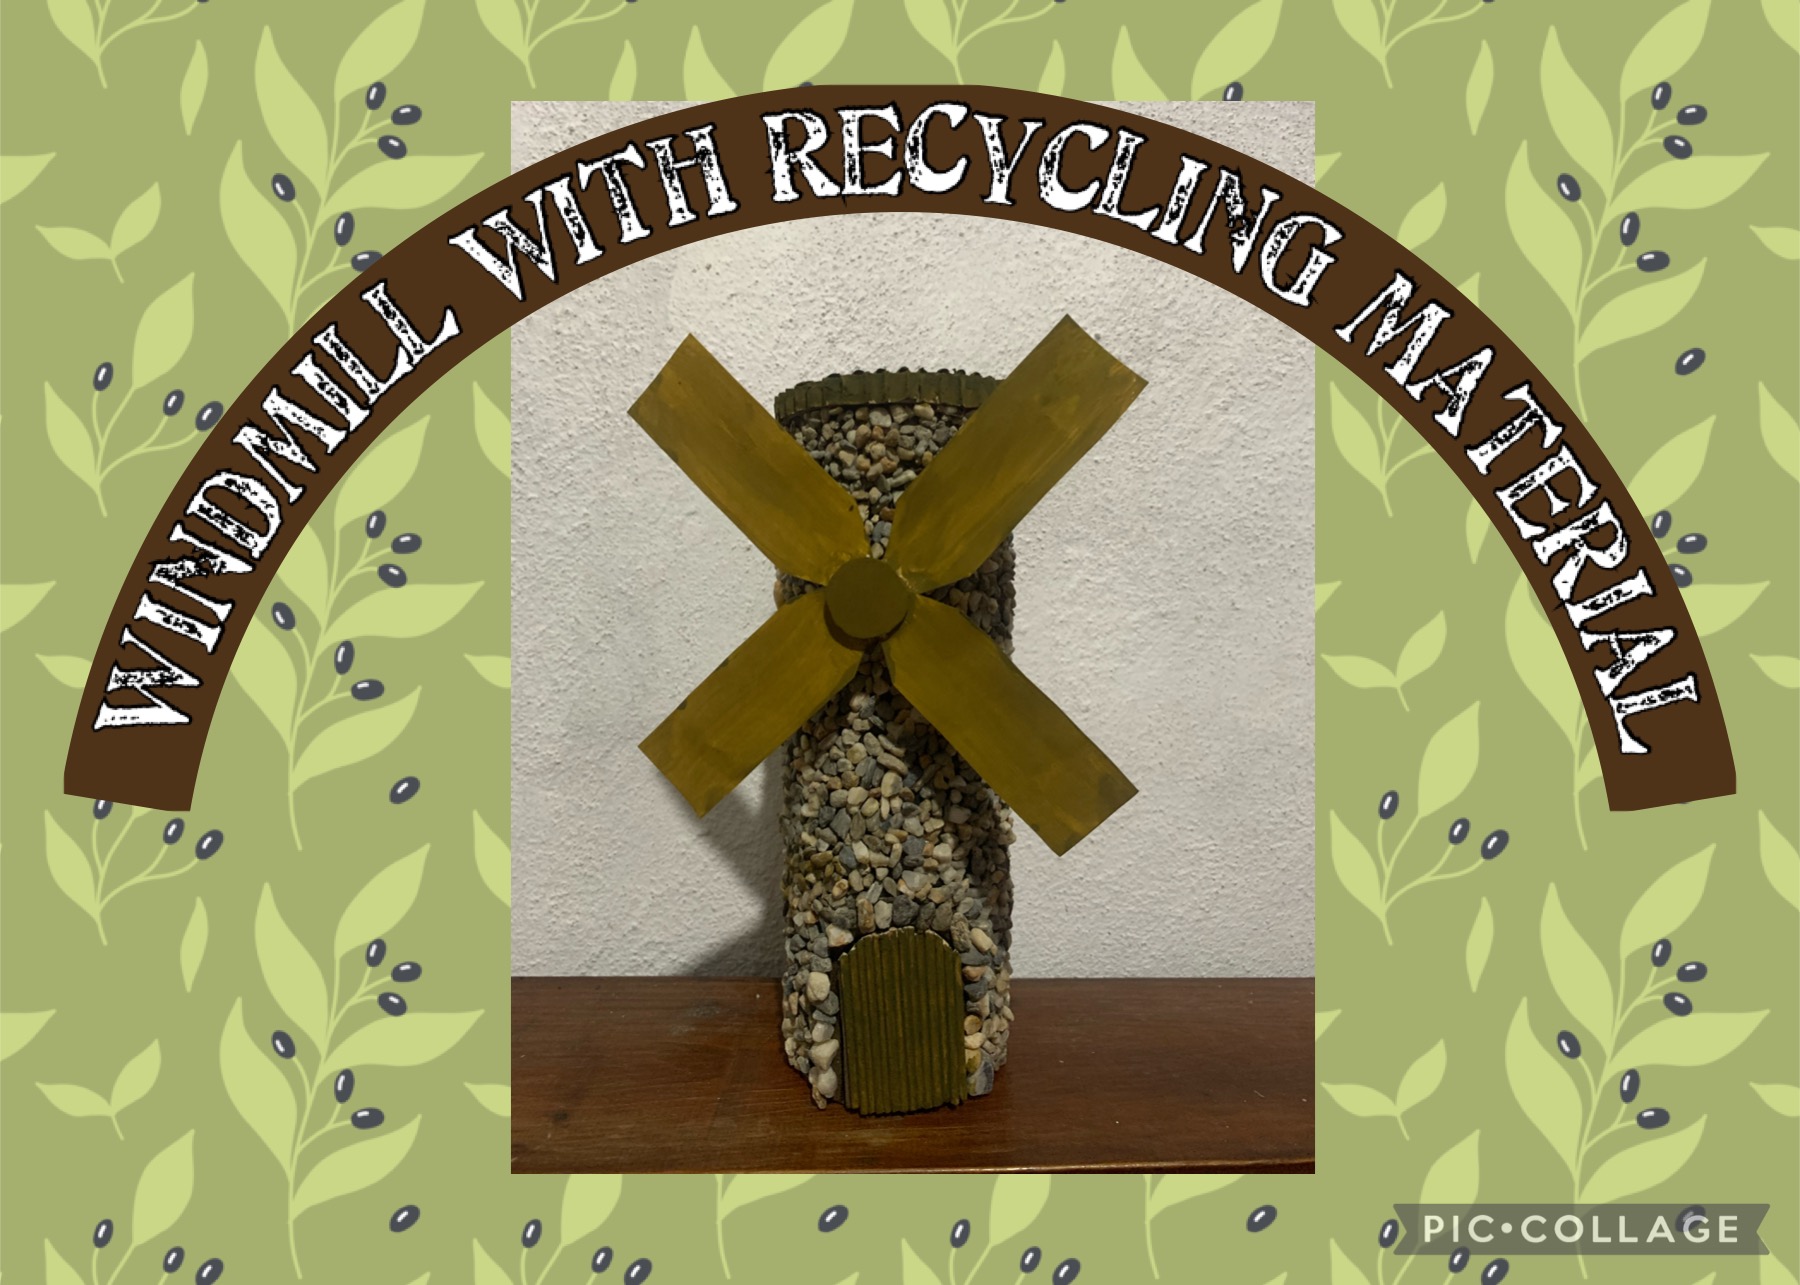
Hello, today I wanted to share with you this craft with recycling materials that I made yesterday, it is a wheat mill. Below I leave the process of how I did it.
---🤎---

🤎 -𝐌𝐀𝐓𝐄𝐑𝐈𝐀𝐋𝐒 𝐔𝐒𝐄𝐃:
I made the following craft using mainly a pringles potato can. To decorate and complement I used cardboard from a box, toothpicks, foamy, school cardboard and small stones that I took from my backyard (I washed them). I also used white glue, a marking pen, ruler, compass, scissors, fine sandpaper, brushes and paint (gray and brown).🤎 -𝐏𝐑𝐎𝐂𝐄𝐃𝐔𝐑𝐄- 🤎
.jpeg) | 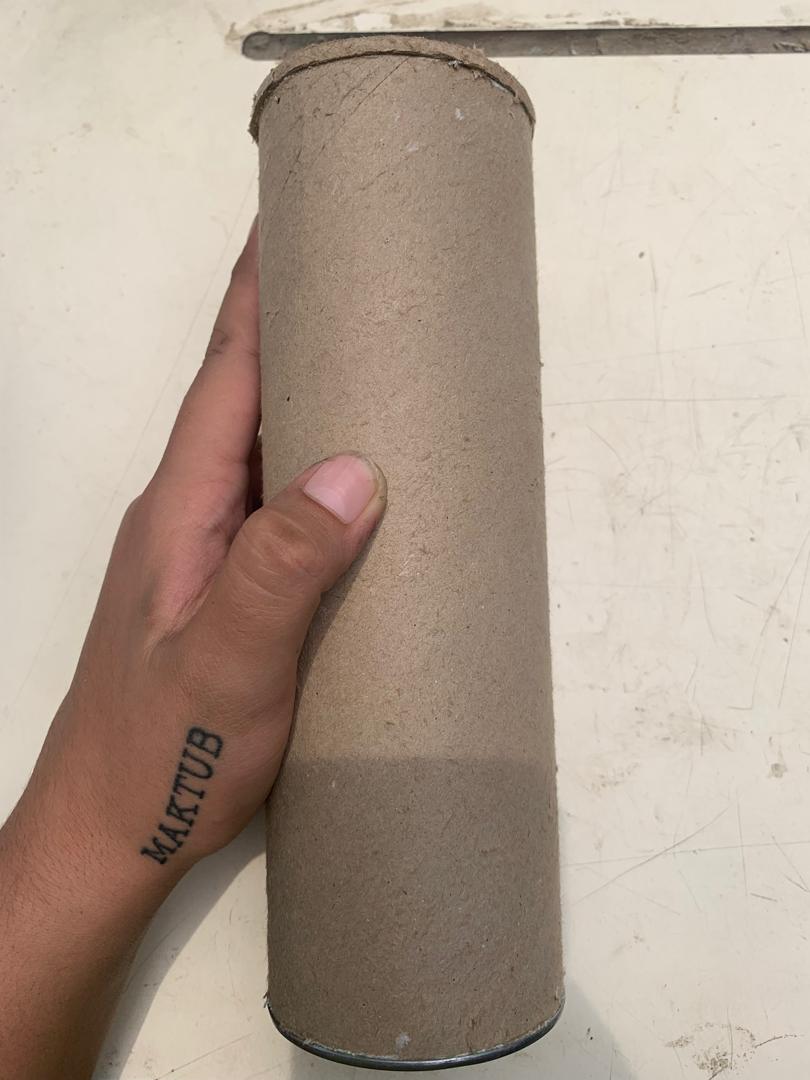 |
|---|---|
.jpeg) | .jpeg) |
🤎-𝐟𝐢𝐫𝐬𝐭 𝐬𝐭𝐞𝐩:
the first thing i did was to take the pringles can and remove the paper it is covered with, the one that is like a label and says the brand and specifications of the product. i removed this paper with the help of a sandpaper first and as i went along with my fingers to make it faster. the can was completely without paper, showing only the color of the cardboard on its entire surface. After this step, I painted the entire can in a dark gray color.
I did this step to be able to paint the can with less effort, besides being able to glue the details better.
I also picked, washed and sifted a cup of small stones that I grabbed from my yard.
.jpeg) | 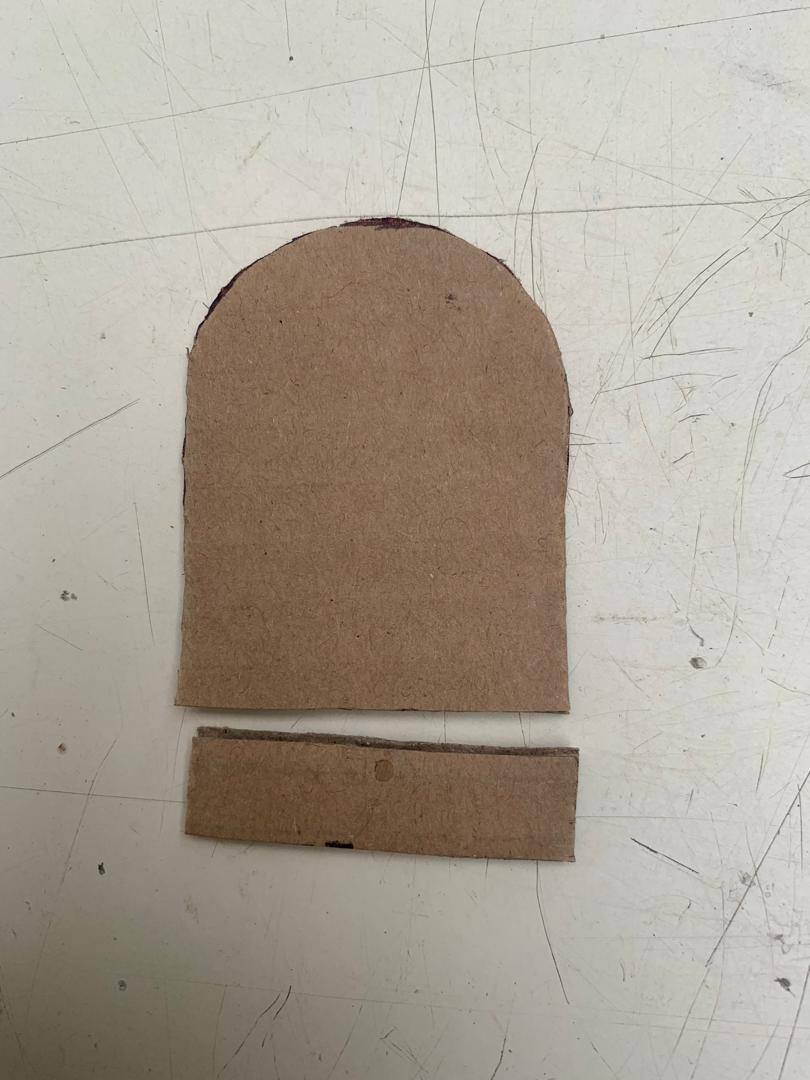 |
|---|---|
.jpeg) | .jpeg) |
🤎-𝐬𝐞𝐜𝐨𝐧𝐝 𝐬𝐭𝐞𝐩:
I took the box cardboard and made the figure of a rectangle with an arc, 7cm high and 5cm wide. I cut this same figure inside the one I had already cut leaving 0.7cm of space, so the two figures that I show in the first image of this table were left.
To this second figure (the smaller one) I cut 1cm from the bottom, to make it smaller. I also drew a frame of 0.7cm on all sides inside this one which I cut to obtain the two pieces that you see in the third image of this table were left (the first one I cut and the one that emerged from this frame). I joined these two pieces with white glue on the can, the largest one at the bottom where I decided it would be the front of my windmill and the smallest one on a side at the top
.jpeg) | .jpeg) |
|---|---|
.jpeg) | .jpeg) |
🤎-𝐭𝐡𝐢𝐫𝐝 𝐬𝐭𝐞𝐩:
This step is the one that I considered most important, since it is the main decoration of my craft.
Here I grabbed the stones I had previously chosen and started gluing them all over the can, starting at the edges of the cardboard pieces I had glued. I had to do this very patiently because if I stuck too many stones on the can at the same time they would fall and I would need to start over. So I glued on some rocks, waited for the glue to dry, and continued like this repeatedly until the can was completely covered in rocks.
The only places I left unfilled were inside the frames I had glued onto the can. I added another one in a circle shape, about a centimeter to the top front of my windmill.
.jpeg) | .jpeg) | .jpeg) |
|---|---|---|
.jpeg) | .jpeg) | .jpeg) |
🤎-𝐟𝐨𝐮𝐫𝐭𝐡 𝐬𝐭𝐞𝐩:
For the fourth step I glued stones, a little larger than the ones I had used before, on top of the cardboard frames. I did this in both the large and small frame, but not in the circle-shaped one.
For the fifth step I used foamy to make the figures that appear in the third image of the following table, which correspond to the size of the inside of the cardboard frames. To these foamy figures I glued cut-out sticks, well joined together, and adapted them to their shape with the help of the sandpaper that I used in the first step of this craft (remaining as it appears in the penultimate photo of the following table). The same is done with the small piece of foamy and glued inside the cardboard frames, on the can.
.jpeg) | .jpeg) |
|---|---|
.jpeg) | .jpeg) |
 .jpeg) |
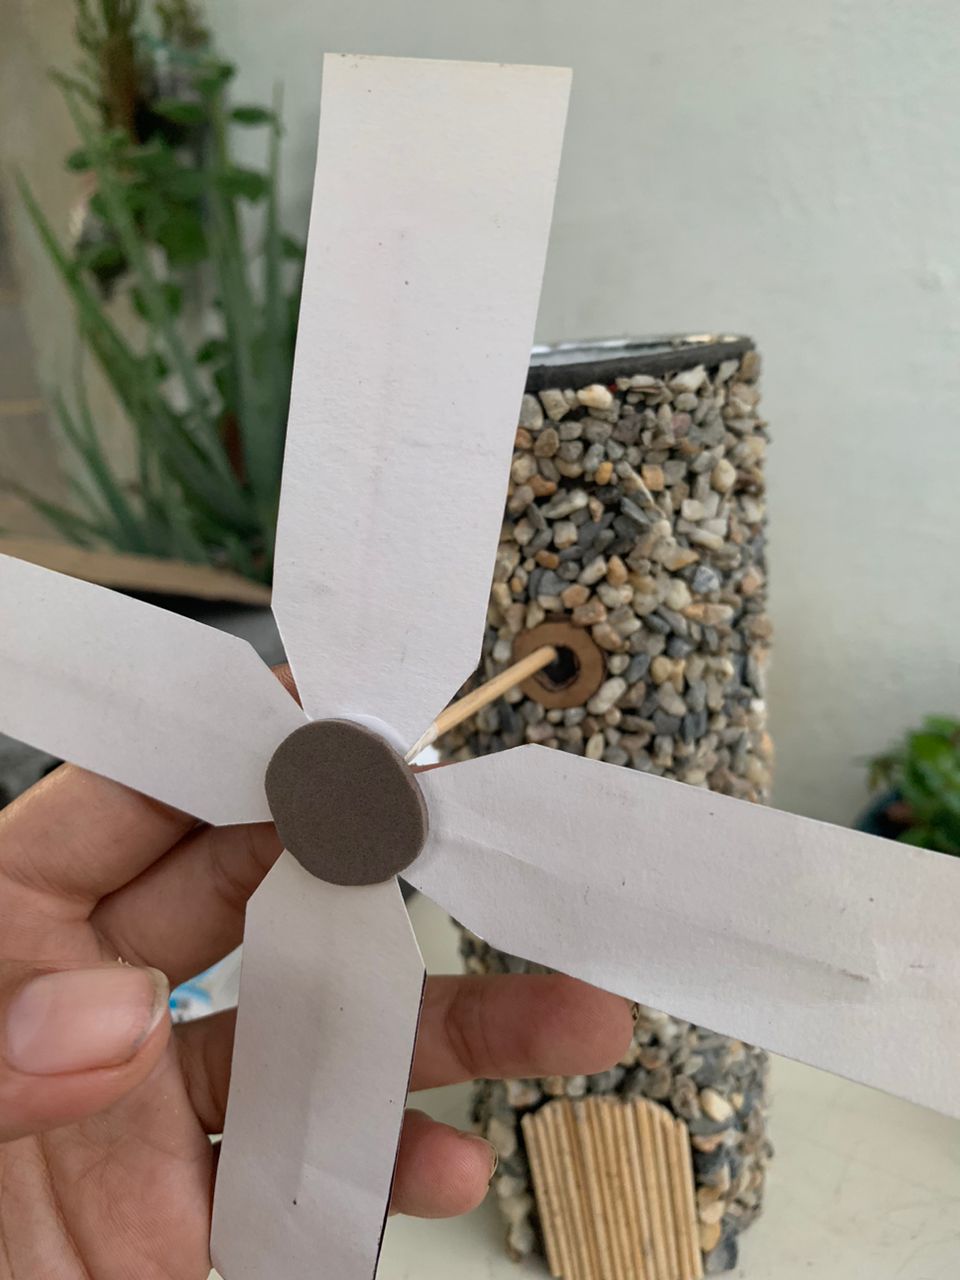
🤎-𝐟𝐢𝐟𝐭𝐡 𝐬𝐭𝐞𝐩:
To make the blade of wheat millIn this step I used the two halves of a tall toothpick, with which I formed an "X". I fixed this figure with the help of adhesive tape and placing a small piece of cardboard in the middle.
From white school cardboard I cut 4 rectangles, each 8 cm high and 3 cm long, and made a small diagonal cut on each side at the bottom of each of them. This diagonal cut leaves an average space of approximately 1 cm.
I glued these 4 figures that I made in the previous step with adhesive tape on each of the sides of the tall toothpick "X" that I had made in a previous step. I did this by leaving the widest part of each of the figures out and the narrowest part in the middle of the "X". I finished this by taping a tall toothpick to the back of the "X" (like in the last image in the table below).
 | .jpeg) |
|---|---|
 | .jpeg) |
🤎-𝐬𝐢𝐱𝐭𝐡 𝐬𝐭𝐞𝐩:
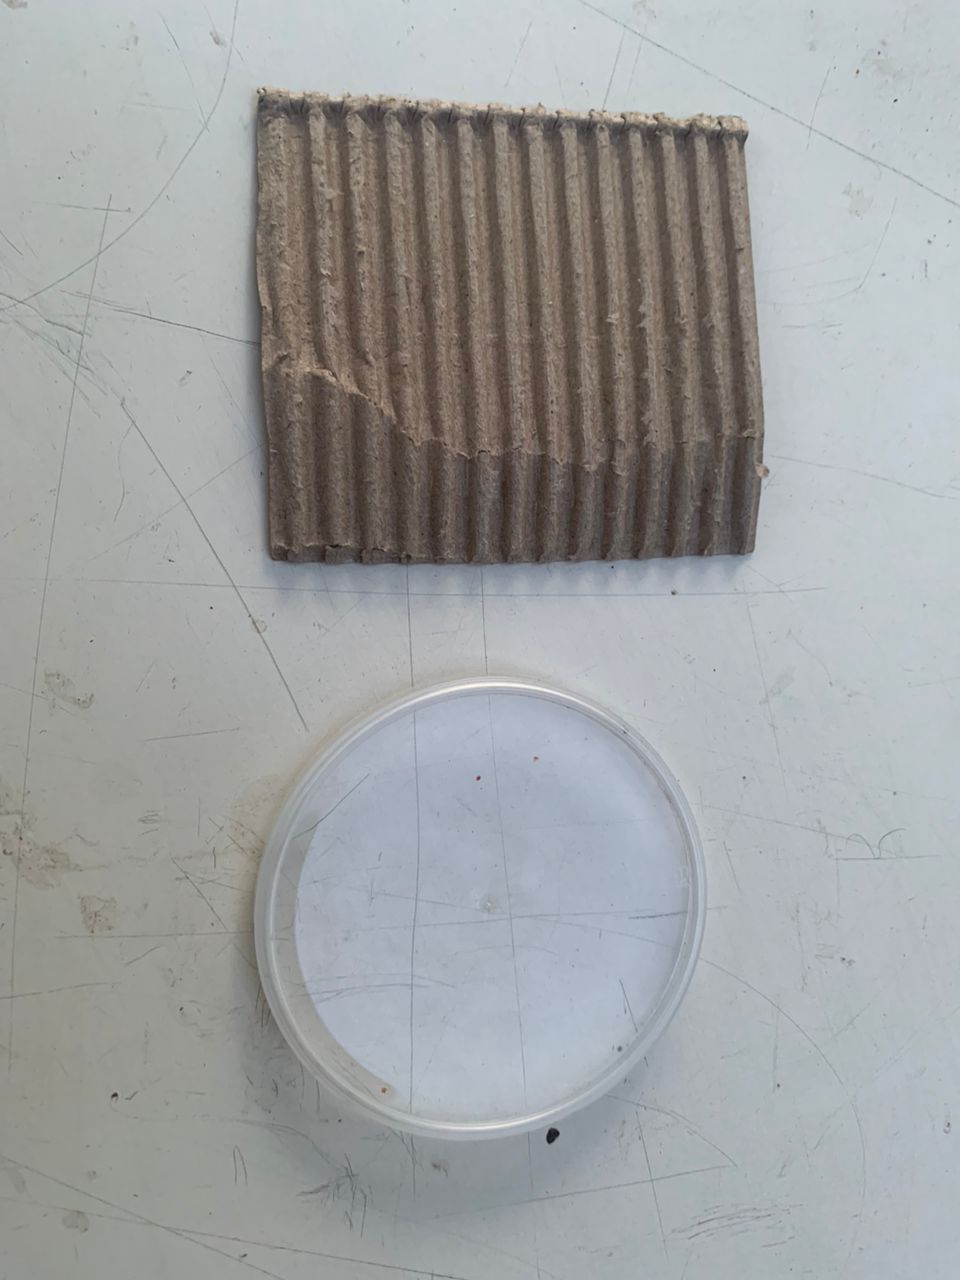
I made the roof with the lid of the can and the cardboard from which I removed one of its thin layers. On top of the lid I glued a circle of this cardboard and around it an equal ribbon of the same cardboard.
I placed the roof on top of the wheat mill, without gluing it.. I also cut a small hole in the middle of the circular frame (which I had previously glued to the can) so I could attach the blade. I also glued a small circular piece of foamy to the front, right in the middle of the blade.
---🤎---
🤎-𝐬𝐞𝐯𝐞𝐧𝐭𝐡 𝐬𝐭𝐞𝐩 (last step):
Finally I only painted the door, the window, the blade and the roof of the mill with brown paint to make it look more beautiful.
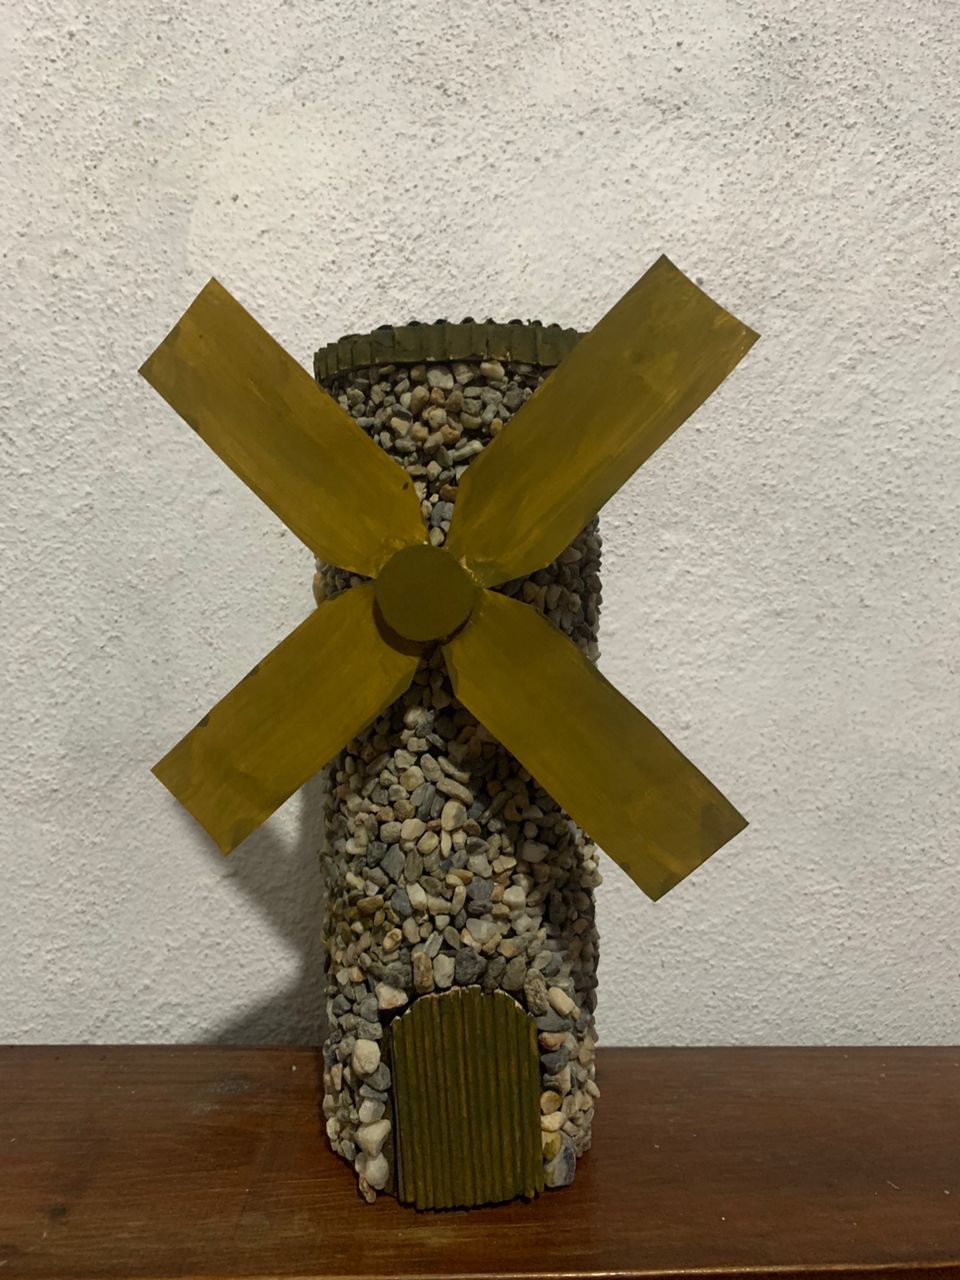 | This craft is used to decorate a garden or a house, and it is also used to store things inside (that's why I didn't glue the roof). You can also make a base with cardboard and more stones but it turned out well that way to my liking. I think it could even be used as a gift this Mother's Day. |
wow , you are amazing that looks so beautiful. keep up the good work.
Congratulations @merlysmont! You have completed the following achievement on the Hive blockchain And have been rewarded with New badge(s)
Your next target is to reach 1750 upvotes.
You can view your badges on your board and compare yourself to others in the Ranking
If you no longer want to receive notifications, reply to this comment with the word
STOPCheck out our last posts: