Versión En Español.
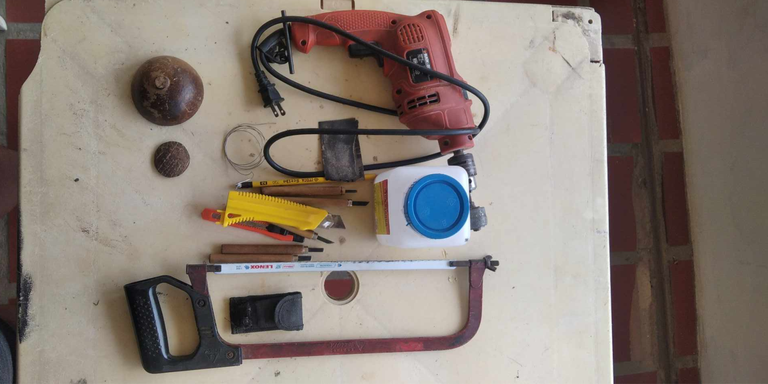
Dicho esto y sin cavilar más, mostraré el proceso de elaboración, los materiales que utilicé fueron los siguientes:
-1 taladro y mecha.
-Mecha de 1 mm.
-Cola de carpintería.
-Un martillo.
-Un clavo.
-Una tenaza de corte.
-Un ser de talladores de madera.
-2 cutter.
-Lija 120 y 400.
- 1 Segueta.
-1 Lápiz.
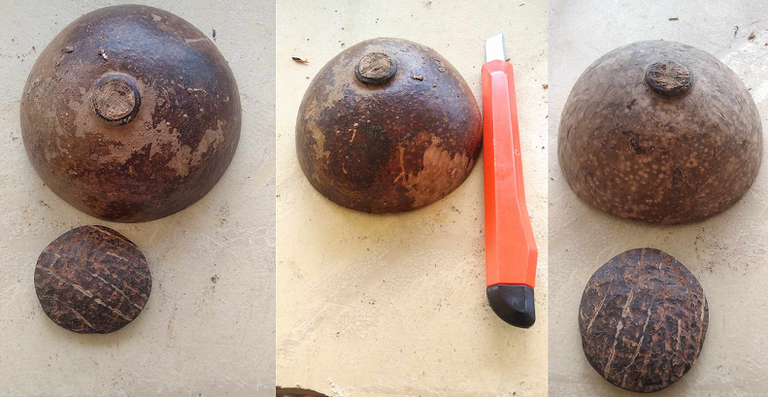
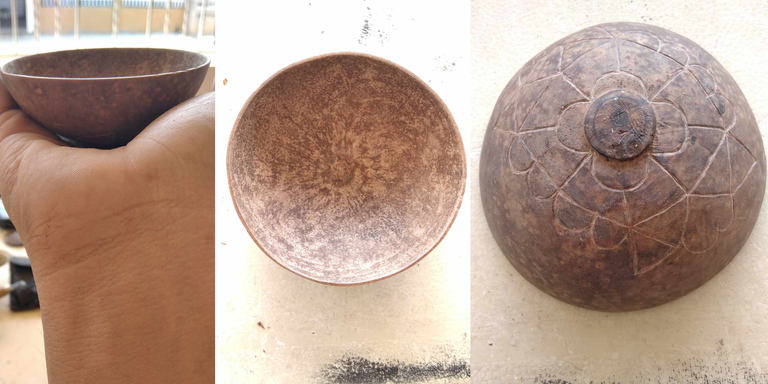
Paso 1: Limpiar el esmalte de la totuma.
Con la ayuda de un cutter lo repasamos sobre la superficie de la totuma, sería a modo de raspado, la totuma en su estado natural tiene un esmalte que protege la concha del fruto, yo trabajo este tipo de material sin el esmalte, hay otras personas que lo aprovechan para hacer sus tallados directos, hay personas que lo remueven con lija número 80, considero que se gasta mucho material y deja marcas profundas en la superficie, hasta donde me va mejor es con el cutter.
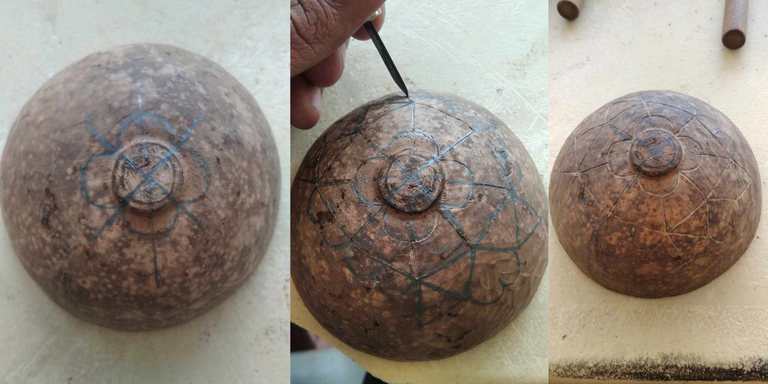
Paso 2: Elaboración de un diseño.
Con un lápiz y a pulso me dediqué a crear figuras desde la base de la totuma, primero hice una cruz, toda su elaboración se hizo a pulso, por tanto iba agregando figuras para rellenar el espacio, solo me dediqué a hacer un diseño sencillo pero un tanto recatado, discreto ante las personas, el diseño es meramente ornamental.
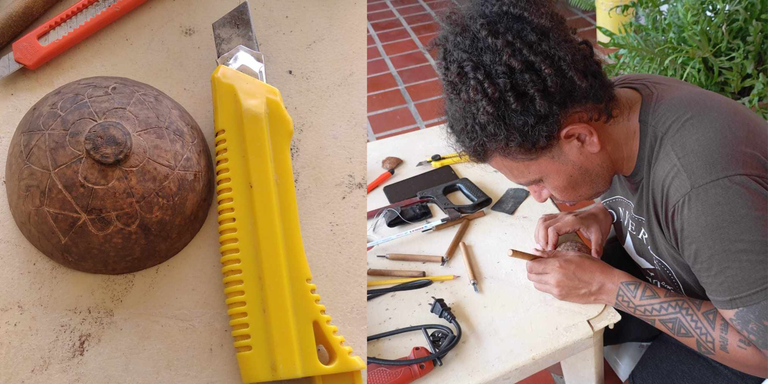
Paso 3: El tallado.
Ya el dibujo terminado, me puse a trabajar en el tallado, en el cual me valí del uso de mi juego de tallado y un cutter, con paciencia fui marcando surcos con el dibujo como guía fui realizando el tallado, me tomó cerca de 2 días realizar todo el proceso, dado que quería un tallado no tan marcado intentando buscar unas líneas los más suaves posibles.
Paso 4: Nivelado y alisado.
Culminado el paso 3 comenzamos con el nivelado de los bordes de la totuma, el alisado lo hago frotando los bordes sobre con una superficie rustica, ya sea con el suelo o una pared de textura áspera, logrado mi cometido, con una lija 120 lijé la parte externa para borrar marcas y detalles y poder darle una textura de suavidad al contacto con la misma, de igual forma el mismo proceso también fue aplicado a lo interno de la totuma.
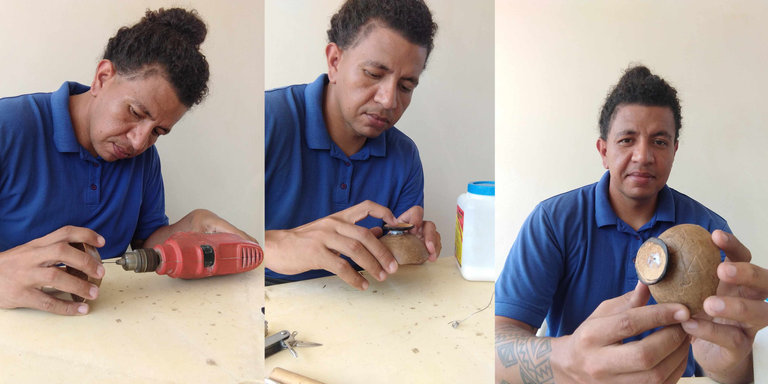
Paso 5: Ensamblado.
El fragmento de concha de coco que era el remanente de un trabajo anterior lo trabajé de tal manera que sirviera como pedestal, para concretar esto utilicé un taladro con una mecha ficha el cual usé para abrir un orificio por el cual debe pasar un clavo, este será el encargado de unir las 2 piezas, además lo reformé utilizando pega de carpintería, uní ambas piezas y dejé secar.
Paso 6: Curado.
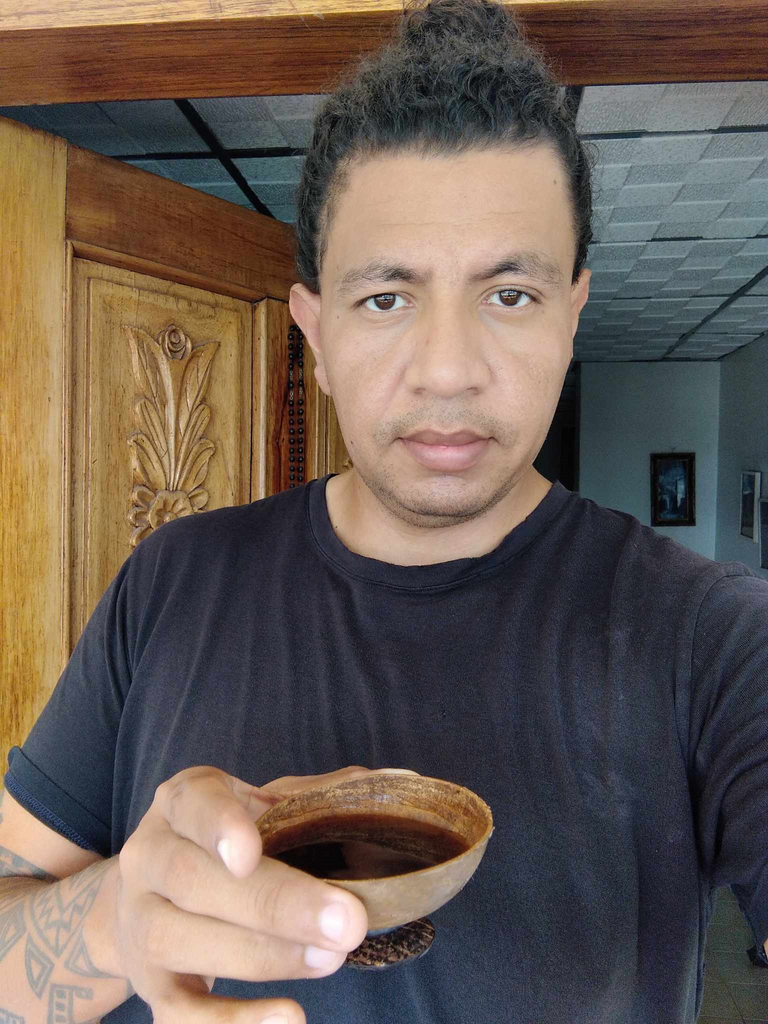
Este material tiene la particularidad que necesita ser curado, esto trata de verter el líquido en el cual únicamente vamos a poner en el recipiente, de tal manera que de un sabor único, ya que la madera absorbe el aroma, en este caso la usé para café, también se usa para beber licor, jamás se puede usar para ambos, pues dañaría el recipiente emane sabores amargos.
Y este es el resultado.
Así he culminado la elaboración de esta modesta pieza, espero que les haya gustado la pieza, me despido complacido si llegaste a este punto del post por haber tomado tu tiempo en visitarlo, hasta una próximas ocasión.
EnglisH Version.
Hello to all the Diyhub community, reading about the theme of this month which is about the earth day, I decided to bring here the elaboration of a coffee cup made from the remaining material that I used to make some (tendrils) previously made from the shell of totuma plus a piece of coconut shell to make a pedestal, to make this type of pieces to drink coffee gives a unique experience due to the time in which the totuma has lasted sealed, I have left it about 4 years without uncovering, which has made that its internal fragrance is impregnated to the shell of the fruit, imagine that the aroma is a very soft smell of vanilla, aroma that can spend years impregnated on it.Having said this and without digging any further, I will show the elaboration process, the materials I used were the following:
- 1 drill and bit.
- 1 mm drill bit.
- Carpentry glue.
- A hammer.
- One nail.
- A cutting pliers.
- A being of wood carvers.
- 2 cutters.
- Sandpaper 120 and 400.
- 1 saw.
- 1 pencil.
Step 1: To clean the enamel of the totuma.
With the help of a cutter we review it on the surface of the totuma, it would be like scraping, the totuma in its natural state has an enamel that protects the shell of the fruit, I work this type of material without the enamel, there are other people who take advantage of it to make their direct carvings, there are people who remove it with sandpaper number 80, I consider that much material is spent and leaves deep marks on the surface, to where I do better is with the cutter.
Step 2: Elaboration of a design.
With a pencil and by hand I dedicated myself to create figures from the base of the totuma, first I made a cross, all its elaboration was done by hand, therefore I was adding figures to fill the space, I only dedicated myself to make a simple design but somewhat demure, discreet before the people, the design is merely ornamental.
Step 3: Carving.
Once the drawing was finished, I started to work on the carving, in which I used my carving set and a cutter, patiently I was marking grooves with the drawing as a guide, I went to work on the carving.It took me about 2 days to do the whole process, since I wanted a not so marked carving trying to look for the smoothest possible lines.
Step 4: Leveling and smoothing.
Finished step 3 we start with the leveling of the edges of the totuma, the smoothing is done by rubbing the edges on a rustic surface, either with the floor or a rough textured wall, achieved my goal, with a 120 sandpaper I sanded the outside to erase marks and details and to give a smooth texture in contact with it, similarly the same process was also applied to the inside of the totuma.
Step 5: Assembly.
The fragment of coconut shell that was the remnant of a previous work I worked it in such a way that it served as a pedestal, to do this I used a drill with a chip bit which I used to open a hole through which a nail must pass, this will be responsible for joining the 2 pieces, I also reformed it using carpentry glue, I joined both pieces and let dry.
Step 6: Curing.
This material has the particularity that needs to be cured, this is about pouring the liquid in which only we are going to put in the container, so that it gives a unique flavor, since the wood absorbs the aroma, in this case I used it for coffee, it is also used to drink liquor, it can never be used for both, because it would damage the container emanating bitter flavors.
And this is the result.
So I have completed the development of this modest piece, I hope you liked the piece, I say goodbye pleased if you got to this point of the post for having taken your time to visit it, until next time.
The cup looks like a beautiful relic from the roman empire, xD. Nice work
From the empire of the South American aborigines with love to hive 😀, I am glad you liked it.
Thanks for the support.
Has sido curado por @visualblock / You've been curated by @visualblock
Bienvenidas delegaciones / Delegations welcome
Trail de Curación / Curation Trail
Vota por nuestro Testigo aliado - @hispapro / Vote for our allied Witness - @hispapro
Más información sobre el testigo aquí / More information about the witness here
Me encanta como quedó, me encantan las totumas, me recuerda todo lo que la naturaleza nos brinda. Saludos ☺️
Muchas gracias Irene me alegro que te haya gustado, además la pieza tiene un perfume natural que casi que hipnotiza.
Belleza de taza! Me encanta! 😍 gracias por compartir
Hola @yetsimar me alegra que te haya gustado, gracias a tí por visitar y comentar tu apreciación, me motiva a crear artesanías de igual y mejor calidad.
¡Y así es que se toma café sabroso! #crafting #hive #posh
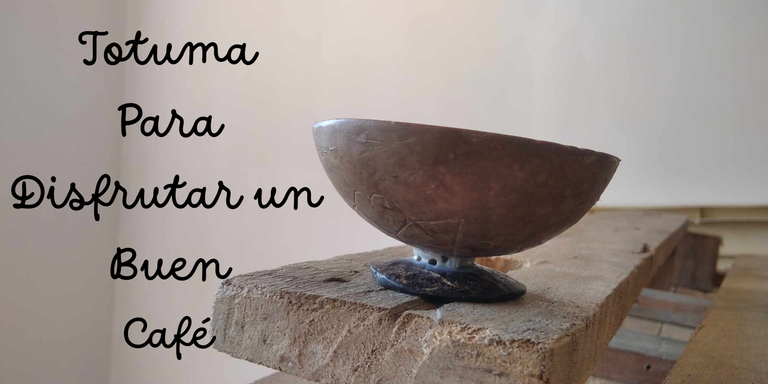
Elaborando una totuma para disfrutar un buen café./Making a totuma to enjoy a good coffee.
Sin duda alguna @yenmendt es otra experiencia cafecera, saludos.
I love the cup and how you crafted it, nice job.
Thank you very much, it takes a lot of patience and dedication that in the end gives this result, I'm glad you liked it.
Congratulations @miguelc88! You have completed the following achievement on the Hive blockchain And have been rewarded with New badge(s)
Your next target is to reach 3750 upvotes.
You can view your badges on your board and compare yourself to others in the Ranking
If you no longer want to receive notifications, reply to this comment with the word
STOPMuy lindo.
Hola Oscarly me da gusto que sea de tu agrado, saludos y gracias por comentar.
✨️ gracias a ti, por tu buen trabajo. 🙏
Que hermosura de trabajo realizado, el detalle del tallado, la paciencia y la calidez de tus manos creadoras. ¡quiero una taparita para mi!
Hola @aguamiel diste las palabras exactas, la calidez de las manos creadoras, construir y vivir el momento para que suceda ha traido como resultado esta pieza, como narré en el post, el perfume de la totuma, el curado del café, el aroma a clavos de olor y canela, te puedes imaginar como son los días de quien se toma se toma el primer café del día en esta pieza.
Saludos, muchas gracias por tu comentario, me motiva a seguir creando piezas de calidad.
Olores sagrados, el tiempo aliado fusiona el perfume sutil para el olfato y de exquisito sabor en el paladar...
Siempre he querido una totuma para tomar cafe, vas a tener que enviarme una amigo, aqui no hay totuma..
Haberlo dicho antes, si alguien va por allá en estos días te la hago llegar para que te tomes el cafecito con ganas.
Los mantes del café disfrutaríamos mucho de la bebida oscura en esta bella totuma. Me encantó. Gracias por compartir el proceso creativo.
!discovery 45
!DIY
Hola @chacald.dcymt beber café en totuma es una cuestión diferente, el fresco de la mañana, el aroma de la madera, el olor del café, las mañanas son bien ansiadas.
Me da gusto que te haya agradado la pieza, me alegra mucho.
This post was shared and voted inside the discord by the curators team of discovery-it
Join our Community and follow our Curation Trail
Discovery-it is also a Witness, vote for us here
Delegate to us for passive income. Check our 80% fee-back Program
You can query your personal balance by
!DIYSTATSquedo genial! un gran trabajo!
great job! great job!
Hola @yasmarit muchas gracias por tu apreciación.
Así se toma el café más sabroso profe.
Muy bonito, en mi país es una tradición tomar café en una de esas, aunque se les conoce con otro nombre. Hermoso trabajo
Hola @nery01 gracias por tu comentario. Me da curiosidad ¿cómo la conocen en tu país?
En mi país se le conoce como jícara
Hermoso trabajo realizado con mucha paciencia y cálidos de talles, me recuerda los días que pasaba en la casa de campo donde nos servían café en totuma , claro no elaboradas y hermosa como está.
Te felicito me hiciste volver en el tiempo, abrazos🤗🌹❤️
Muchisimas gracias por tu apreciación @yraimadiaz me alegro que te traiga bonitos recuerdo.
Hola!! Quedó mu y bonita. Mi abuelita casi tenía una vajilla ja, ja, ja. Tengo una pequeñita, que uso para tomar tragos cuando me reuno con los amigos.