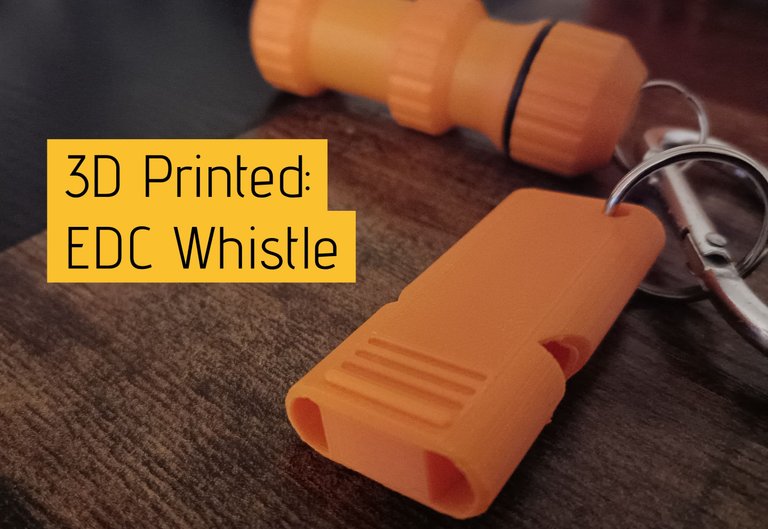
I go hiking in the mountains once in a while, I've been meaning to bring a whistle with me when I do. I found a suitable whistle design online, then put the 3D printer to work.
Chirping the whistle once in a while will help to proactively keep bears at a distance, I carry bear spray too - the whistle announces to wildlife that someone's around, so they aren't unexpectedly startled in person. An whistle can also be useful in urban settings, and search and rescues - a whistle draws attention.
The 3D Printer
I've been using the Creator Pro 3D printer by Flashforge. It can use spools of multiple types and colors of filament - a plastic that is extruded by the heated print head.
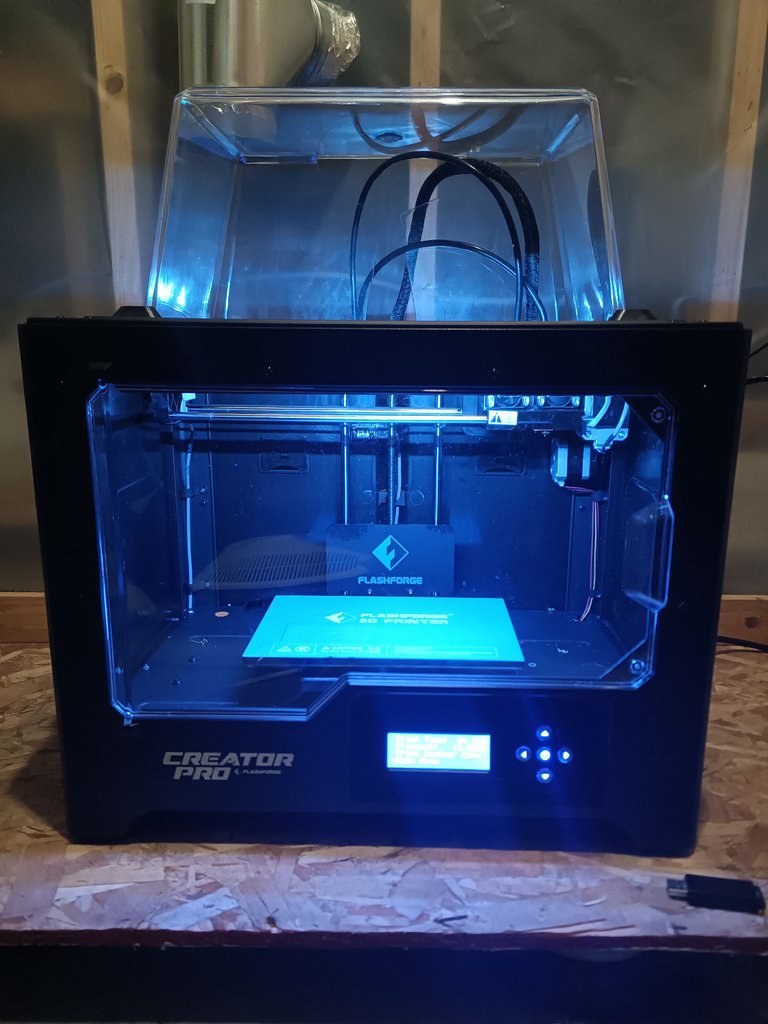
The print head moves side to side and forward and back with belts - the platform is heated and moves up and down with a screw mechanism.
Whistle Design Download
I checked my favorite web site for free 3D printer friendly .STL design files, ThingiVerse.com - there were more than fifty whistle designs, I thought this one was sleek enough to EDC.
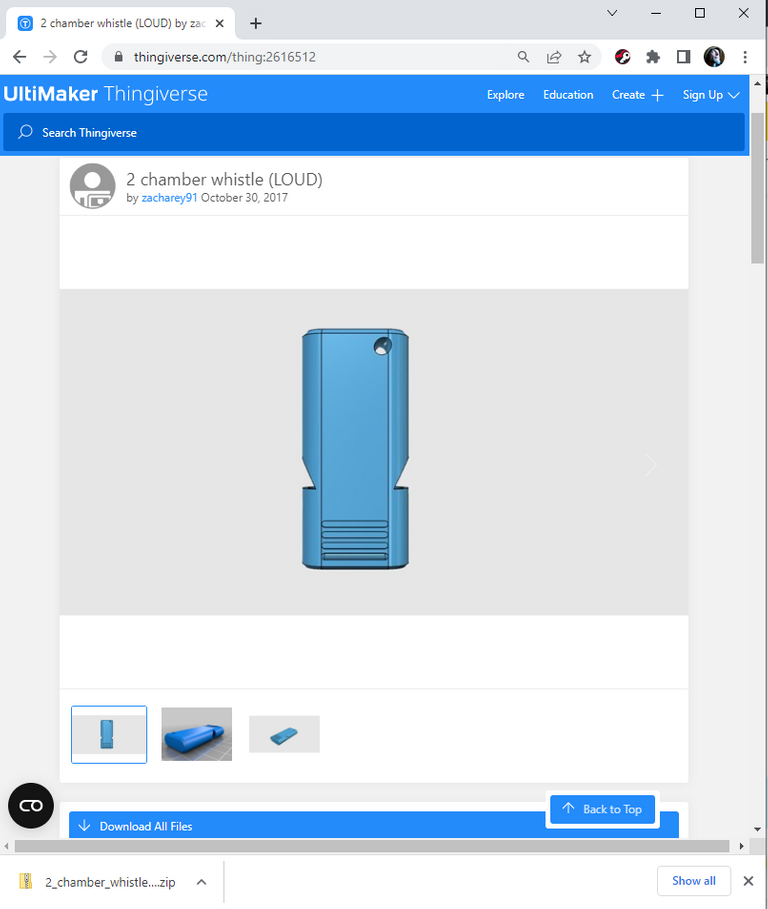
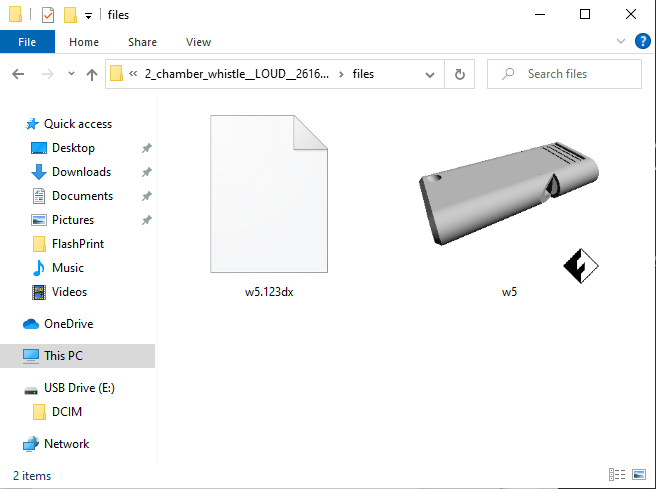
After clicking the button to 'Download All Files' and expanding the .ZIP file, the 'w5.STL' whistle design is found in the 'file' folder.
FlashPrint Layout
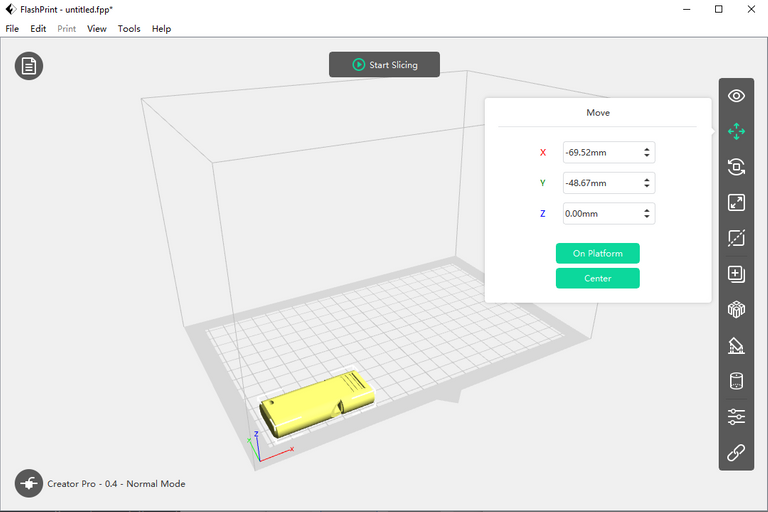
Double clicking the 'w5.STL' file opens the design in the FlashPrint software. FlashPrint is used to layout the object designs to prepare the print file for the 3D printer.
 |  |
|---|
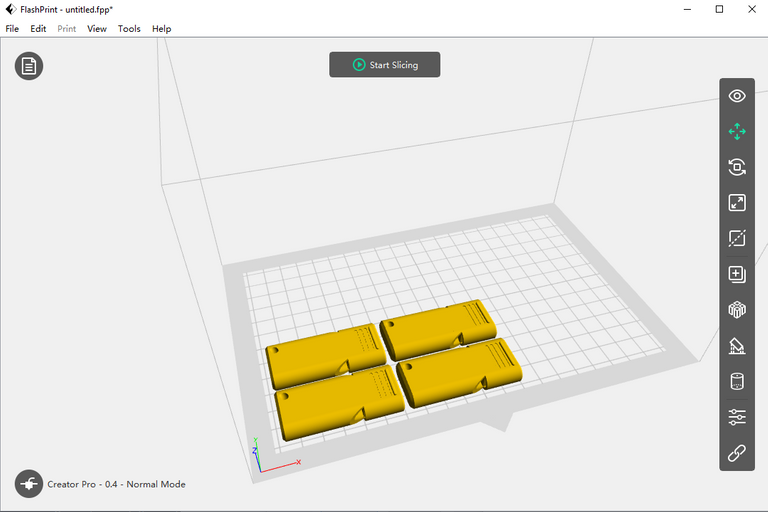
After clicking the Move button at the top right, the whistle is selected and moved to the front left corner of the print space. With a 'CTRL-C' and multiple 'CTRL-V's, the whistle is duplicated three times. No supports are needed for this print job, so I click the 'Start Slicing' button at the top of the page to start preparing the print job.
 |  |
|---|
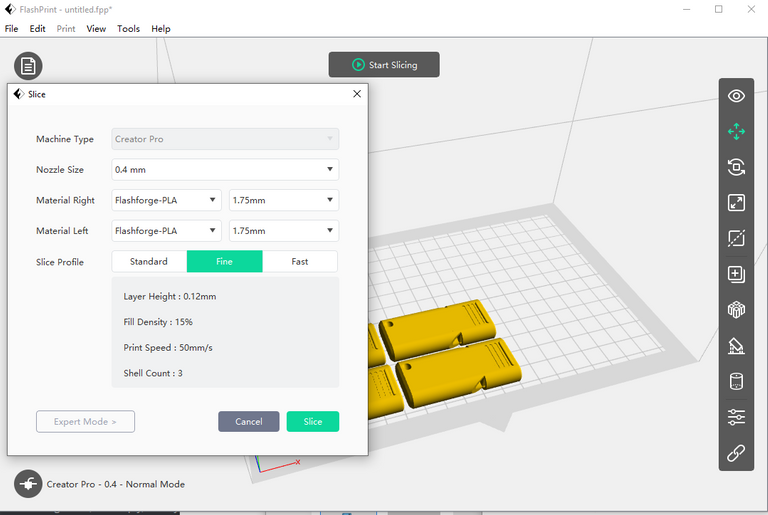
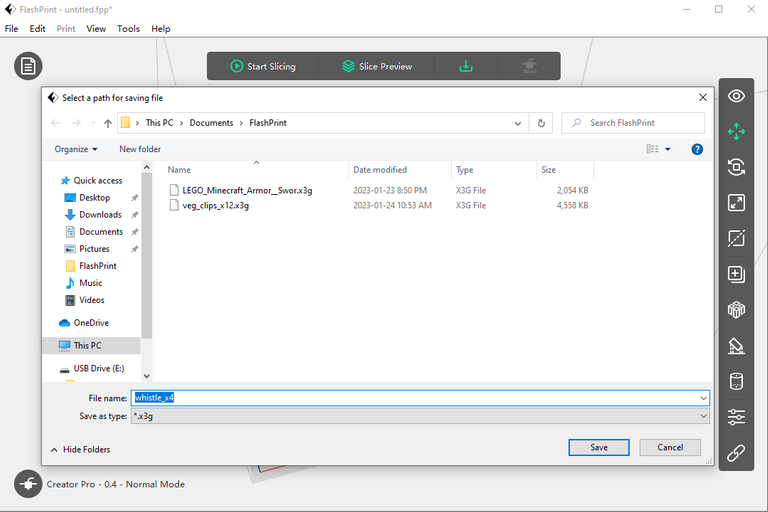
I select 'Fine' for the 'Slice Profile's, then click the 'Slice' button. After the slicing, the 'Down Arrow' button is clicked to save the 3D print file - this .x3g file is copied to the SDCard, for the 3D printer.
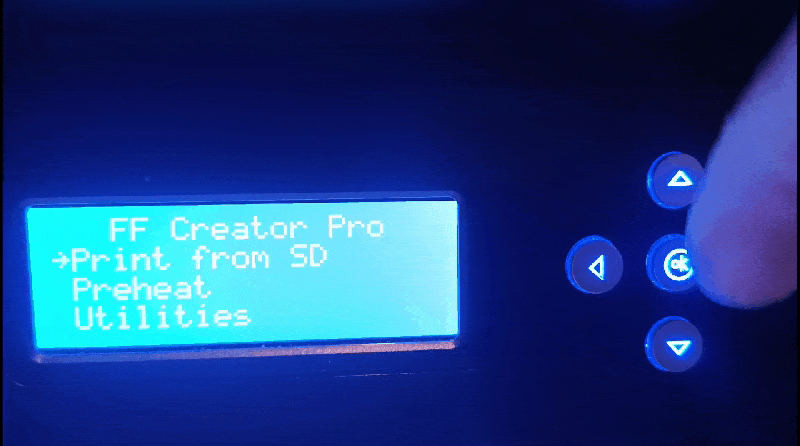
3D Print Prepare
The SDCard is inserted into slot on the 3D printer, 'Print From SDCard', and then the file is selected from the LCD screen.

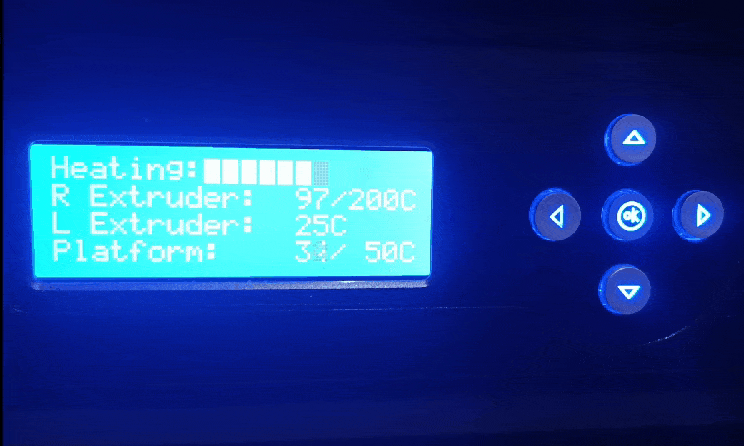
Before the printing is started, the print head needs to preheat to Celsius, and the print platform to 50 degrees Celsius.
 |  |
|---|
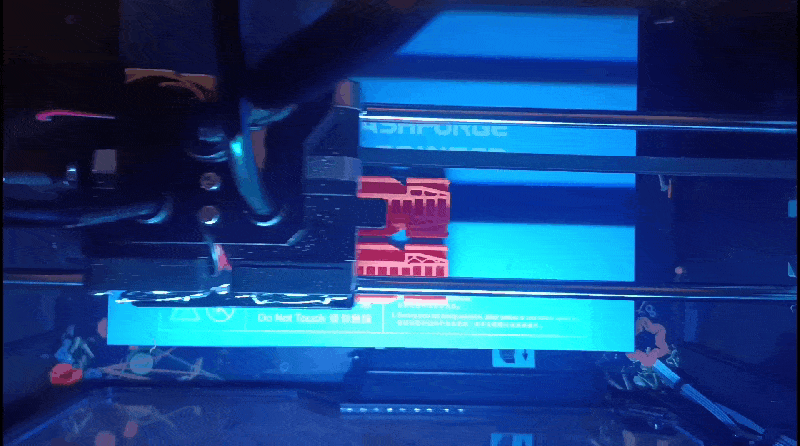
3D Printing
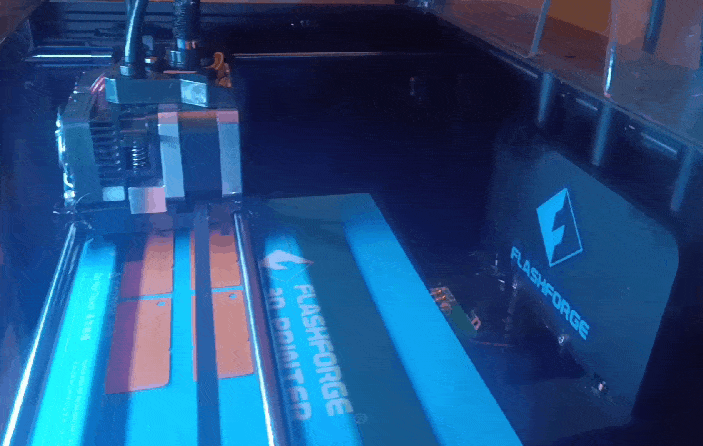
When the printing begins, the platform moves up to the print head, for the print head to move side to side and forward and back to lay down the first layer.
 |  |
|---|
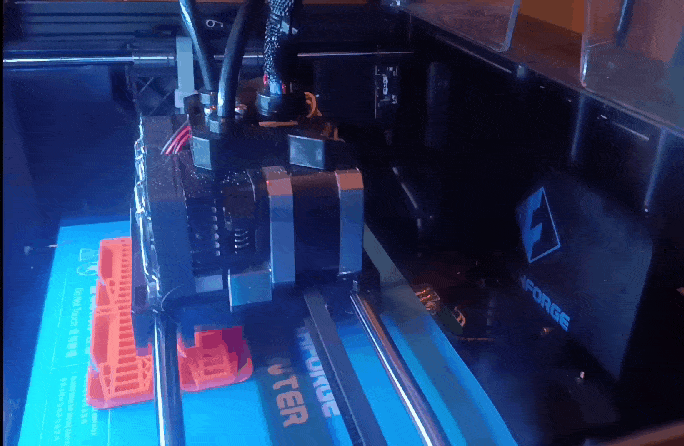
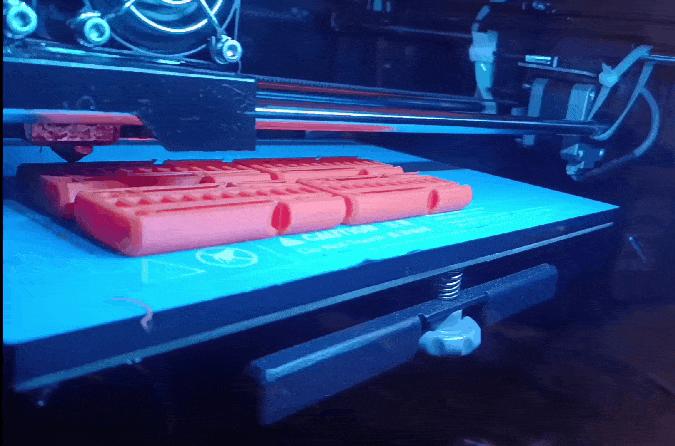
After each layer of the whistles are completed, the print platform ever so slightly moves down for the next one.
 |  |
|---|
You can see the hidden inner chambers of the whistle while it's printing.
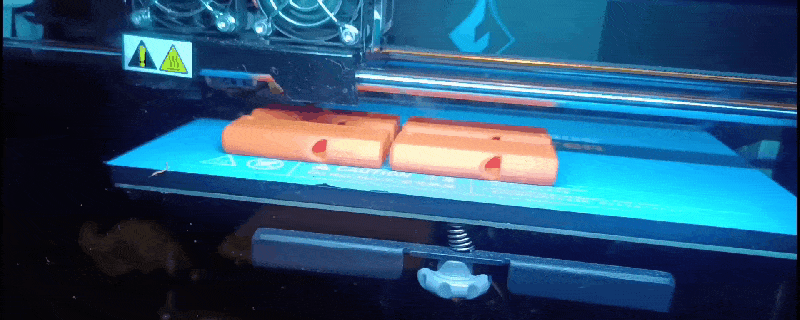
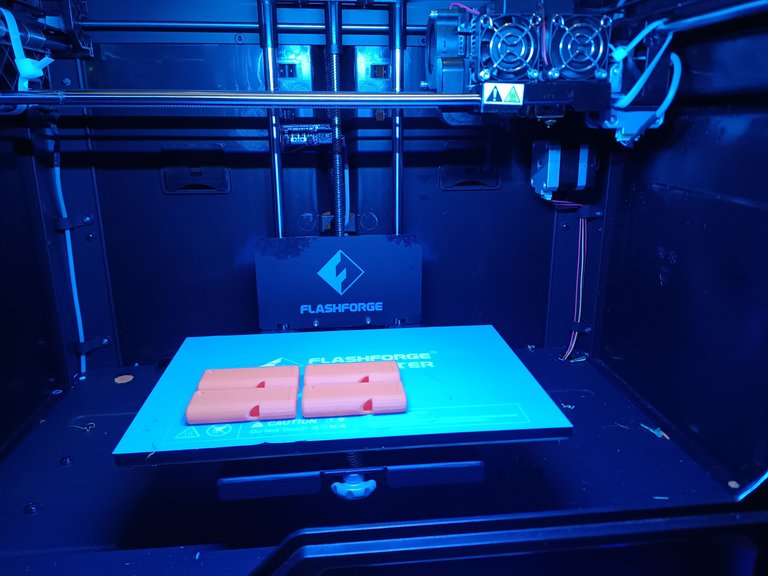
3D Print Finished
Approximately six hours later, the four whistle 3D print job was complete. With the help of a pocket knife, I gently lift the whistles off the platform.
 |  |
|---|
The print job looks great, and the whistles are LOUD, solid design.
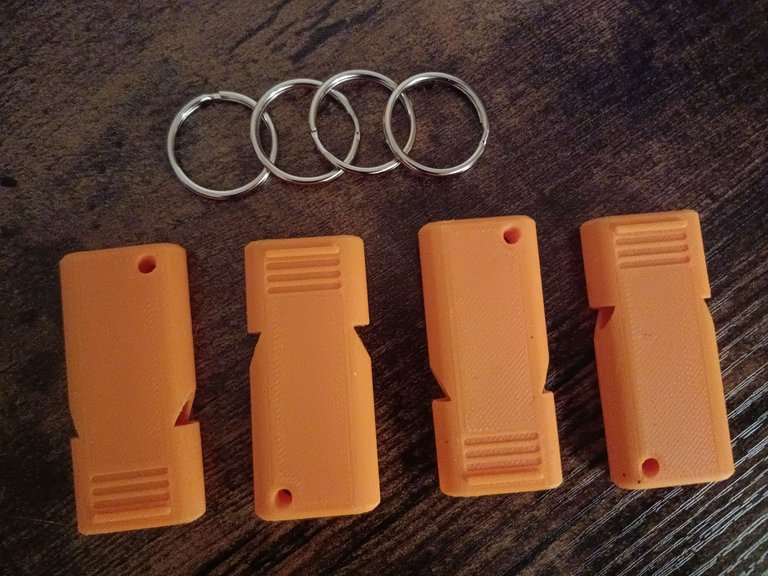
Luckily I had some keyrings on hand to feed through the ring hole on the whistles.
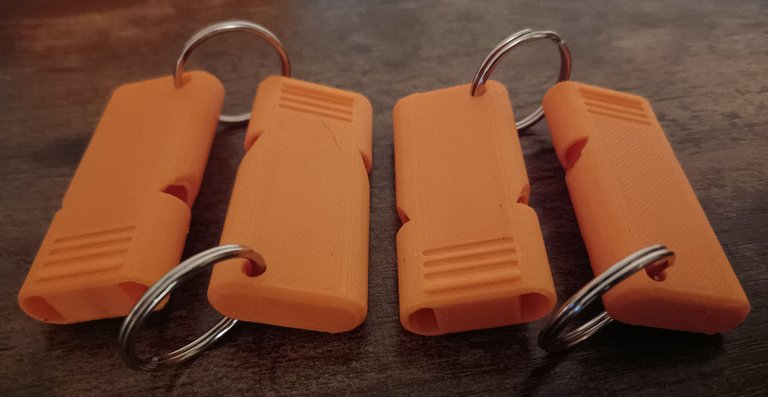
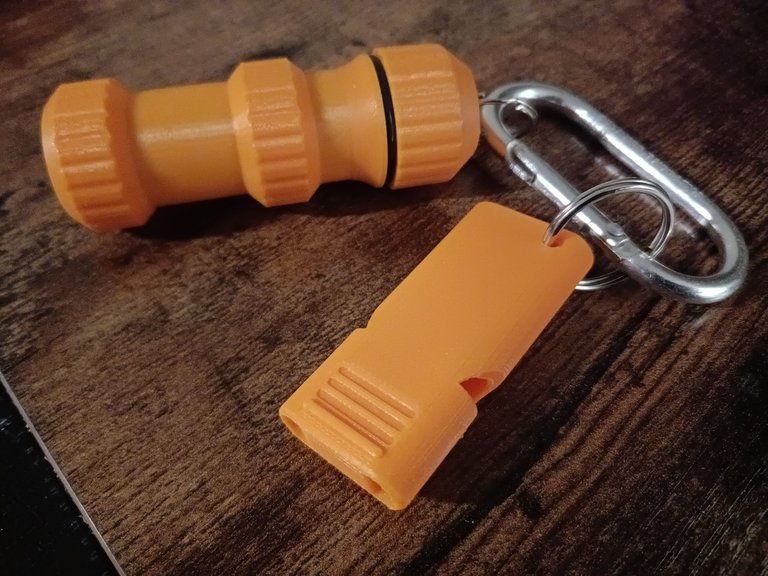
This whistle pairs up well with the previously printed EDC Waterproof Container. Pocket ready for hikes in the mountains, the 3D printer consistently amazes me with what it can do.
The rewards earned on this comment will go directly to the people( @semarekha ) sharing the post on Twitter as long as they are registered with @poshtoken. Sign up at https://hiveposh.com.
I like the color and the design too, looks great. At home I also try to use stylish key rings, I like them. !DIY
Thanks - just the right keychain can be very useful :)
Thank you for sharing this post in the DIYHUB Community!
Your content got selected by our fellow curator semarekha & you just received a little thank you upvote from us for your great work! Your post will be featured in one of our recurring compilations which are aiming to offer you a stage to widen your audience within the DIY scene of Hive. Stay creative & HIVE ON!
Please vote for our hive witness <3