Saludos Artesanos Creadores que comparten sus contenidos por esta maravillosa comunidad diyhub; está vez con la colaboración de @skatehive apoyando la propuesta de este mes de julio, cuya temática trata de esos pequeños insectos que son de mucha utilidad e importancia en nuestras vidas y el mundo me refiero a las Abejas.
Muchas veces comento que presto mis servicios en una comunidad rural, dónde además de los trabajos manuales, artesania, florería, pesca, ganadería agricultura son el sustento diario de la misma; por supuesto no puede faltar la Apicultura ya que también se fabrica la miel, la cera, ayudan a desarrollar las plantas y polinizan las flores; esta actividad está considerada como un recurso libremente disponible en la naturaleza.
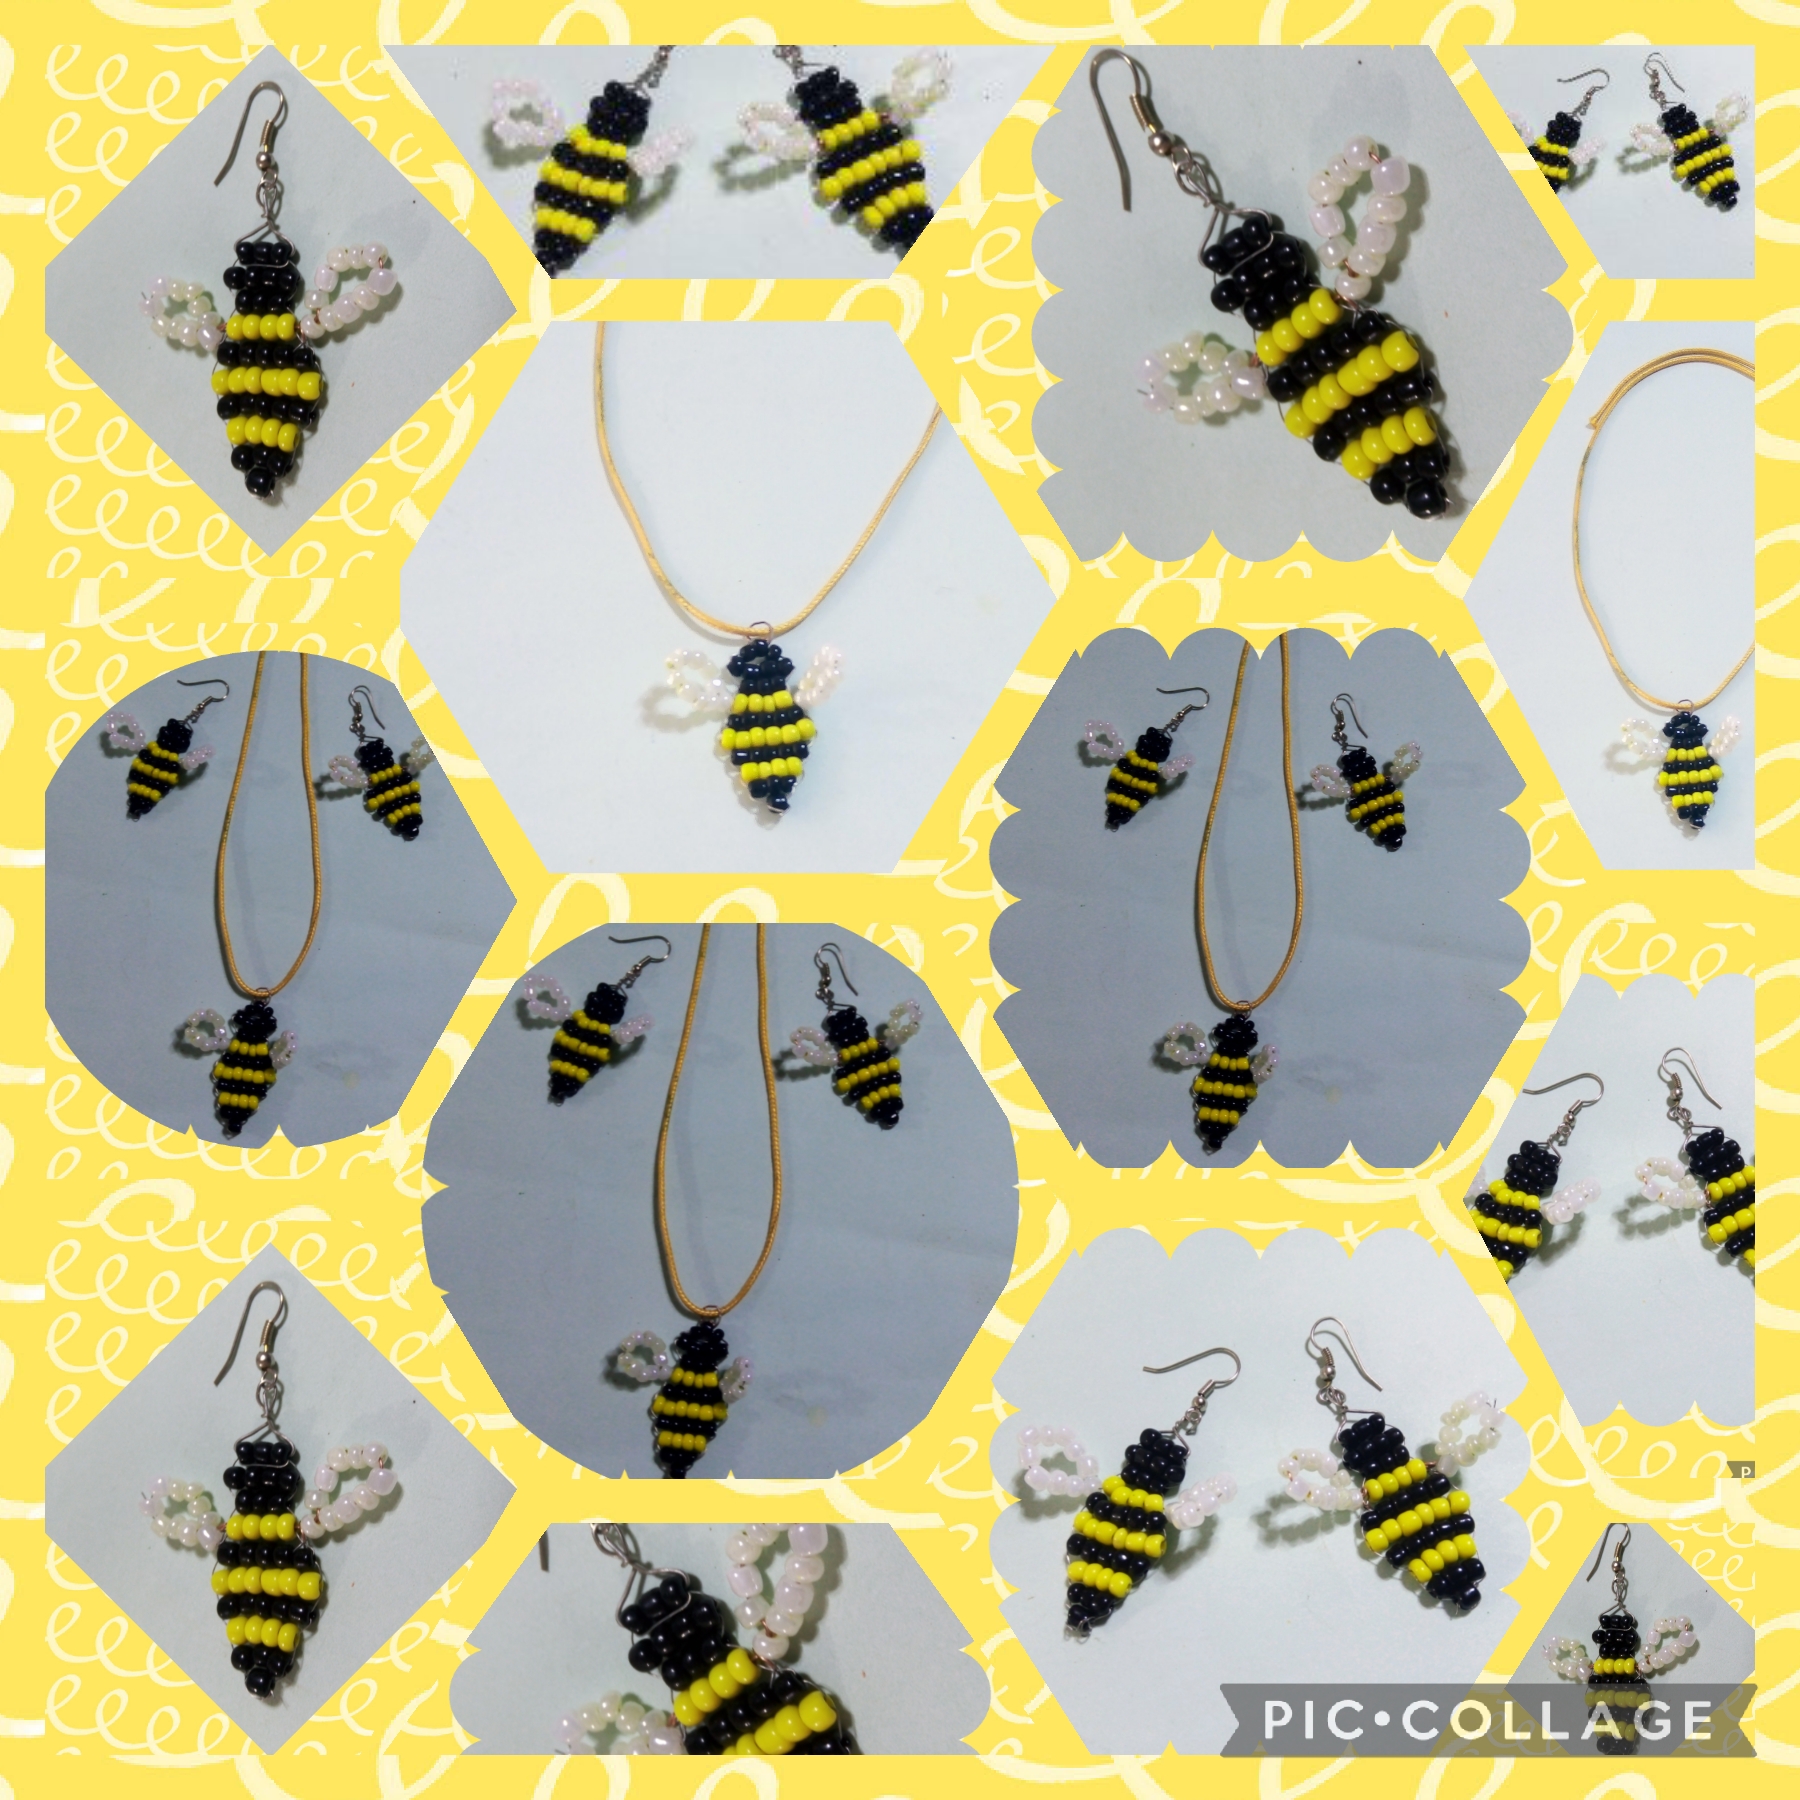
El proyecto que realicé para mí participación en esta propuesta se trata de una Abeja Reina para un Coldije y dos zánganos para un par de aretes hechos en alambre y mostacillones; aquí les dejo el paso a paso de como los hice:
Greetings Artisans Creators who share their content through this wonderful diyhub community; This time with the collaboration of @skatehive supporting the proposal for this month of July, whose theme deals with those small insects that are very useful and important in our lives and in the world, I mean Bees.
Many times I comment that I provide my services in a rural community, where in addition to manual labor, crafts, flower shops, fishing, livestock farming are the daily livelihood of it; Of course, Beekeeping cannot be missing since honey and wax are also manufactured, they help to develop the plants and pollinate the flowers; this activity is considered a freely available resource in nature.
The project that I carried out for my participation in this proposal is about a Queen Bee for a Coldije and two drones for a pair of earrings made of wire and beads; Here I leave the step by step of how
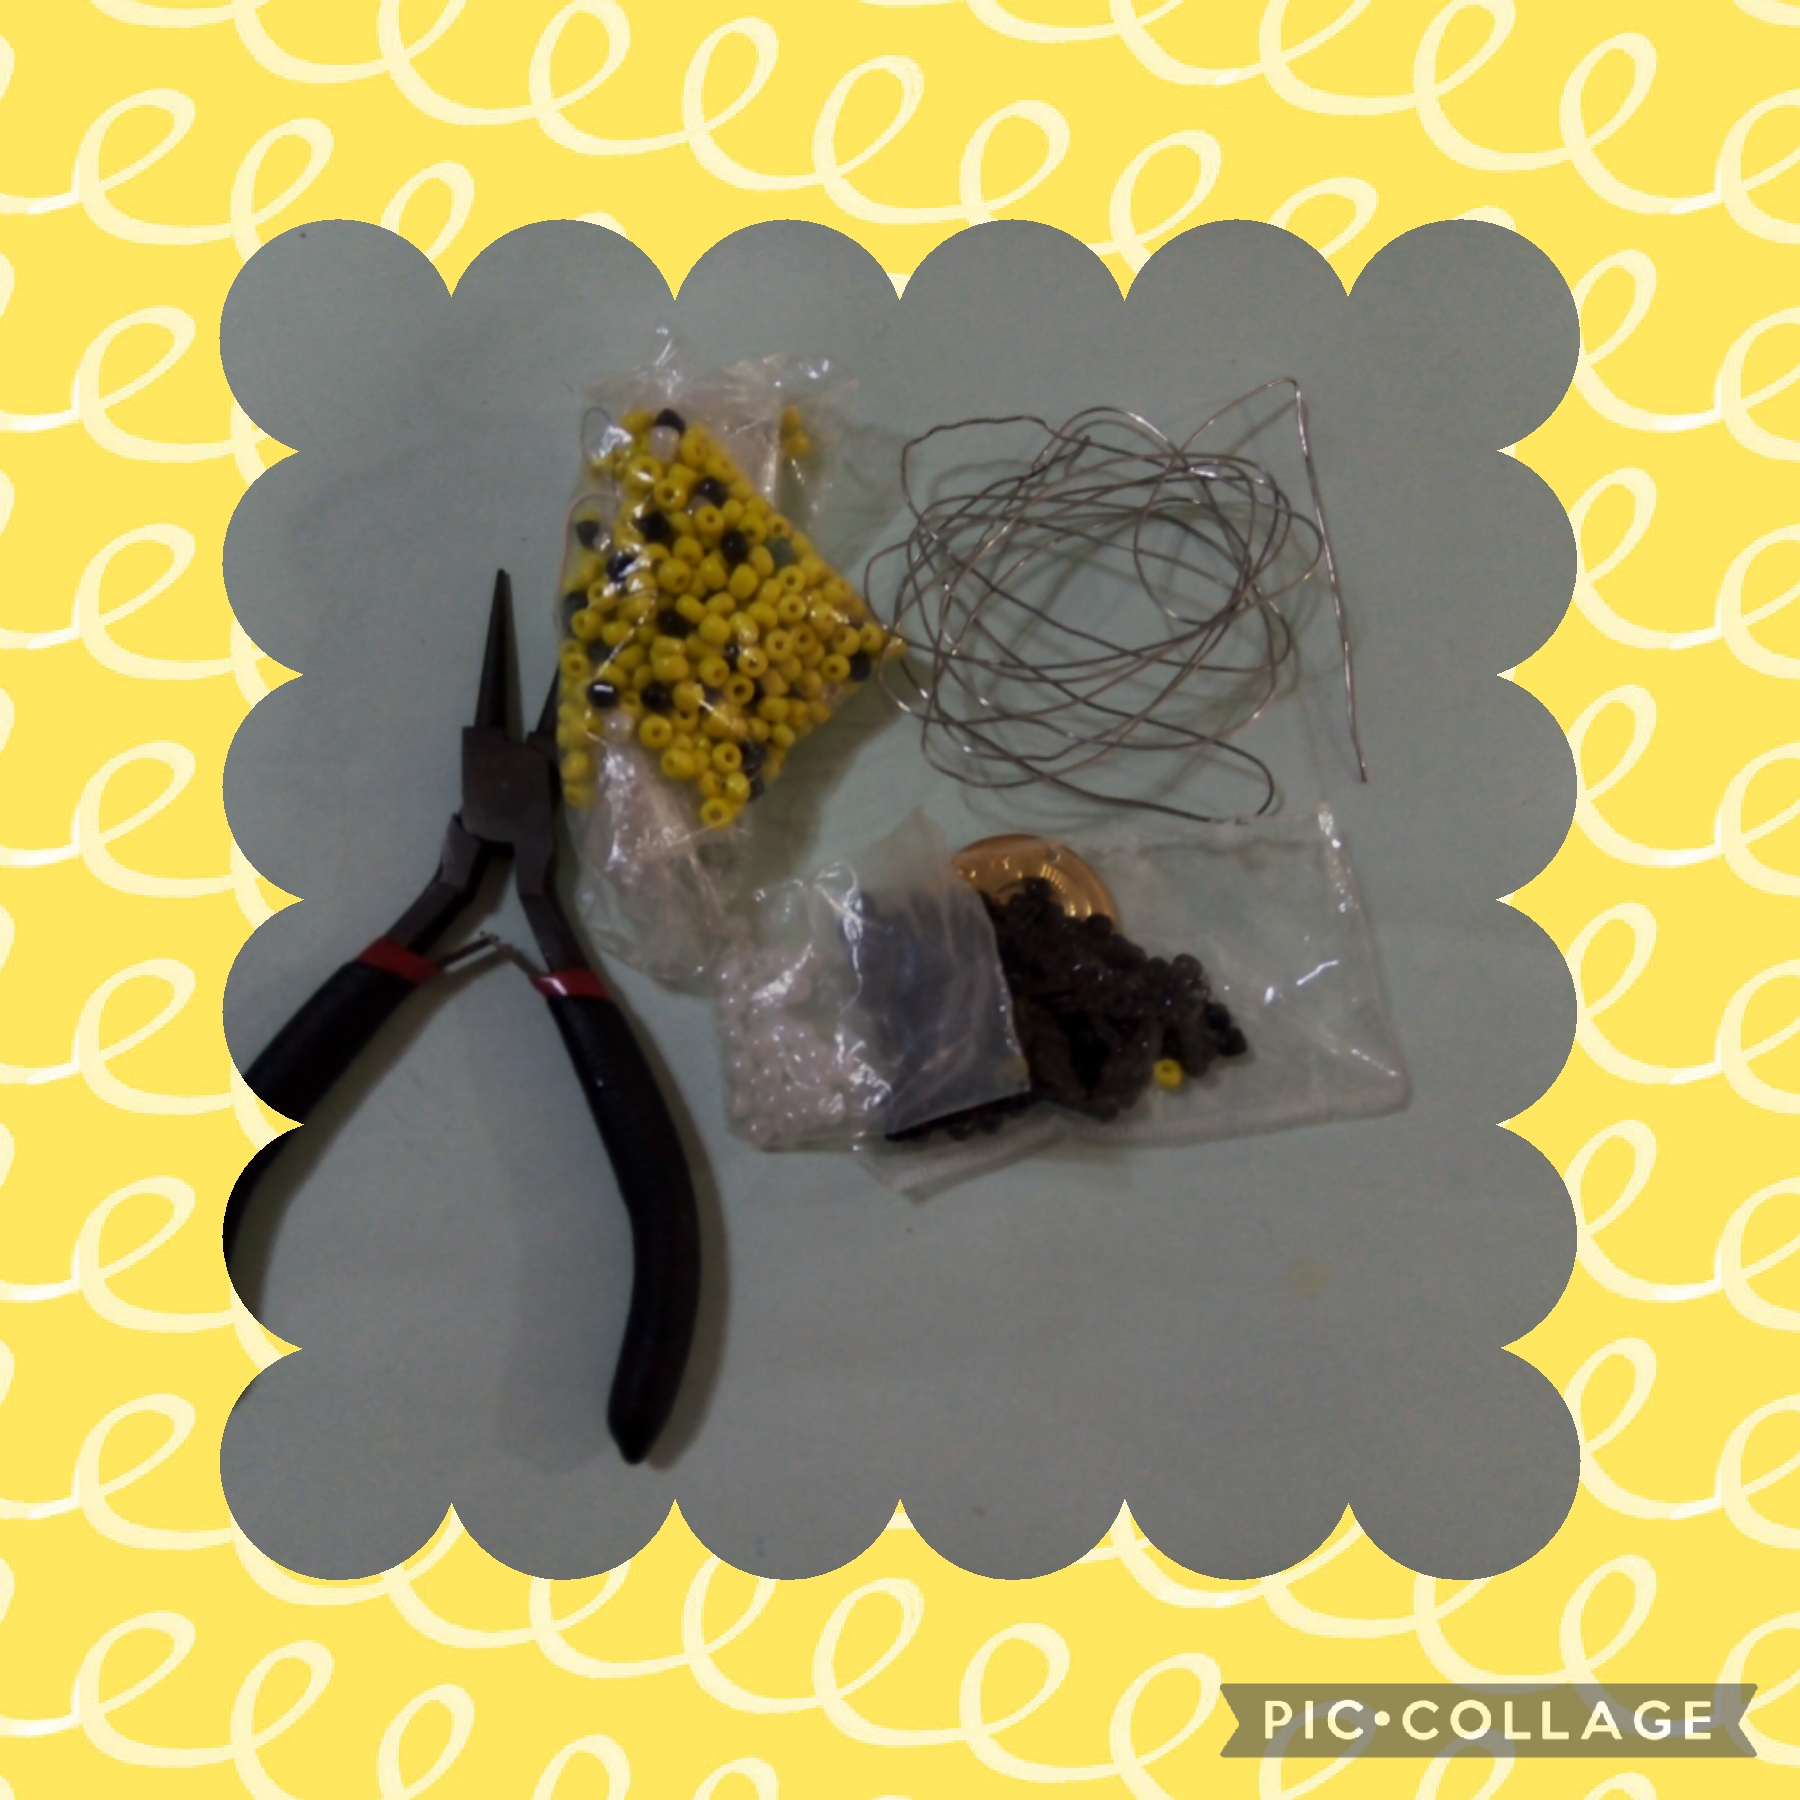
MATERIALES USADOS EN LA ELABORACIÓN DE ESTE PROYECTO:
- Mostacillones Negros.
- Mostacillones Amarillos.
- Mostacillones Blancos
Perlados. - Un metro de Alpaca.
- Dos anzuelos para aretes.
- Pinza de corte.
- Pinza punta redonda.
- Pinza plana.
- Cuarenta centímetros de.
cuerina piel de serpiente
amarilla.
MATERIALS USED IN THE ELABORATION OF THIS PROJECT:
- Black beads.
- Yellow beads.
- White beads
Pearled. - One meter of Alpaca.
- Two hooks for earrings.
- Cutting clamp.
- Round nose tweezers.
- Flat clamp.
- Forty centimeters of.
snake skin
yellow.
PARA ELABORAR ESTE PROYECTO USE POCOS Y SENCILLOS PASOS:
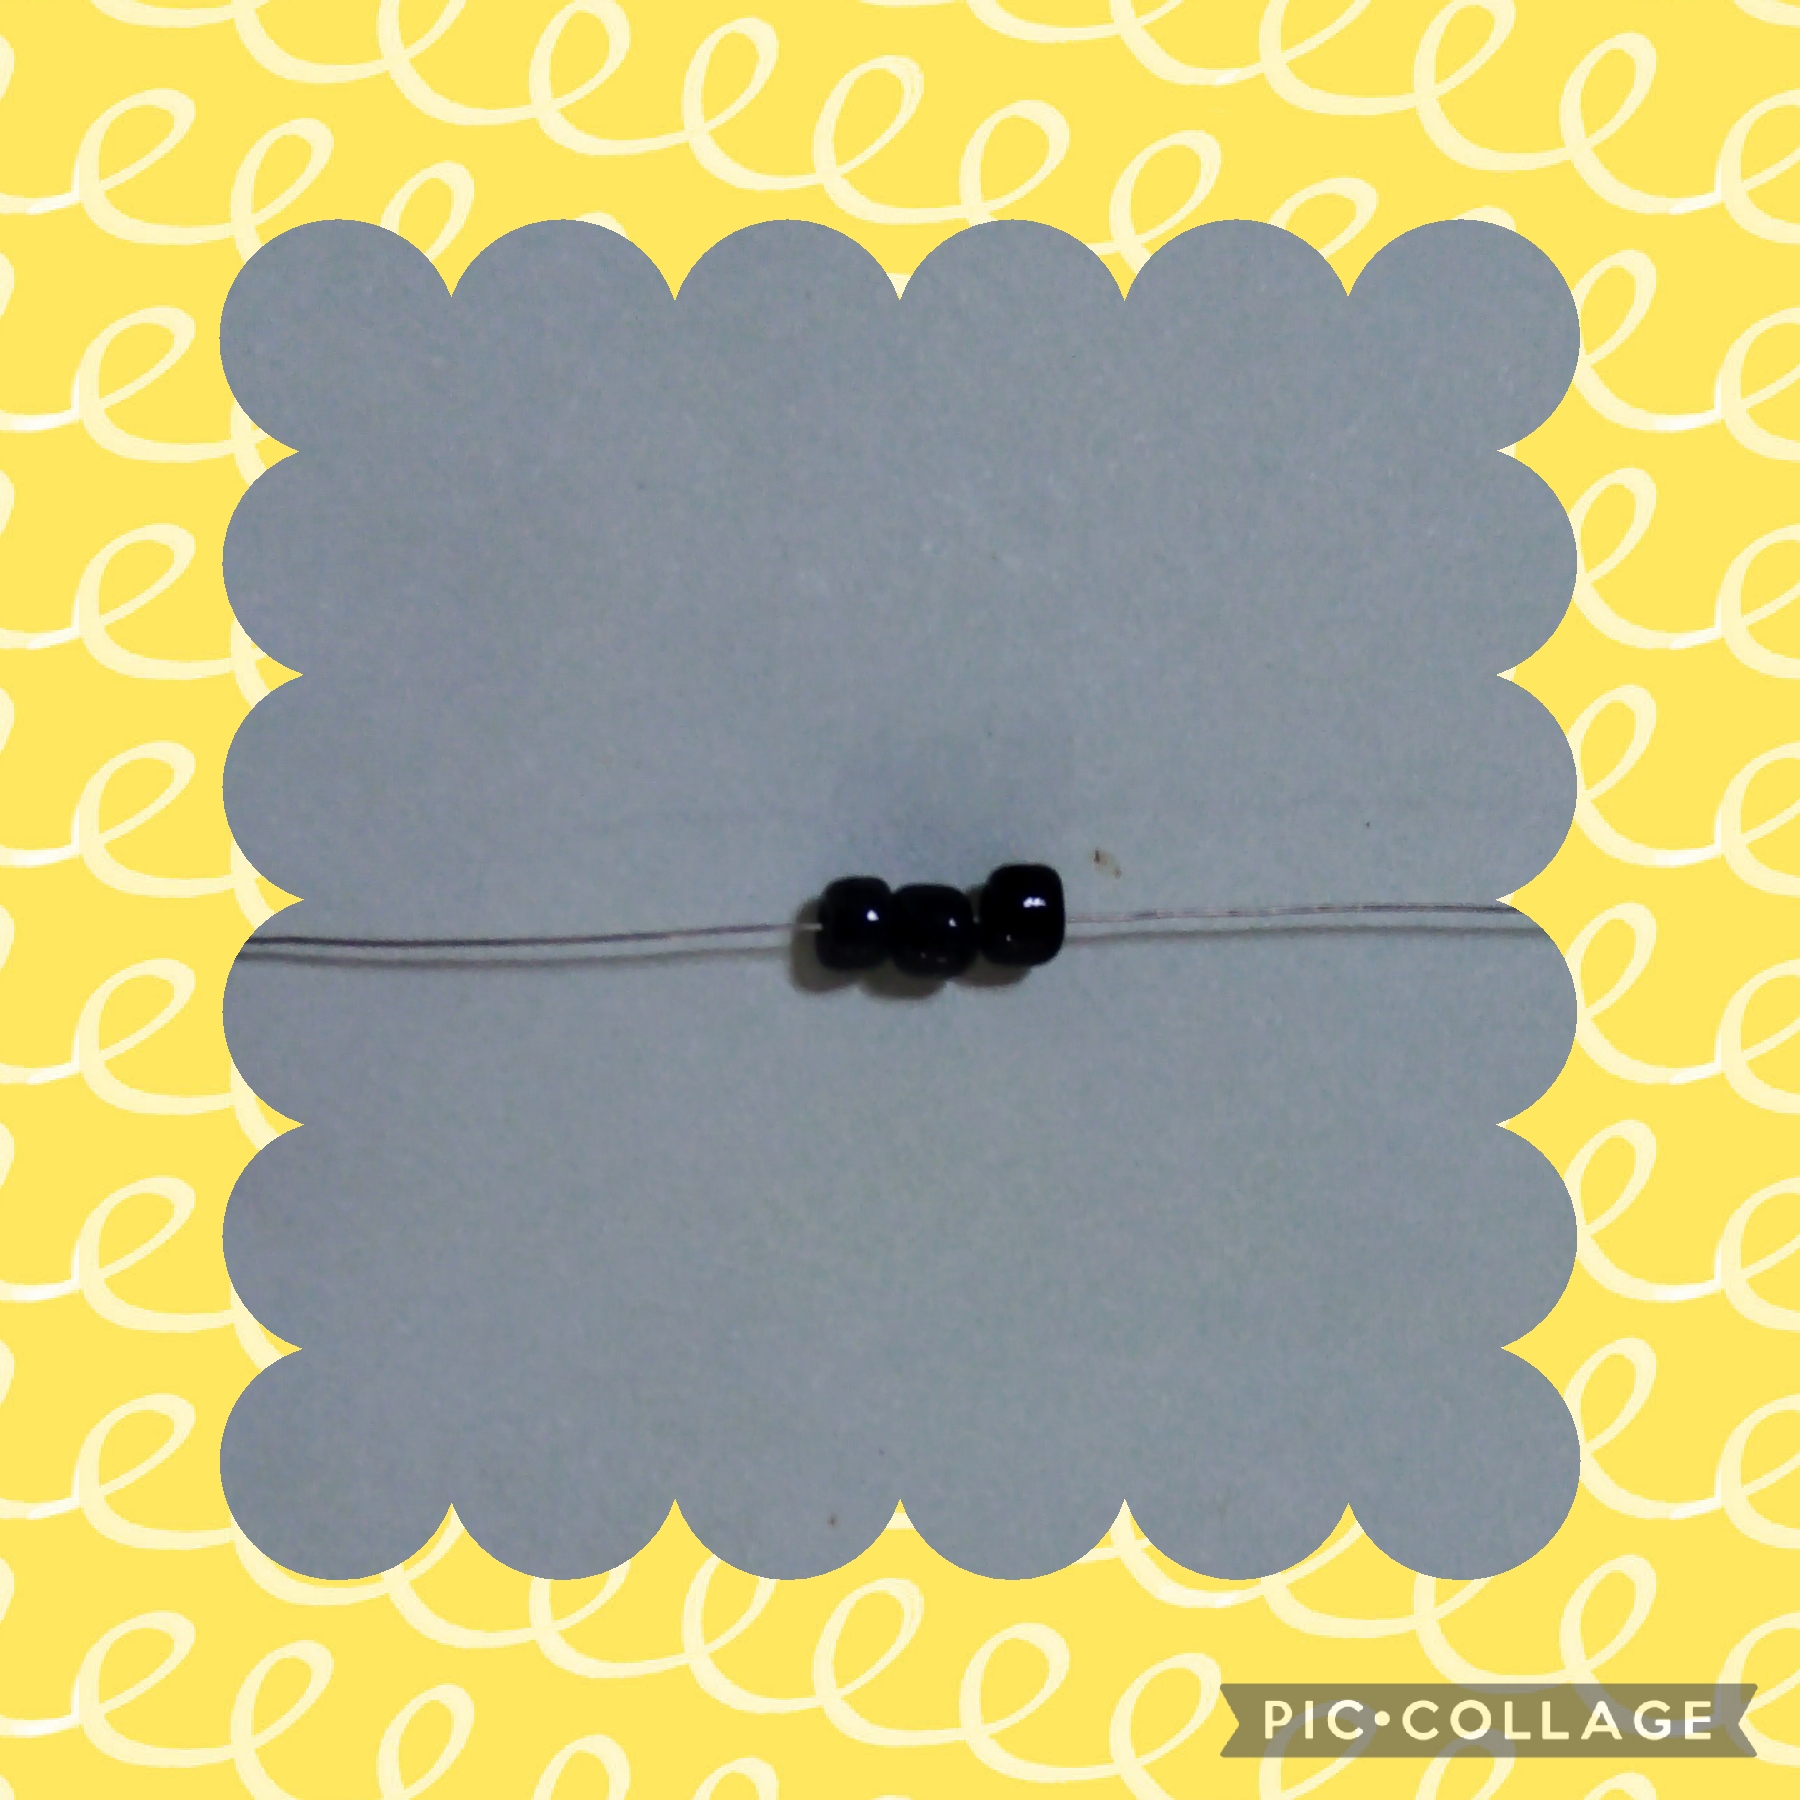
PASO UNO:
Para comenzar con la elaboración de este tutorial, corto con la pinza veinticinco centímetros del metro de alpaca, luego inserto tres mostacillones negros por una punta, ahora los cruzo con la otra punta ajustando para centrar a la mitad de la medida que voy a usar, así muestro la foto.
TO MAKE THIS PROJECT USE A FEW AND SIMPLE STEPS:
STEP ONE:
To begin with the elaboration of this tutorial, I cut twenty-five centimeters of the nickel silver meter with the pliers, then I insert three black beads at one end, now I cross them with the other end, adjusting to center at half the size that I am going to use, this is how I show the photo.
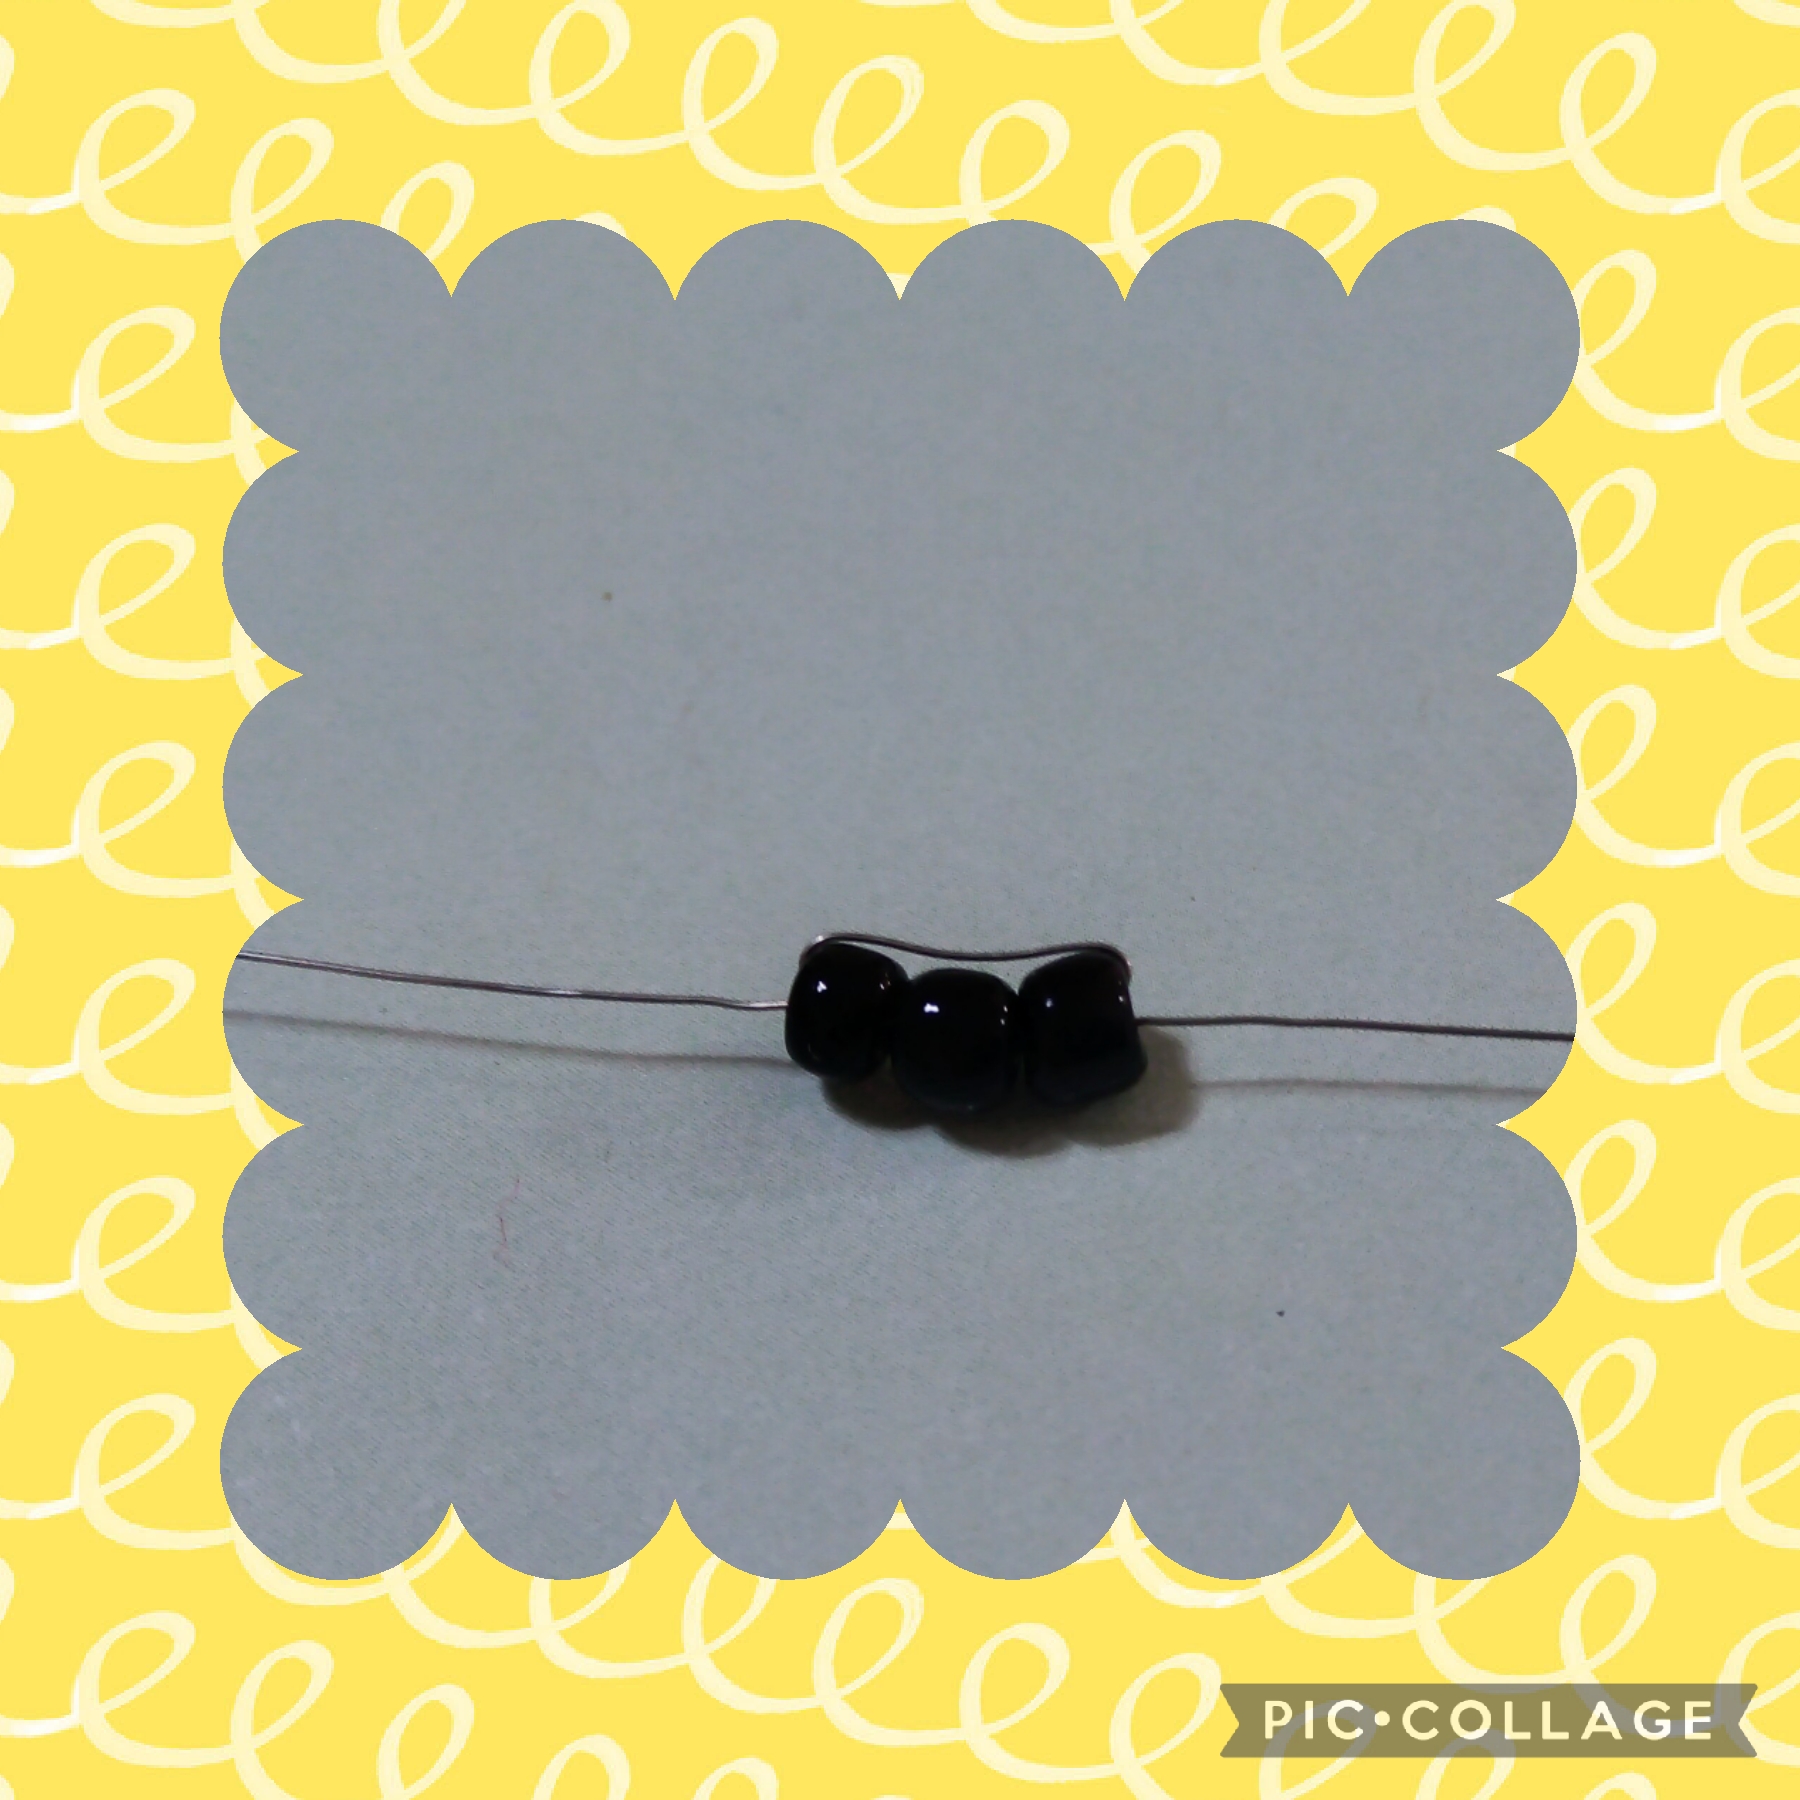
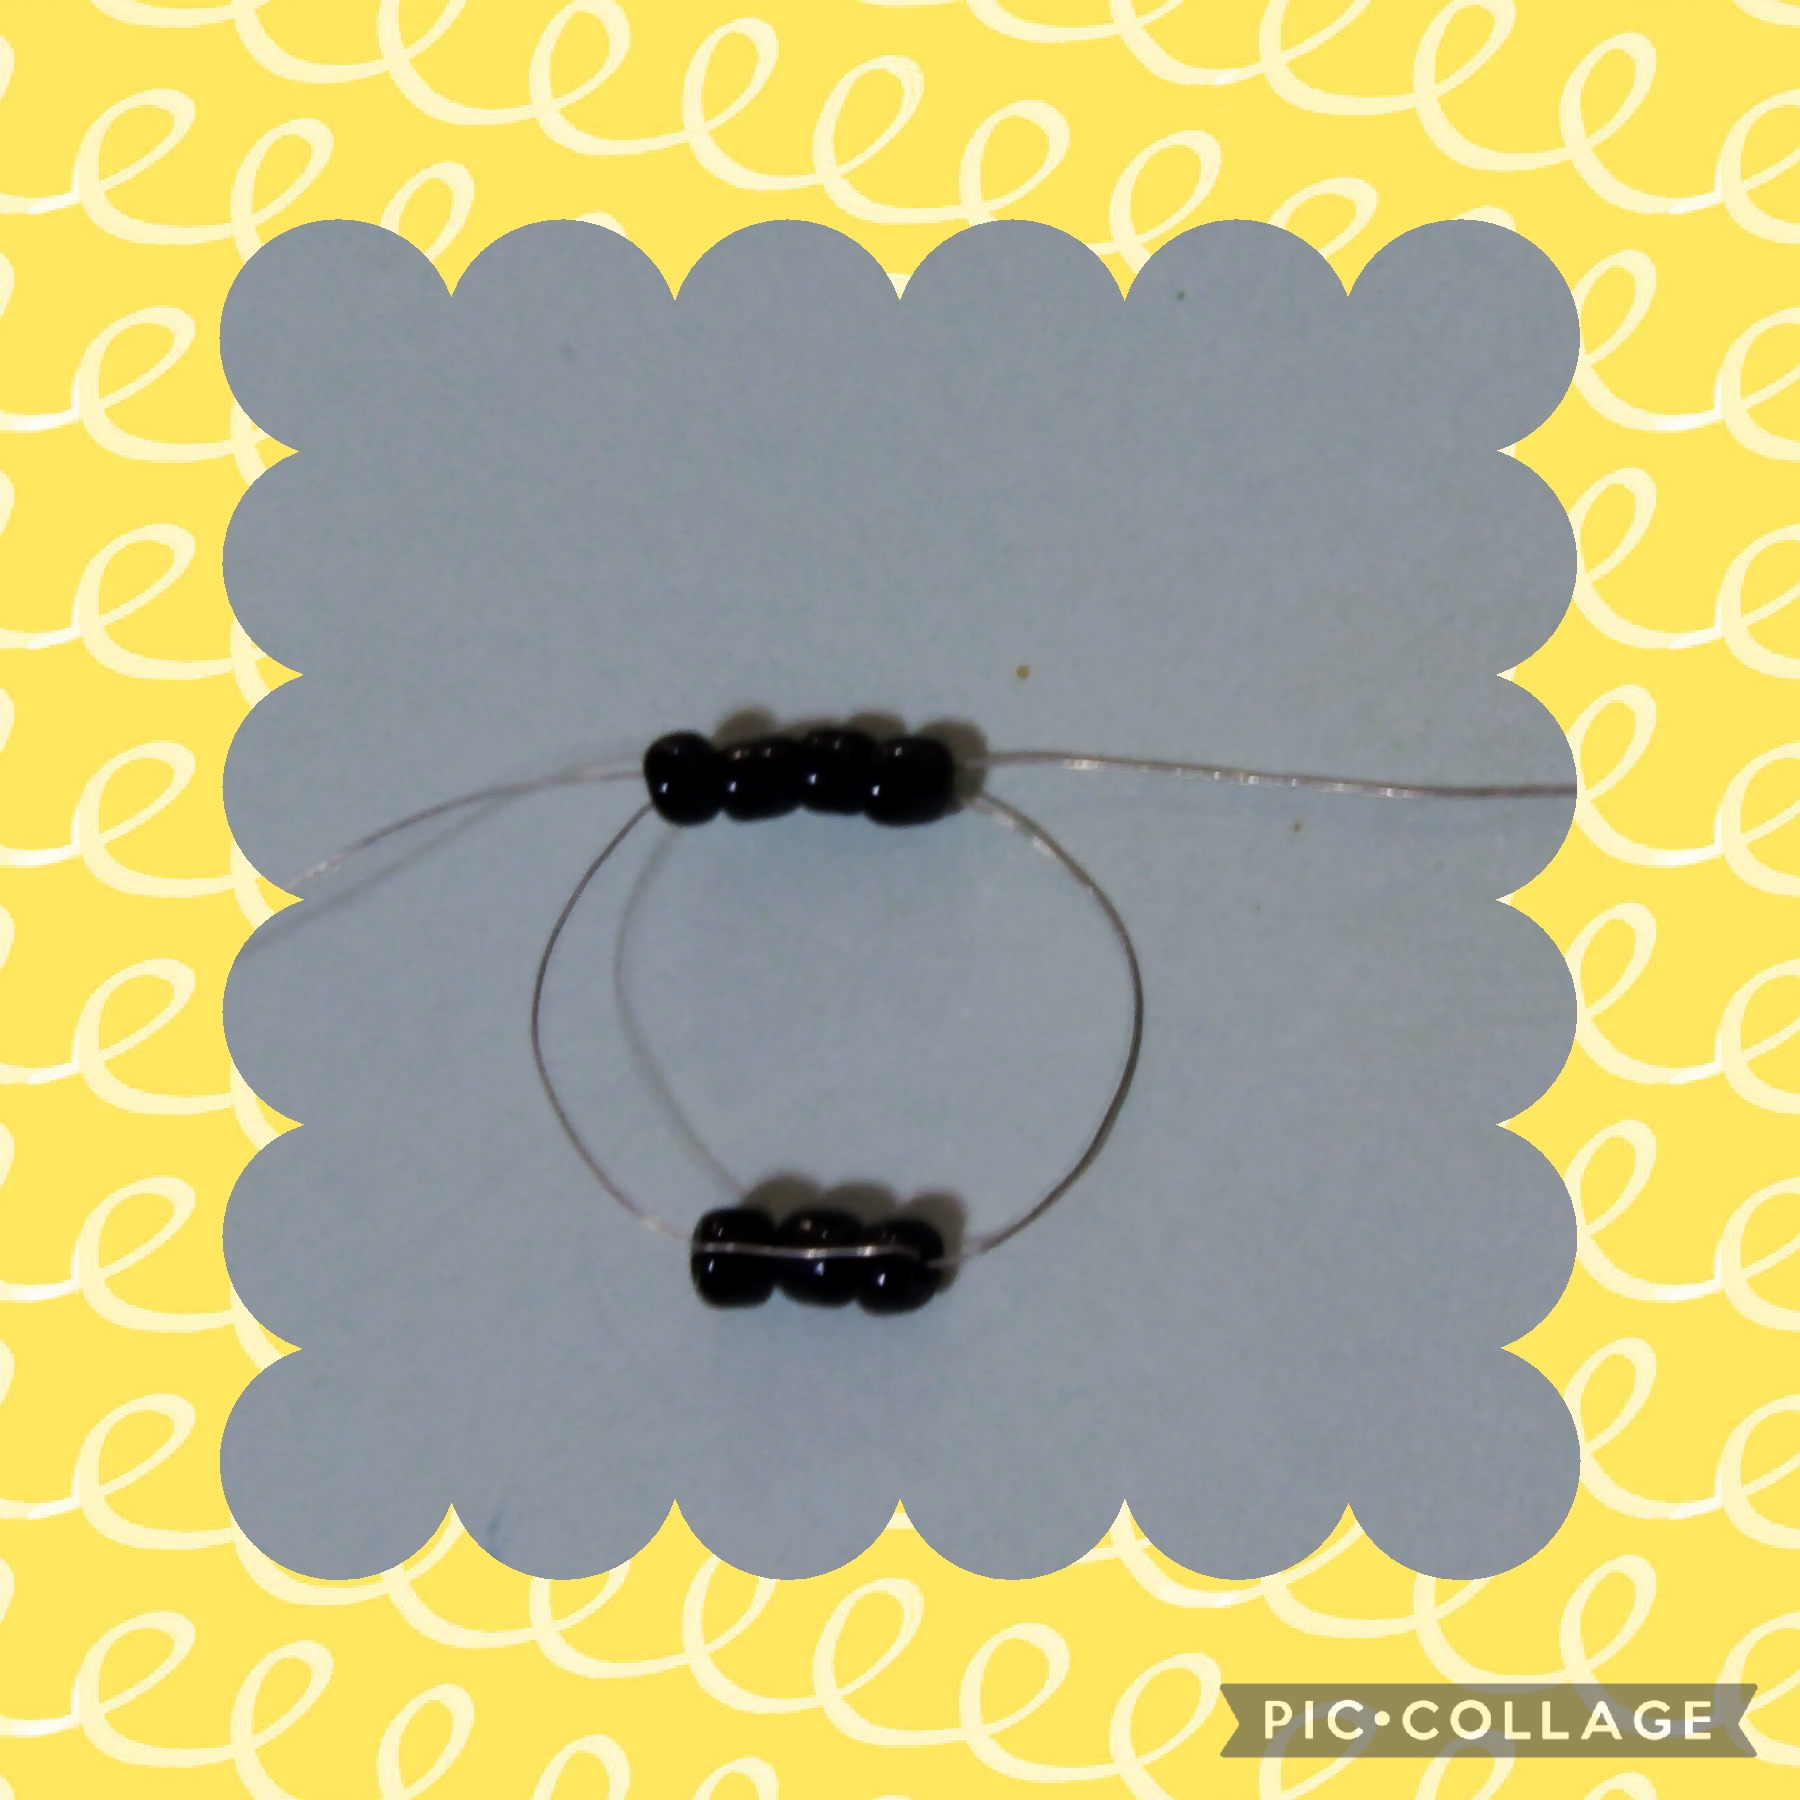
PASO DOS:
En este siguiente paso, voy a insertar por una punta de la alpaca cuatro mostacillones negros y los cruzo con la otra punta del hilo de alpaca, halo los dos extremos, y así se puede ver la imagen, de nuevo inserto tres mostacillones negros por un extremo del hilo de alpaca y los cruzo con el otro extremo y así va quedando.
STEP TWO:
In this next step, I am going to insert four black beads through one end of the alpaca and cross them with the other end of the alpaca thread, pull the two ends, and thus you can see the image, again I insert three black beads through one end of the alpaca thread and cross them with the other end and it will remain like this.
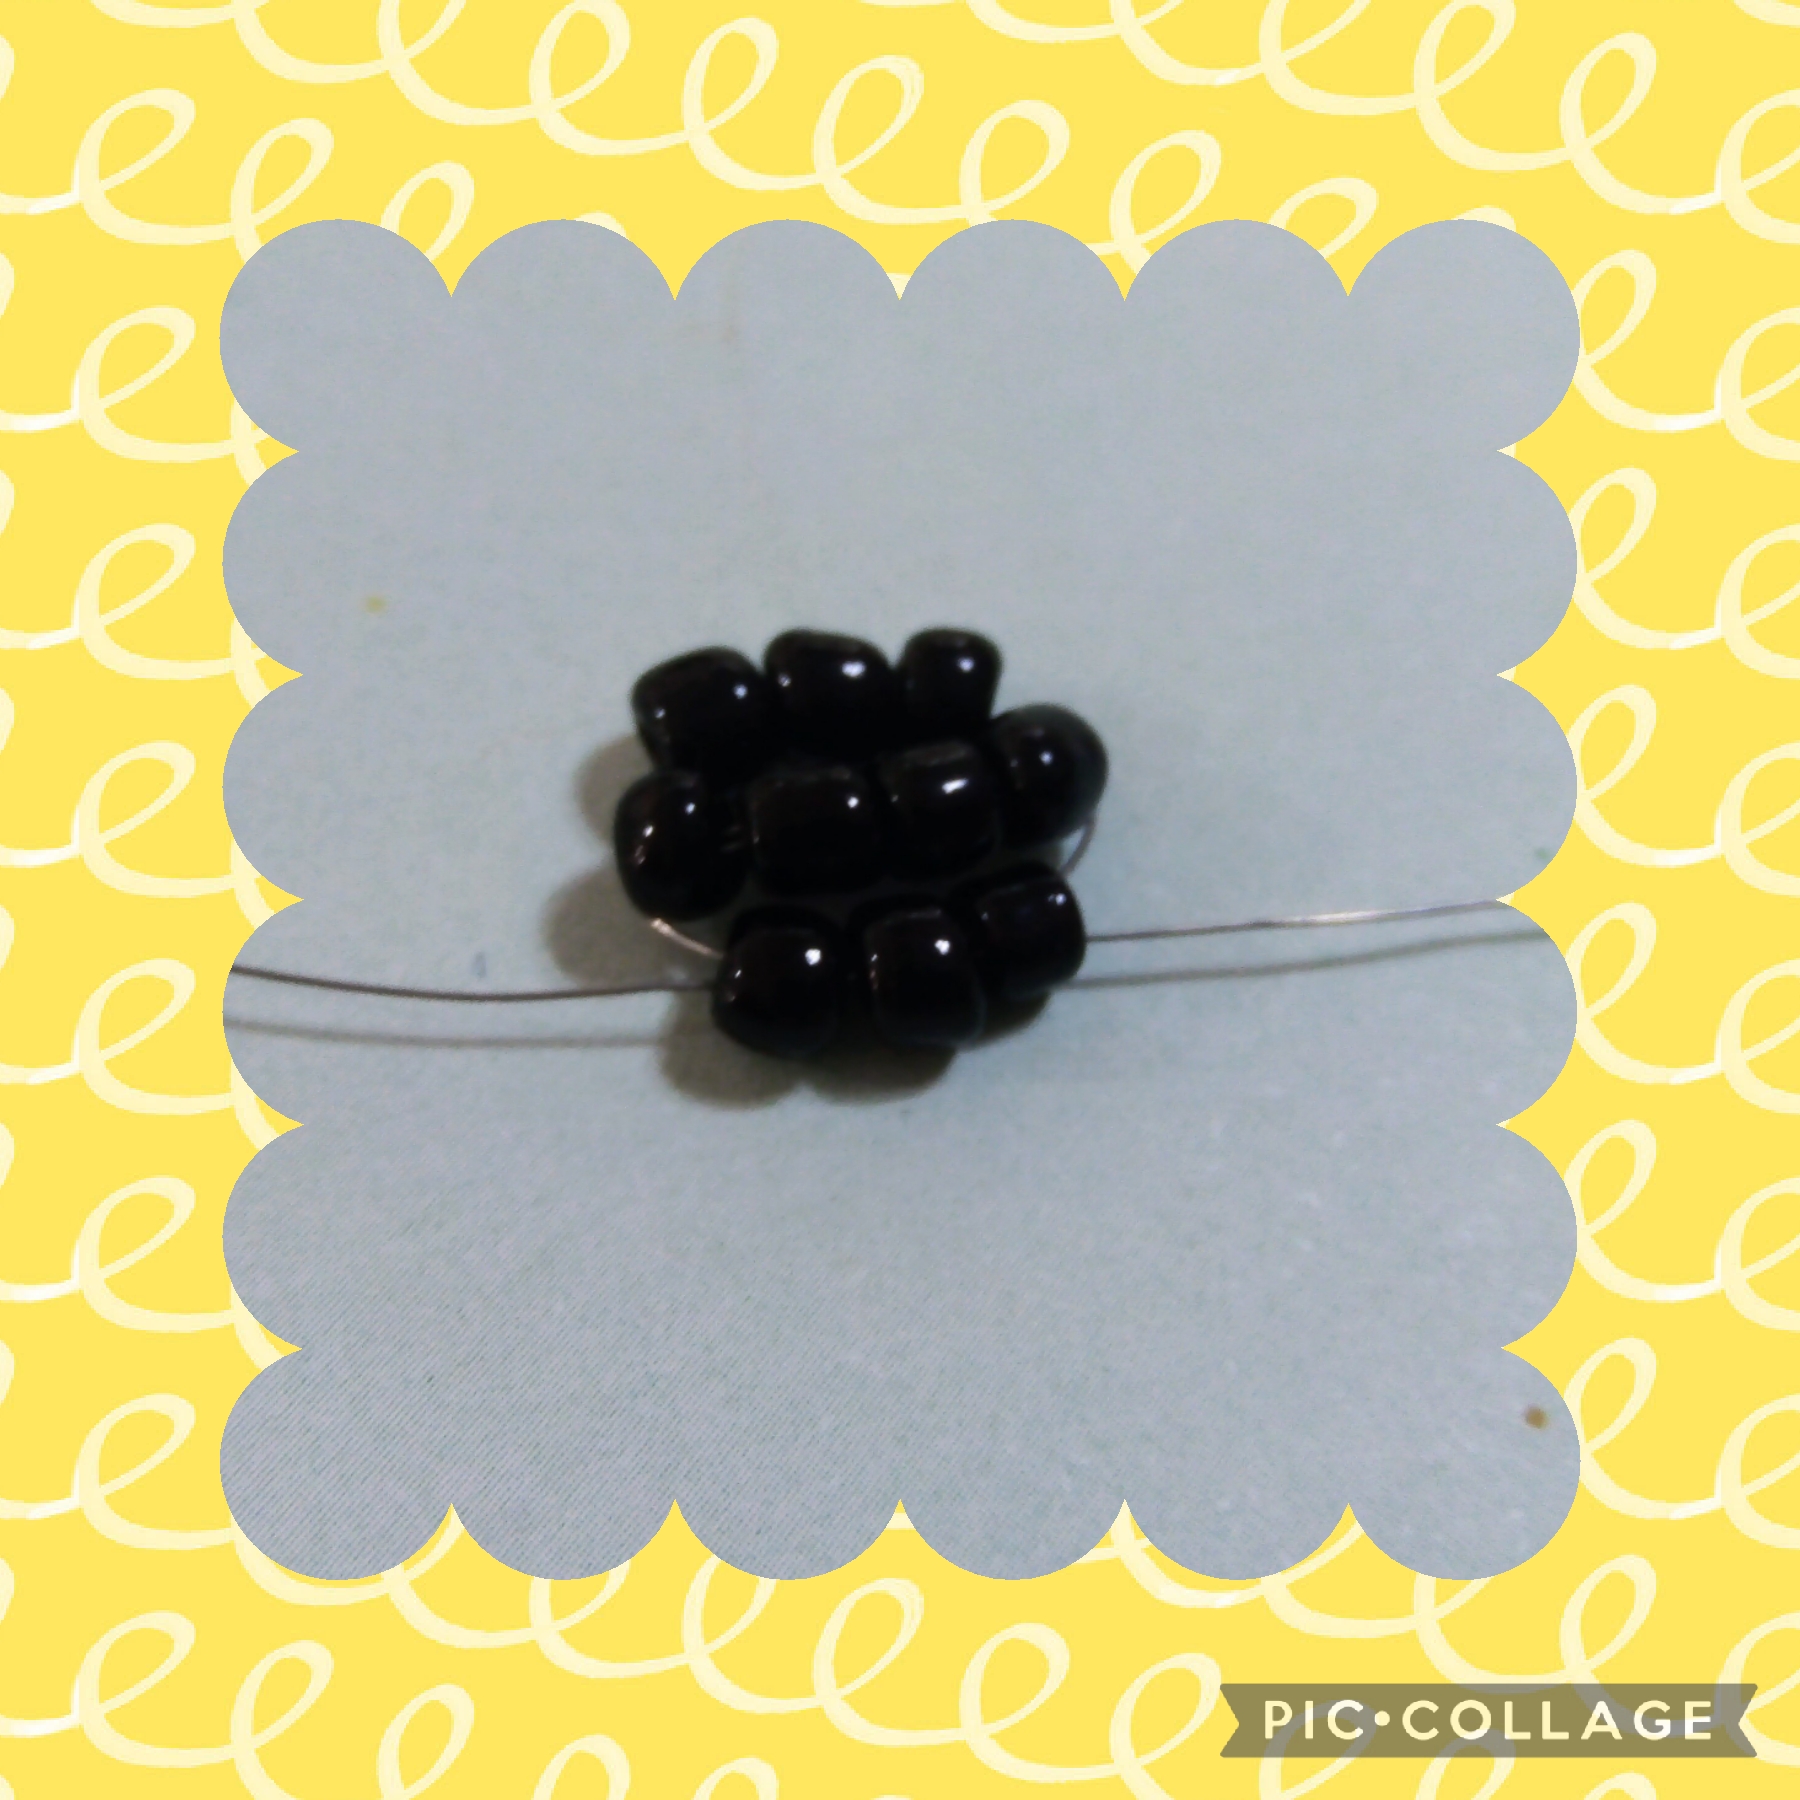
PASO TRES:
Ahora realizo este paso insertando cuatro mostacillones amarillos igual que en los pasos anteriores, o sea los paso por un extremo y los cruzo con el hilo del otro extremo, así queda.
STEP THREE:
Now I do this step by inserting four yellow beads just like in the previous steps, that is, I pass them through one end and cross them with the thread from the other end, that's how it looks.

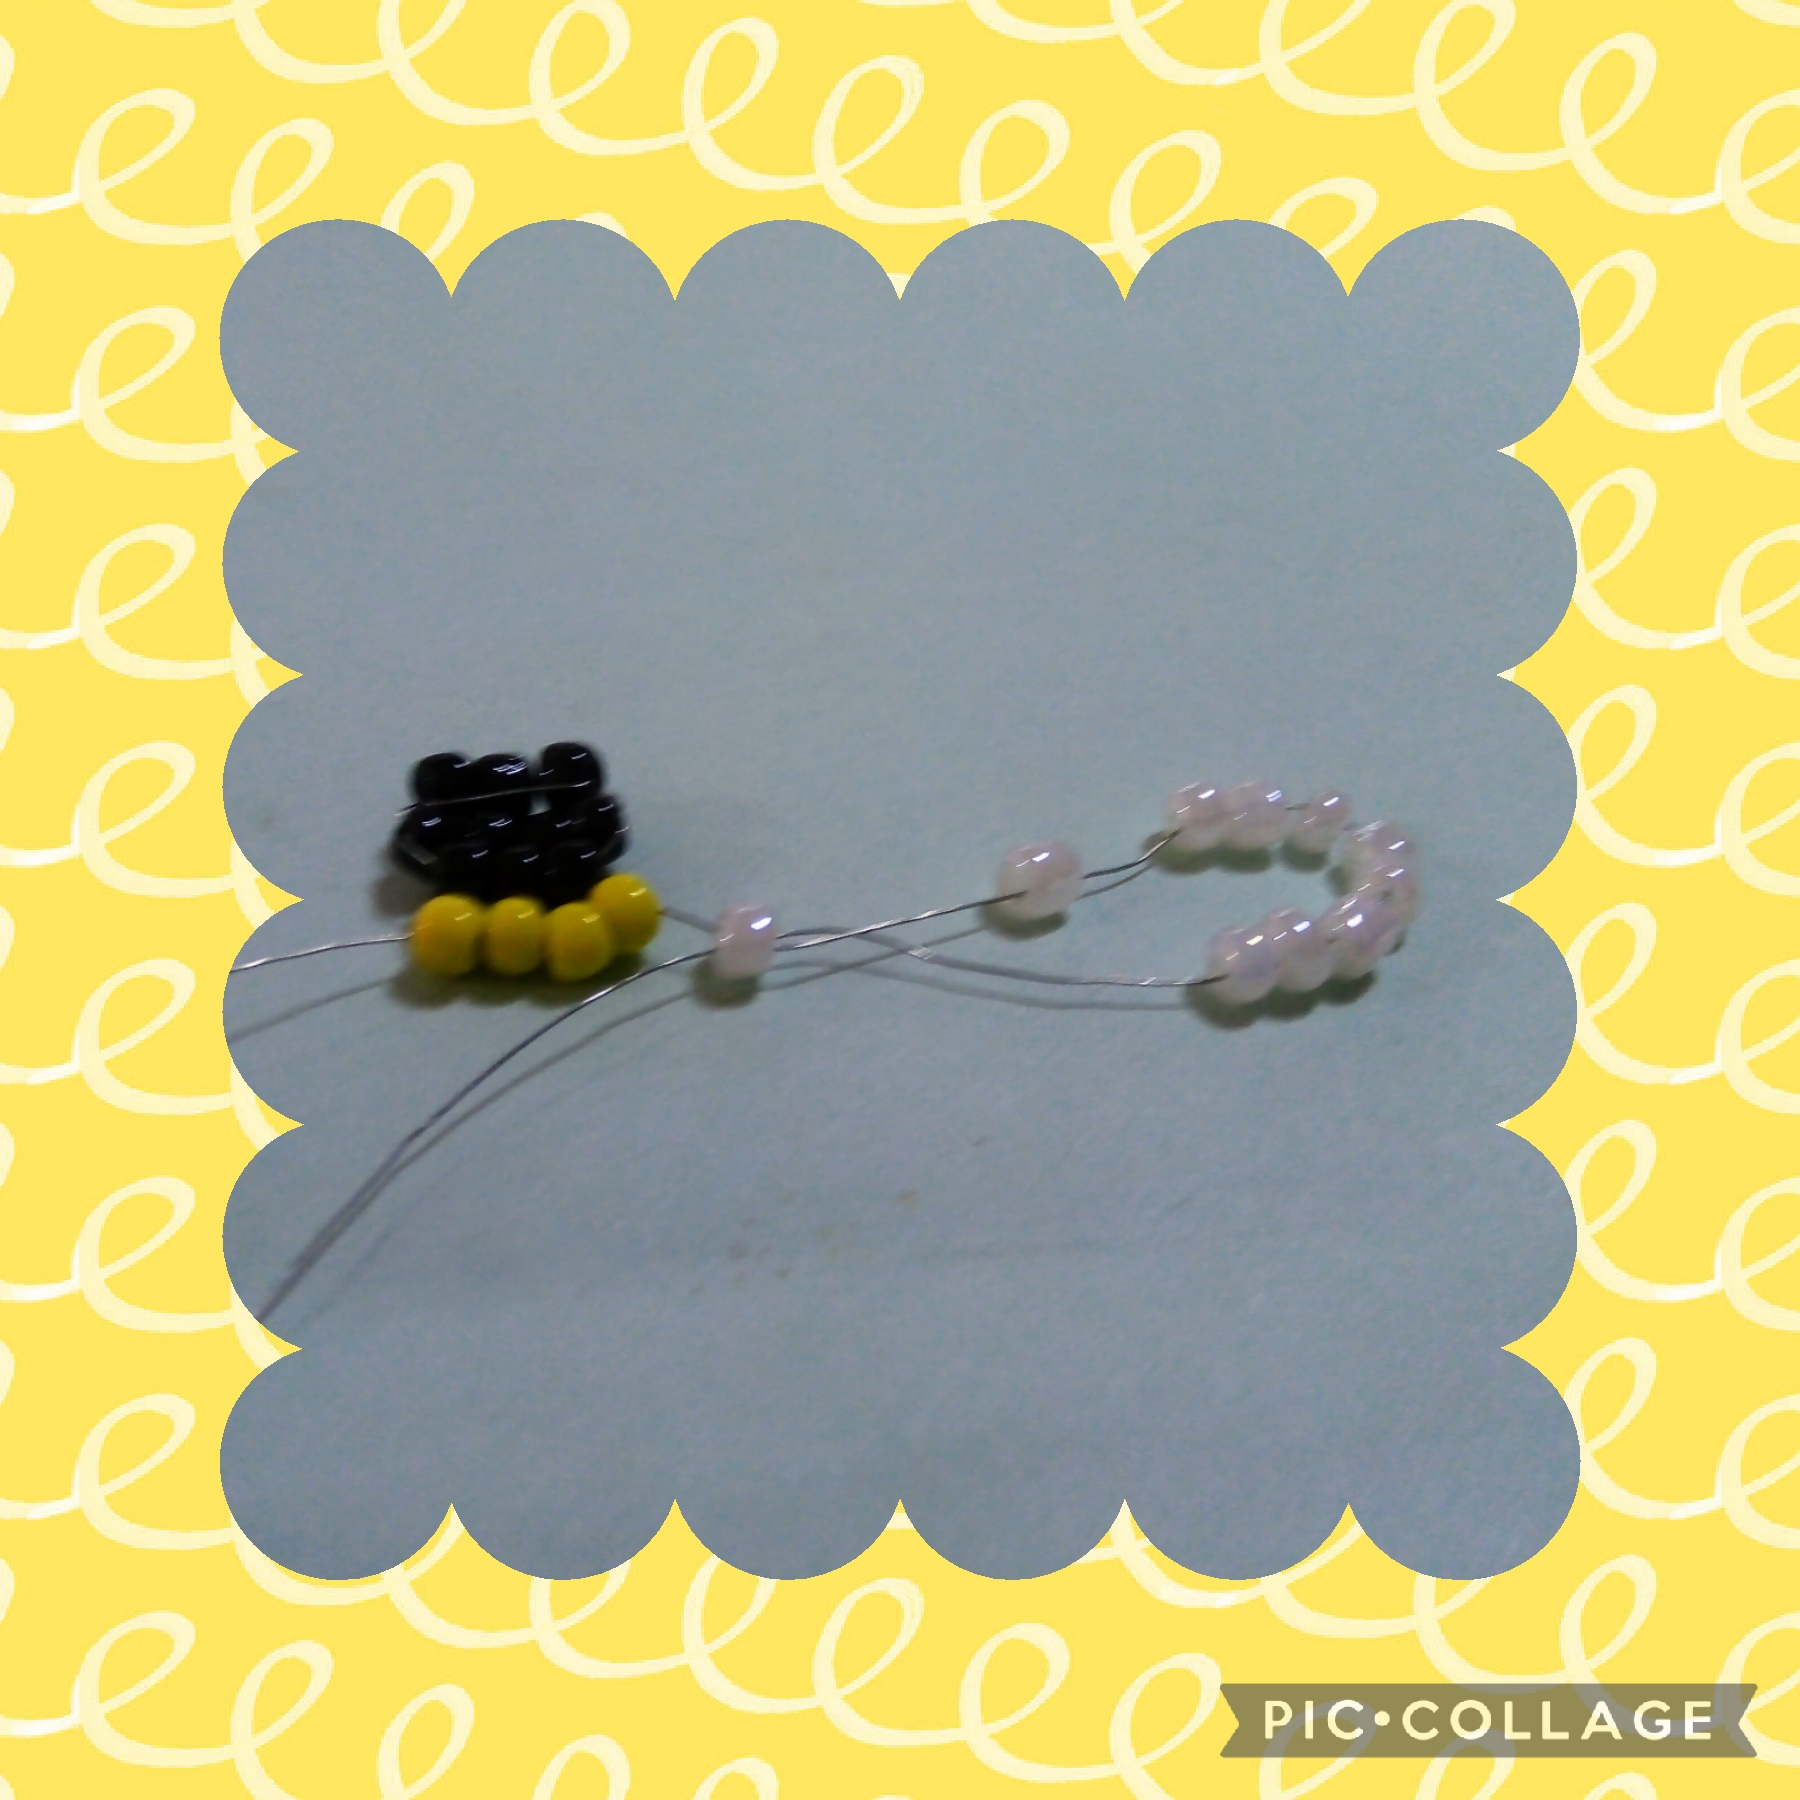
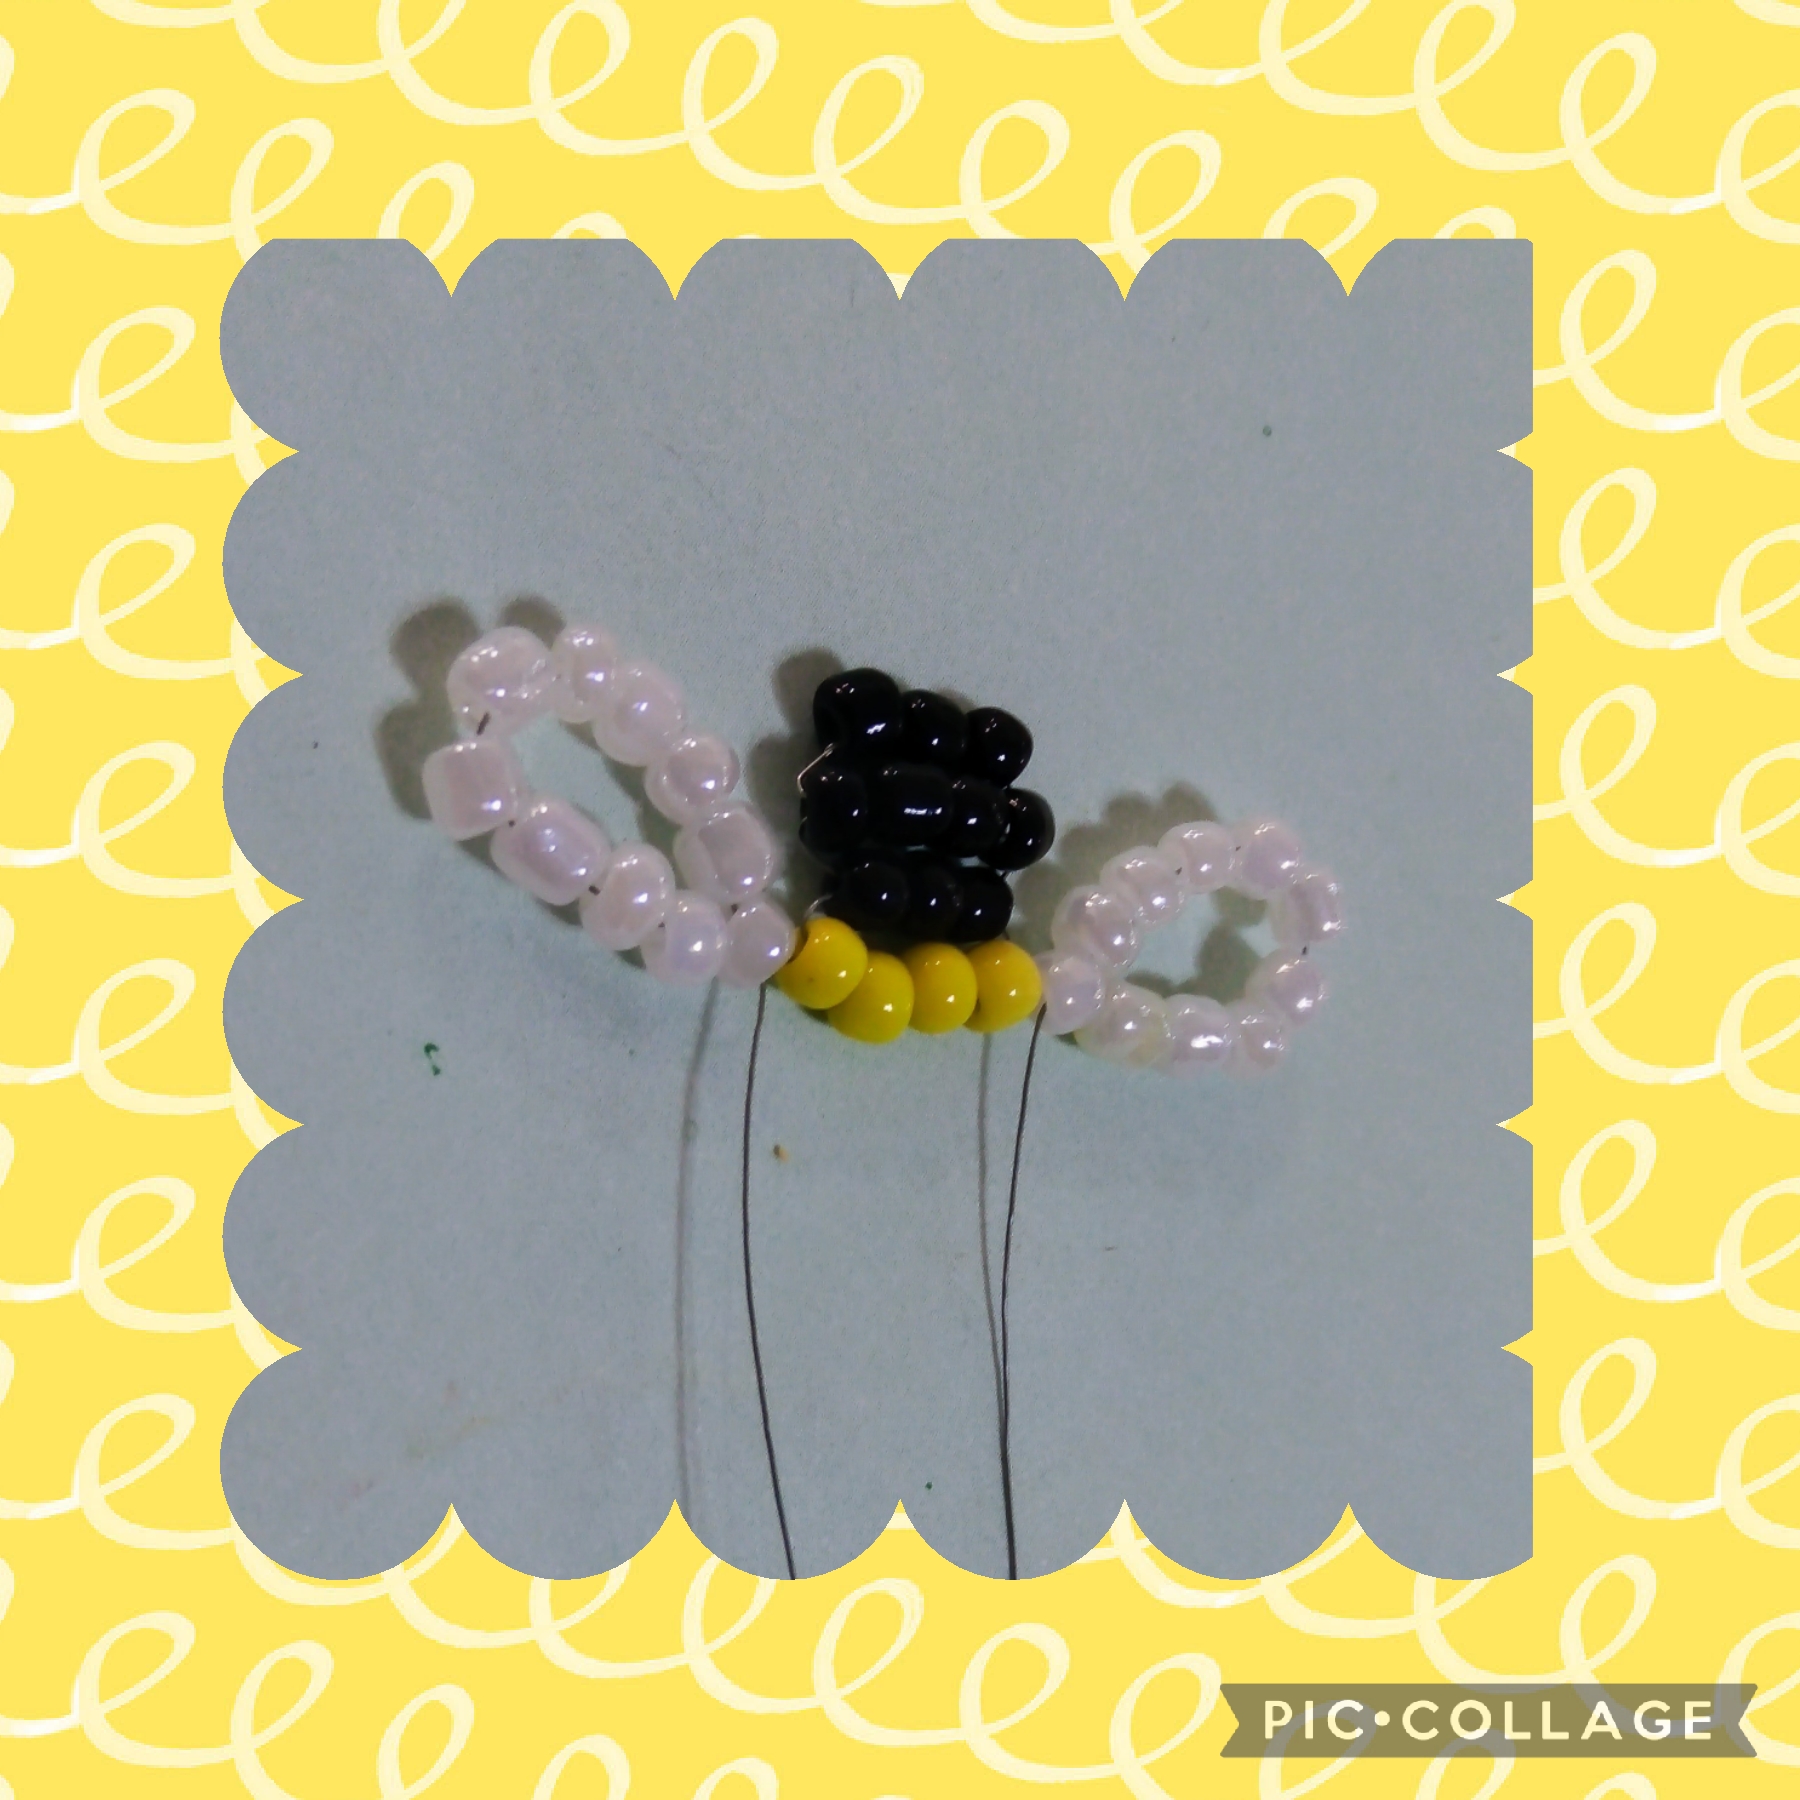
PASO CUATRO:
En este paso voy a realizar las alas de la abeja, las realizo con hilos separados así: inserto diez mostacillones blancos en uno de los hilos, con la punta de ese mismo hilo lo introduzco por el último mostacillón blanco y halo el hilo hacia el cuerpo de la abeja quedando como muestra la foto; uso el mismo procedimiento para formar la otra ala y así queda.
STEP FOUR:
In this step I am going to make the wings of the bee, I make them with separated threads like this: I insert ten white beads into one of the threads, with the tip of that same thread I introduce it through the last white beads and pull the thread towards the body of the bee, remaining as shown in the photo; I use the same procedure to form the other wing and that's how it looks.
PASO CINCO:
Aquí trabajo de nuevo los dos hilos; inserto por uno de los extremos cinco mostacillones negros y los cruzo con el hilo del otro extremo; luego inserto seis mostacillones amarillos en un extremo y los cruzo con el hilo del otro extremo y queda así.
STEP FIVE:
Here I work again the two threads; I insert five black beads at one end and cross them with the thread at the other end; then I insert six yellow beads at one end and cross them with the thread at the other end and it looks like this.

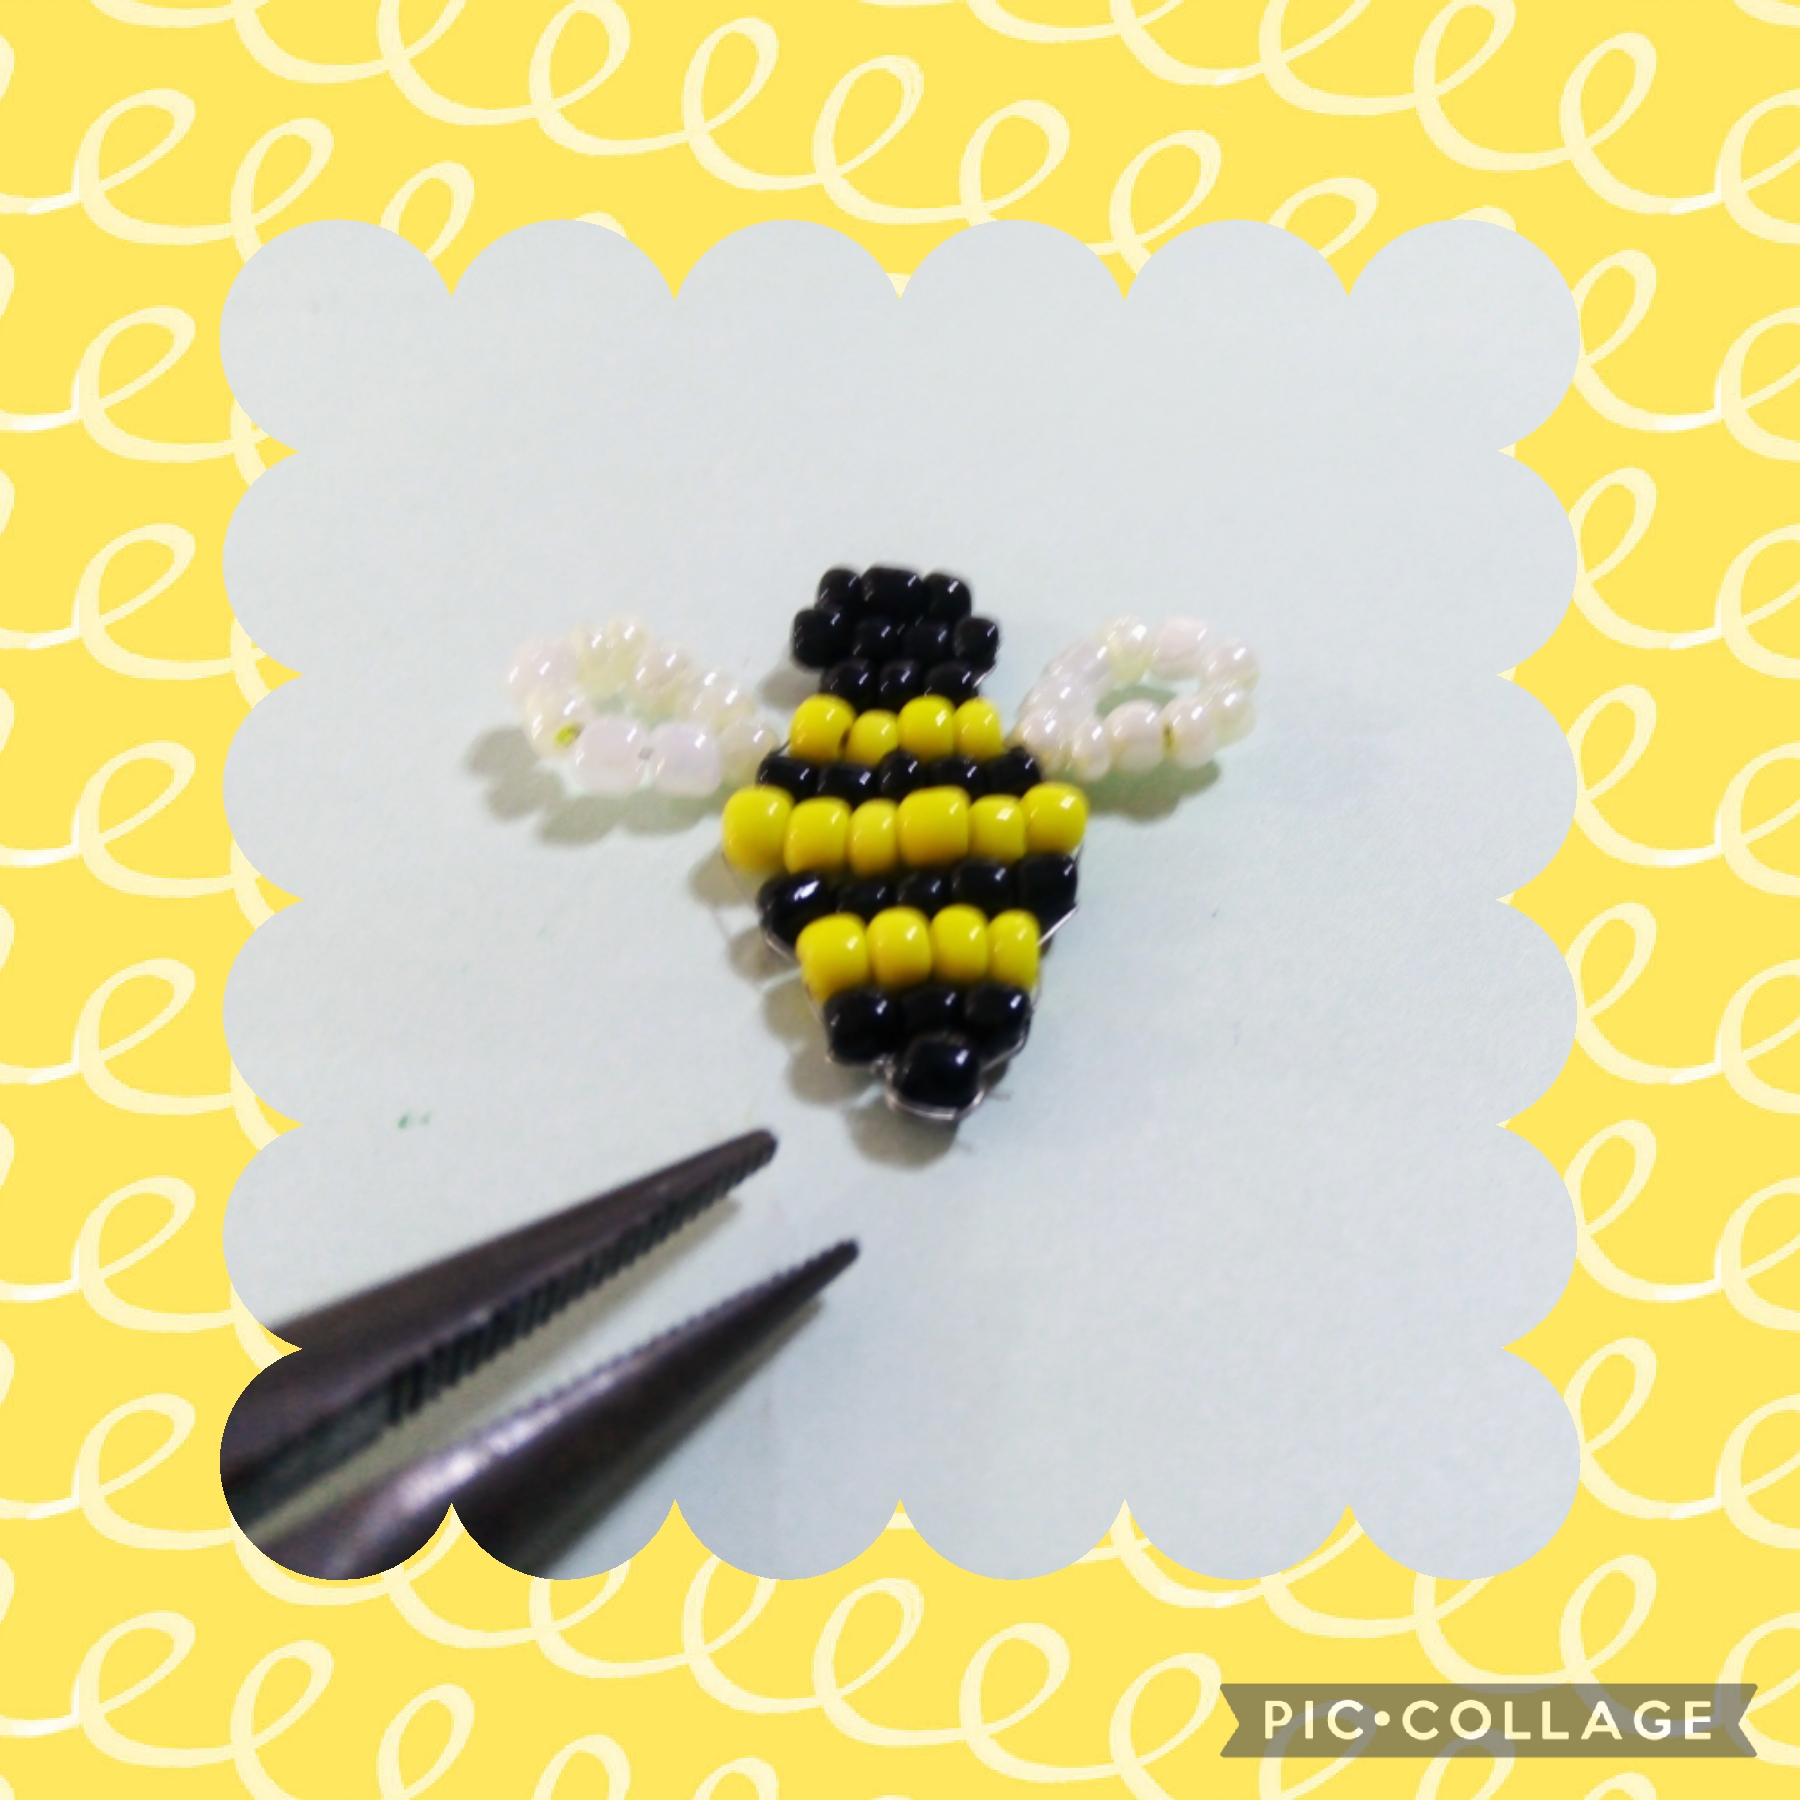
PASO SEIS:
Voy a insertar cinco mostacillones negros y los cruzo, después cuatro amarillos igual los cruzo, luego tres negros y por último uno negro, aquí uso la pinza punta redonda y realizo una argollita que pierdo en el último mostacillón negro y así queda finalizada la imagen de la abeja.
STEP SIX:
I am going to insert five black beads and cross them, then I cross four yellow ones, then three black ones and finally one black, here I use the round tip pliers and make a small ring that I lose in the last black beads and thus the image of the bee is finished.
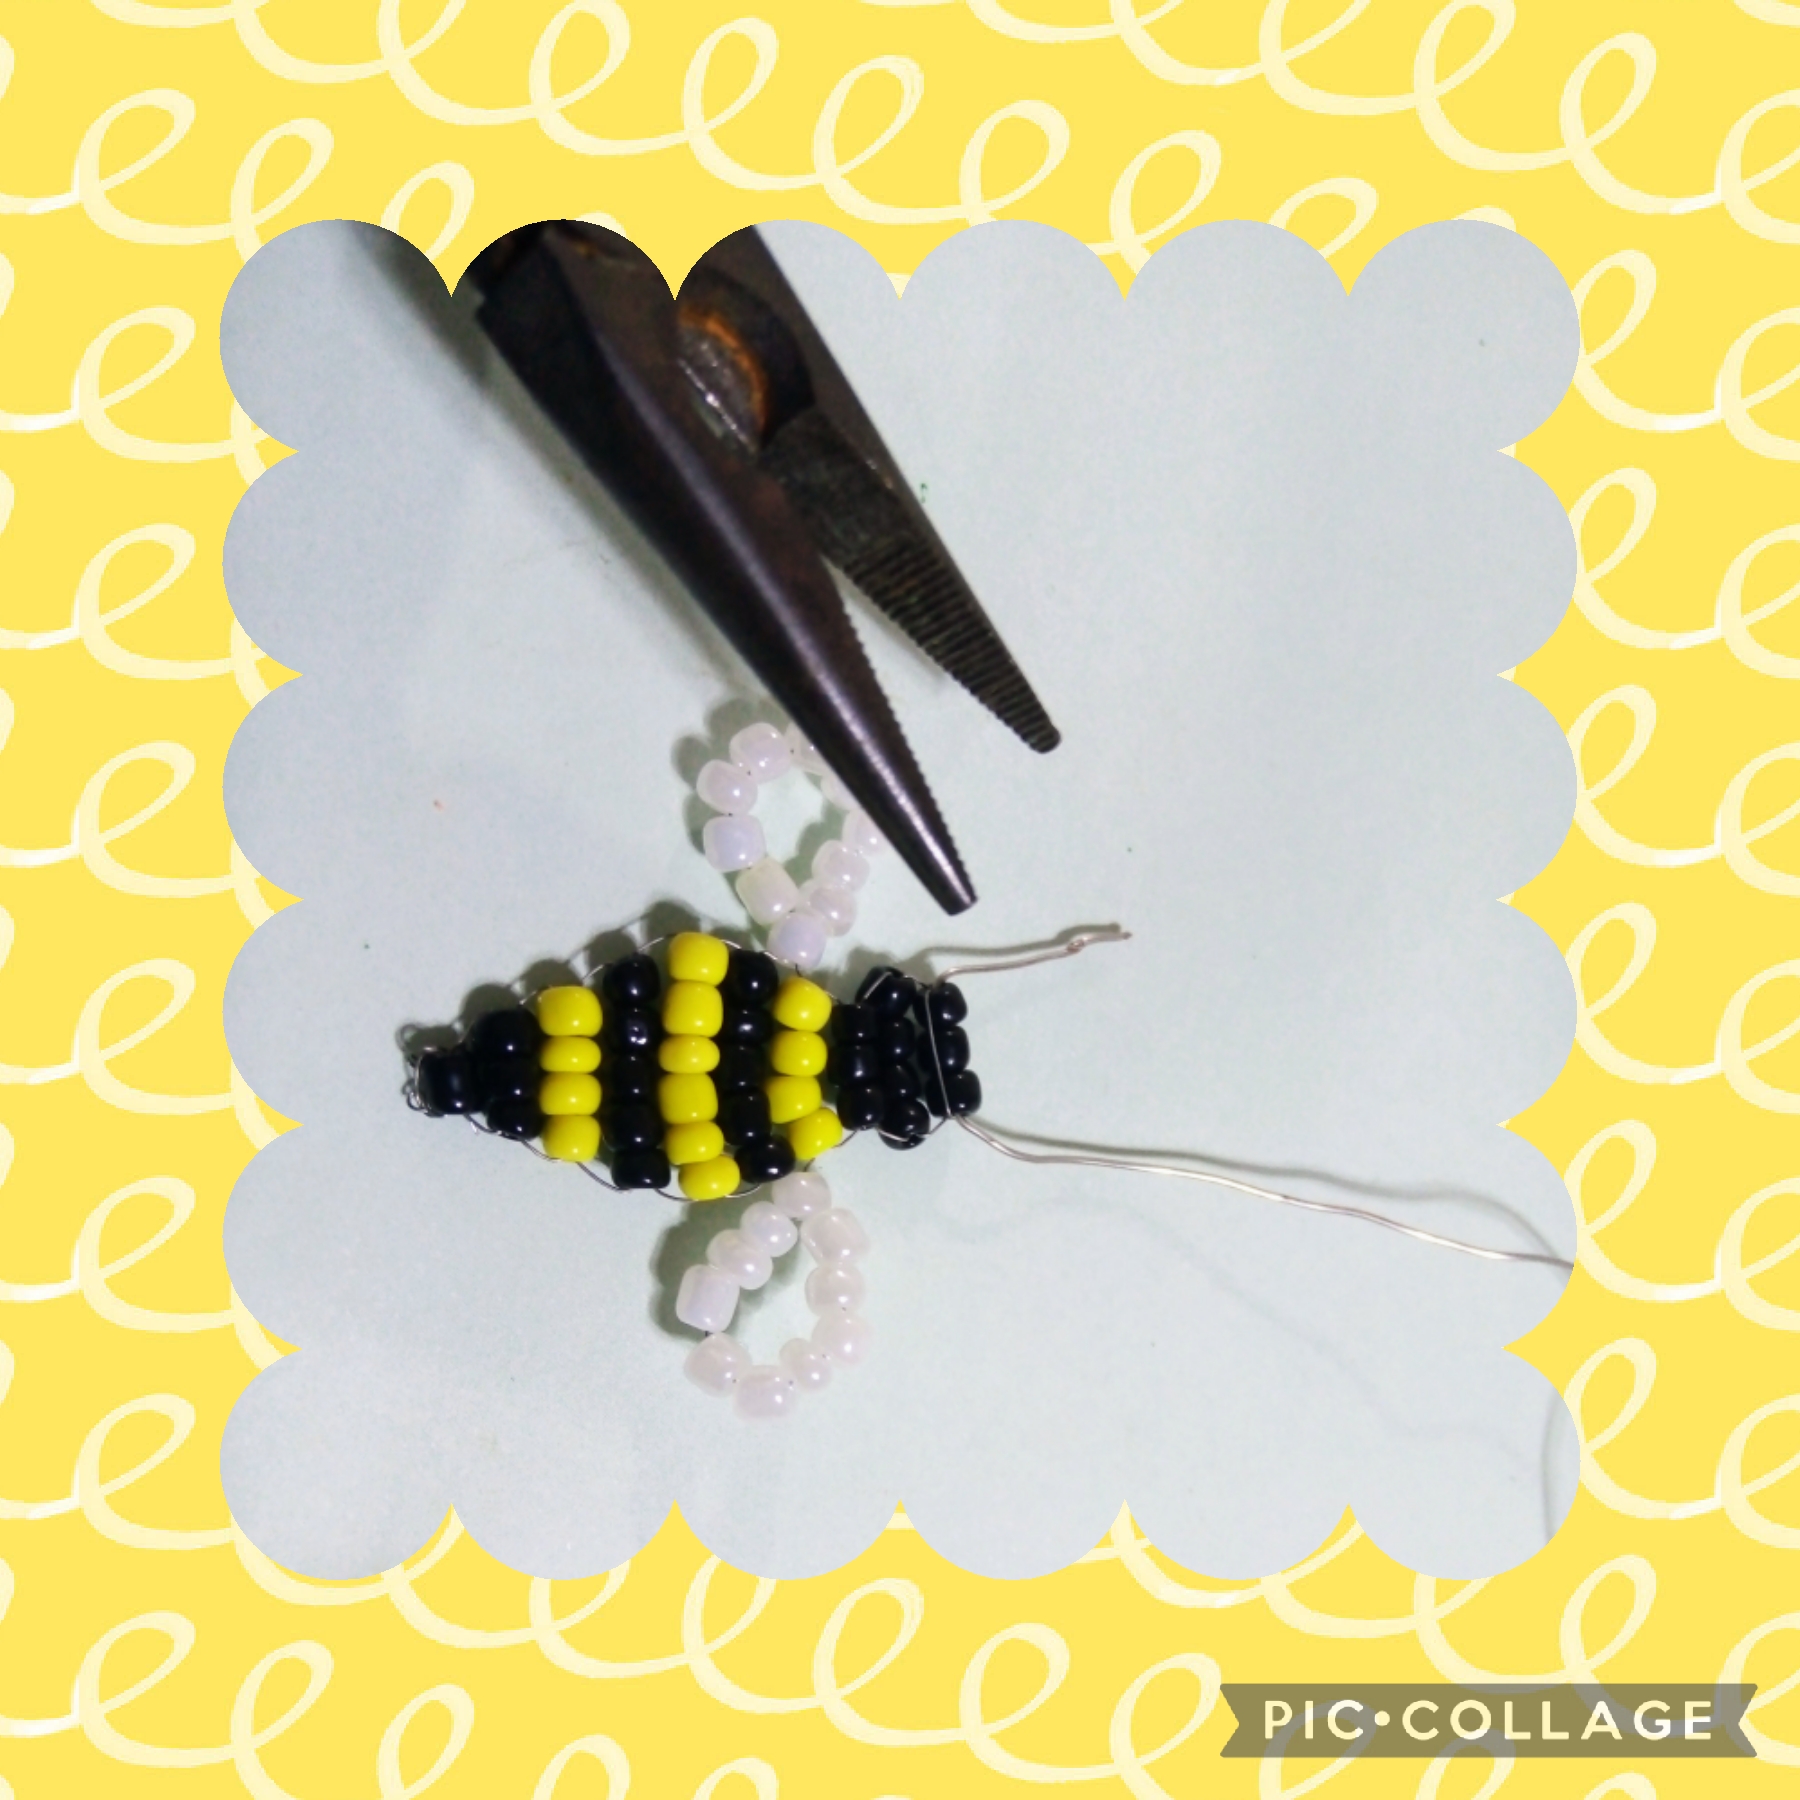
PASO SIETE:
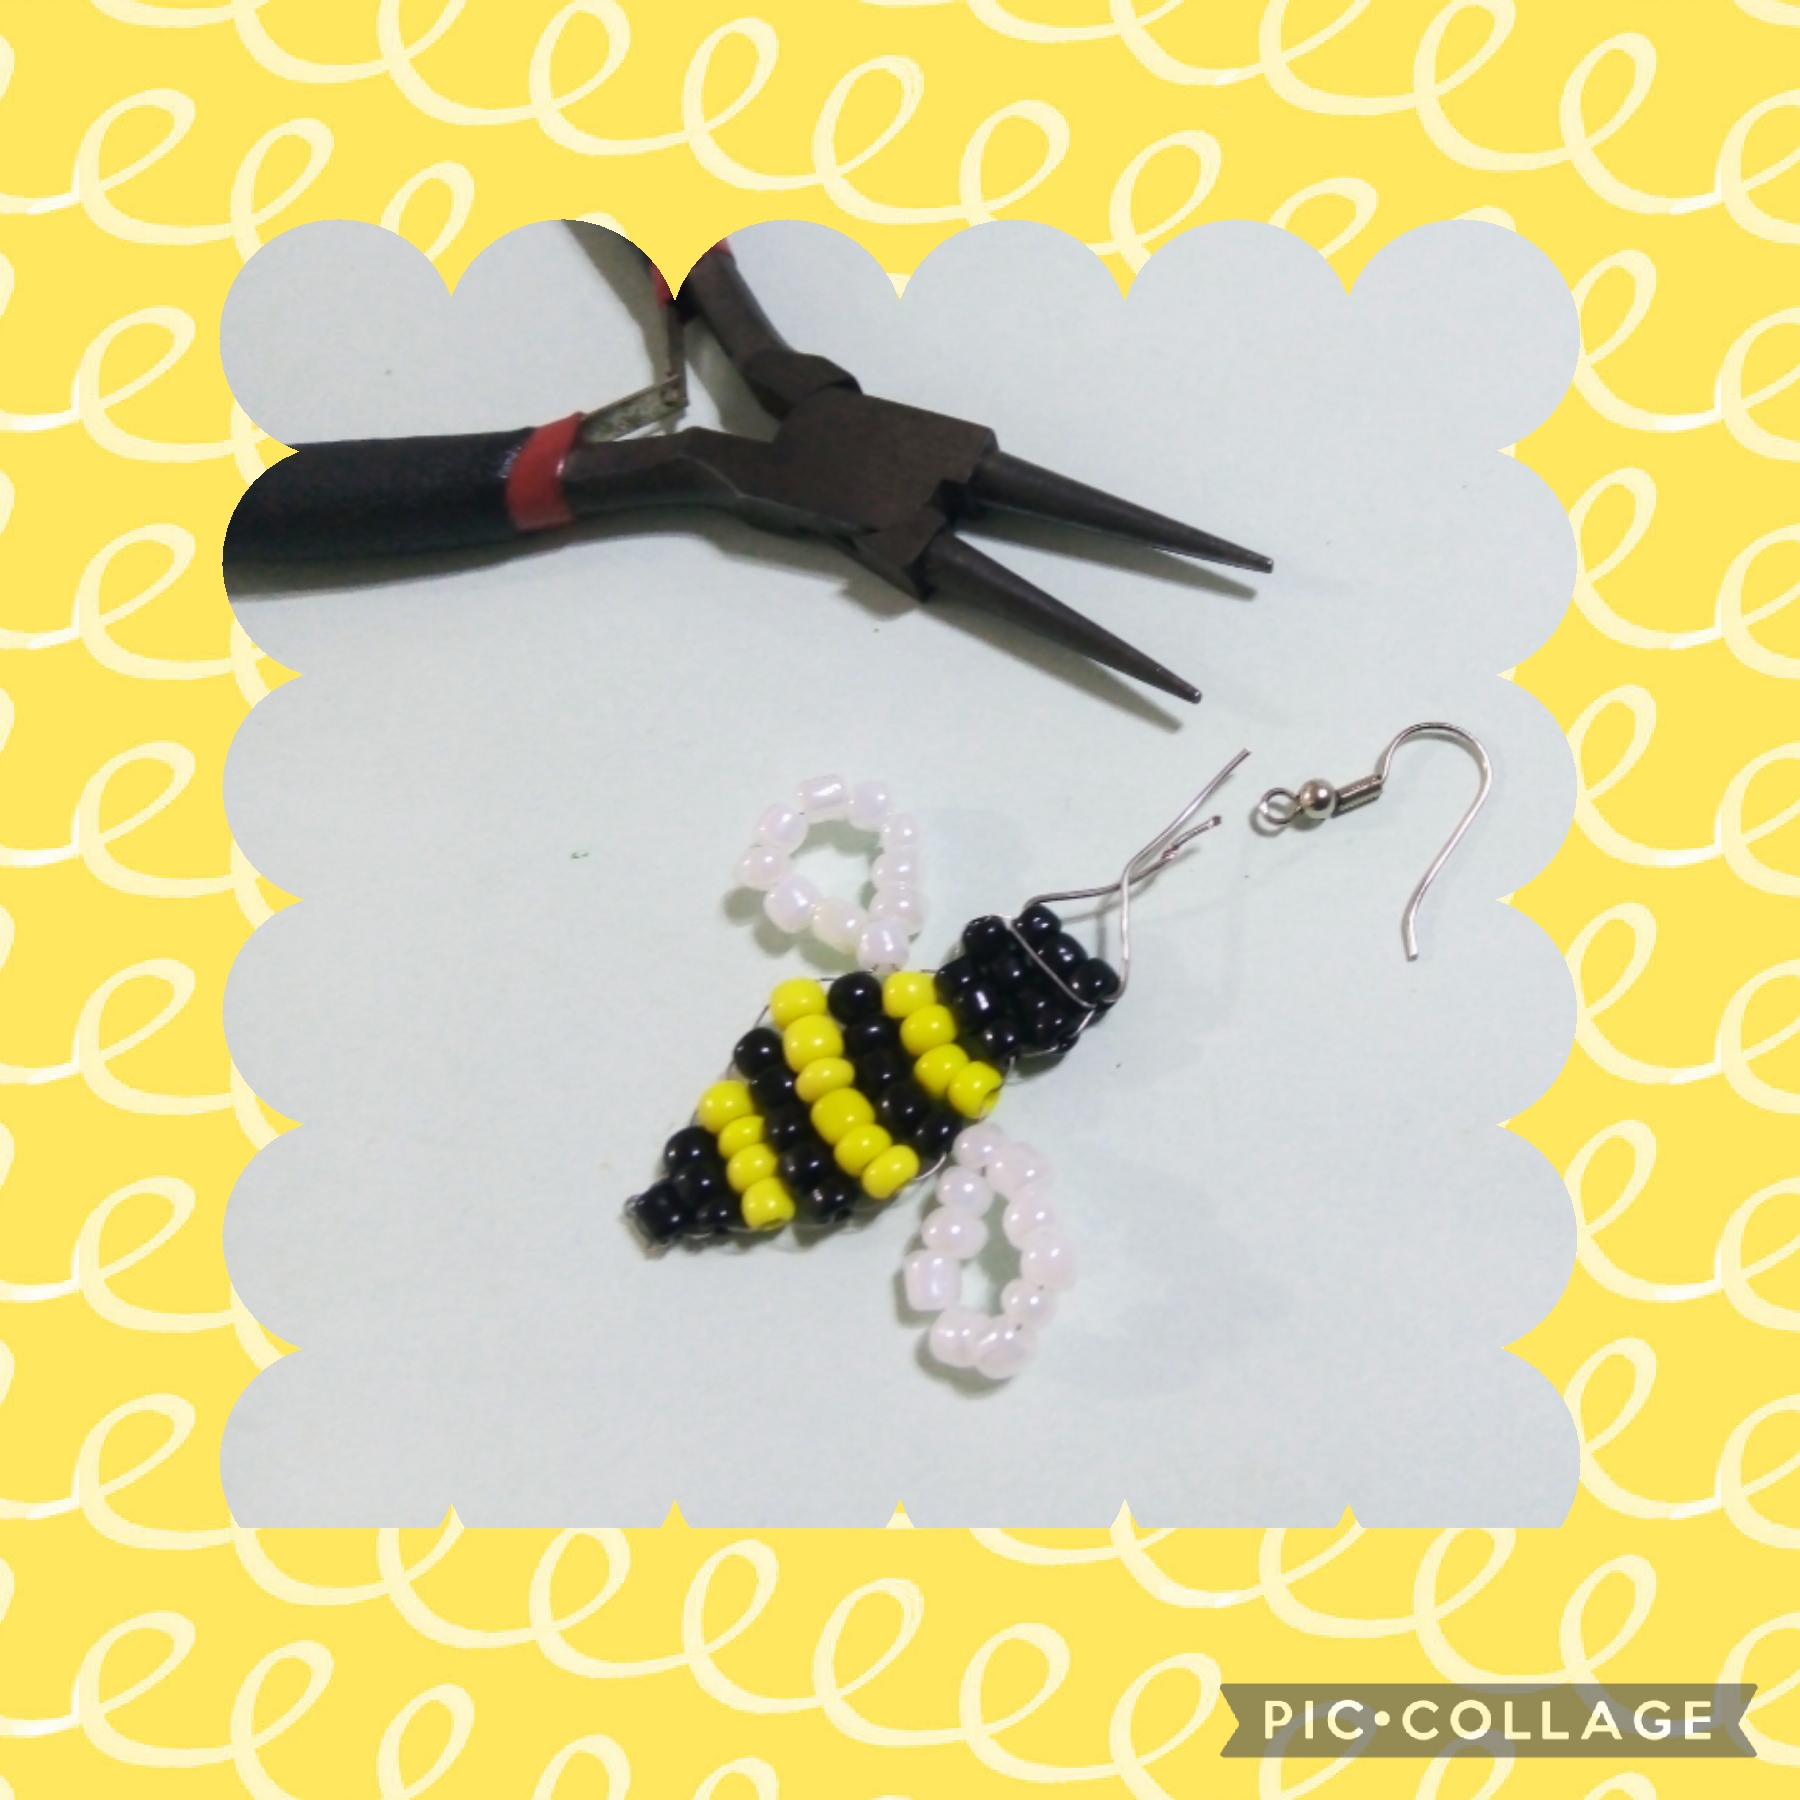
Ya tengo lista la abeja, ahora voy a formar un arete, para ello corto un trocito de cinco centímetros de alpaca y lo paso por los tres primeros mostacillones negros del comienzo de lado a lado con la pinza punta redonda hago un pequeño triángulo y aseguro con una especie de ojal, tomo un anzuelo y lo pongo dentro del ojal y así queda listo el arete, de la misma forma realizo el otro para tener el par.
STEP SEVEN:
I already have the bee ready, now I am going to form an earring, for this I cut a small piece of five centimeters of nickel silver and pass it through the first three black beads from side to side with the round tip pliers I make a small triangle and secure with a kind of eyelet, I take a hook and put it inside the eyelet and thus the earring is ready, in the same way I make the other one to have the pair.
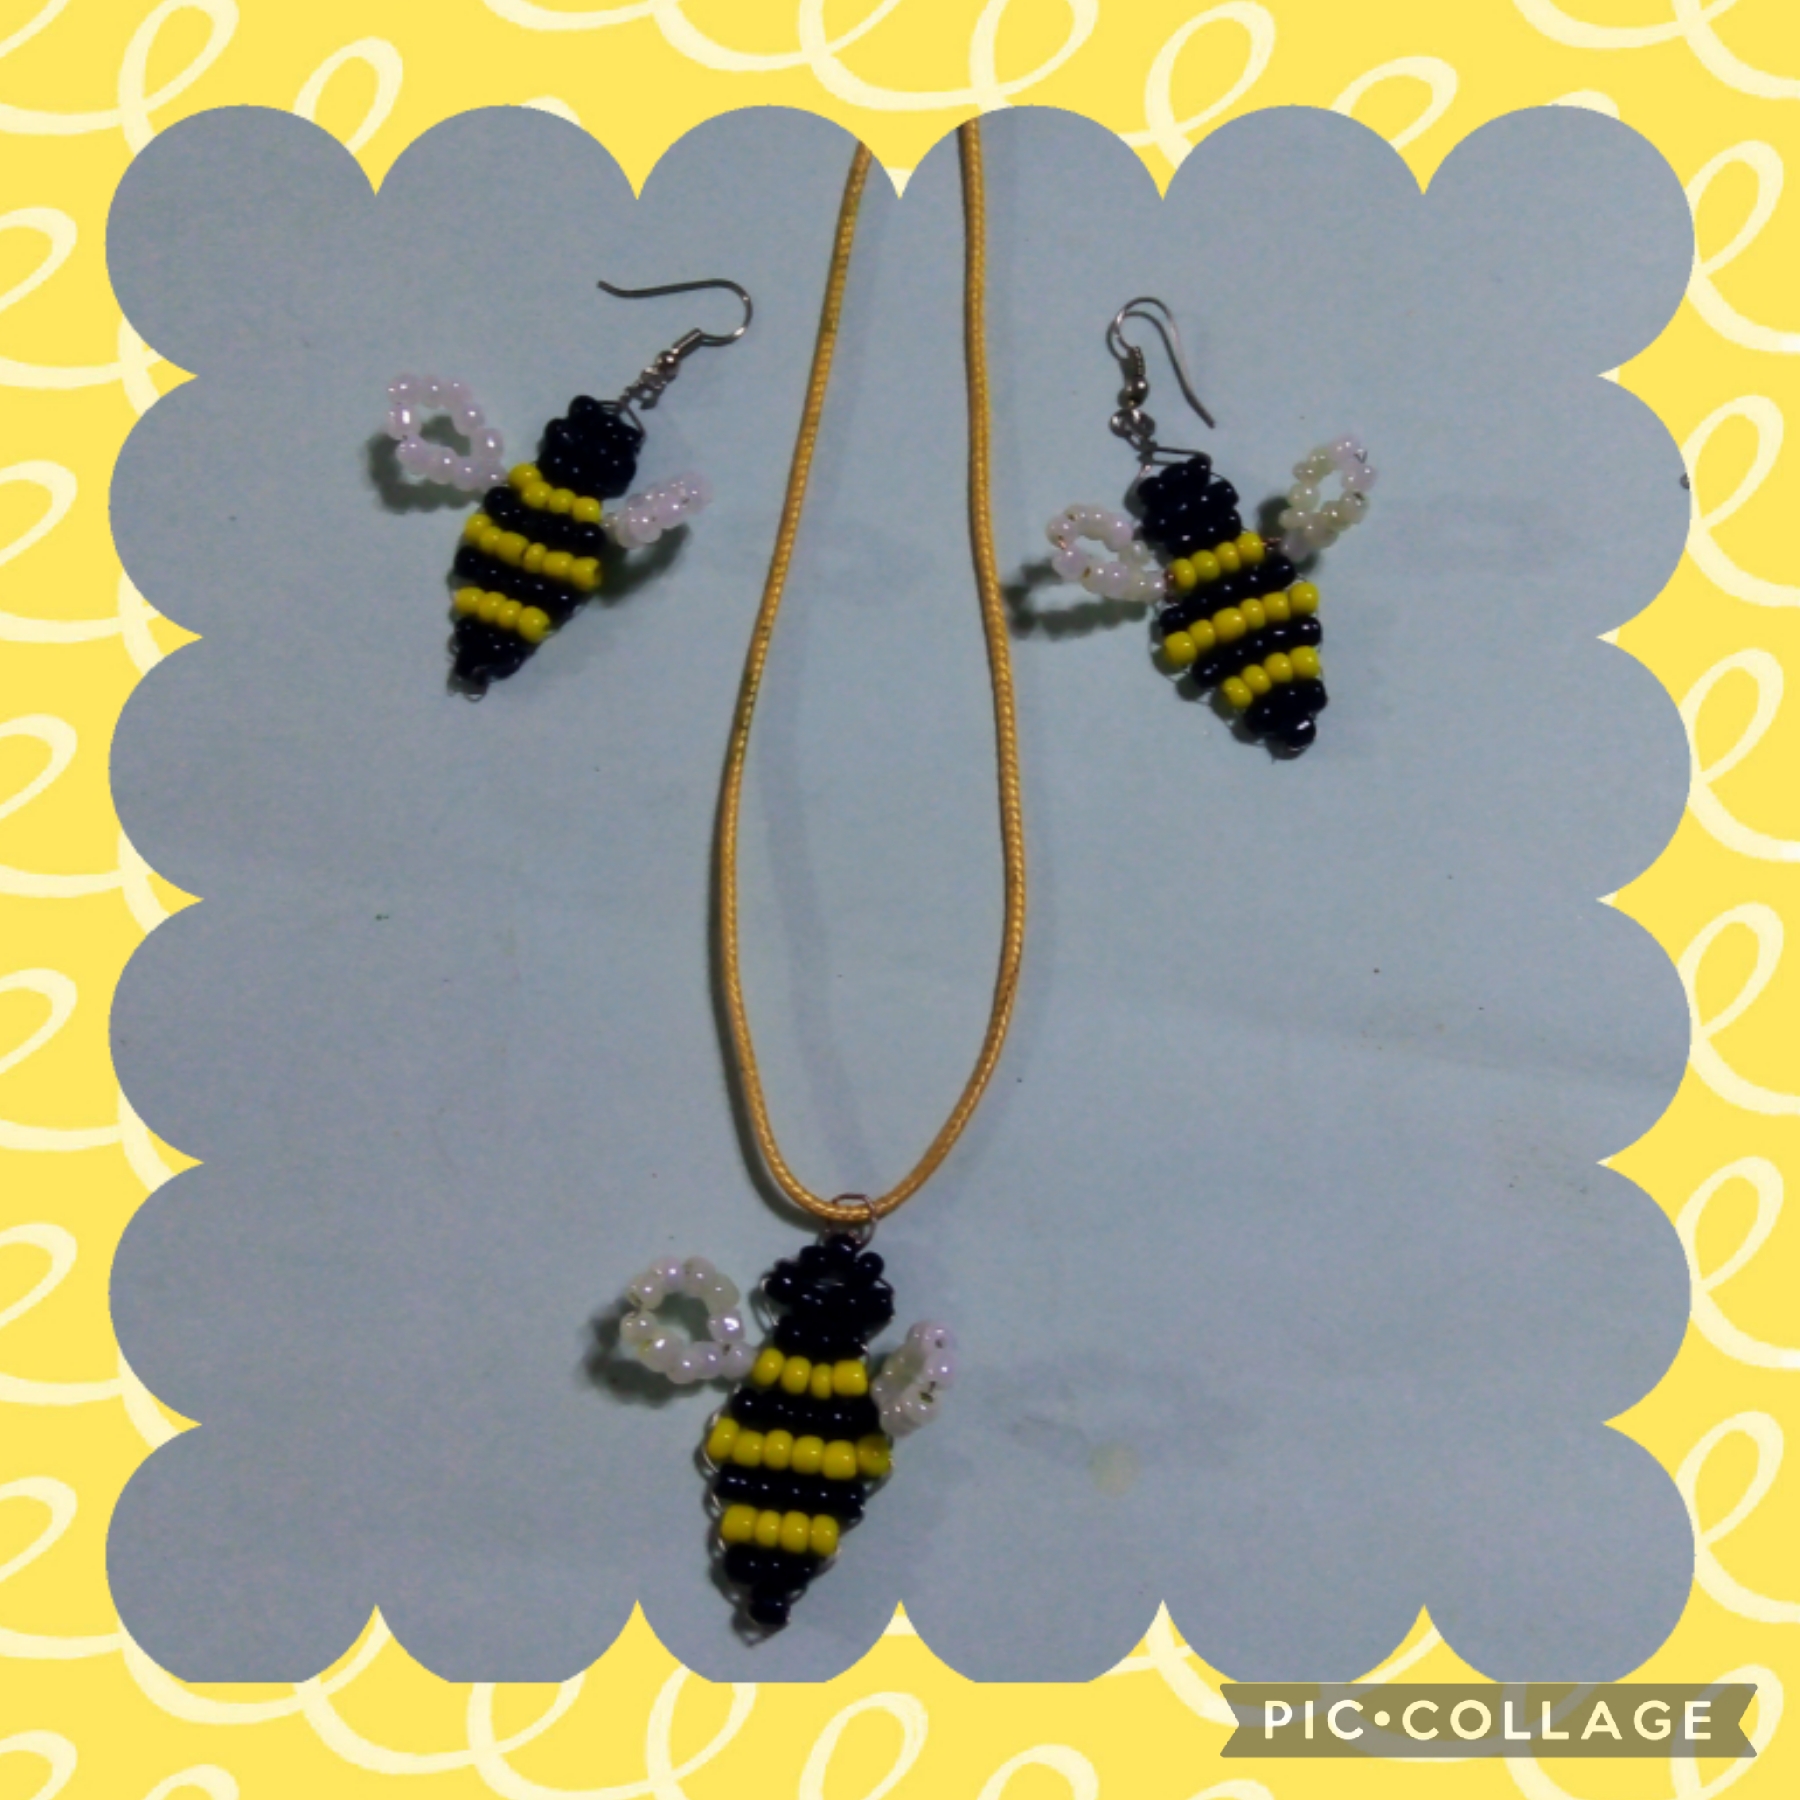
Artesanos Creadores, para este Proyecto realicé tres abejitas dos para los Aretes y otra para un Coldije que coloque en un cordón de cuerina piel de serpiente amarilla y este es el resultado.
Espero que les guste mi entrada para esta propuesta y anticipo las gracias por visitar mi blog, saluditos hasta una próxima manualidad.
Creative Artisans, for this Project I made three little bees, two for the Earrings and another for a Coldije that I placed on a yellow snakeskin leather cord and this is the result.
I hope you like my entry for this proposal and thank you in advance for visiting my blog, greetings until a next craft.
Las imágenes y redacción de este tutorial son de mi propiedad, las fotos fueron tomadas con mi telefono celular Motorola E6 y las edite con una aplicación gratis del mismo.
Para traducir texto use Google traductor.
The images and wording of this tutorial are my property, the photos were taken with my Motorola E6 cell phone and I edited them with a free application of the same.
To translate text use Google translator.
This post has been manually curated by @bhattg from Indiaunited community. Join us on our Discord Server.
Do you know that you can earn a passive income by delegating to @indiaunited. We share more than 100 % of the curation rewards with the delegators in the form of IUC tokens. HP delegators and IUC token holders also get upto 20% additional vote weight.
Here are some handy links for delegations: 100HP, 250HP, 500HP, 1000HP.
100% of the rewards from this comment goes to the curator for their manual curation efforts. Please encourage the curator @bhattg by upvoting this comment and support the community by voting the posts made by @indiaunited.
Agradecida indiaunited, por ese maravilloso apoyo a mi publicación, saludos
wow this looks beautiful, good job. thanks for sharing the detailed steps.
Muchísimas gracias 😊
Me ha encantado el tutorial: sencillo y versátil!; gracias por compartir, es uno de los proyectos que seguro realizaré!
Agradecida contigo @leticiapereira, por visitarme, seguro para ti será muy fácil realizar esas abejitas, un abrazo grande 🌹
Buen trabajo estás abejas se ven excelente en esos pendiente y collar.
Si y lo mejor es que tú sabes que la abeja reina es inofensiva no pica y los zánganos muy poco 🤣🤣🤣
Están preciosas estas abejitas. El trabajo con alambre y MOSTACILLAS siempre ha gustado. Hace un tiempo que no realizo ningún proyecto, me siento motivada al ver estas bellas abejitas como dijes de tus accesorios. Hermosa creación. Mucha suerte 🍀🫂🍀
Gracias amiguita, para mí trabajar con cuentas, piedras, para realizar accesorios de bisutería me gusta hacerlo con el alambre pues te ayuda a darle una mejor forma, como siempre agradecida con tu comentario valioso, saluditos 🌷