
Como está mi creativa familia de #Diyhub?? Espero que muy bien pasando un lindo día... Hoy los invito a aprender conmigo a realizar una práctica piñata de un hermoso personaje de la película animada de "Frozen", no sin antes felicitarlos por los grandes tutoriales que hoy me encuentro en la comunidad 🤗
How is my creative #Diyhub family?? I hope you are having a great day... Today I invite you to learn with me how to make a practical piñata of a beautiful character from the animated movie "Frozen", but not before congratulating you for the great tutorials that I found in the community today 🤗
A mí parecer, diseñar y hacer una piñata es sinónimo de diversión y alegría, es inevitable pensar en el momento que los niños estan compitiendo por ver quien la rompe primero para recoger los dulces.. Está es la tercera vez que tengo la oportunidad de crear una piñata y me emocionaba saber que se trataba de la Reina de hielo Elsa, un radiante personaje que no pasa de moda, y le fascina especialmente a las niñas... Por mi mente pasaron muchas ideas de piñatas sencillas de esta reina, pero me gusta mucho en estos trabajos ponerme retos, que requieran de empeño y me deje aprendizajes, así que decidí crear a la reina en grande con todo y vestido, que además de ser la piñata, funcionará también como parte decorativa de la mesa de la cumpleañera. Acompañame hasta el final para mostrarte como la hice utilizando principalmente materiales reciclados.
In my opinion, designing and making a piñata is synonymous with fun and joy, it is inevitable to think about the moment when the children are competing to see who breaks it first to collect the candy.. It is It is the third time that I have had the opportunity to create a piñata and I was excited to know that it was the Ice Queen Elsa, a radiant character that does not go out of style, and girls are especially fascinated by it... Many things passed through my mind. ideas for simple piñatas of this queen, but I really like to set challenges for myself in these jobs, that require effort and give me learning, so I decided to create the queen in a big way with everything and dress, which in addition to being the piñata, will also work as a decorative part of the birthday girl's table. Join me until the end to show you how I made it using mainly recycled materials.
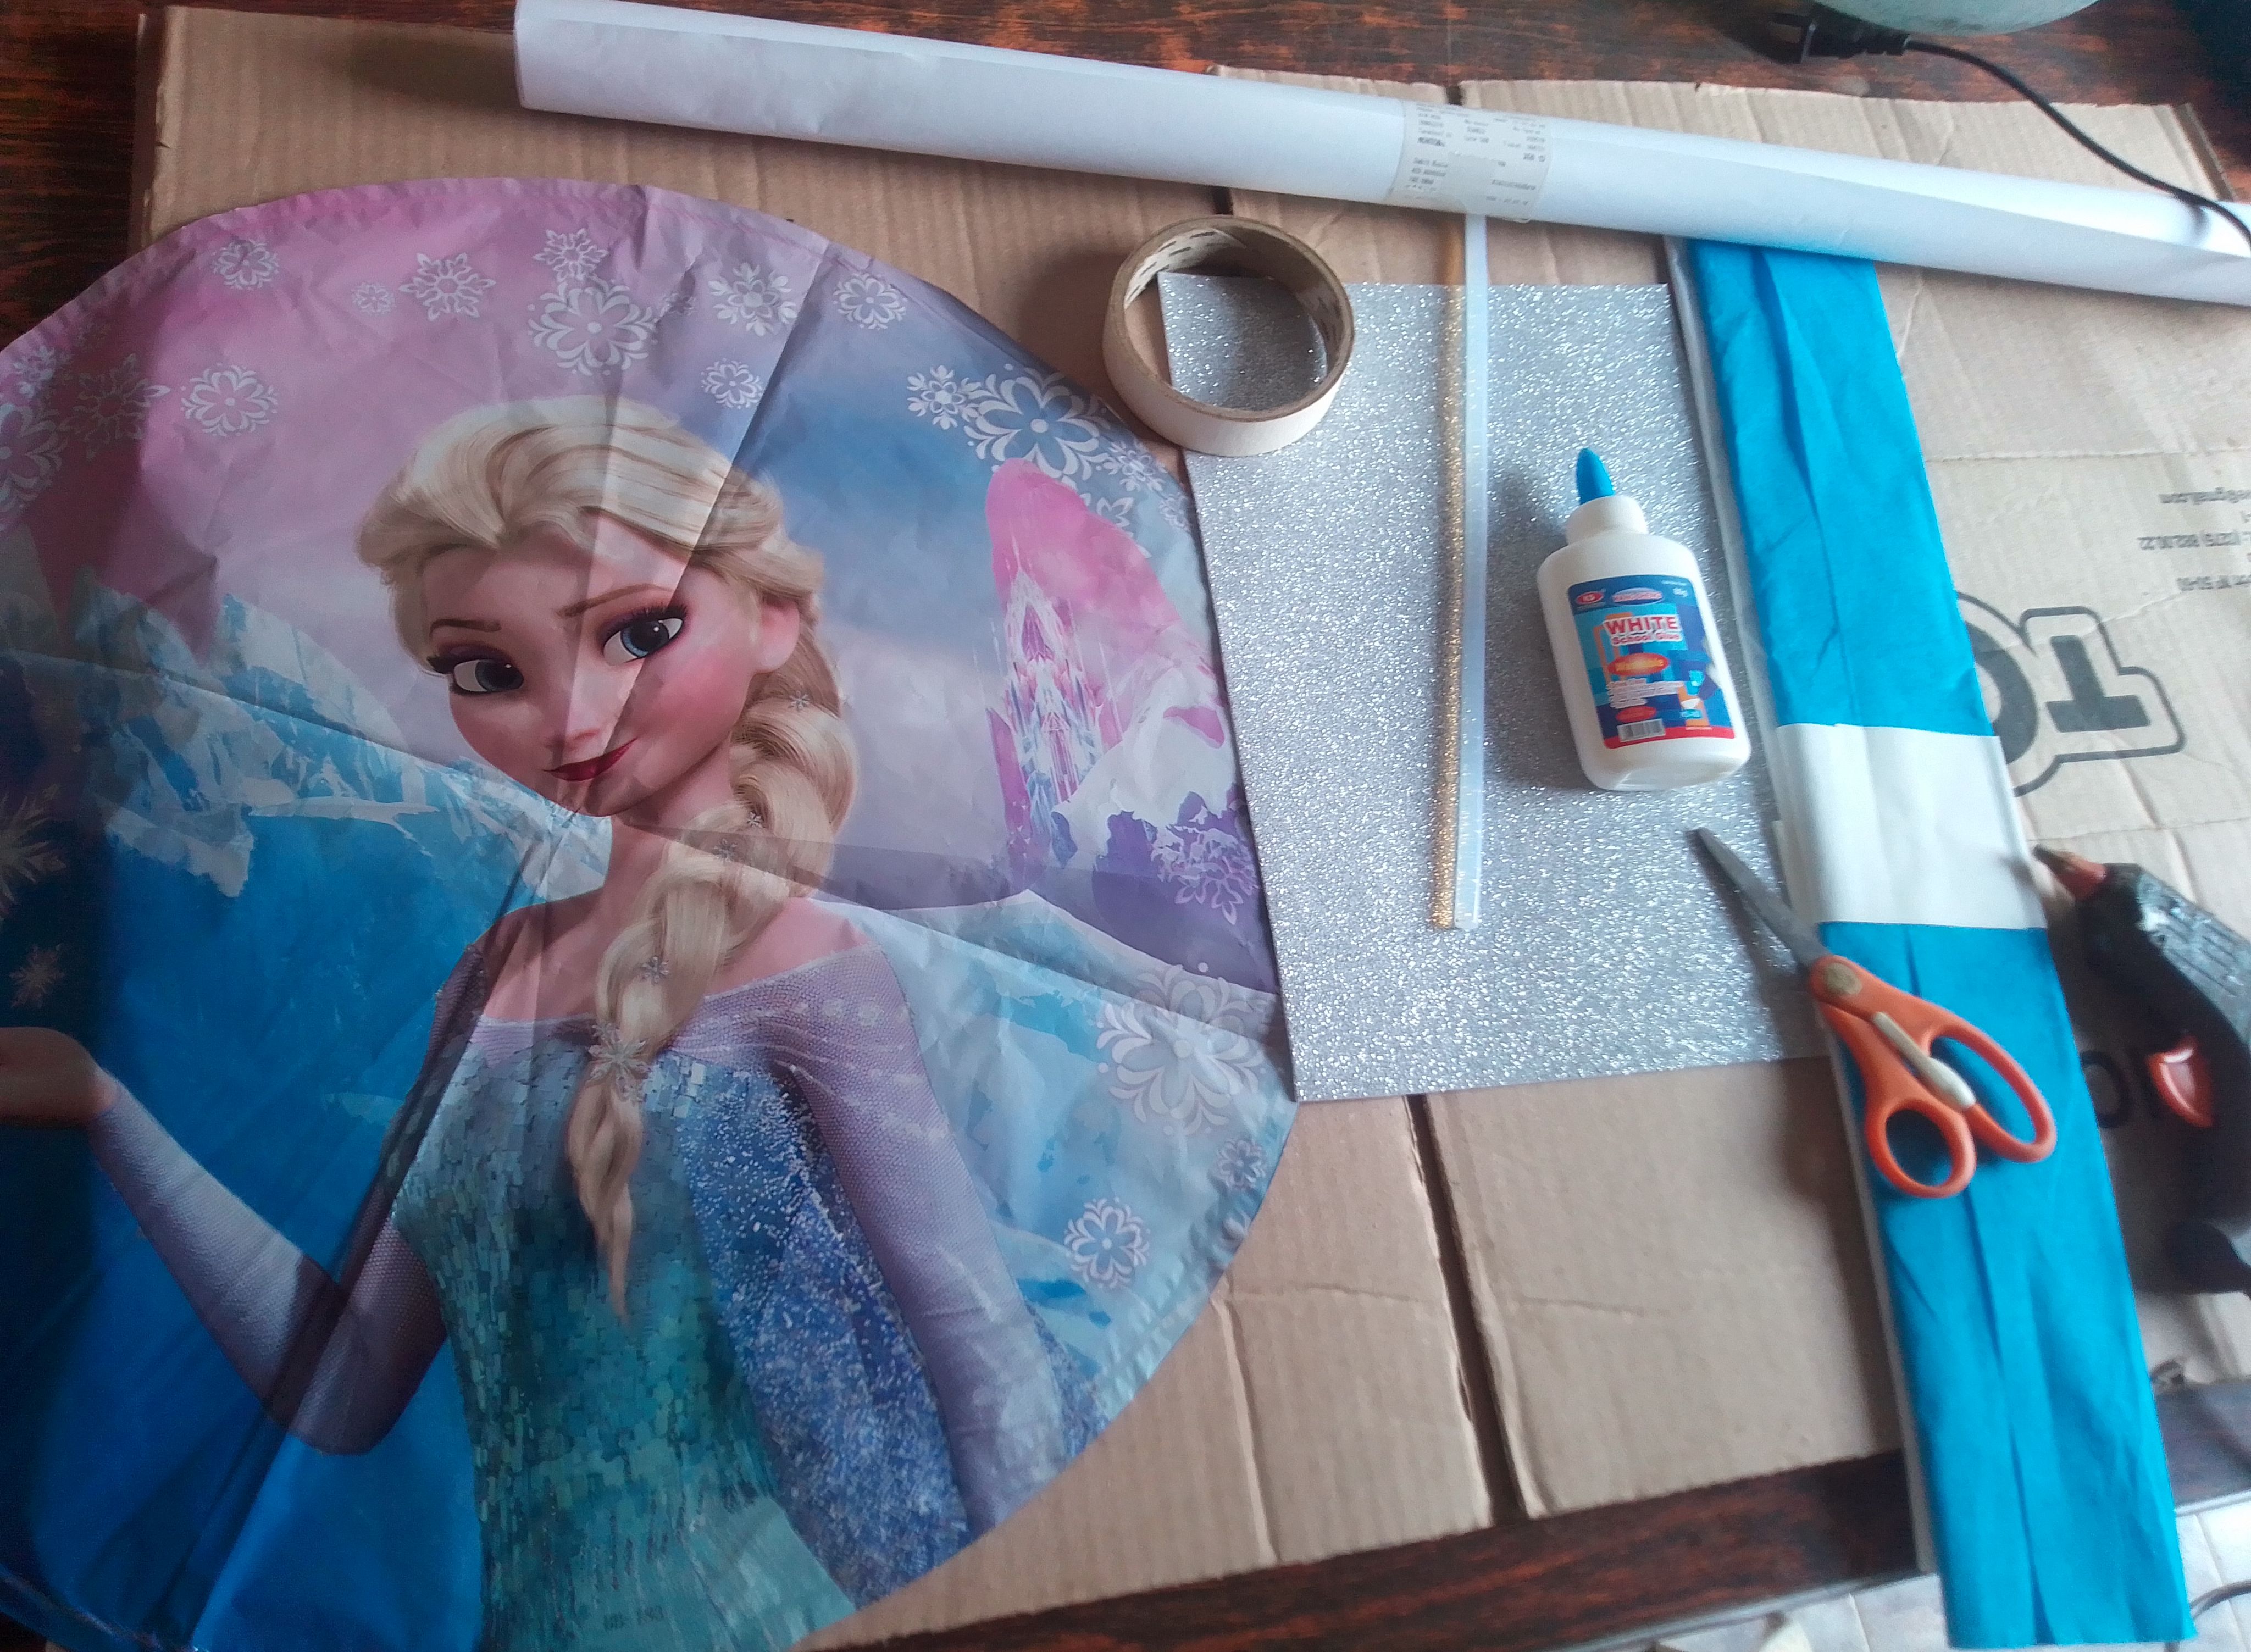
Materiales que necesitas:
- Cajas de cartón.
- Una globo o fotografía de la reina Elsa.
- Papel crepé azul y blanco.
- Silicón en barra.
- Pegamento blanco.
- Hojas de reciclaje.
- Cinta adhesiva.
- Hojas de reciclaje.
- Foami plateado.
- Tijeras.
- Cardboard boxes.
- A balloon or photograph of Queen Elsa.
- Blue and white crepe paper.
- Silicone stick.
- White glue.
- Recycling sheets.
- Scotch tape.
- Recycling sheets.
- Silver foami.
- Scissors.
(PROCEDIMIENTO)
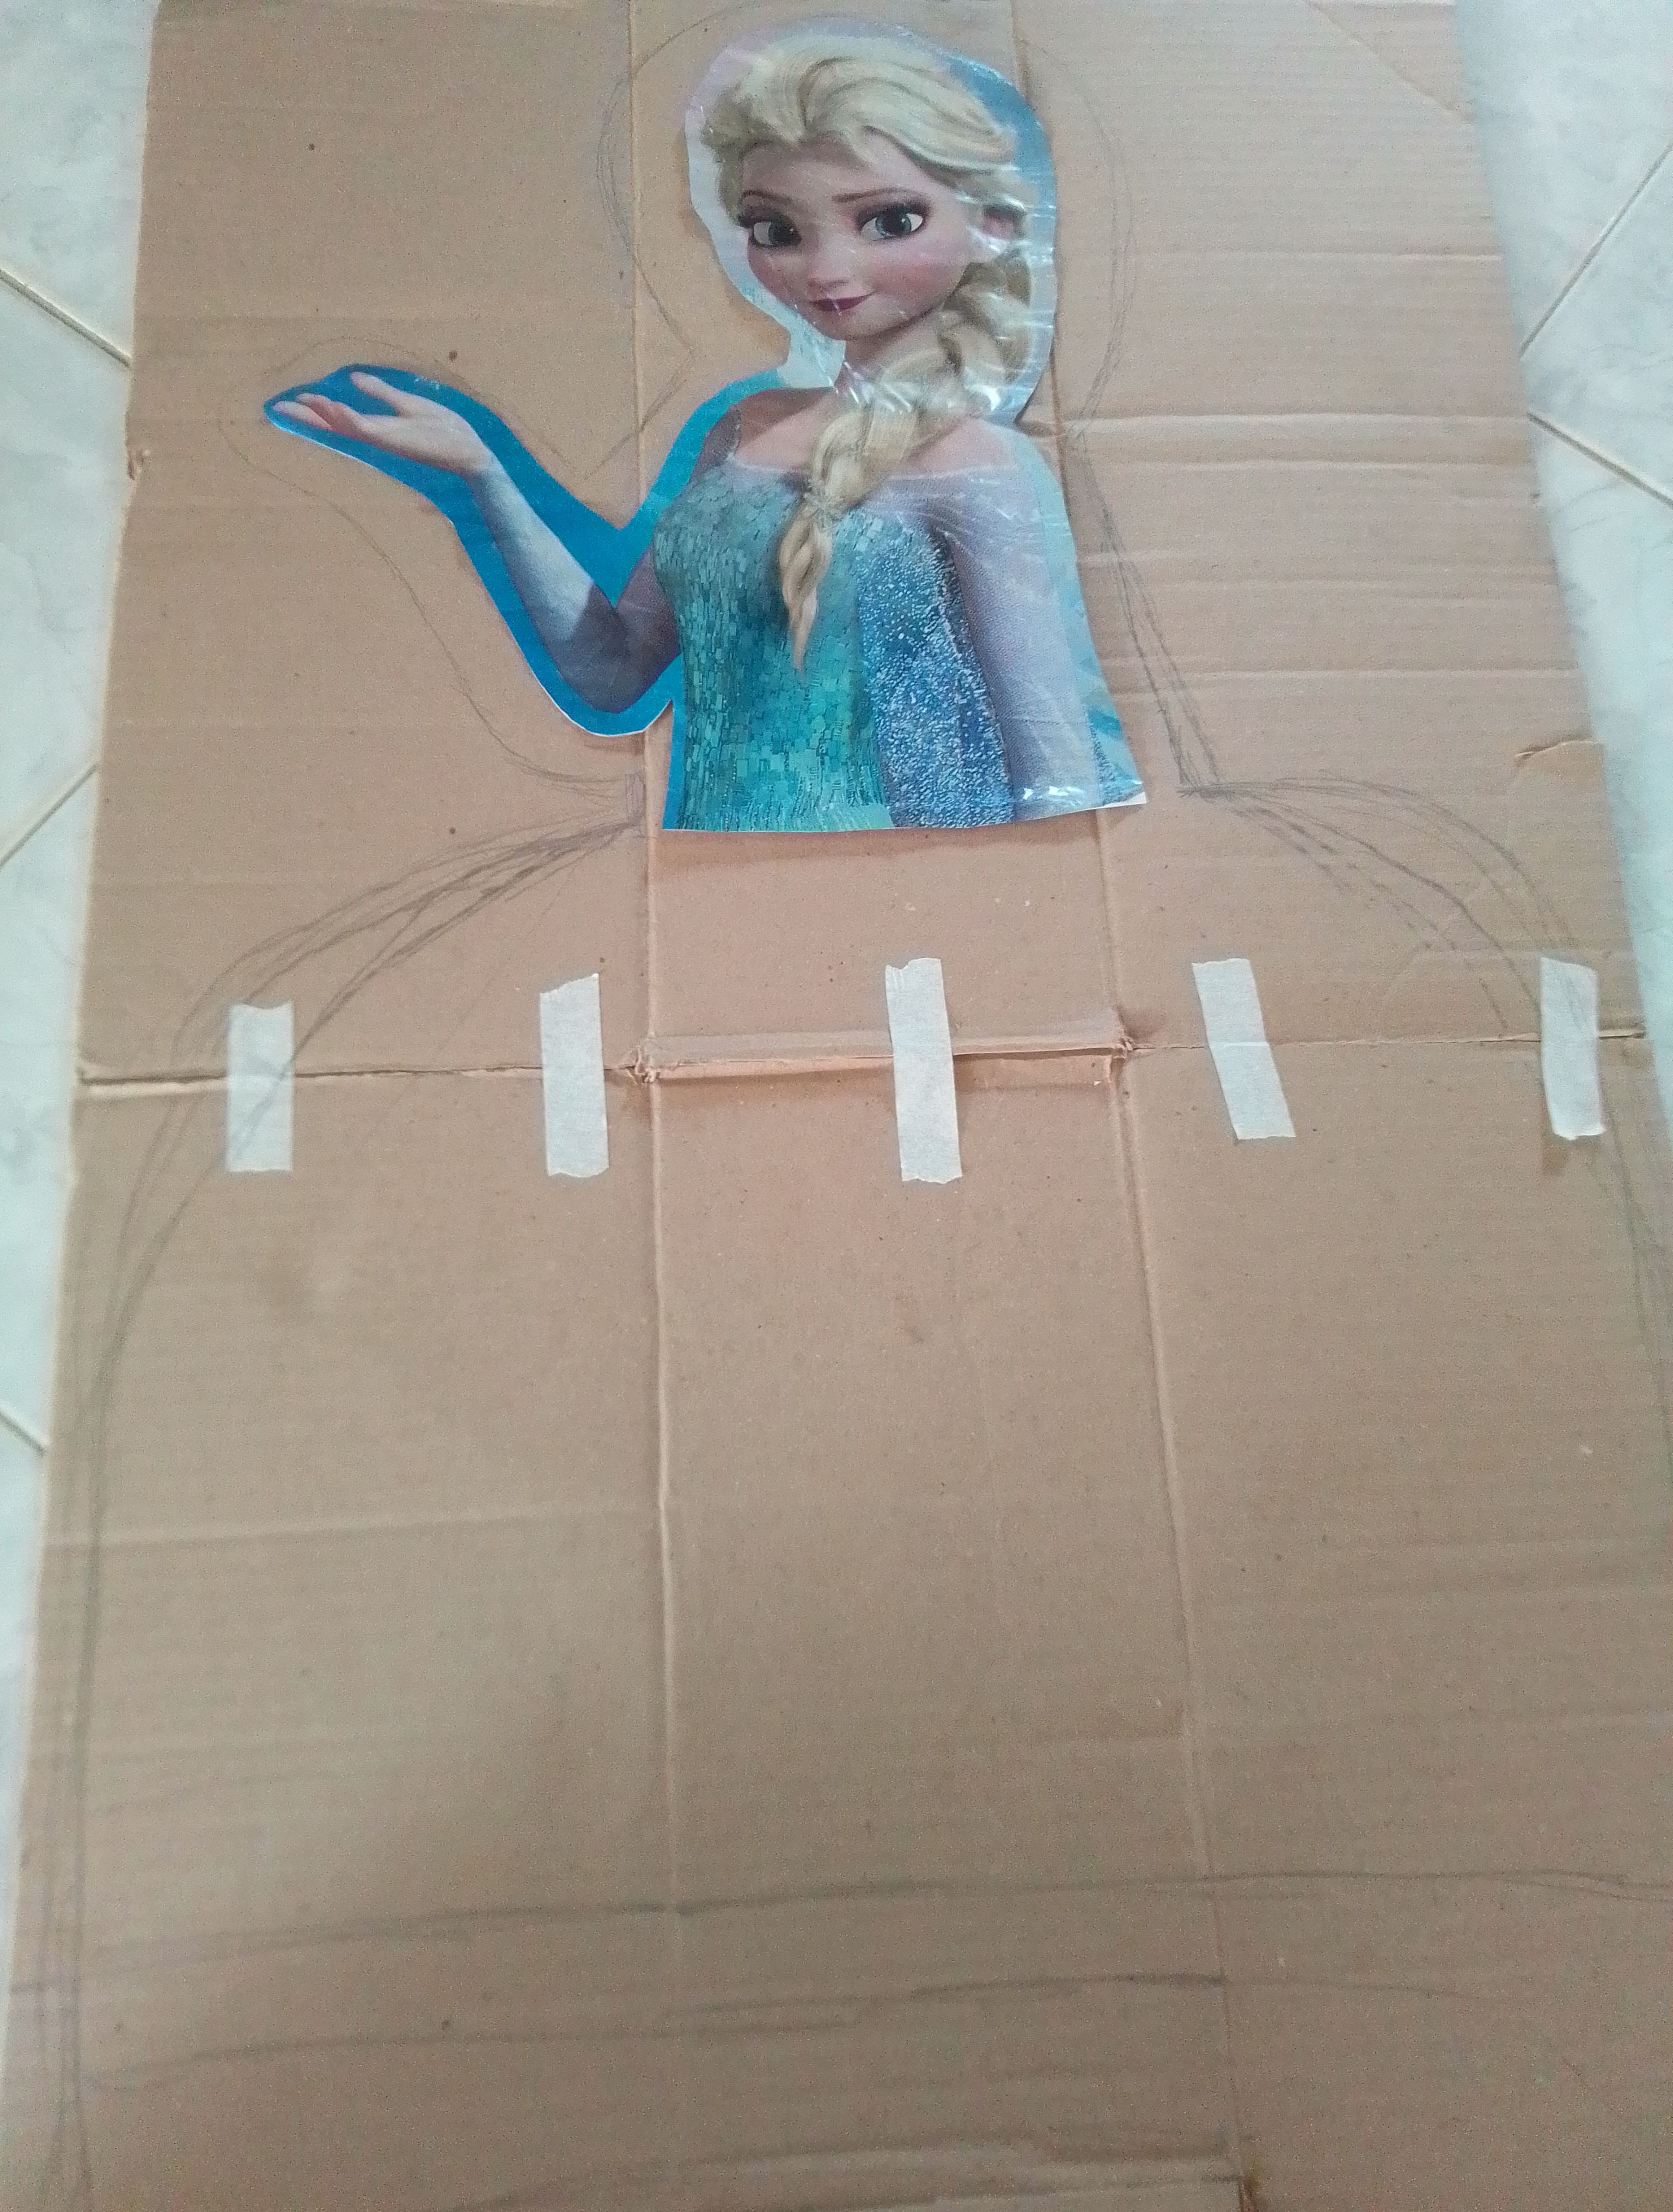
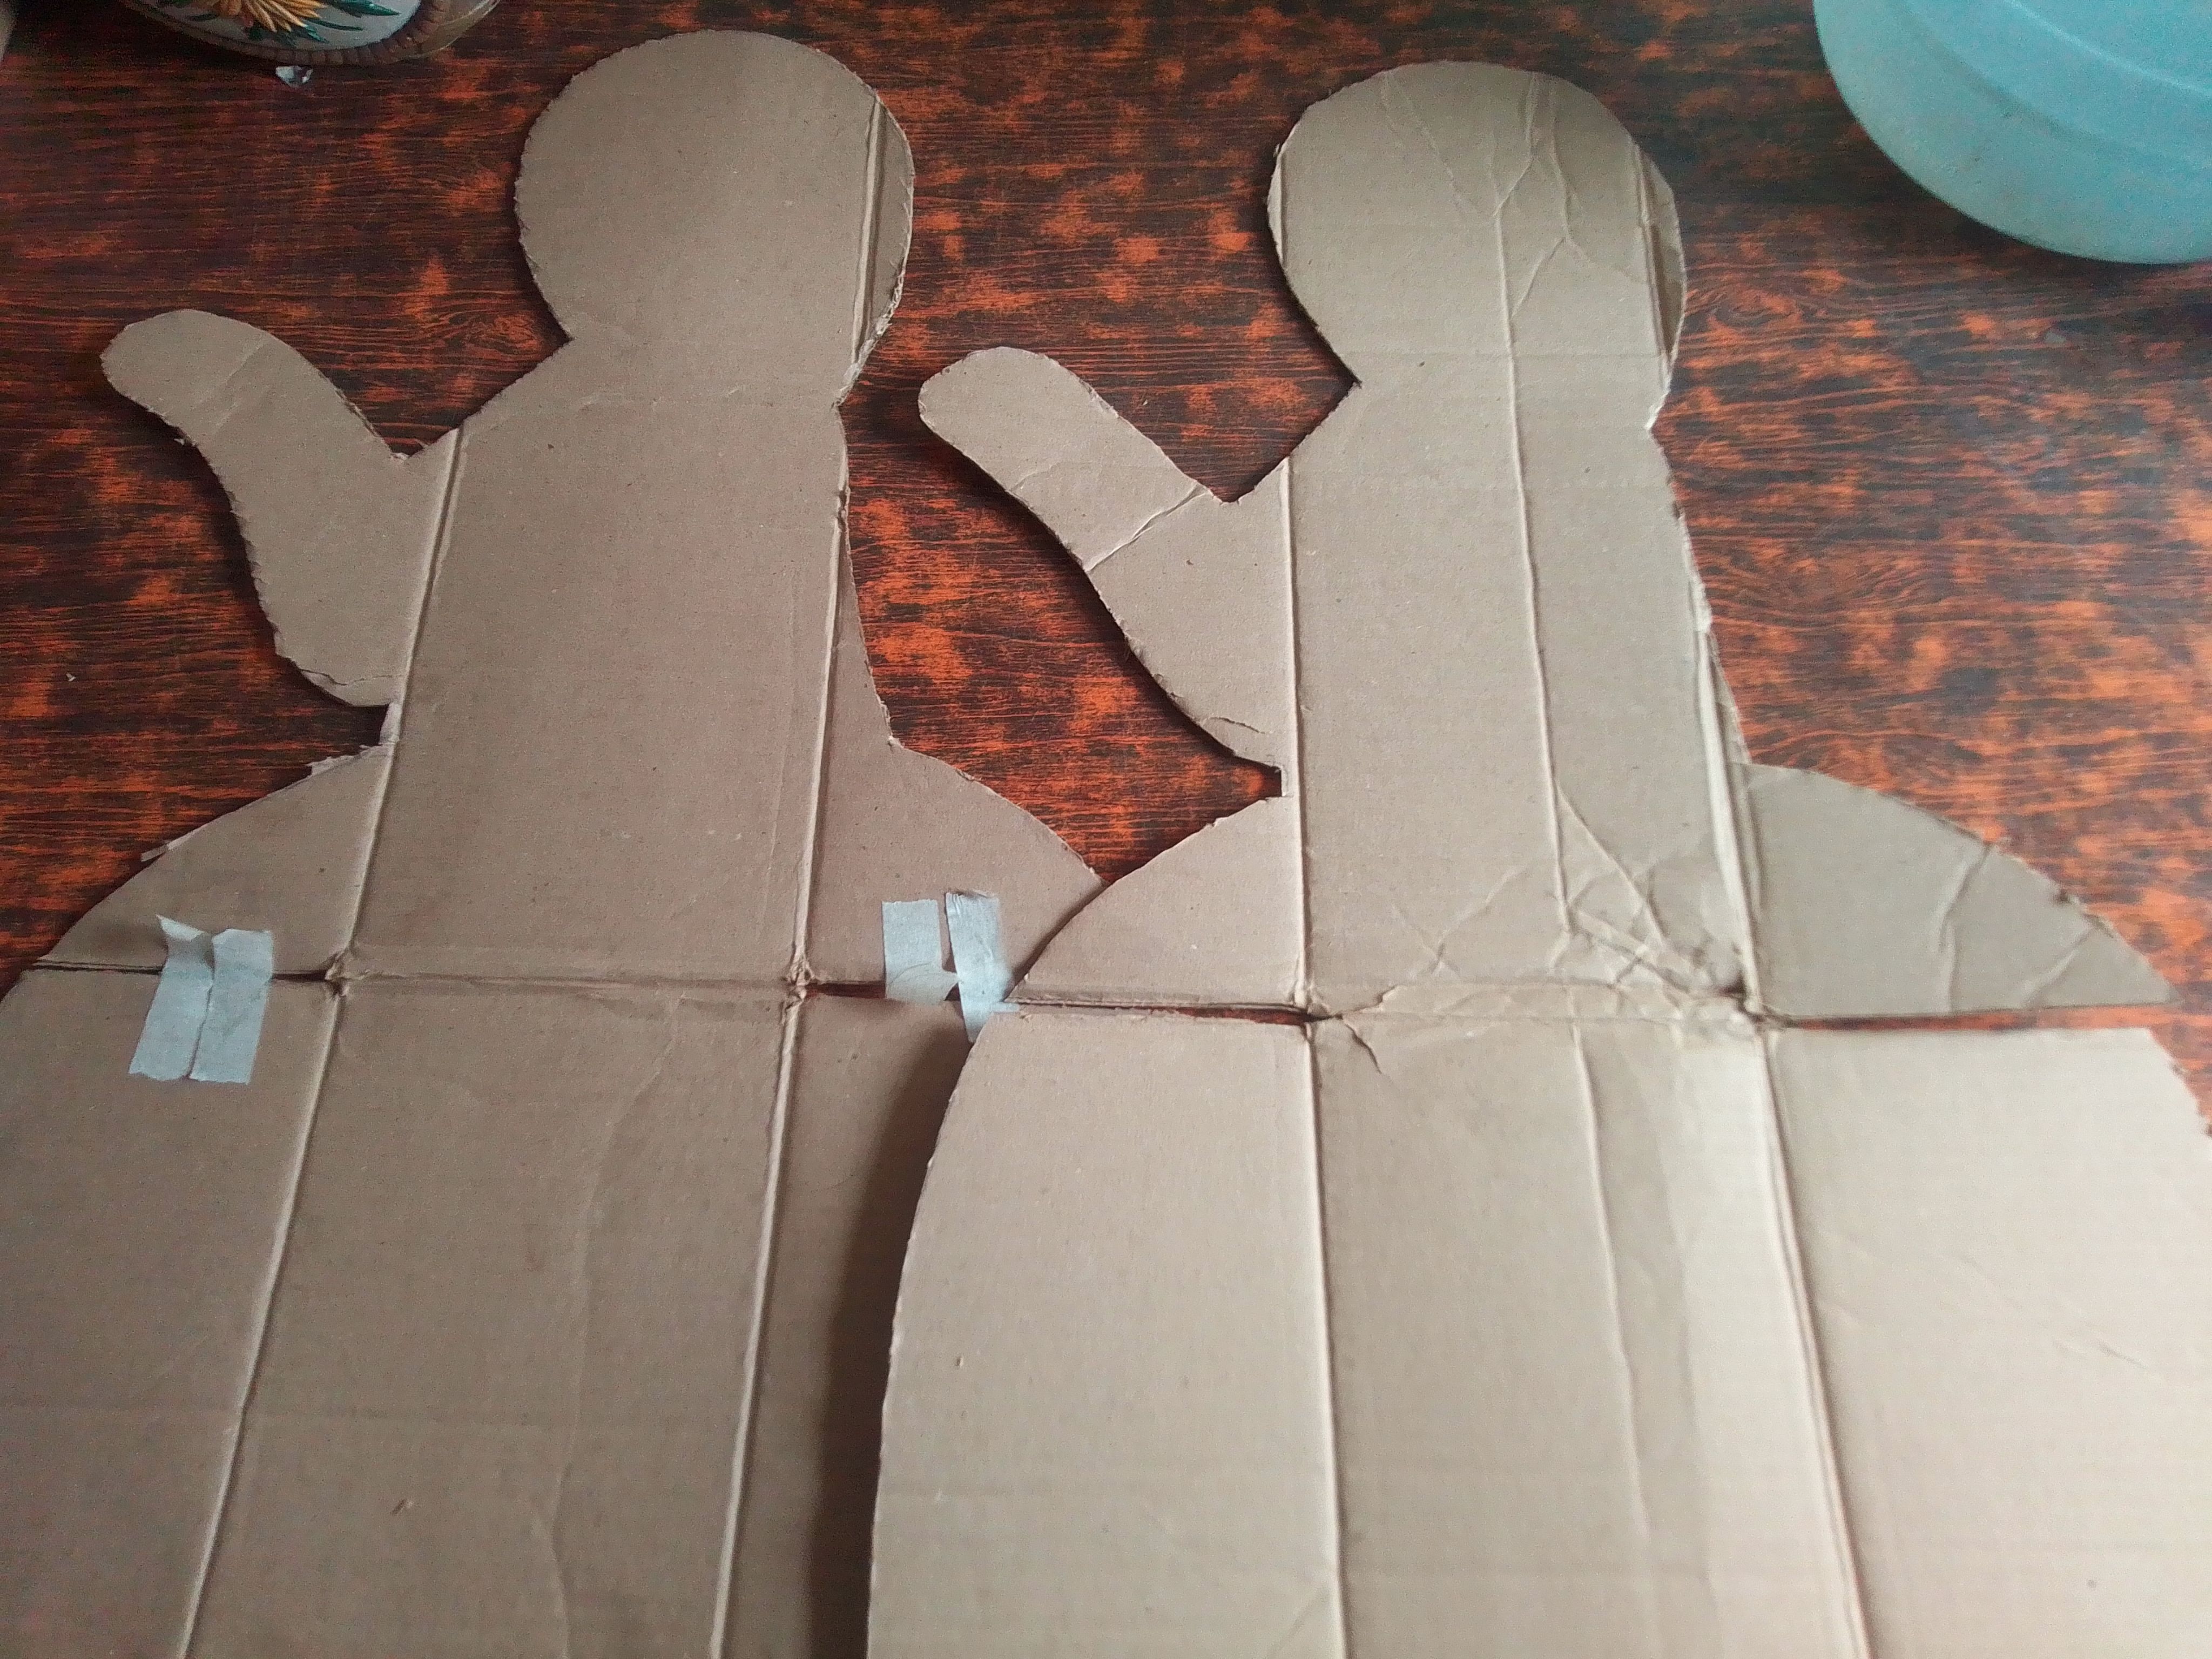
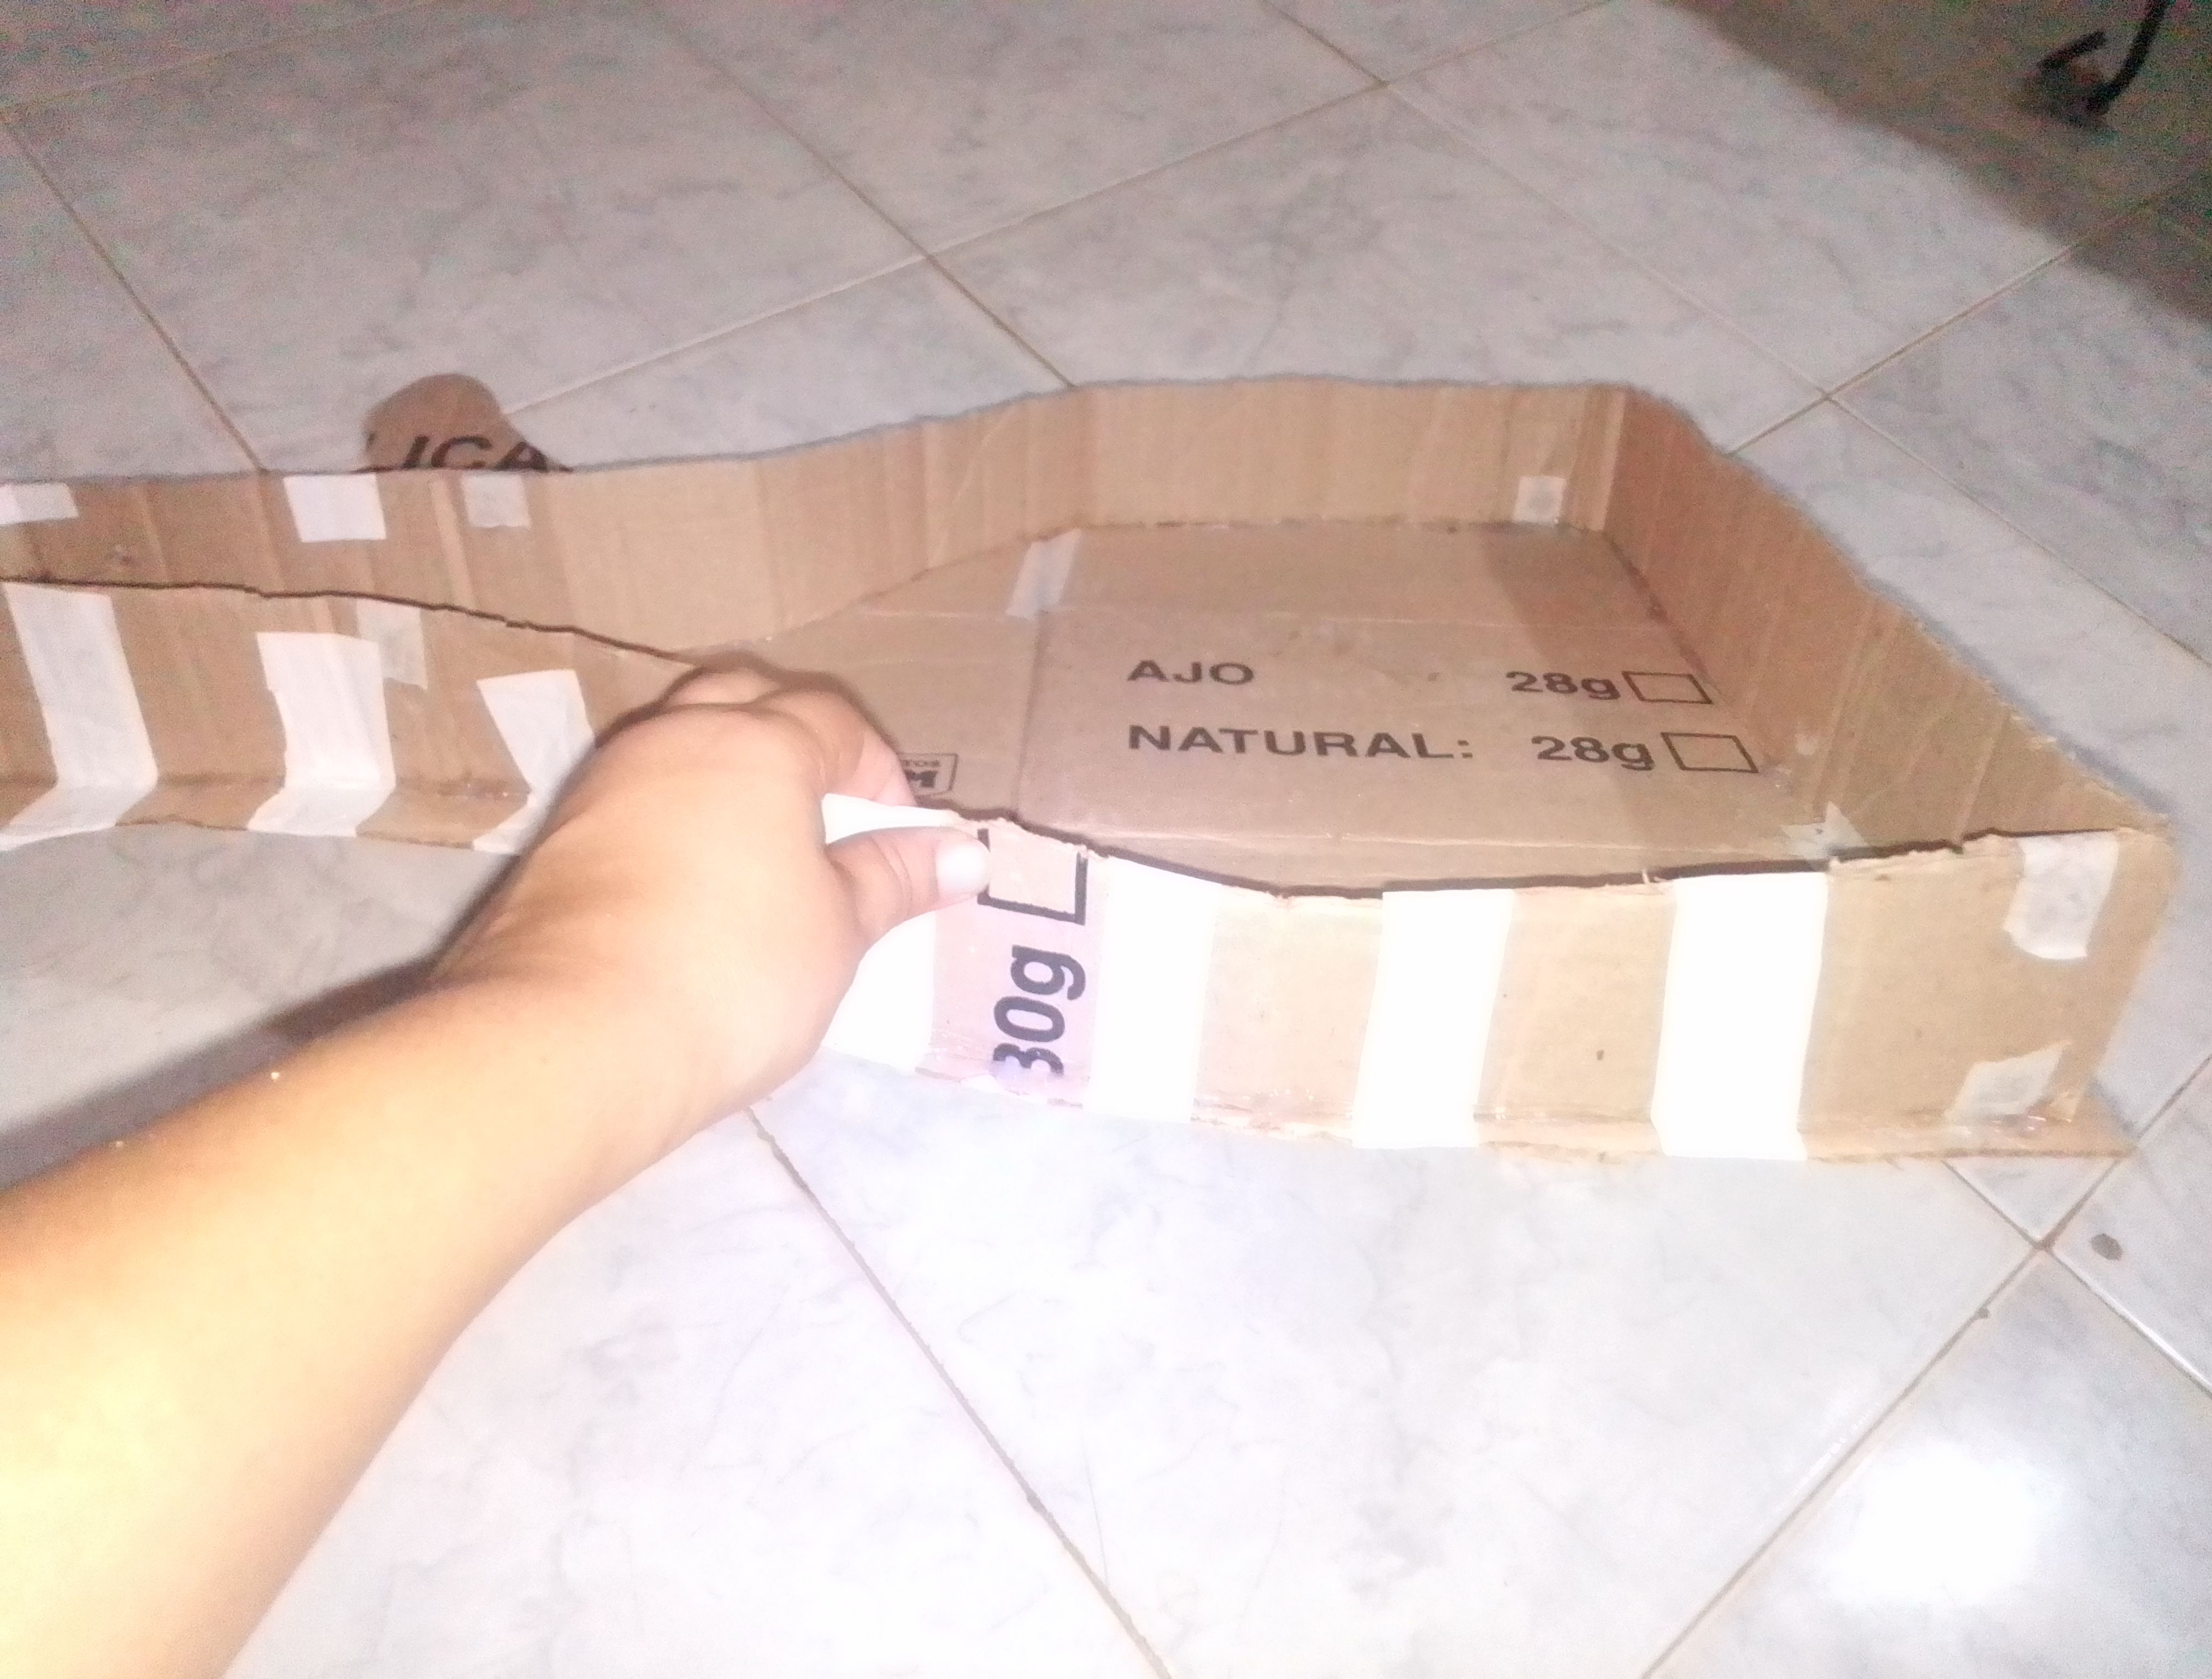
Paso 01
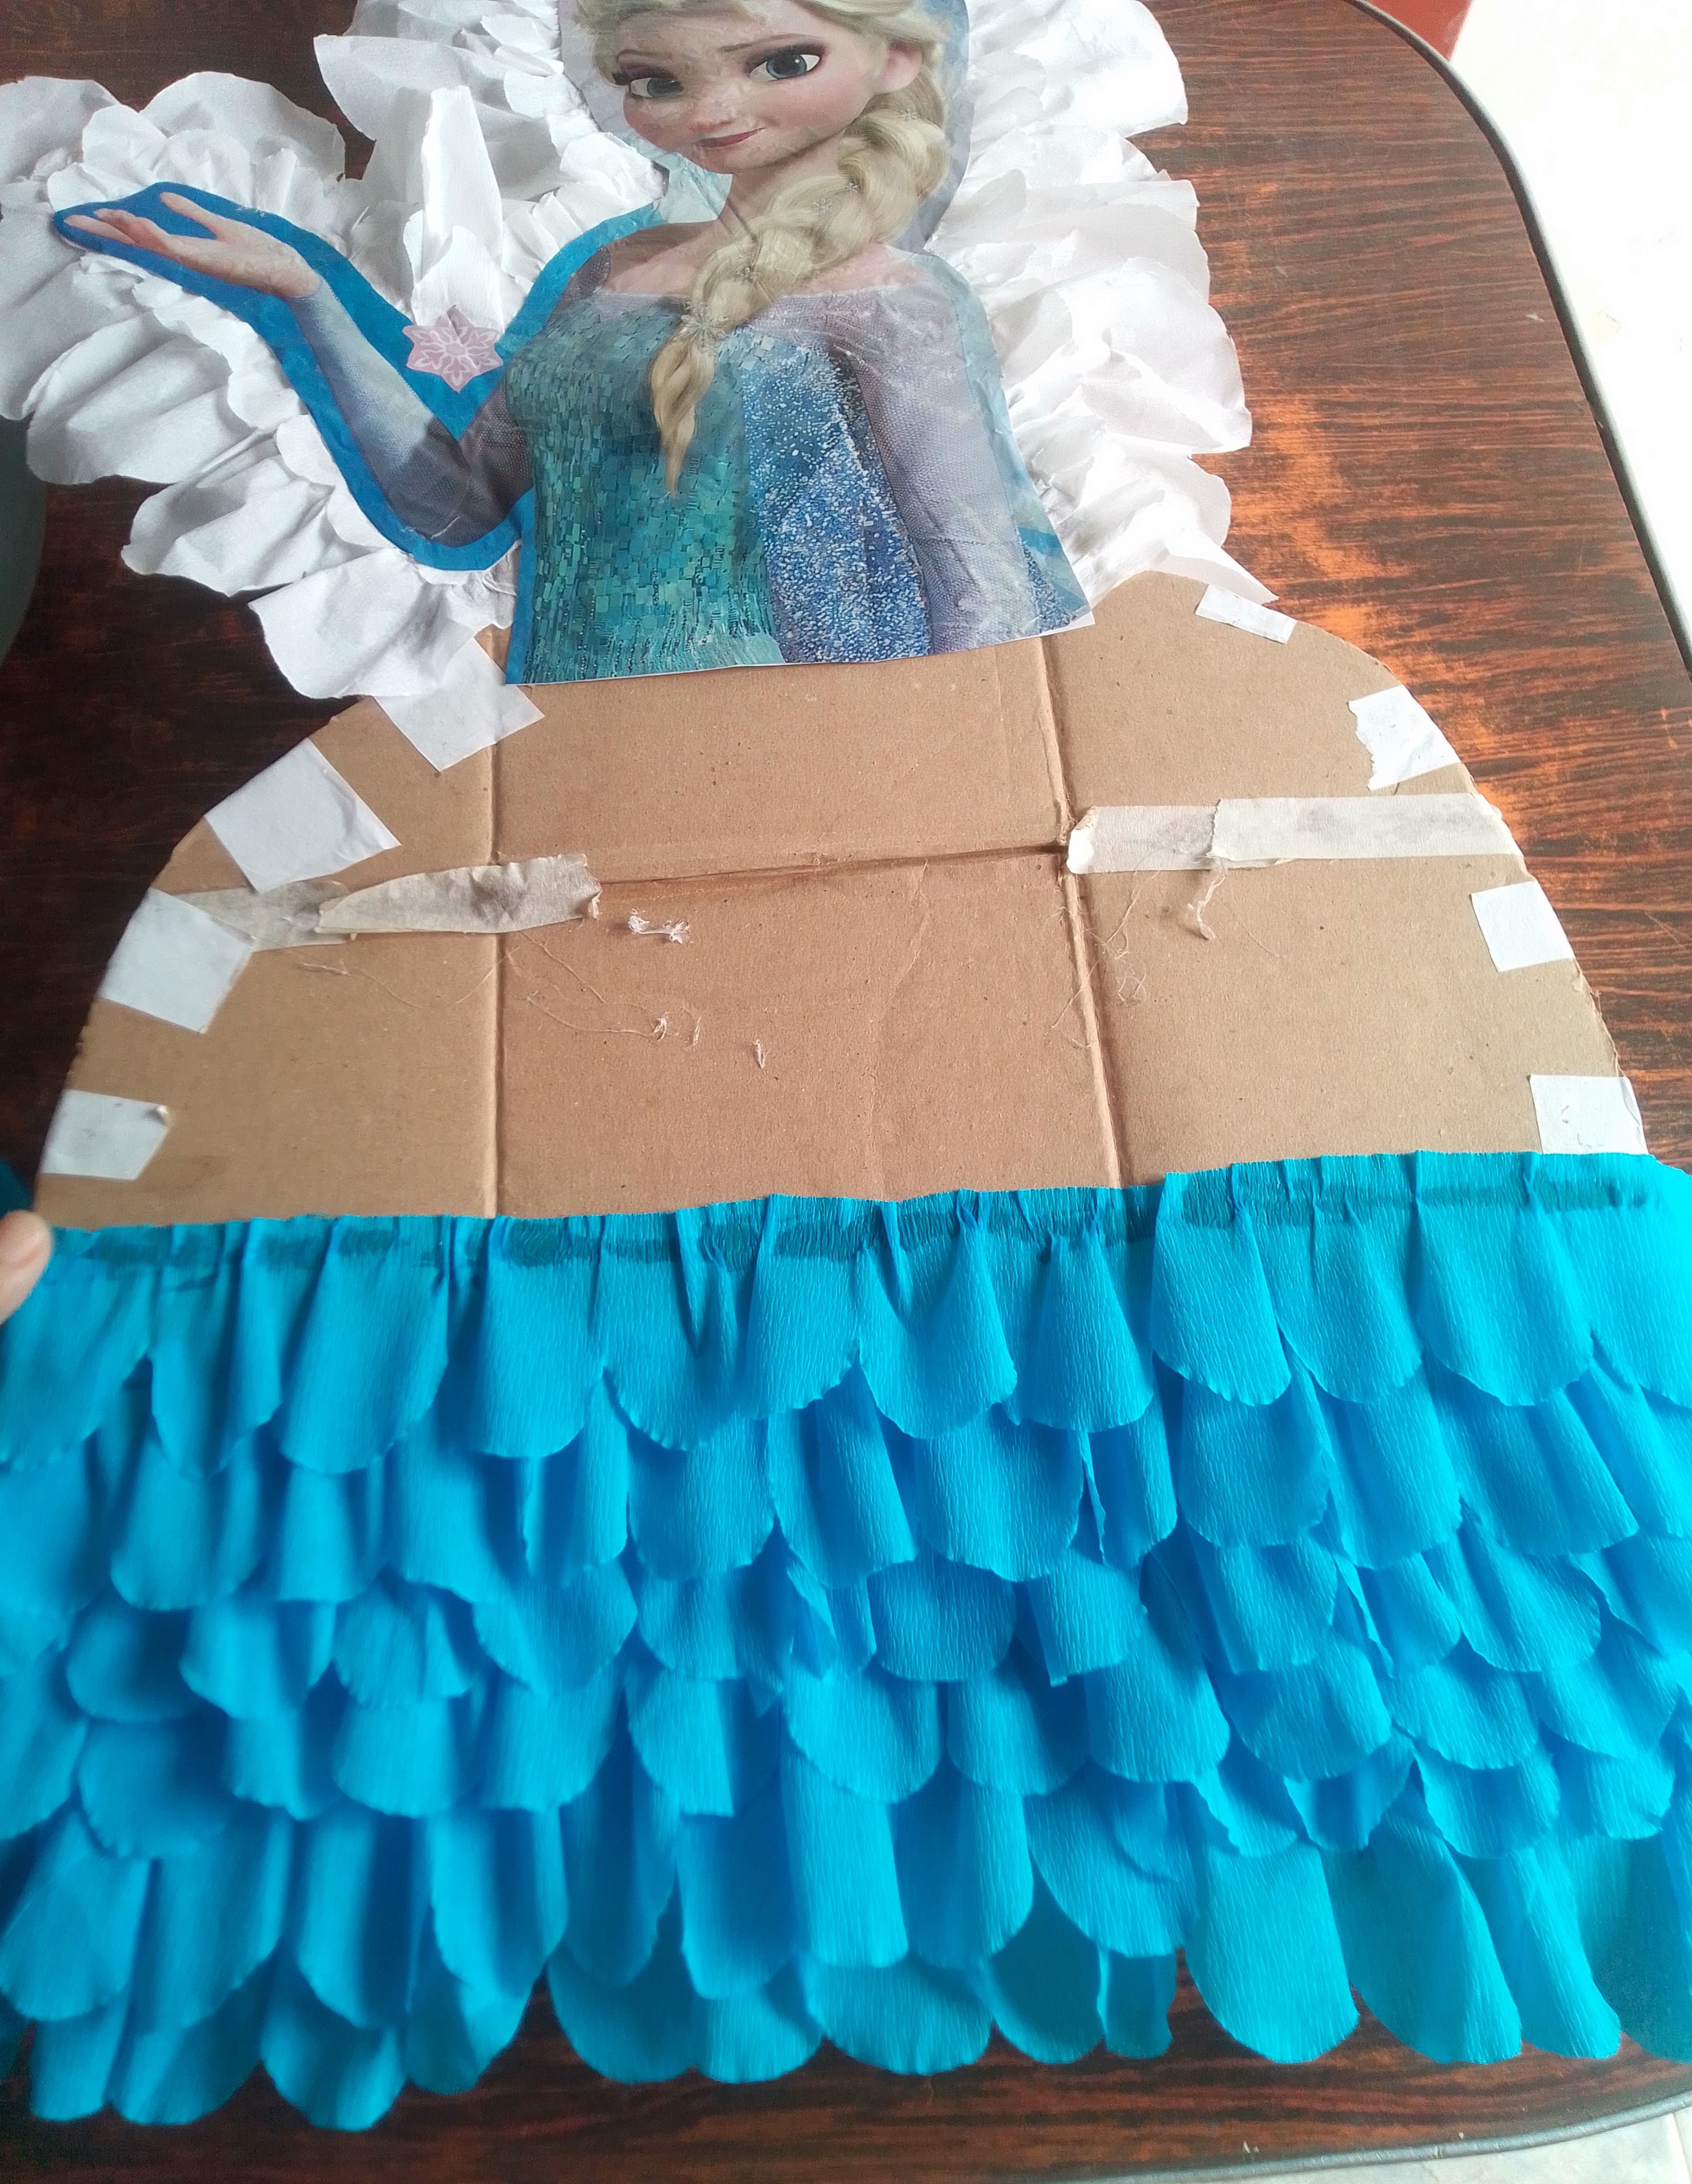
El material principal que se necesita para este tiempo de piñatas es cartón, así que un par de cajas grandes serán suficientes para hacer una de tamaño mediano como ésta que tiene una medida de 70cm de altura. Utilizamos también la figura tamaño mediano de la reina para marcar la silueta en el cartón, en mi caso, recortar la figura en un globo tamaño grande me resulto ideal para este paso.. Dibujamos unos centimetros mas fuera de la orilla y continuamos hacia abajo dandole la forma del vestido y cortamos. Esta pieza nos servirá para marcar y obtener la segunda pieza que conforma la parte posterior de la piñata. Con esto listo cortaré una tira larga de cartón midiendo toda la silueta de piñata. Ésta la vamos pegando primeramente con silicón y luego reforzamos con cinta adhesiva y tiras de hojas de papel con pegamento blanco, esto la hara más resistente.. De la misma manera colocamos la otra tapa de la muñeca y pegamos.
Step 01
The main material needed for this piñata time is cardboard, so a couple of large boxes will be enough to make a medium-sized one like this one that measures 70cm high. We also used the medium-sized figure of the queen to mark the silhouette on the cardboard, in my case, cutting out the figure in a large-sized balloon was ideal for this step. We draw a few centimeters more outside the edge and continue downwards giving it the shape of the dress and we cut. This piece will help us mark and obtain the second piece that makes up the back of the piñata. With this ready I will cut a long strip of cardboard measuring the entire piñata silhouette. We first glue this one with silicone and then we reinforce it with adhesive tape and strips of paper sheets with white glue, this will make it more resistant. In the same way we place the other doll cover and glue it.
Paso 02
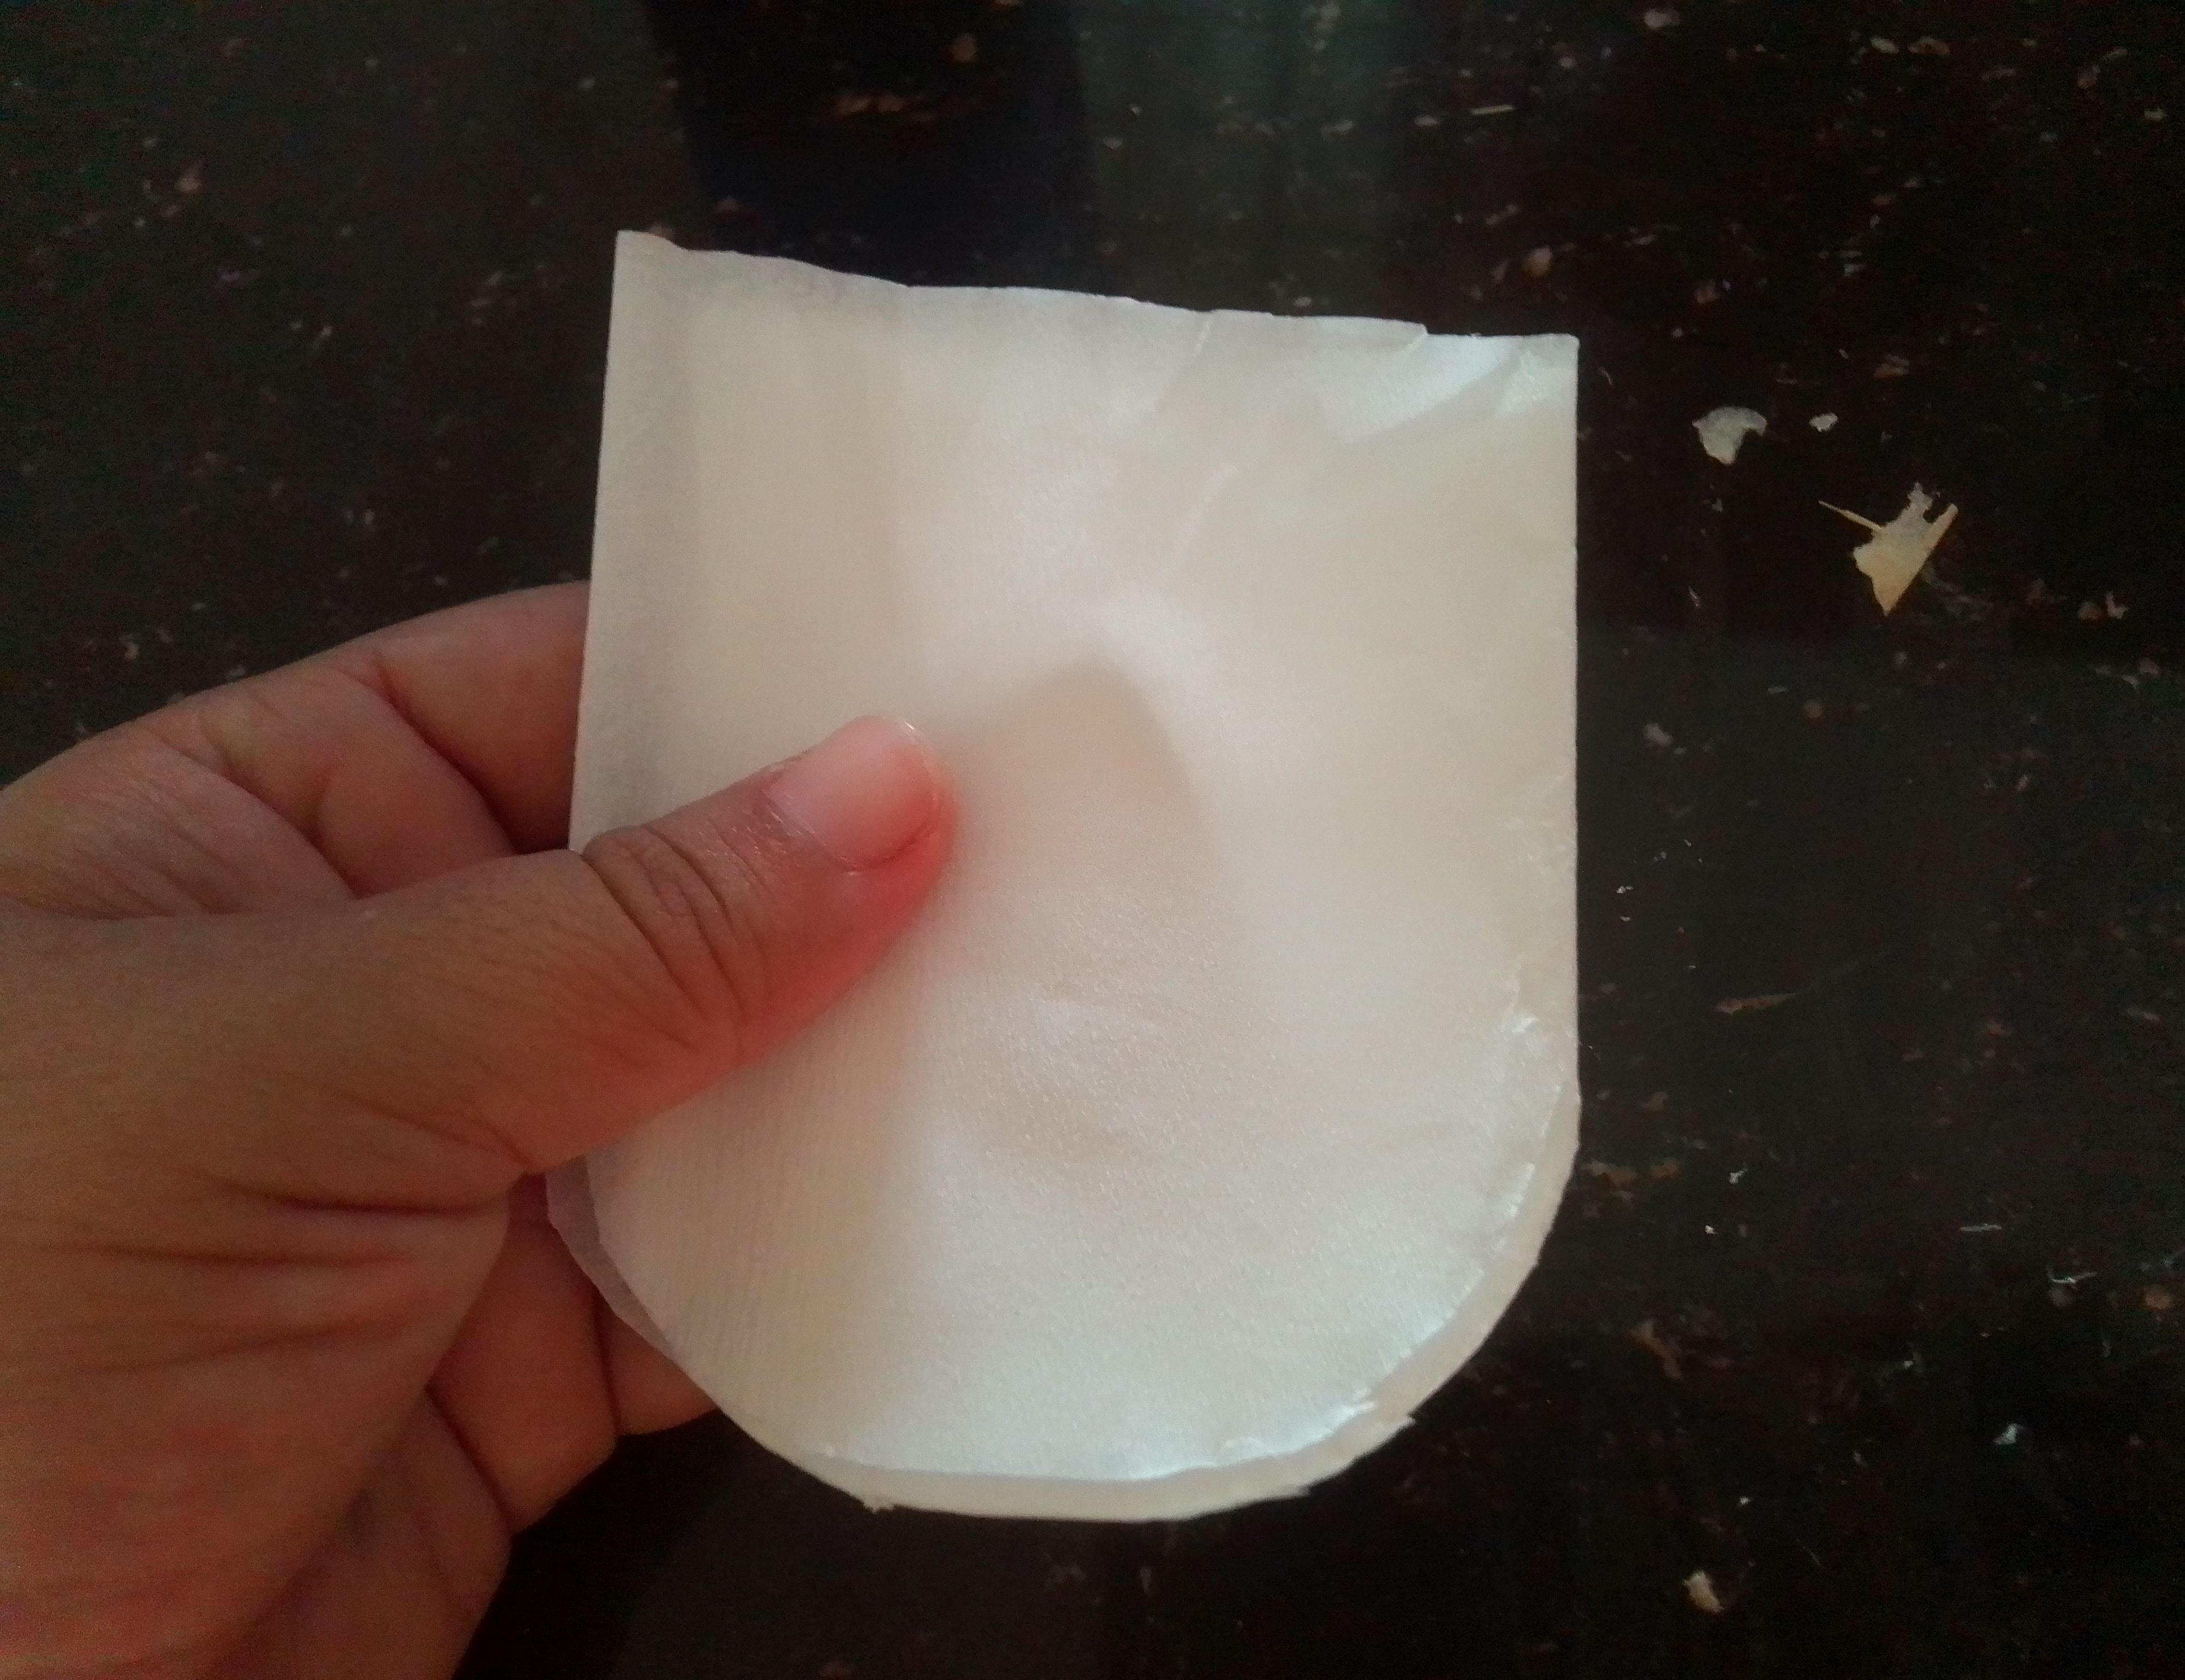
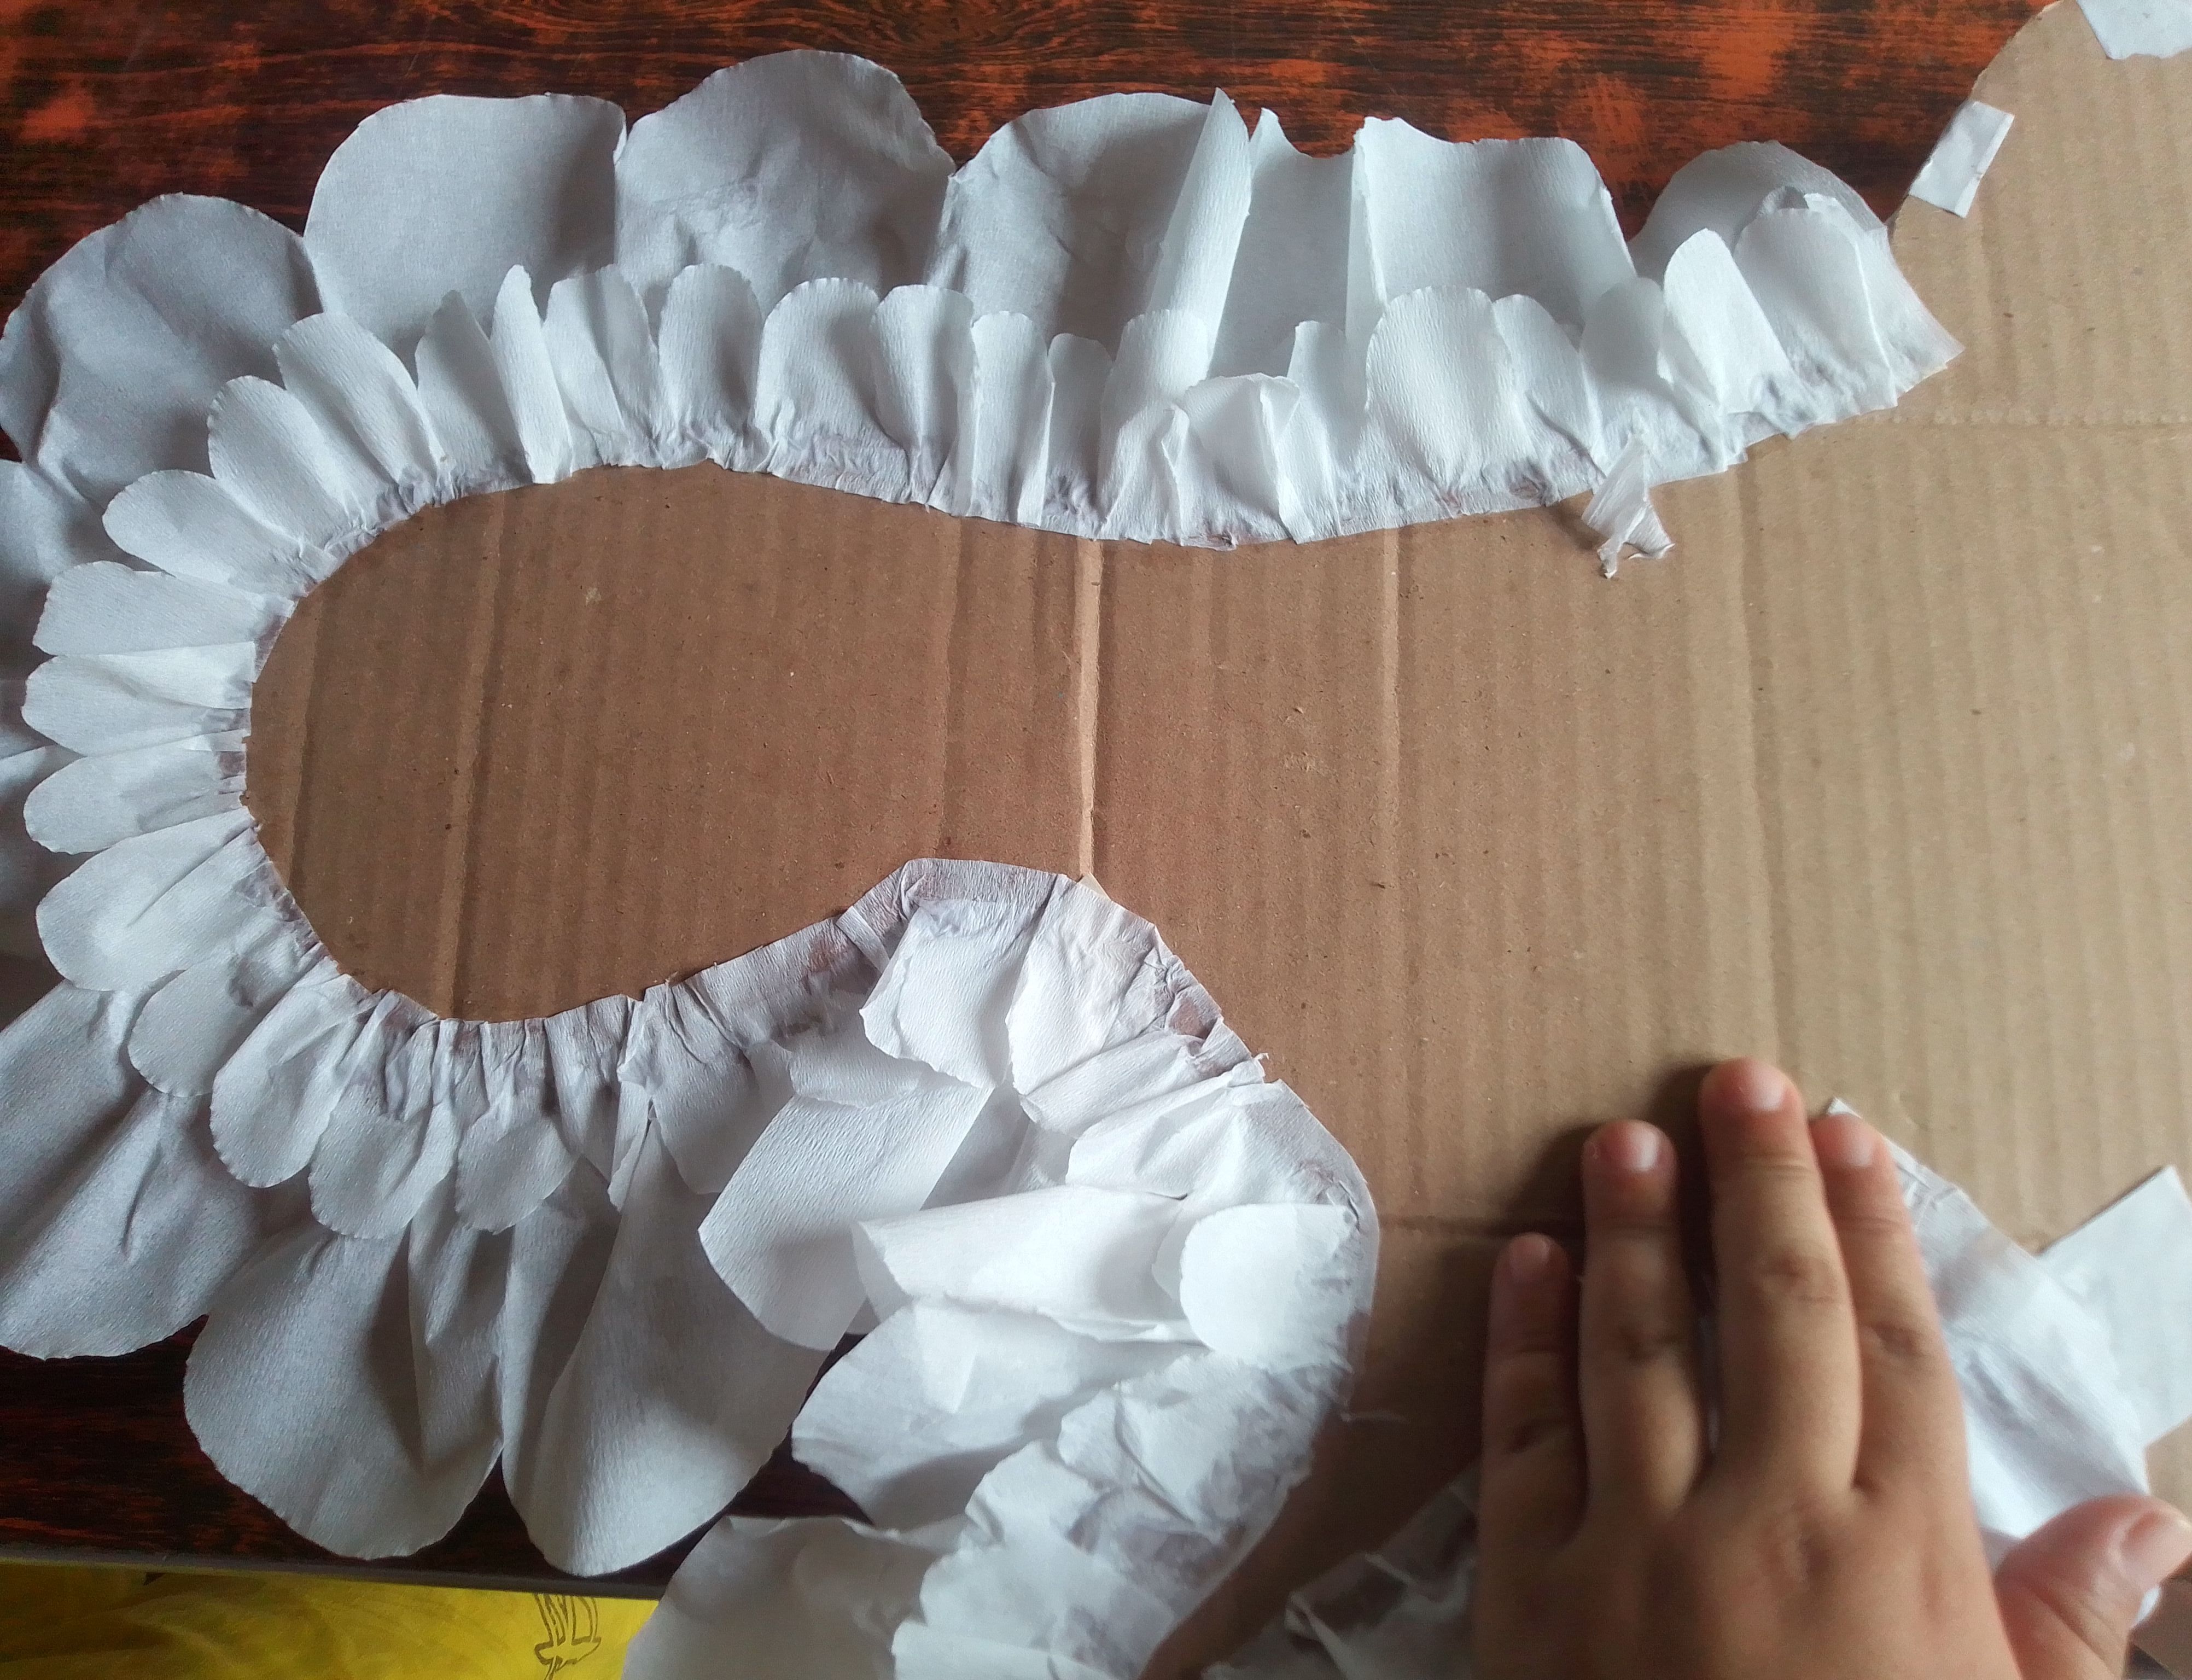
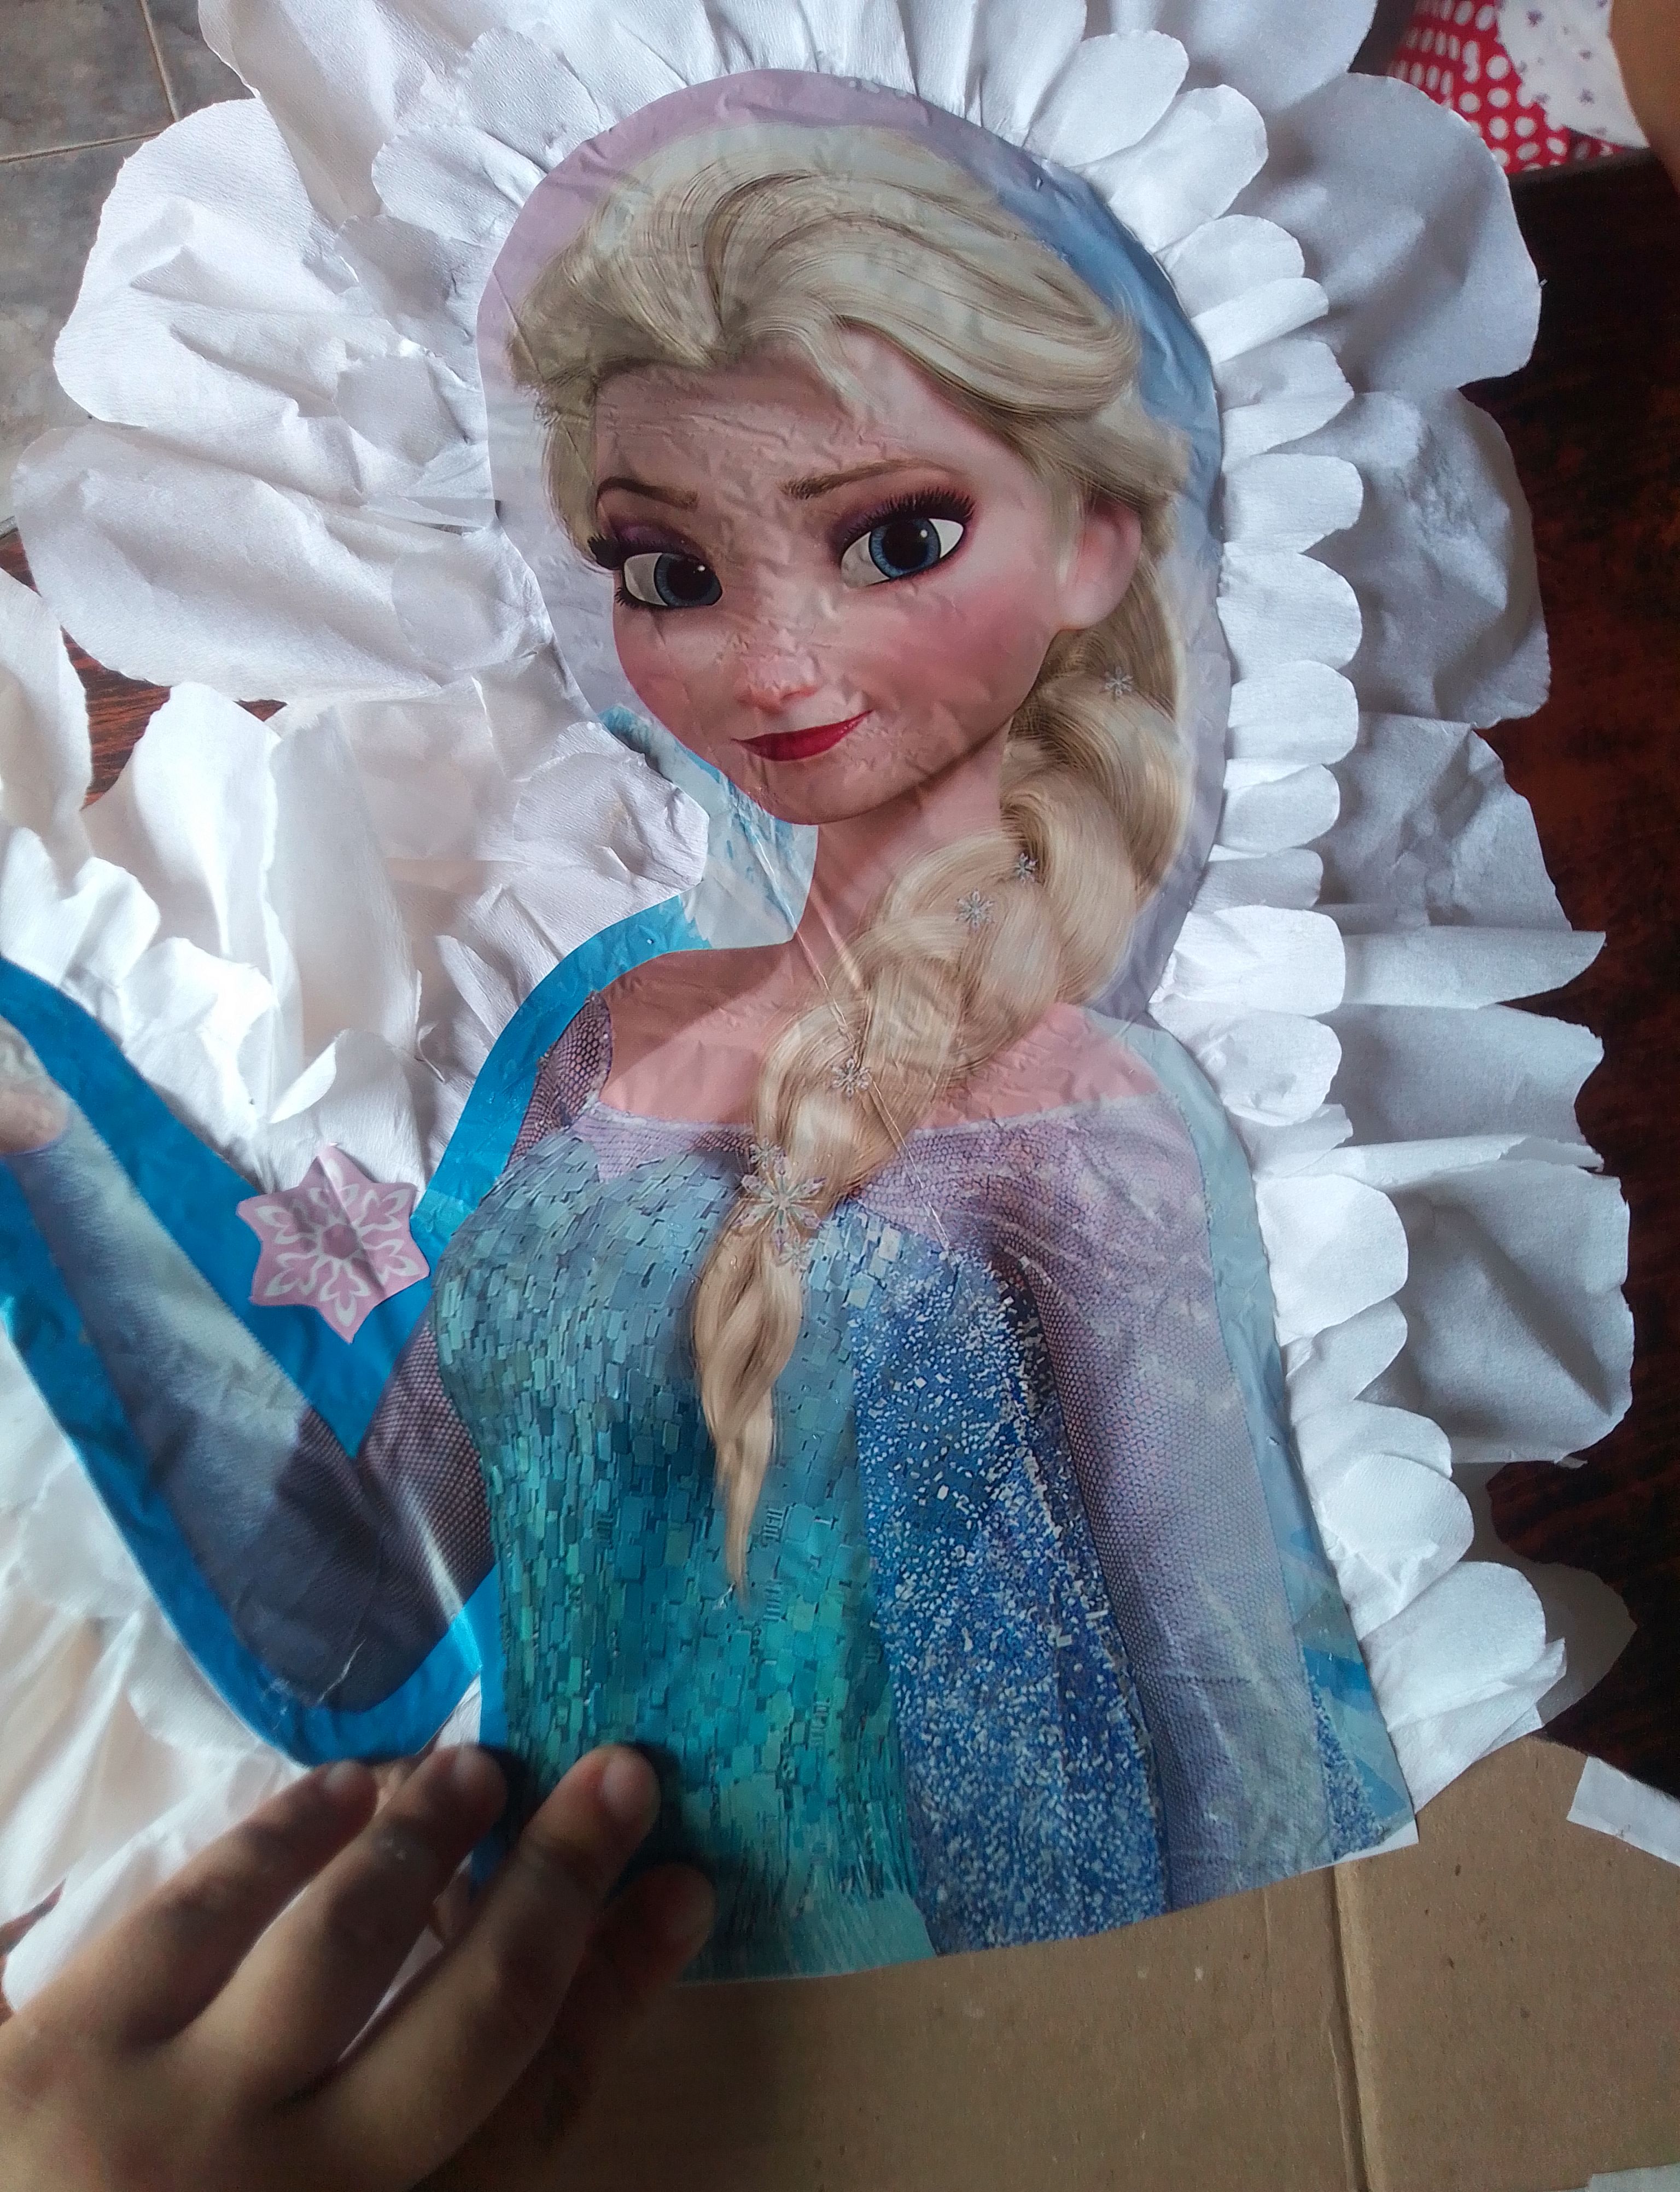
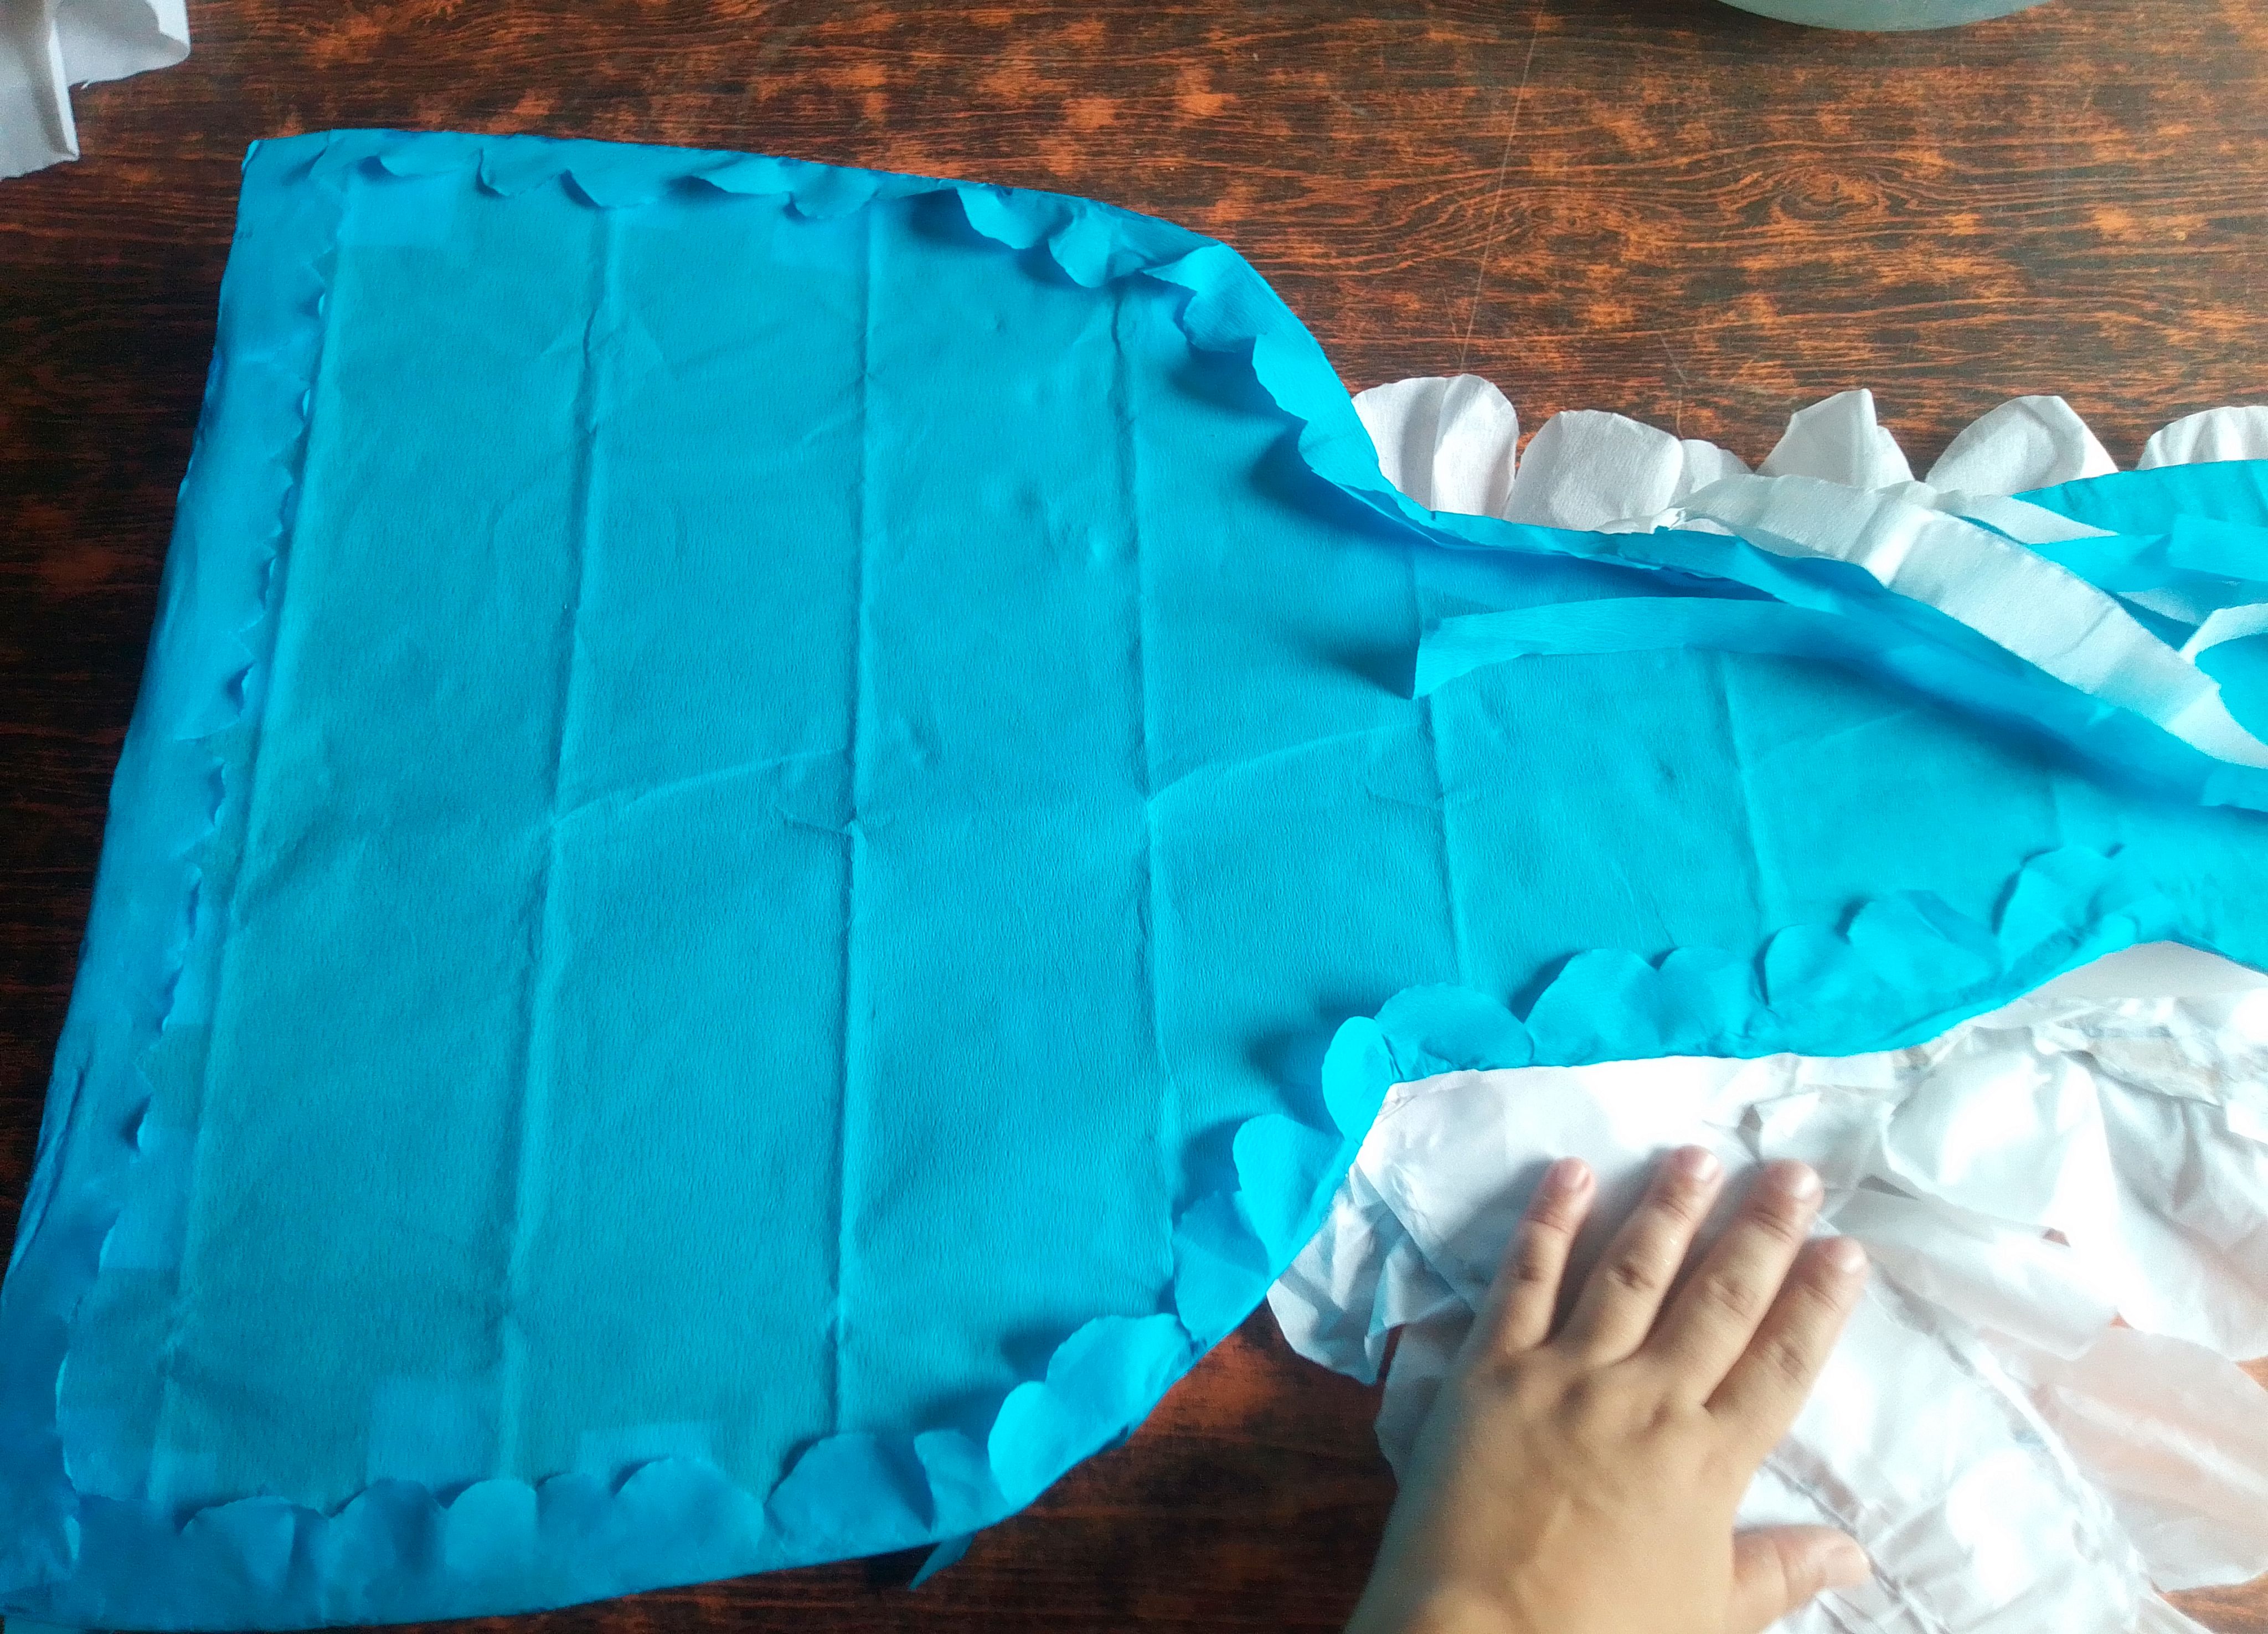
Continuaremos cortando el papel crepé primero en tiras y luego le damos una forma ondeada aún doblado.. Abrimos y vamos pegando con mucho cuidado haciendo pliegues en todo el contorno de lo que es la cabeza y mano de la reina. Luego pegamos la figura en el centro.
Step 02
We will continue cutting the crepe paper first into strips and then we will give it a wavy shape while still folded. We open and glue very carefully making folds around the entire contour of what is the head and hand of the Queen. Then we glue the figure in the center.
Paso 03
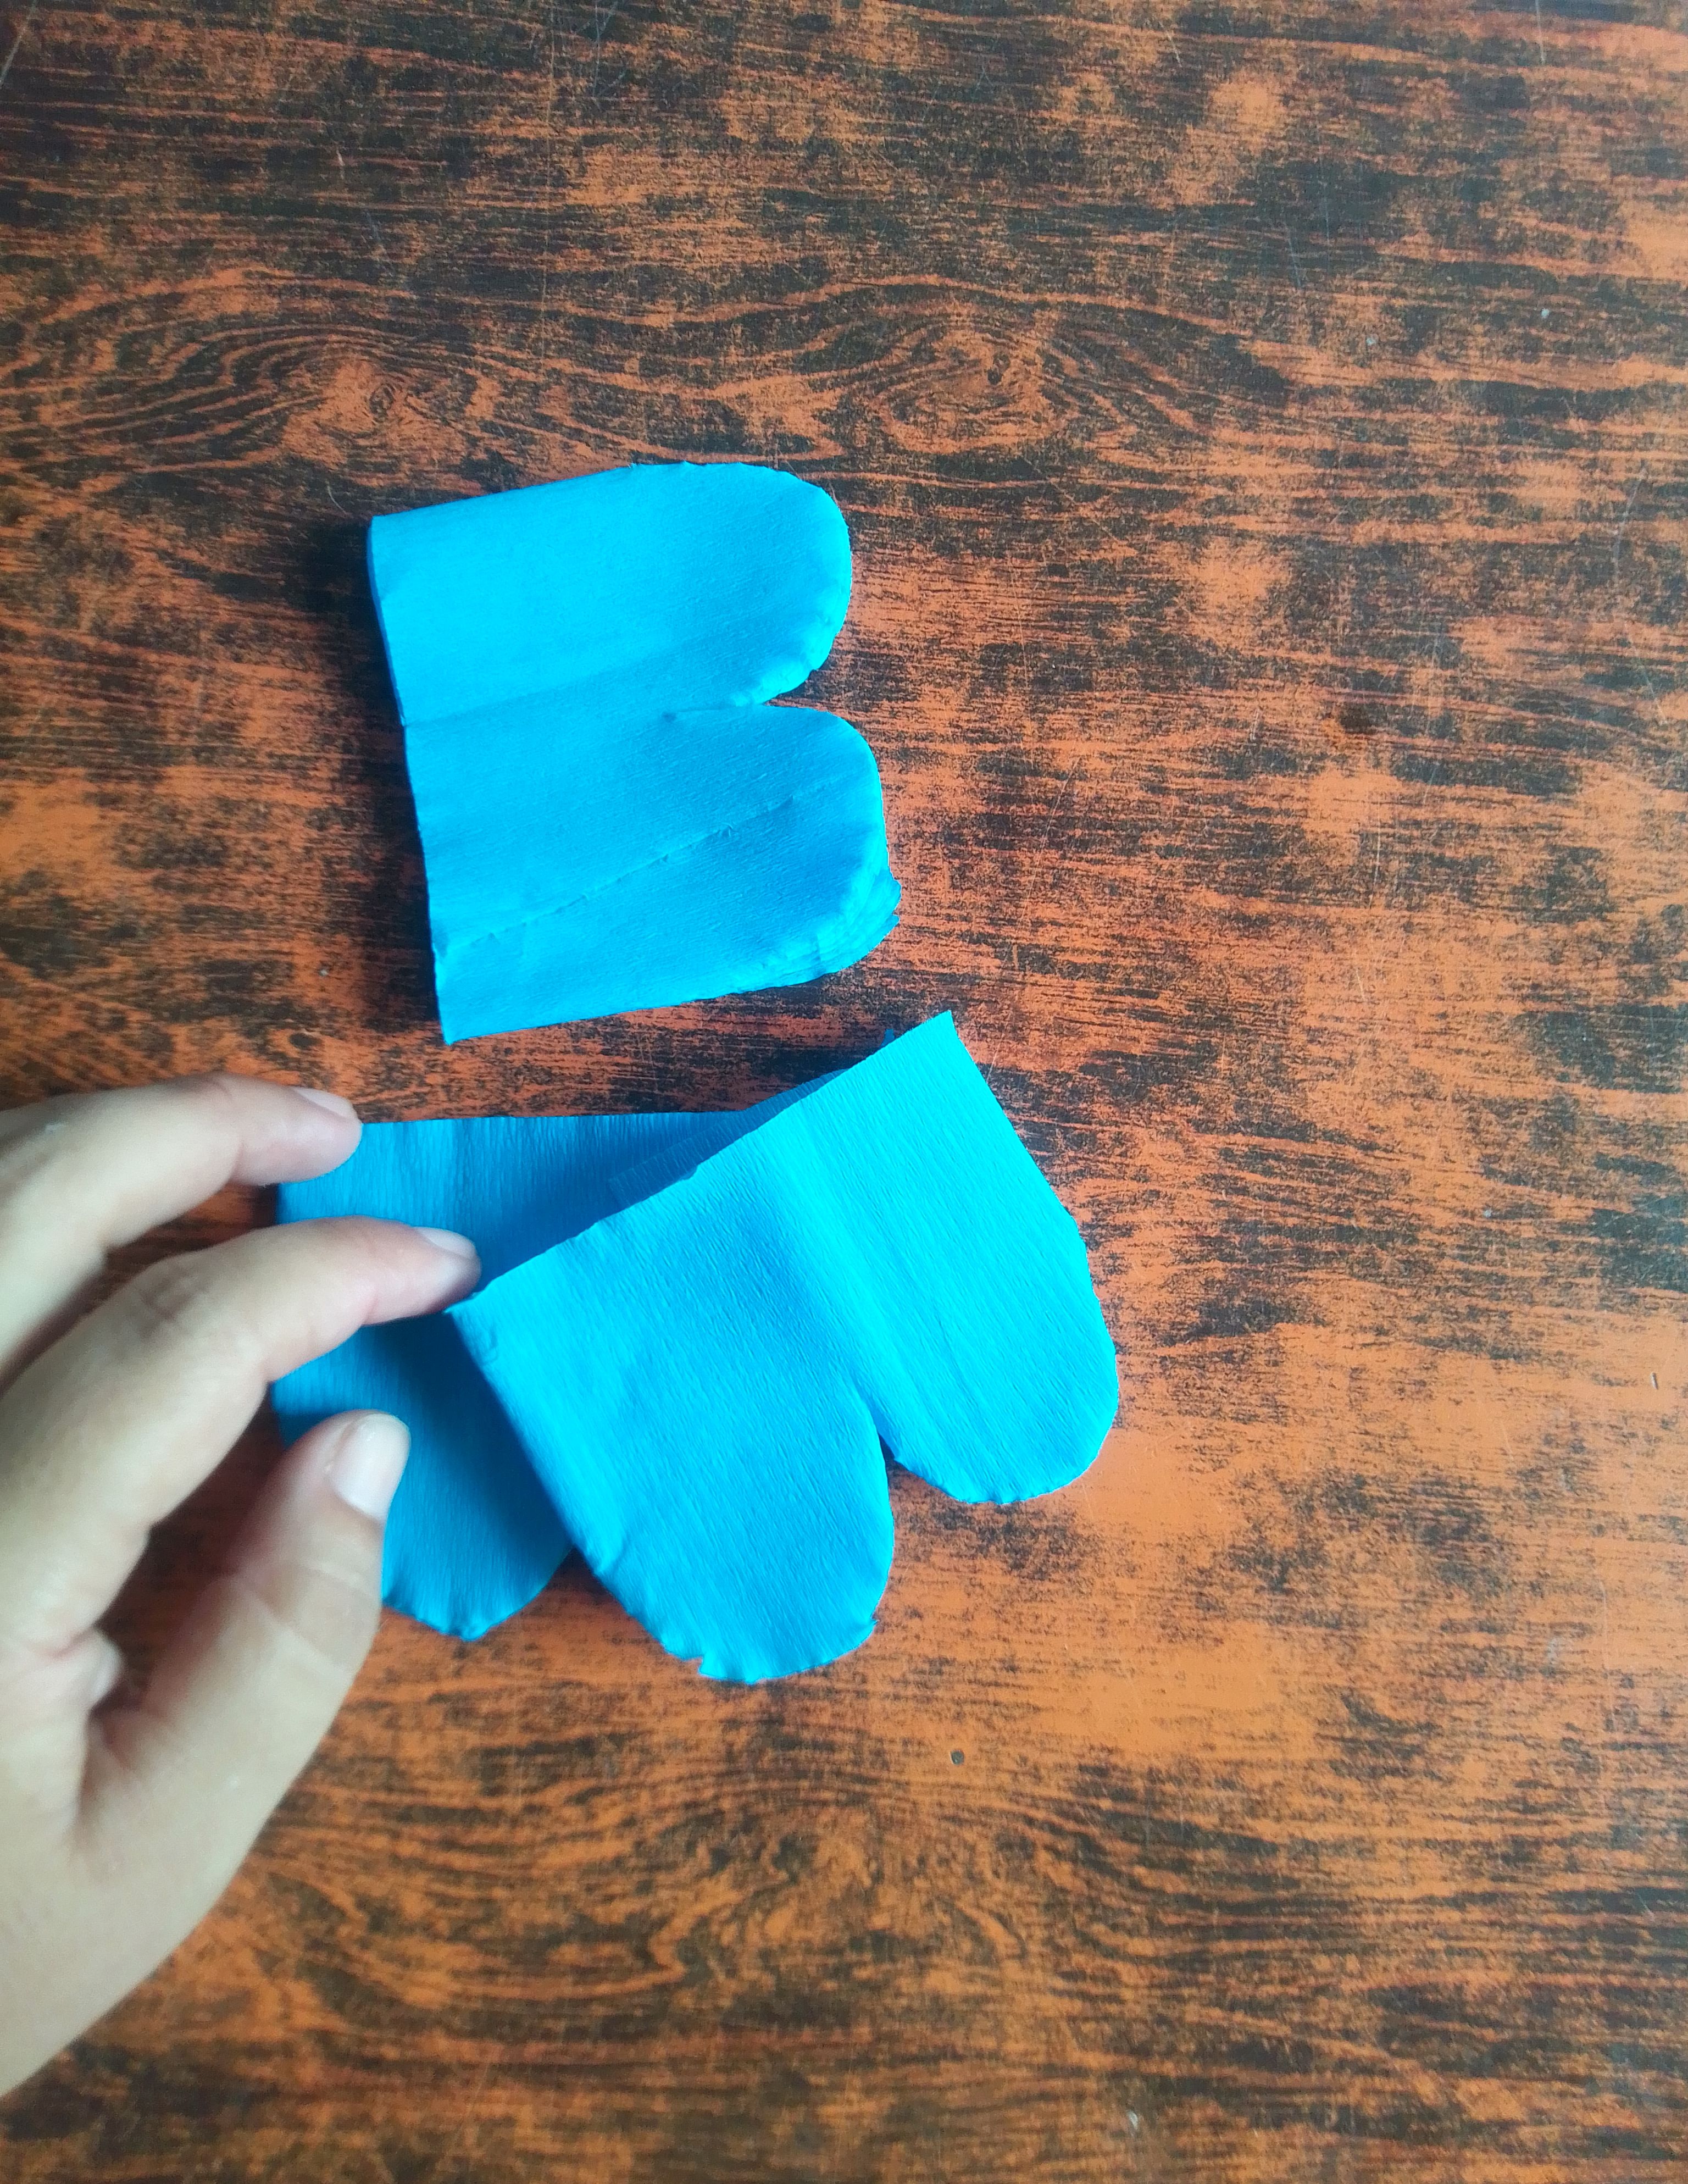
Al papel crepé azul le daremos la misma forma con la tijera pero más pequeña. Abrimos y comienzo a pegar de abajo hacia arriba en toda la forma del vestido, intentando que las tiras queden los mas cerca posible para hacerlo ver muy tupido en volantes. La parte trasera la cubro con papel crepé azul y coloco algunas ondas en las orillas. Finalmente corto copos de nieve de foami plateado y pego al vestido para decorar.
Step 03
We will give the blue crepe paper the same shape with the scissors but smaller. We open it and start gluing from bottom to top along the entire shape of the dress, trying to get the strips as close as possible to make it look very dense with ruffles. I cover the back with blue crepe paper and place some waves on the edges. Finally I cut snowflakes out of silver foam and glue them to the dress to decorate.
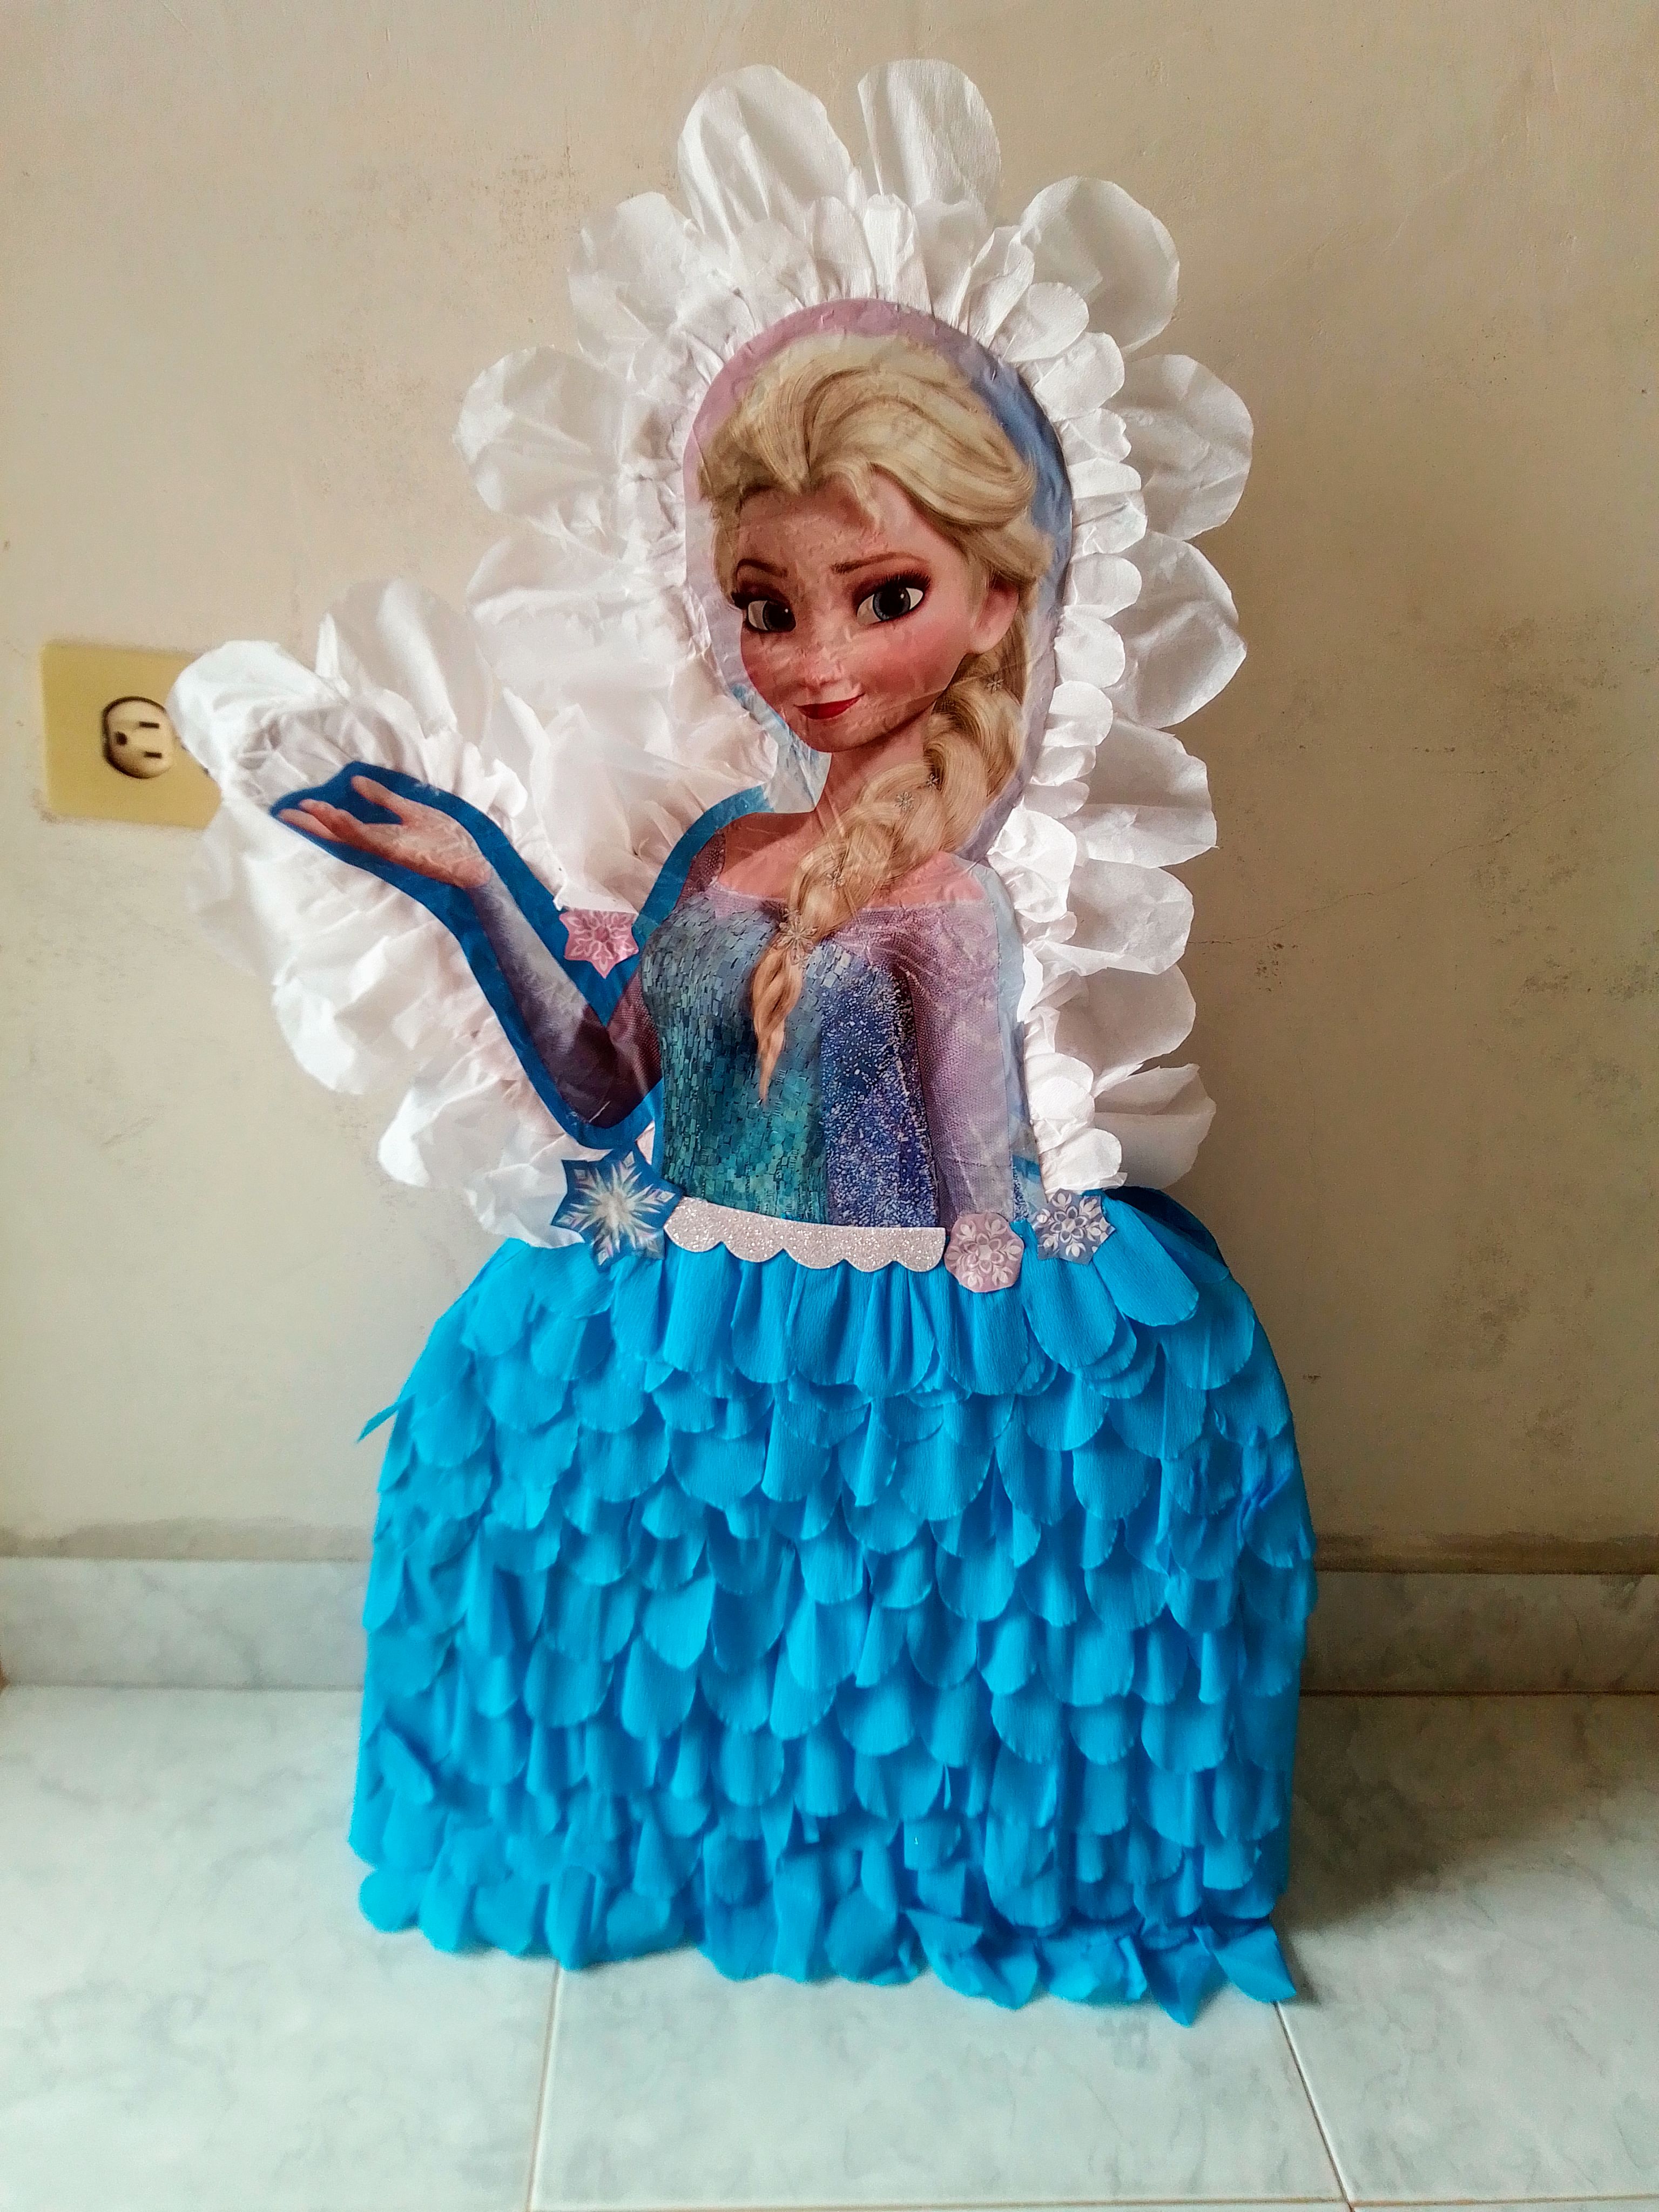
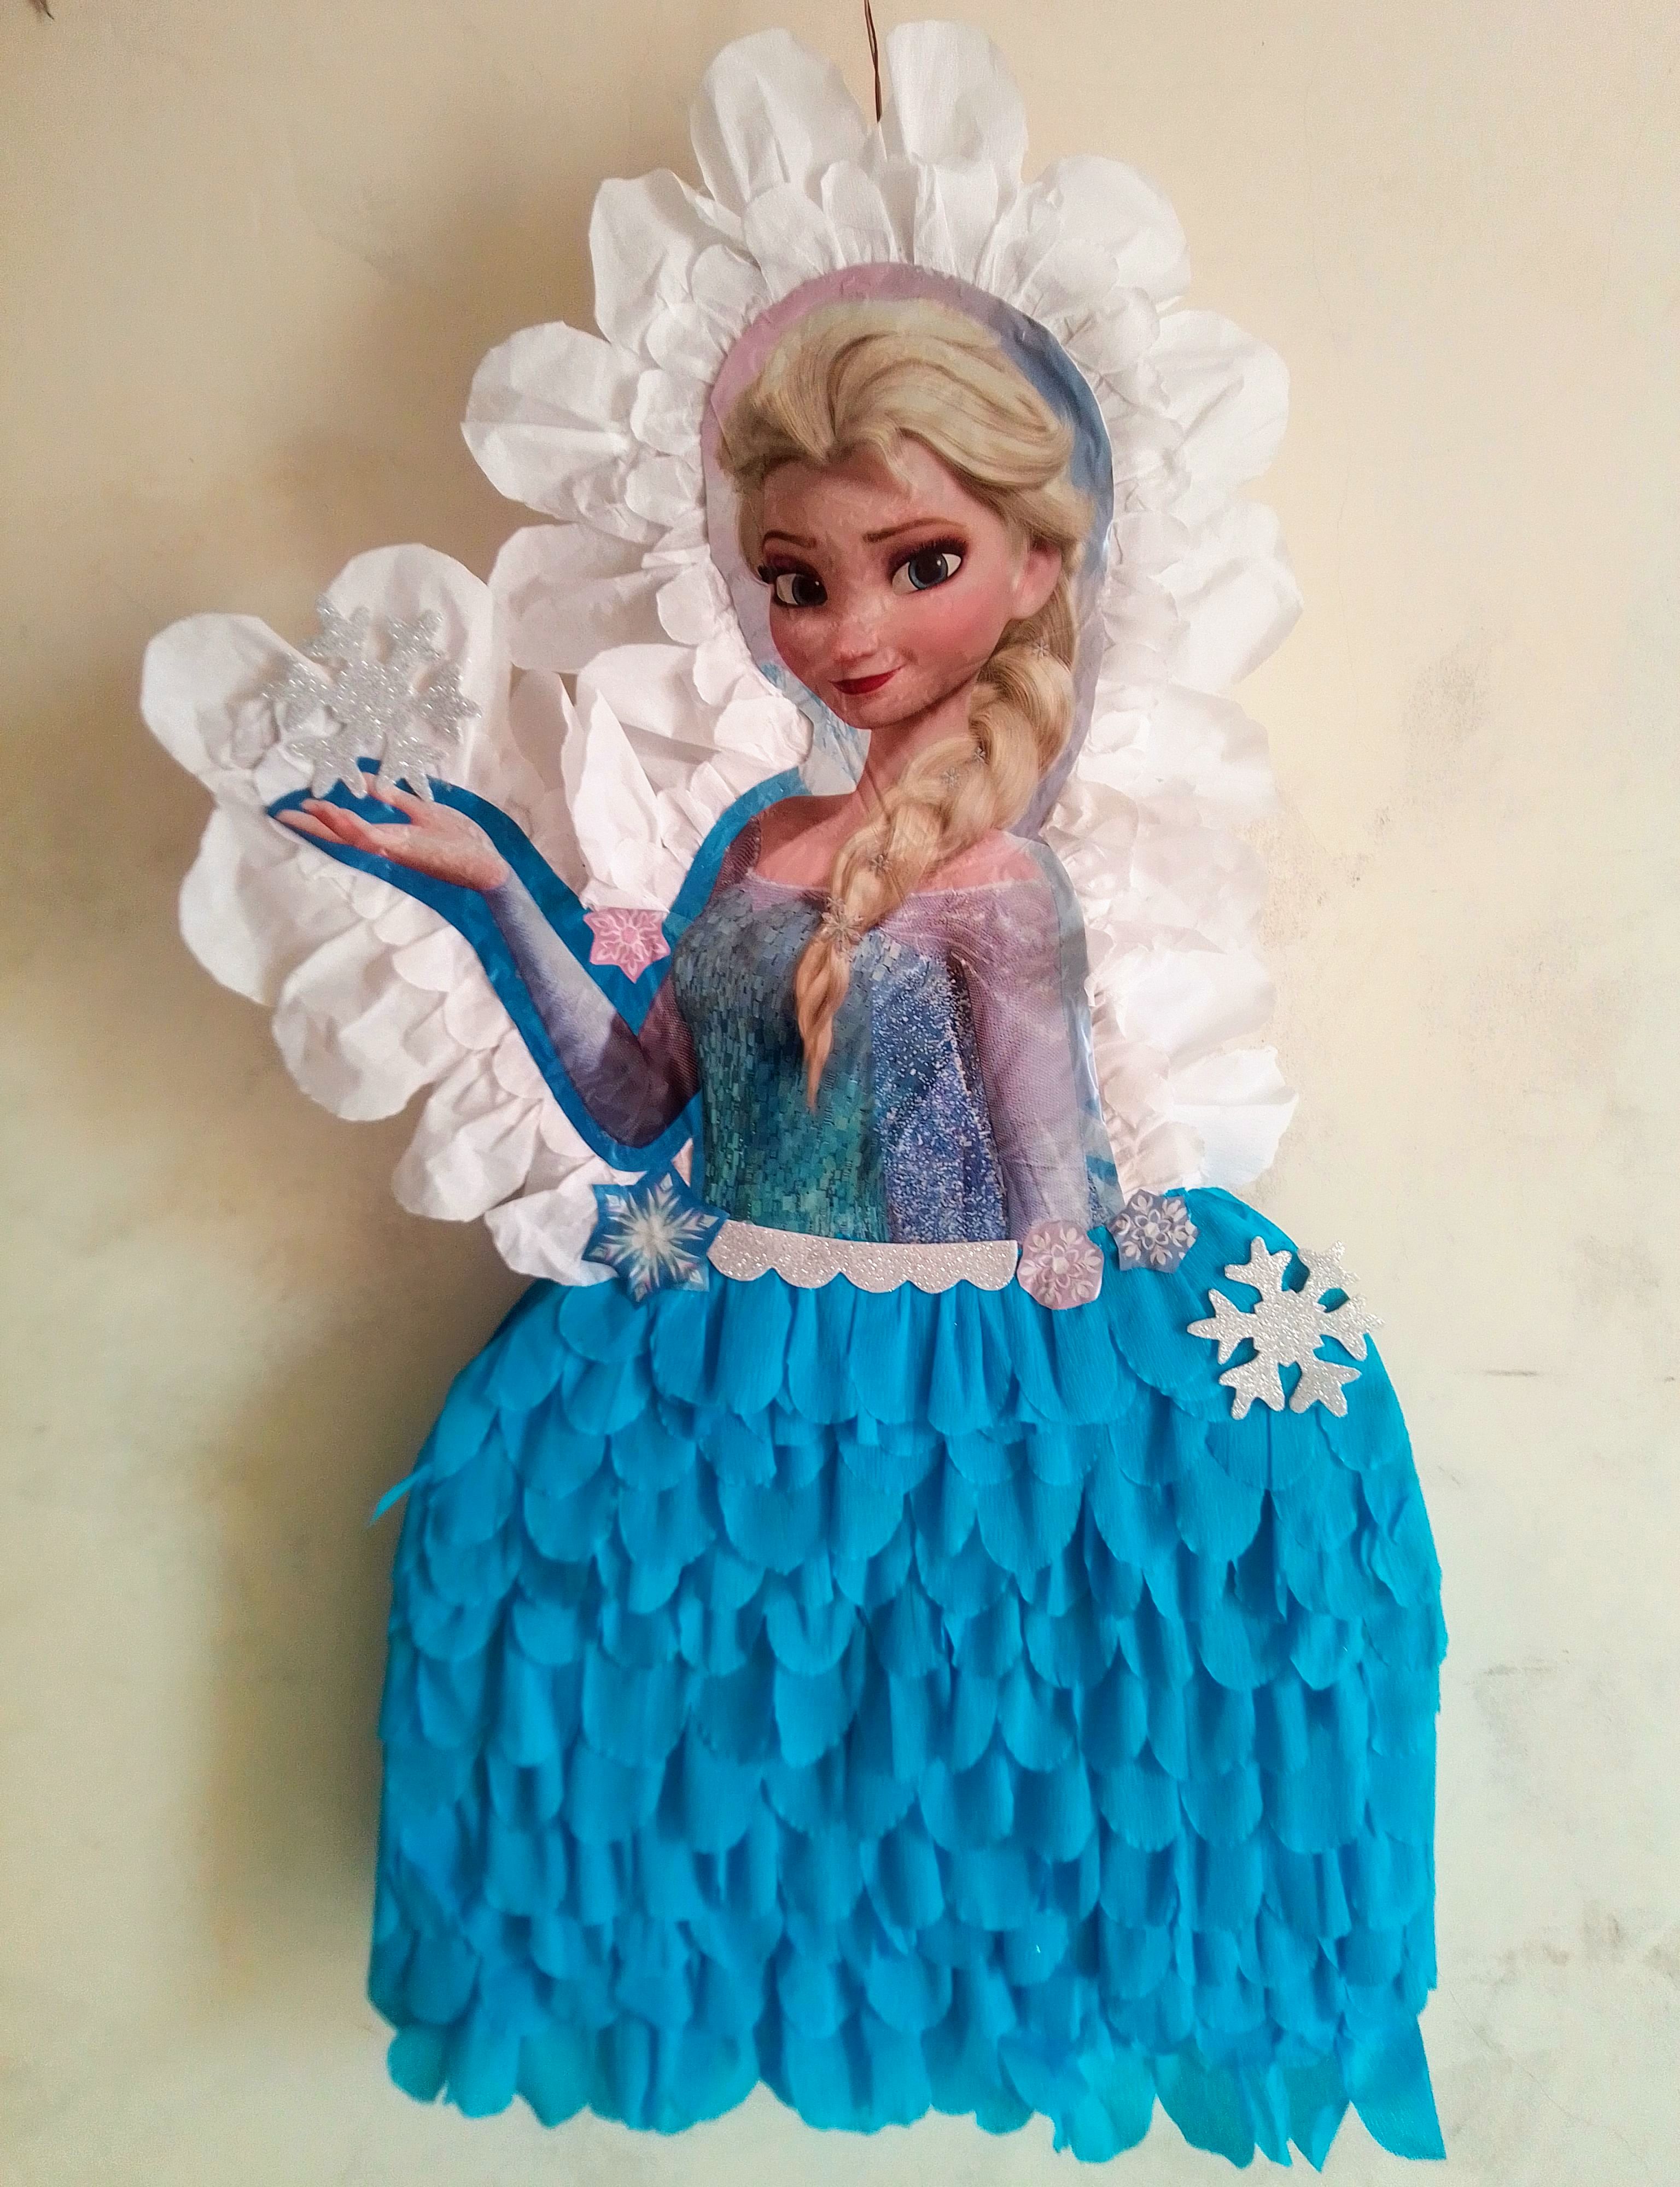
❄️Resultado!❄️
Está piñata la hice para mí linda sobrina quien cumplió muy feliz sus 5 añitos..Este arte sin duda requiere de esmero para cada detalle, imaginación para improvisar algún material faltante o que te salga algo mal, y mucha paciencia para tener un gran resultado. Admiro a las personas que se dedican trabajar este arte, que aun sabiendo que será un objeto rompible, lo hacen con tanta delicadeza.. Yo me encuentro feliz con el resultado, pero me encantaría seguir adelante aprendiendo y practicando.
I made this piñata for my beautiful niece who turned 5 years old very happily. This art undoubtedly requires care for every detail, imagination to improvise some missing material or something that goes wrong , and a lot of patience to have a great result. I admire the people who dedicate themselves to working on this art, who even knowing that it will be a breakable object, do it with such delicacy. I am happy with the result, but I would love to continue learning and practicing.
Me despido por hoy, enviándote y gran abrazo y feliz de haber tenido la oportunidad de compartir este tutorial con ustedes, que espero le sea de utilidad.. No olvides decirme que te pareció en los comentarios, hasta la próxima!!
I say goodbye for today, sending you a big hug and happy to have had the opportunity to share this tutorial with you, which I hope will be useful to you. Don't forget to tell me what you thought in the comments , until next time!!
that is a really nice pinata. Send our birthday regards from all of us at DIYHUB to your cute niece. ❤️ 🎂 🎈
Big persons! Thank you very much... I really appreciate your great support... I greatly appreciate your comment...! A hug and a lot of blessings!!
A beautiful pinata for a cute little princess.❤️ Wish her a happy birthday on my behalf 😊
So beautiful, thank you for your words of appreciation. It will be a pleasure!
Muy hermosa piñata amiga me encantó.
Gracias mi linda..! 🤗🤗
quedo hermosa, un trabajo excelente
beautiful, excellent work
Gracias amiga, aprecio que le guste..🤗
Que piñata tan bonita y grande!
Que hermosaaaa piñata ¡¡¡ amé como le pusiste el papel crepé al vestido ¡¡¡ Con este paso a paso me animo a realizar una piñata , nunca he hecho una y tu lo muestras fácil de entender en este tutorial ...