Feliz miércoles amigos creativos, que hoy sea un día donde te sobren las ganas de sonreír y ser feliz!!... Me entusiasma mucho la idea de que se acerca el cumpleaños de mi niña y seguramente tendré muchas creaciones que compartir con todos ustedes, pienso que tener conocimientos sobre manualidades y artesanía es una gran ventaja debido a que me permite poder elaborarle su decoración.
Happy Wednesday creative friends, may today be a day where you have the desire to smile and be happy!!... I am very excited about the idea that my daughter's birthday is coming up and surely I will have many creations to share with all of you, I think that having knowledge about arts and crafts is a great advantage because it allows me to create your decoration.
Este año el personaje escogido por mi pequeña es la protagonista de la serie animada “El mundo de luna”, una linda chica aventurera y curiosa, llena de mucha energía y entusiasmo que busca aprender más sobre muchas cosas... A mi hija le encanta este personaje, y sus canciones, son una constante melodía en casa; sinceramente me parece una gran elección de su parte, Luna despierta mucha pasión e instinto de observación sobre el mundo que los rodea, por este motivo su festejo número 4 se basará en este vivaz y extrovertido personaje. Aunque tengo muchas cosas en mente, cosas por hacer, comenzaré por mostrarles como hacer una bonita piñata con este motivo, es una manera muy práctica y sencilla que podría ahorrarte mucho dinero en caso que necesites de una. Acompáñame hasta el final de cada paso.
This year the character chosen by my little girl is the protagonist of the animated series “El mundo de luna”, a cute adventurous and curious girl, full of energy and enthusiasm who seeks to learn more about many things... My daughter loves this character, and her songs are a constant melody at home; Honestly, it seems to me a great choice on their part, Luna arouses a lot of passion and an instinct for observation about the world that surrounds them, for this reason their 4th celebration will be based on this lively and outgoing character. Although I have many things in mind, things to do, I will start by showing you how to make a beautiful piñata with this motif, it is a very practical and simple way that could save you a lot of money in case you need one. Accompany me until the end of each step.
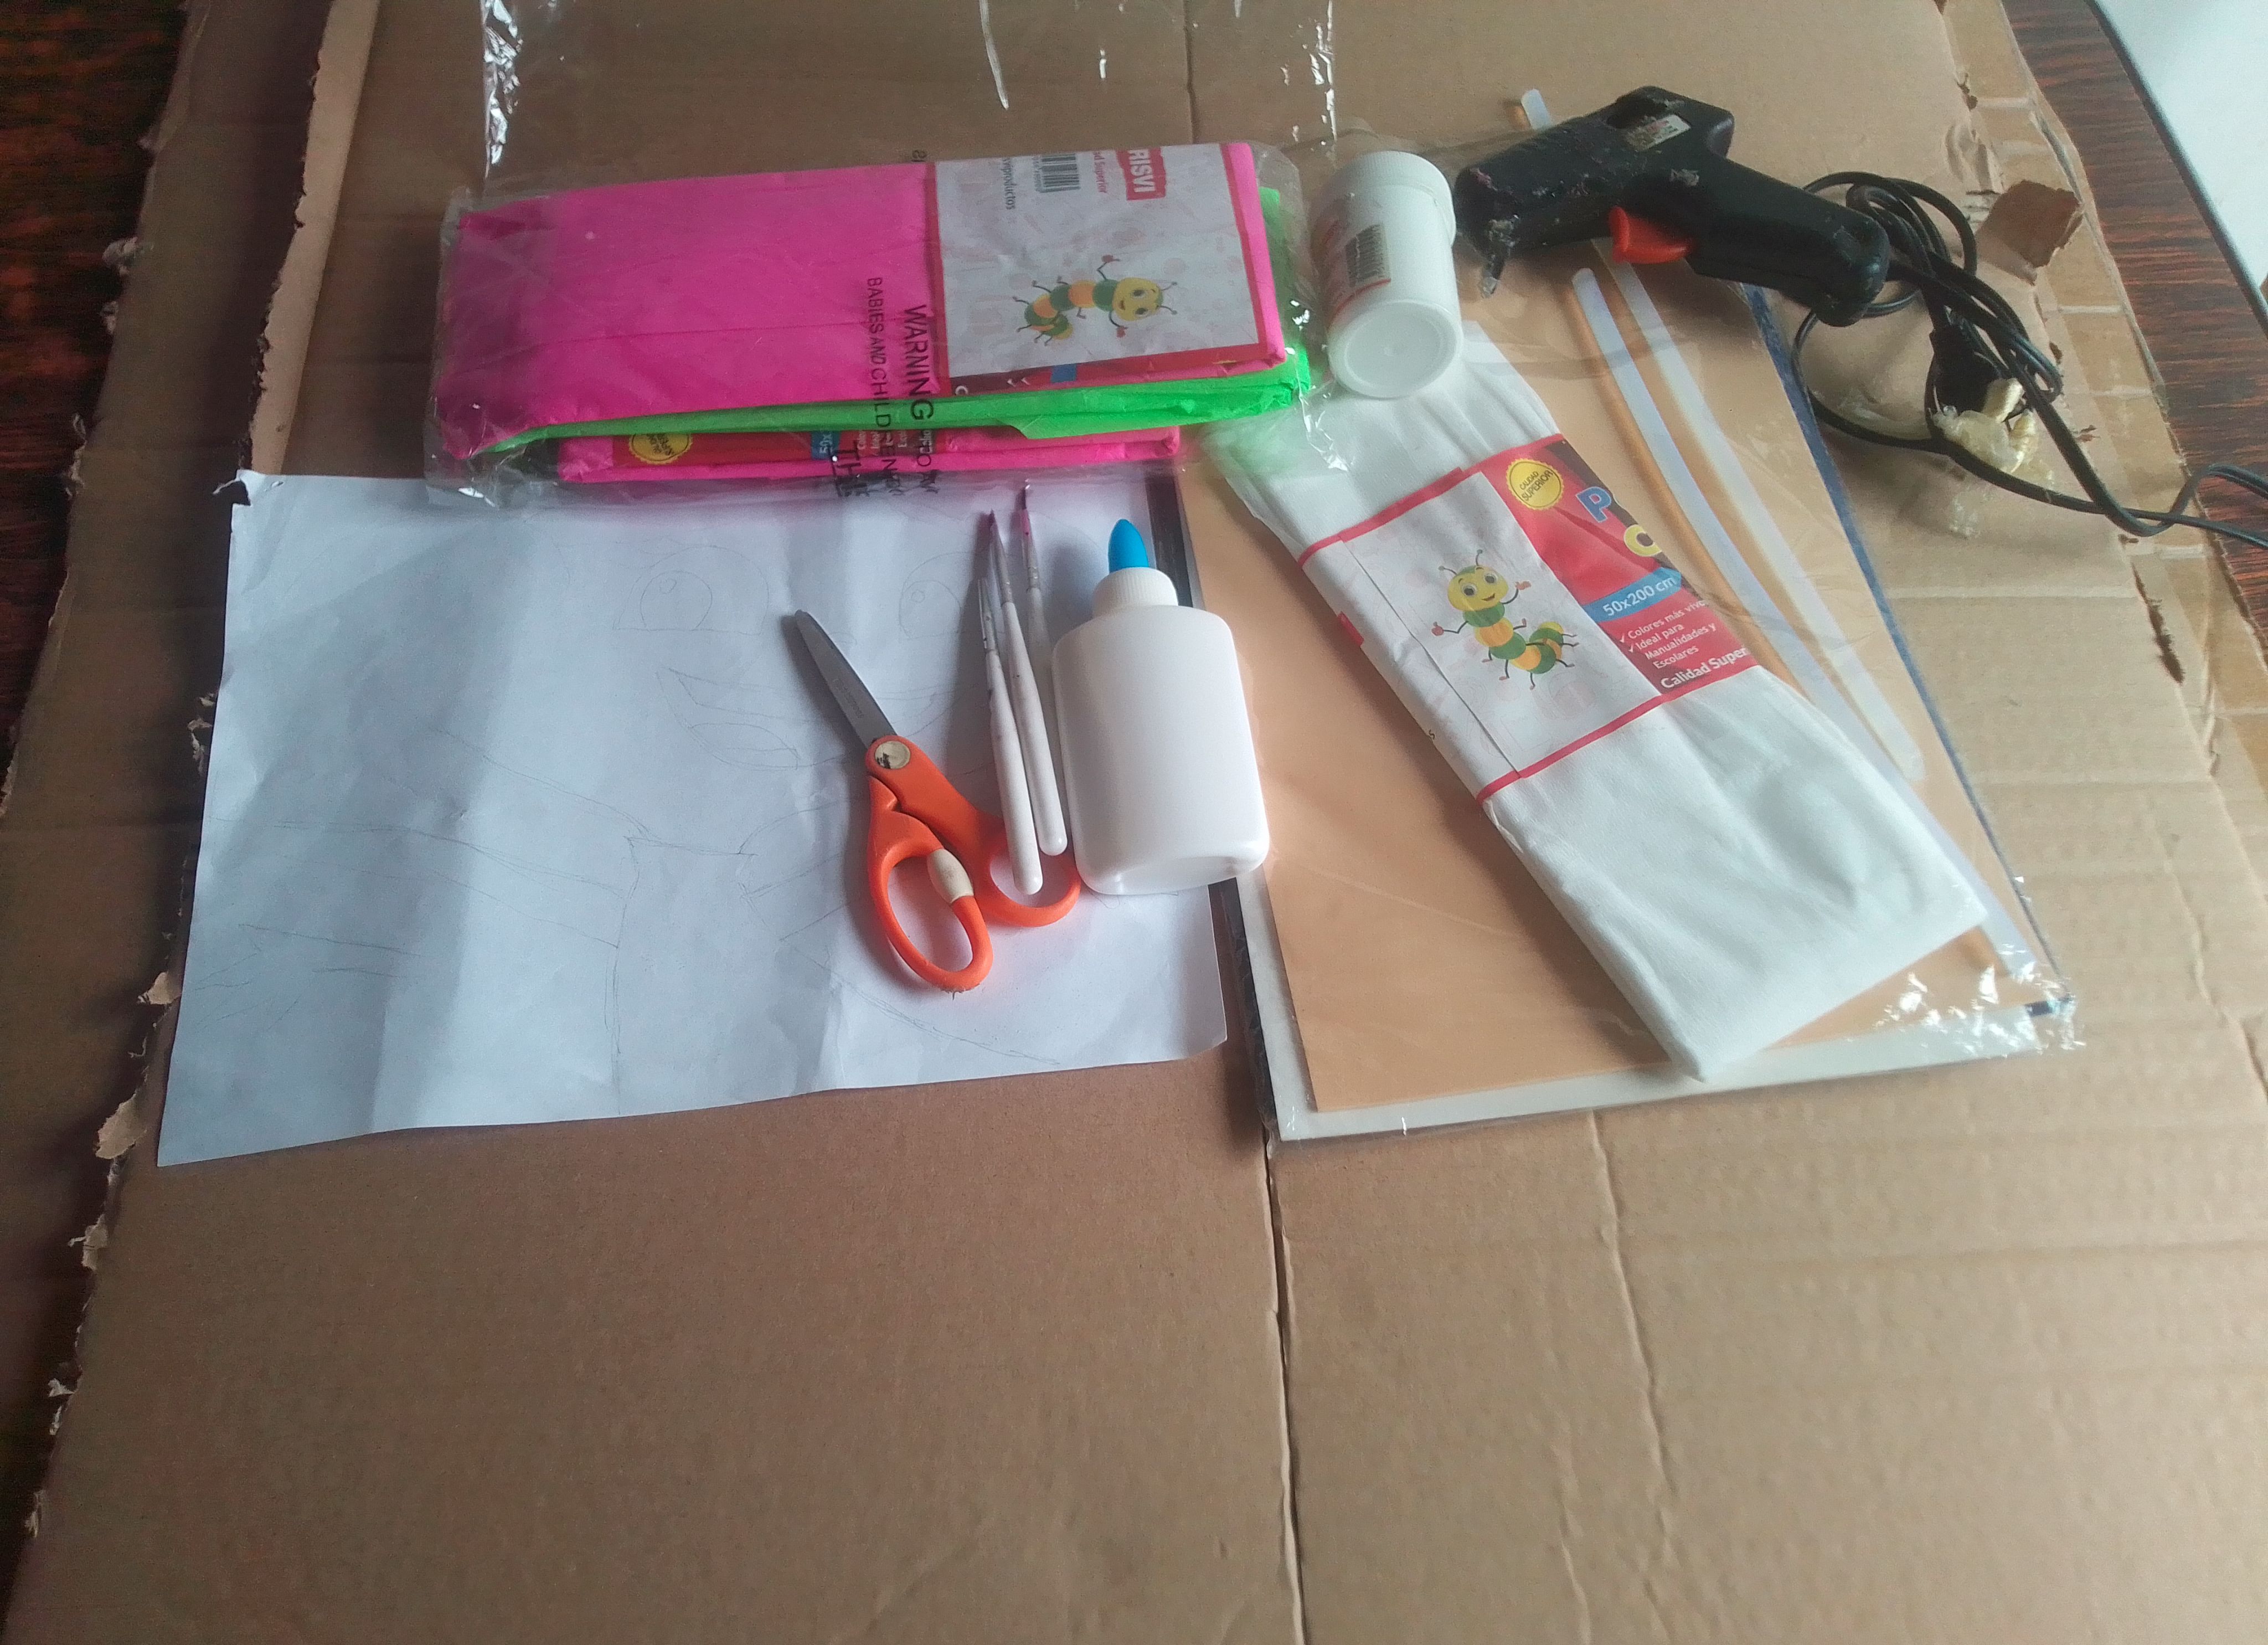
Materiales que necesitas:
- Cajas de cartón.
- Papel crepé ( verde, blanco y fucsia)
- Pegamento blanco.
- Silicón.
- Faomi color azul, negro, carne, rojo y amarillo.
- Pinturas.
- Pinceles.
- Tijeras.
- Boceto del personaje.
- Hojas de reciclaje o cinta adhesiva.
Materials you need:
- Cardboard boxes.
- Crepe paper (green, white and fuchsia)
- White glue.
- Silicone.
- Faomi color blue, black, flesh, red and yellow.
- Paintings.
- Brushes.
- Scissors.
- Sketch of the character.
- Recycling sheets or masking tape.
(PROCEDIMIENTO)
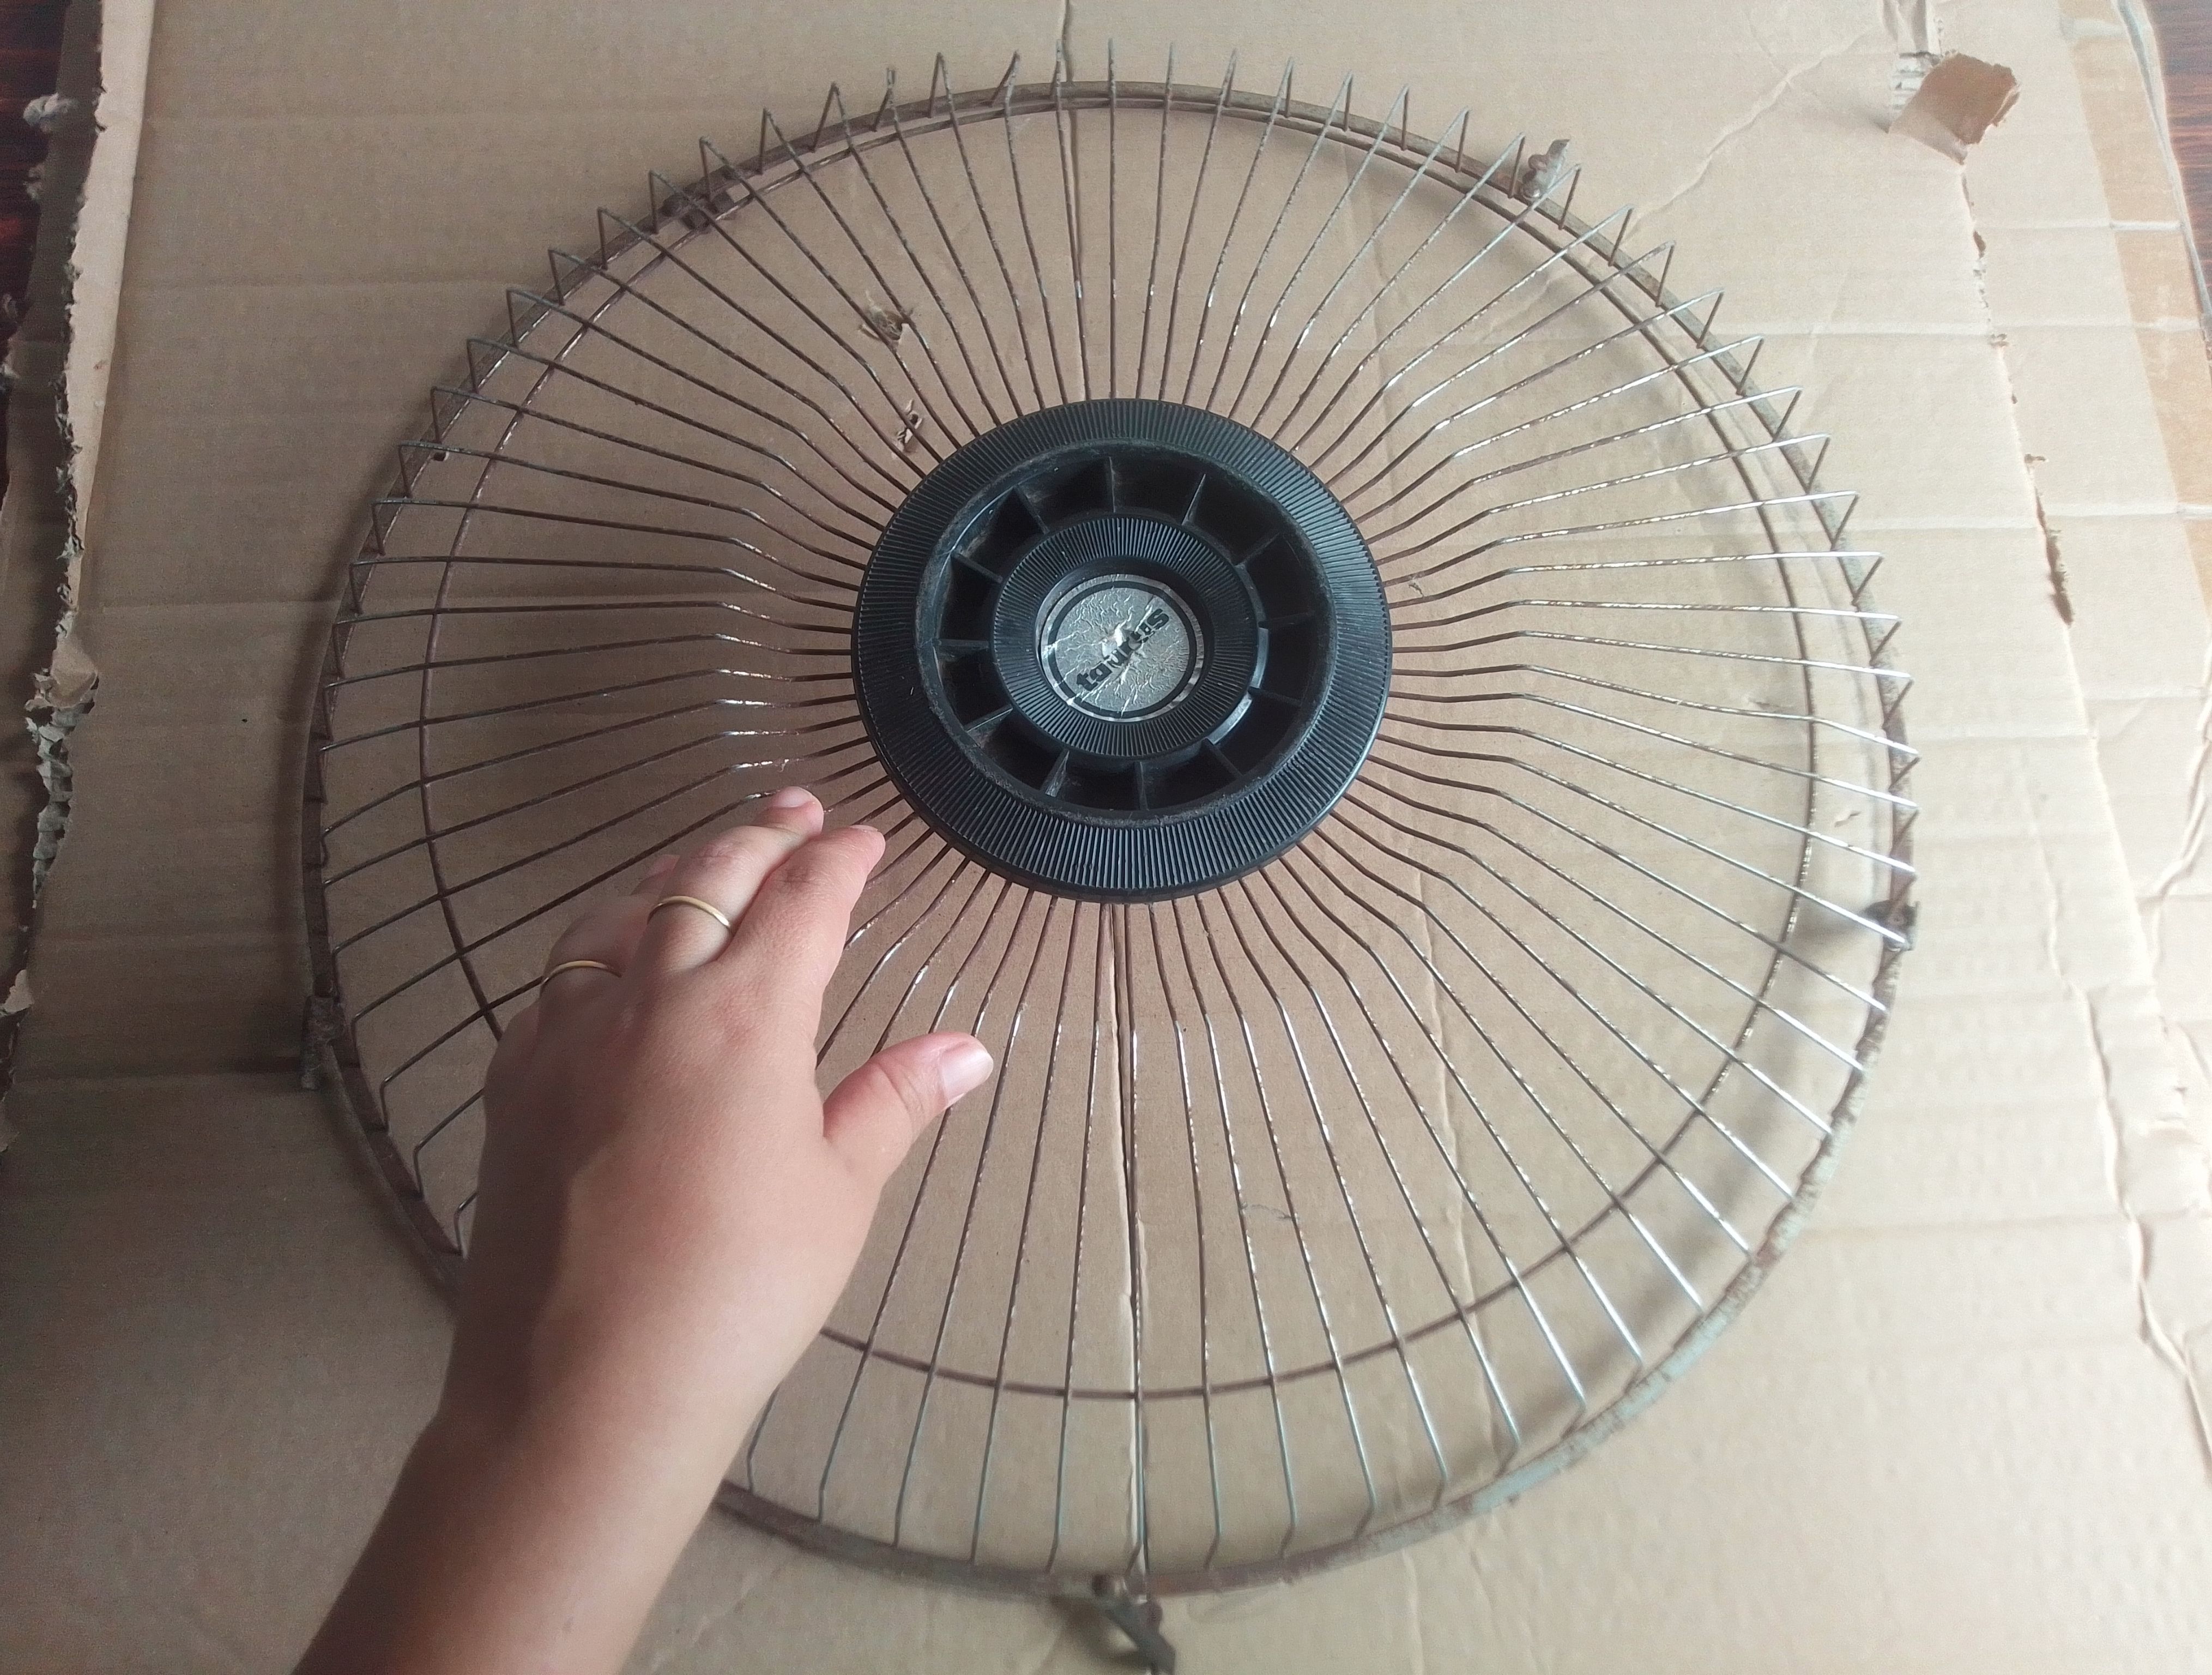
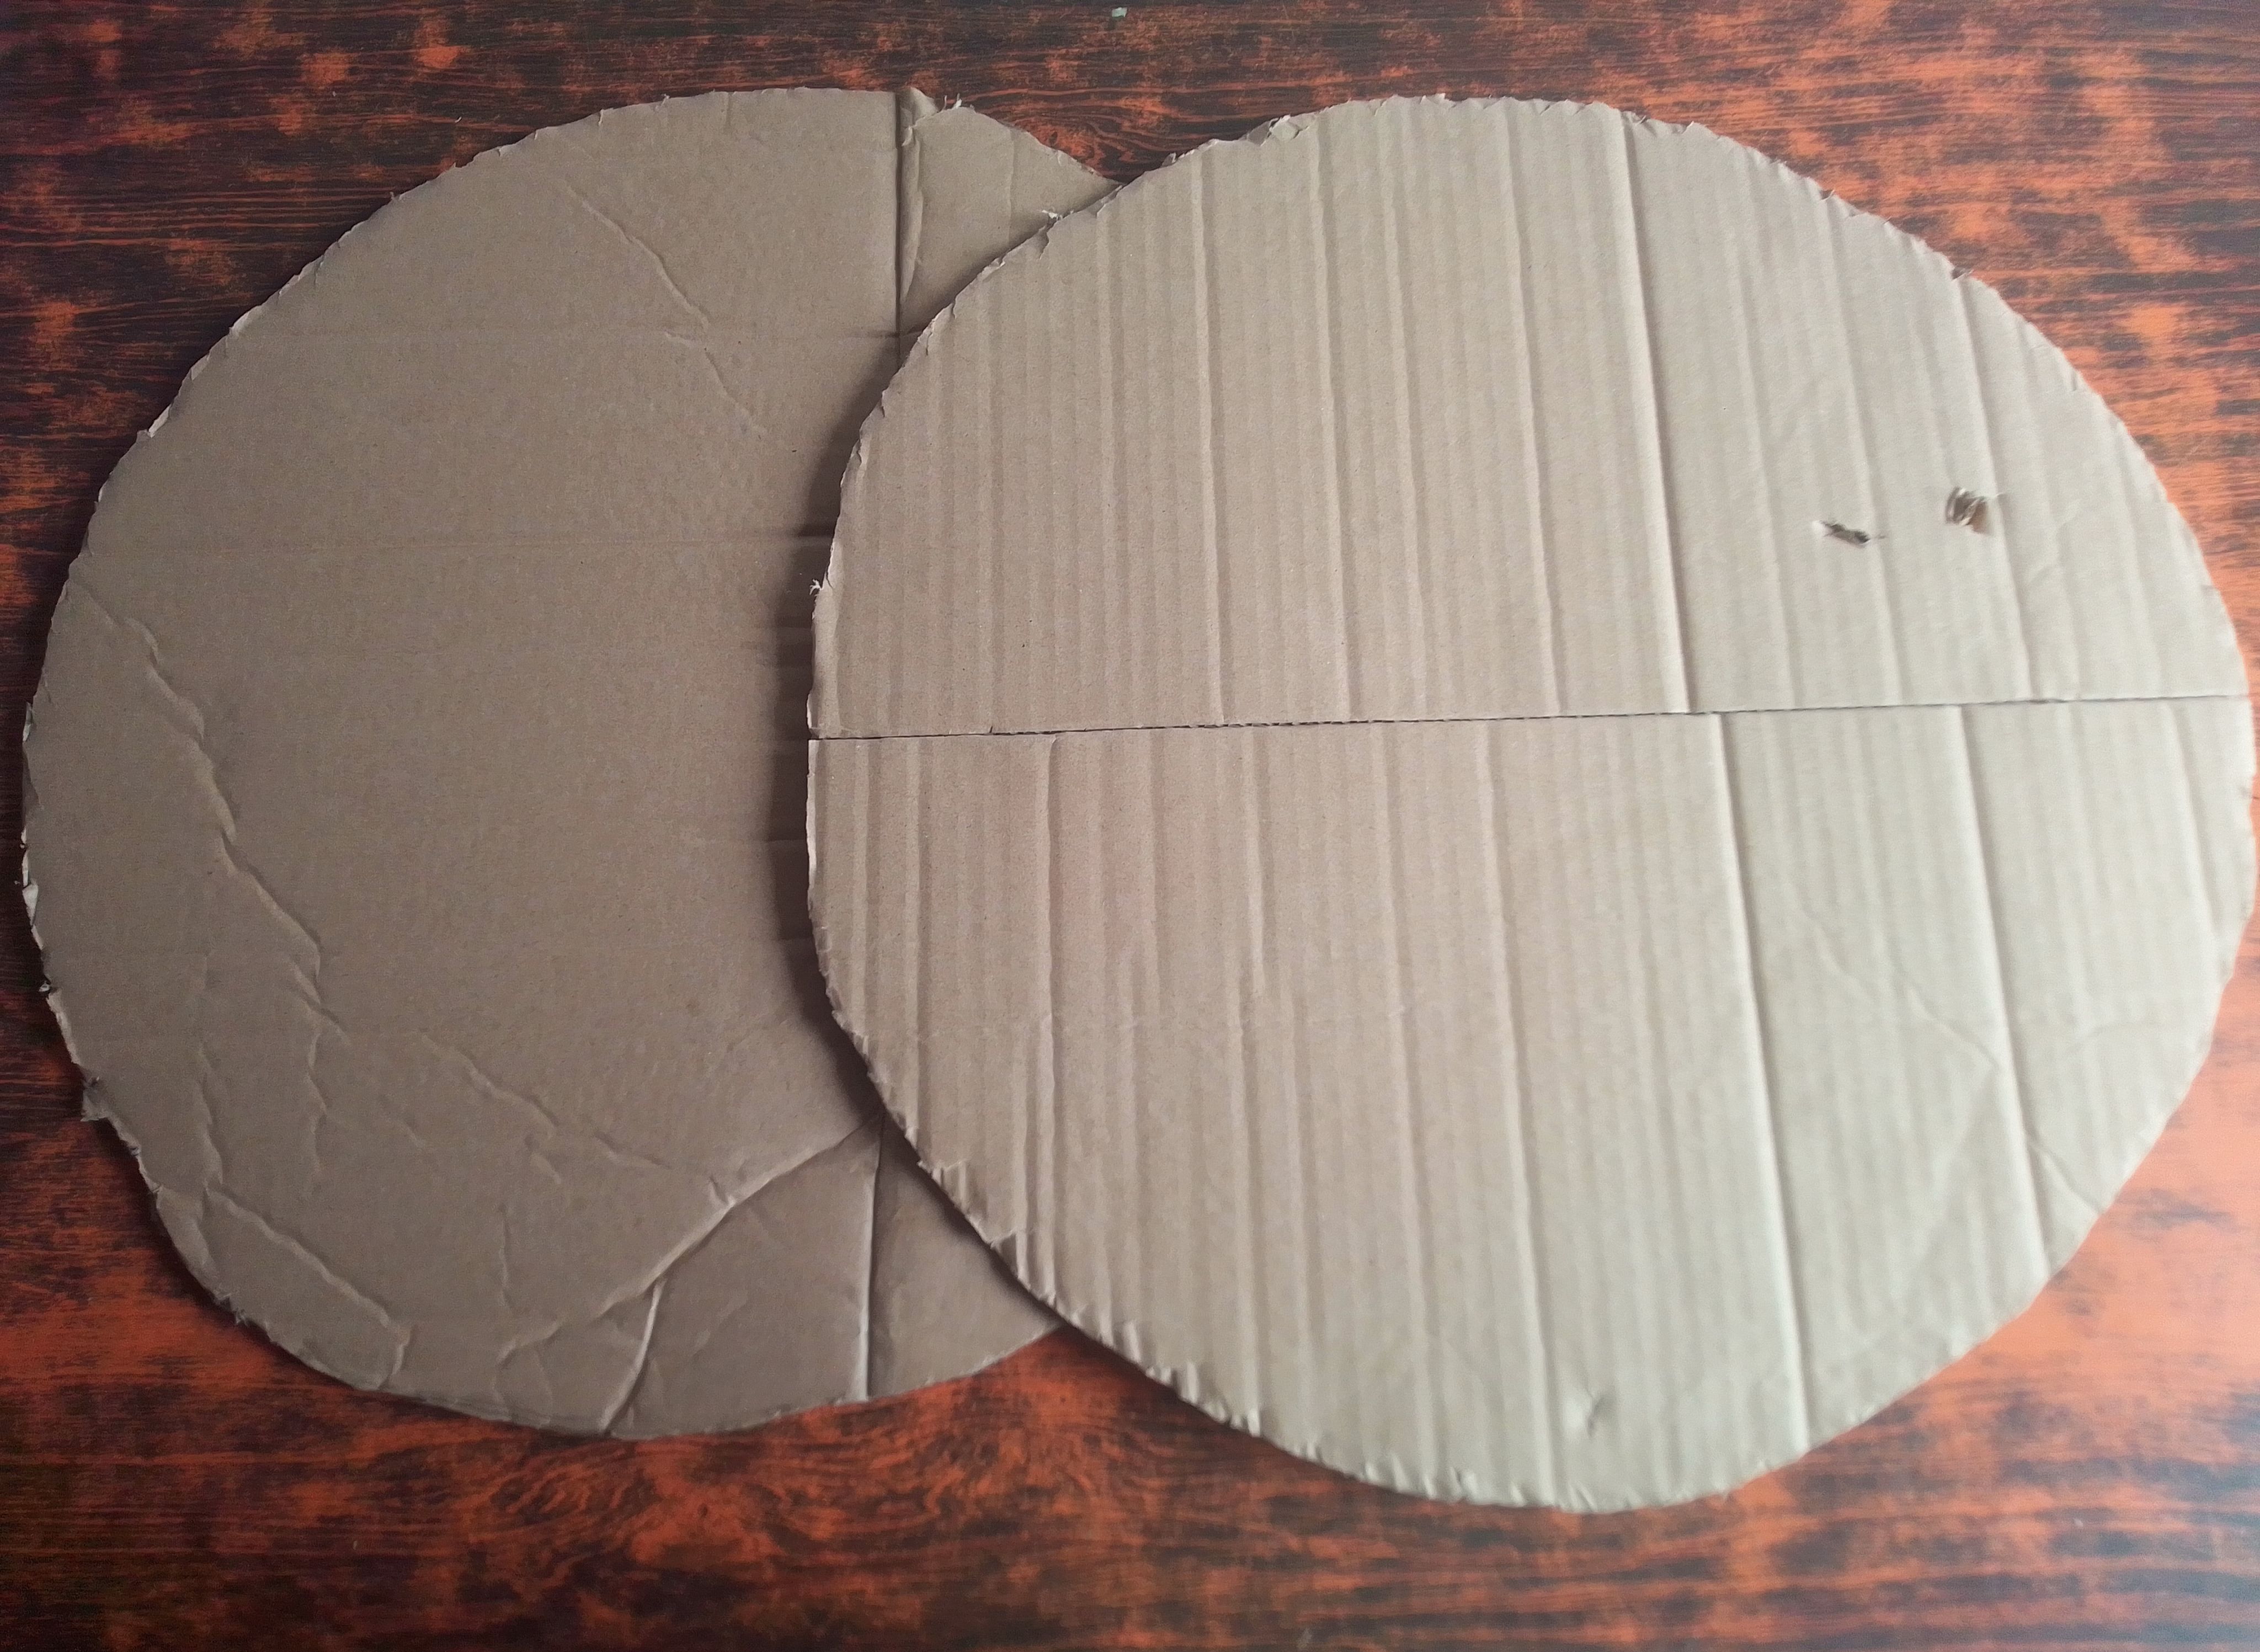
Paso 01
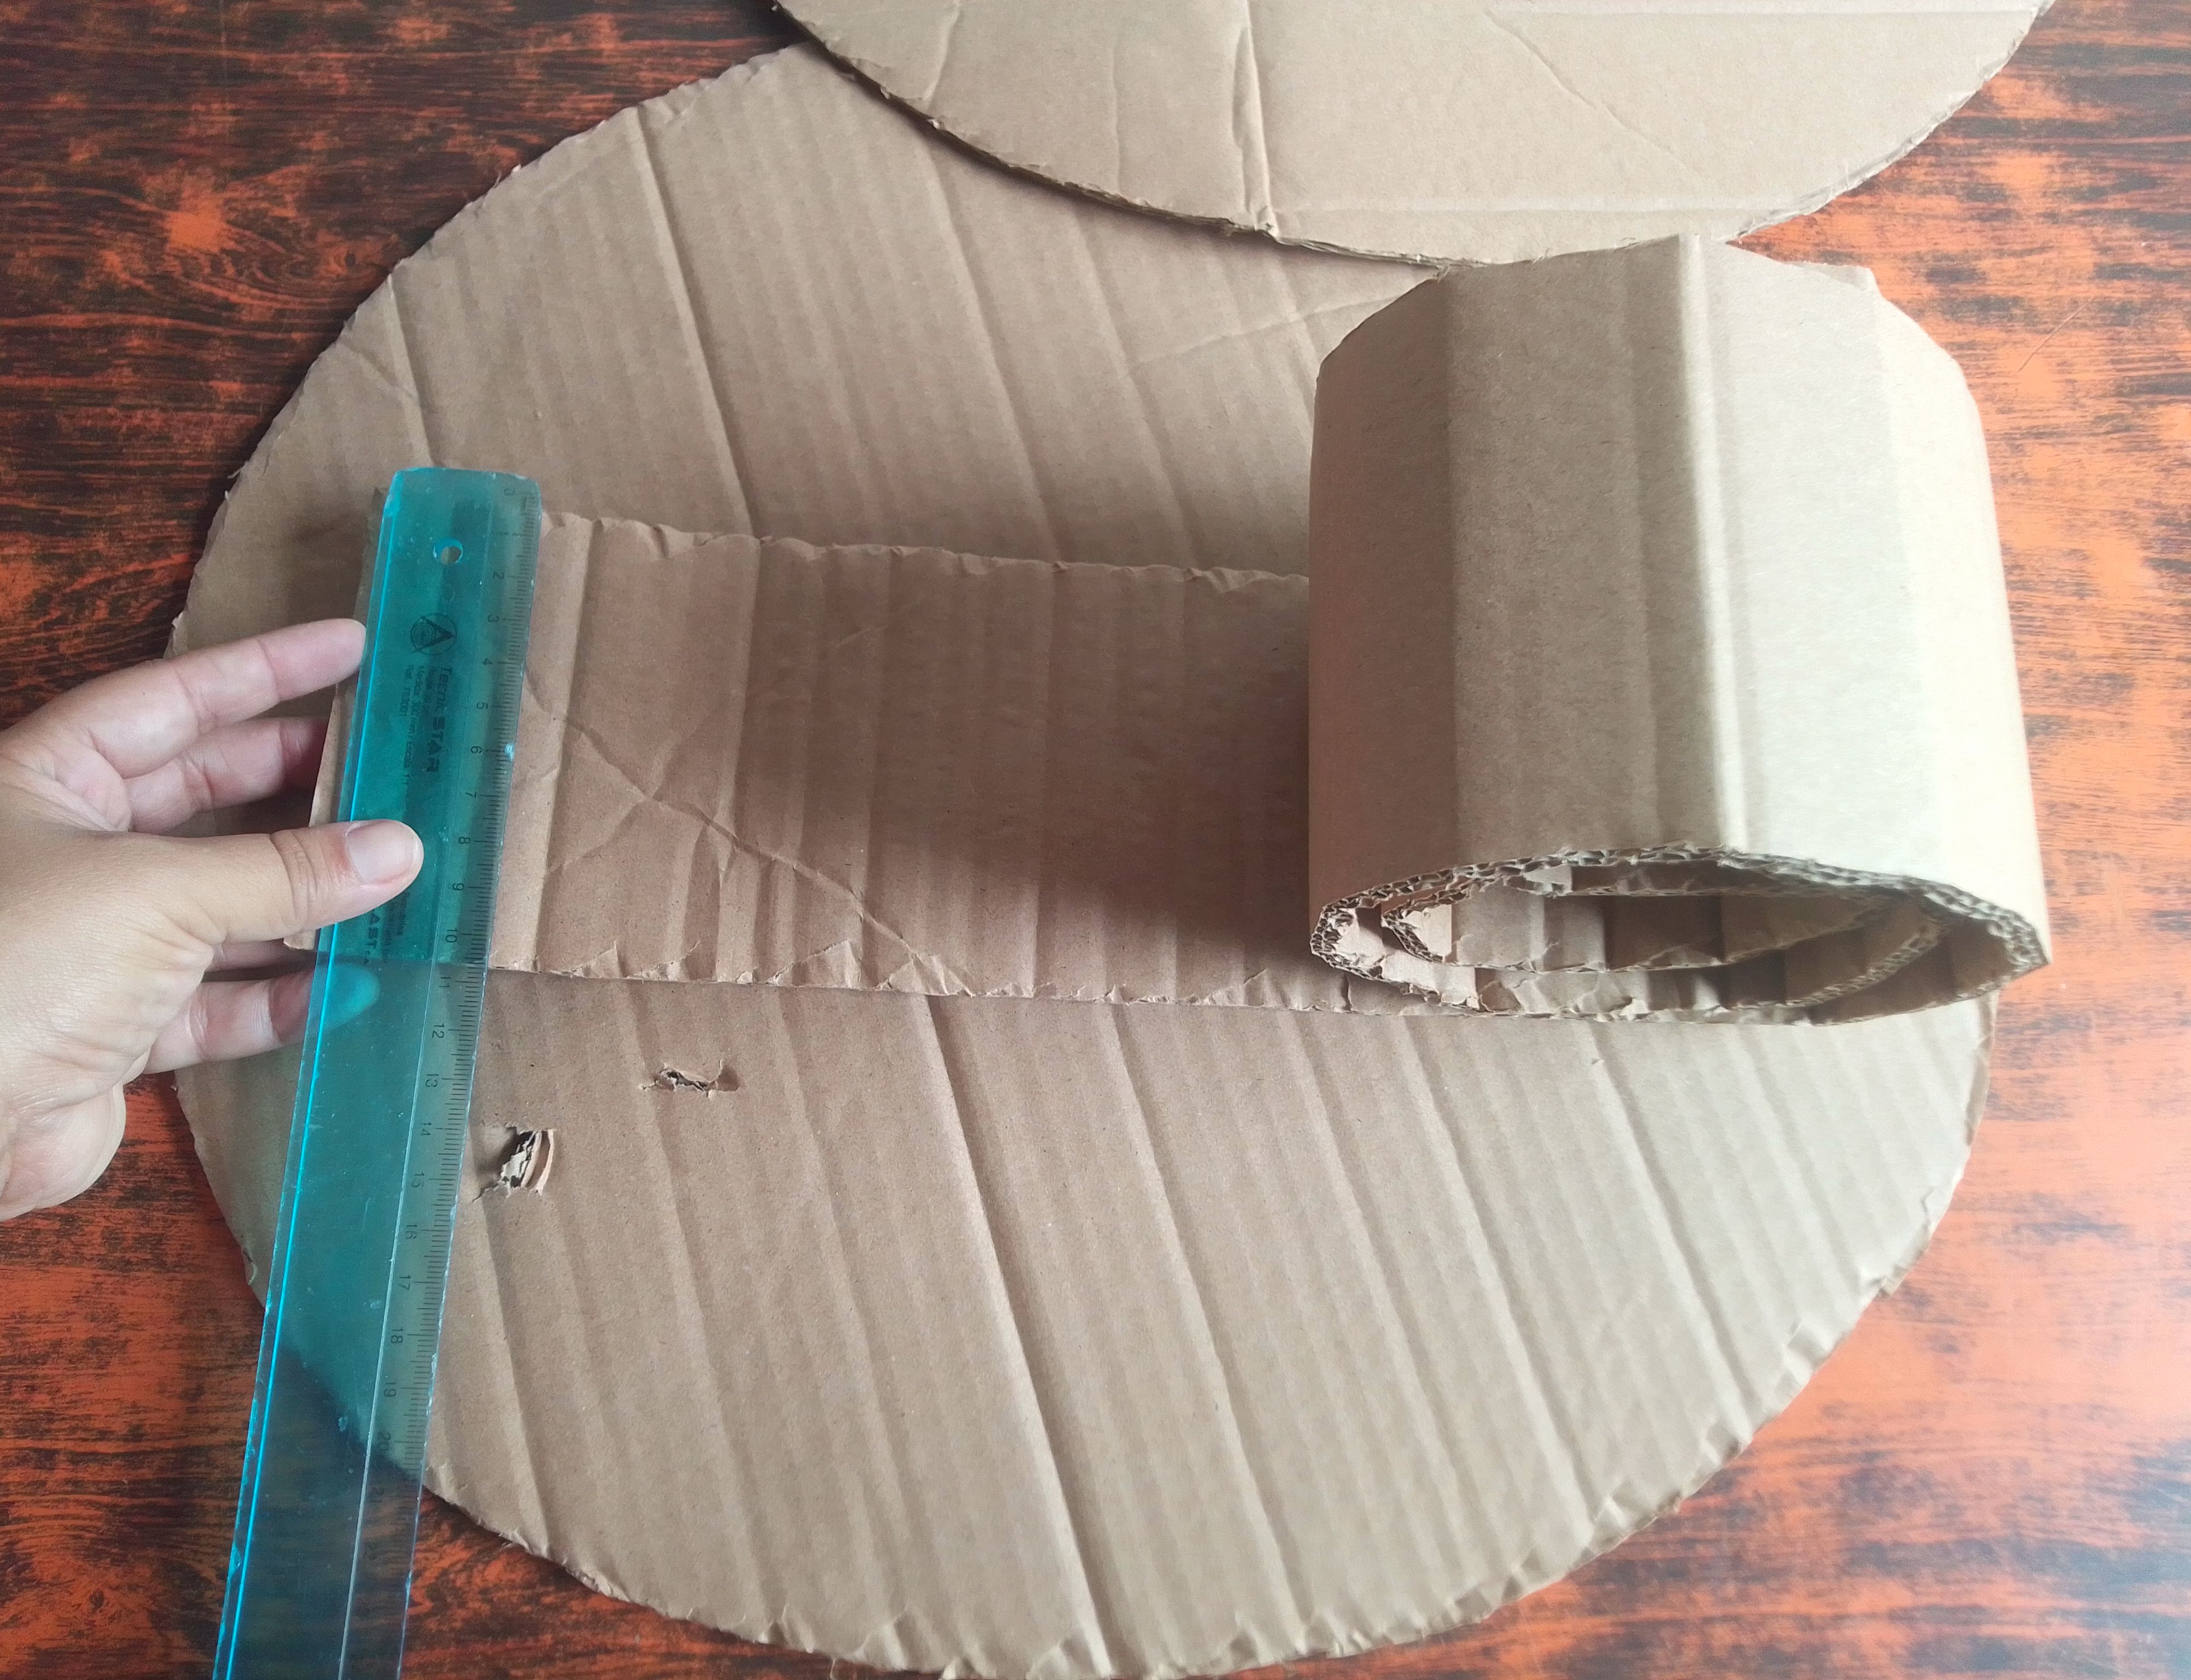
Comienzo la elaboración de este proyecto estirando las cajas de cartón sobre mi lugar de trabajo, ubico una pieza circular dependiendo el tamaño que deseemos que tenga la piñata; me gusta mucho improvisar por lo que mi molde fue una tapa de ventilador 🤭.. La coloco sobre la parte más grande del cartón y marco dos círculos, luego con tijeras cortamos toda la forma. También corto una tira larga de 8cm de ancho por las medidas de la circunferencia, prácticamente solo estás serán las partes fundamentales de la base de la piñata.
Step 01
I begin the elaboration of this project by stretching the cardboard boxes over my workplace, I place a circular piece depending on the size that we want the piñata to have; I really like to improvise so my mold was a fan cover 🤭.. I place it on the largest part of the cardboard and mark two circles, then with scissors we cut the whole shape. I also cut a long strip 8cm wide by the measurements of the circumference, practically only these will be the fundamental parts of the base of the piñata.
Paso 02
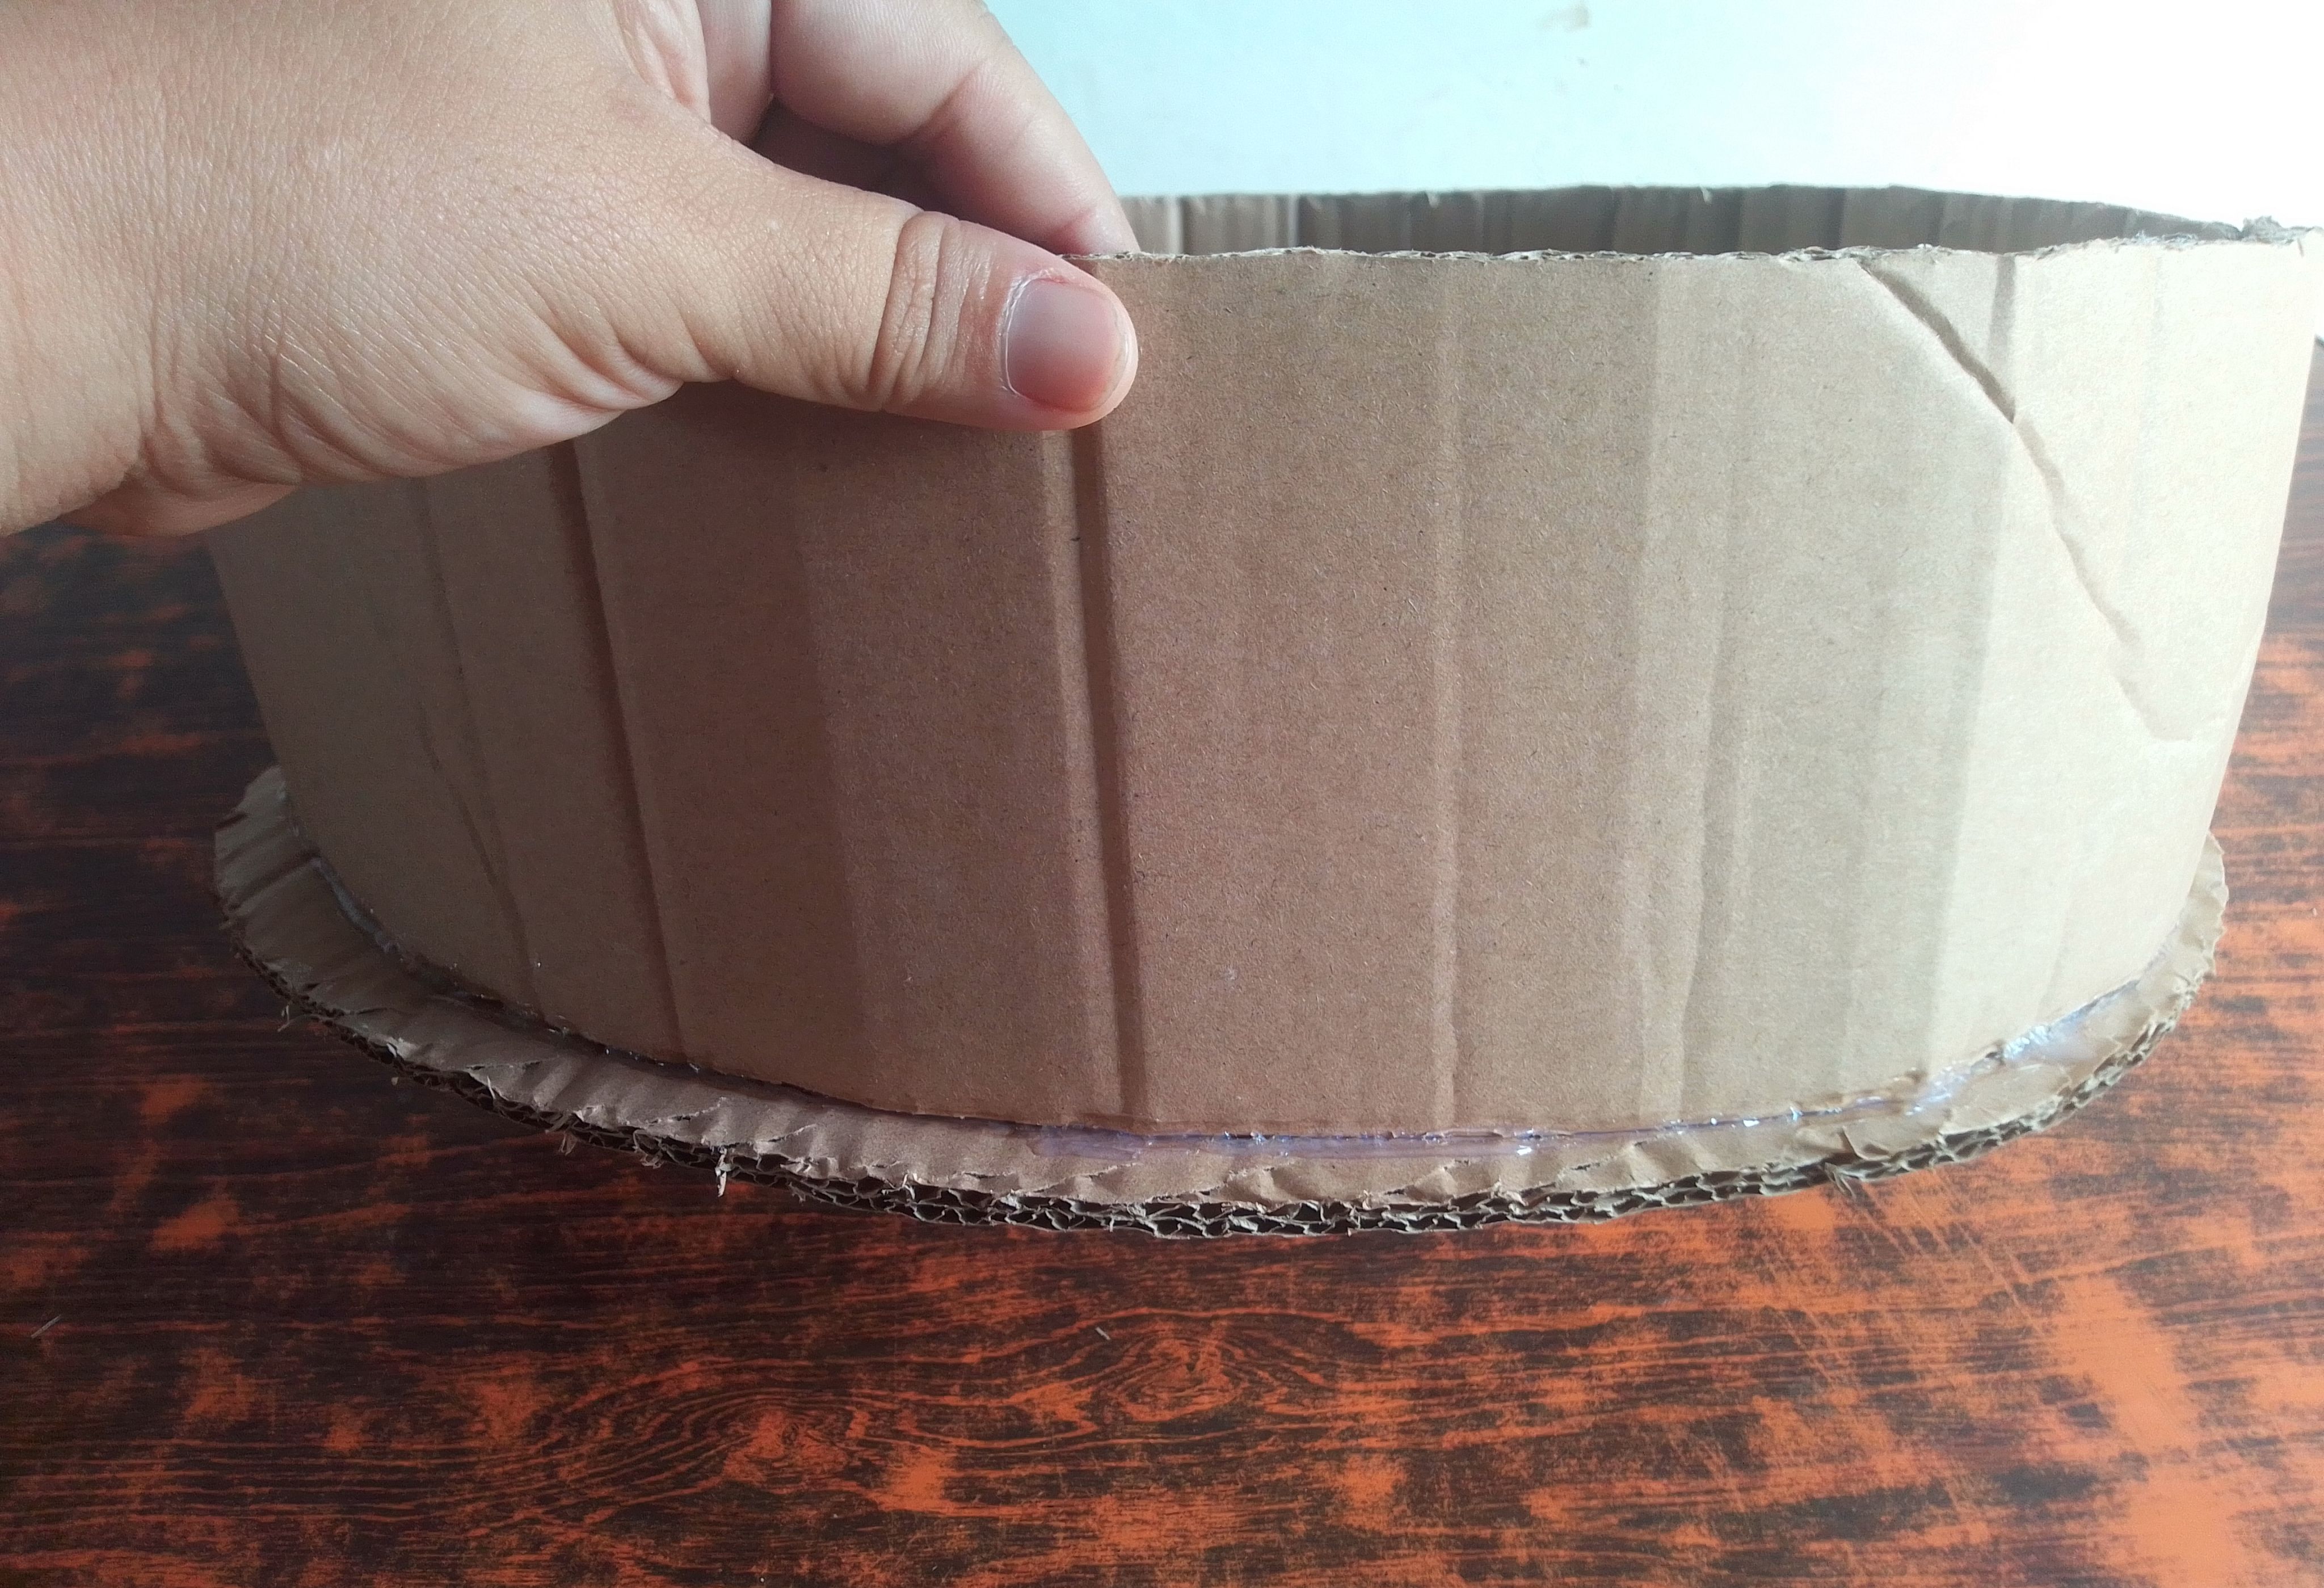
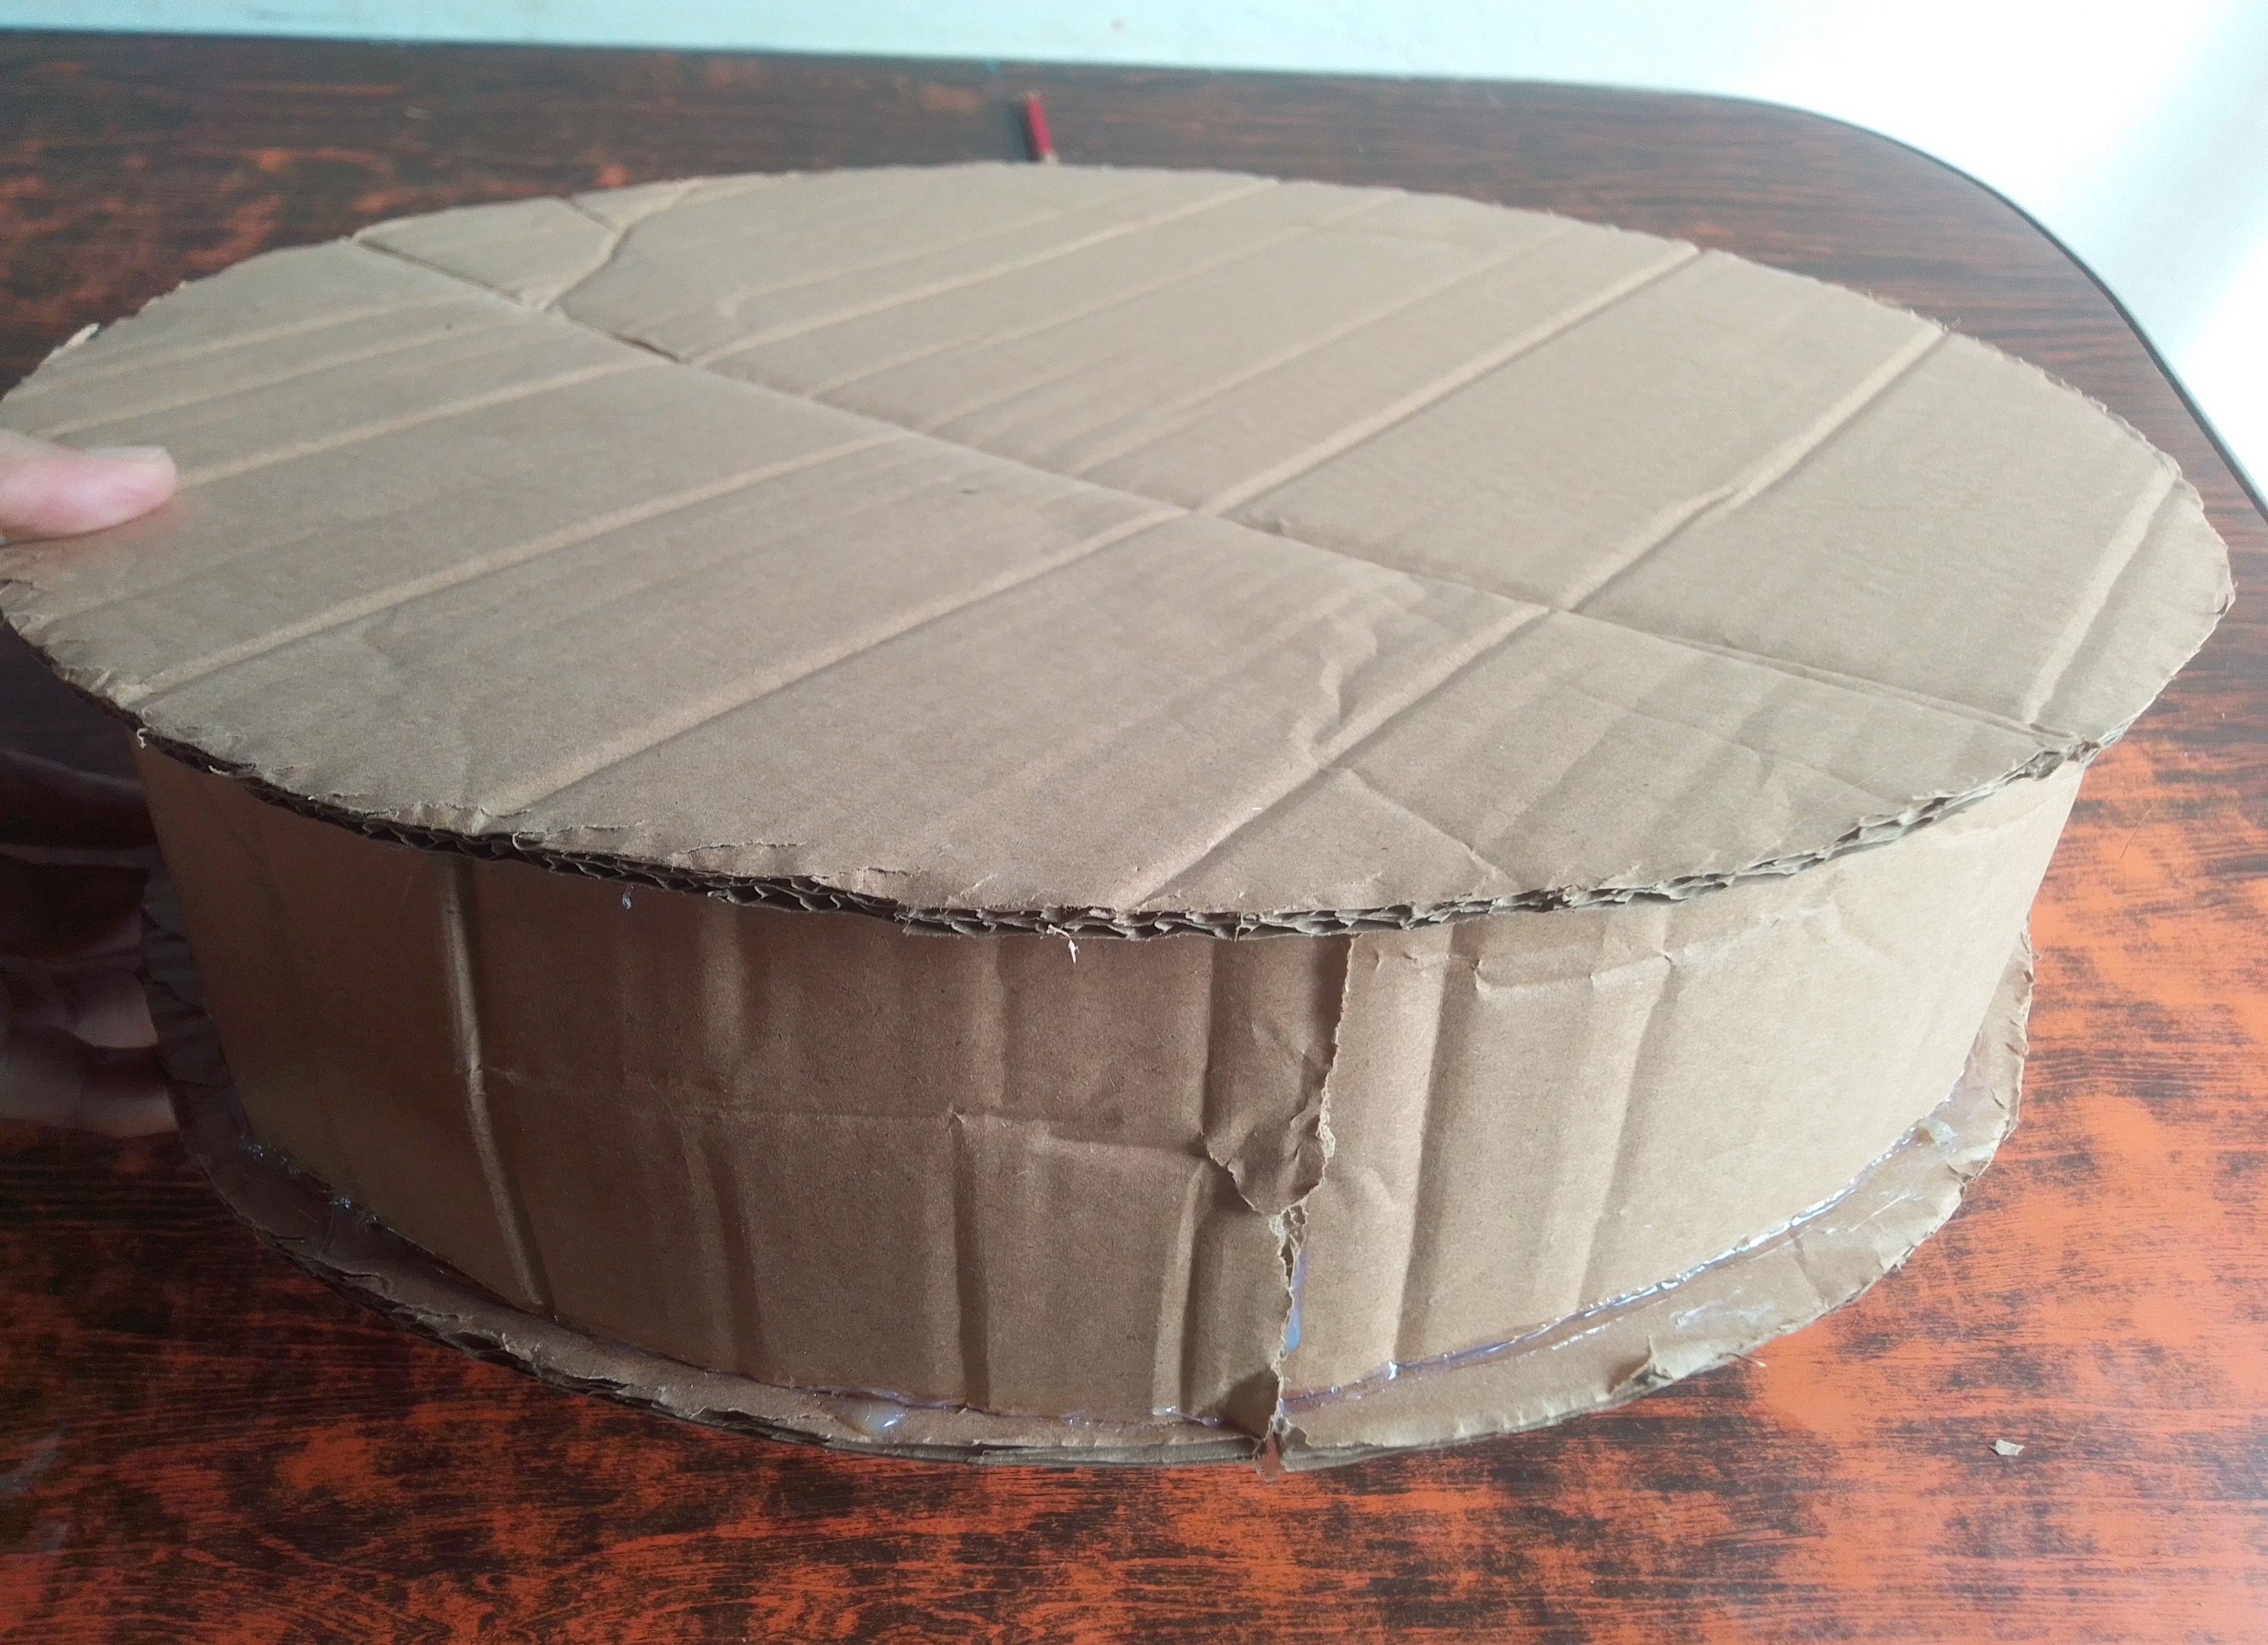
Pasamos a pegar con silicón caliente la tira en el contorno del primer círculo y así se nos hará más sencillo pegar el otro círculo encima, pondremos suficiente pegamento para que sea muy resistente.
Step 02
We will glue the strip around the outline of the first circle with hot silicone and this will make it easier for us to glue the other circle on top, we will put enough glue to make it very resistant.
Paso 03
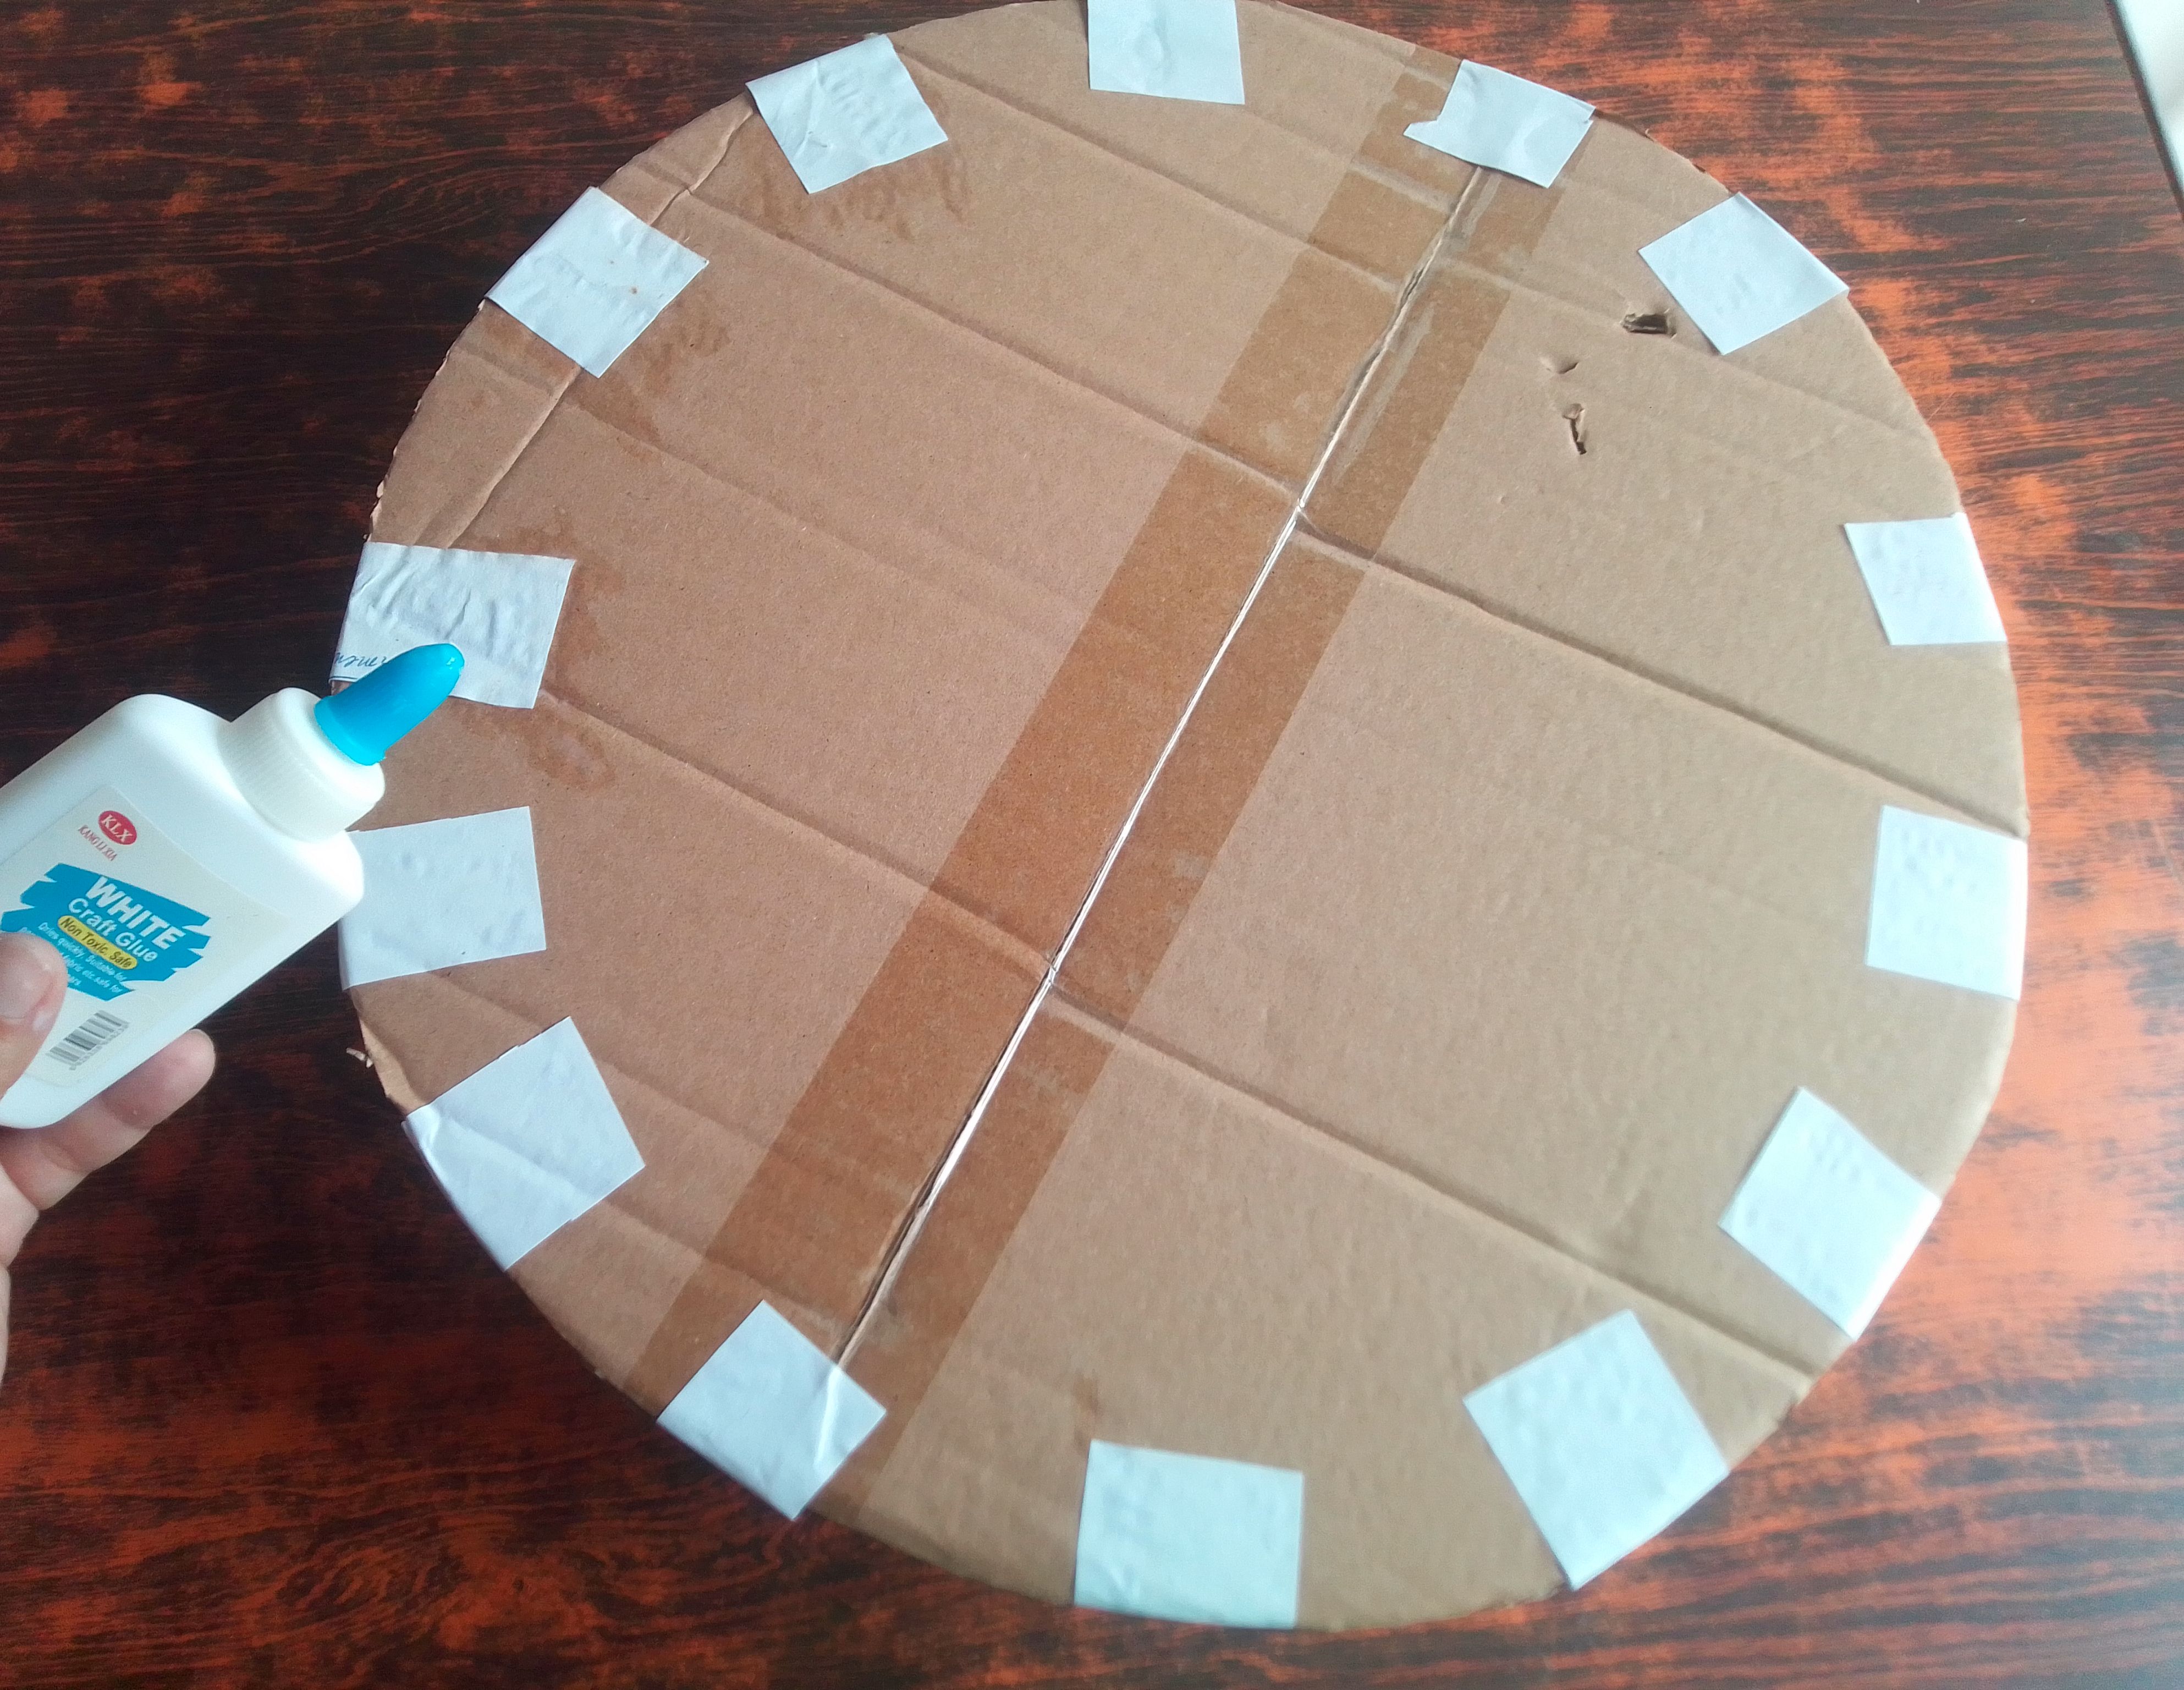
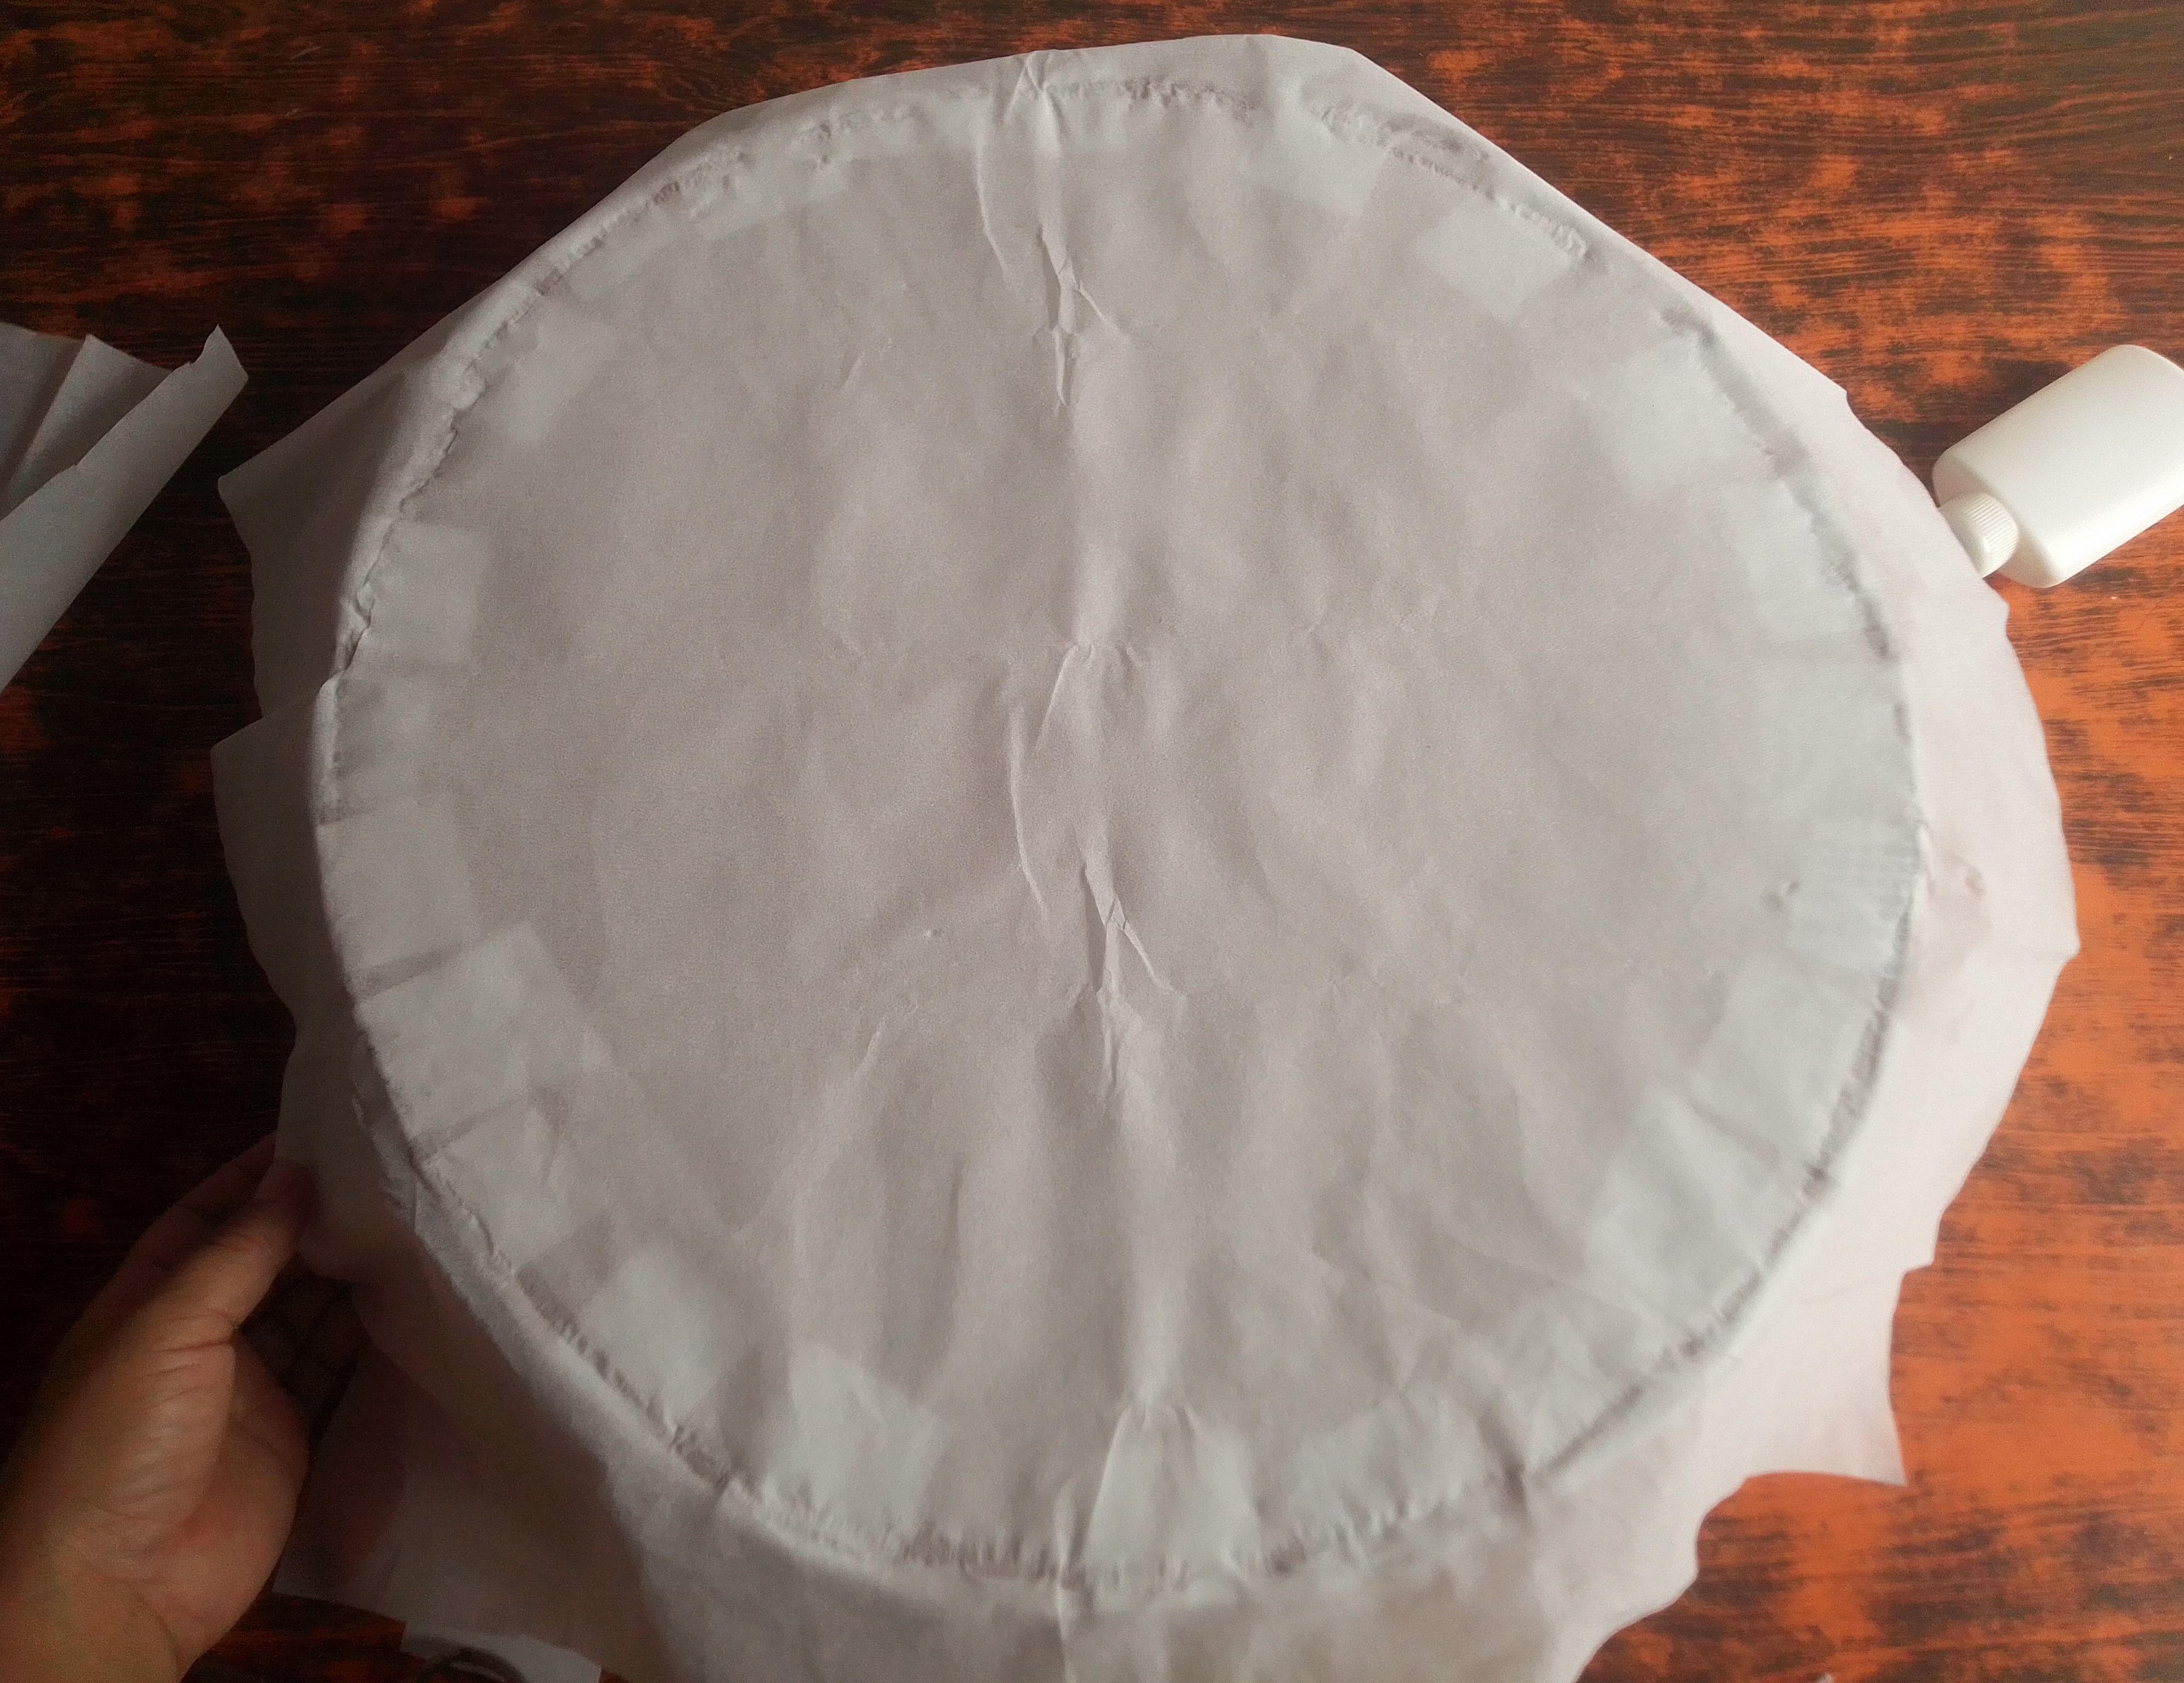
Para asegurarnos de que esta piñada quedé muy fuerte, colocamos cinta adhesiva en los bordes para reforzarla, en mi caso no tenía y corte tiras de papel y las pegué pegamento blanco.. Una vez este seca la pega, comienzo a cubrir toda la piñata con papel crepé color blanco.
Step 03
To make sure that this piñada was very strong, we put adhesive tape on the edges to reinforce it, in my case I didn't have one and I cut strips of paper and glued them with white glue. Once it's dry The glue, I begin to cover the entire piñata with white crepe paper.
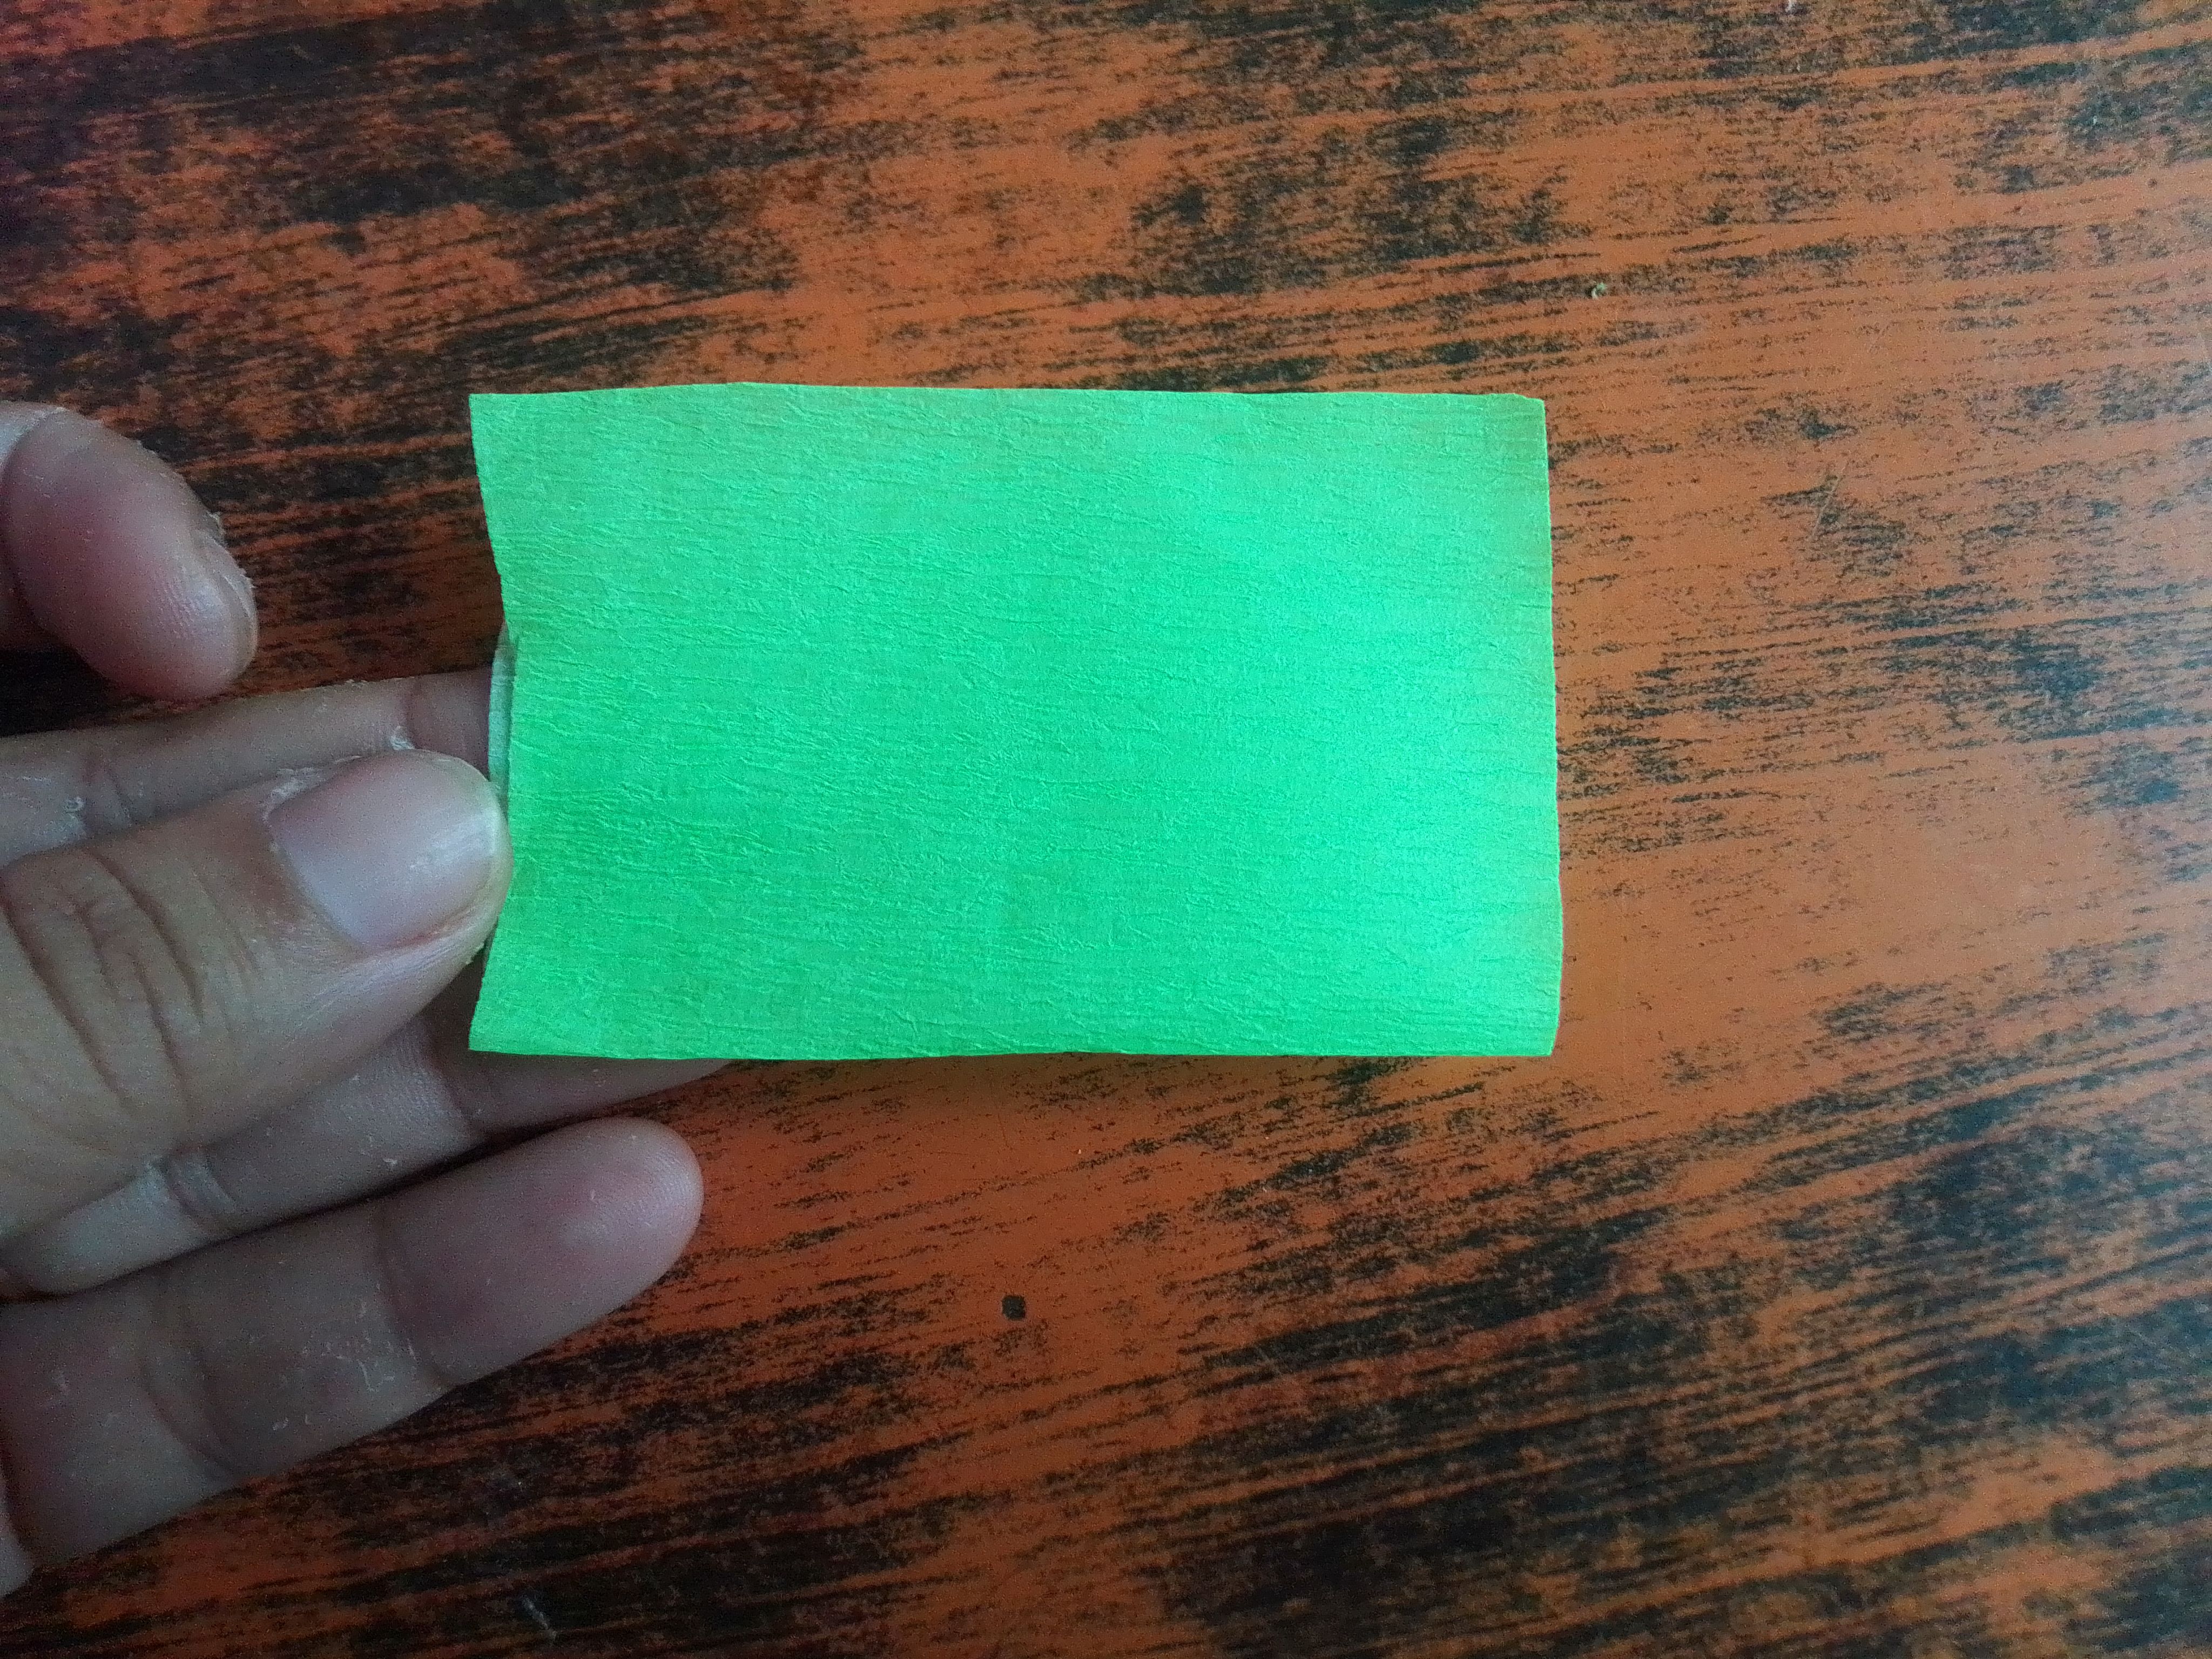
Paso 04
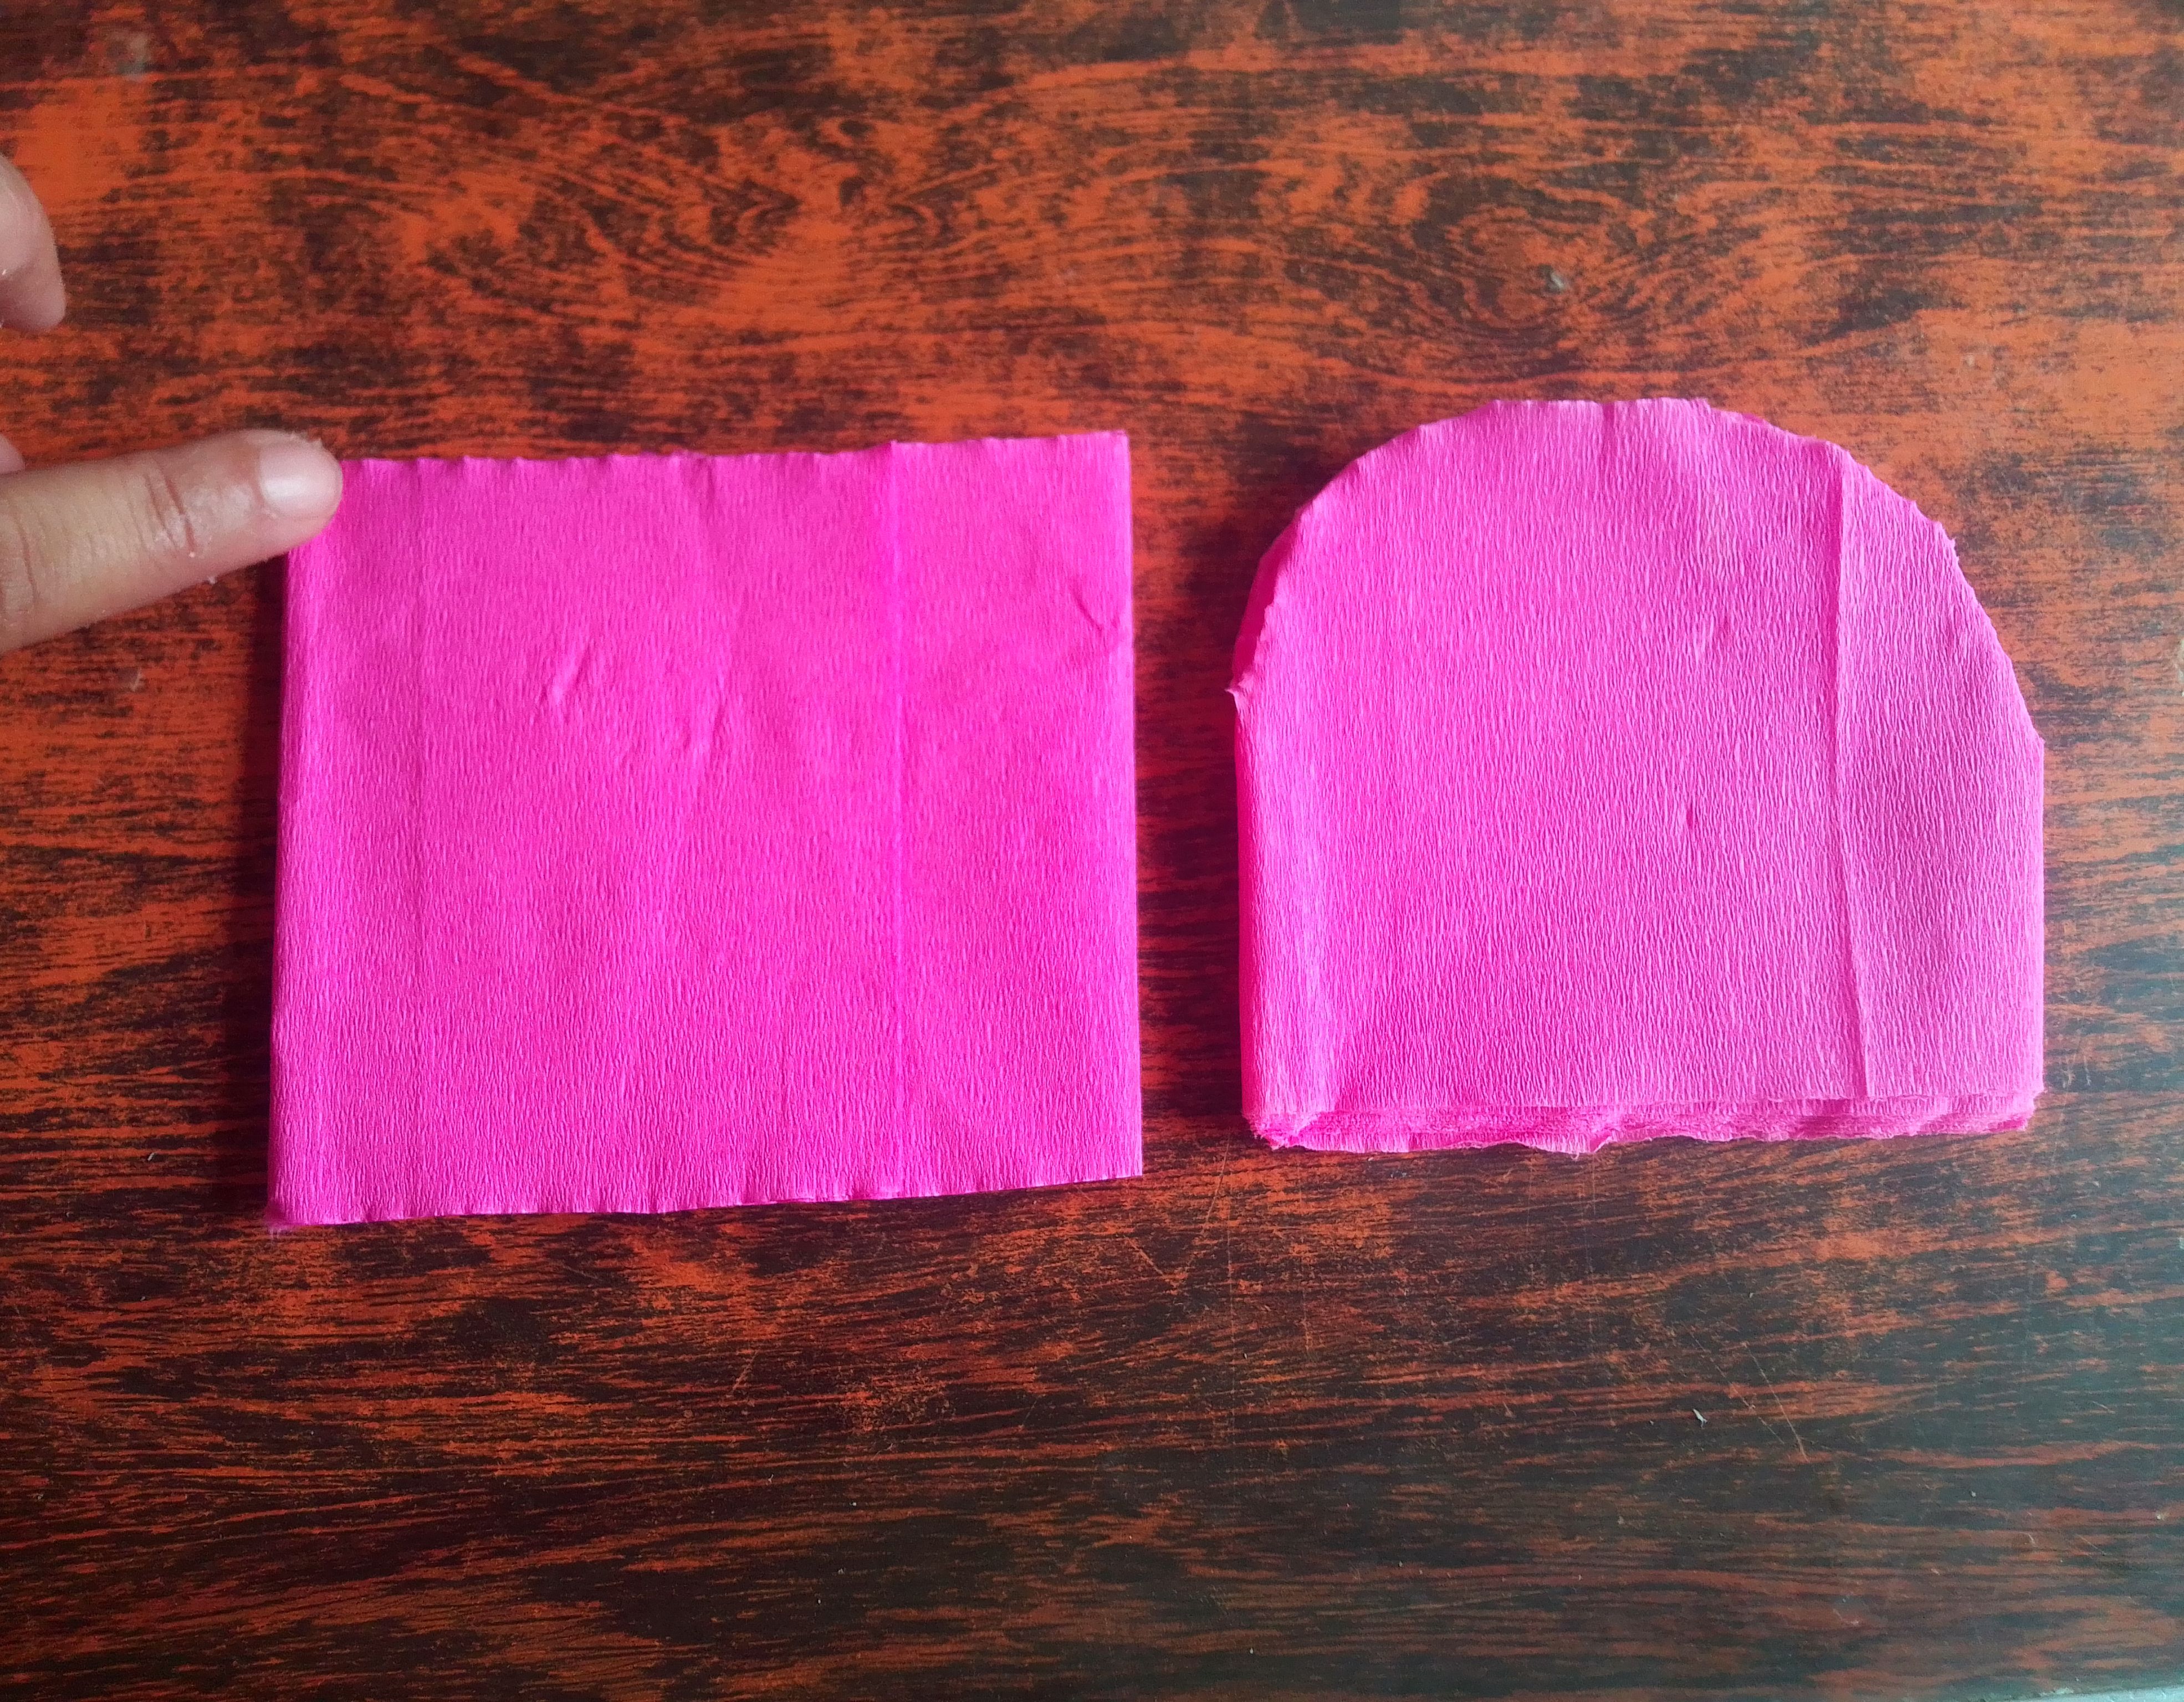
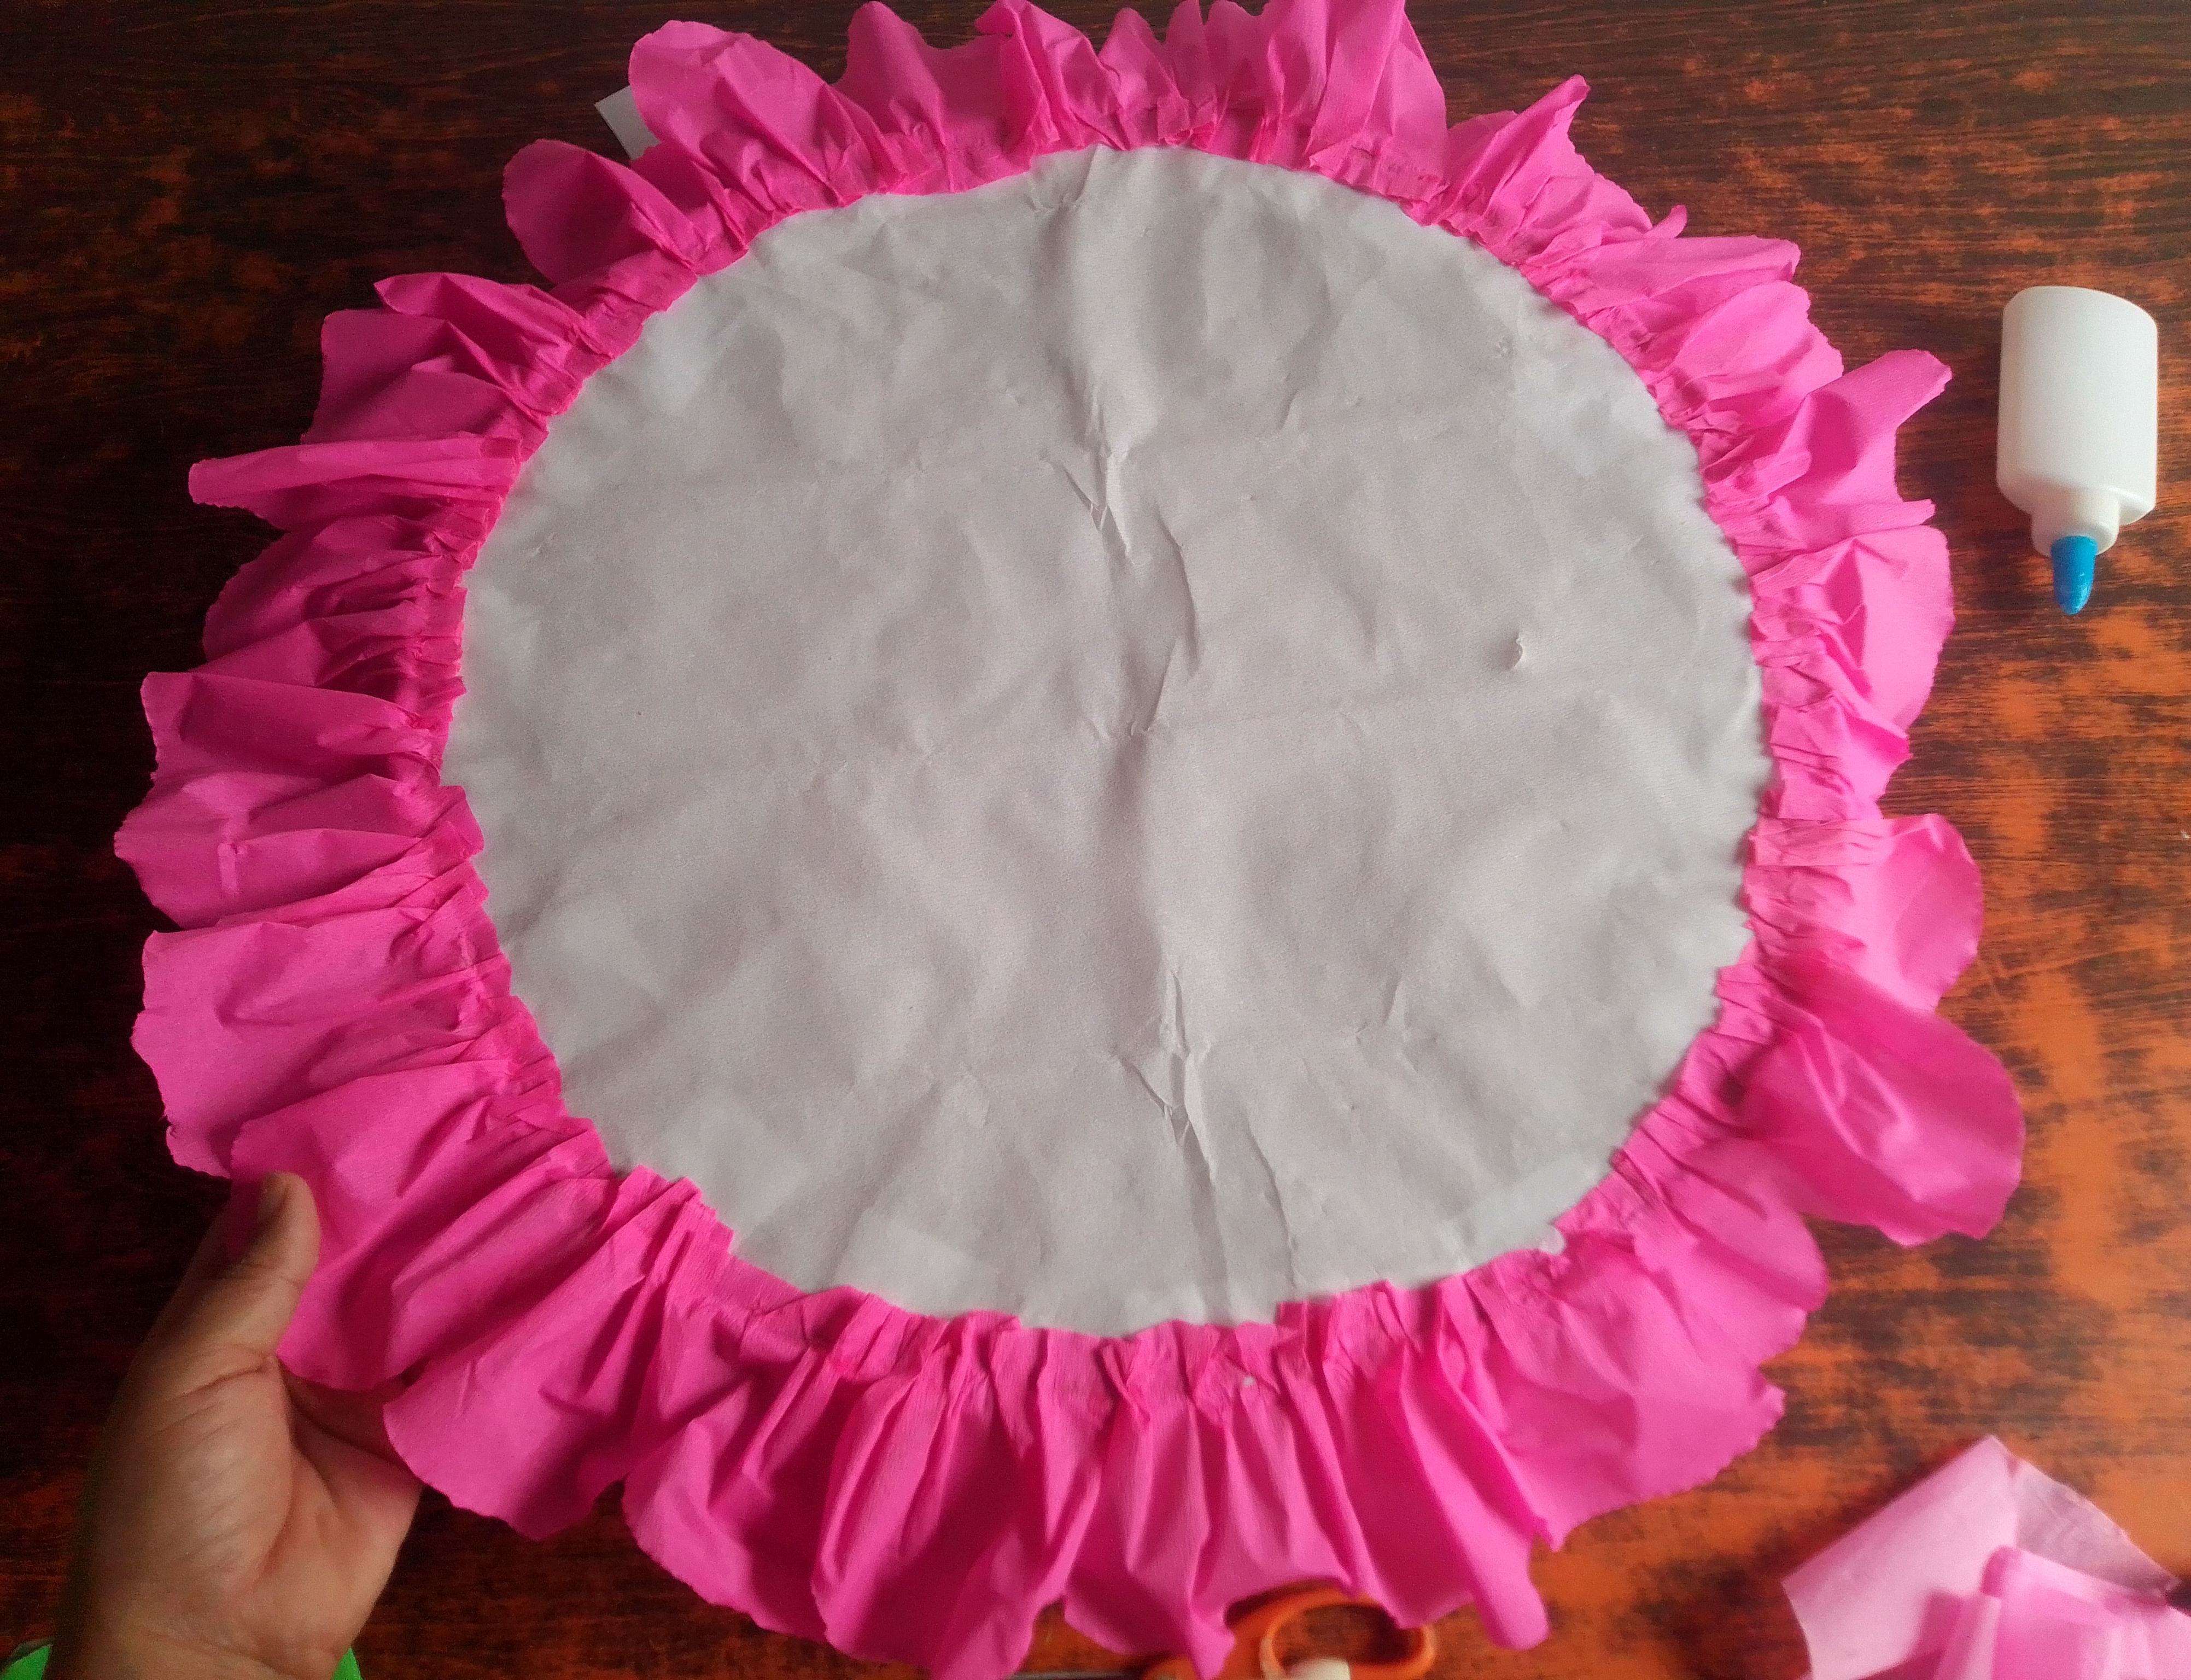
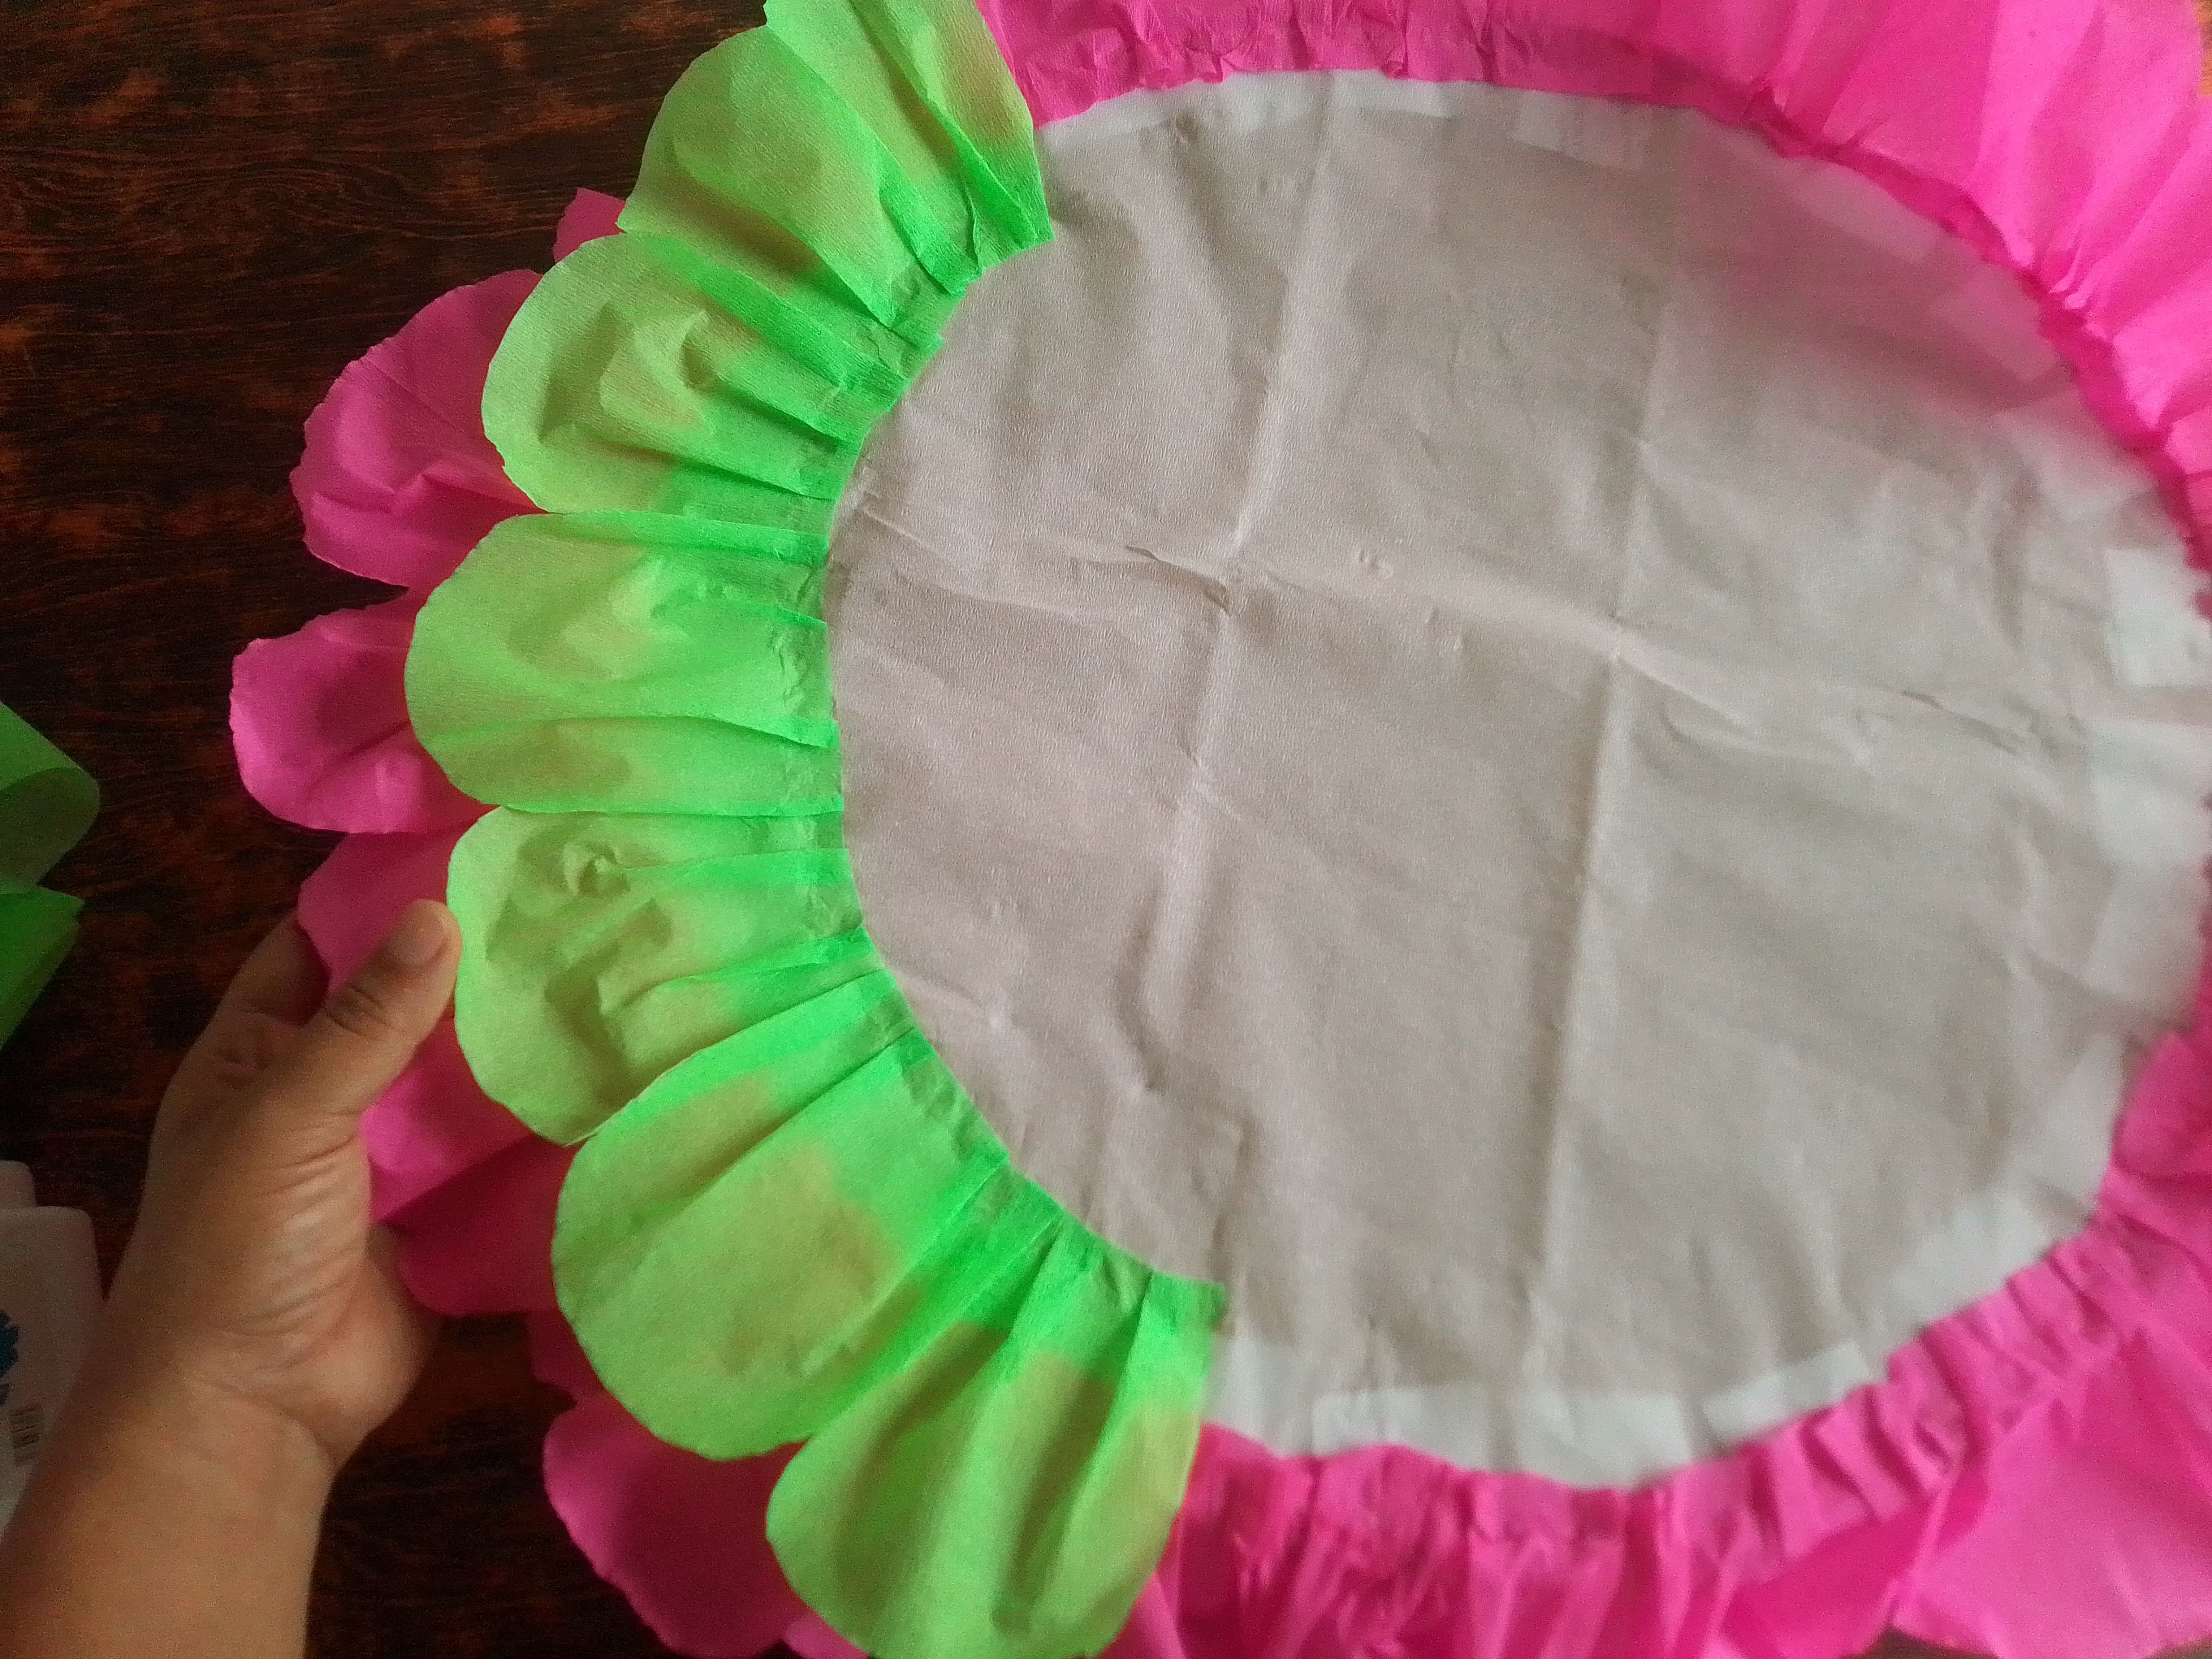
Corto una tira de papel crepé fucsia de 8cm de ancho y aún doblado cortamos las esquinas para hacer una cadena de pétalos. Haciendo pliegues los pego en borde de todo el círculo incluyendo ambas partes ( parte trasera y delantera). Tomo otro color de papel crepé y realizo lo mismo pero está vez un poco más hacía adentro de manera que se vea el color fucsia.
Step 04
I cut a strip of fuchsia crepe paper 8cm wide and still folded we cut the corners to make a chain of petals. Making folds I glue them on the edge of the entire circle including both parts (back and front). I take another color of crepe paper and do the same but this time a little further in so that the fuchsia color shows through.
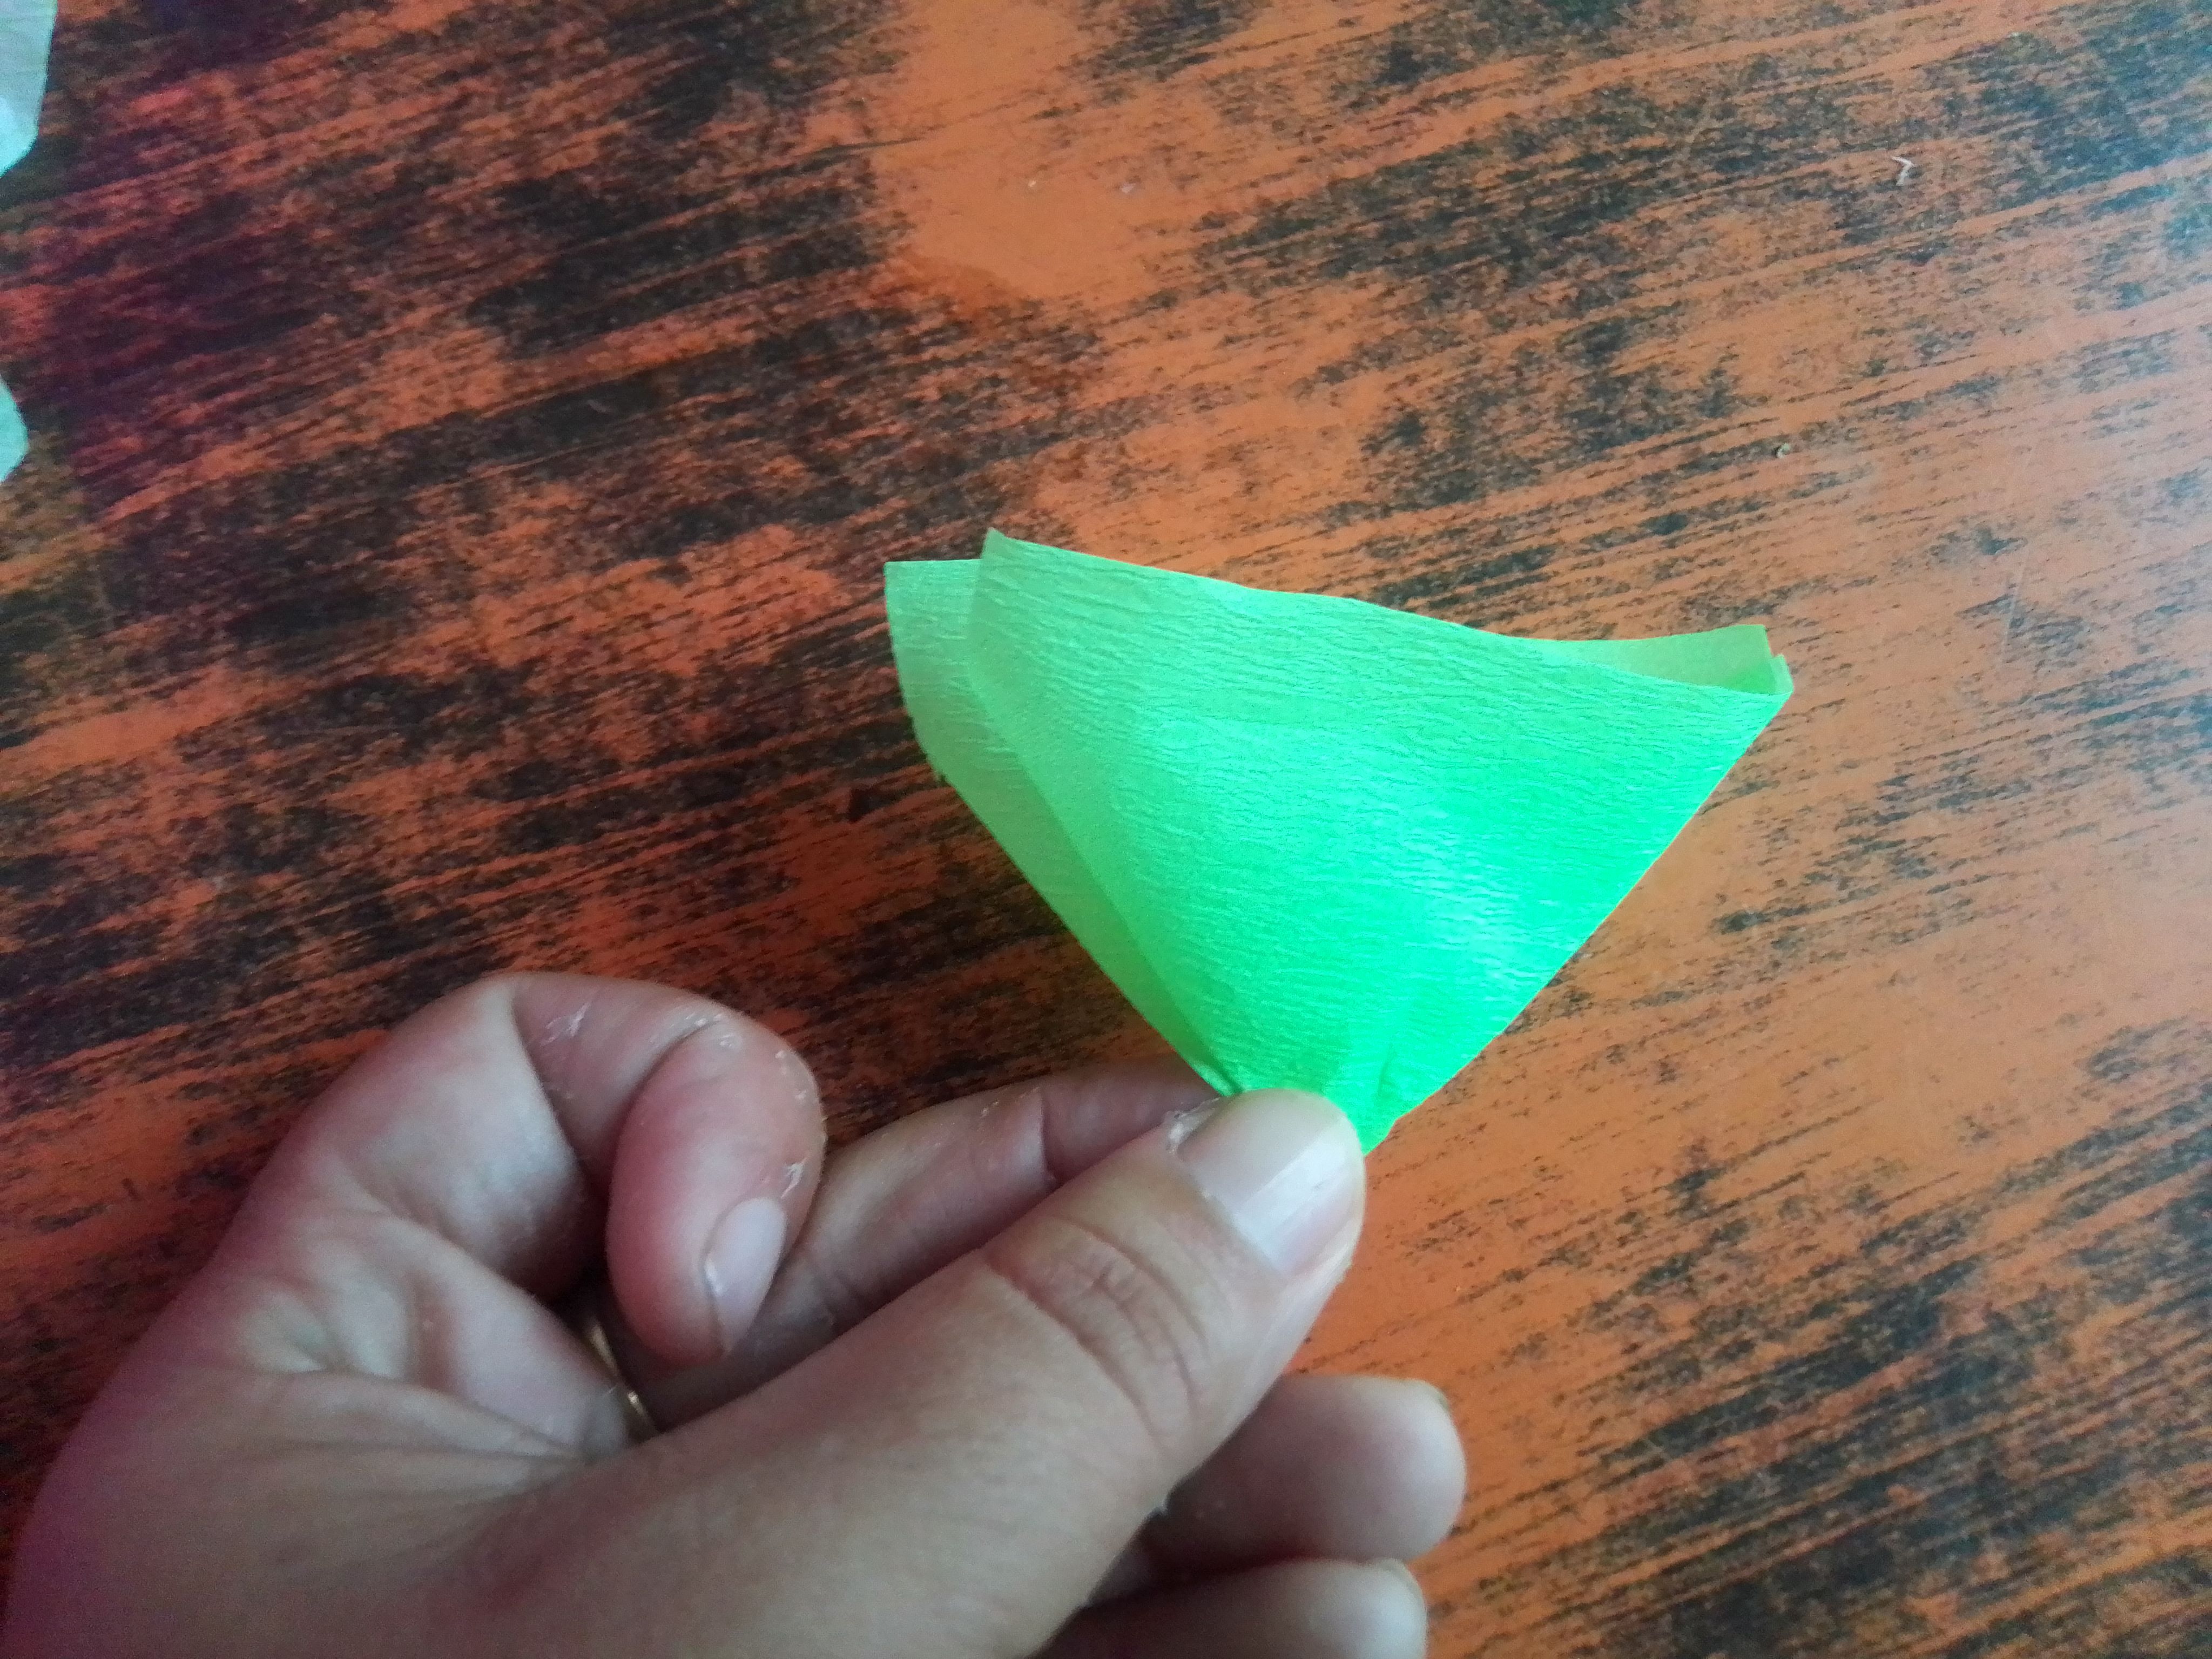
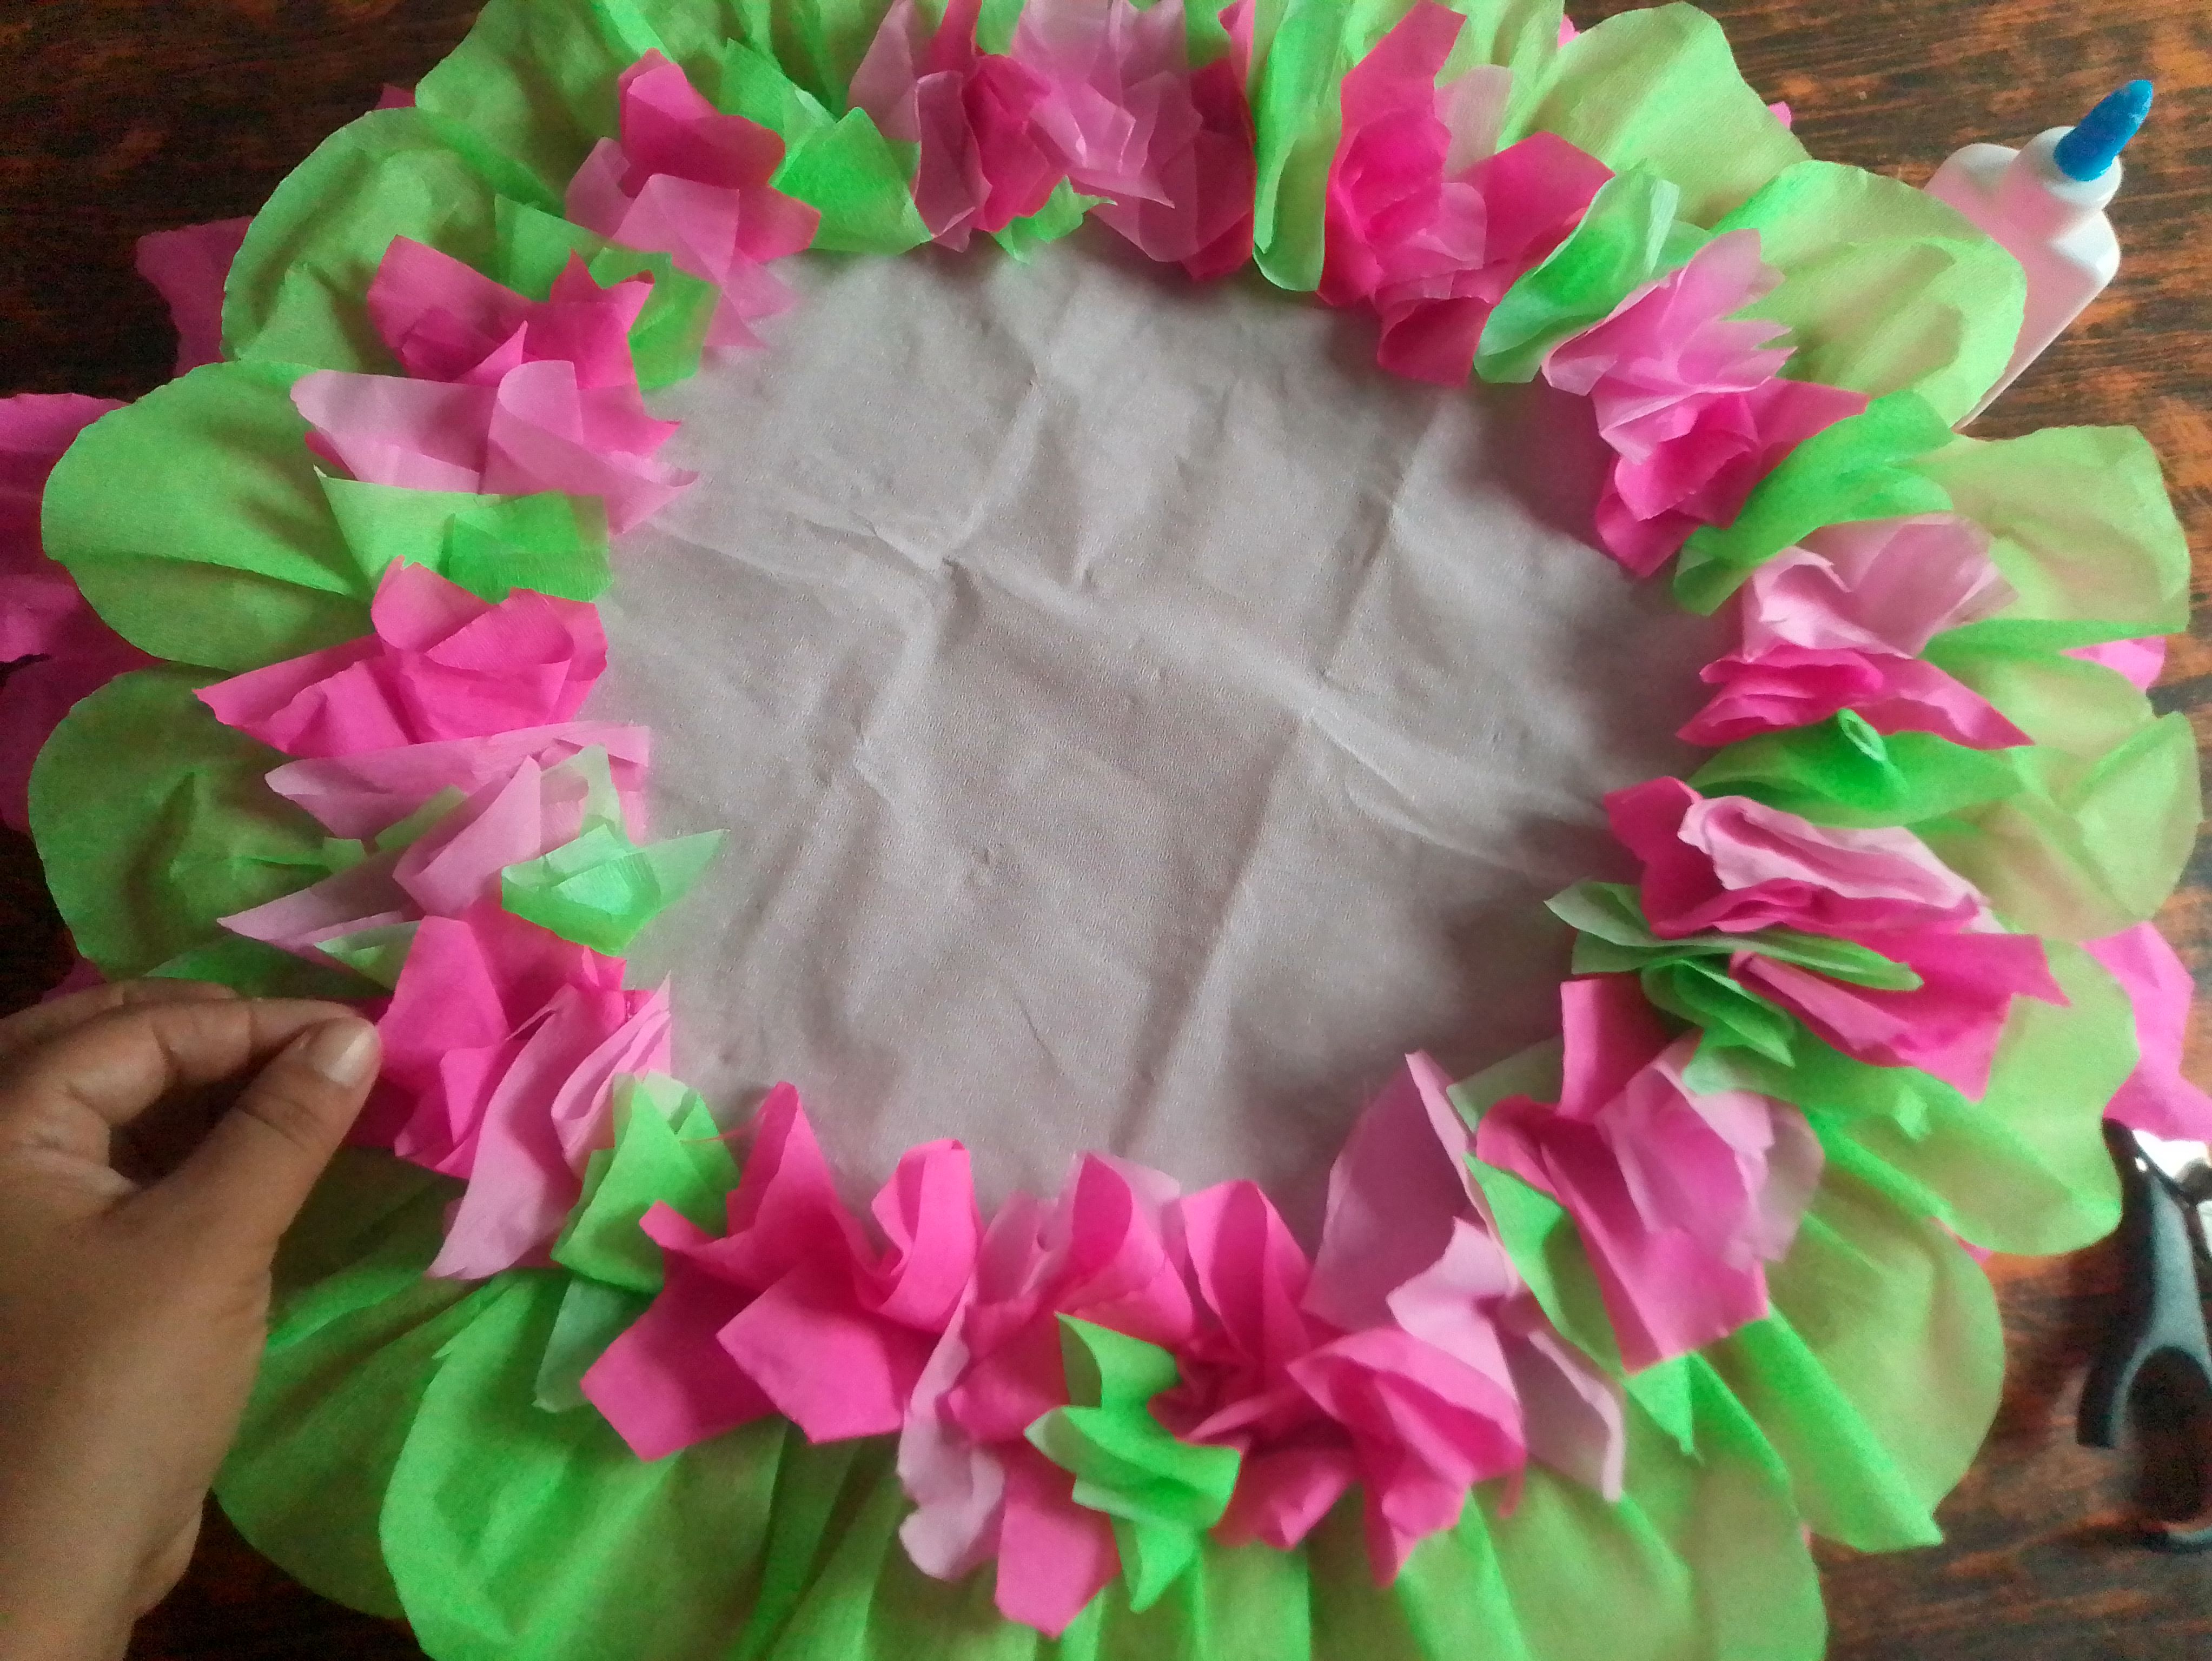
Paso 05
Ahora corto varios rectángulos de ambos colores de papel y doblo dos veces para formar un figura triangular. Está piezas las pego en el contorno interno de los pétalos verdes, variando los colores. Ya con estos pasos nuestra piñata tiene forma de flor y podemos decorarla con el motivo de nuestra preferencia.
Step 05
Now I cut out several rectangles from both colors of paper and fold them twice to form a triangular shape. These pieces are glued to the inner contour of the green petals, varying the colors. With these steps, our piñata is shaped like a flower and we can decorate it with the motif of our choice.
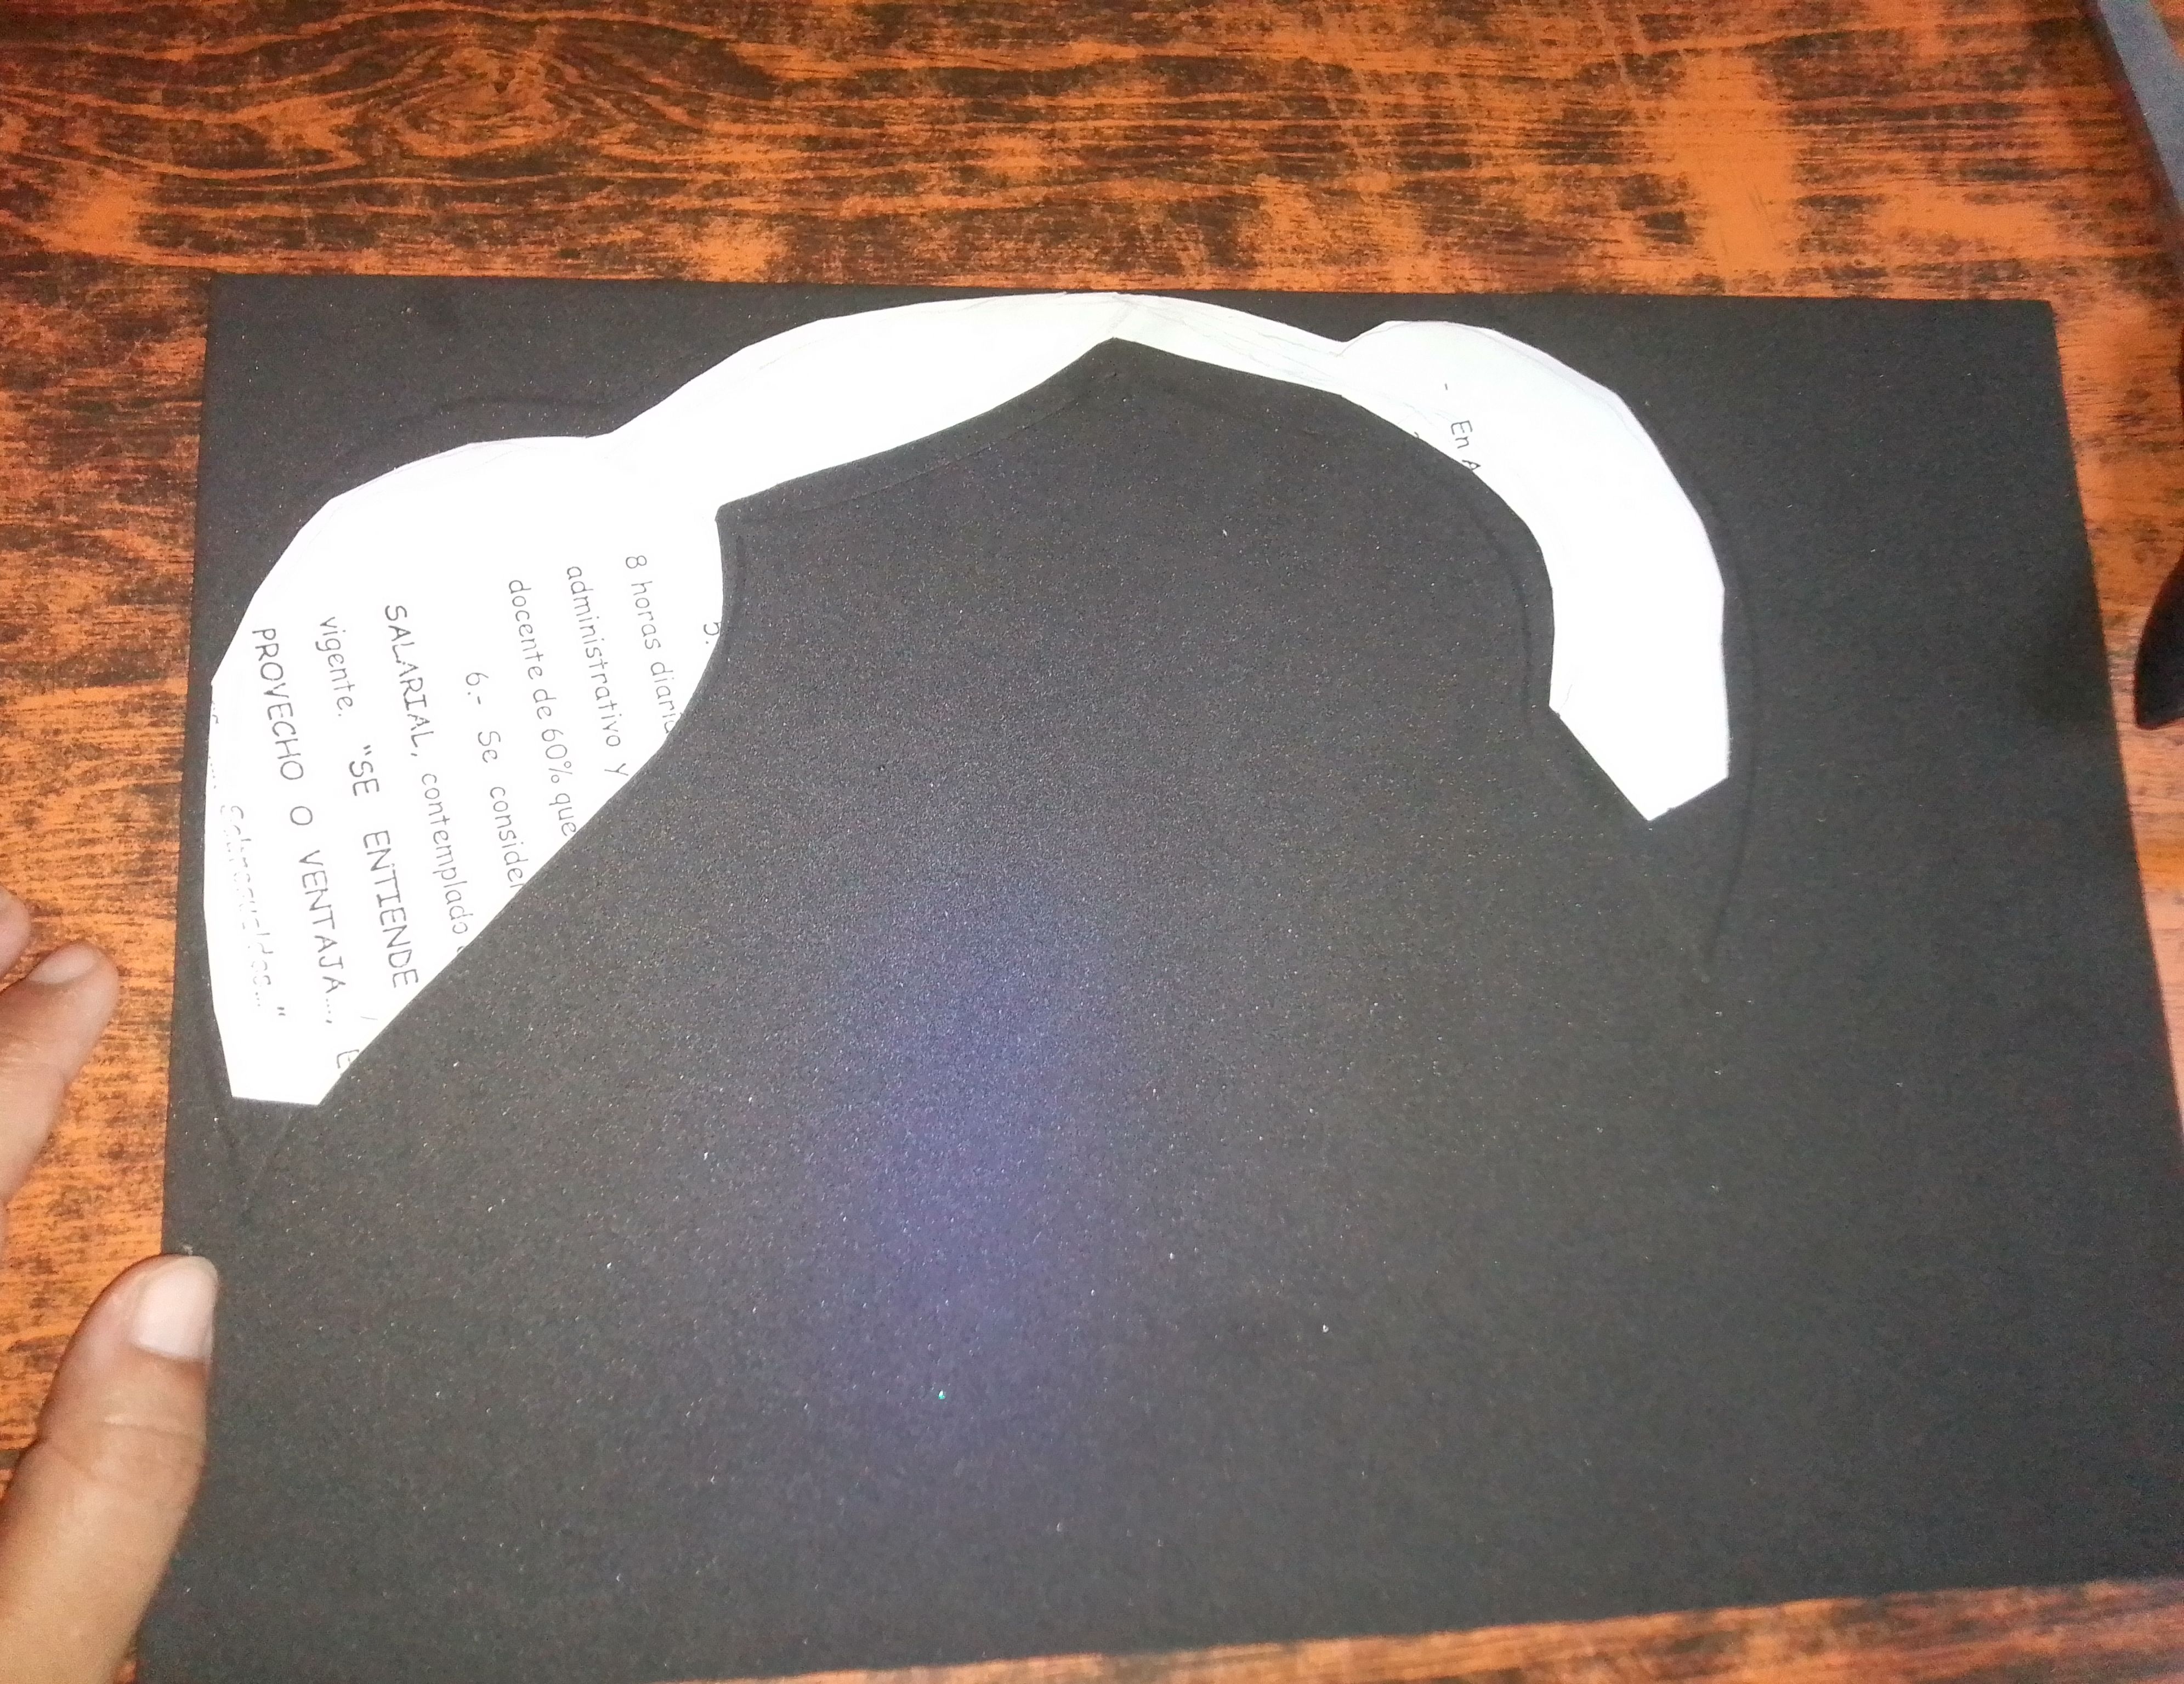
Paso 06
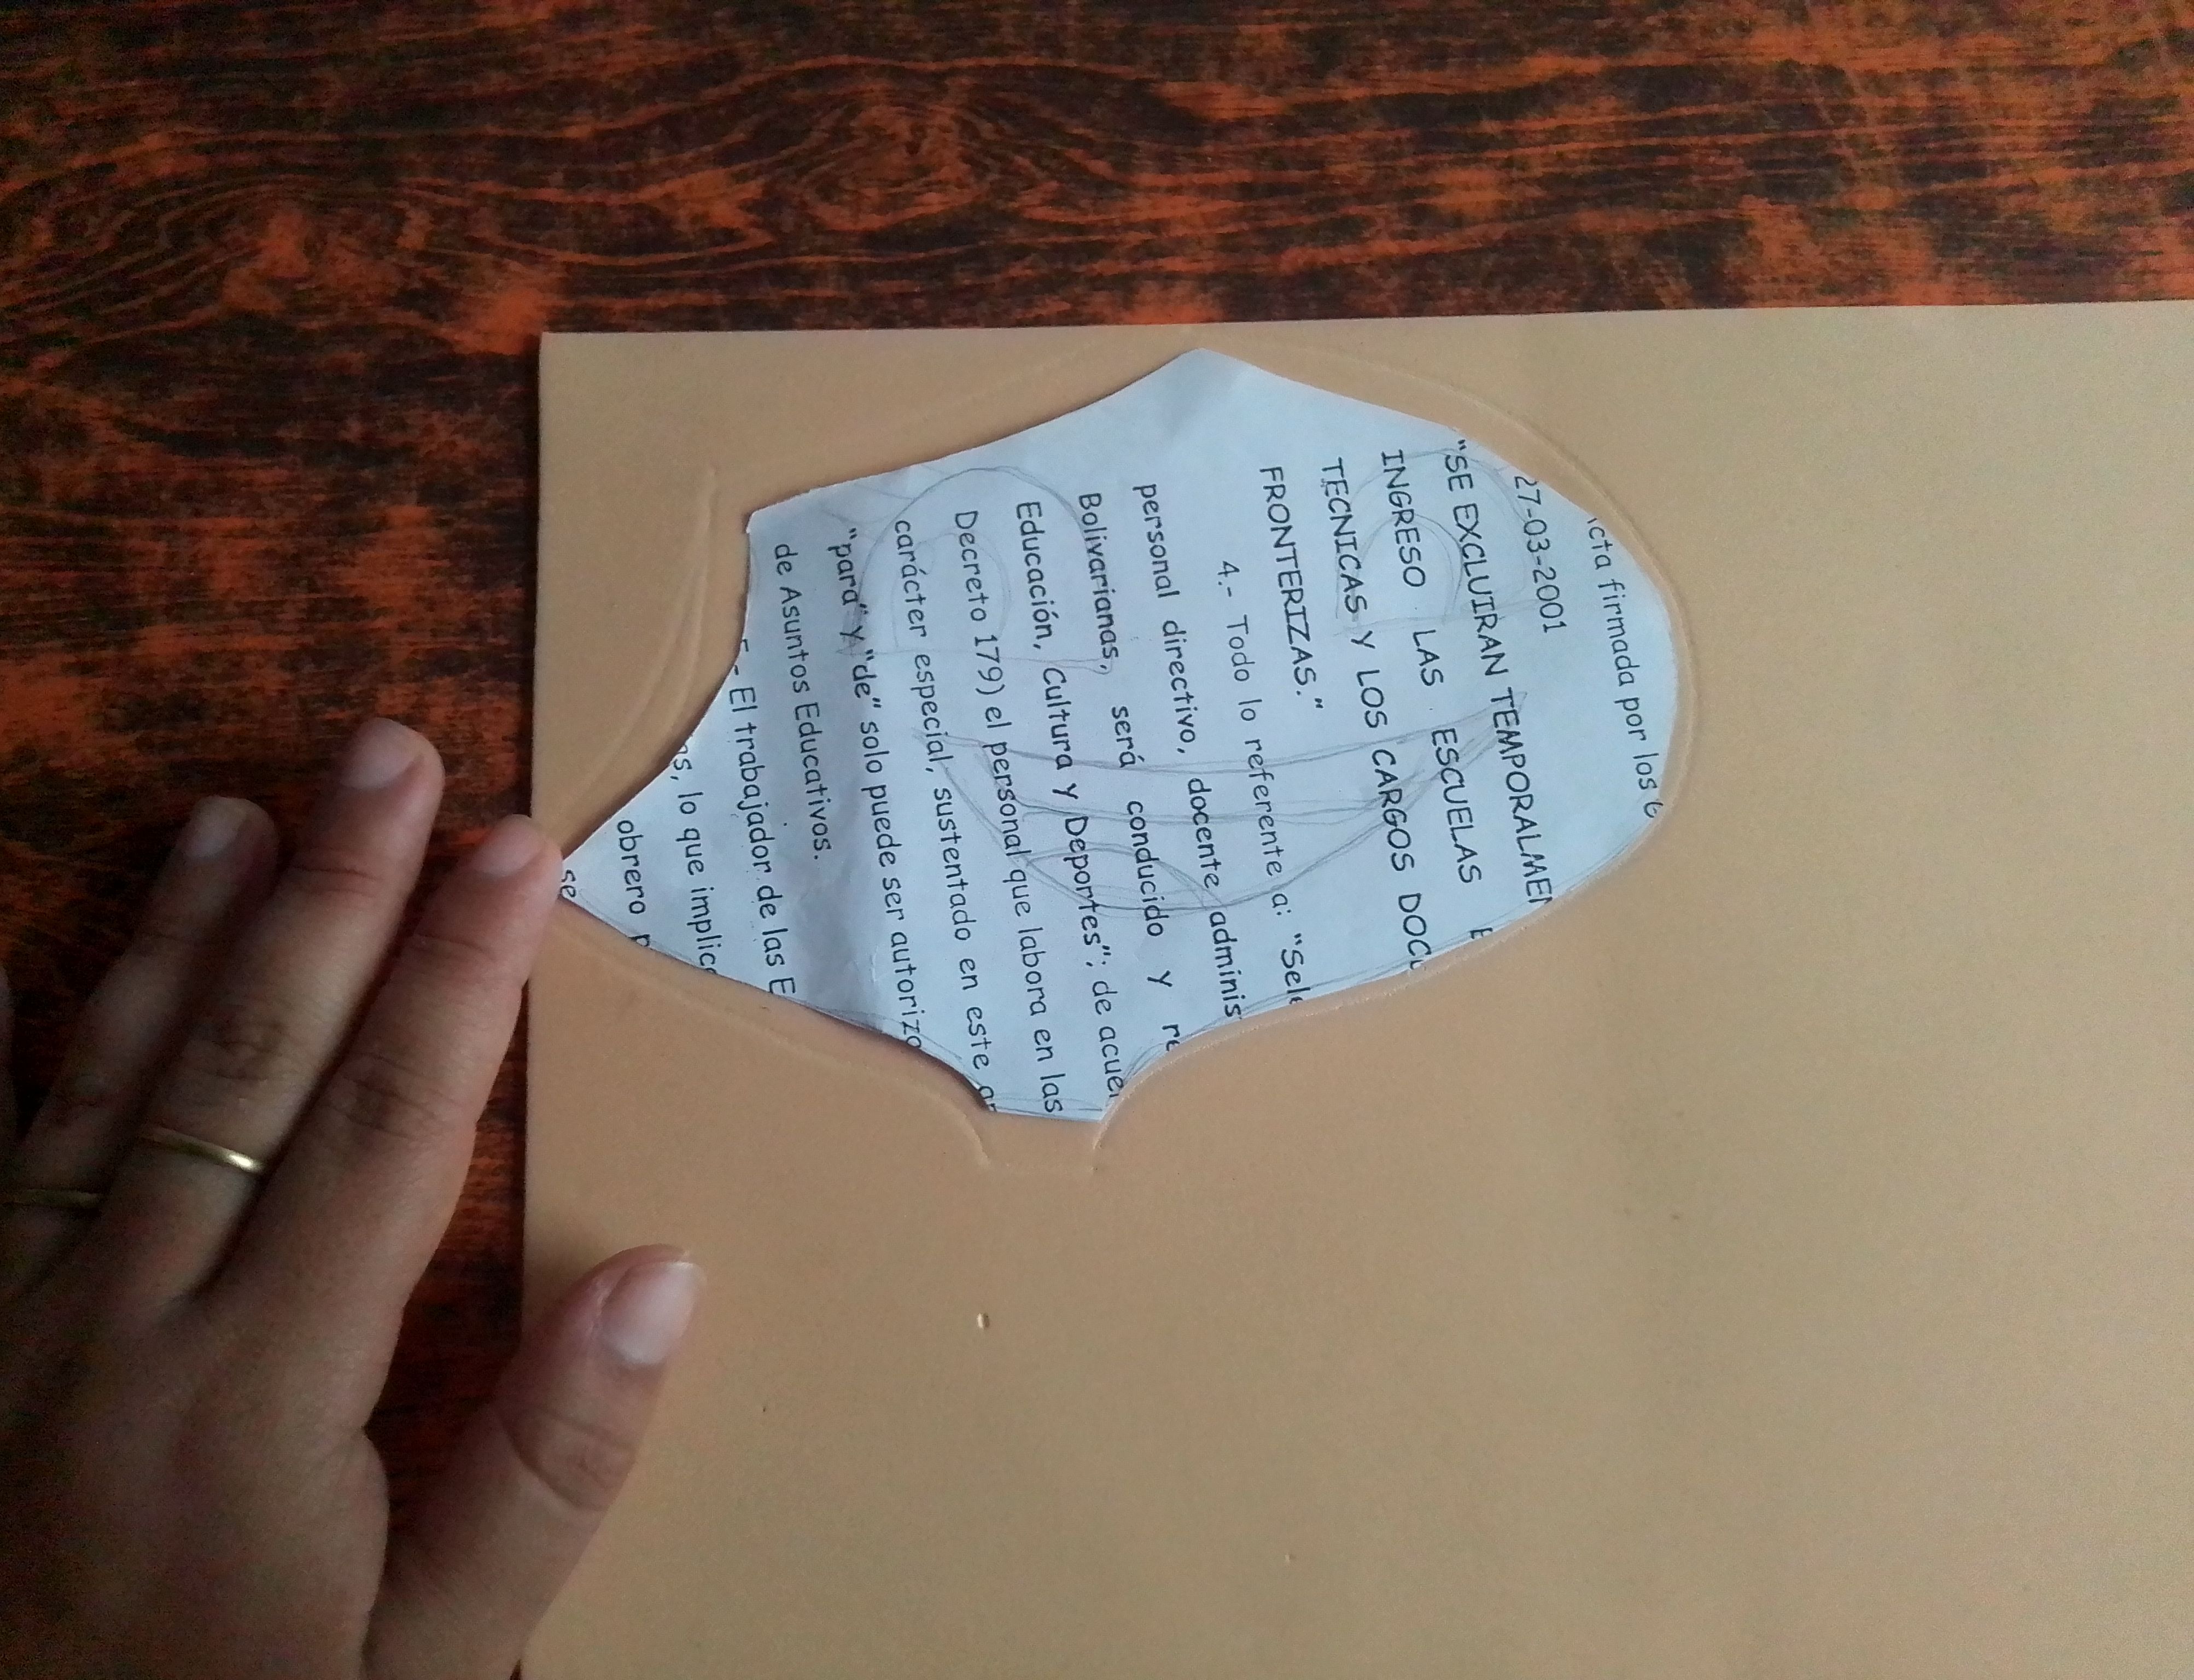
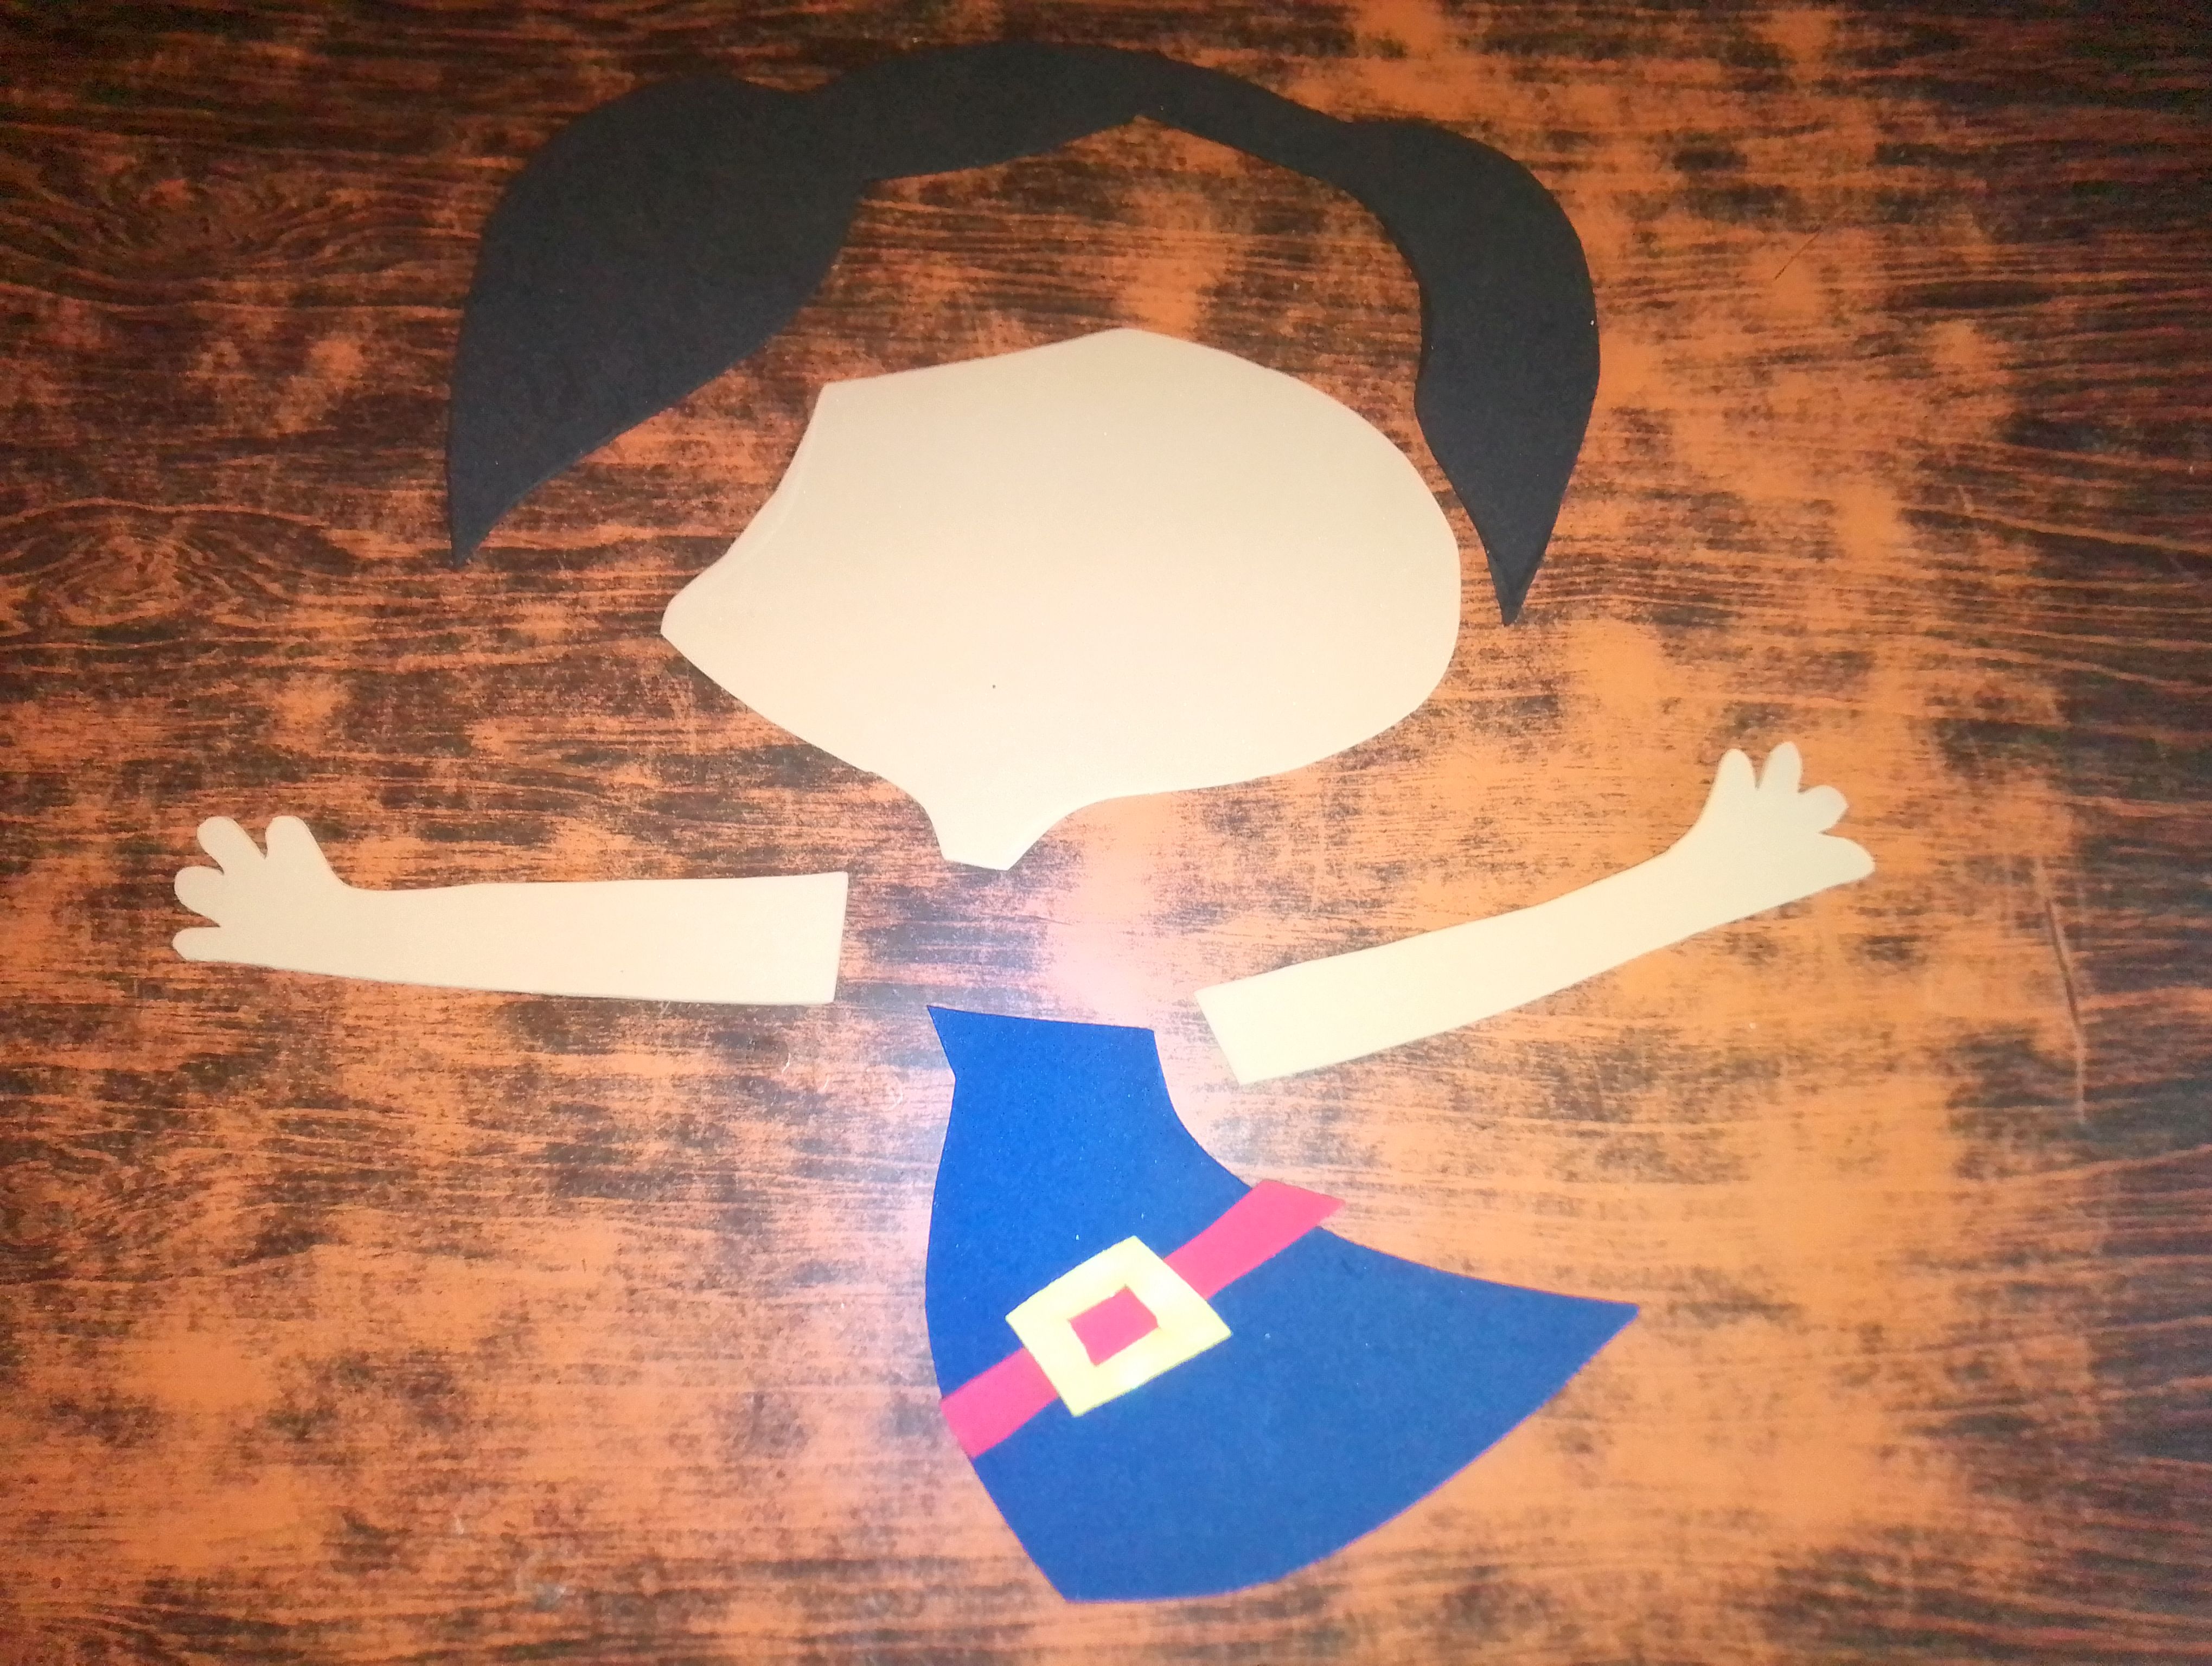
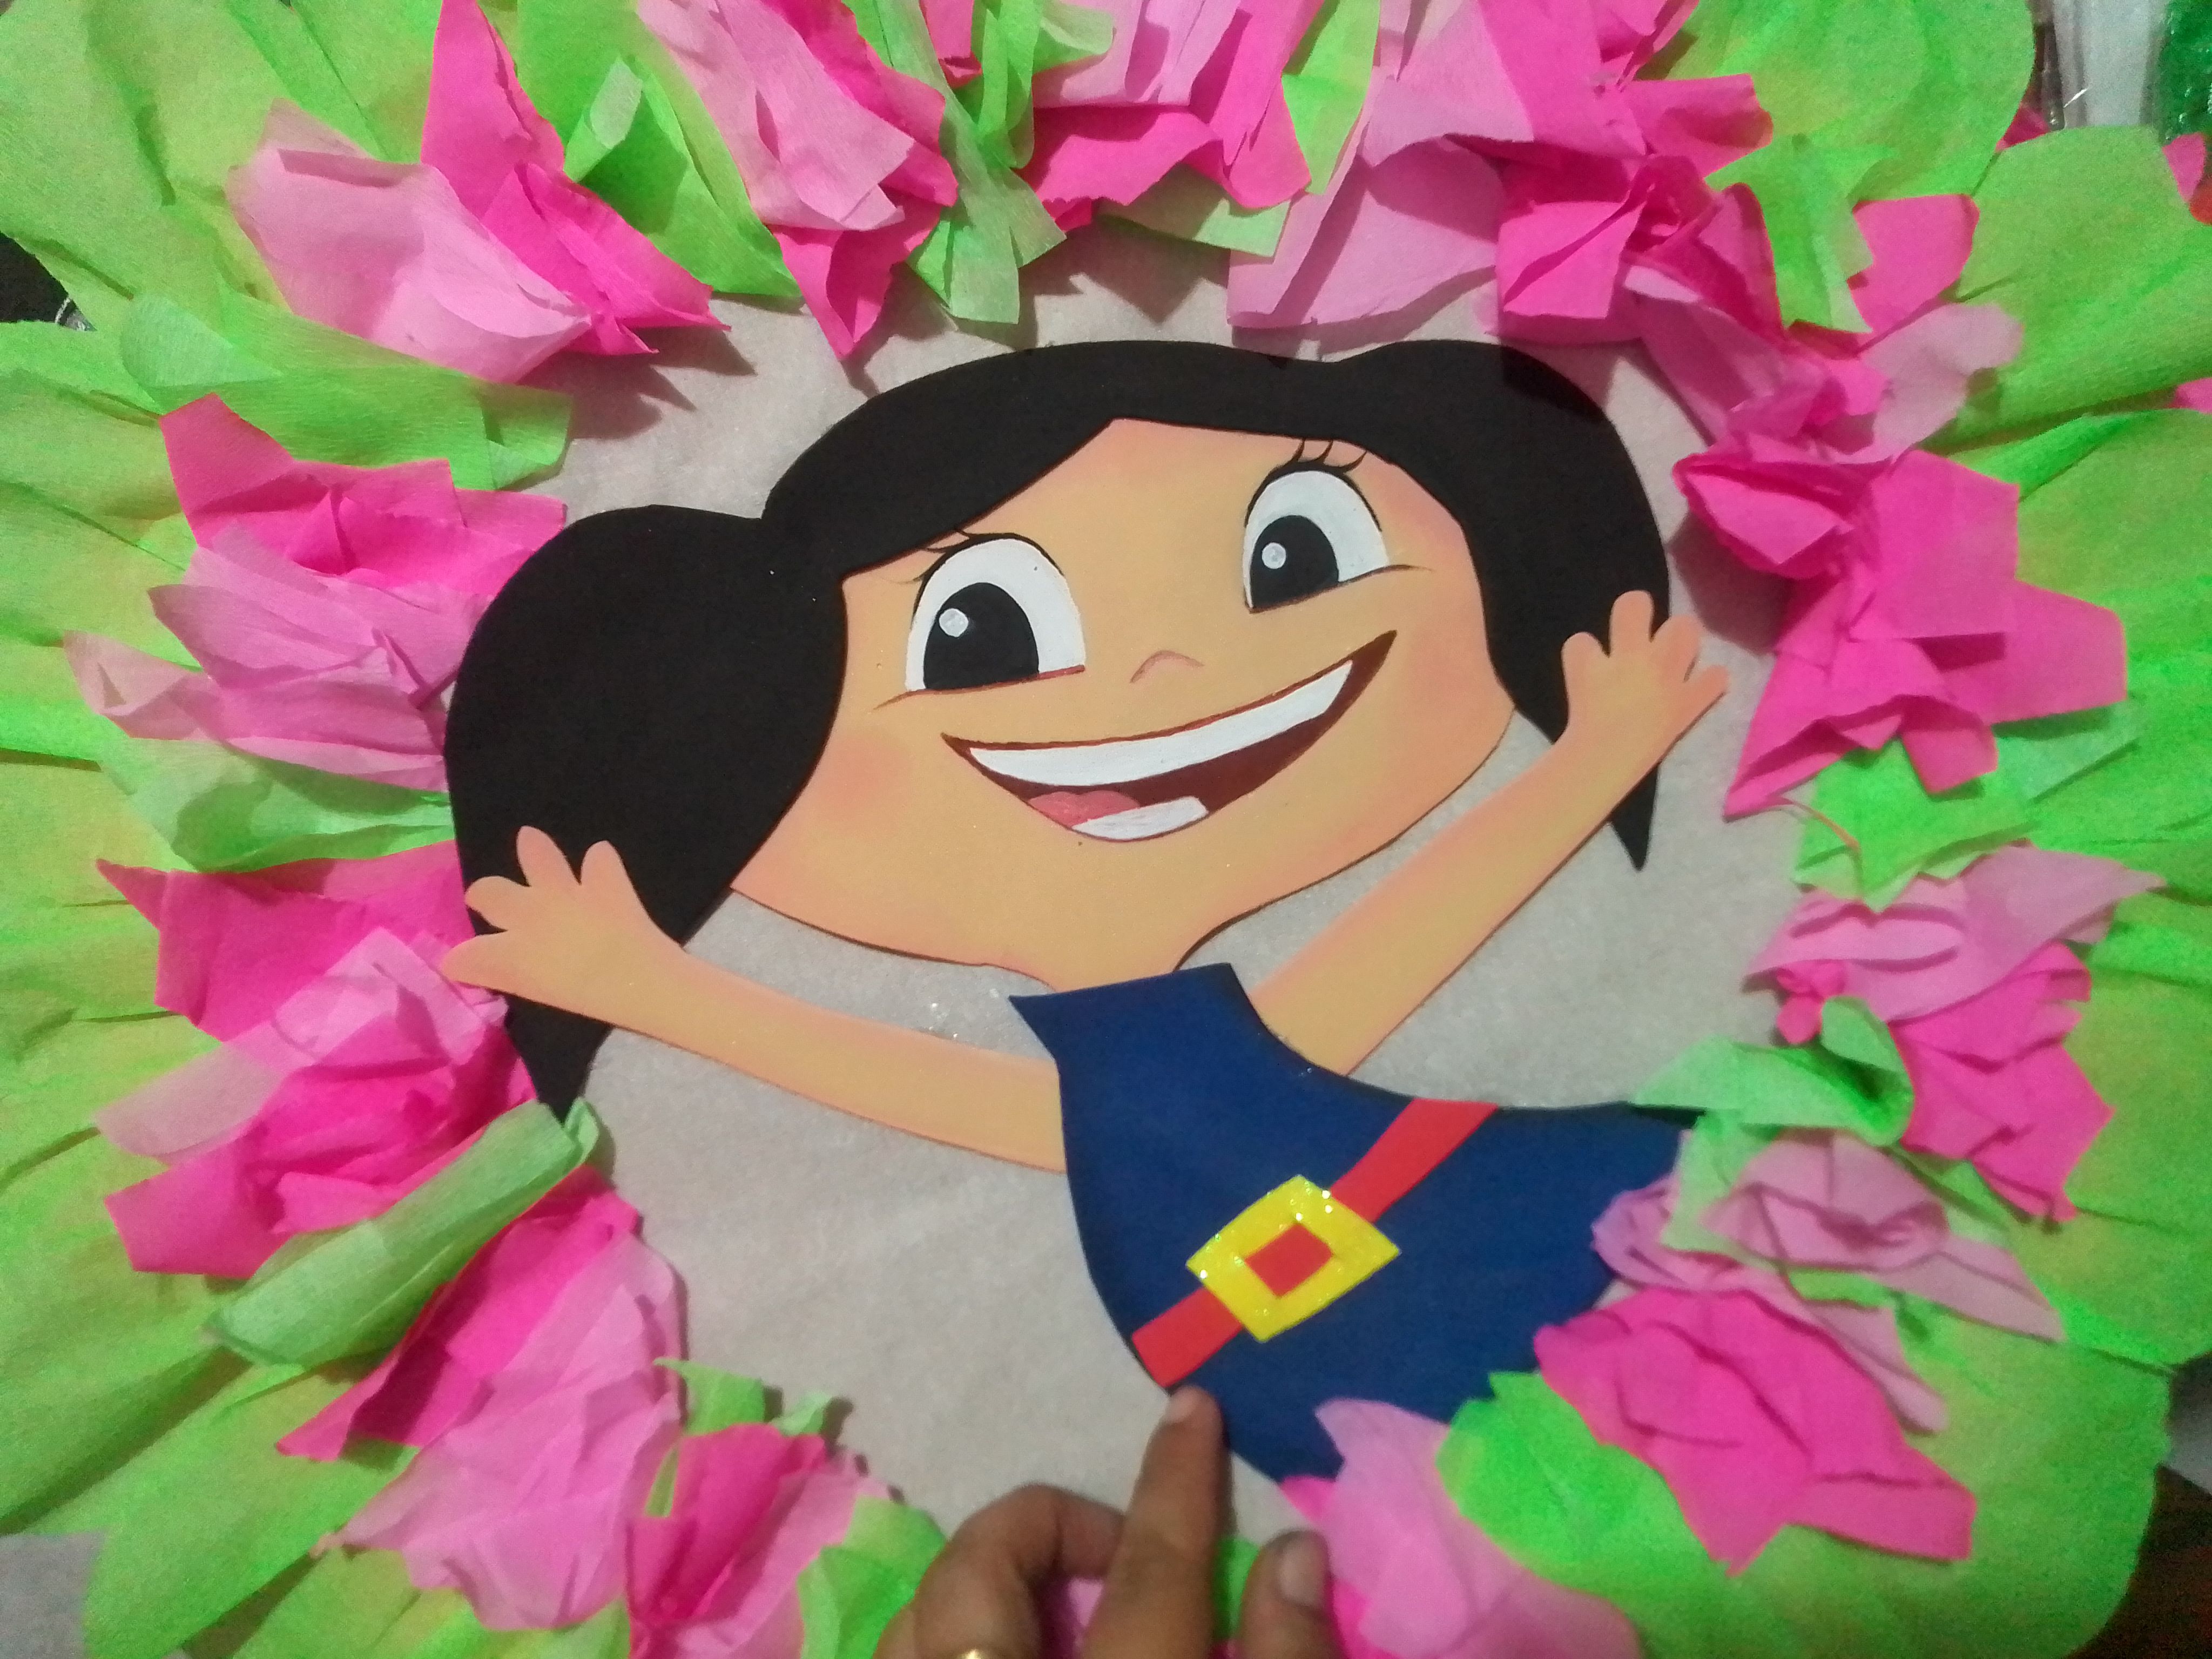
Como les mencioné, mi motivo es Luna, así que tomo un boceto del personaje y recorta todas sus piezas, es decir, su cara, cabello, brazos y vestido. Procedo a transferir cada parte al color de foami que corresponde según el diseño.
Step 06
As I mentioned, my motif is Luna, so I take a sketch of the character and cut out all her pieces, i.e. her face, hair, arms and dress. I proceed to transfer each part to the foami color that corresponds according to the design.
Paso 07
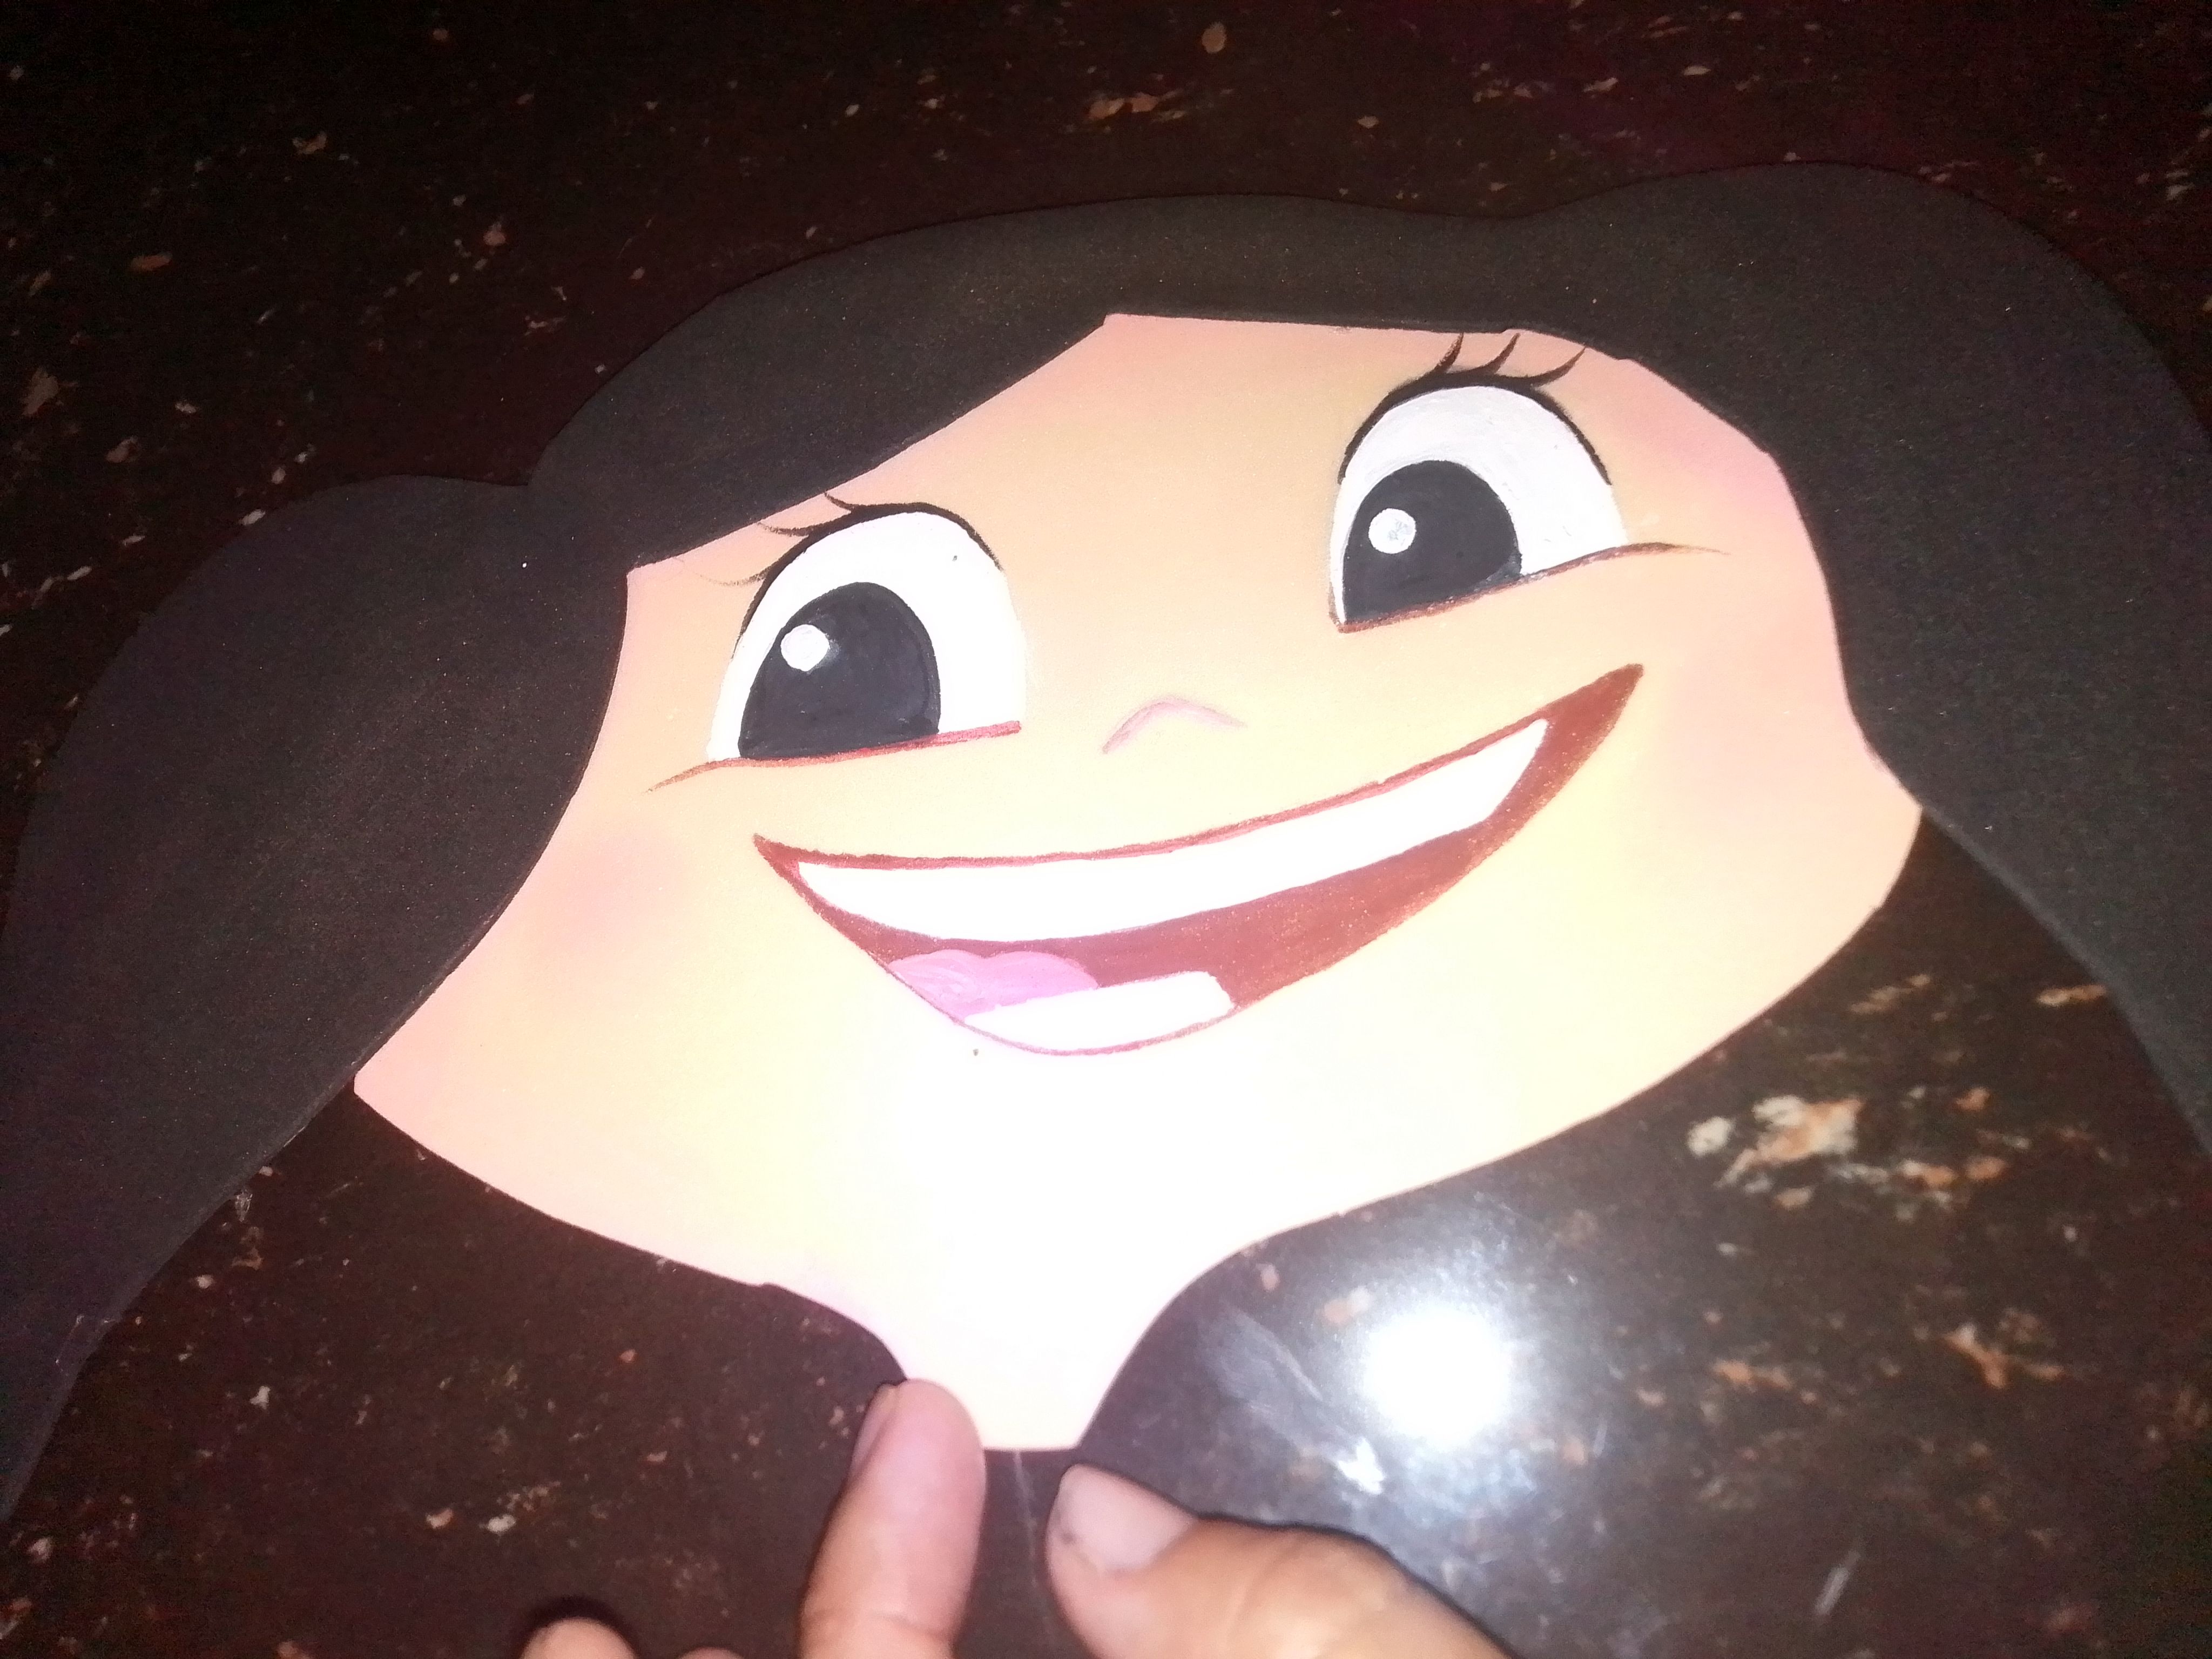
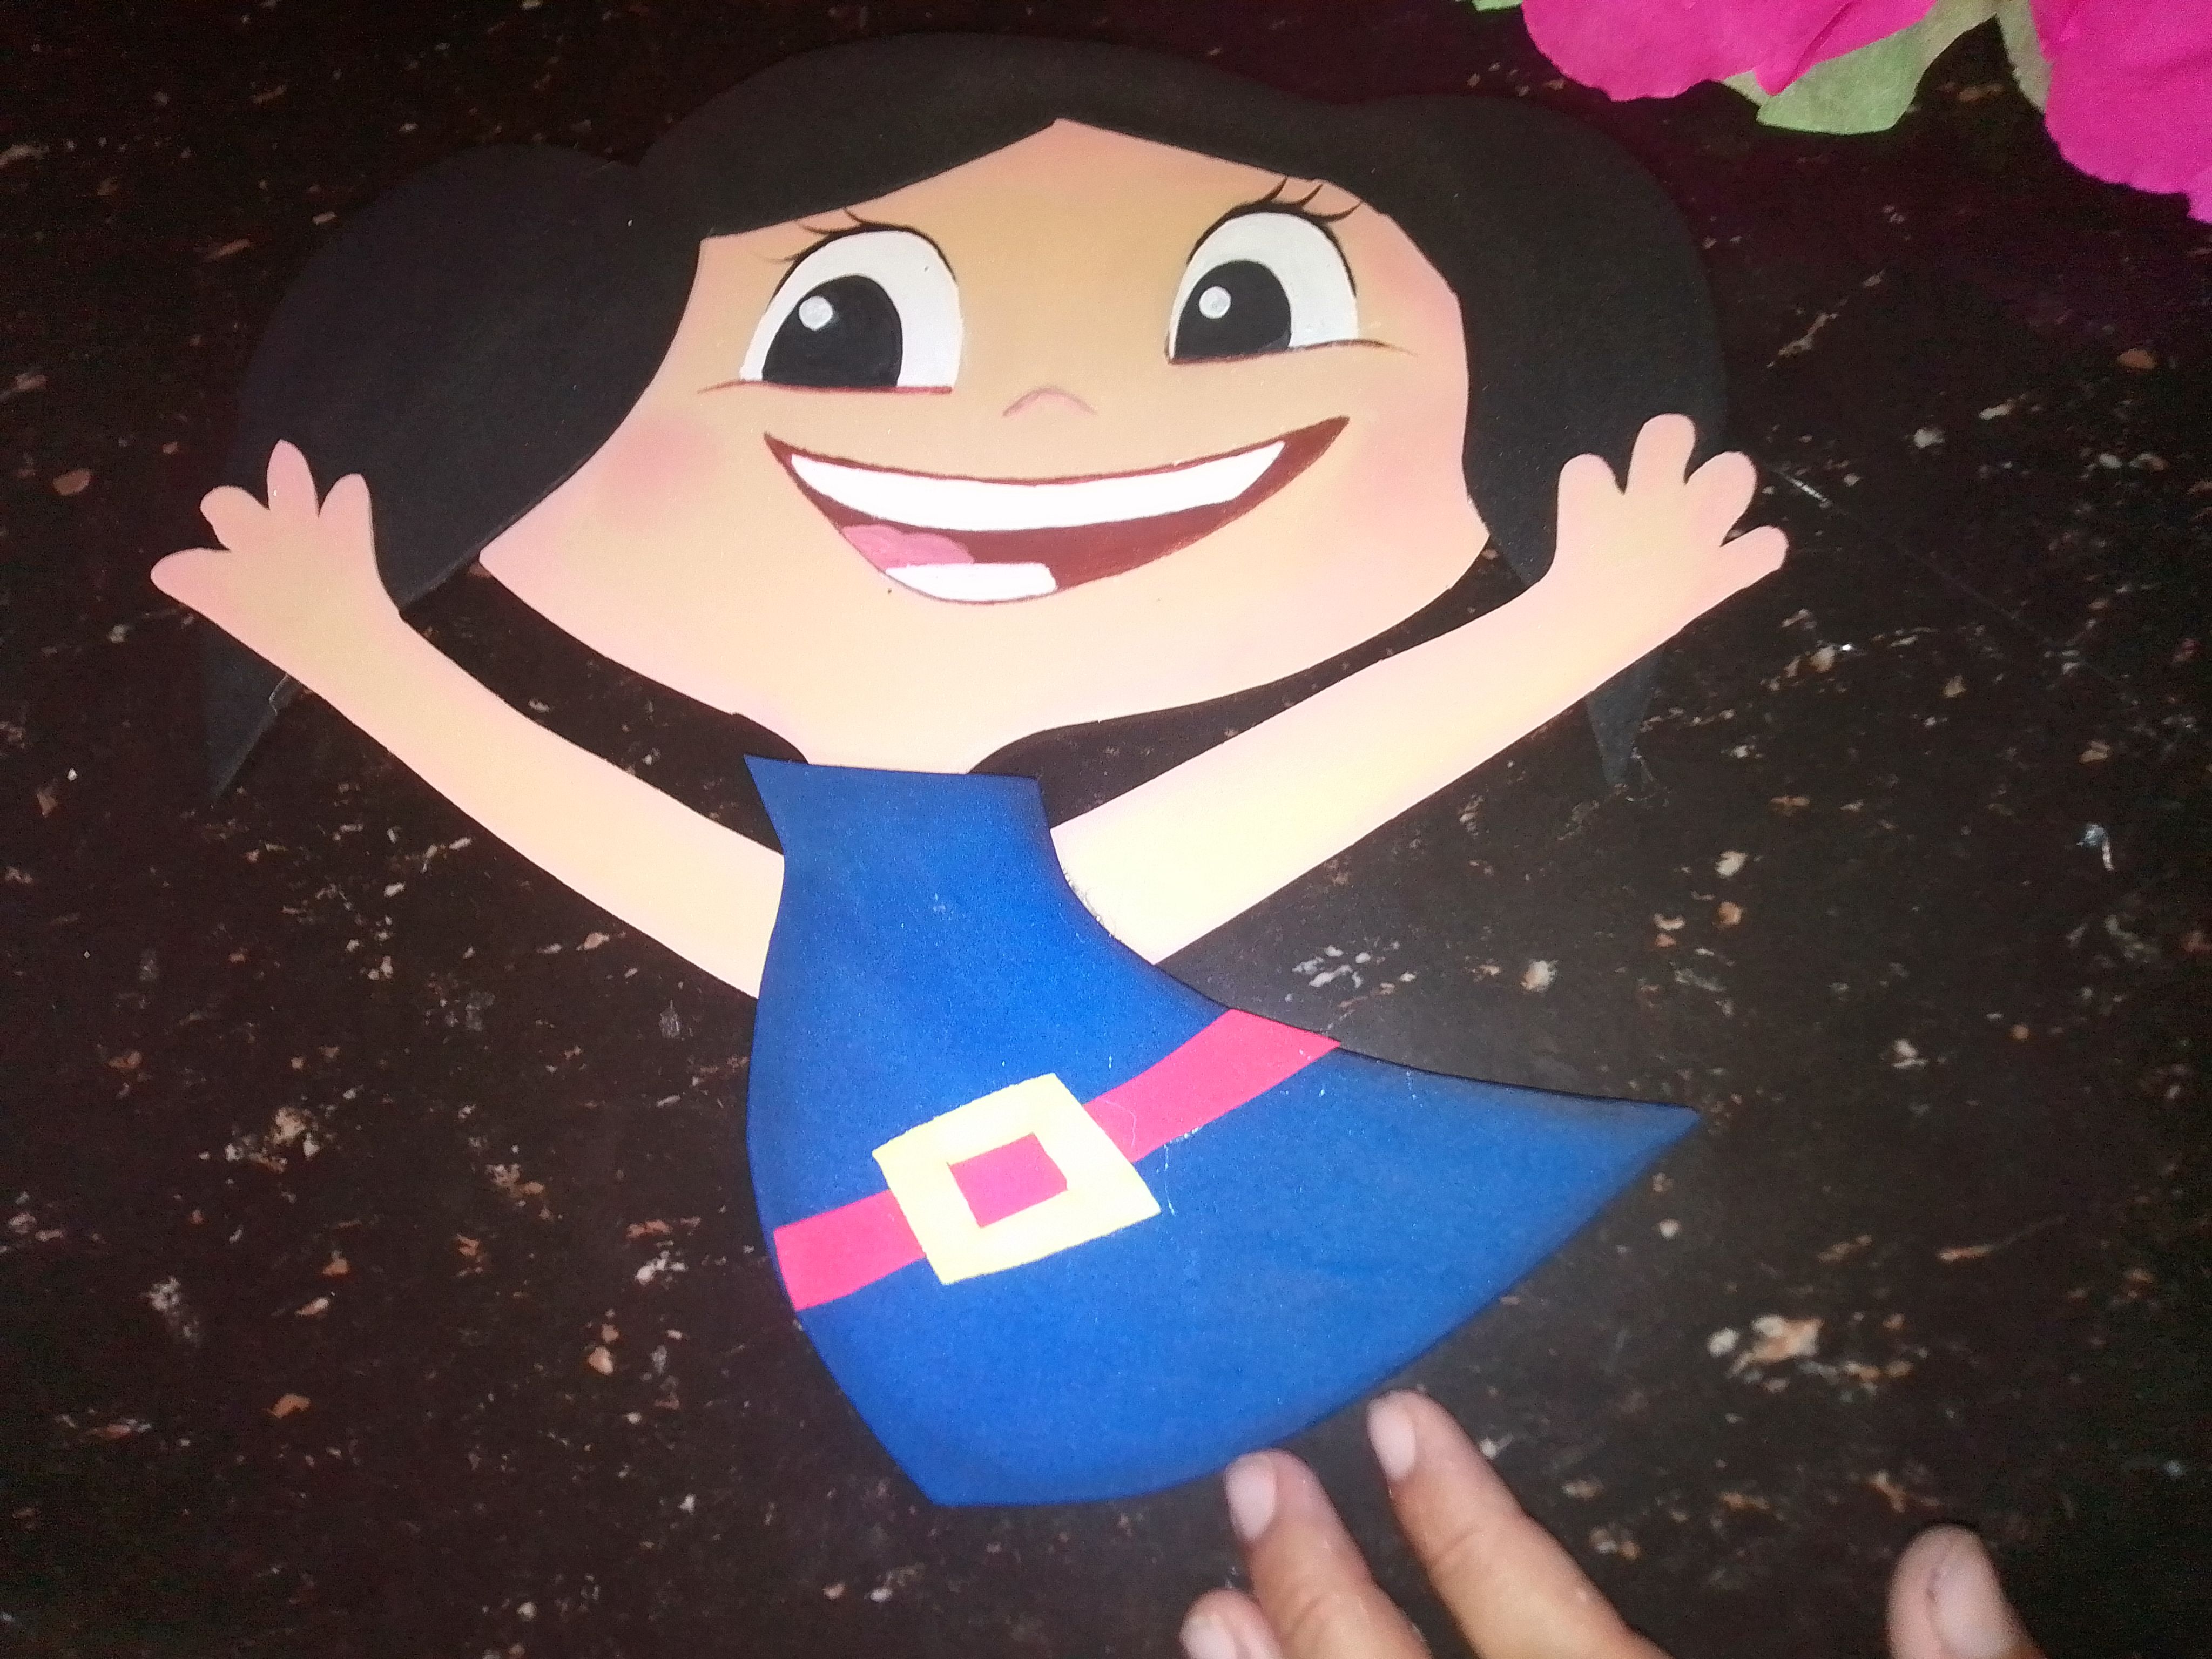
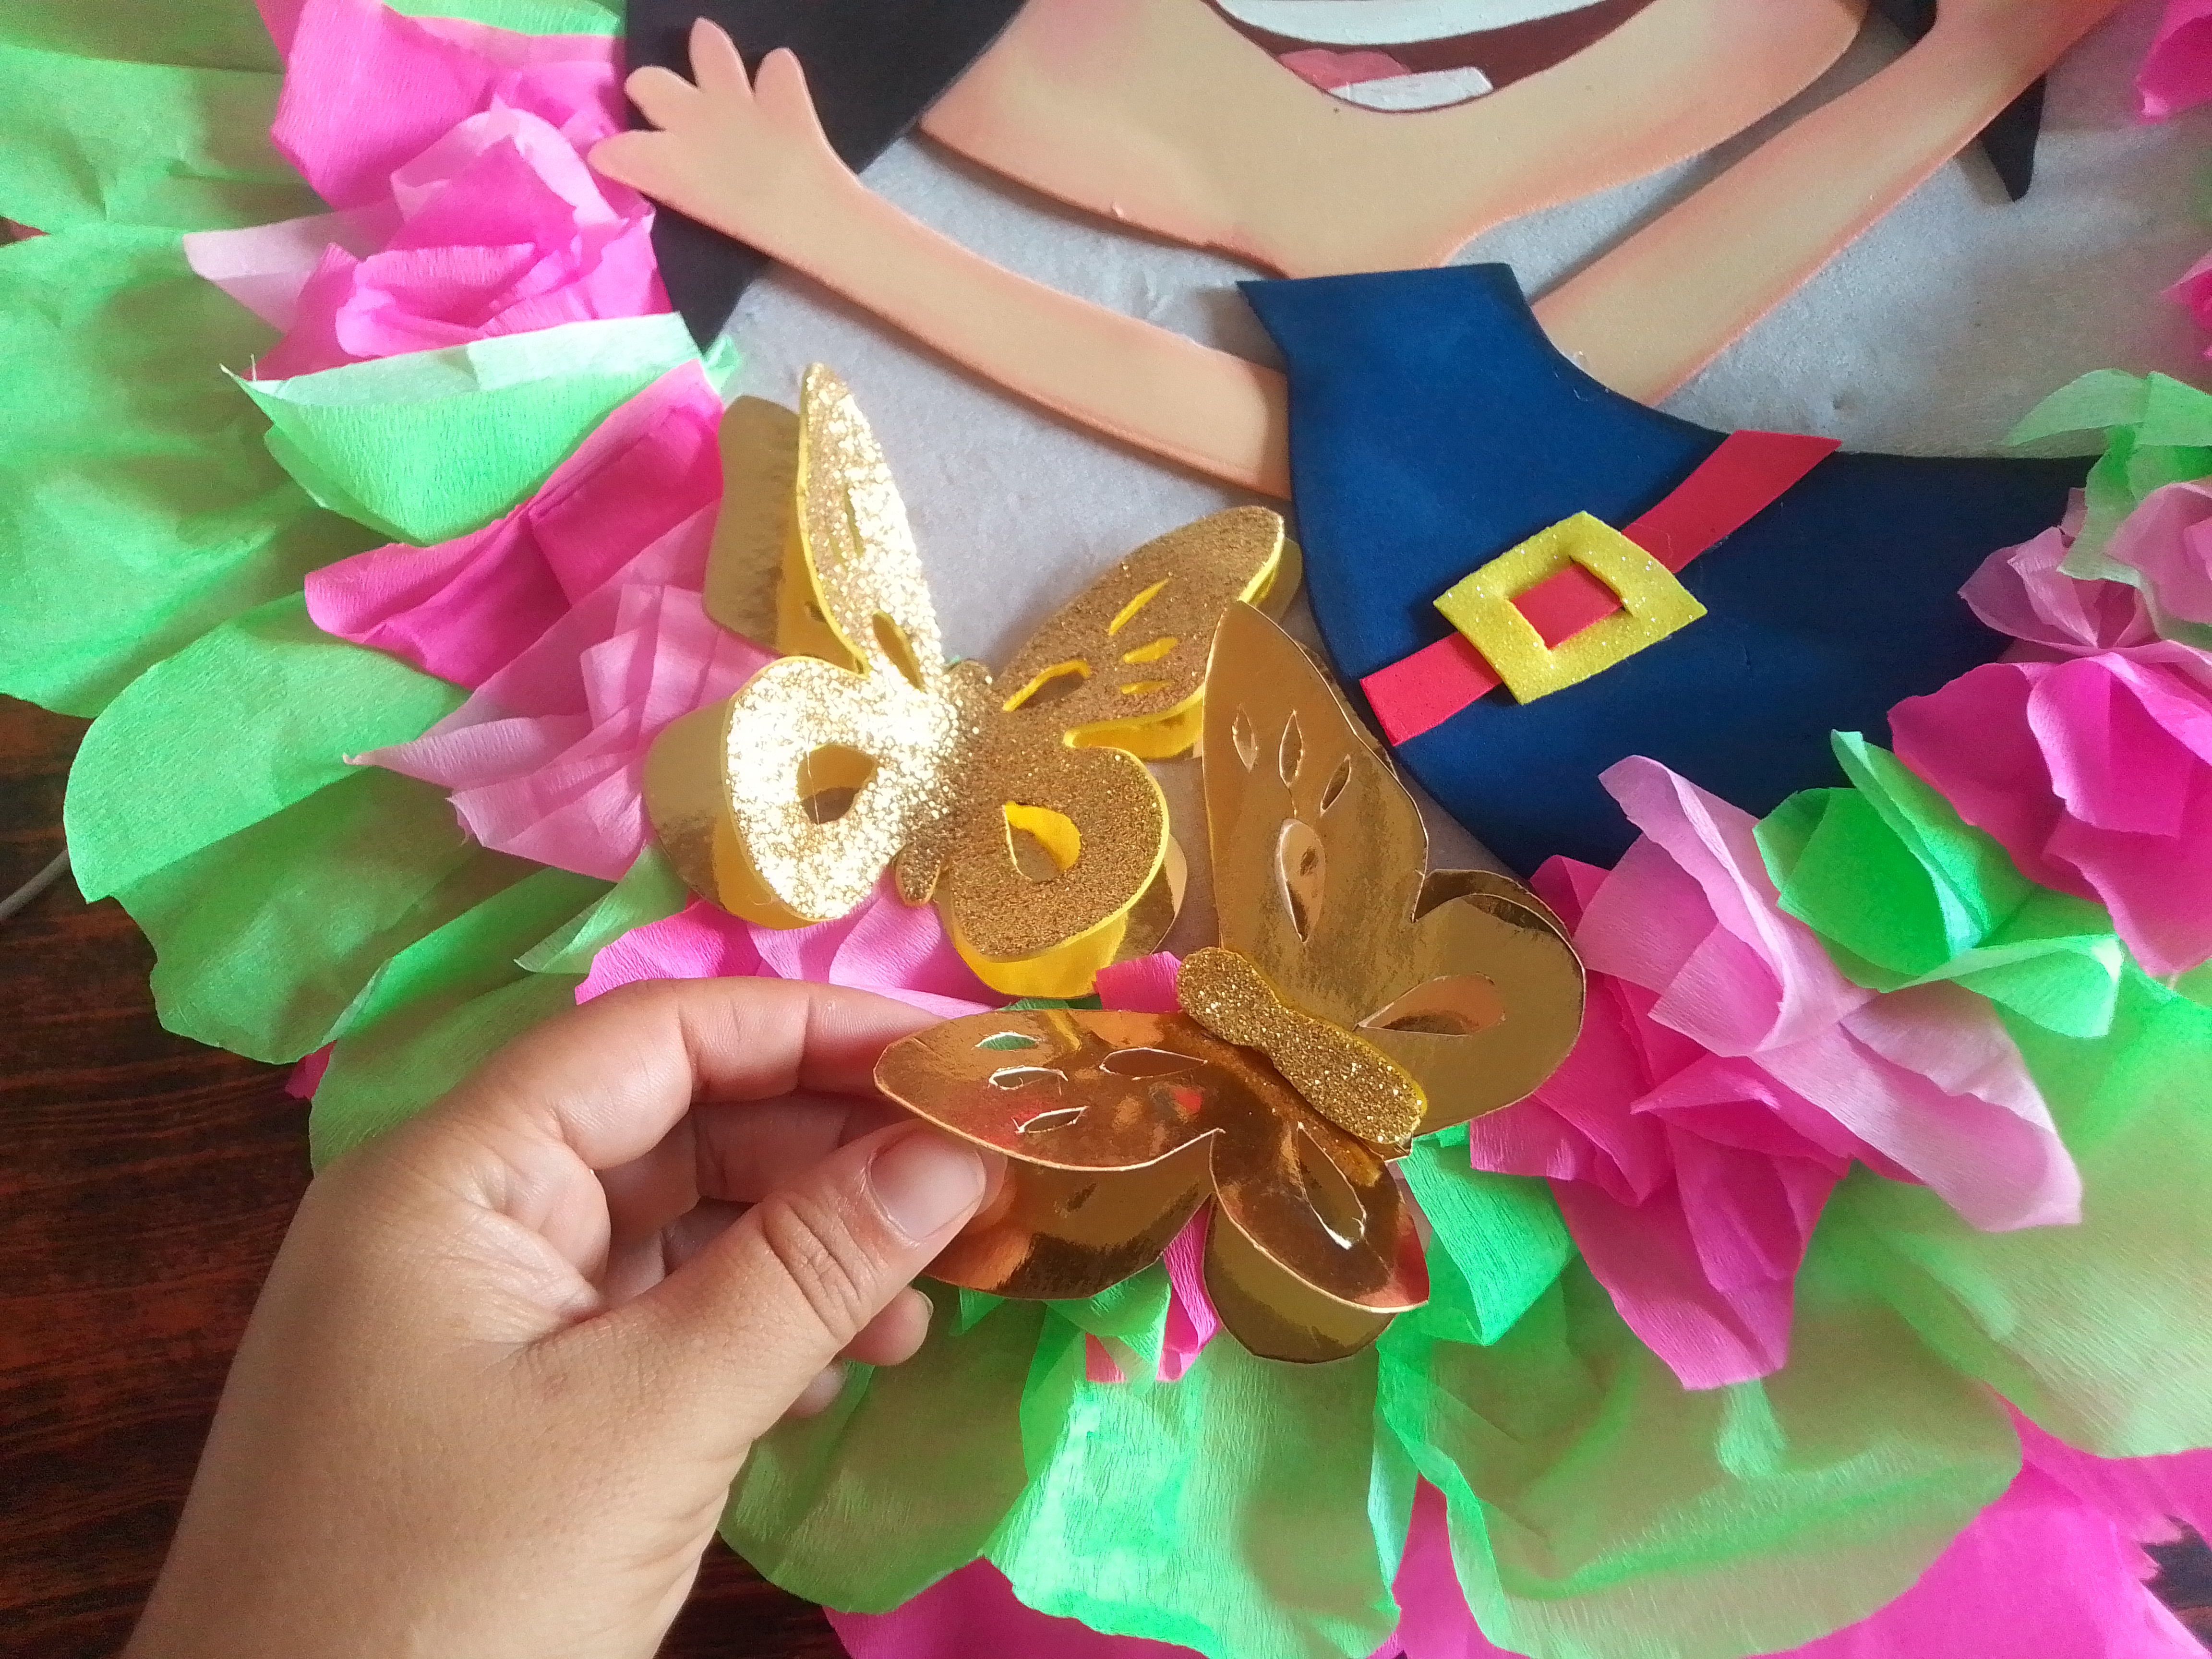
Utilizo pinturas de cada color para profundizar los bordes del foami. Y luego paso a pintar el rostro alegre del personaje. Ubicamos cada parte y armamos según el boceto. Seguidamente pegamos está extrovertida chica en el centro de nuestra piñata y añadimos unas mariposas a la decoración.
Step 07
I use paints of each color to deepen the edges of the foami. And then I go on to paint the cheerful face of the character. We locate each part and assemble according to the sketch.Next we paste this extroverted girl in the center of our piñata and add some butterflies to the decoration.
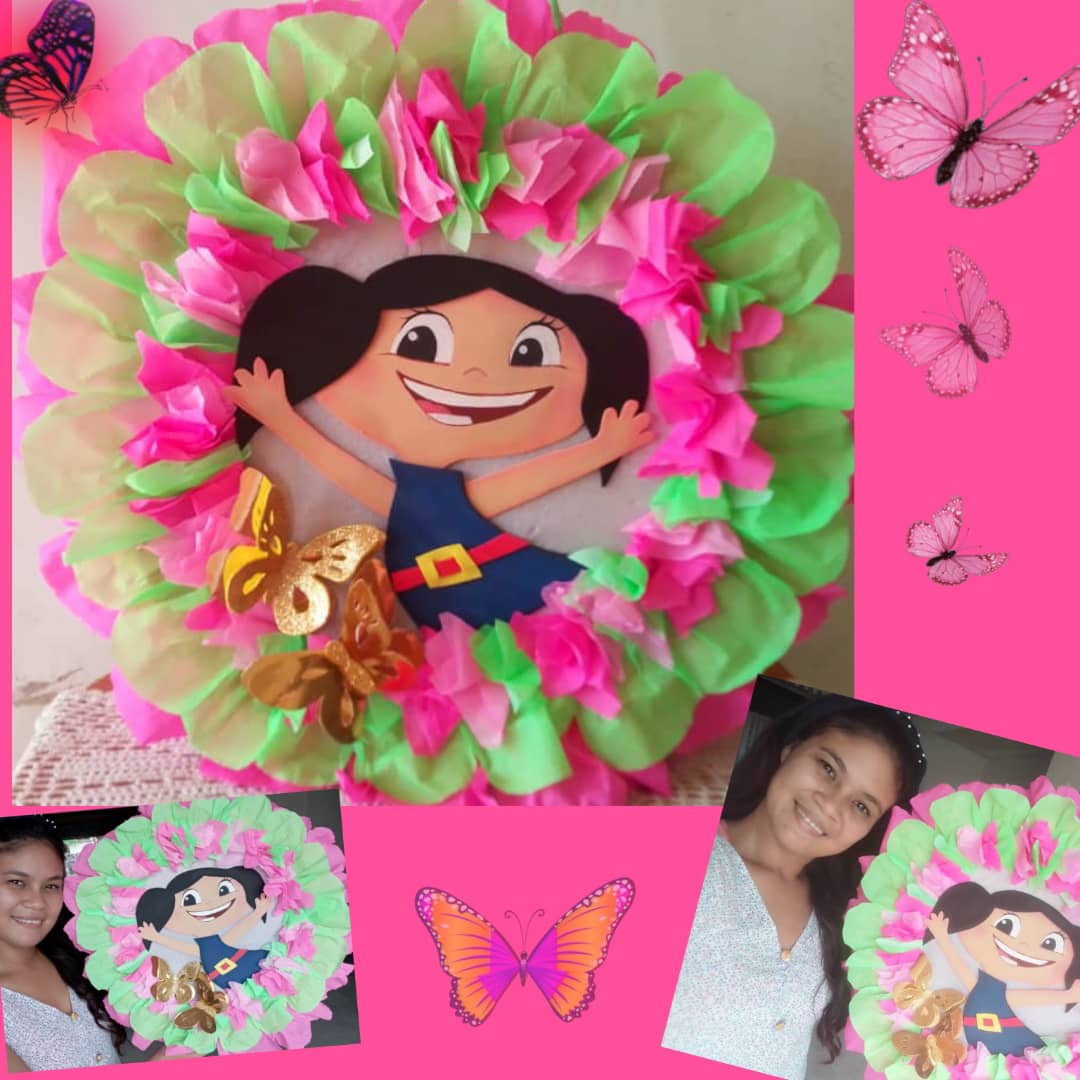
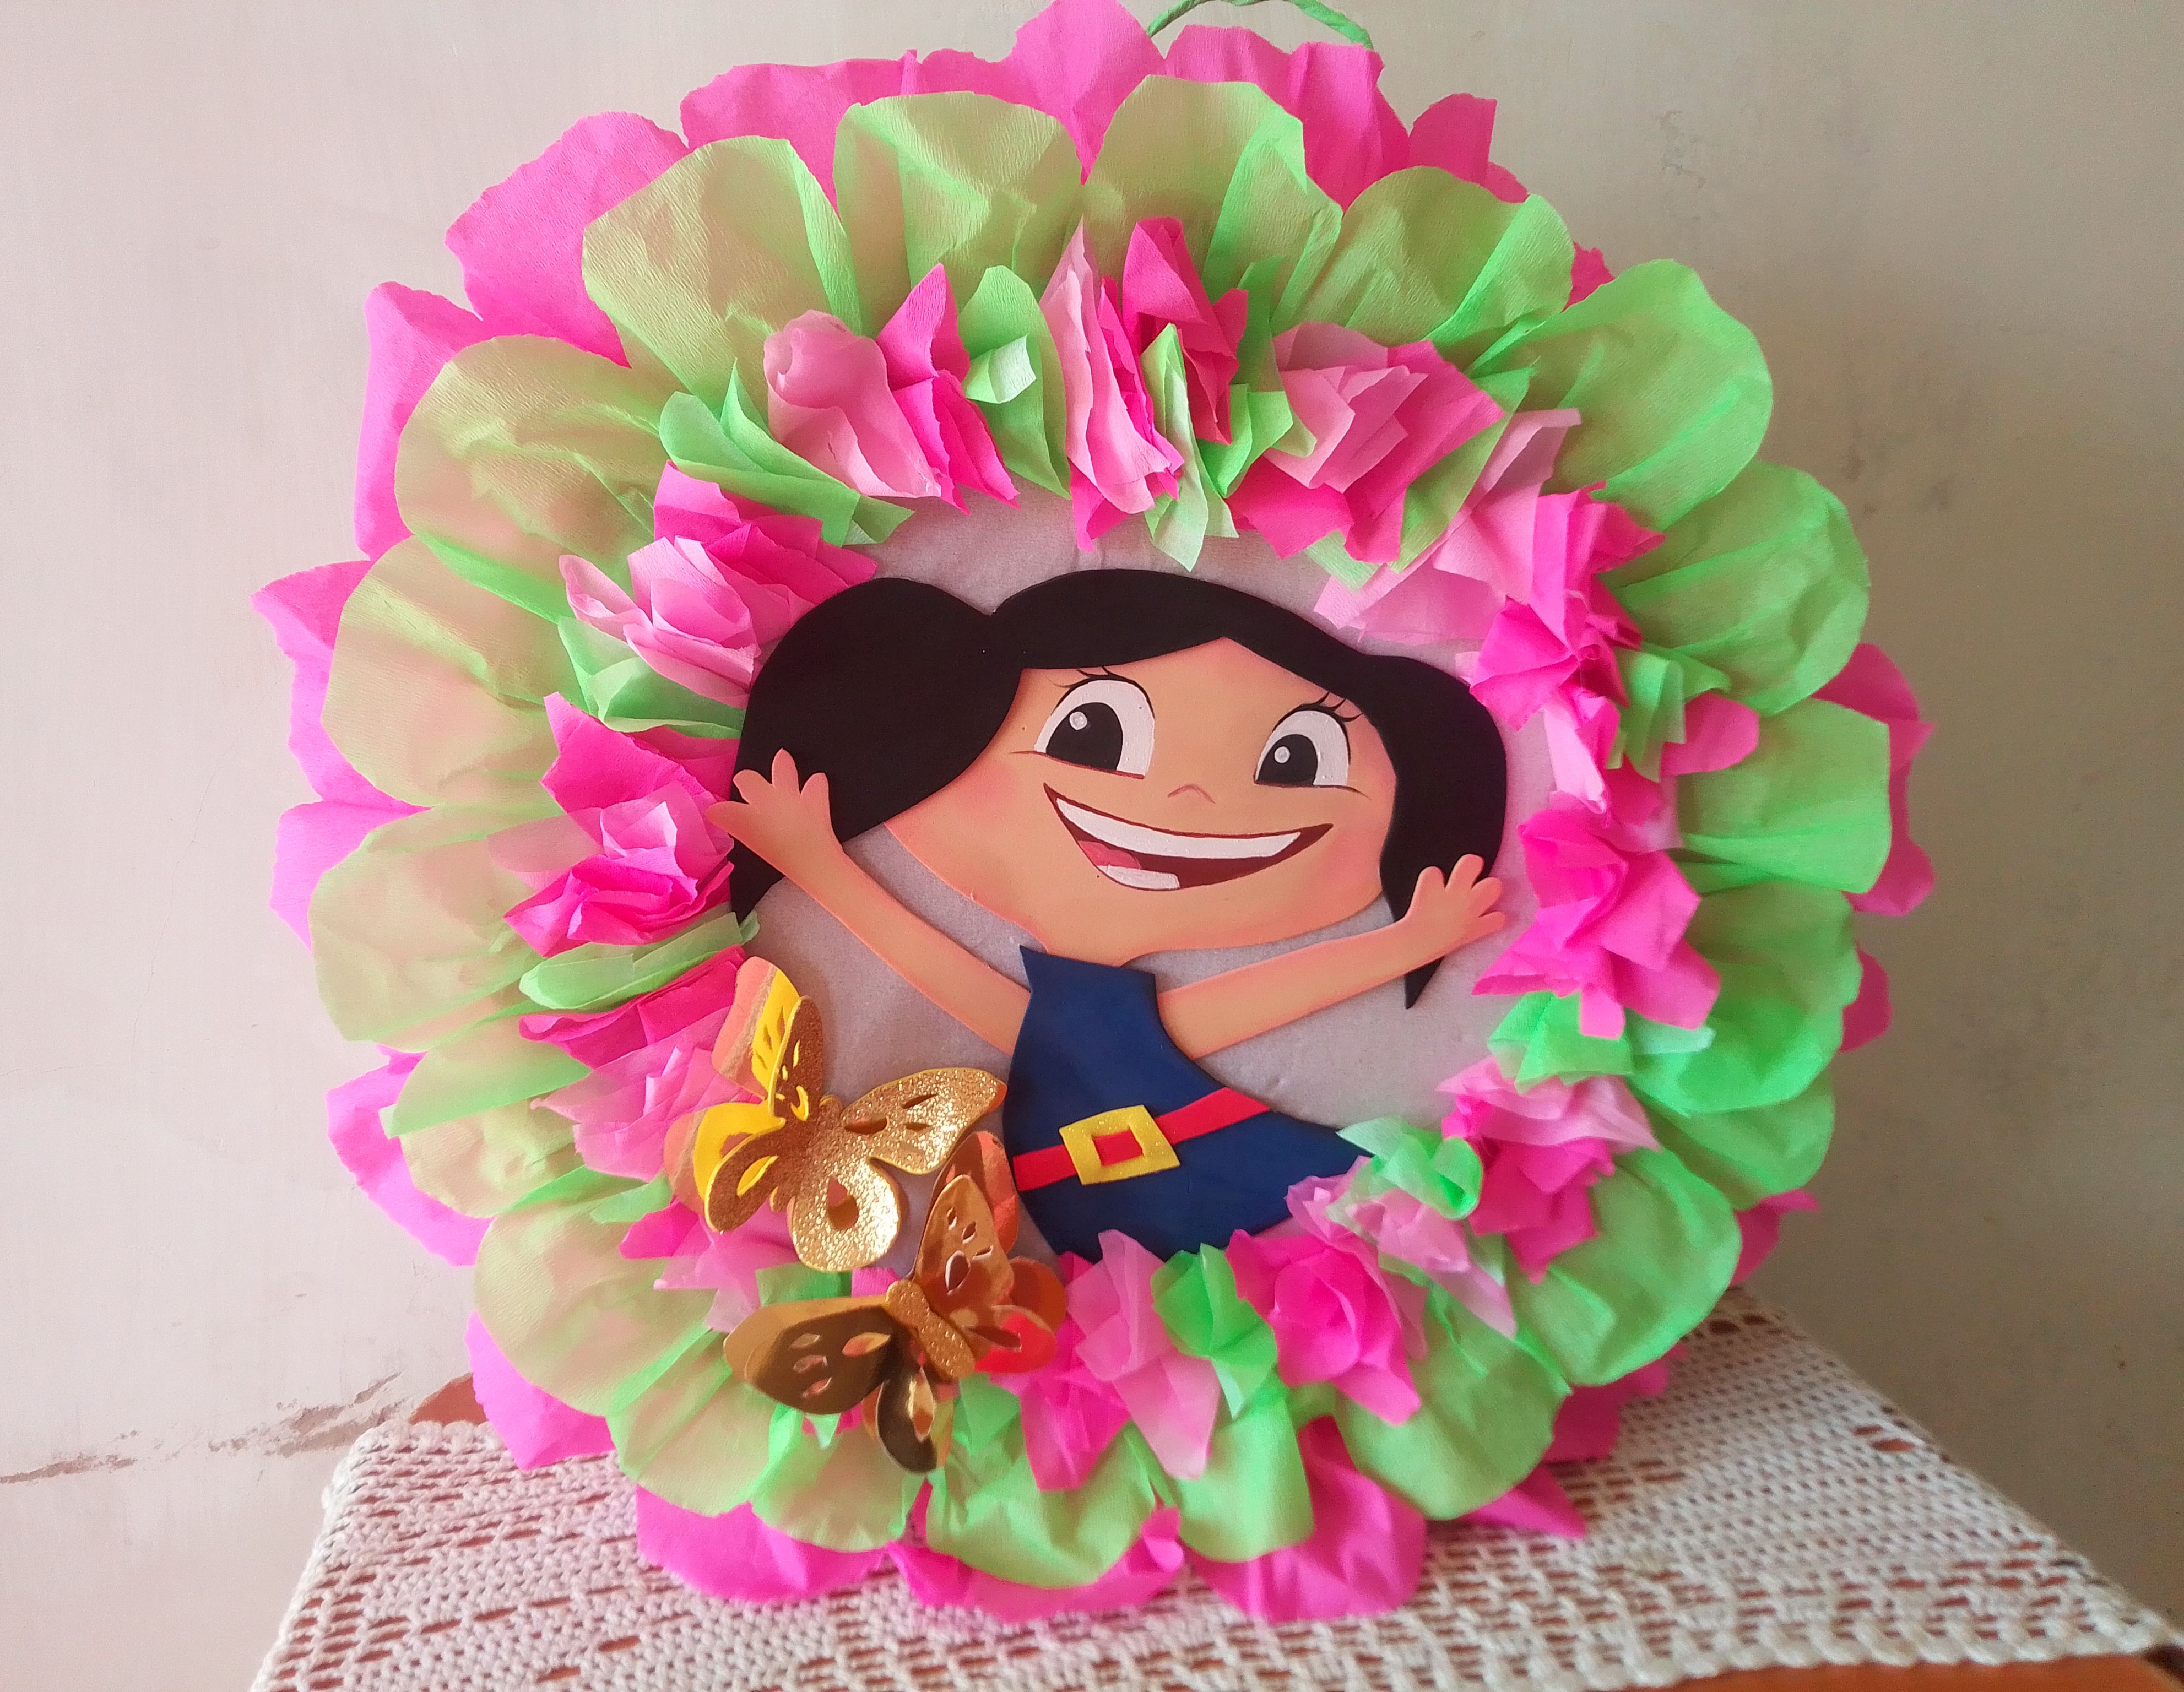
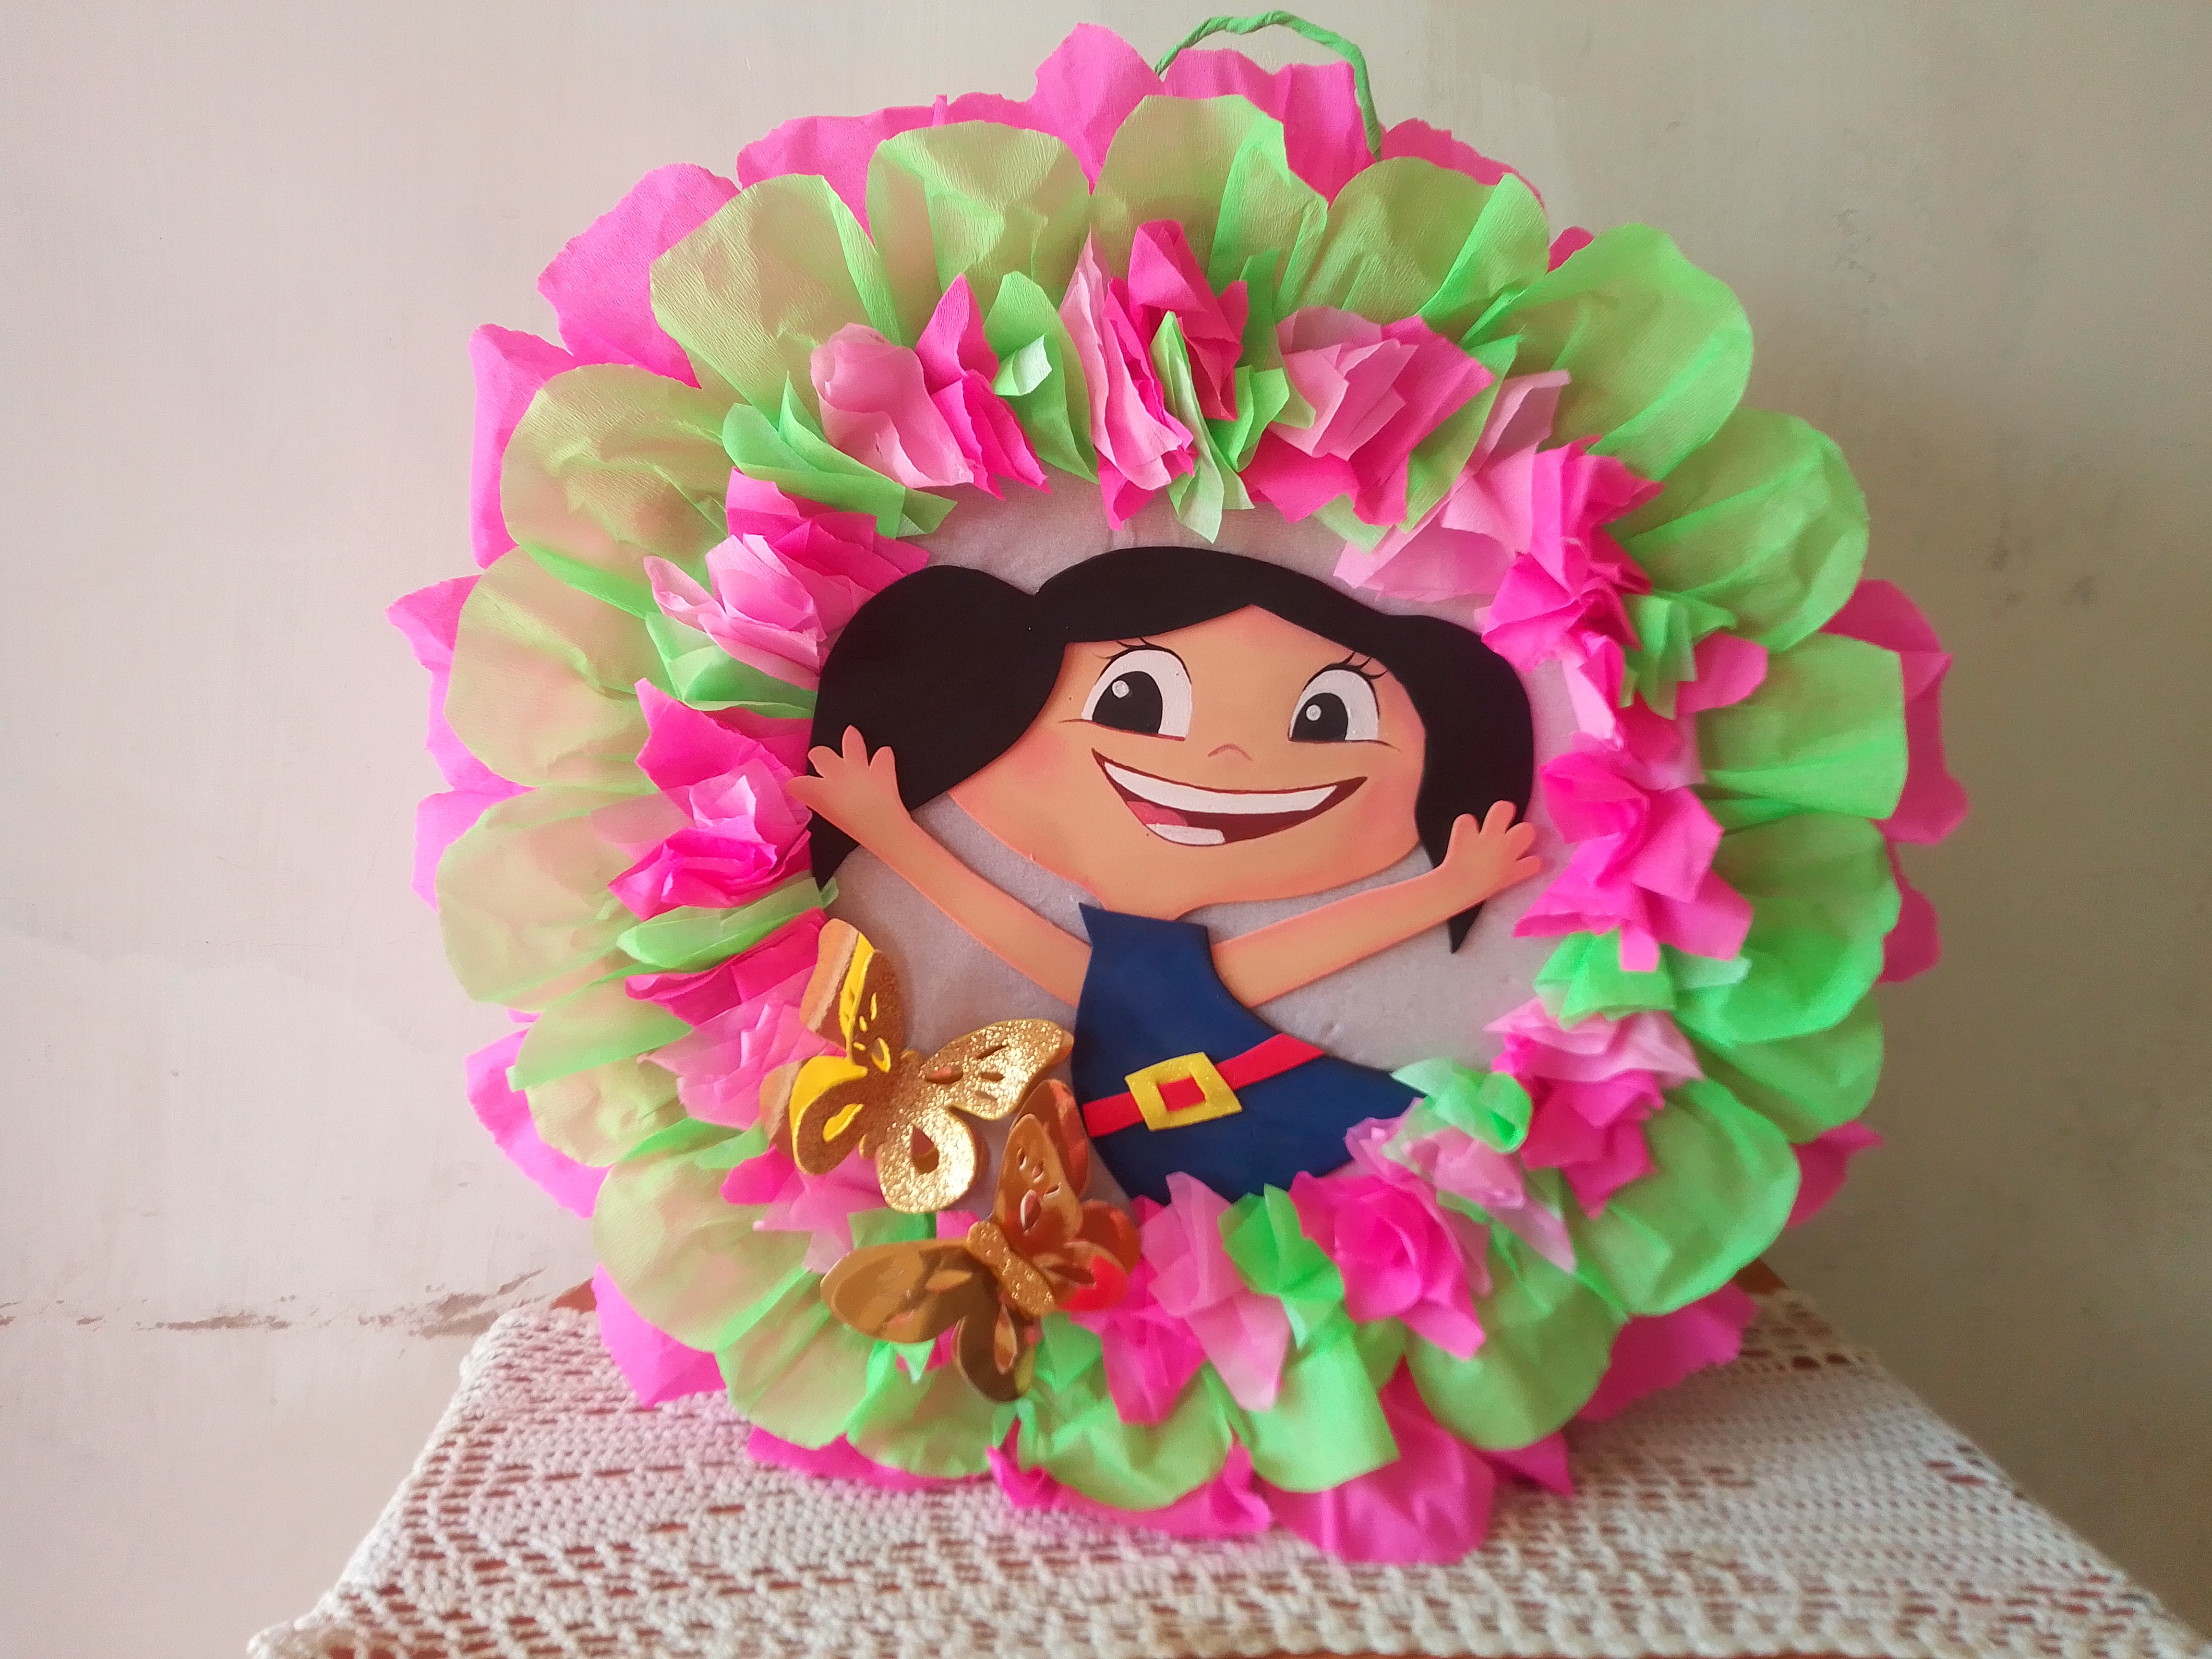
💞Resultado! 💞
Con cariño les muestro este increíble resultado, que ha encantado y que ha puesto a mi niña más impaciente que nunca porque llegue el día de su cumpleaños.
With love I show you this incredible result, which has delighted and has made my girl more impatient than ever for her birthday to arrive.

Como ven, hacer este tipo de piñatas no es tan complicado, solo se necesita un poco de disponibilidad e imaginación, pude hacerla en tan solo 3 horas. Son proyectos que fácilmente pueden servir para nuevos emprendimientos de trabajo, mientras la creaba pensaba en negocio lleno de piñatas cómo esta. Espero también para ustedes haya sido de gran valor este tutorial si en algún momento quieren crear una piñata cómo esta, me gustaría saber que les pareció, por los momentos me despido deseandoles una linda tarde, Dios les bendiga y hasta una próxima oportunidad!.
As you can see, making this type of piñata is not that complicated, it just takes a little availability and imagination, I was able to do it in just 3 hours. They are projects that can easily be used for new work ventures. While I was creating it, I was thinking about a business full of piñatas like this one. I also hope this tutorial has been of great value to you if at any time you want to create a piñata like this, I would like to know what you think, for now I say goodbye wishing you a nice afternoon, God bless you and see you next time!.
Hola, saludos, te quedo hermosa la piñata, a mi hija también les gusta este personaje, enseña muchas cosas, tu hija estará muy feliz.
@razielmorales primero amiga a mi me encanta esta muñequita porque tiene la comiquita mas educativa del mundo jeje y segundo aprenderé hacer mis propias piñatas para los cumples de mis hijas!!! Yess!!! Gracias por compartir cada paso esto me cayo del cielo amiga😍
https://leofinance.io/threads/dayadam/re-leothreads-2fxm9fhkk
The rewards earned on this comment will go directly to the people ( dayadam ) sharing the post on LeoThreads,LikeTu,dBuzz.
This is so beautiful finishing. I love all the designs.
The piñata is very nice. You give us an excellent step by step. Thank you for your contribution to the community, we hope you keep bringing valuable work. Congratulations @razielmorales :) // Te quedo muy linda la piñata. Nos regalas un excelente paso a paso. Gracias por tu aporte a la comunidad, esperamos sigas trayendo trabajos de valor. Felicidades @razielmorales :)
#hive #posh
vaya! que preciosa te ha quedado esta piñata. Me encanta el resultado! felicidades.
Ah! Es una decoración bellísima! Me encantó este decorado y el proceso creativo se Luna, le quedó genial!