[Esp/Eng]Como hacer una carpeta Prenatal // How to make a Prenatal folder
Muy buenos días, tardes o noche amigos artesanos y creadores de bricolaje, dependiendo de la hora en que visiten el post que le comparto hoy espero les guste es otra de mis grandes creaciones, aprovechando que me había solicitado una carpeta para control prenatal aproveché para tomar fotos del paso a paso para traerles este pequeño tutorial a todos
Como ya les mencioné hoy les traigo un proyecto que se les va a encantar una de las chicas de administración del IVSS me preguntó si podía realizar carpetas para control prenatal y con mucho gusto le dije que claro yo se la podría realizar y le quedaría muy hermosa, también me dijo que la gestante era su hija y que estaba esperando una niña por lo que le mostré varios modelos y le encantó una de una osita muy hermosa, sin más que agregar pongamos manos a la obra

Los materiales que utilicé para crear este hermoso proyecto con los siguientes:
- Carpeta reciclada
- Foamy color rosado
- Cartulina escolar rosada
- Pistola de silicon
- Tijera
- Foamy escarchado dorado
- Cinta de bebe dorada
- Cinta de lazos rosada
- Encaje blanco
- Pintura al frío blanca
- Pincel
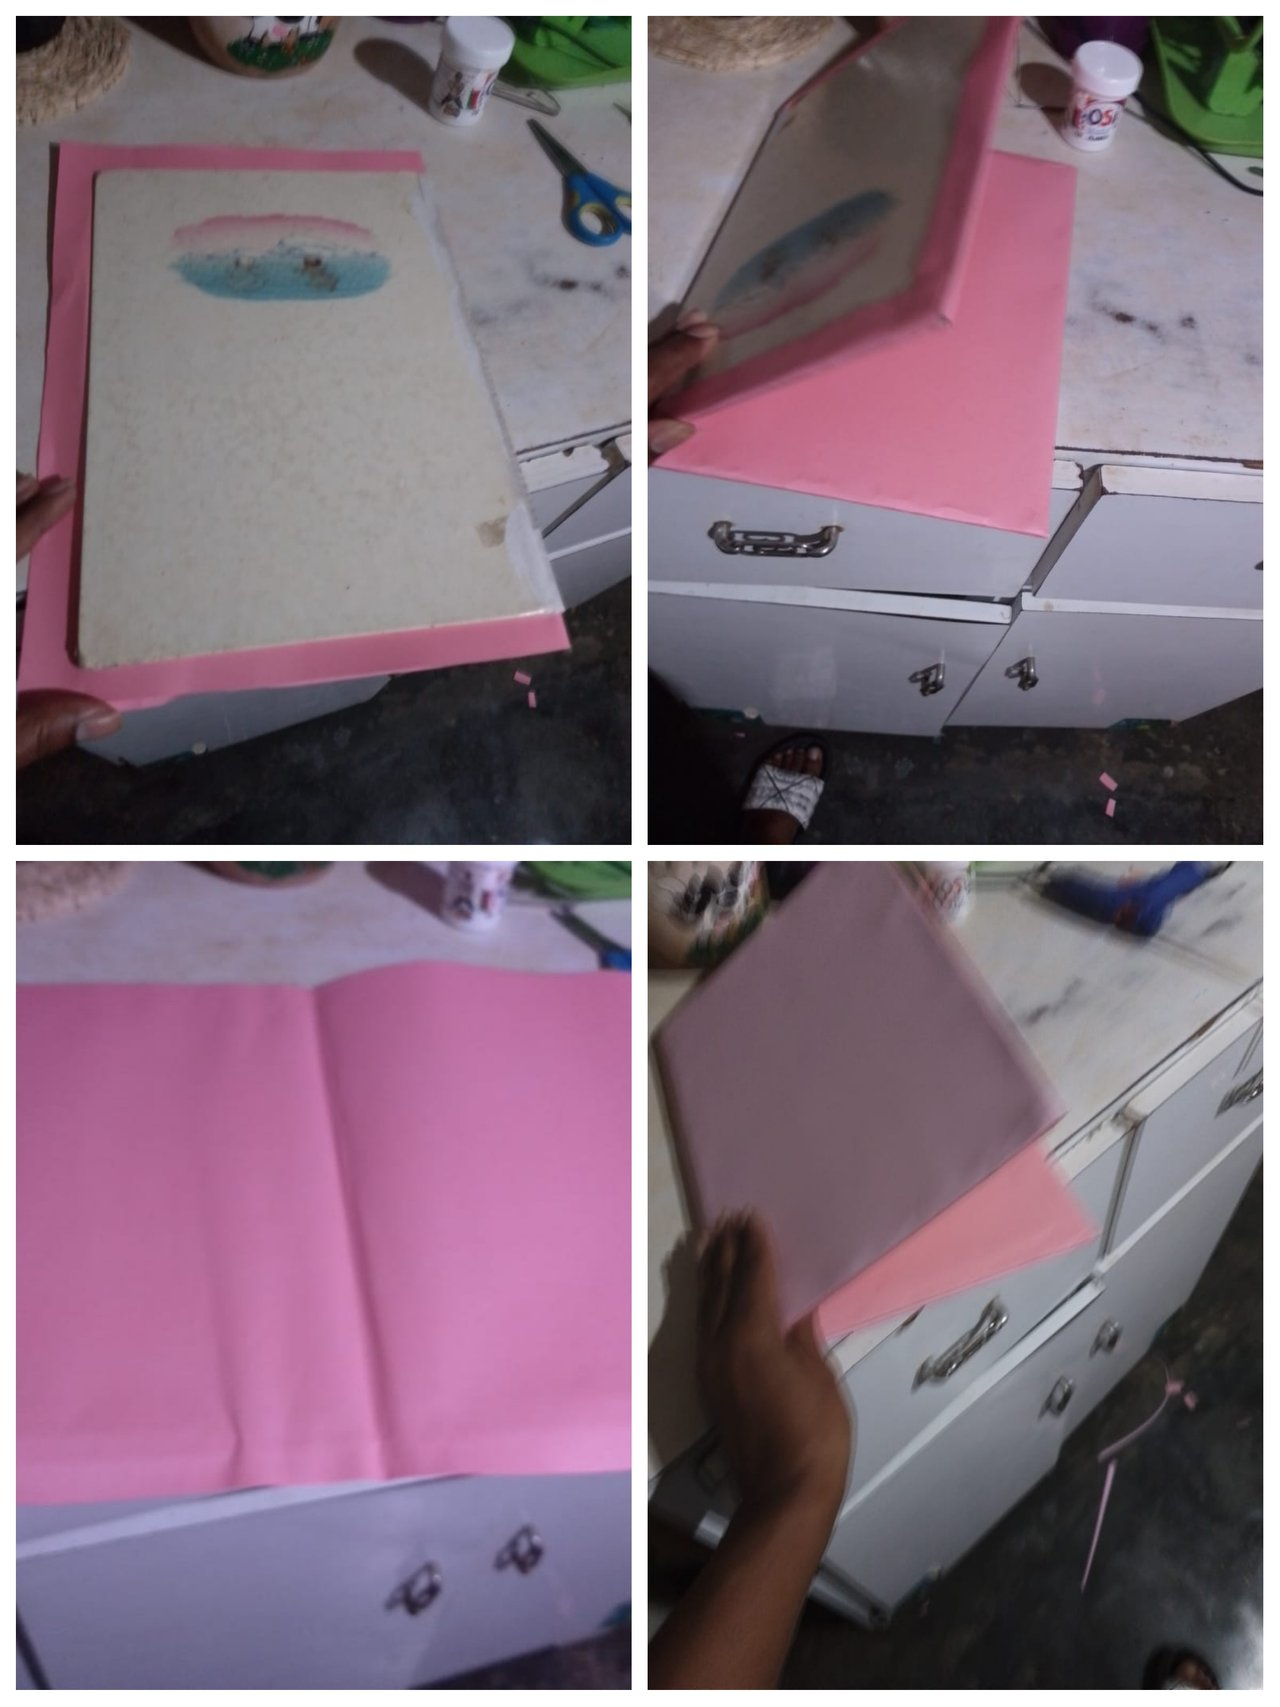
Lo primero que vamos a hacer es tomar la cartulina escolar y medimos la cantidad que usaremos, la pegamos en la carpeta por la parte de dentro de la carpeta y usando la pistola de silicon y por fuera le vamos a pegar las dos láminas del foamy rosado una por cada cara de la carpeta y cortamos el sobrante que nos queda

Ahora que ya hemos forrado la carpeta vamos a realizar unas pequeñas flores blancas con el pincel por todo el borde superior y también en la parte inferior de la carpeta
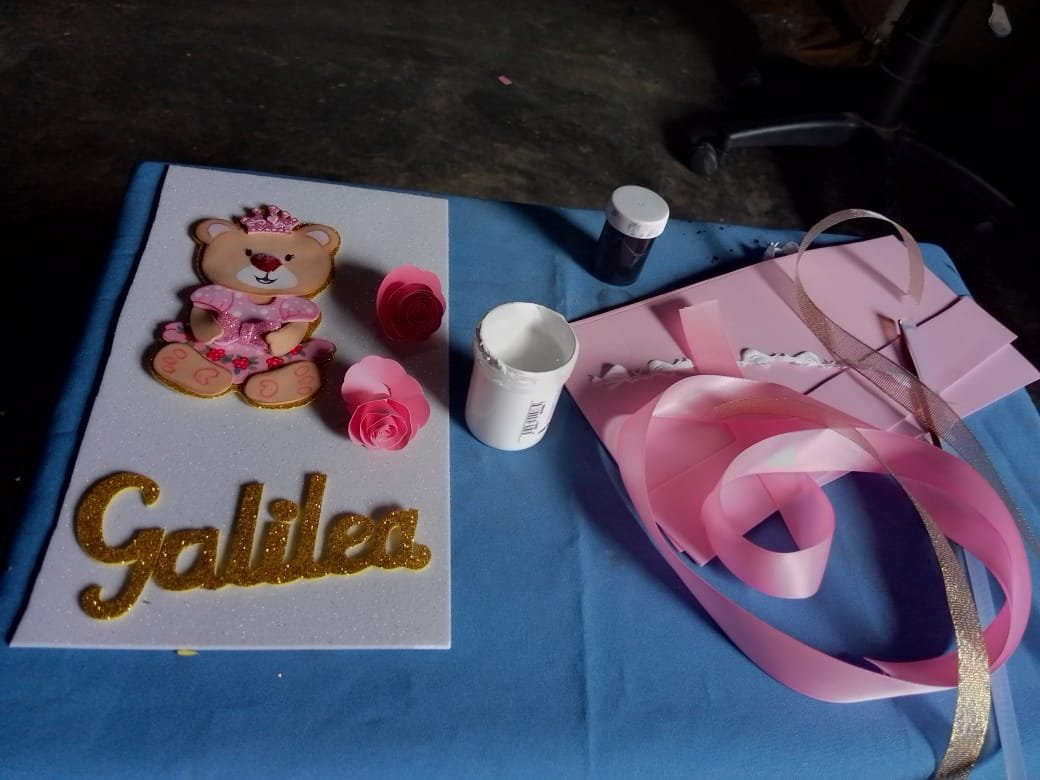
Vamos a realizar una linda osita con el foamy cortamos primero todas las piezas y la armamos y le colocamos de fondo el foamy escarchado dorado para resaltar, tomamos la cartulina escolar hacemos unas pequeñas rosas, y el nombre de la bebé que está por nacer lo hacemos con el foamy escarchado dorado
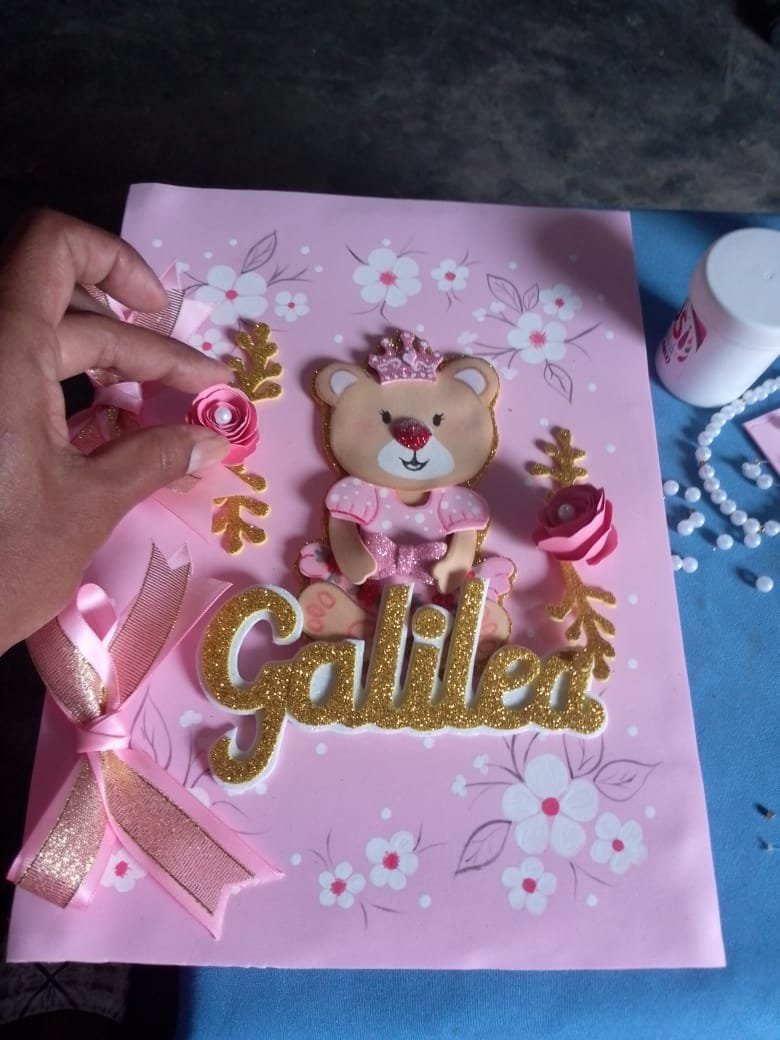
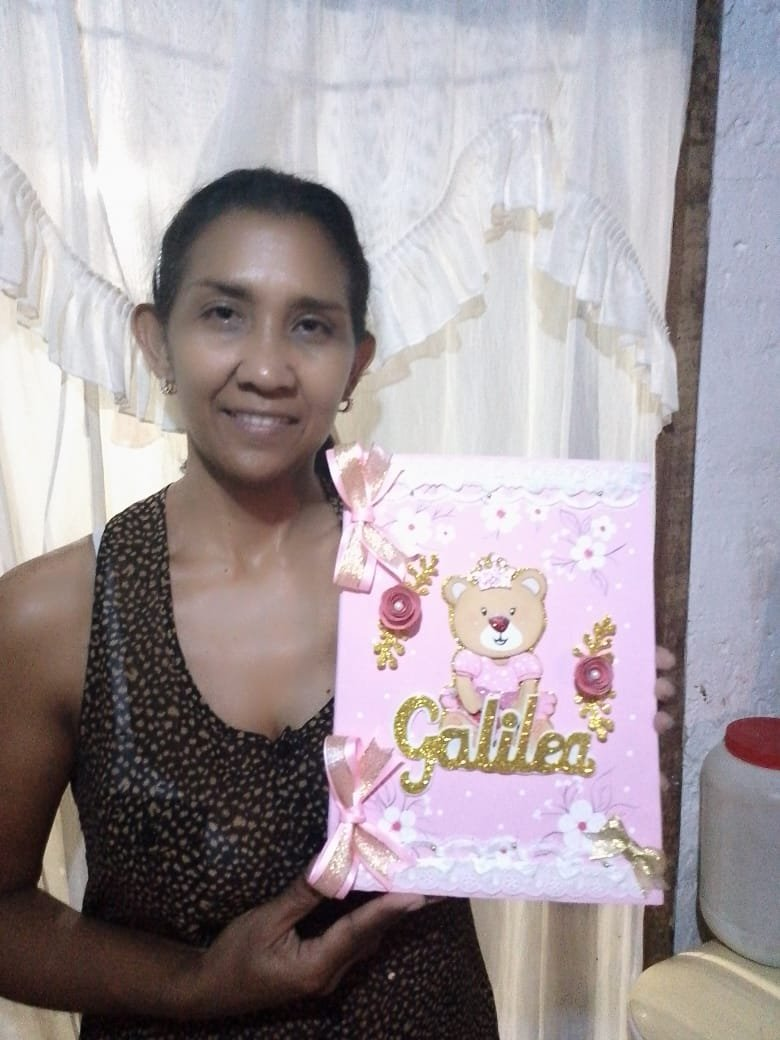
Por último pegamos la figura en nuestra carpeta, colocamos las rositas, el nombre de la bebé y adornamos con unos lazos y unas ramitas con el foamy dorado a las rositas y listo tendremos nuestra carpeta Prenatal lista para entregar, la abuela quedó encantada cuando vio el resultado
Bueno amigos espero que les guste el proyecto que les traigo con mucho cariño nos vemos en un próximo proyecto
Las imágenes mostradas fueron realizadas con mi teléfono Infinity Hot Play 12
Traductor Google en línea
English
Very good morning, afternoon or evening friends artisans and DIY creators, depending on the time you visit the post that I share with you today, I hope you like it, it is another of my great creations, taking advantage of what I had requested a folder for prenatal control, I took the opportunity to take photos of the step by step to bring this little tutorial to everyone
As I already mentioned, today I bring you a project that you are going to love. One of the IVSS administration girls asked me if I could make folders for prenatal control and I was happy to tell her that of course I know I could make it and it would look very beautiful. He also told me that the surrogate was his daughter and that she was expecting a girl, so I showed her several models and she loved one of a very beautiful bear. Without further ado, let's get to work
The materials I used to create this beautiful project with the following:
- Recycled folder
- Pink foamy
- Pink school cardboard
- Silicone gun
- Scissors
*Gold frosted foamy - Golden baby ribbon
- Pink bow ribbon
- White lace
- White cold paint
- Brush
The first thing we are going to do is take the school cardboard and measure the amount that we will use, we glue it to the folder on the inside of the folder and using the silicone gun and on the outside we go Let's glue the two sheets of pink foam, one on each side of the folder, and cut off the excess that remains
Now that we have lined the folder we are going to make some small white flowers with the brush all over the upper edge and also at the bottom of the folder
We are going to make a cute little bear with the foam. We first cut all the pieces and put it together and place the gold frosted foam in the background to highlight it. We take the school cardboard and make some small roses, and the name of We make the baby that is about to be born with the golden frosty foam
Finally we paste the figure in our folder, we place the roses, the baby's name and we decorate the roses with some bows and some twigs with the golden foam and that's it we will have our Prenatal folder ready to deliver , grandma was delighted when she saw the result
Well friends, I hope you like the project that I bring you with great love, see you in the next project
The images shown were taken with my Infinity Hot Play 12 phone
Google Translate online
!DIY
!discovery 30
Muchas gracias por tu apoyo amigo
This post was shared and voted inside the discord by the curators team of discovery-it
Join our Community and follow our Curation Trail
Discovery-it is also a Witness, vote for us here
Delegate to us for passive income. Check our 80% fee-back Program
Wow, this is really nice and I’m surprised that you actually made everything from scratch
This is stunning and pink also makes it more nicer
Hola amiga muchas gracias por tu visita que lindo comentario es muy agradable ver qué te elogien de esa manera tan linda