
Saludos comunidad @diyhub, les deseo un feliz día en unión familiar, me siento feliz de compartir un nuevo proyecto de moldeado con masa flexible, me gusta por su textura y facilidad para trabajar; se trata del personaje Chance que aparece en el juego Forsaken, quien destaca por su llamativo sombrero fedora y traje negro.
Greetings @diyhub community, I wish you a happy family day. I'm happy to share a new molding project with flexible clay. I like its texture and ease of work. It's about the character Chance who appears in the game Forsaken, and who stands out for his striking fedora hat and black suit.


Pintura al frío
Estecas
Crema para moldear
Pegamento
Masa flexible
Cold paint
Cuttings
Modeling cream
Glue
Flexible compound

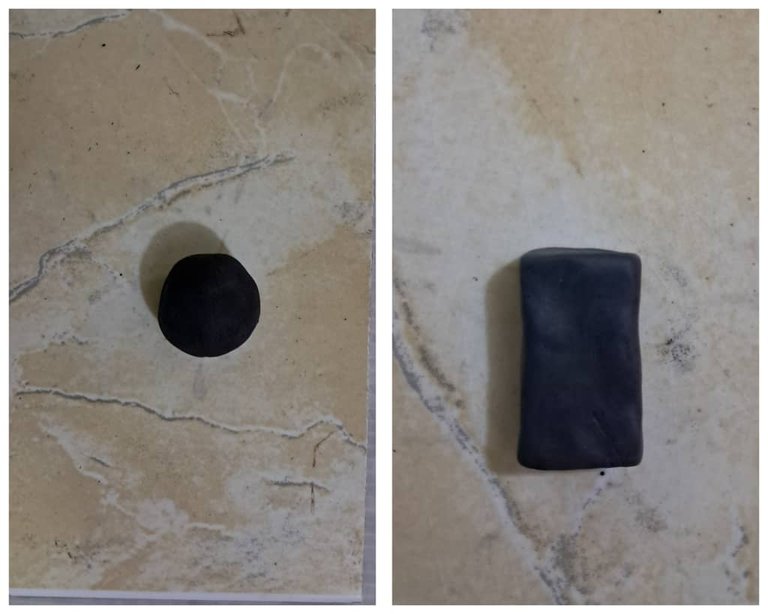
Iniciamos dividiendo la masa en pequeñas porciones, luego agregamos pintura y mezclamos hasta obtener el color deseado, luego formamos una bola, aplanamos y formamos un rectángulo que será la base del cuerpo.
Con ayuda de las estecas sacamos una franja desde arriba hasta abajo, rellenamos con masa de color blanco, a la cual previamente hemos añadido pintura y mezclado, para lograr un color uniforme, colocamos pegamento y dejamos secar por aproximadamente 15 minutos.
We start by dividing the dough into small portions, then add paint and mix until the desired color is achieved. Then, we form a ball, flatten it, and form a rectangle that will be the base of the body.
Using the stakes, we cut a strip from top to bottom, fill it with white dough, to which we previously added paint and mixed to achieve a uniform color, apply glue, and let it dry for approximately 15 minutes.

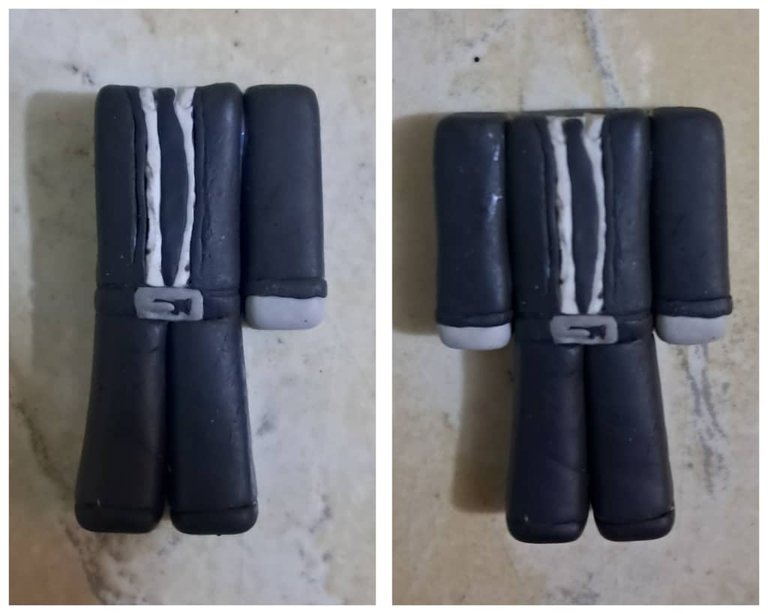
Con la masa de color negro aplanamos dos tiras, con una hacemos la corbata, le damos forma puntiaguda en la parte de abajo y redondeada en la parte de arriba, agregamos pegamento y unimos a la camisa, con la otra tira negra haremos la correa y con masa gris un rectángulo y una tira muy delgada en el centro que será la hebilla, colocamos también pegamento y unimos la correa en la parte de abajo de la camisa y dejamos secar al igual que en el paso anterior.
With the black dough we flatten two strips, with one we make the tie, we give it a pointed shape at the bottom and rounded at the top, we add glue and join it to the shirt, with the other black strip we will make the strap and with gray dough a rectangle and a very thin strip in the center that will be the buckle, we also put glue and join the strap at the bottom of the shirt and let it dry just like in the previous step.

Para hacer las piernas moldeamos dos rectángulos con masa negra y en la parte de abajo agregamos un cuadrado que salga un poco hacia la parte delantera, este será el zapato, luego ponemos pegamento y dejamos secar, luego unimos las piernas al cuerpo colocando también pegamento y dejamos secar.
To make the legs, we mold two rectangles with black dough and at the bottom we add a square that sticks out a little towards the front, this will be the shoe, then we apply glue and let it dry, then we join the legs to the body also applying glue and let it dry.


Los brazos, los moldeamos al igual que las piernas, para los puños usamos masa gris y hacemos un cuadrado, encima de este colocamos una tira negra, unimos con pegamento y luego pegamos los brazos al cuerpo, nuevamente dejamos secar.
We molded the arms just like the legs. For the wrists, we used gray dough and made a square. On top of this, we placed a black strip, joined it with glue, and then glued the arms to the body. We let it dry again.
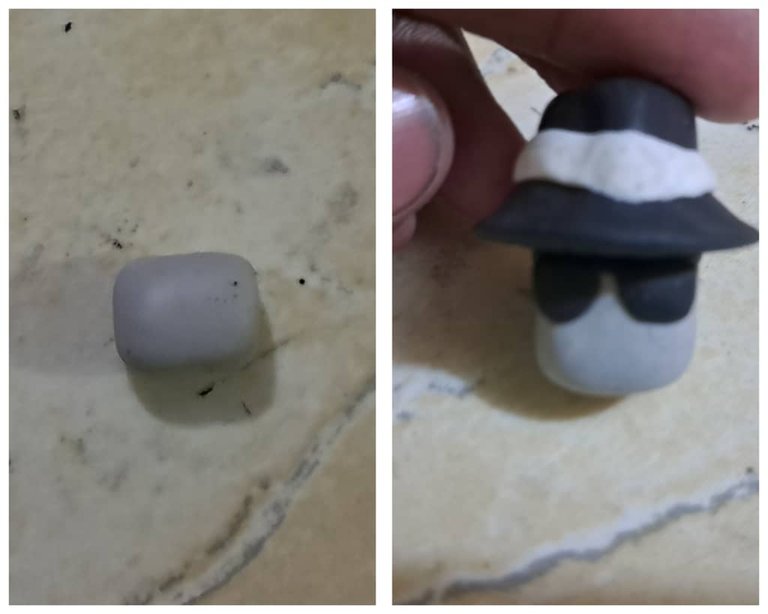
Moldeamos un círculo de color negro para hacer la copa del sombrero, luego hacemos un triángulo y lo pegamos en la parte de arriba del círculo, dejamos secar, con masa blanca hacemos una tira y la pegamos al sombrero.
We mold a black circle to make the crown of the hat, then make a triangle and glue it on top of the circle, let it dry, with white dough we make a strip and glue it to the hat.

Para hacer la cabeza, tomamos masa de color gris aplanamos y hacemos un cuadrado, con las manos y las estecas vamos dando forma, colocamos pegamento y la unimos al sombrero, al igual que los pasos anteriores dejamos secar.
Tomamos masa de color negro y moldeamos los lentes, con una tira negra delgada hacemos la boca, por los costados agregamos círculos negros que serán las orejeras, colocamos pegamento, dejamos secar y así está terminada la escultura de Chance.
To make the head, we take some gray dough and flatten it into a square. Shape it with our hands and the stakes. Apply glue and attach it to the hat, just like in the previous steps, and let it dry.
We take some black dough and shape the glasses. Use a thin black strip to make the mouth. On the sides, we add black circles for the earmuffs. We apply glue and let it dry. That's it. Chance's sculpture is finished.

Les muestro el resultado.
I show you the result

Gracias por Leer.
Thank you for reading.
See you later!
Translated with https://www.deepl.com/translator
    All images are of my authorship captured with an Alcatel phone.


      Todas las imágenes son de mi autoría capturadas con un teléfono Alcatel.
Thank you so much for sharing your new molding project with our community. We applaud your creativity. Well done.
selected by @ibbtammy
Hi @diyhub, I'm glad you liked it. Thanks for the support.
Best regards!
Hey bro! What a fun character! I love its shape and especially its colors. Thanks so much for sharing this detailed step-by-step guide on DIYHub. Great work!...
Greetings @jesuslnrs, I'm glad you liked Chance's sculpture; the colors and outfit are elegant.
Happy new week!
jeje que genial, muy increible
hehe that's great, very incredible
Saludos @yasmarit, me alegra que te haya gustado.