Every now and then something tends to malfunction inside your house.
This time it was my toilet. My wife noticed some water drips behind the toilet coming out of the water tank attachment screw.
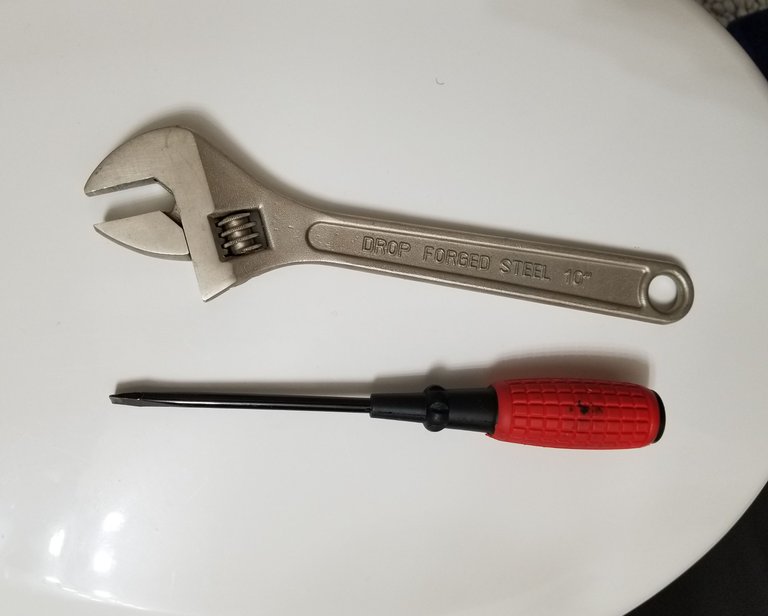
Fortinately the tools for this job are really simple. Just an adjustable wrench and a flathead screwdriver will do the trick.
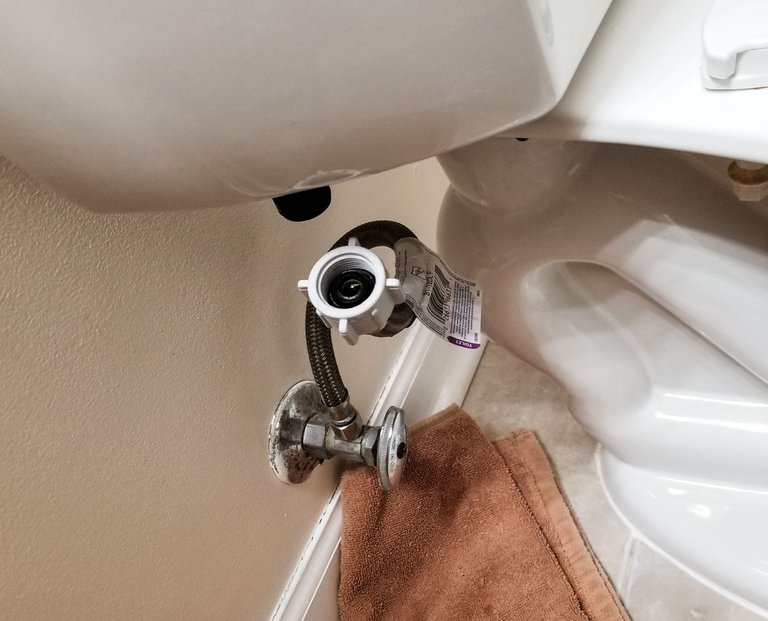
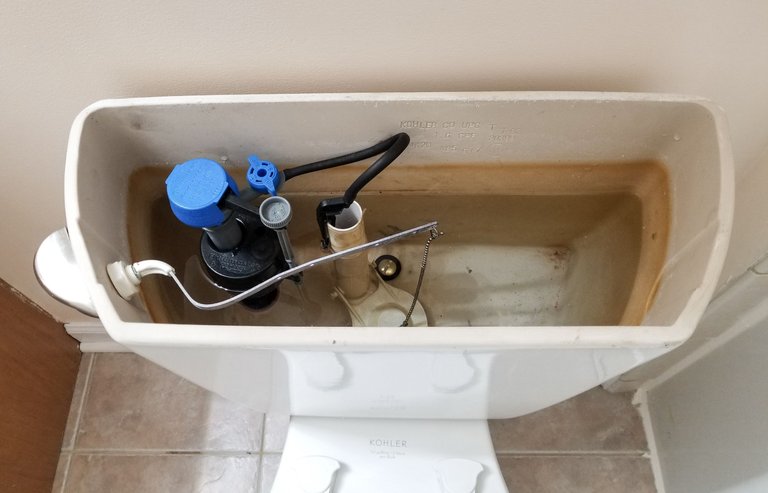
Before I can remove the water tank the water supply has to be turned off and disconnected. Fortunately about a year ago I already replaced the tubing to be a modern hose and not a soldered copper pipe, now that was a tough project. I can just unscrew the water intake by hand and get on to unscrewing the attachment screws.
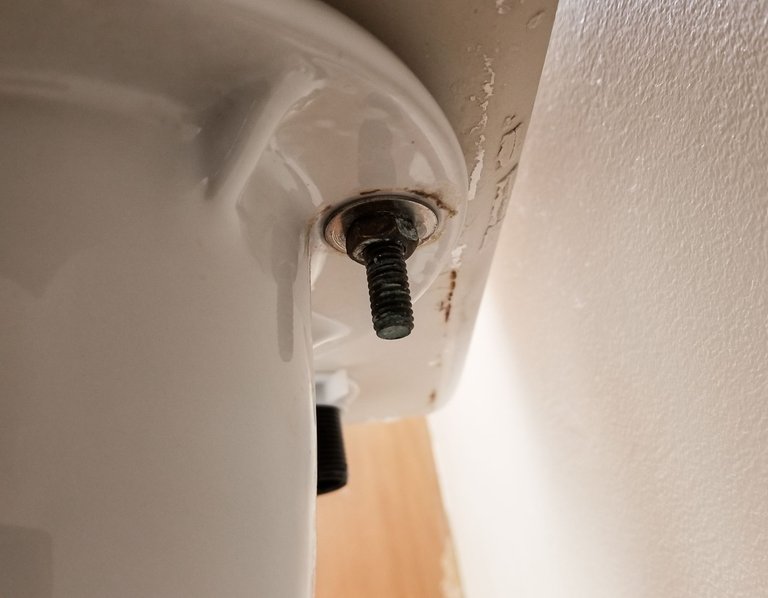
I drained all the water out and can see the rubber seal around the attachment screws is corroding. The seal must be around 20 years old and I'm surprised it lasted this long. It is rather tough trying to hold the nut with the wrench and unscrew the bolt with the flathead. Meanwhile my baby daughter started crying in the middle of this process lol.
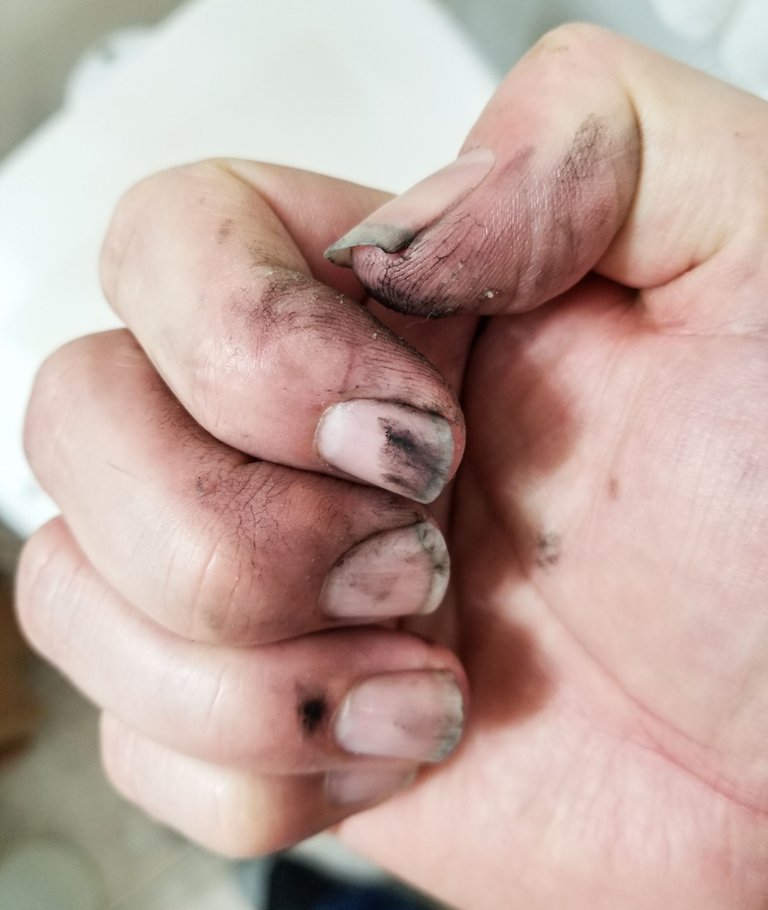
At this point my hands were quite dirty with old corroded rubber seal. I had to throuoghly wash my hand to go feed my daughter and rock her back to sleep. What would have been done in 15 minutes ended up taking over an hour lol.
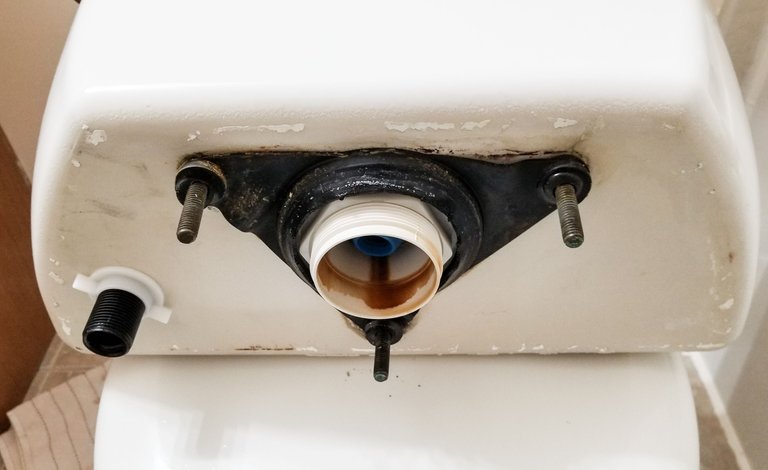
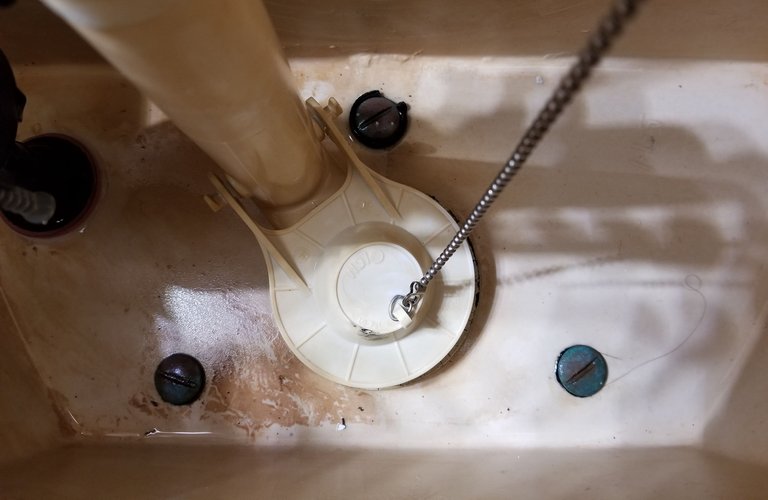
Now I have discovered a new challenge. The seal encompasses not only the bolts but the main water hole as well. If I try and remove the whole seal then I would need to replace the seal in the middle of the tank as well. I had to improvise as I would need to special order this strange triangular seal.
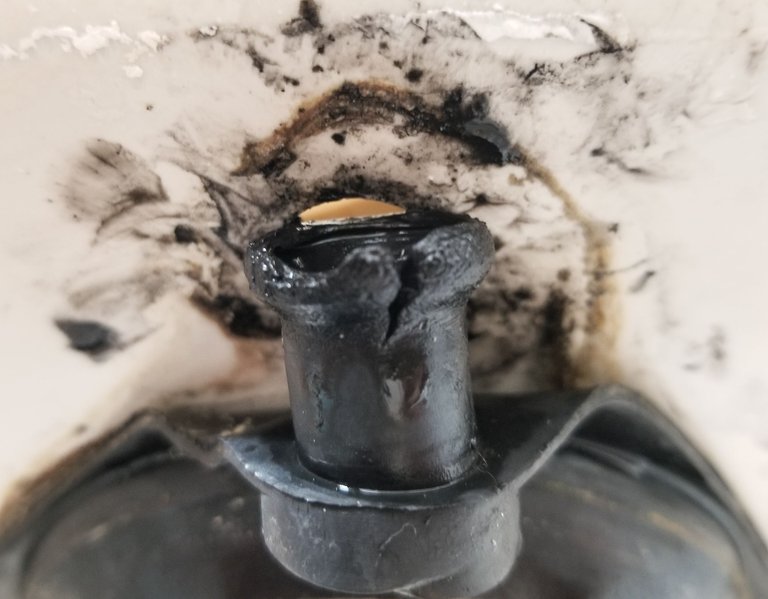
After some close inspection I noticed where the water was dripping past the screw. This crack slowly lets the water run down the screw threads. Fortunately this is an easy fix. I ended up cutting the entire cracked tip of this seal off. I also did the same for the other two screws to preempt the problem.
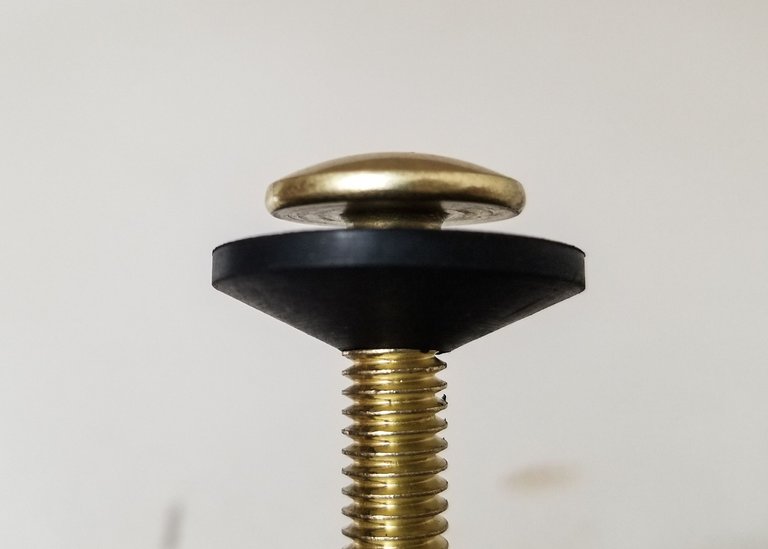
A more standard separate seal will do the job of the part I cut off. This way I can replace a smaller seal 20 years or so into the future when the rubber corrodes.
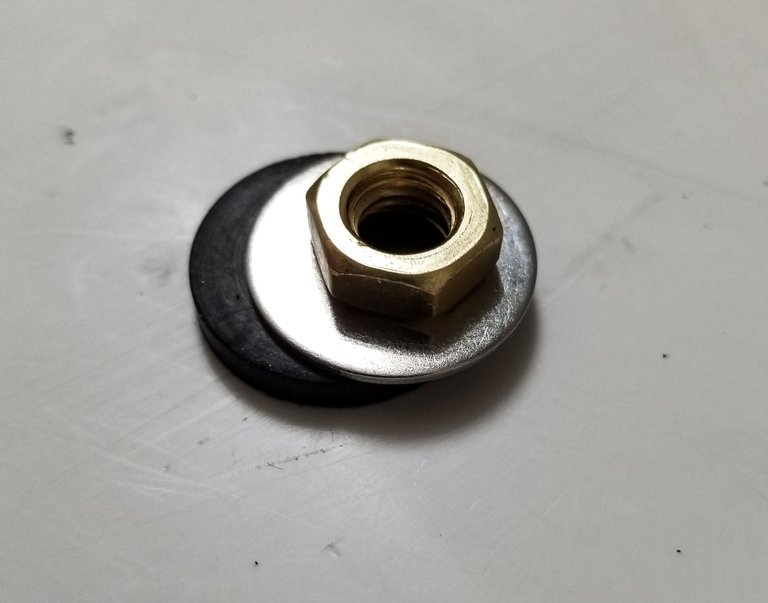
On the underside of the tank I added an additional seal and washer to really make the connection watertight. It was quite a process torquing it back down as you have to blindly hold the wrench and twist the flathead at the same time while dodging the flusher components.
And now its done. I kept an eye out for any stray drops of water, so far so good. We'll see what breaks next in the house lol.
Maybe when my daughter gets a bit older she can hold the wrench and and help me fix the toilet lol. She'll have to learn all the home improvement tips by helping me out.
That's all for now, thanks for looking :-)
Thank you for sharing this post in the DIYHUB Community!
Your content got selected by our fellow curator semarekha & you just received a little thank you upvote from us for your great work! Your post will be featured in one of our recurring compilations which are aiming to offer you a stage to widen your audience within the DIY scene of Hive. Stay creative & HIVE ON!
Please vote for our hive witness <3
Nice, professional repair 👍 bad news on the daughter though... neither of my boys ever showed any interest in toilet repairs or even holding a wrench for me 🙄 maybe it was the constant yelling and swearing that normally accompanies repairs at my house lol especially ones that involve getting that dissolved rubber crap on your hands. Good luck getting that out from under your nails.
I still have some of under my nails. I gotta figure out how to get my kid to like doing chores lol. Probably impossible.