Hello everyone, how are you all? I hope you are well. I am also well. Today I have come back with a new diy. Thank you so much to the @diyhub community for organizing such a community with diy so that there is an opportunity to show creativity. Today I shared a diy post where I made a bangle with my own hands. The feeling of making something with your own hands and using it is a completely different and different feeling which is very nice. I really like the bangle that I made. Do let me know how you like it.
A girl's thousands of emotional memories and silent language are hidden inside this small ornament, a bangle. Outwardly it may seem like just a circle of colored glass metal or plastic but to a girl a bangle is never just a decoration. It is a vague yet living reflection of her feelings her love her unspoken words.
However, if that bangle is made by her own hands, then its meaning is deeper and more sincere. A bangle made by her own hands contains a touch of the girl's hard work patience creativity and confidence. When I make the bangle piece by piece, I embed the language of my mind in each knot. Such a bangle is not just an ornament for girls, it is a sign of her own love.
When a girl stands in front of the mirror wearing a bangle made by her own hands, the face reflected in the mirror seems more confident, more lively. To be honest, I had these same feelings when I first read the bangle after making it, and I liked it quite a bit.
•Old glass bangles
•Cloth
•glue
•Putty
•Scissors

I will first prepare the bangles to make new bangles. First I took a glass bangle and put glue in it. Then I attached another glass bangle to it.


Then I applied glue again to the glass bangles in the same way. In this way, I made a bangle by joining four bangles together in a row. This is how I made another glass bangle.


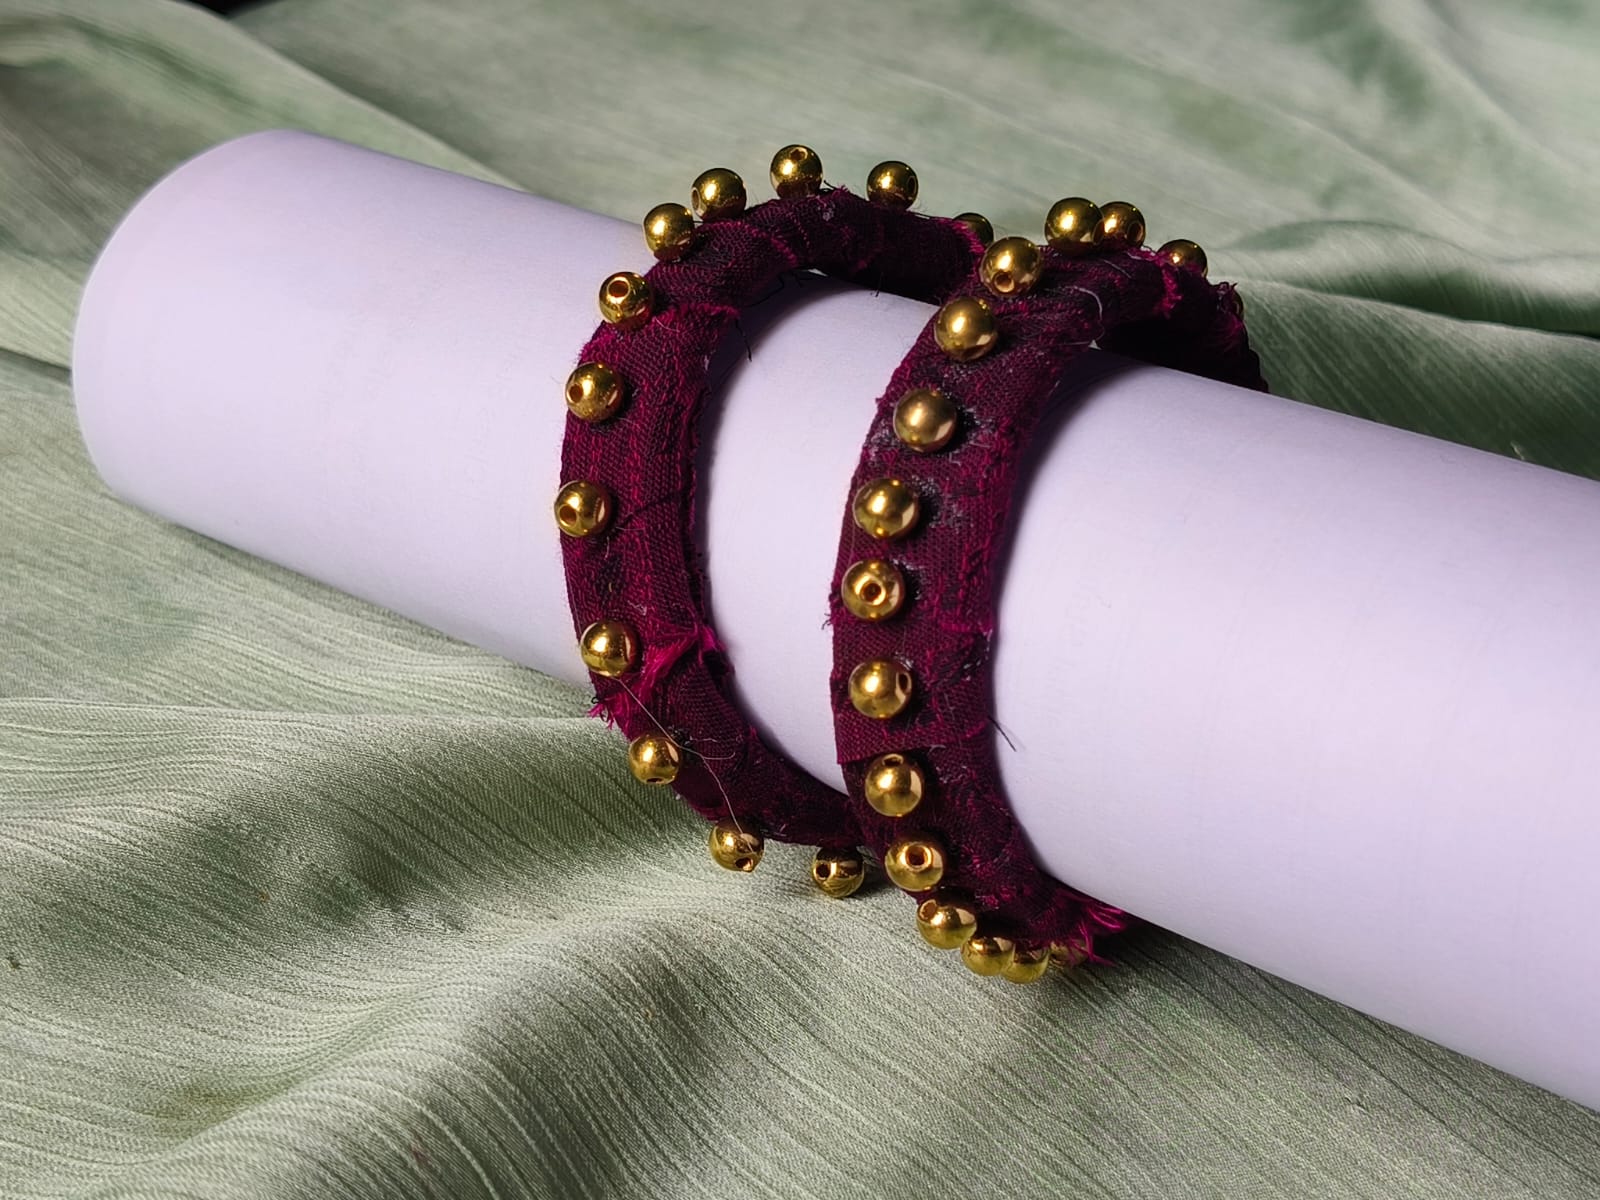
Now I took a piece of cloth. The piece of cloth was purple in color. I wanted to make purple bangles. That's why I cut a very long piece of purple cloth and took two pieces of cloth.


At this stage, I took a bangle that had already been prepared with glue for the glass bangles. I applied a small amount of glue on that bangle. After applying glue on the glass bangle, I took a piece of cloth from the piece of cloth cut above and started the process of attaching it to the glass bangles.


Then I wrapped the part with cloth and placed the cloth neatly on the bangle.


In the same way, I glued the thread cloth to the remaining bangle. In this way, I prepared the two glass bangles by attaching the cloth.


Now I will place stones on the cloth. That's why I took golden colored stones so that they look beautiful.


At this stage, I slowly attached the golden colored stones one by one with glue onto the bangle. This method took a long time to complete. And I used the same method to insert golden colored stones between the two bangles.


And I have made these beautiful bangles today using the above method. Please let me know in the comments how you like these bangles that I have made. It took a lot of time and effort to make these bangles. I hope that my hard work will be successful through your love.


It is nice, beautiful, and elegant. It looks amazing. Love its design. You did a great job! Keep up the good work!
selected by @rezoanulvibes
muy lindo diseño
very nice design
Thanks for your comments.
This is really awesome and fantastic you did great