ENGLISH CONTENT
Hello all craft lovers! I am fascinated by creating new things from useful materials and one of my fascinations is Splinterlands art contest, is that there is no limit when it comes to participating, so I have decided to let myself be guided by my instinct when embarking on a new artistic project. Join me on the adventure I like to call "transformation."
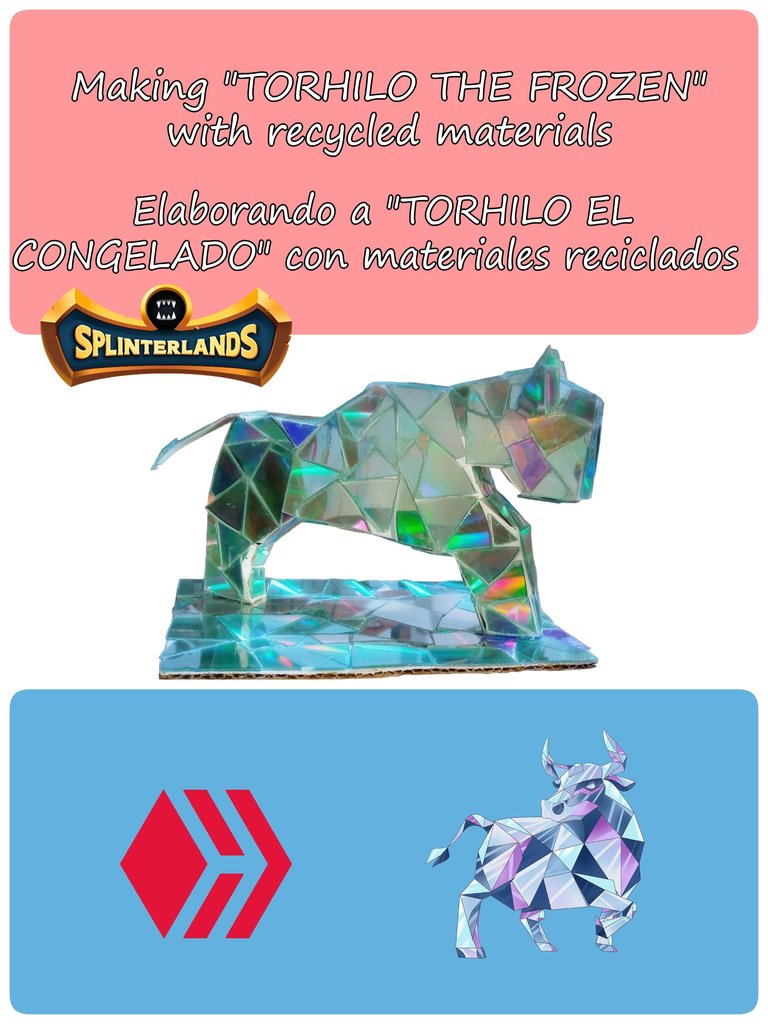
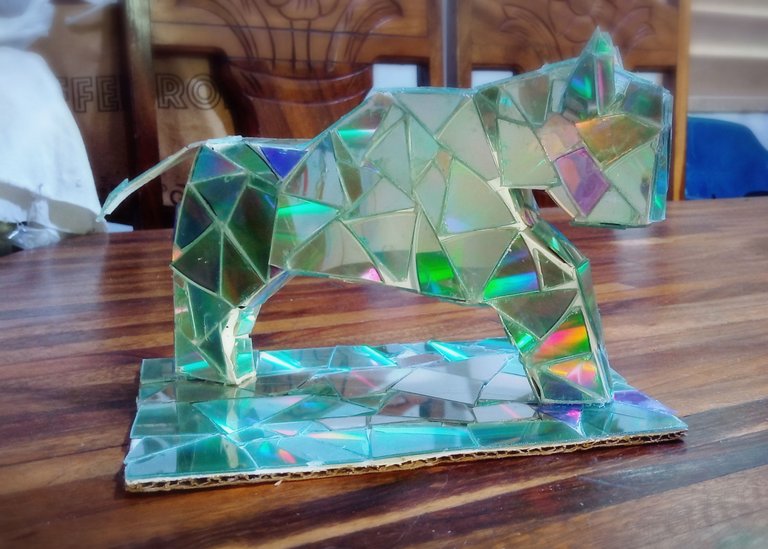
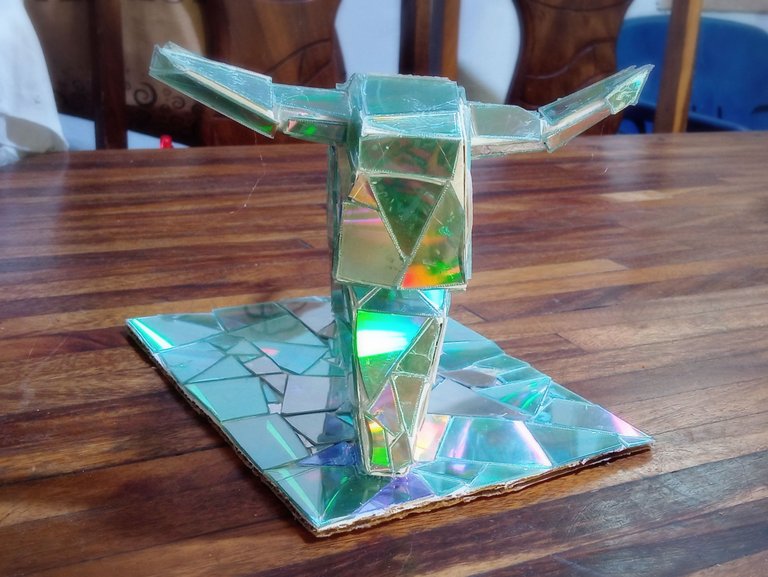
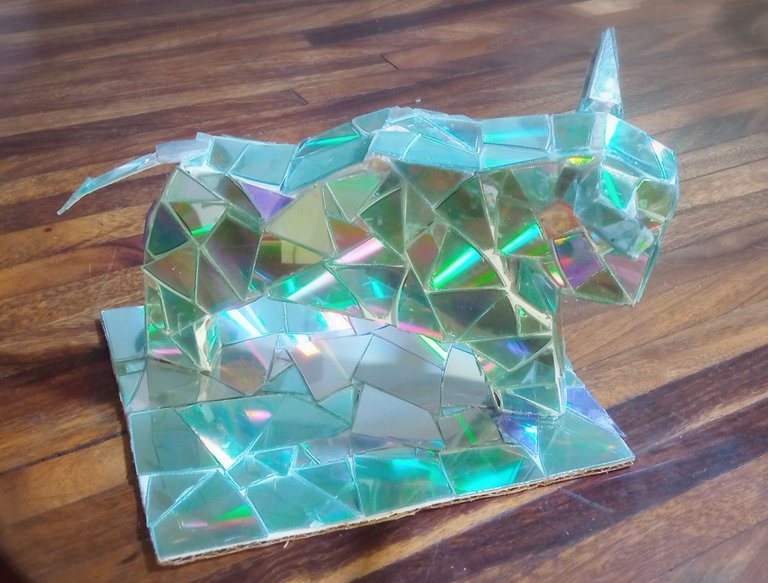
For this occasion, I have created the character Torhilo the frozen, which is a some kind of frozen bull creature. I like to review the selection of characters and be "called" by the card, usually having the thought that it tells me, how I could make it and with what materials. Once that idea forms in my head, I try to recreate it in reality. And that's the fun part for me! How am I going to get there? I don't know, but I want to try.
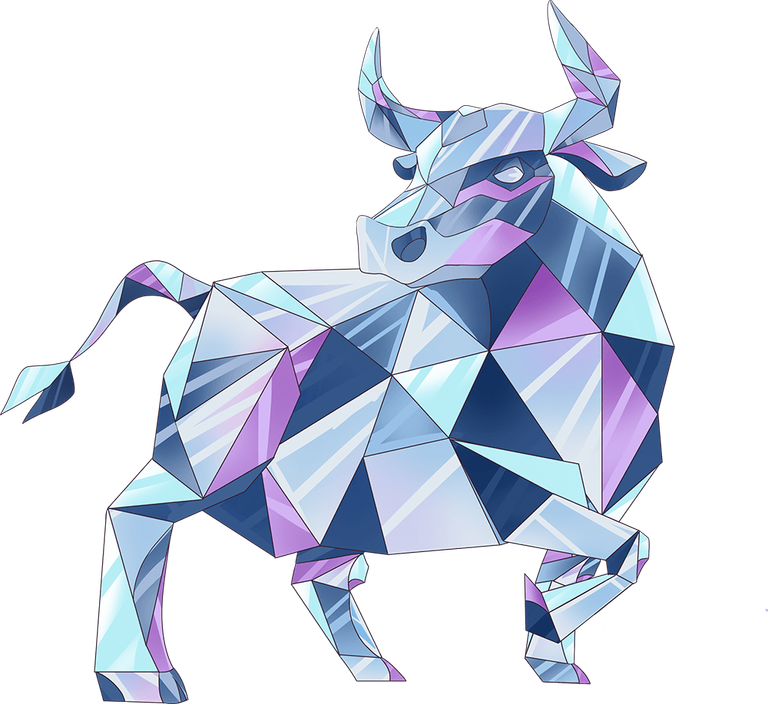
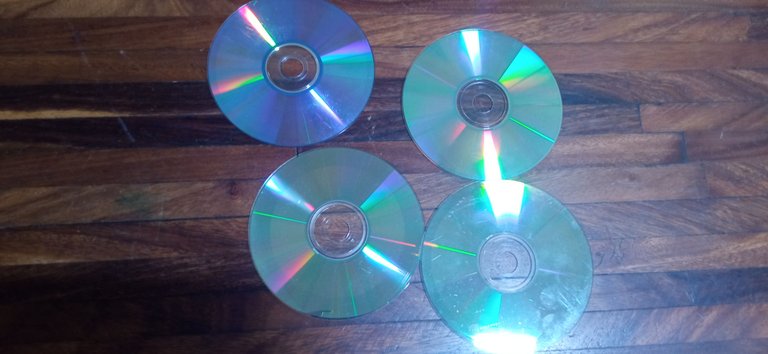
The first thing I thought was to make the figure of the polygonal bull, with acetate. But since I had little material of this type and I was not sure how to make the shape, I discarded the idea, since I also did not believe that it could give the visual illusion of ice that I was looking for. So the next thing that came to mind was the CDs, since the surface of them is not only reflective but was perfect for what I wanted to achieve.
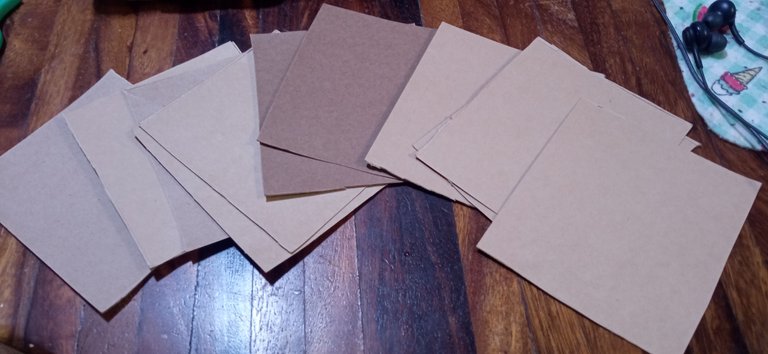
So, the materials I basically used were: Cardboard boxes (paneled, a paper tea with lemon), old CDs, cold silicone, school glue, white paint and hard cardboard for the base.
 |  |
|---|
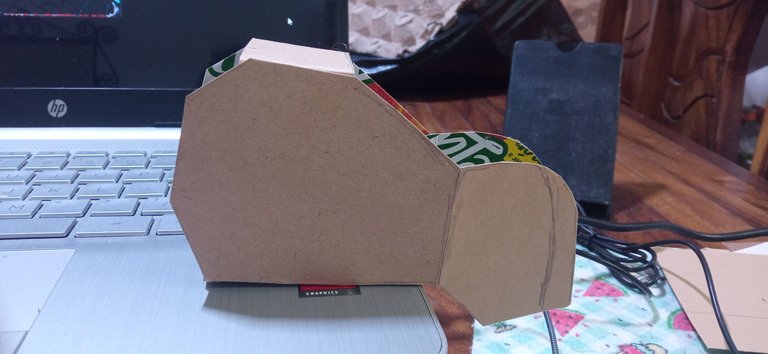
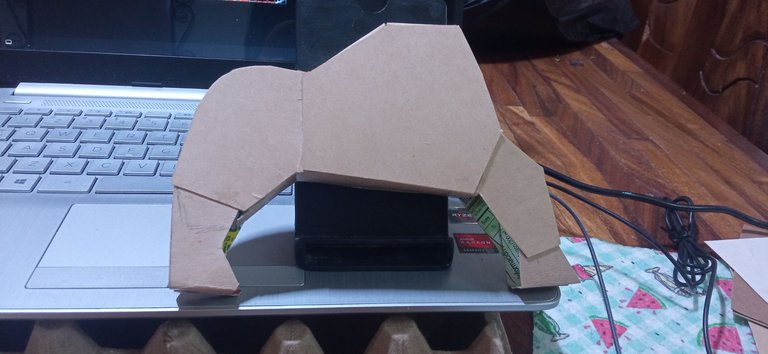
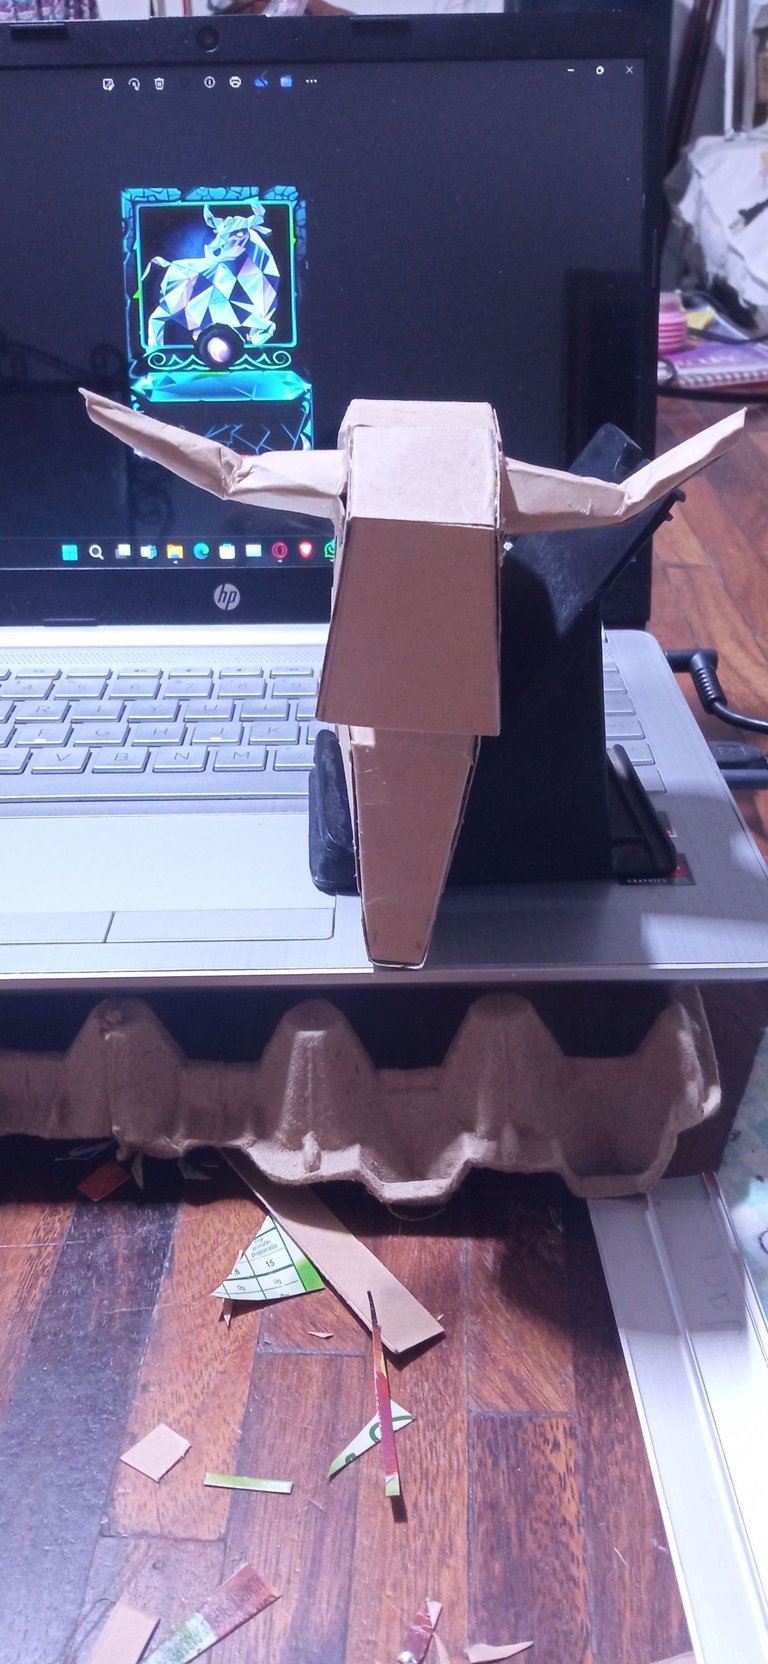
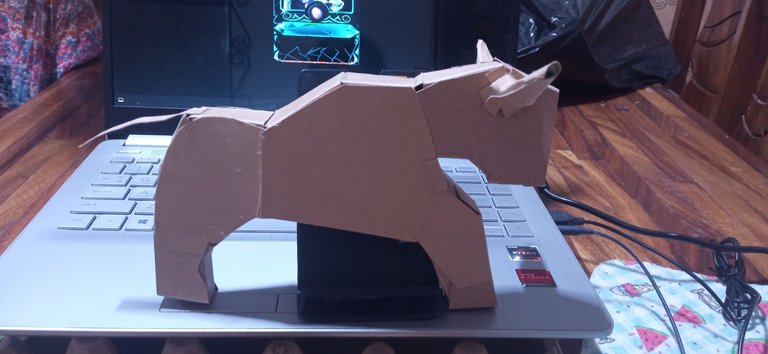
The idea I originally had was to make the base figure of the bull in origami and then place the pieces of CDs on top. But, after watching several tutorials, I was not convinced by the shape of the bull in that type of paper art, so I looked for how to make a cardboard bull, but with a polygonal shape. I loved it!... Unfortunately, the steps seemed very confusing and since I had no way to print the templates, I ruled out that option, I did not give up and chose the following option, according to my available materials:... Invent my own base. That's right, completely by eye and at random, I was drawing and cutting the pieces of cardboard, with the shape that seemed to me would be the best to serve me. I joined them with cold silicone, until, luckily for me, I was able to obtain a decent figure.
 |  |  |
|---|
 |  |  |
|---|

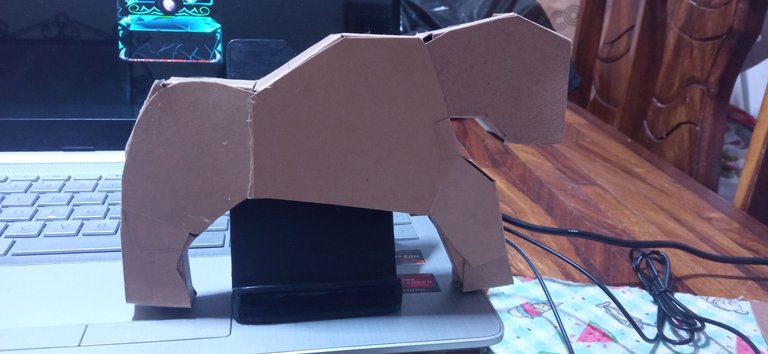
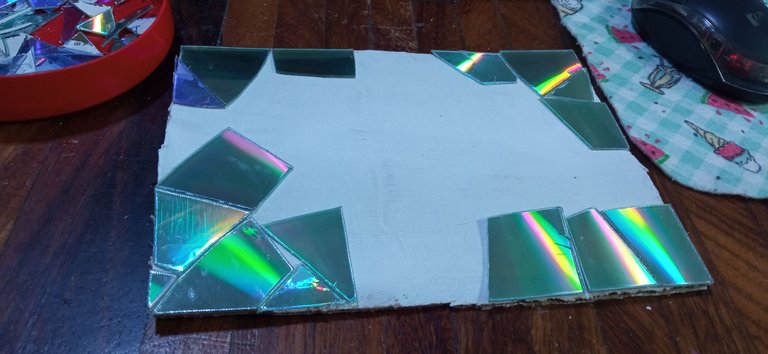
At this point, I was already excited to move on to the next step. I thought the best thing was to put a layer of white paint on the figure, to eliminate the color of the cardboard and make it look better once I glued the plastic pieces.
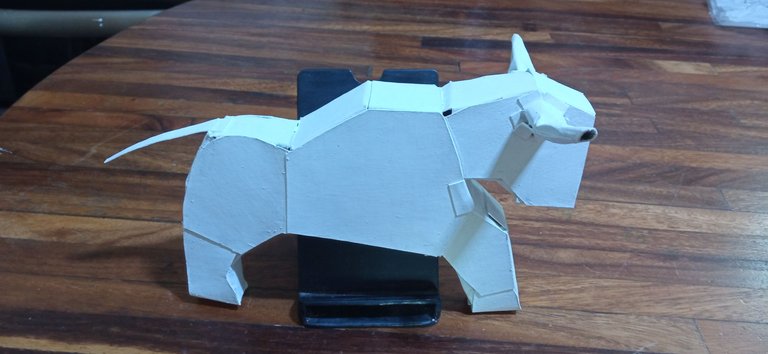
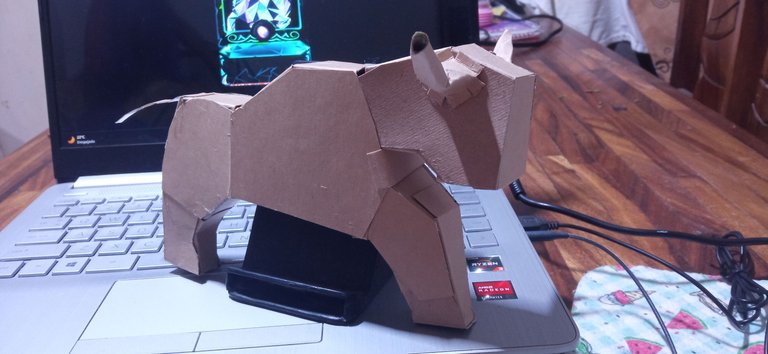
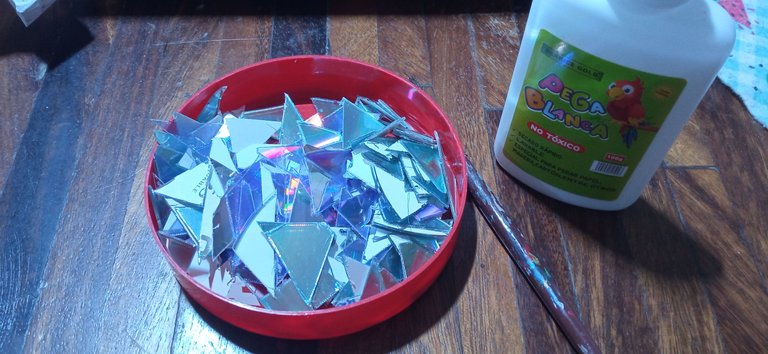
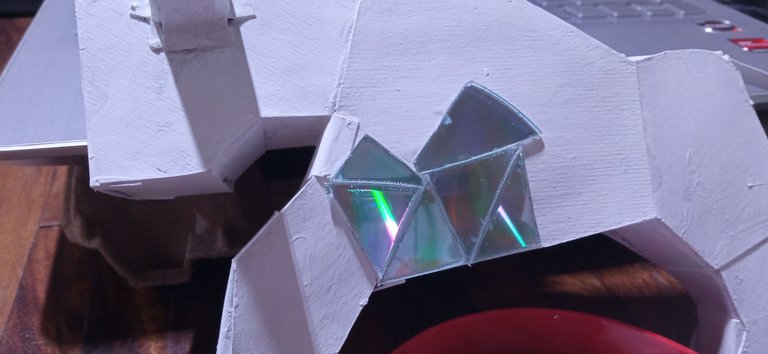
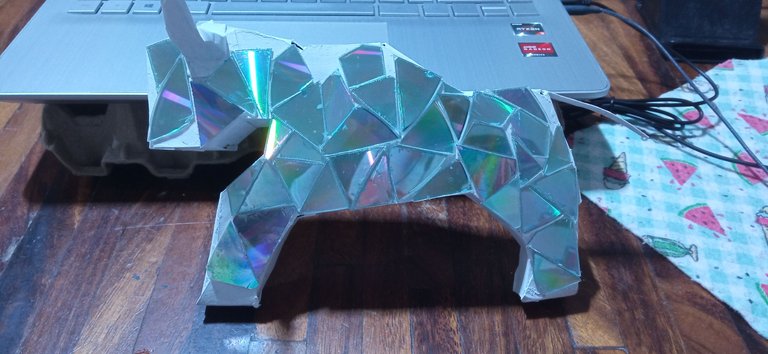
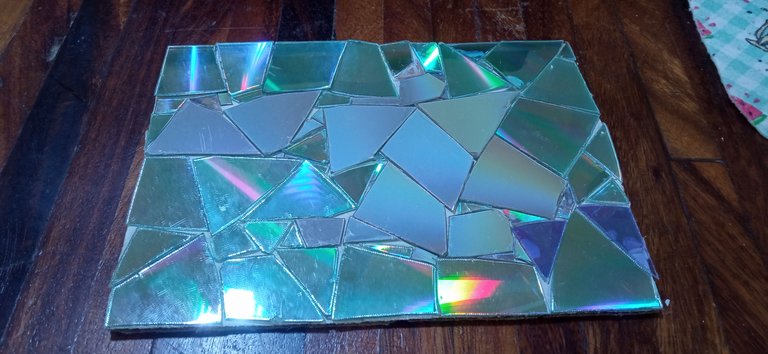
Looking at it this way, if I had been confident in my coloring, I could have tried to create the illusion of ice with paint. But, since that's not the case, I stayed with what I had in mind haha Well, to do this, I proceeded to cut the CDs into triangular, hexagonal and irregular shapes, depending on the areas I wanted to cover and I glued them with white glue. The best thing for this step is to use special scissors to cut hard materials, like plastic, because even with them, your hands are left with pain haha To avoid hurting myself, I cut only one CD per day.
 |  |  |
|---|
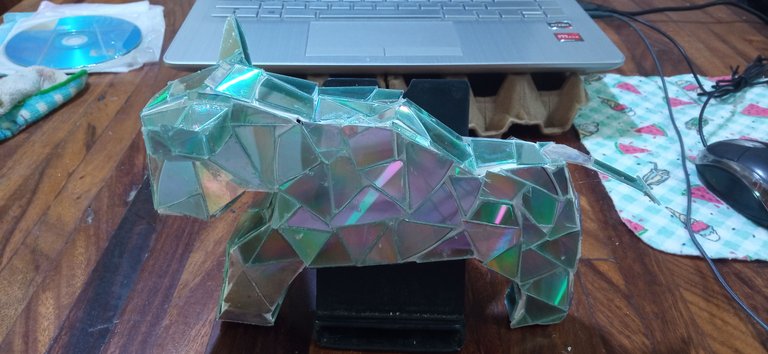
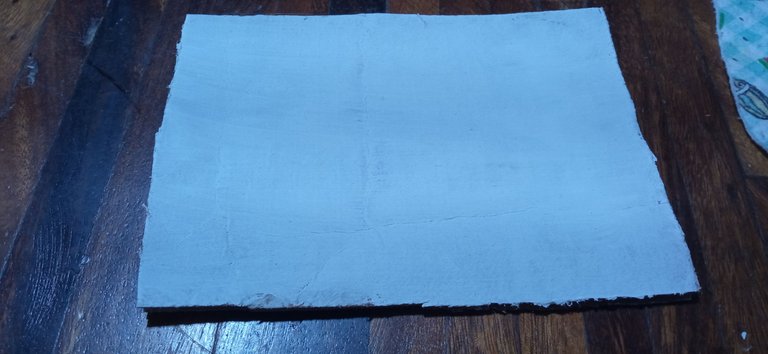
As it was, the figure did not have good balance, it was necessary to make a base for it and to do this, I used a cardboard rectangle that I took out of a box. I put a layer of white paint on it and also glued the plastic mosaic on it.
 |  |  |
|---|
Finally, I proceeded to glue the bull figure to the base with cold silicone and took the corresponding photo session.
 |  |  |
|---|
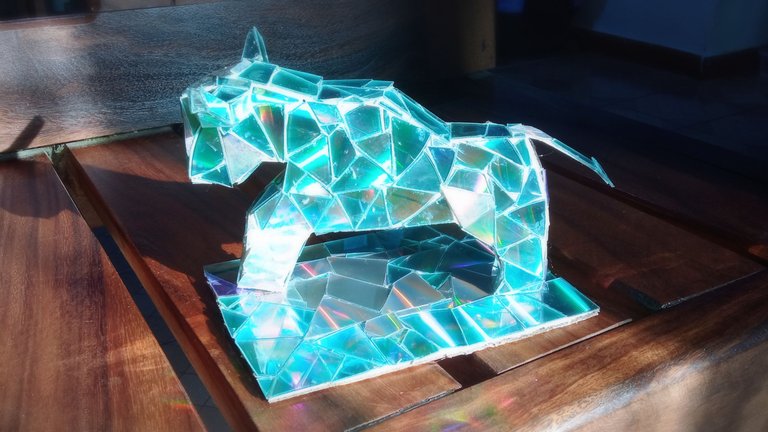
I really enjoyed making this character and since it turned out as I had thought, I have been motivated to continue participating in the contest. I'm excited to see what I come up with next time 👀

Thank you very much for visiting my publication. I hope you found it interesting.
Until next time!

CONTENIDO EN ESPAÑOL
¡Hola a todos los amantes de las manualidades! Me fascina crear cosas nuevas a partir de materiales de provecho y una de mis fascinaciones del concurso de arte de Splinterlands, es que no hay límite a la hora de participar, de modo que he decidido dejarme guiar por mi instinto a la hora de embarcarme en un nuevo proyecto artístico. Acompáñenme en la aventura que me gusta llamar de "transformación".
Para ésta ocasión, he elaborado el personaje Torhilo el congelado, el cual se trata de un una especie de criatura toro congelada. Me gusta revisar la selección de personajes y ser "llamada" por la carta, teniendo por lo general el pensamiento que me dice, cómo podría elaborarlo y con qué materiales. Una vez que esa idea se forma en mi cabeza, trato de recrearlo en la realidad ¡Y esa es la parte divertida para mí! ¿Cómo voy a llegar a eso?, no lo sé, pero quiero intentarlo.
Lo primero que pensé, fue en elaborar la figura del toro poligonal, con acetato. Pero dado que tenía poco material de éste tipo y no estaba segura de cómo hacer la forma, descarté la idea, pues tampoco creía que podría dar la ilusión visual de hielo que estaba buscando. Así que lo siguiente que me vino a la mente, fueron los Cds, siendo que la superficie de los mismos, no sólo es reflectante sino que era perfecta para lo que quería lograr.
Entonces, los materiales que usé básicamente, fueron: Cajas de cartulina (de panelada, un té de papelón con limón), cds viejos, silicón frío, pegamento escolar, pintura blanca y cartón duro para la base.
| |
|---|
La idea que tuve originalmente, era realizar la figura base del toro en origami y luego, colocarle los trozos de cds encima. Pero, luego de ver varios tutoriales, no me convencía la forma del toro en ese tipo de arte en papel, así que busqué como elaborar un toro en cartón, pero con forma poligonal ¡Me encantó!... Lamentablemente, los pasos me parecían muy confusos y como no tenía forma de imprimir las plantillas, descarté esa opción, no me di por vencida y opté la siguiente opción, acorde a mis materiales disponibles:... Inventar mi propia base. Así es, completamente al ojo y al azar, fui dibujando y cortando los trozos de cartón, con la forma que me parecía, sería la mejor para que me sirviera. Los iba uniendo con silicón frío, hasta que, para mi suerte, pude obtener una figura decente.
| | |
|---|
| | |
|---|
En éste punto, ya estaba emocionada por pasar al siguiente paso. Pensé que lo mejor, era colocarle una capa de pintura blanca a la figura, para eliminar el color de la cartulina y se viera mejor una vez que pegase los trozos de plástico.
Viéndolo de ésta forma, si hubiese tenido seguridad de mi coloreado, pude haber intentado crear la ilusión del hielo con pintura. Pero, como no es así, me quedé con lo que tenía en mente jaja Bien, para ello, procedí a cortar los cds en formas triangulares, hexagonales e irregulares, dependiendo de las zonas que deseara cubrir y los fui pegando con pegamento blanco. Lo mejor para éste paso, es usar una tijera especial para cortar materiales duros, como el plástico, porque incluso con ellas, quedan con dolor en las manos jaja Para evitar lastimarme, cortaba sólo un cd por día.
| | |
|---|
Así como estaba, la figura no tenía buen equilibrio, era necesario realizarle una base y para ello, utilicé un rectángulo de cartón que saqué de una caja. Le coloqué una capa de pintura blanca e igualmente, le pegué el mosaico de plástico.
| | |
|---|
Finalmente, procedí a pegar la figura del toro en la base con silicón frío e hice la sesión de fotografías correspondiente.
| | |
|---|
Realmente disfruté haciendo a éste personaje y dado que quedó como lo había pensado, me he motivado para continuar participando en el concurso. Estoy ansiosa por ver qué se me ocurre para la próxima 👀
Muchas gracias por haber visitado mi publicación. Espero que les haya parecido interesante.
¡Hasta una próxima oportunidad!
Yeehaw! This blog post is as thrilling as a rodeo!
LOL thanks! 😃 Thank you very much, I'm glad you liked it 😊
Well howdy, partner! Sure sounds like you've been rustlin' up some mighty fine tales on this here blog trail! Keep those stories a-goin' and gatherin' folks 'round that digital campfire with your words. The next adventure's awaitin' and I reckon it's gonna be a rootin'-tootin' good time! Yeehaw!
Hola amiga de verdad que muy creativa tu idea, los cd tienen muchas utilidades cierto!
¡Hola! 😃 Ciertamente, con los cds se pueden hacer maravillas. Hace unos años atrás, llegué a usarlos mucho para hacer adornos, aunque muy poco los llegaba a cortar porque es un material muy duro para mí 😅 Pero el efecto reflectante que generan es demasiado hermoso como para desperdiciarlo 😊 Muchas gracias por acercarte a ver mi creación, me alegra mucho que haya sido de tu agrado 🤗💚
This is creative and lovely .
Thank you very much, I'm glad you liked it 😘💚
Checkout our BDVoter Daily Hive Showcase & Participate into our Daily giveaway to win various prize.
!DIY
You can query your personal balance by
!DIYSTATSWowww amiga este Torhilo the frozen te quedo genial, gran trabajo hiciste con ese fantart, te deseo la mejor de las suertes en el concurso bella...
!LADY
Muchísimas gracias, de verdad 😊 Me gustó mucho el resultado final porque algo así era lo que tenía en mente. Lo mejor es que usé materiales de reciclaje, me fascina poder darle la oportunidad a cosas que generalmente, se desechan 😩 Gracias por haber visitado mi publicación y por tus buenos deseos 🤗✨