
Tried To Create Some Color-Gel Lighting Effect On A Portrait…….
2 July 2021
Hello everyone,
Assalamualaikum! Welcome back to another brand new exciting tutorial blog post. I hope everything is well and safe by the grace of Allah. Today I am gonna share with you how to control the color and the lighting of different lights in a picture to create a beautiful effect of color gel photography in photoshop. I used two colors to make the gel lighting effect on the photo. The final product was not enough satisfying but I tried my best. For the first time, it was good. Next, I will try to improve more. Now I should focus on the process. so without wasting any time let's get started.
Process:
step 1:
.png)
.png) | .png) |
|---|
At first, I took an indoor photo and then I cropped it as much as I needed. After that, I made a selection of the subject and created a selection mask added a black background.
step 2:
.png)
.png) | .png) |
|---|
After that, I created a gradient map. For the bright parts, I choose a bright orange color and for the dark parts, I choose black color. Then I used blend-If it keeps the color of the dark areas natural. After that, I made a clipping mask to separate the background.
step 3:
.png)
I named the previous layer Worm light. After that, I made another gradient map. For the bright parts, I choose light blue and for the dark arts, I chose the black color. After that, I again use Blind-If to keep the color of the dark areas natural. After that, I again made a clipping mask to separate the background. Then I named the layer cool light.
step 4:
.png)
.png) | .png) |
|---|
Then I selected the bright areas to paint. I used a color range to do that. After selecting the right areas I took a soft round brush and painted the selected bright areas with 5-10% of the flow.
step 5:
| .png) |
|---|
After that, I created a curves adjustment layer and adjusted the highlights as much as I want and make it smoother, shiny, and oily skin. I adjusted the colors with a curves adjustment layer three times for the best results.
step 6:
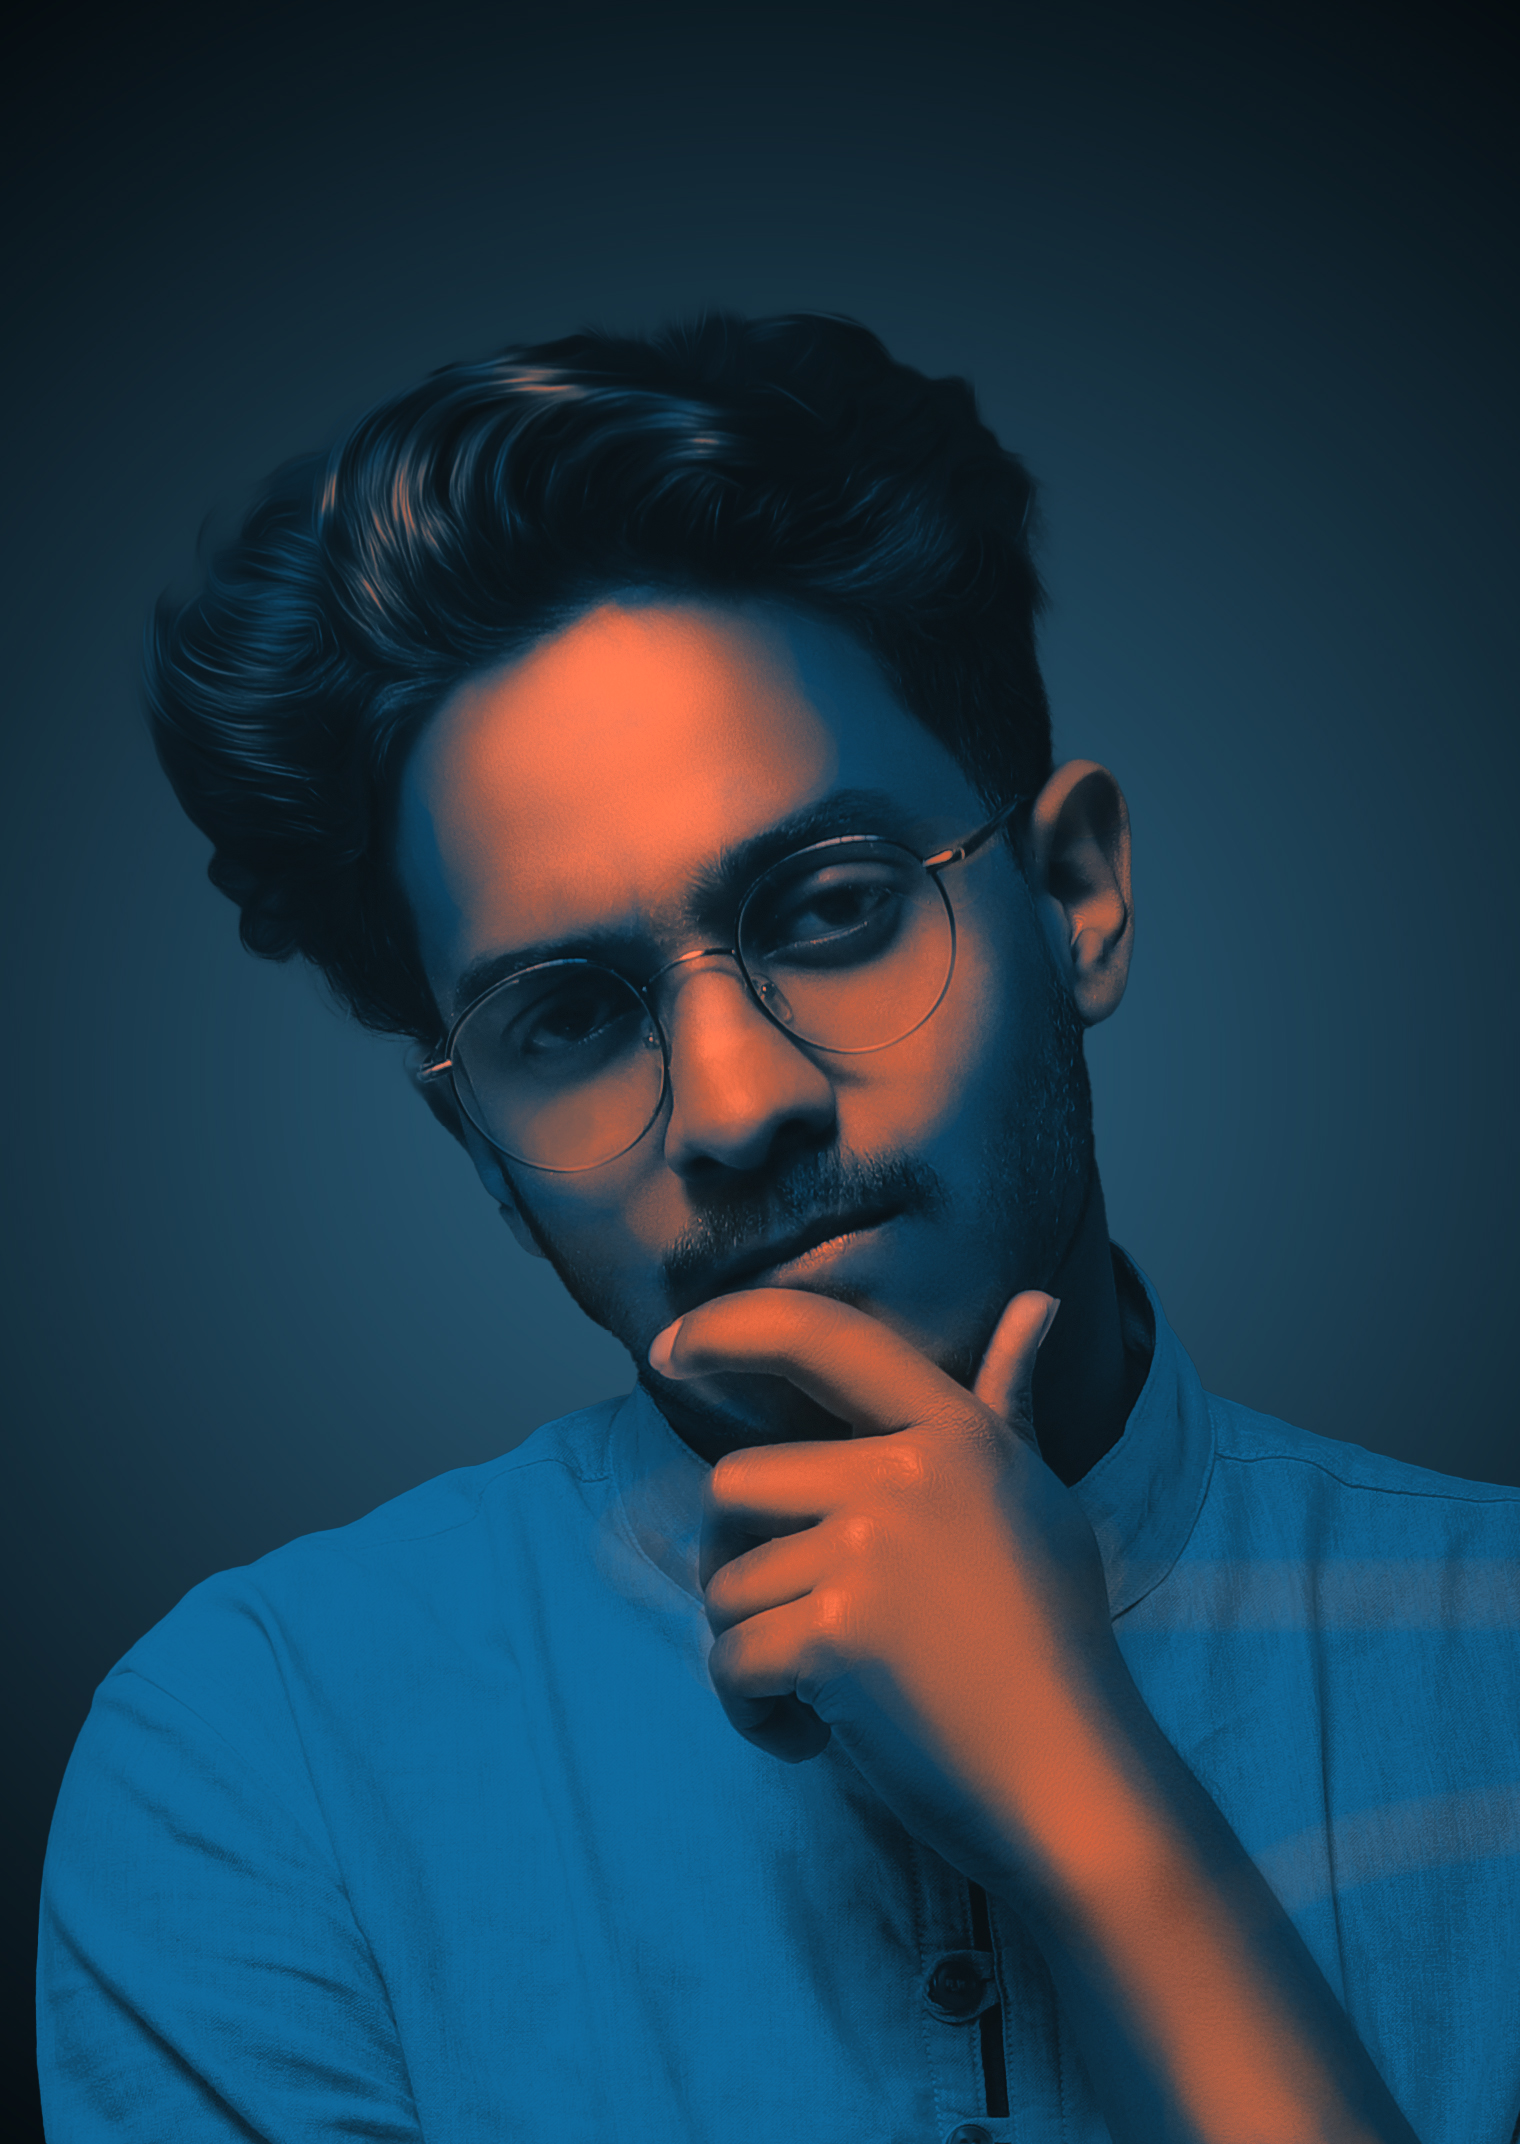
In the end, an important part comes. We have to change the background. To change the background I made a gradient on the background. I made a blue background matching the picture colour. I made a radial background for the picture. I look gorgeous in the picture and decrease the opacity as much as I wanted to be. This is how the colour-gel lighting effect will be done. So the fundamental of the tutorial is gradient map gradient and masking. That's all for today. I hope everyone enjoyed my blog. See you guys soon in my next blog post. Till then stay safe.
Thank you for reading!
@troublemakerrr
I like that! Very cool.
Thanks a lot @zo3d!
Congratulations @troublemakerrr! You have completed the following achievement on the Hive blockchain and have been rewarded with new badge(s) :
Your next target is to reach 400 comments.
You can view your badges on your board and compare yourself to others in the Ranking
If you no longer want to receive notifications, reply to this comment with the word
STOPCheck out the last post from @hivebuzz: