Hello everyone :)
At first glance, it's just a rock. But upon closer inspection, it's an entire continent, the rough skin of a miniature planet. The surfaces reveal themselves in explosions of color: rusty stains reminiscent of corroded hardware, whitish crystals that shine like petrified salt, cracks that look like scars.
There are areas that resemble the desert, others that resemble volcanic crusts, as if the rock were born in the heart of an eruption, full of textures that oscillate between the organic and the mineral, with scales, fibers, fragments.
The narrow focus creates chasms and mountains; a grain of rock transforms into a mountain range, a speck into an ocean. The blur pushes us to the brink of abstraction; now we are faced with a microscopic organism, now with a distant planet captured by a telescope.
The colors shift between burnt ocher, deep brown, and fractured white, in a chaotic dance of contrasts. What is small takes on cosmic proportions. In this macro, the stone stops being just a stone and transforms into a condensed universe.


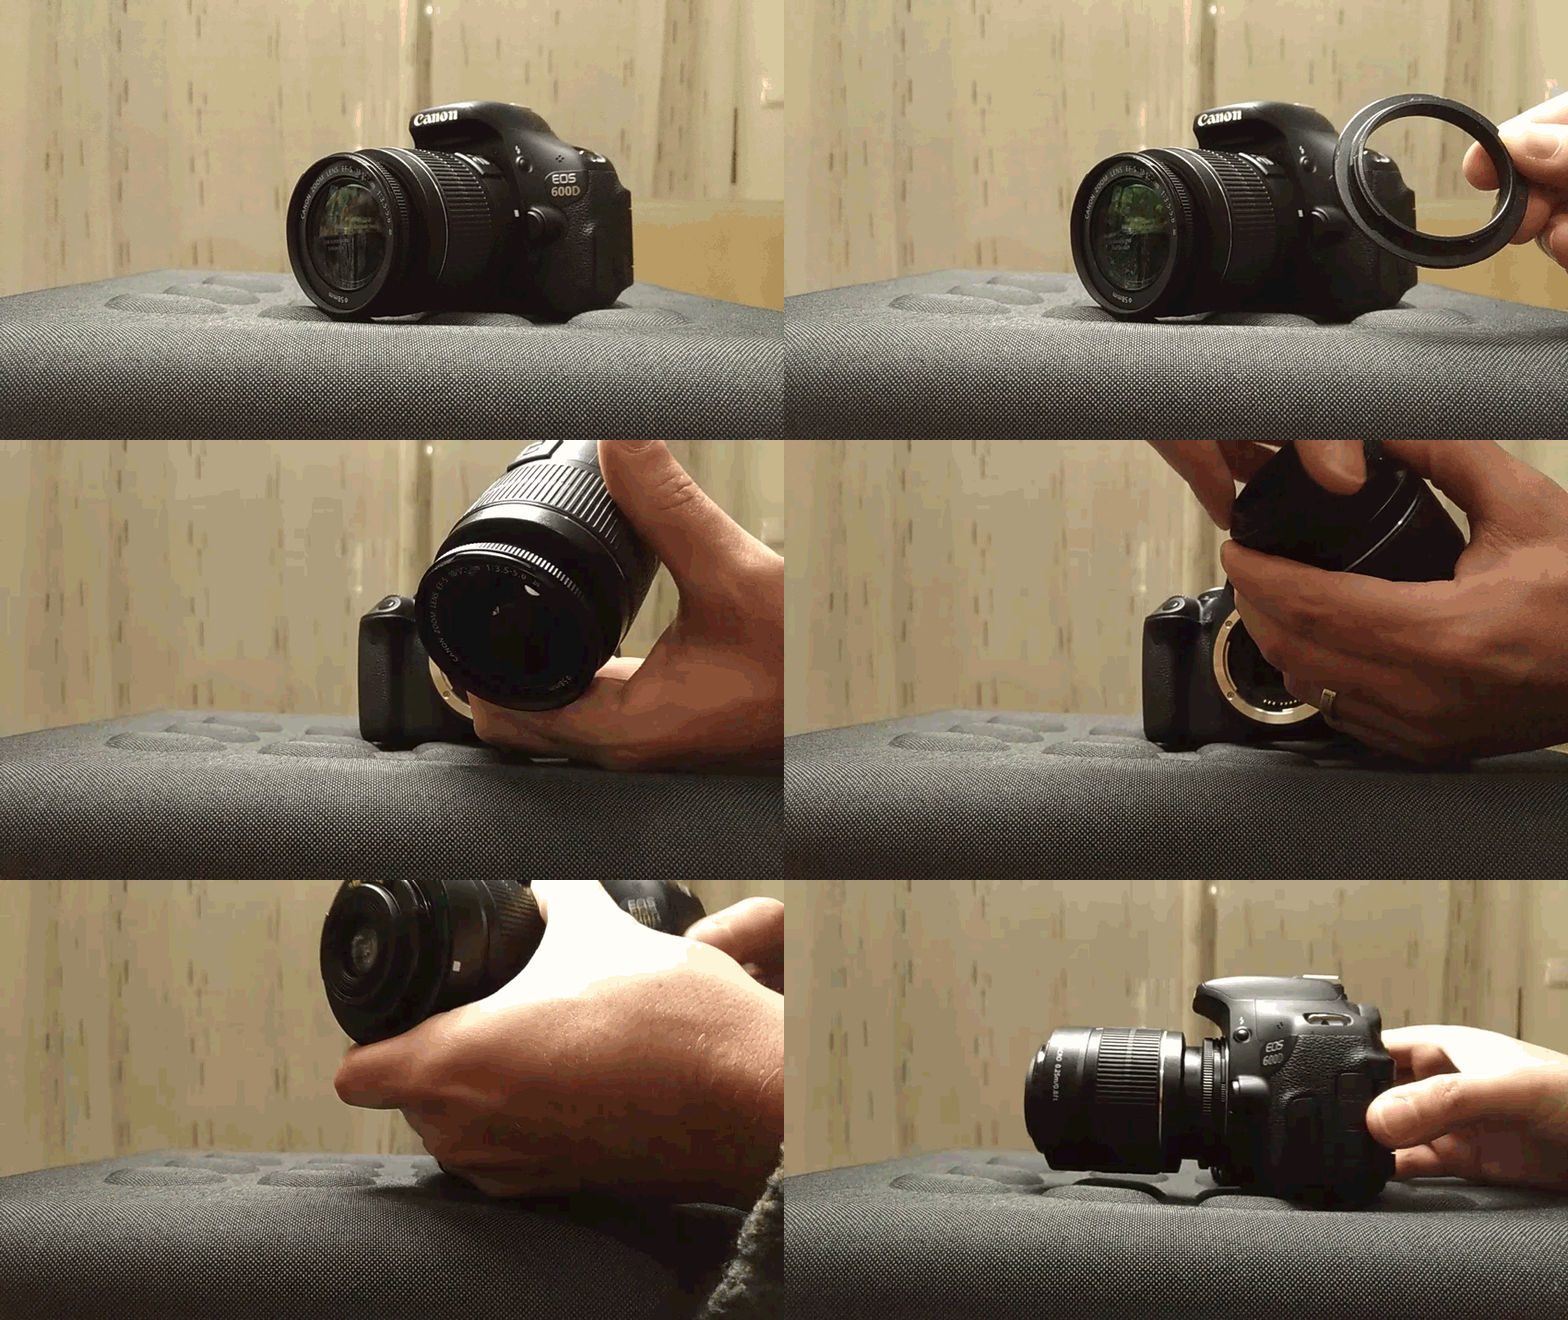
Among the numerous techniques available for macro photography, this method is arguably the most cost-effective and efficient for individuals possessing a camera with a removable lens. By simply detaching the lens and reversing its direction, and employing an inversion ring, the process becomes more manageable and streamlined.
Let's now move onto the result:


Session Purpose
The main purpose of this macro photography session is to capture highly detailed images of the structure, paying close attention to every characteristic and visual nuance. Beyond documentation, I also aim to explore visually engaging compositions, designed for publication on this blog, in order to share the beauty and complexity of this structure with you all.
Technical Description of Macro Photography Session
Camera Settings
Focus Mode: Manual focus to ensure precision in specific details of the structure.
Aperture: Variable aperture between f/3 and f/5 for adequate depth of field, ensuring all important details are in focus.
ISO: Low ISO setting (400) to minimize noise in images.
Shutter Speed: Adjust shutter speed as needed to avoid underexposure, while maintaining a value that allows you to capture sharp details.
Used equipments
Camera: Canon EOS 600D Digital SLR with CMOS sensor
Lens: EFS 18-55mm with f/5 maximum aperture, allowing shallow depth of field and capturing fine details.
Used inverter ring
Tripod: not used
Lighting: Adjustable LED lights to provide soft, even lighting, avoiding harsh shadows and highlighting the details of structures.
Procedures
- Environment Preparation:
Assembling the macro photography set in a controlled environment, minimizing the presence of dust and ensuring a clean and white surface for positioning the piece. - Section Positioning:
Placing the subject in position that highlight the unique characteristics, using appropriate supports to keep the example stable. - Lighting Adjustment:
Setting the LED lights to provide uniform illumination, adjusting the intensity and angle of the lights to eliminate unwanted shadows. - Image Capture:
Taking multiple shots with variations in aperture settings, shutter speed and capture angle, exploring different perspectives and compositions. - Image Review:
Immediate analysis of images captured on the camera's viewfinder to ensure that all desired details were captured sharply and clearly. - Post-Production Editing:
Importing images into editing software (Adobe Photoshop CS) to adjust brightness, contrast, sharpness and remove any imperfections.
The session is closed for today.
Hope you like it :)

These photos weren't taken with a tripod
Camera - Canon EOS 600D
Lens - EFS 18-55mm
Location - Portugal


See you soon
Thank you for watching
Never forget
The price of anything is the amount of life you trade for it.
Time is life... value yours, make every fraction worth it
Awesome macro shots... Love the textures and data 👏🏻
Glad you like it, Thanks :)