Hi there everybody :)
The visuals direct us into the intricate world of an oyster shell, revealing the complexity of its various layers. The blurred, diffuse background dissolves into muted neutral tones, creating a discreet stage that directs all attention to the shell's textured surface.
The superimposed layers, a result of their natural formation, appear as structures that demonstrate the growth and resilience of this marine organism. There are clear signs of erosion, marks left by the continuous action of water and natural wear, giving the shell an appearance that is simultaneously fragile and robust.
The color palette intensifies the visual richness, with burnt white and gray dominating the most exposed areas, while burnt yellow and multiple brownish tones create variations in depth. Spots of mirrored purple appear unexpectedly, almost like precious fragments, reflecting the light and adding a vibrant contrast that breaks the earthy uniformity.
As a whole, the image not only documents a surface, but allows us to observe the shell as a microcosm in constant transformation, where matter, time and environment intertwine in unique shapes and colors.


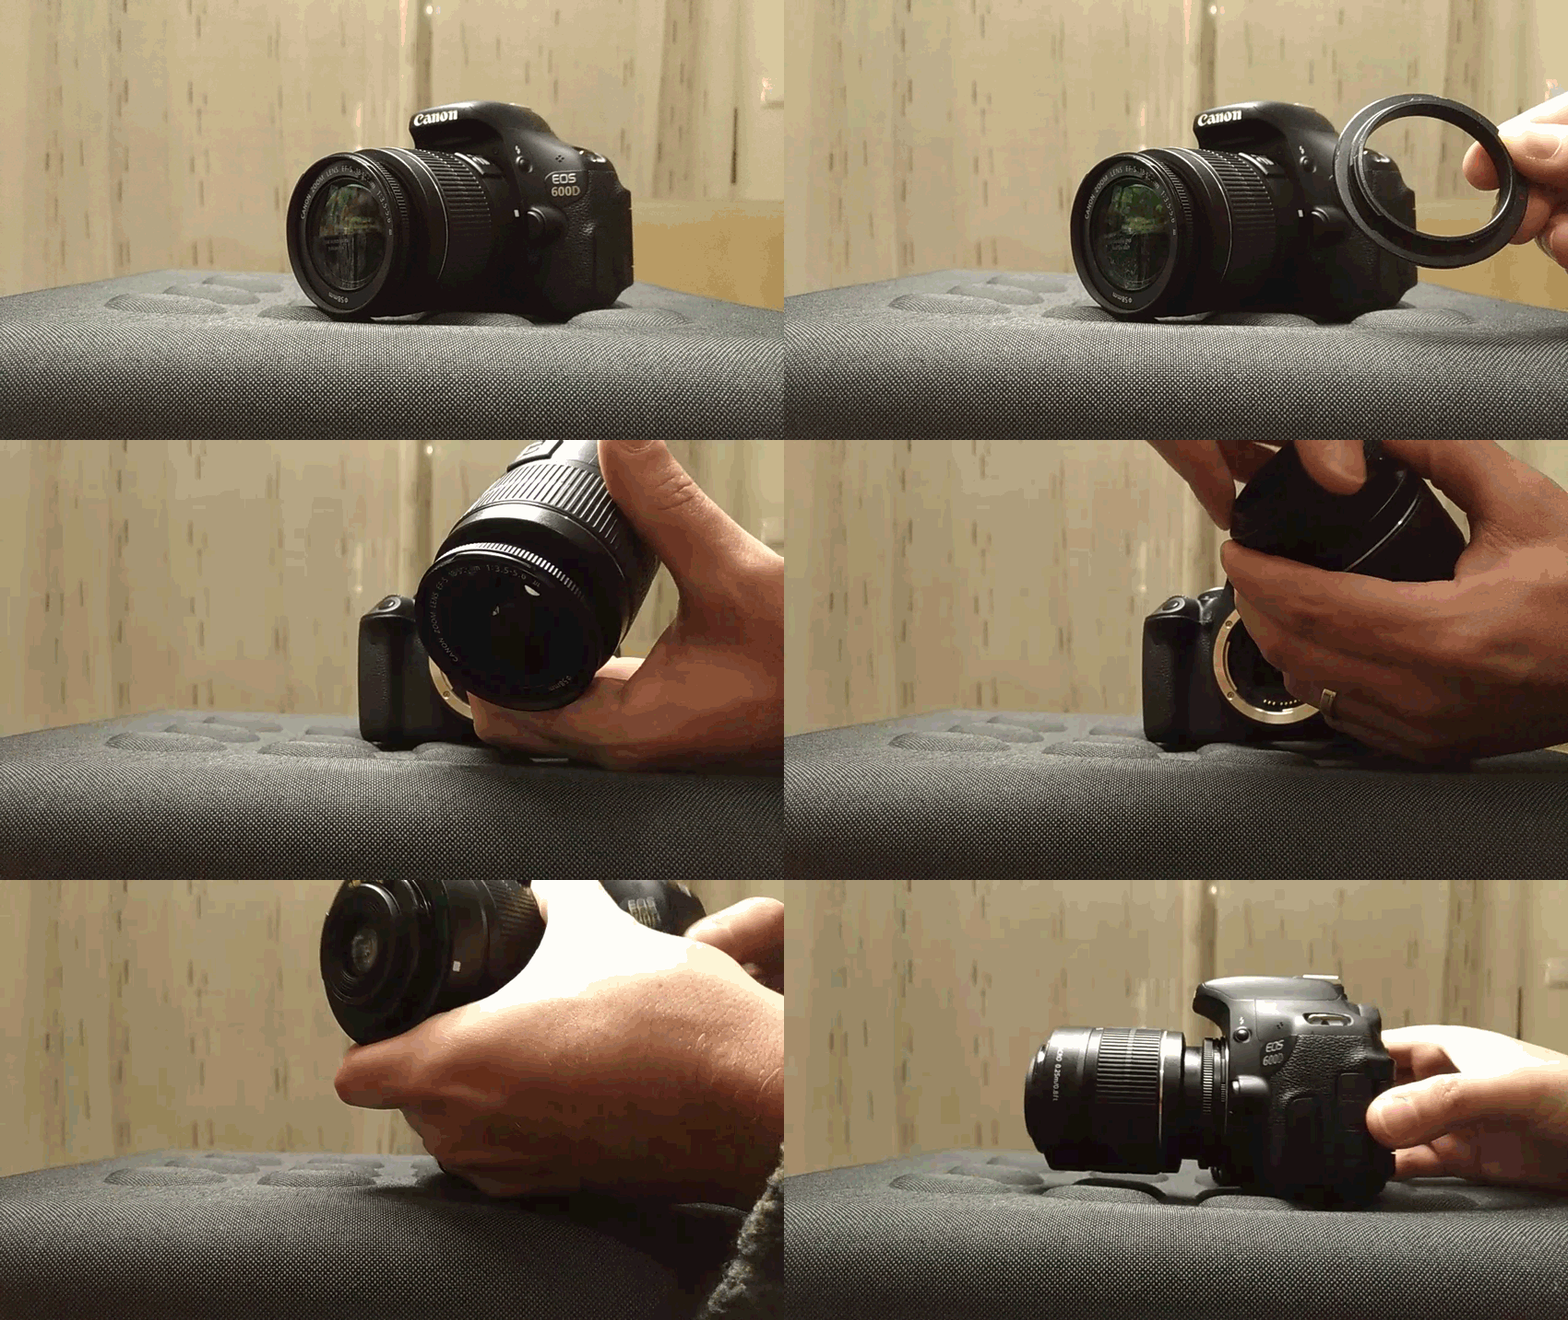
Among the numerous techniques available for macro photography, this method is arguably the most cost-effective and efficient for individuals possessing a camera with a removable lens. By simply detaching the lens and reversing its direction, and employing an inversion ring, the process becomes more manageable and streamlined.
Let me share the visual result of this session:


Technical Description of Macro Photography Session
Camera Settings
Focus Mode: Manual focus to ensure precision in specific details of structure.
Aperture: Variable aperture between f/4 and f/5 for adequate depth of field, ensuring all important details are in focus.
ISO: Low ISO setting (600) to minimize noise in images.
Shutter Speed: Adjust shutter speed as needed to avoid underexposure, while maintaining a value that allows you to capture sharp details.
Procedures
- Environment Preparation:
Assembling the macro photography set in a controlled environment, minimizing the presence of dust and ensuring a clean and white surface for positioning the subject. - Section Positioning:
Placing the subject in position that highlight the unique characteristics, using appropriate supports to keep the example stable. - Lighting Adjustment:
Setting the LED lights to provide uniform illumination, adjusting the intensity and angle of the lights to eliminate unwanted shadows. - Image Capture:
Taking multiple shots with variations in aperture settings, shutter speed and capture angle, exploring different perspectives and compositions. - Image Review:
Immediate analysis of images captured on the camera's viewfinder to ensure that all desired details were captured sharply and clearly. - Post-Production Editing:
Importing images into editing software (Adobe Photoshop CS) to adjust brightness, contrast, sharpness and remove any imperfections.
To finish, i leave you with some considerations regarding these photo sessions:
Examining miniature subjects through macro photography reveals a compelling domain where minute details assume significant importance. Immersing oneself in the intricacies of these diminutive objects allows for the recognition of the often-overlooked beauty within this microenvironment. Each image captures a fleeting moment, showcasing the complexity hidden within the small-scale elements of nature. The essence of macro photography lies in its ability to elevate ordinary subjects to extraordinary levels, offering an intimate and captivating perspective.
The session is closed for today.
Hope you like it :)

These photos weren't taken with a tripod
Camera - Canon EOS 600D
Lens - EFS 18-55mm
Location - Portugal


See you soon
Thank you for watching
Never forget
The price of anything is the amount of life you trade for it.
Time is life... value yours, make every fraction worth it.