Step into the tiny worlds that often escape the naked eye.
In this exclusive Hive article, we dive into the art and wonder of macro photography.
The images resulting from this macro photography session feature a conch shell as the main object, captured with the aim of highlighting the interaction between shape, texture and the process of natural erosion. The background of the composition, out of focus and composed of abstract contrasts in sepia tones, creates a warm and balanced ambience that enhances the subject and adds depth to the image. This tonal choice contributes to a harmonious visual perception, allowing the eye to focus on the structure and details of the object.
The shell reveals a rough surface, marked by multiple imperfections resulting from wear caused by the environment. These irregularities, however, are smoothed out by the prolonged action of natural elements such as water, salt and friction, which give it an appearance that is simultaneously organic and polished. The texture, although visibly rough, presents smoother transition areas, suggesting a balance between resistance and transformation.
The neutral and earthy tones, with subtle variations between greys, whites and toasted notes, reinforce the naturalness of the object and evoke the coastal environment from which it comes. The play of light and shadow on the surface accentuates the three-dimensionality of the cowrie shell and highlights the complexity of its spiral structure.
Let me present today’s model:


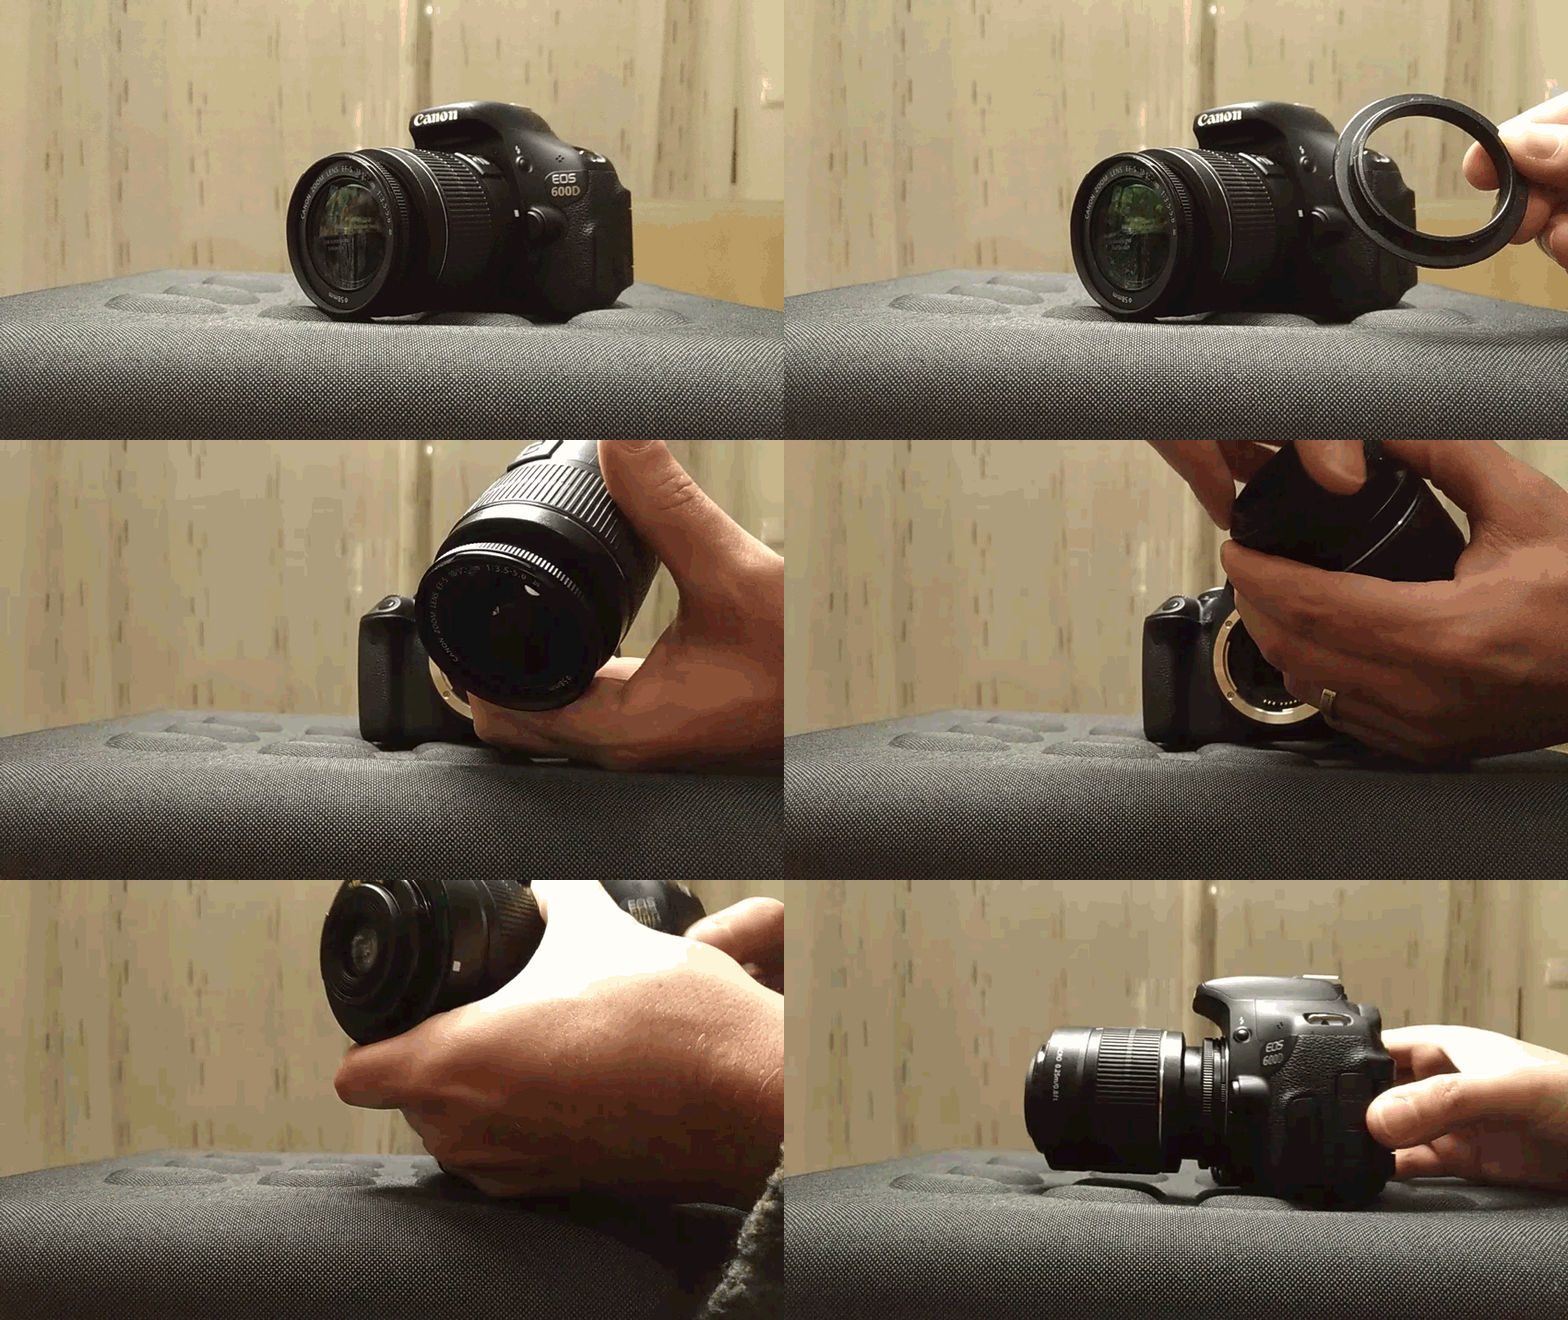
Among the numerous techniques available for macro photography, this method is arguably the most cost-effective and efficient for individuals possessing a camera with a removable lens. By simply detaching the lens and reversing its direction, and employing an inversion ring, the process becomes more manageable and streamlined.
Technical Description of Macro Photography Session
Camera Settings
Focus Mode: Manual focus to ensure precision in specific details of the structure.
Aperture: Variable aperture between f/4 and f/5 for adequate depth of field, ensuring all important details are in focus.
ISO: Low ISO setting (400) to minimize noise in images.
Shutter Speed: Adjust shutter speed as needed to avoid underexposure, while maintaining a value that allows you to capture sharp details.
Procedures
- Environment Preparation:
Assembling the macro photography set in a controlled environment, minimizing the presence of dust and ensuring a clean and white surface for positioning the piece. - Section Positioning:
Placing the subject in position that highlight the unique characteristics, using appropriate supports to keep the example stable. - Lighting Adjustment:
Setting the LED lights to provide uniform illumination, adjusting the intensity and angle of the lights to eliminate unwanted shadows. - Image Capture:
Taking multiple shots with variations in aperture settings, shutter speed and capture angle, exploring different perspectives and compositions. - Image Review:
Immediate analysis of images captured on the camera's viewfinder to ensure that all desired details were captured sharply and clearly. - Post-Production Editing:
Importing images into editing software (Adobe Photoshop CS) to adjust brightness, contrast, sharpness and remove any imperfections.
The session is closed for today.
Hope you like it :)

These photos weren't taken with a tripod
Camera - Canon EOS 600D
Lens - EFS 18-55mm
Location - Portugal

See you soon
Thank you for watching
Never forget
The price of anything is the amount of life you trade for it.
Time is life... value yours, make every fraction worth it.