Brenizer Method
is, in essence, a bunch of stitched photos to make a panorama, but used for portraits. People were taking panoramic photos for ages and some probably did take portraits that way, but Ryan Brenizer made this style popular with his wedding portraits, so people started calling it Brenzier Method.
There are two main things that you get by taking a portrait this way:
- first is the end file resolution is really big (depends on how many photos you take)
- second, and why it is mostly used, is the depth of field (amount of blur in the background)
Large resolution could be useful if you want to print big with a lot of details.
Depth of field that you get using this method would be really hard, expensive, or maybe even not possible with just one photo because you would need a wide lens with an aperture of f/0.5 or maybe even more (less? i am never sure because less is more)
How to do this?
First, you tell your model to be in a pose that he/she/they can hold with the least amount of movement for 15-30 seconds.
Then you start taking photos with your portrait lens (50mm, 85mm, 105mm) standing from your as you would want to take a half body shot (you can get a bit closer or further but i would not go with head shot range).
You start with the photo of your subject, and in first few photos, you make sure that you got the photos of the whole body. Then you start moving your camera and taking photos of the surroundings. You make sure to have enough overlapping in your photos for software to be able to stitch them together. (it is not the rule but i find it better to take photos of the subject first, so even if they move after a few photos, you don't get a weird photo of them. But it is more chaotic and it happened to me that i missed a part of the background. Some people like to start from, example, upper left corner and move to the right)
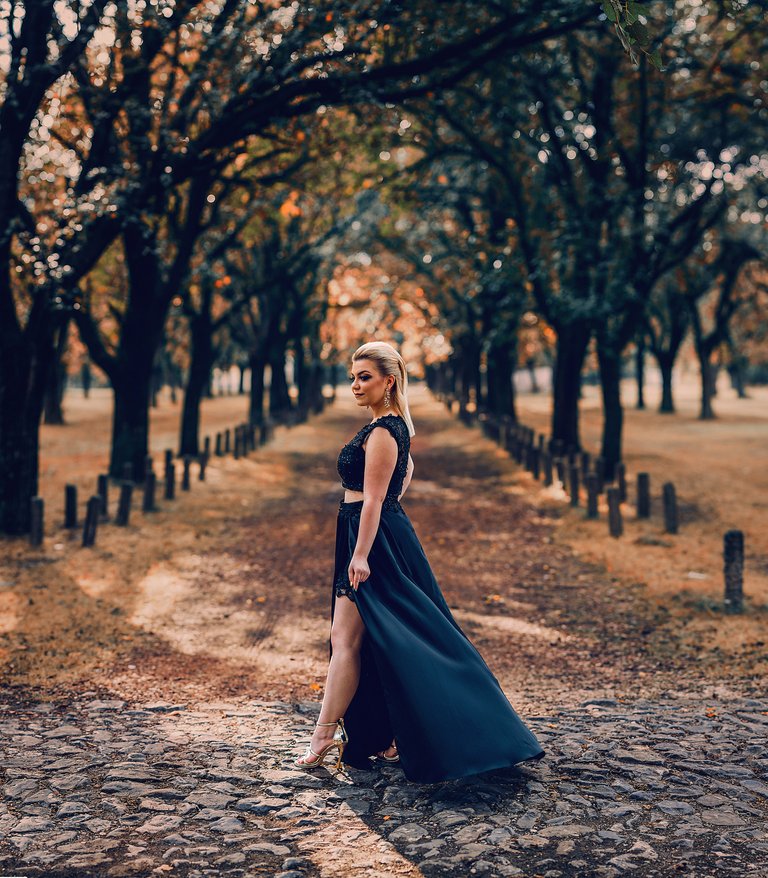
This was my first photo:
Important thing to remember, you need to change your focus to manual because you want the focus distance to be at your subject even when you photograph the background. You don't have to go all manual, you can autofocus for the first photo and then change it to manual.
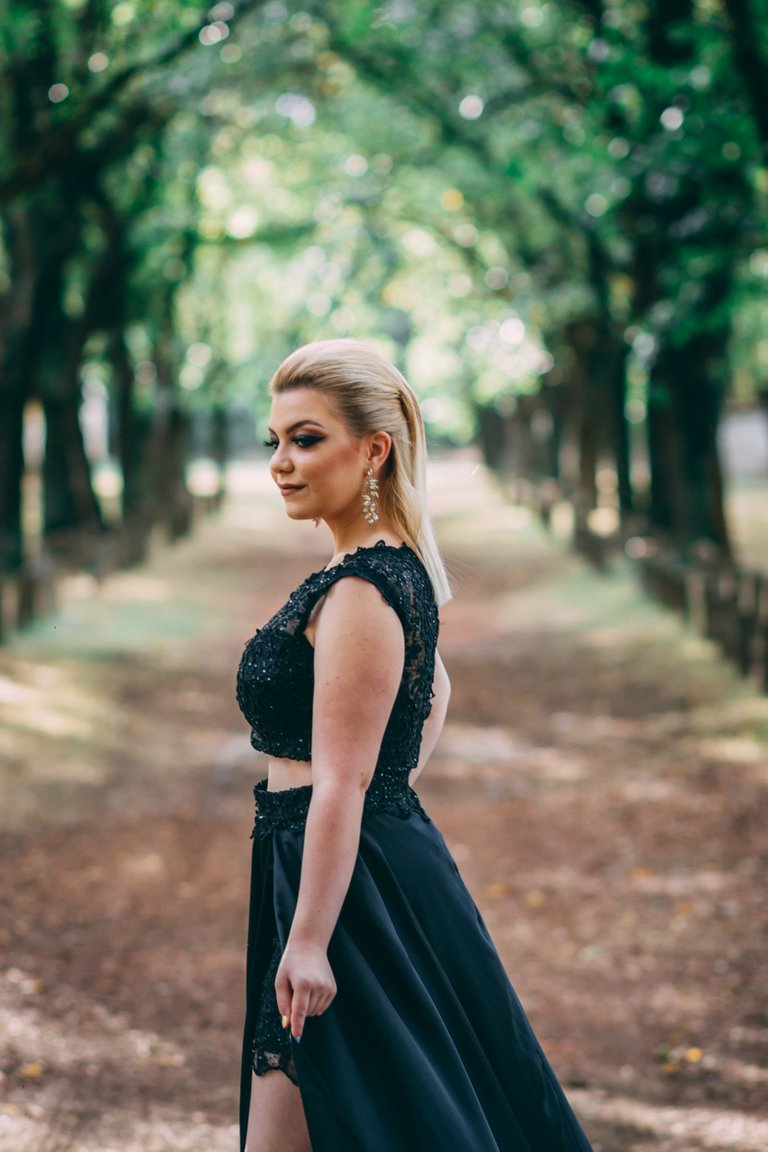
After that, all you need to do is use your editing software to stitch a panorama.
This photo is taken with Canon 85mm on Canon 80d (cropped sensor so the mm of the lens is approx 135) with an F-stop of 2.5. I took 25 photos but there was a lot of overlapping, but i tend to overshoot because i don't like to spend time fixing the gaps that i missed and yap happened to me few times.
Photography Basics: Learn Manual Mode (tutorial, Part 1)
Photography Basics: Learn Manual Mode, Shutter speed (tutorial, Part 2)
Photography Basics: Learn Manual Mode, Aperture and ISO (tutorial, Part 3)
Photography Basics: Learn Manual Mode - Thinking process (Tutorial Part 4)
The picture looked great, that depth of field gives the feeling that the girl was rising. I also have a Canon but I always found the manual mode complicated, all my shots are in automatic.🙈
well if you look at the end of the blog, there are 4 posts that will help you to get into manual mode really easy :D if you don't understand something, feel free to ask.
Thank you. I'm gonna check them.
!ENGAGE 20
ENGAGEtokens.I need to try this technique, I haven't read about it before. Beautiful picture.
thanks.
it is not that complicated and it could give you interesting results.
Just call it a pano-portrait ... I have heard that name for a long time it is much much more useful to give it a descriptive name of some sort. I've been doing panoramic portraits for a while its just a panorama just like any panorama I take but the subject happens to be people
think i heard him saying in an interview some years ago, that it is a pano-portrait and people were doing it for years. He just made it social network recognizable so people started calling it Brenizer method.
Need to check this out further, but beautiful result!
not that hard, but you can get something interesting
thanks
Perfectly executed this technique
thanks