Immediately you might be asking yourself - Wait, people still shoot film?
The answer of course is OBVIOUSLY
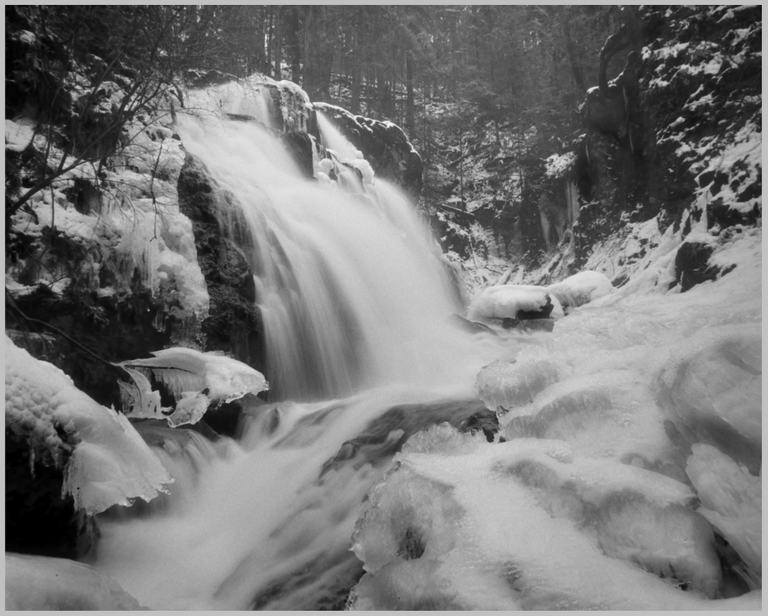
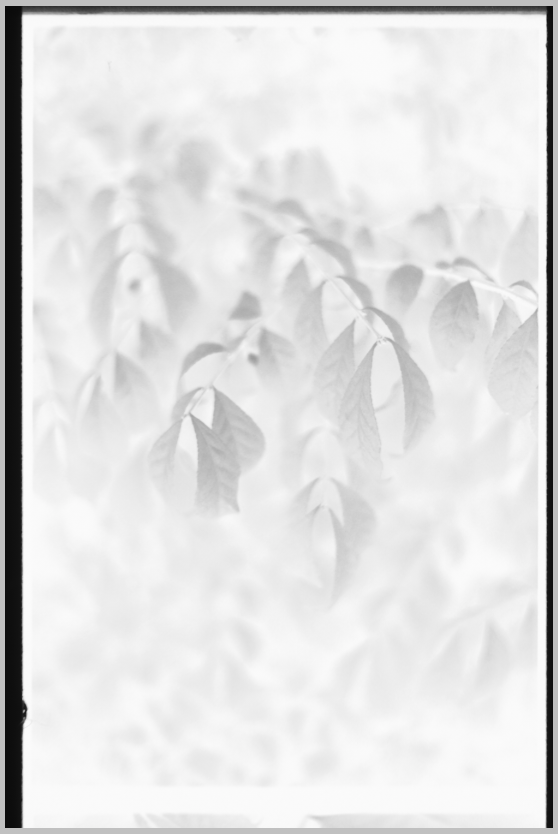
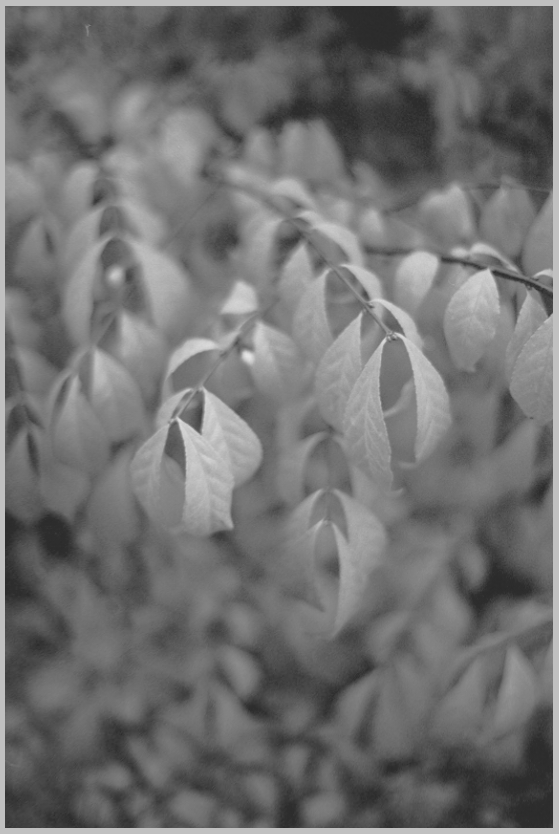
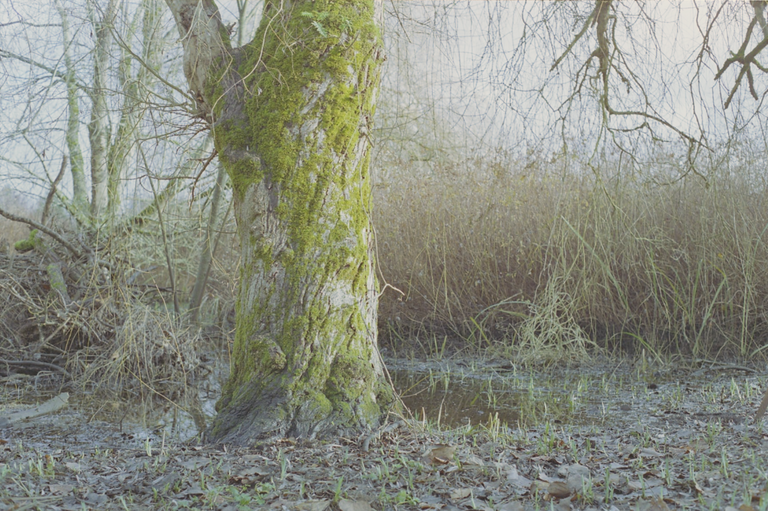
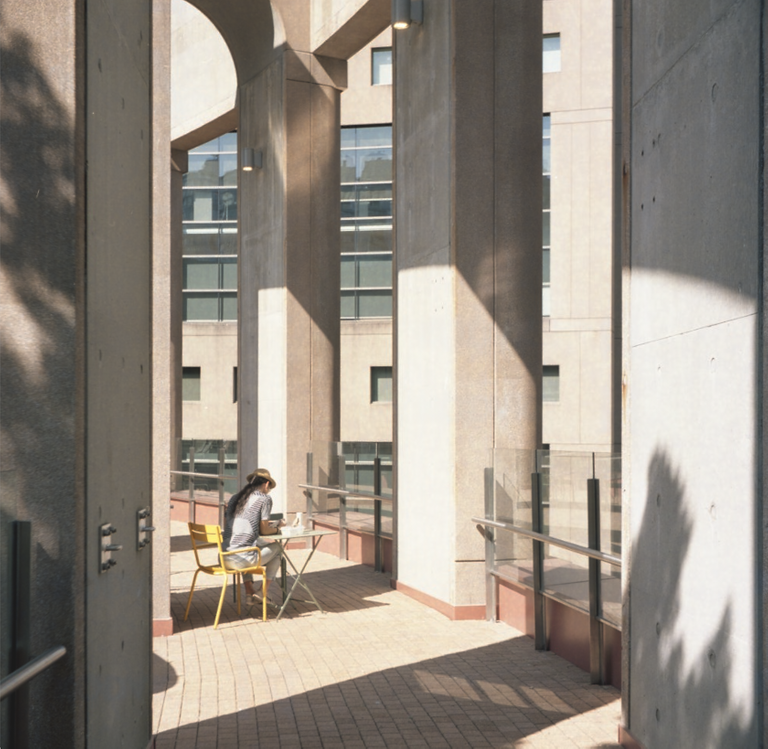
Shot on a Pentax P30, Pentax-M 24mm f2.8 on Delta100 Emulsion
But Why
Although to many it may seem like a relic of the past, film has been making a resurgence in the last decade. Fueled by what some may consider a hipster movement focused on enjoying the imperfections in life, film for me is a way to challenge myself as a photographer. It provides a creative challenge through the limitations it creates for me.
Of course, shooting film has its own costs that can be prohibitive. There's the roll of film, developing, and then scanning the film which can range from $10-20/roll for each step! That's up to $60 just to shoot 24-36 frames. It can be expensive. So in an in effort to curb that back a bit one of the things I've started doing is self scanning.
A friend on a local Discord channel I'm apart of inspired me to get my butt in gear and I headed to my local library where I used a flatbed scanner to scan film negates for a few months. But this meant travelling during Covid and I also couldn't enjoy the luxury of my home. So, again, from a different member I was inspired to setup my own DSLR scanning setup.
The idea of a DSLR scanning setup is to use a backlight source in conjunction with a modern digital camera to scan your films with a Macro lens.
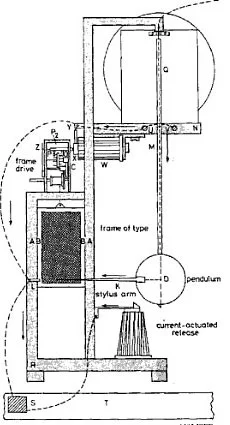
Image from https://history-computer.com/computer-scanner/
In this little sketch you can get a good idea of how this used to be done. Its much easier with a proper scanning bed - but alas I'm a DIY kinda guy and so I resorted to using a modern videography clamp and my desk chair leg!
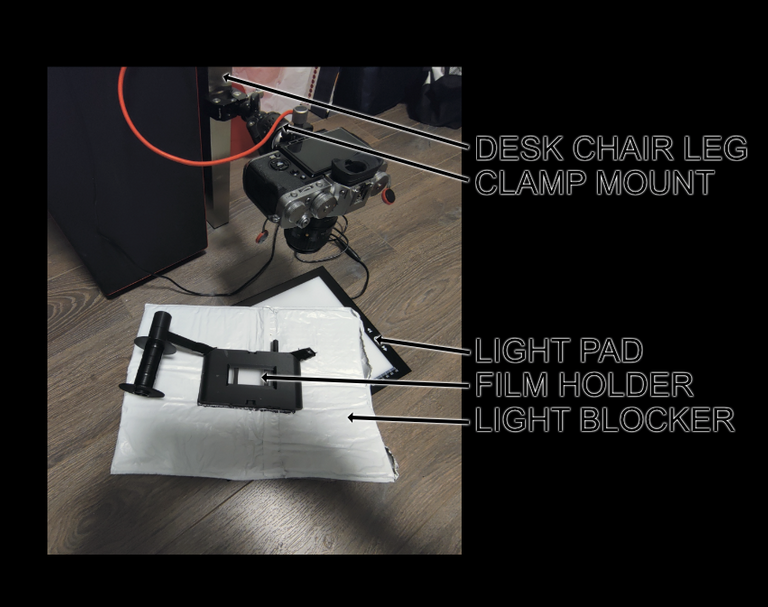
This is my current setup
Parts:
Desk Chair Leg: To hold the camera (duh)
Clamp Mount: Purchased from Amazon for ~$20CAD. Search "Smallrig Clamp"
Light Pad: Purchased from Amazon for ~$30CAD. Great for sketching as well. Plugs in with USB
Film Holder: 3D printed based on the design found here by Brad Brok
Light Blocker: The packaging used to deliver the Light Pad. Its the right size, and keeps glare out of the camera lens when in position. This helps maintain good contrast in the scanning procedure
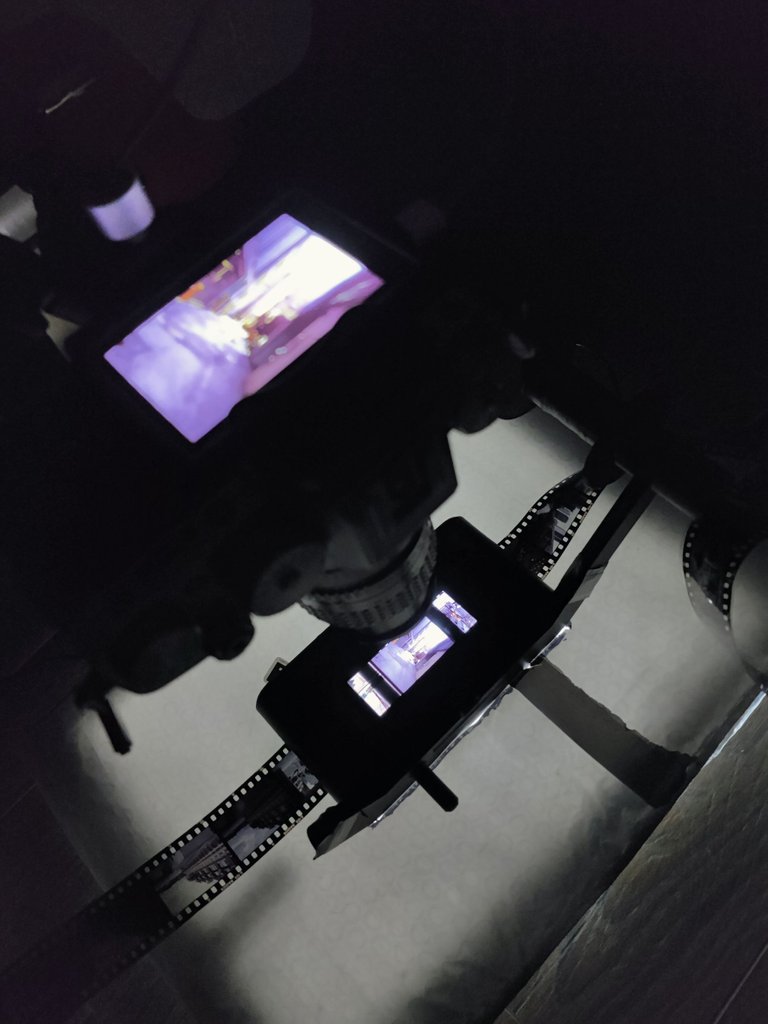
It's also important to note the camera gear. Any camera will work, but its the lens that makes the difference. In an effort to save some money I opted to grab a vintage Pentax-A 50mm f2.8 Macro lens. But, since my Fujifilm X-T3 is a crop sensor camera I need to use a 16mm macro tube to get a true 1:1 Macro lens using the Pentax. If that all sounded confusing, don't worry, it was for me too. Do your research for your system. The key is to get a 1:1 so that you're maximizing the image you can get from scanning with your digital camera.
And this is how it looks assembled and functioning
TIP: When you setup your camera, use a mirror to make sure the camera is perfectly parallel with the surface you're scanning on. It can make a huge difference when the DOF is so small!
Developing your scans
Now scanning negatives yourself has some additional challenges to consider.
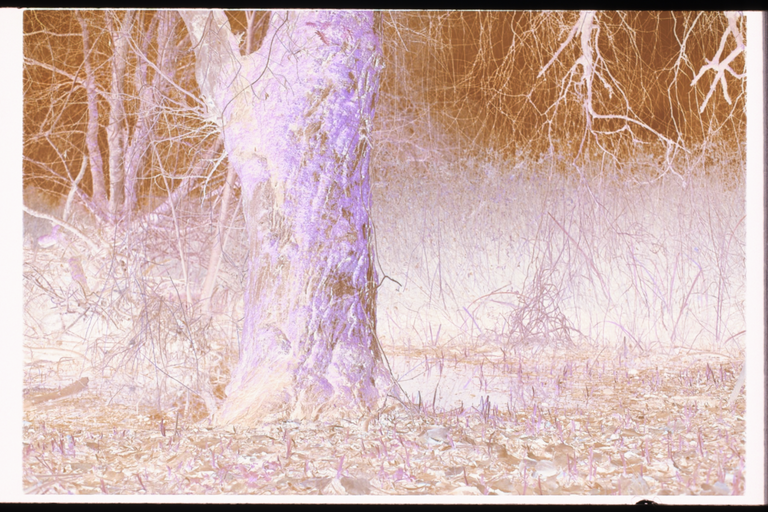
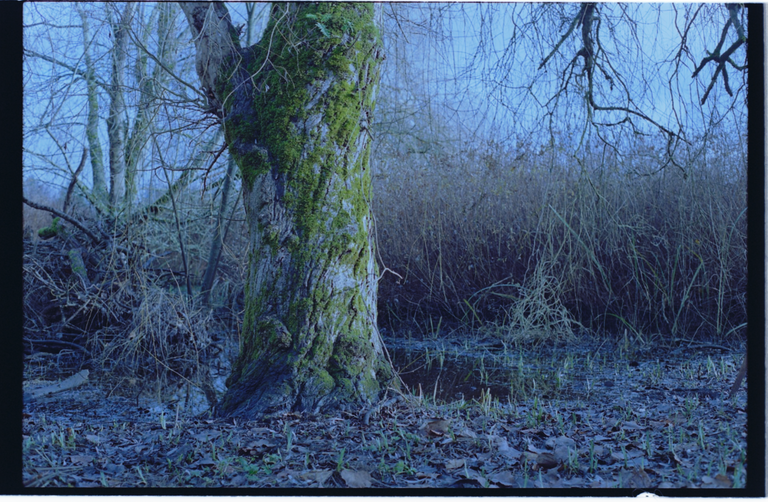
1 - Most film is a negative. So unless you're shooting slide film you'll have to invert the image using software. Otherwise, it will look like the image below!
Scanned Negative (left) and inverted final scan (right)
2 - Color science is all backwards. If you're shooting color negatives this can be super tricky. And its something I'm still learning. You can see the big difference that good color grading can make once inverted. My biggest tip is to select the edge (white part) of the negative before you invert the image. Then adjust from there.
 |  |  |
|---|---|---|
| Negative | Auto White Balance | Corrected White Balance |
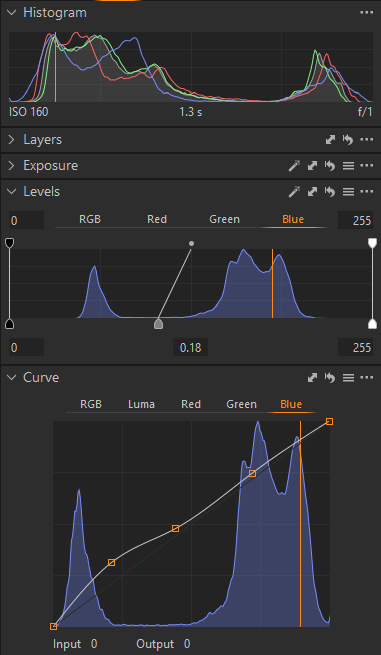
3 - Learn how to use RGB Curves. They'll save you headaches and headaches. I find blue specifically to be a pain for myself. Basic rules though Less Blue = More Yellow, Less Red = More Green, Less Green = More Magenta. Here's how changing the Blue channel can change an images warmth.
 |  |  |
|---|---|---|
| Basic Negative Reversal | Curve and Level Adjustments to Blue Channel | Corrected Image after Blue Channel Adjustments |
4 - Have fun. Thats the point of shooting film anyways. Let you're creative flare shine though and enjoy the process. You're shooting film because this is supposed to be an experience, and a challenge worth mastering.
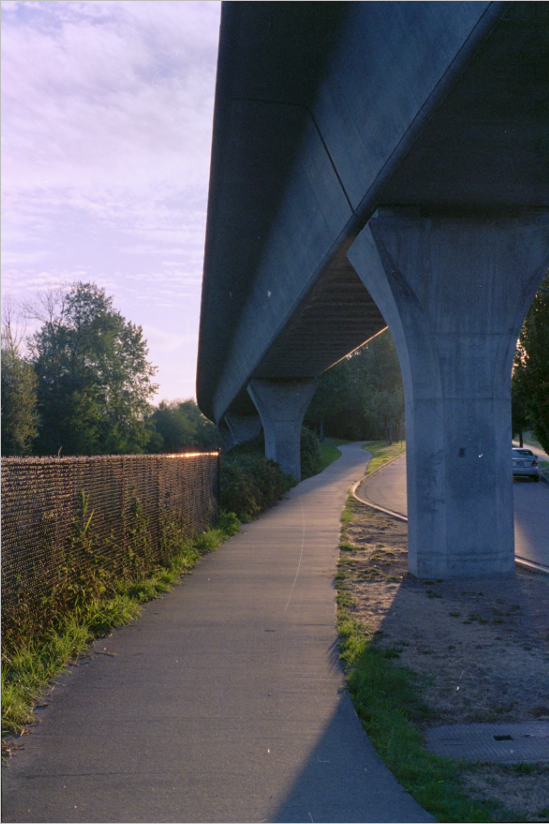
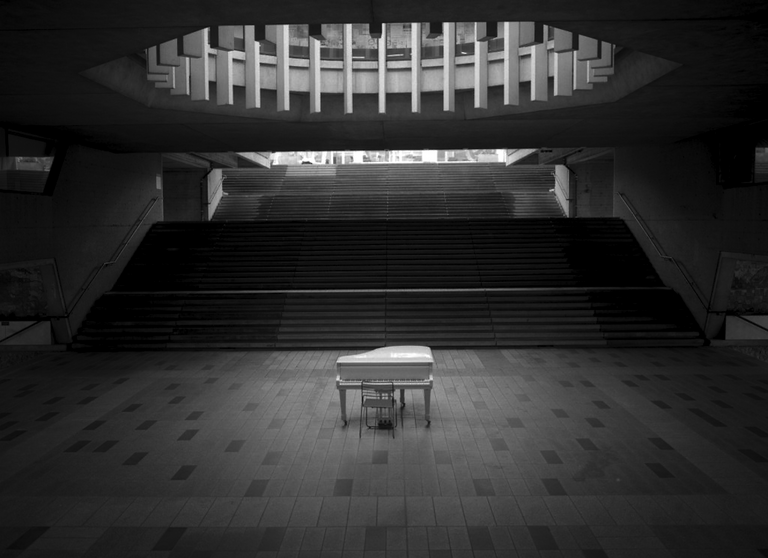
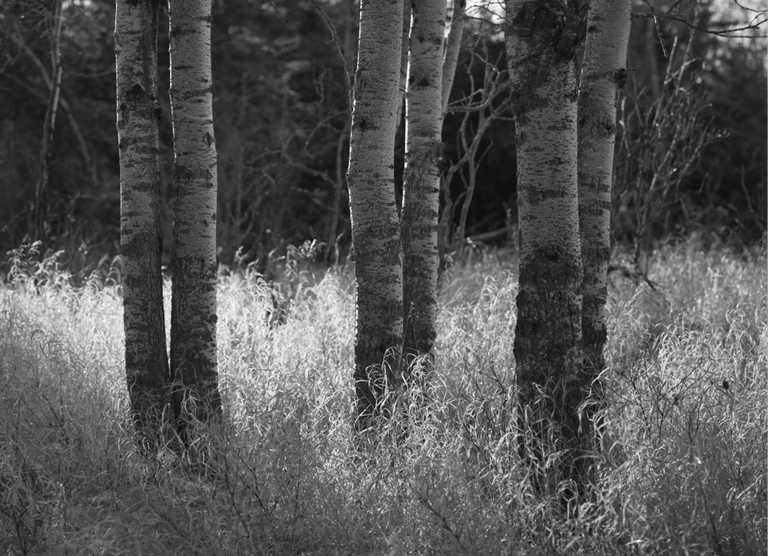
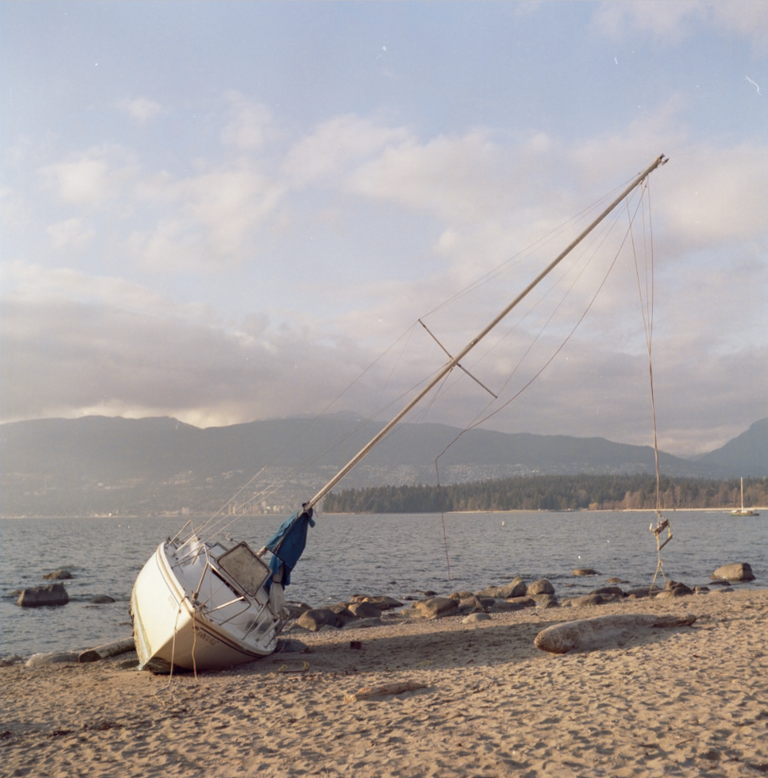
I'd like to finish this by sharing some of my personal favorite film shots I've created over the last two years. Gotta give you a hook-n-sink to get on the film train ;P

Follow me on HIVE or checkout my work at these links below
Website: wwww.dyptrephotography.ca
Instagram: https://www.instagram.com/dyptre/
Twitter: https://twitter.com/dyptre
All images are owned and created by Dyptre www.dyptrephotography.ca
tried to do that with a shoe box and a light, found out that could be done but results were not great. didn't try hard enough to try and make it better. alsodid not have a macro lens at the time. this looks great
Ahh ya I've heard of the shoebox method before. I definitely think a key to this is the 3d printed film holder I have. It keeps the film super flat and reduces curvature. If you have access to one, or a friend has a printer I'd highly suggest printing one to use. Makes a huge difference
main problem was light and white background. i tried several lights and papers but quality of paper is probably important as i could see texture of the paper. i think i did a post about that, not sure how will i find that 😁
Congratulations @dyptre! You have completed the following achievement on the Hive blockchain and have been rewarded with new badge(s):
Your next target is to reach 20000 upvotes.
You can view your badges on your board and compare yourself to others in the Ranking
If you no longer want to receive notifications, reply to this comment with the word
STOPCheck out the last post from @hivebuzz:
Support the HiveBuzz project. Vote for our proposal!
Congratulations @dyptre!
You raised your level and are now a Minnow!
Support the HiveBuzz project. Vote for our proposal!