Hello all Hivers!!
Just now when I do some browsing in my pc, I suddenly remember some of the photoshoot that I joined some years ago. I found some photo that I took during that time and I want to share it with all of you here.
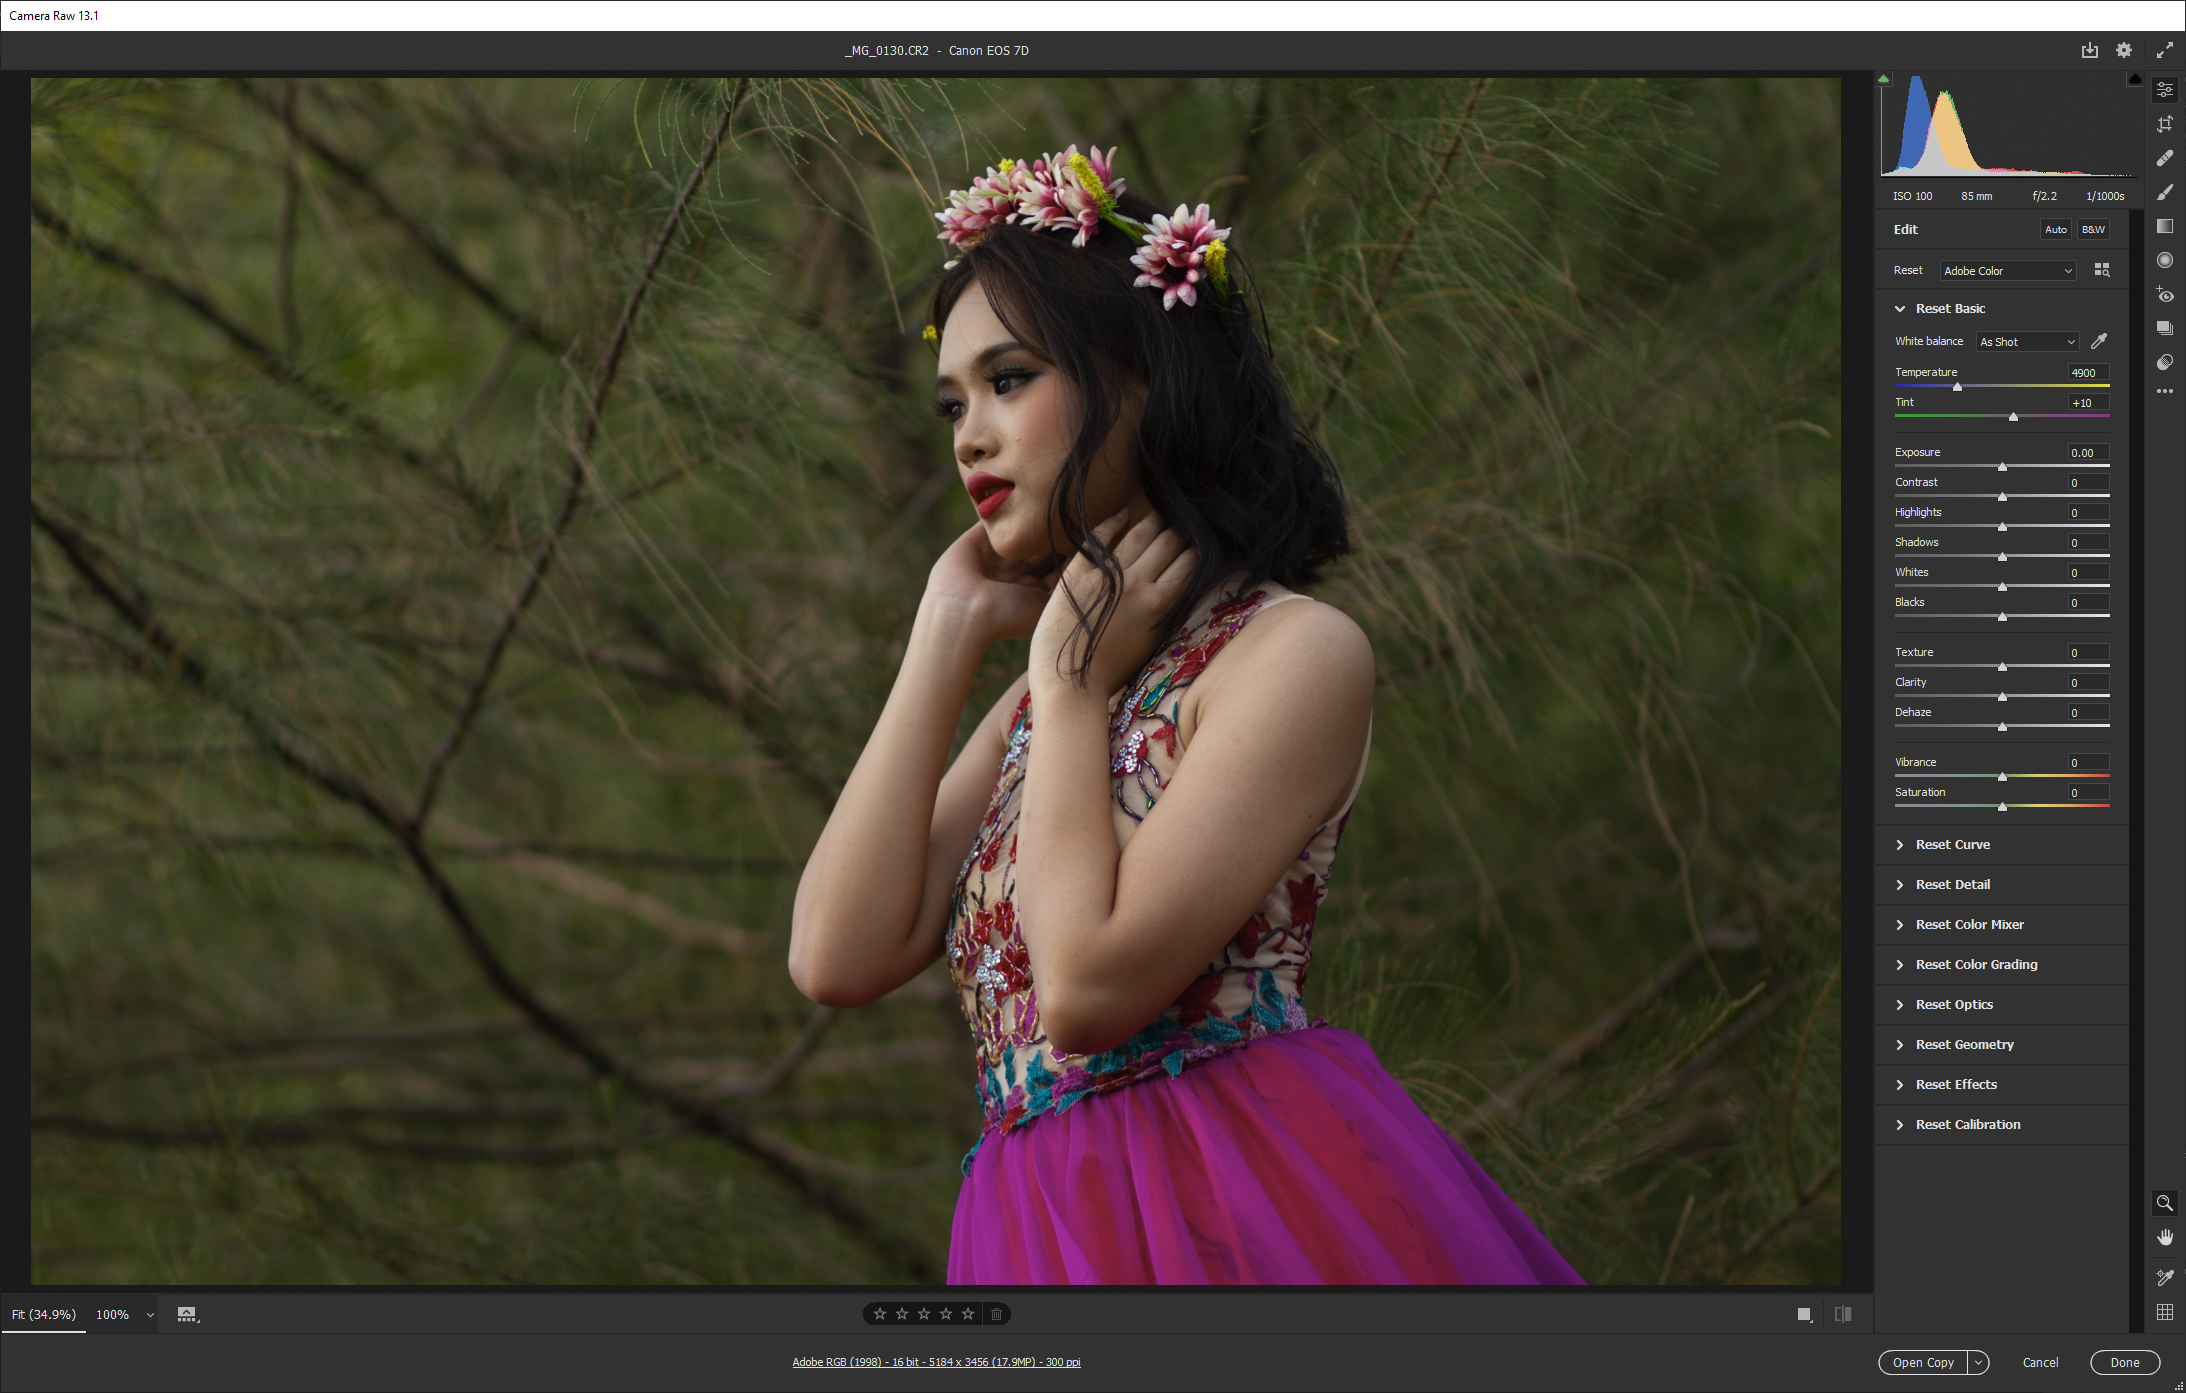
This is the original photo before any adjustment made.
Photo taken with Canon EOS 7D with 85mm 1.8 lens.
ISO - 100 - f/2.2 - 1/1000
By the way her name is Delvia Rachel. This photoshoot event was organized by my fellow photographer and they call it The ABR district Sabah Borneo Chapter. ABR stands for Abundance of Boundless Romance.
So I will try my best to explain on how I do the photo editing retouching process. This will be a very simple workflow.
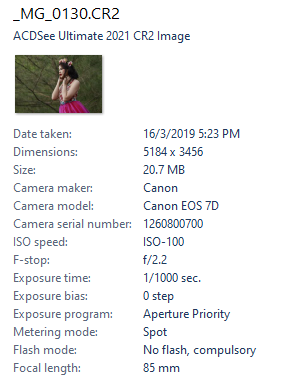
Before going into photoshop, I do some basic adjustment in Camera raw, as you can see below on the right side of the photo.

This is the closeup for the setting I change.
After that I open the image into photoshop, and below is the workspace inside my photoshop.

After that I select the "Healing Brush" tool or its shortcut "J". Below on the blue circle is the icon for "Healing Brush" tool.

After that I zoom in to the face and remove unwanted element such as hair, blemishes, uneven skin texture etc etc.
By using "alt + left mouse click" I get the nearest sample from the element that we want to remove as the new replacement.
This is the before and after image comparison.

Above was before and below was after the "healing Brush" tool.
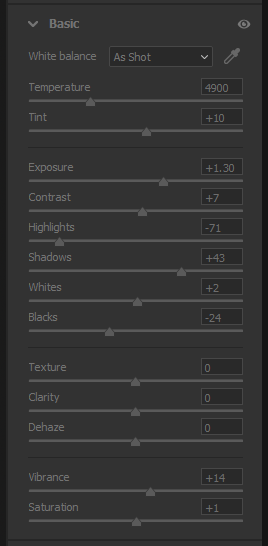
Then after this I do the skin smoothing using a plugin called "SkinFiner" inside the photoshop.
This is one of the fastest way to get a smooth skin but it will look unnatural and a bit dolly like, but that is just what I want to do with this photo here, and the advantages of using this plugin its very fast, but the disadvantages of it is I do not have full control on how to adjust the skin by area or target area. (I may do one full blog about skin retouching by only using the tool inside photoshop without using any of the plugin)
This is how you access the "SkinFiner" plugin, go to Filter > Photo-Toolbox > SkinFiner
Below is the SkinFiner interface.

I just apply the default preset in here,
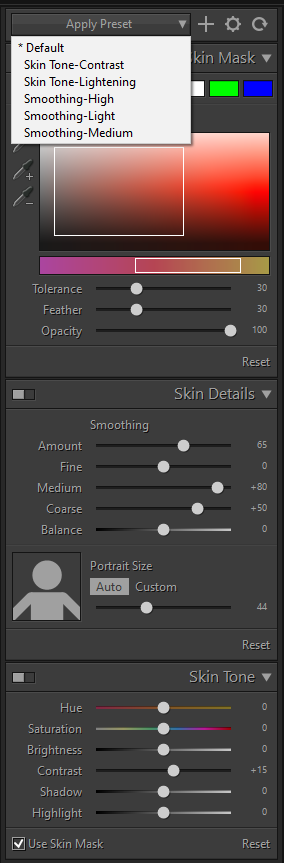
I can adjust the parameter on the right side but as for now I just go with the default value, it already looks great. I just clicked "OK" and it will take me back to photoshop main workspace.
After that I copy the layer by clicking "ctrl + J" on the keyboard.
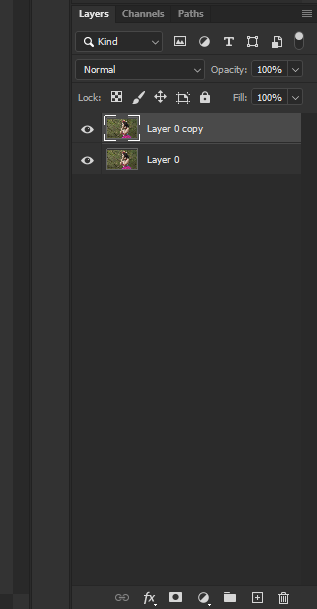
Now the new image will be on the top of the previous image. As shown by the photo above the new image is on the top.
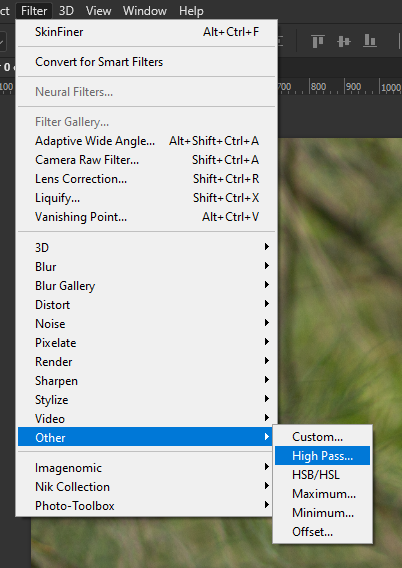
Now I need to make some adjustment on the sharpness on the image to make it looks more sharp. So I go to Filter > Others > High Pass
All the image will turn to grey and here I can see how much sharpness that I want and adjust the setting accordingly.
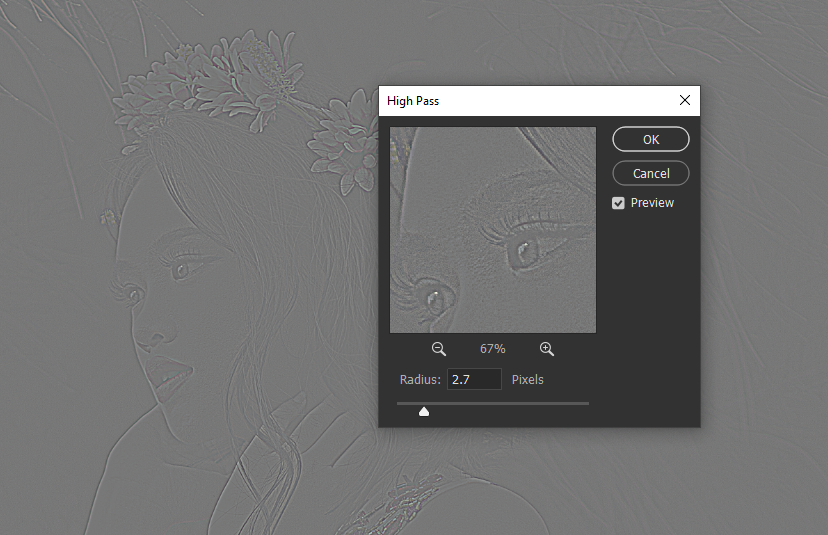
As for this image, I used 2.7. Not to much of sharpness. Just increasing it slightly. After that I change the image blending mode to "Overlay".
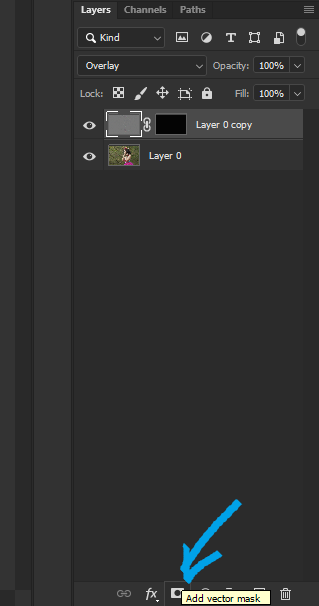
After that I put masking on the overlay image by clicking the "Add vector mask" icon as shown below.
I wanted to put sharpness only to some area of the photo such as some of the hair, the flower above the head, on the eyes etc etc. That is why I need to do the masking.
Just for tips, this black mask is an inverted mask, by clicking on the masking icon and holding "alt" key, we can get the inverted mask directly.

And for this setup, just make sure the brush setting is on white. To do that on the keyboard just press the button "X" or by clicking the arrow shown by the red arrow on the picture above. The "X" button and the arrow button will toggle between the color inside the box.
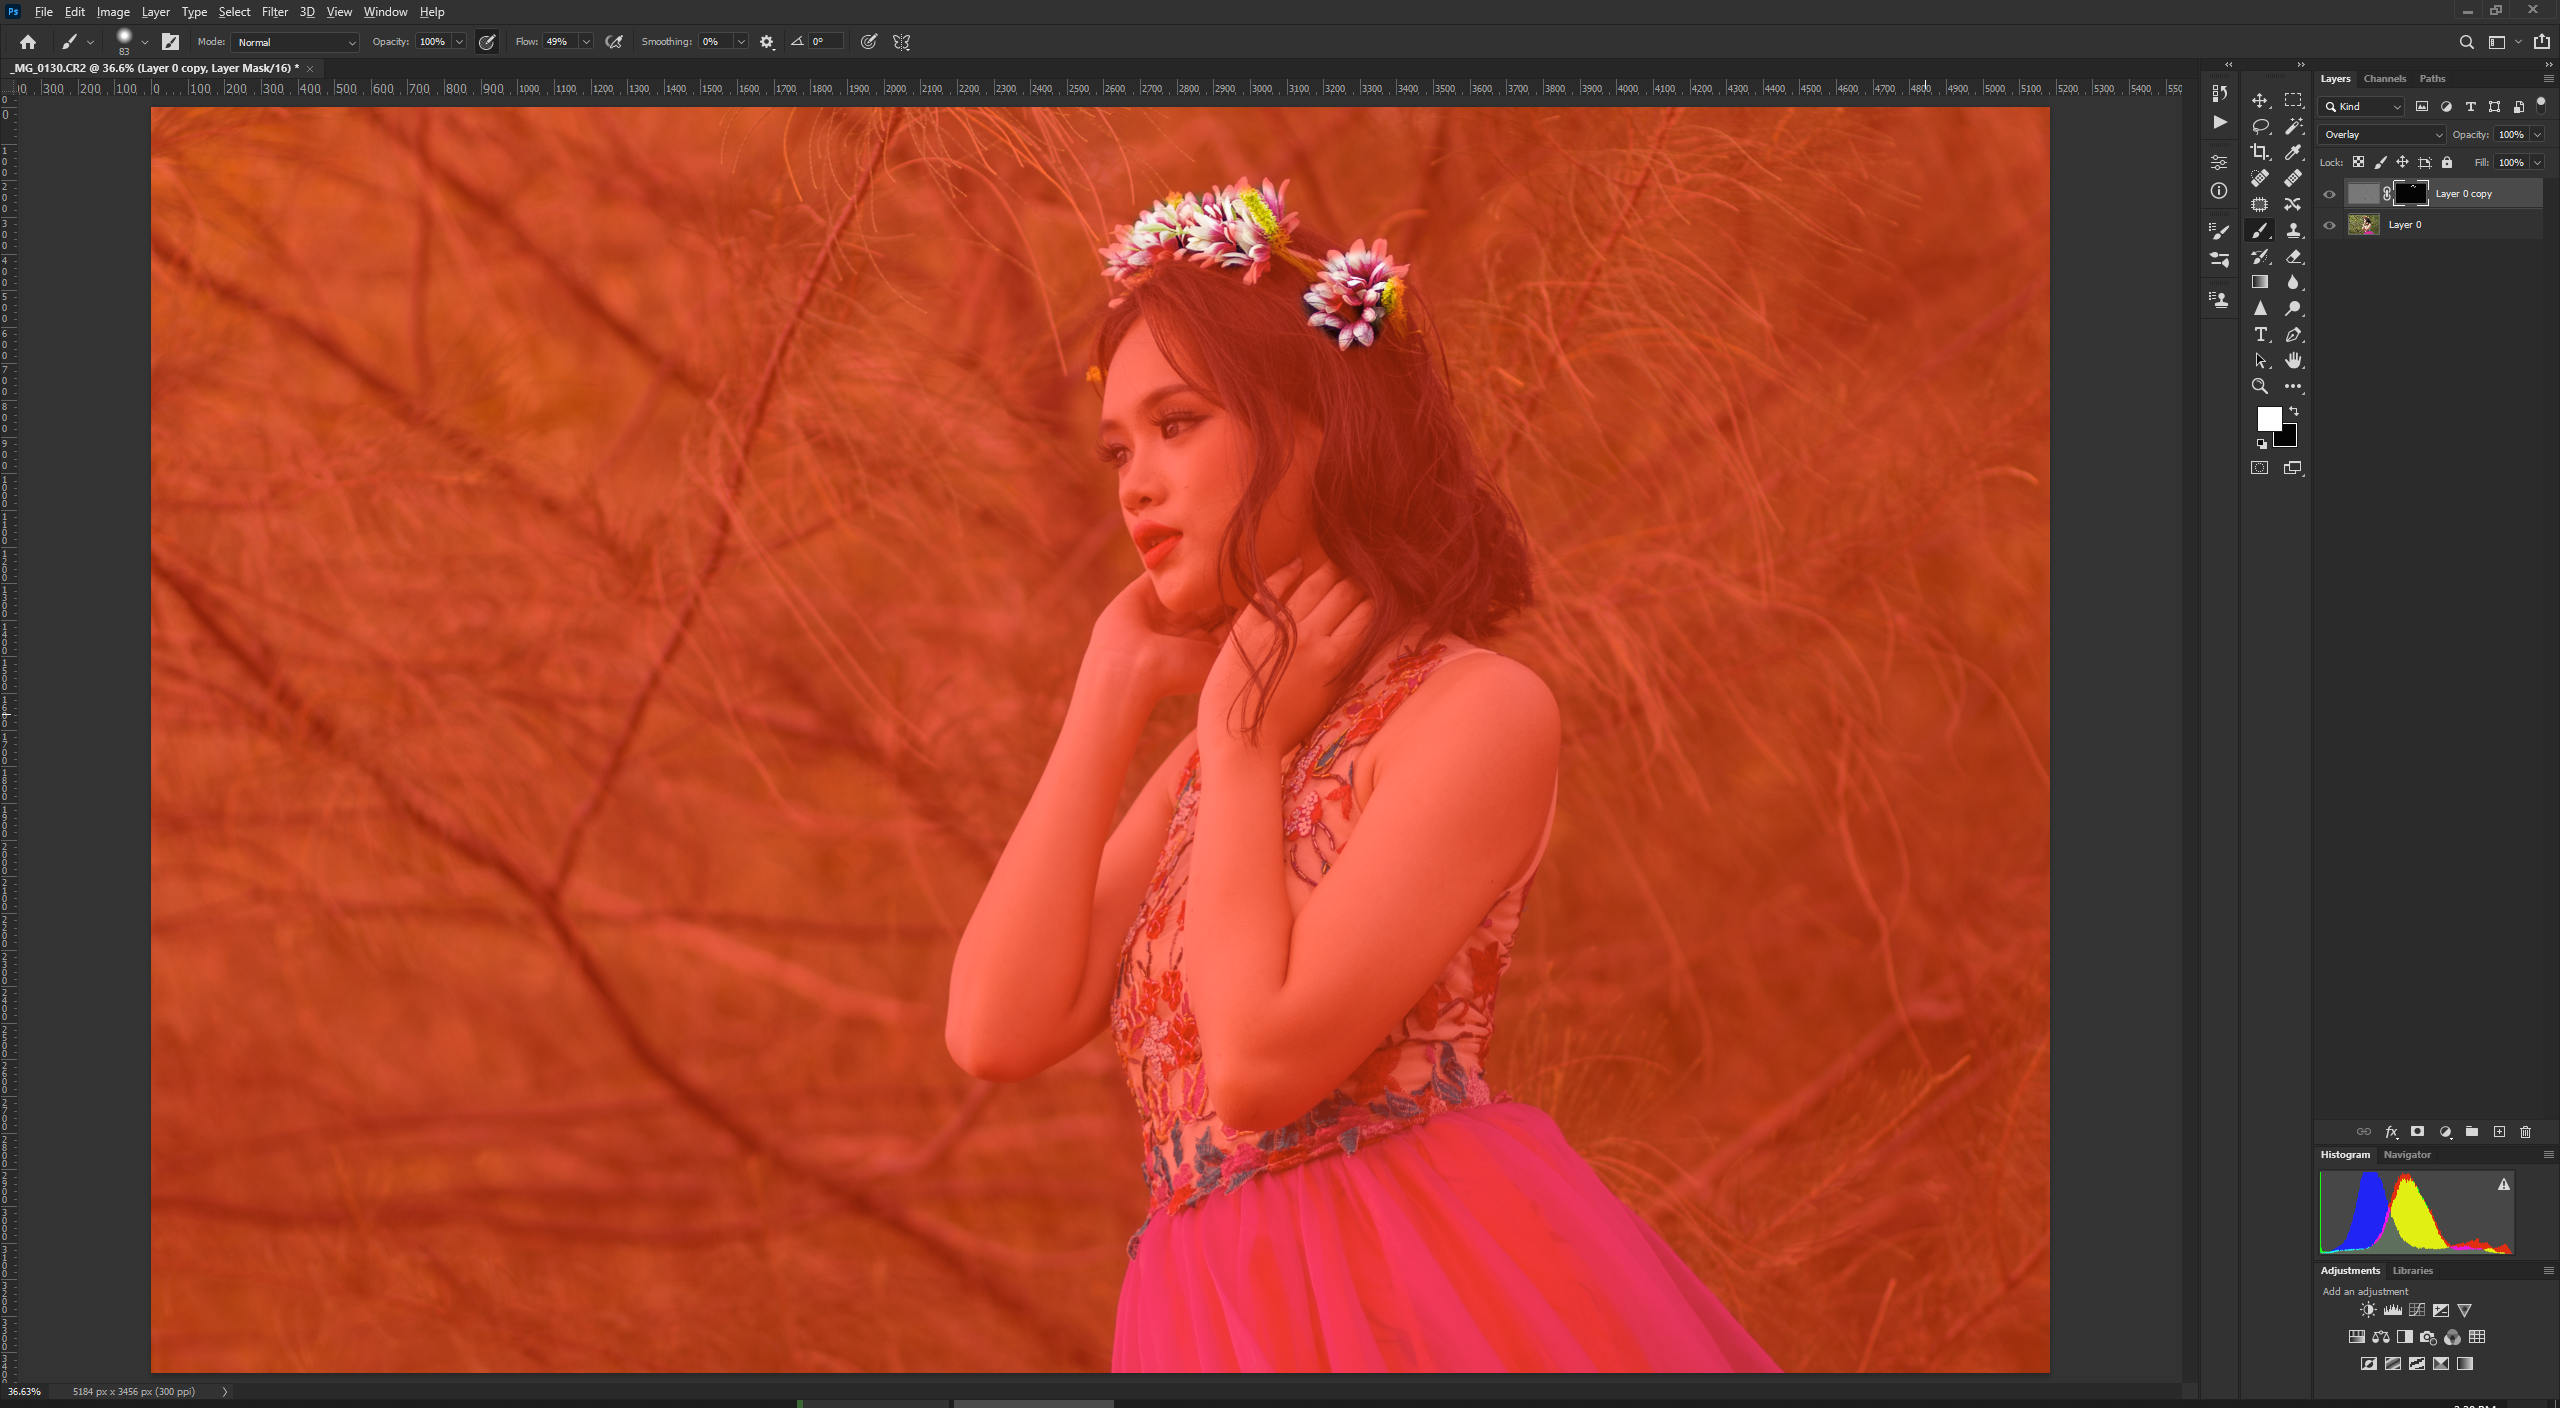
This red overlay is the indicator for the area that being masked. To make it easier to see which area that I wanted to be more sharp from the rest of the image.
After I am done with the masking job. I want to add some vignette to the photo, the easiest way to do this is by using camera raw.
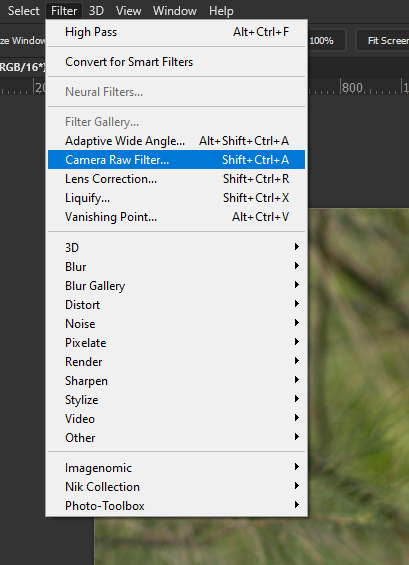
As usual go to Filter > Camera Raw Filter . This will take us back to the Camera Raw interface.
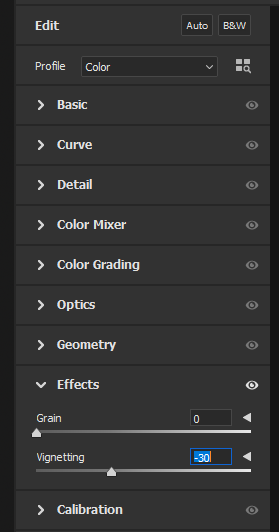
I go to the Effect tab and adjust the vignetting on the photo, on this photo I just go by the "-30" value to get slightly dark area around the photo.

After this I put some lighting on the top left corner of the photo by using the "Graduated Filter".

And below is my final adjustment value.

After that I just click OK and go back to Photoshop. Now I will start the Dodge and Burn part. By adding adjustment filter called "Curved" I will do the dodge and burn technique.
Here I am adding the adjustment layer.

And for the layer adjustments setting I use the value as shown below.
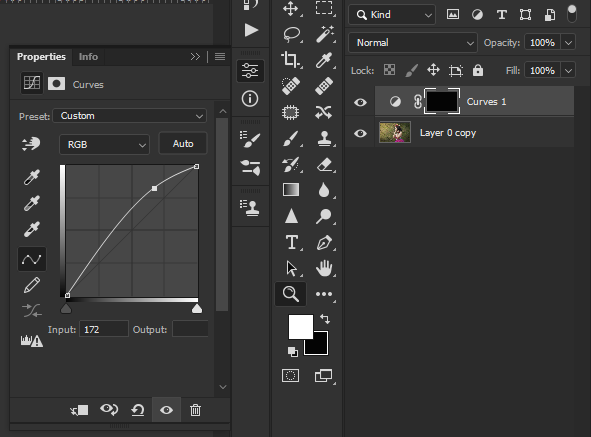
This photo shown above is the layer for the "Dodge" editing.
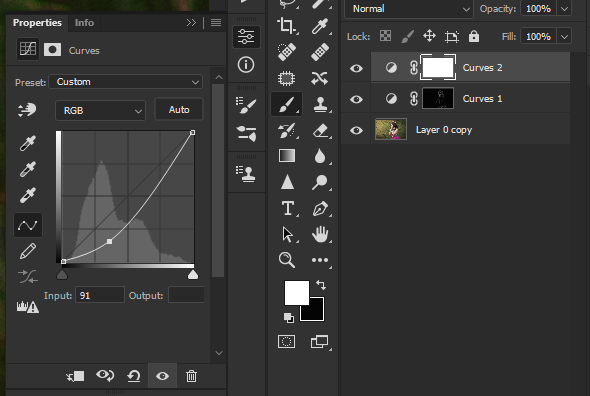
And this photo shown above is the layer for the "Burn" editing.
Now same step as the adding sharpness to the photo. Apply the "Dodge" and "Burn" only to the area that necessary or the target area.
After all the masking job is finished. Now we can save the photo.
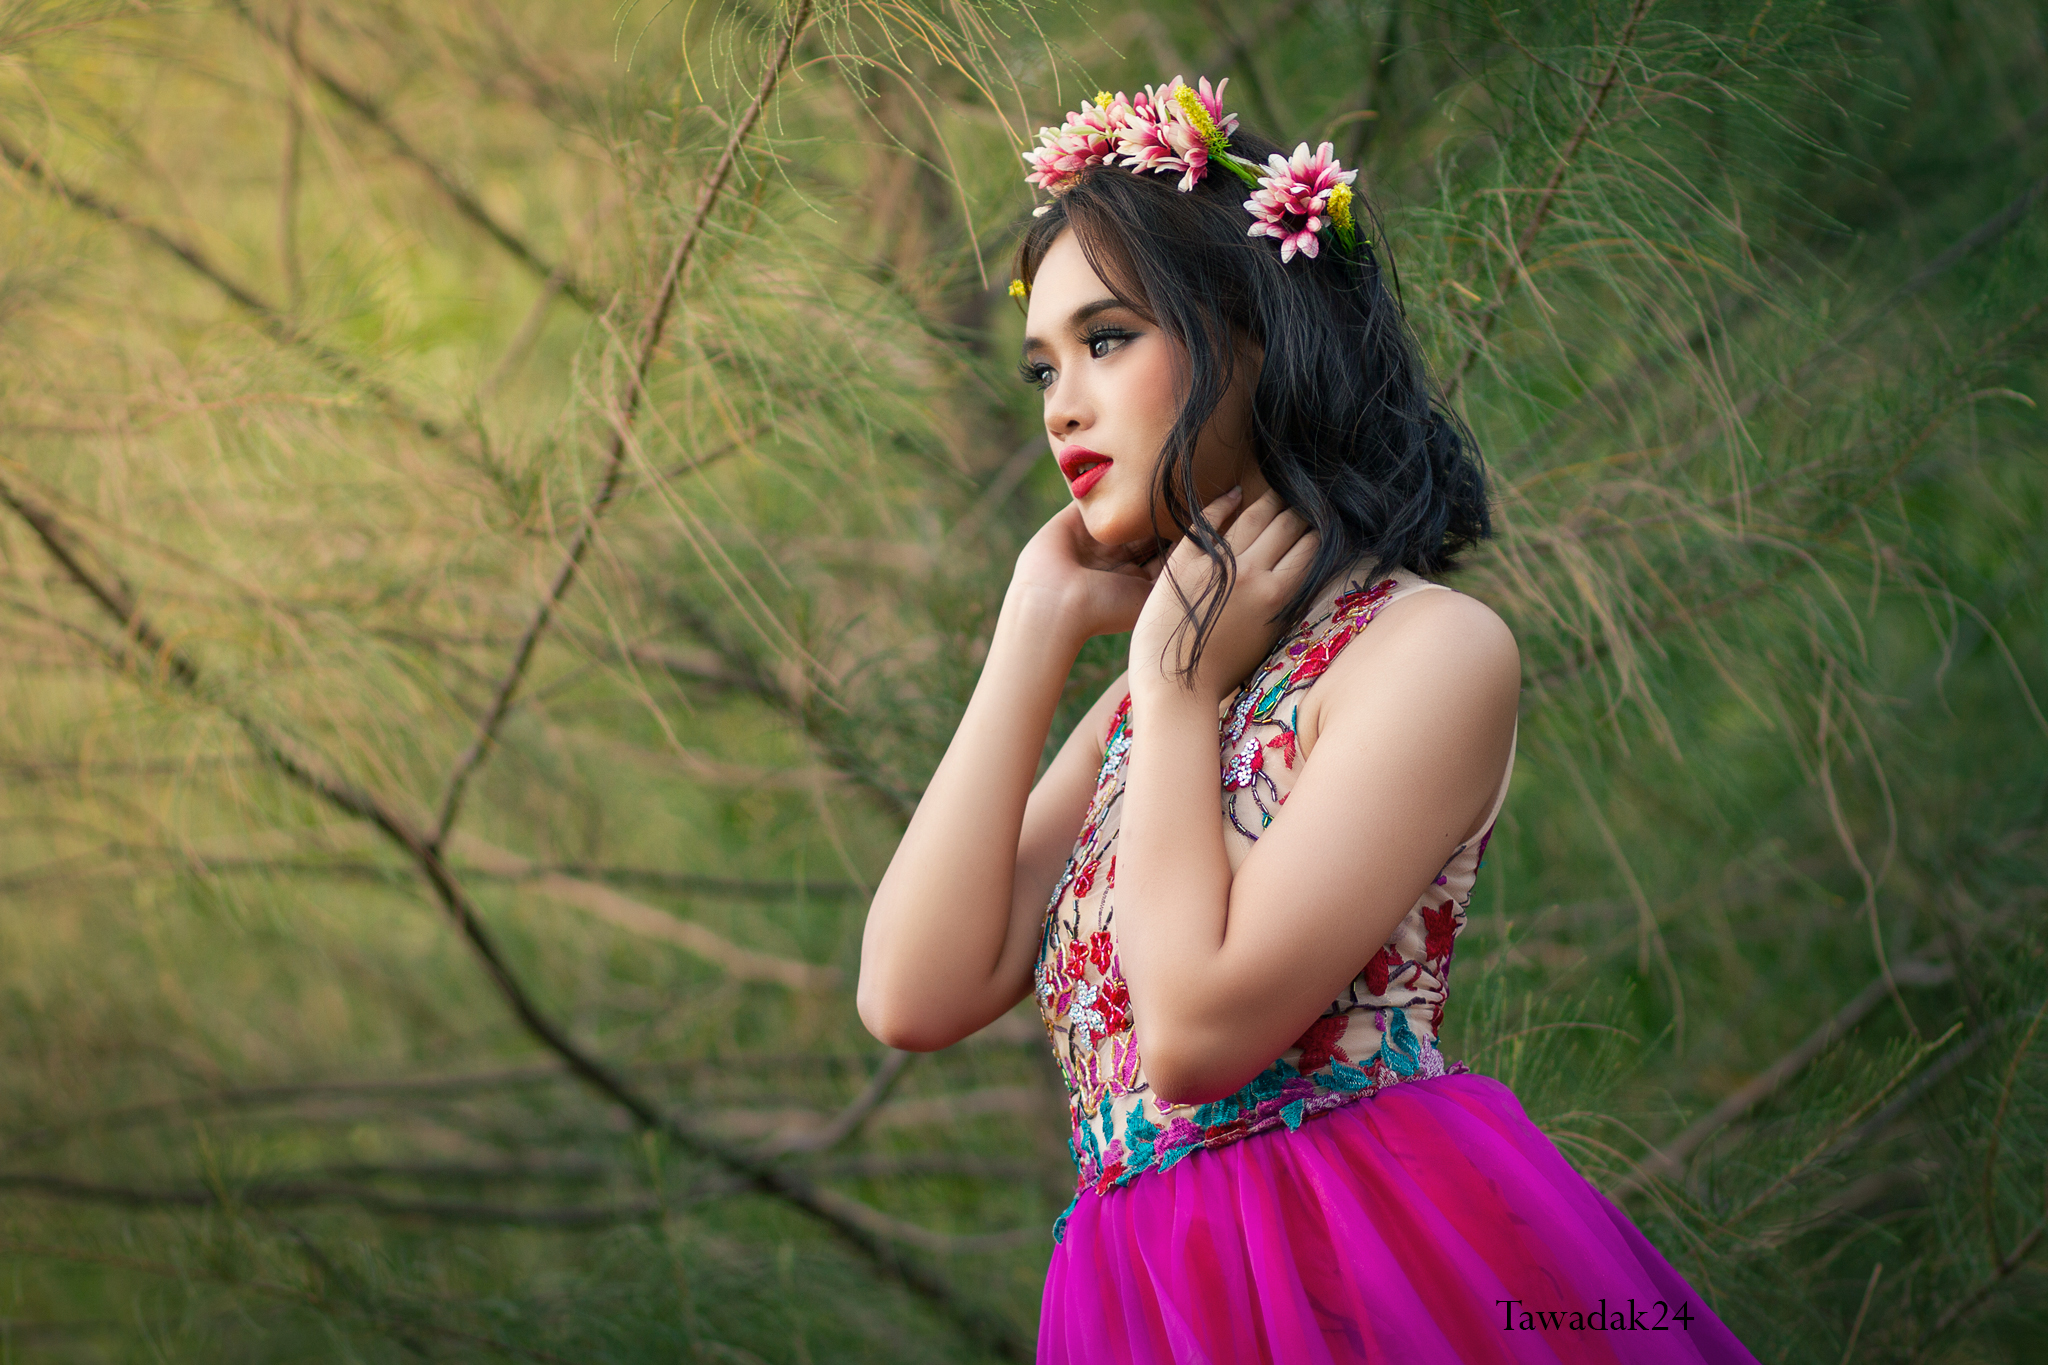
And below is the final image from the editing/retouching process.
@tawadak24 All rights reserved.
The rewards earned on this comment will go directly to the person sharing the post on Twitter as long as they are registered with @poshtoken. Sign up at https://hiveposh.com.