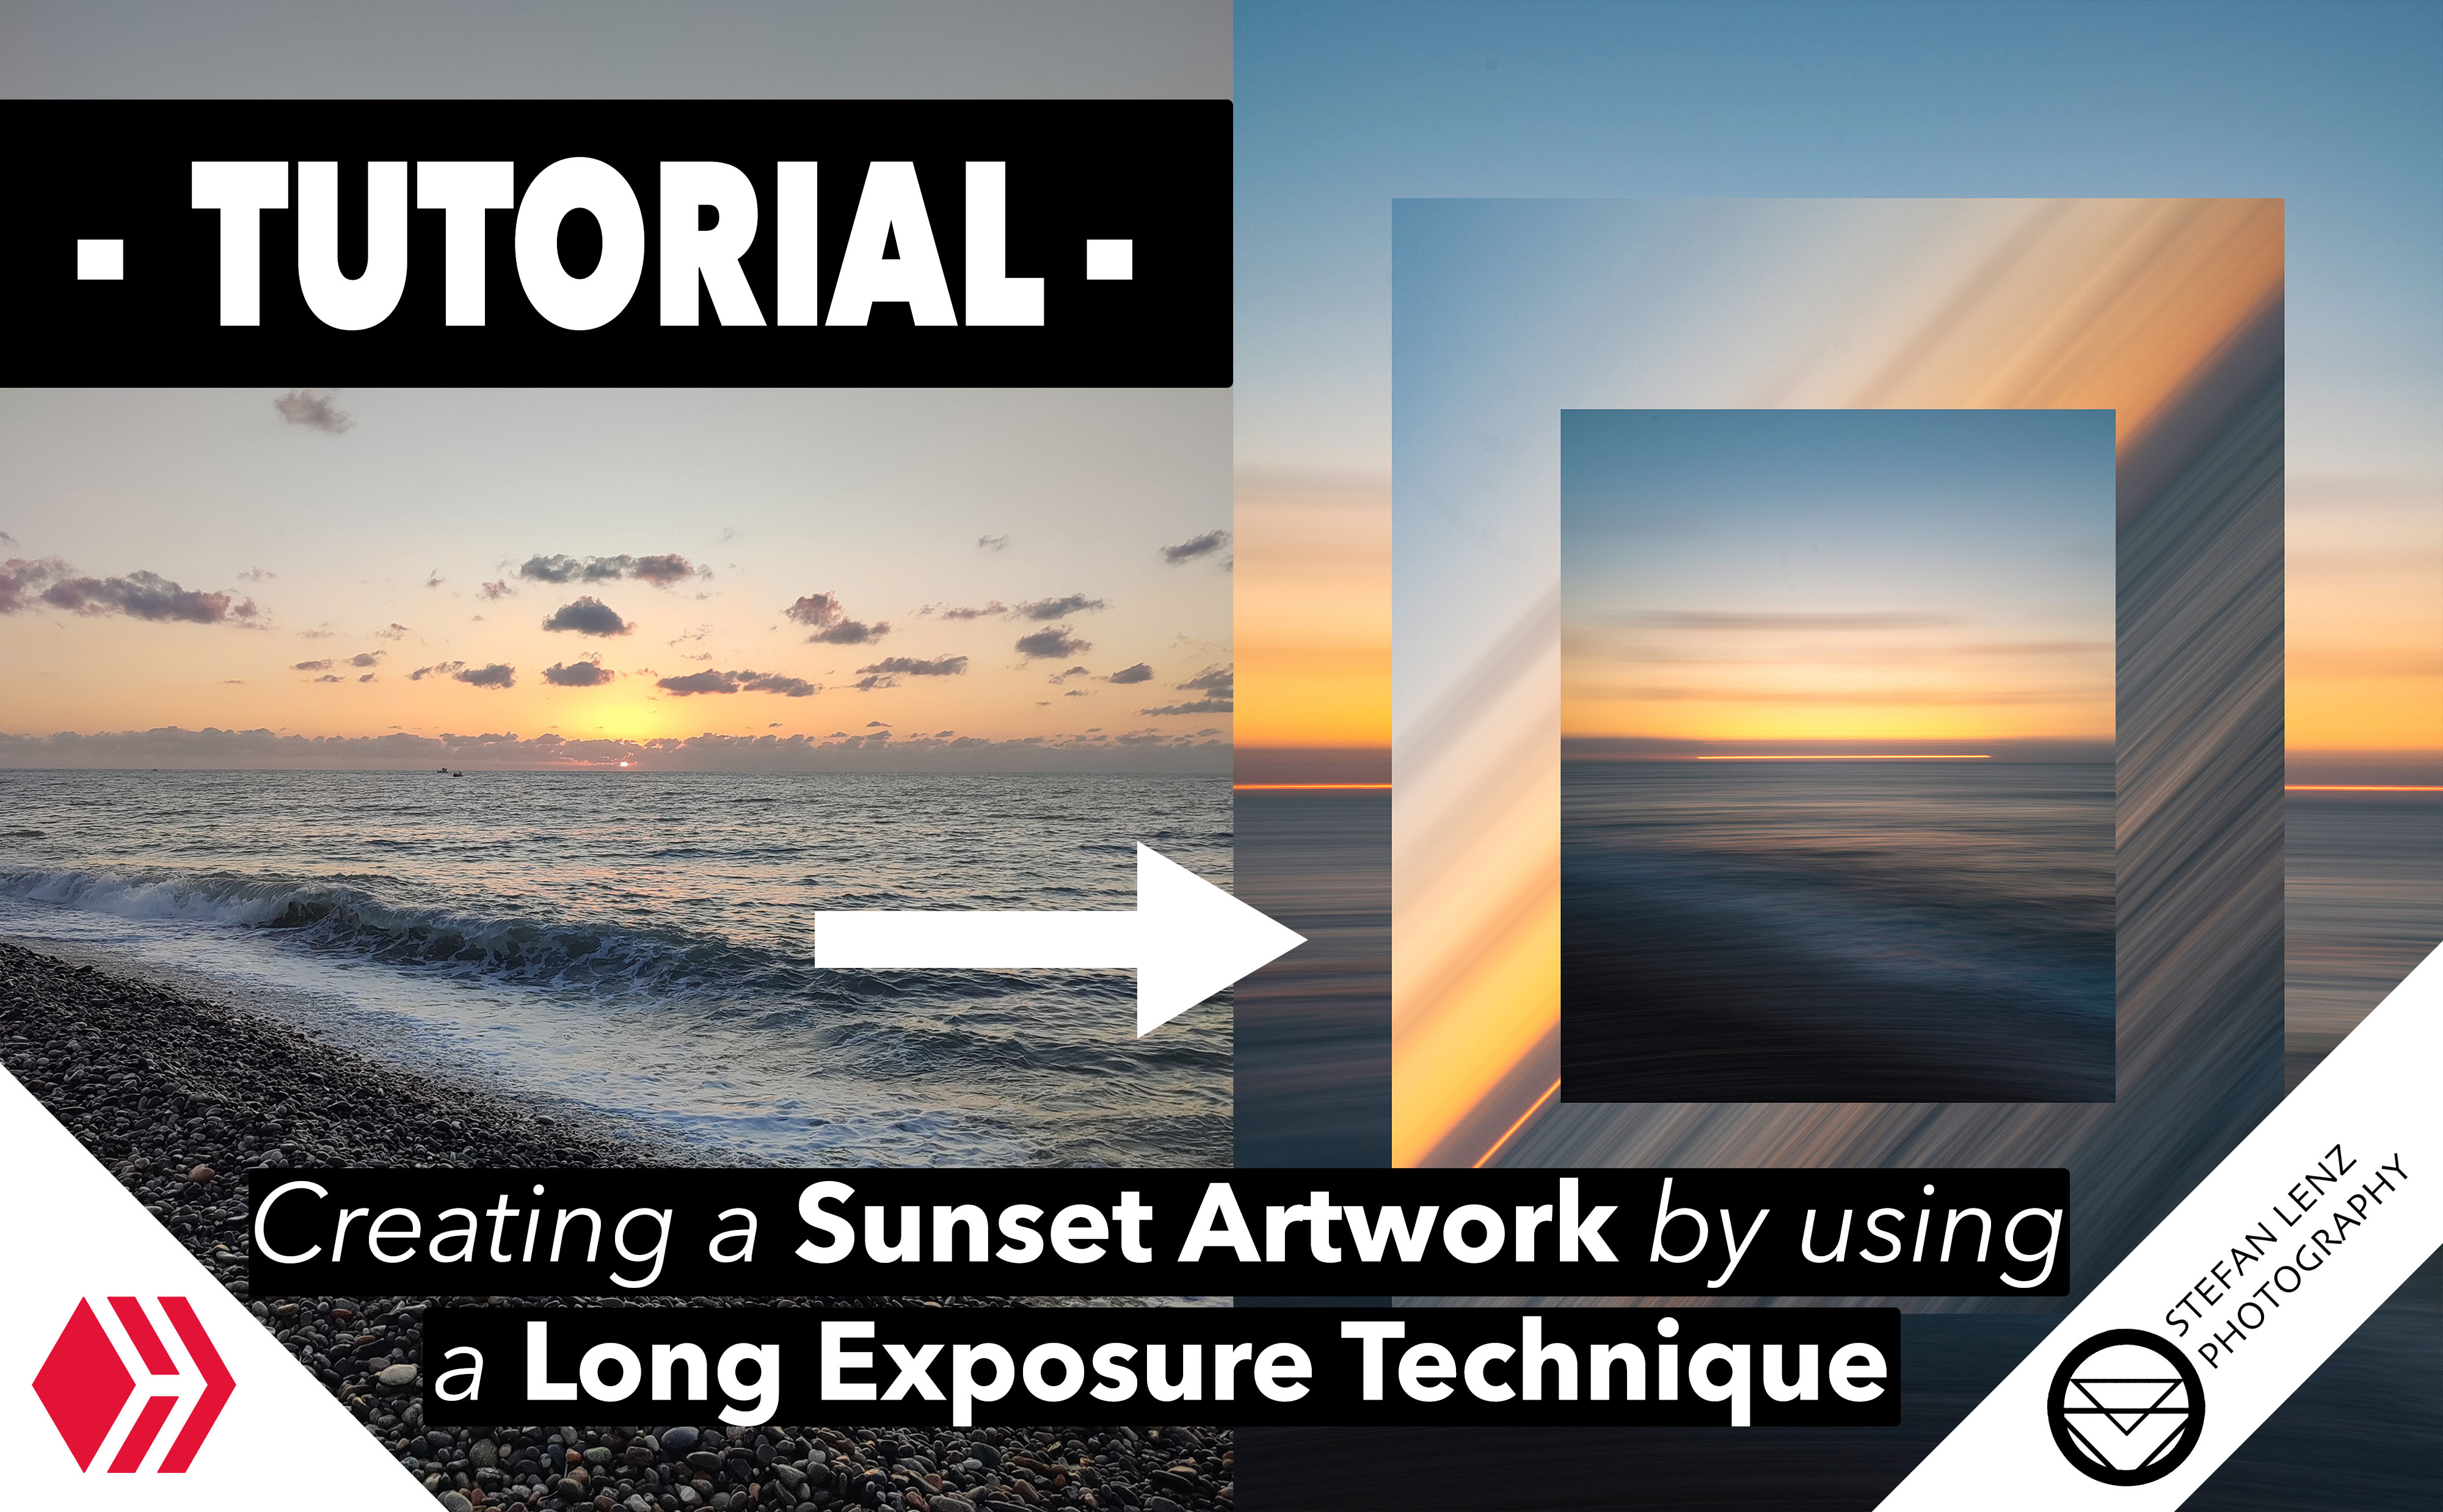
Hey guys! Today I would like to introduce you to a long exposure technique that is relatively unknown, but with which you can achieve amazing results. In my example, I used the setting sun to draw lines, which resulted in a surreal look. I'll explain to you how I did that step by step in this post.
Hallo Leute! Heute möchte ich euch eine Langzeitbelichtungs-Technik vorstellen, die relativ unbekannt ist, mit der man aber interessante Ergebnisse erzielen kann. In meinem Beispiel habe ich die untergehende Sonne verwendet, um Linien zu zeichnen, was für einen surrealen Look sorgte. Wie ich das gemacht habe, erkläre ich euch Schritt für Schritt in diesem Beitrag.
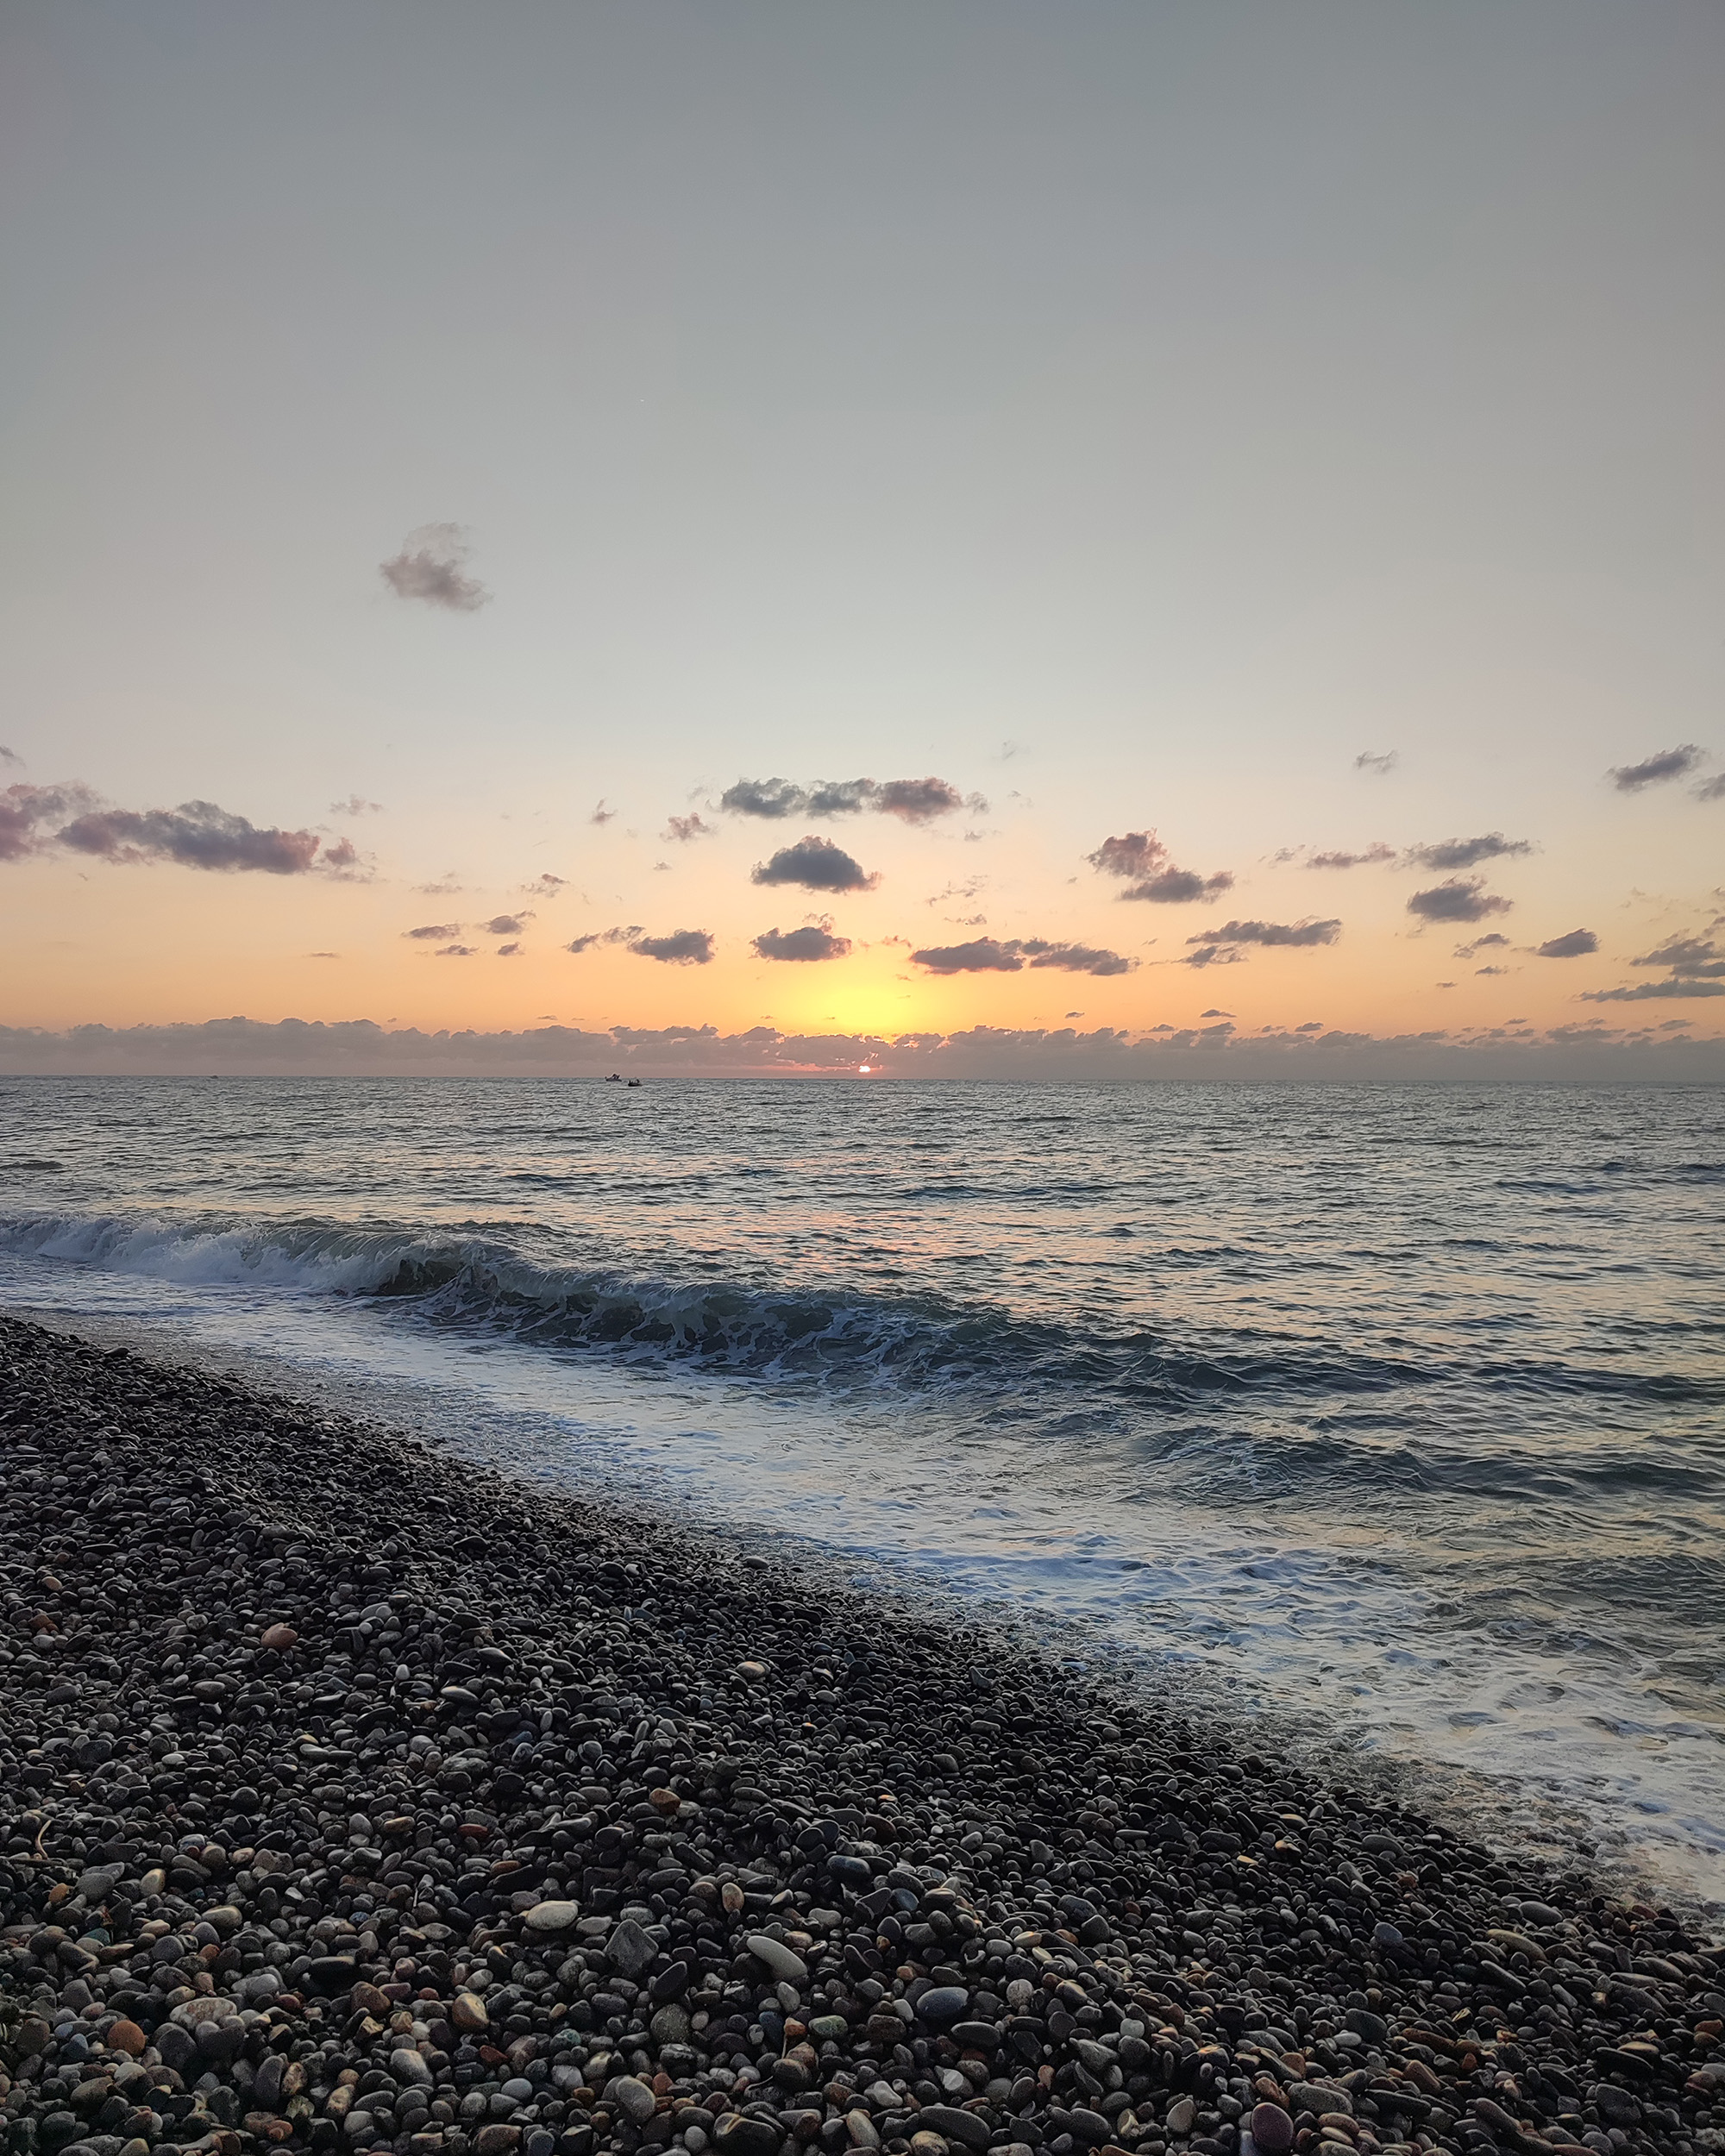
The photo above is a simple snapshot taken with my smartphone. It's just to show you the scene that was the starting position for my pictures. I was on the beach of Batumi, facing a beautiful sunset. As you can see, it was possible to watch the sun sinking into the sea. I was lucky because just above the sun was a band of clouds that provided additional contrast.
Beim obigen Foto handelt es sich um einen simplen Schnappschuss mit meinem Smartphone. Es soll euch nur die Szene zeigen, die die Ausgangsposition für meine Bilder darstellte. Ich befand mich am Strand von Batumi, mit Blick auf einen wunderschönen Sonnenuntergang. Wie ihr seht, konnte man der Sonne dabei zusehen, wie sie im Meer versank. Ich hatte Glück, denn knapp über der Sonne befand sich ein Wolkenband, das für zusätzliche Kontraste sorgte.
35mm - F11.0 - 1,6 sec. - ISO100
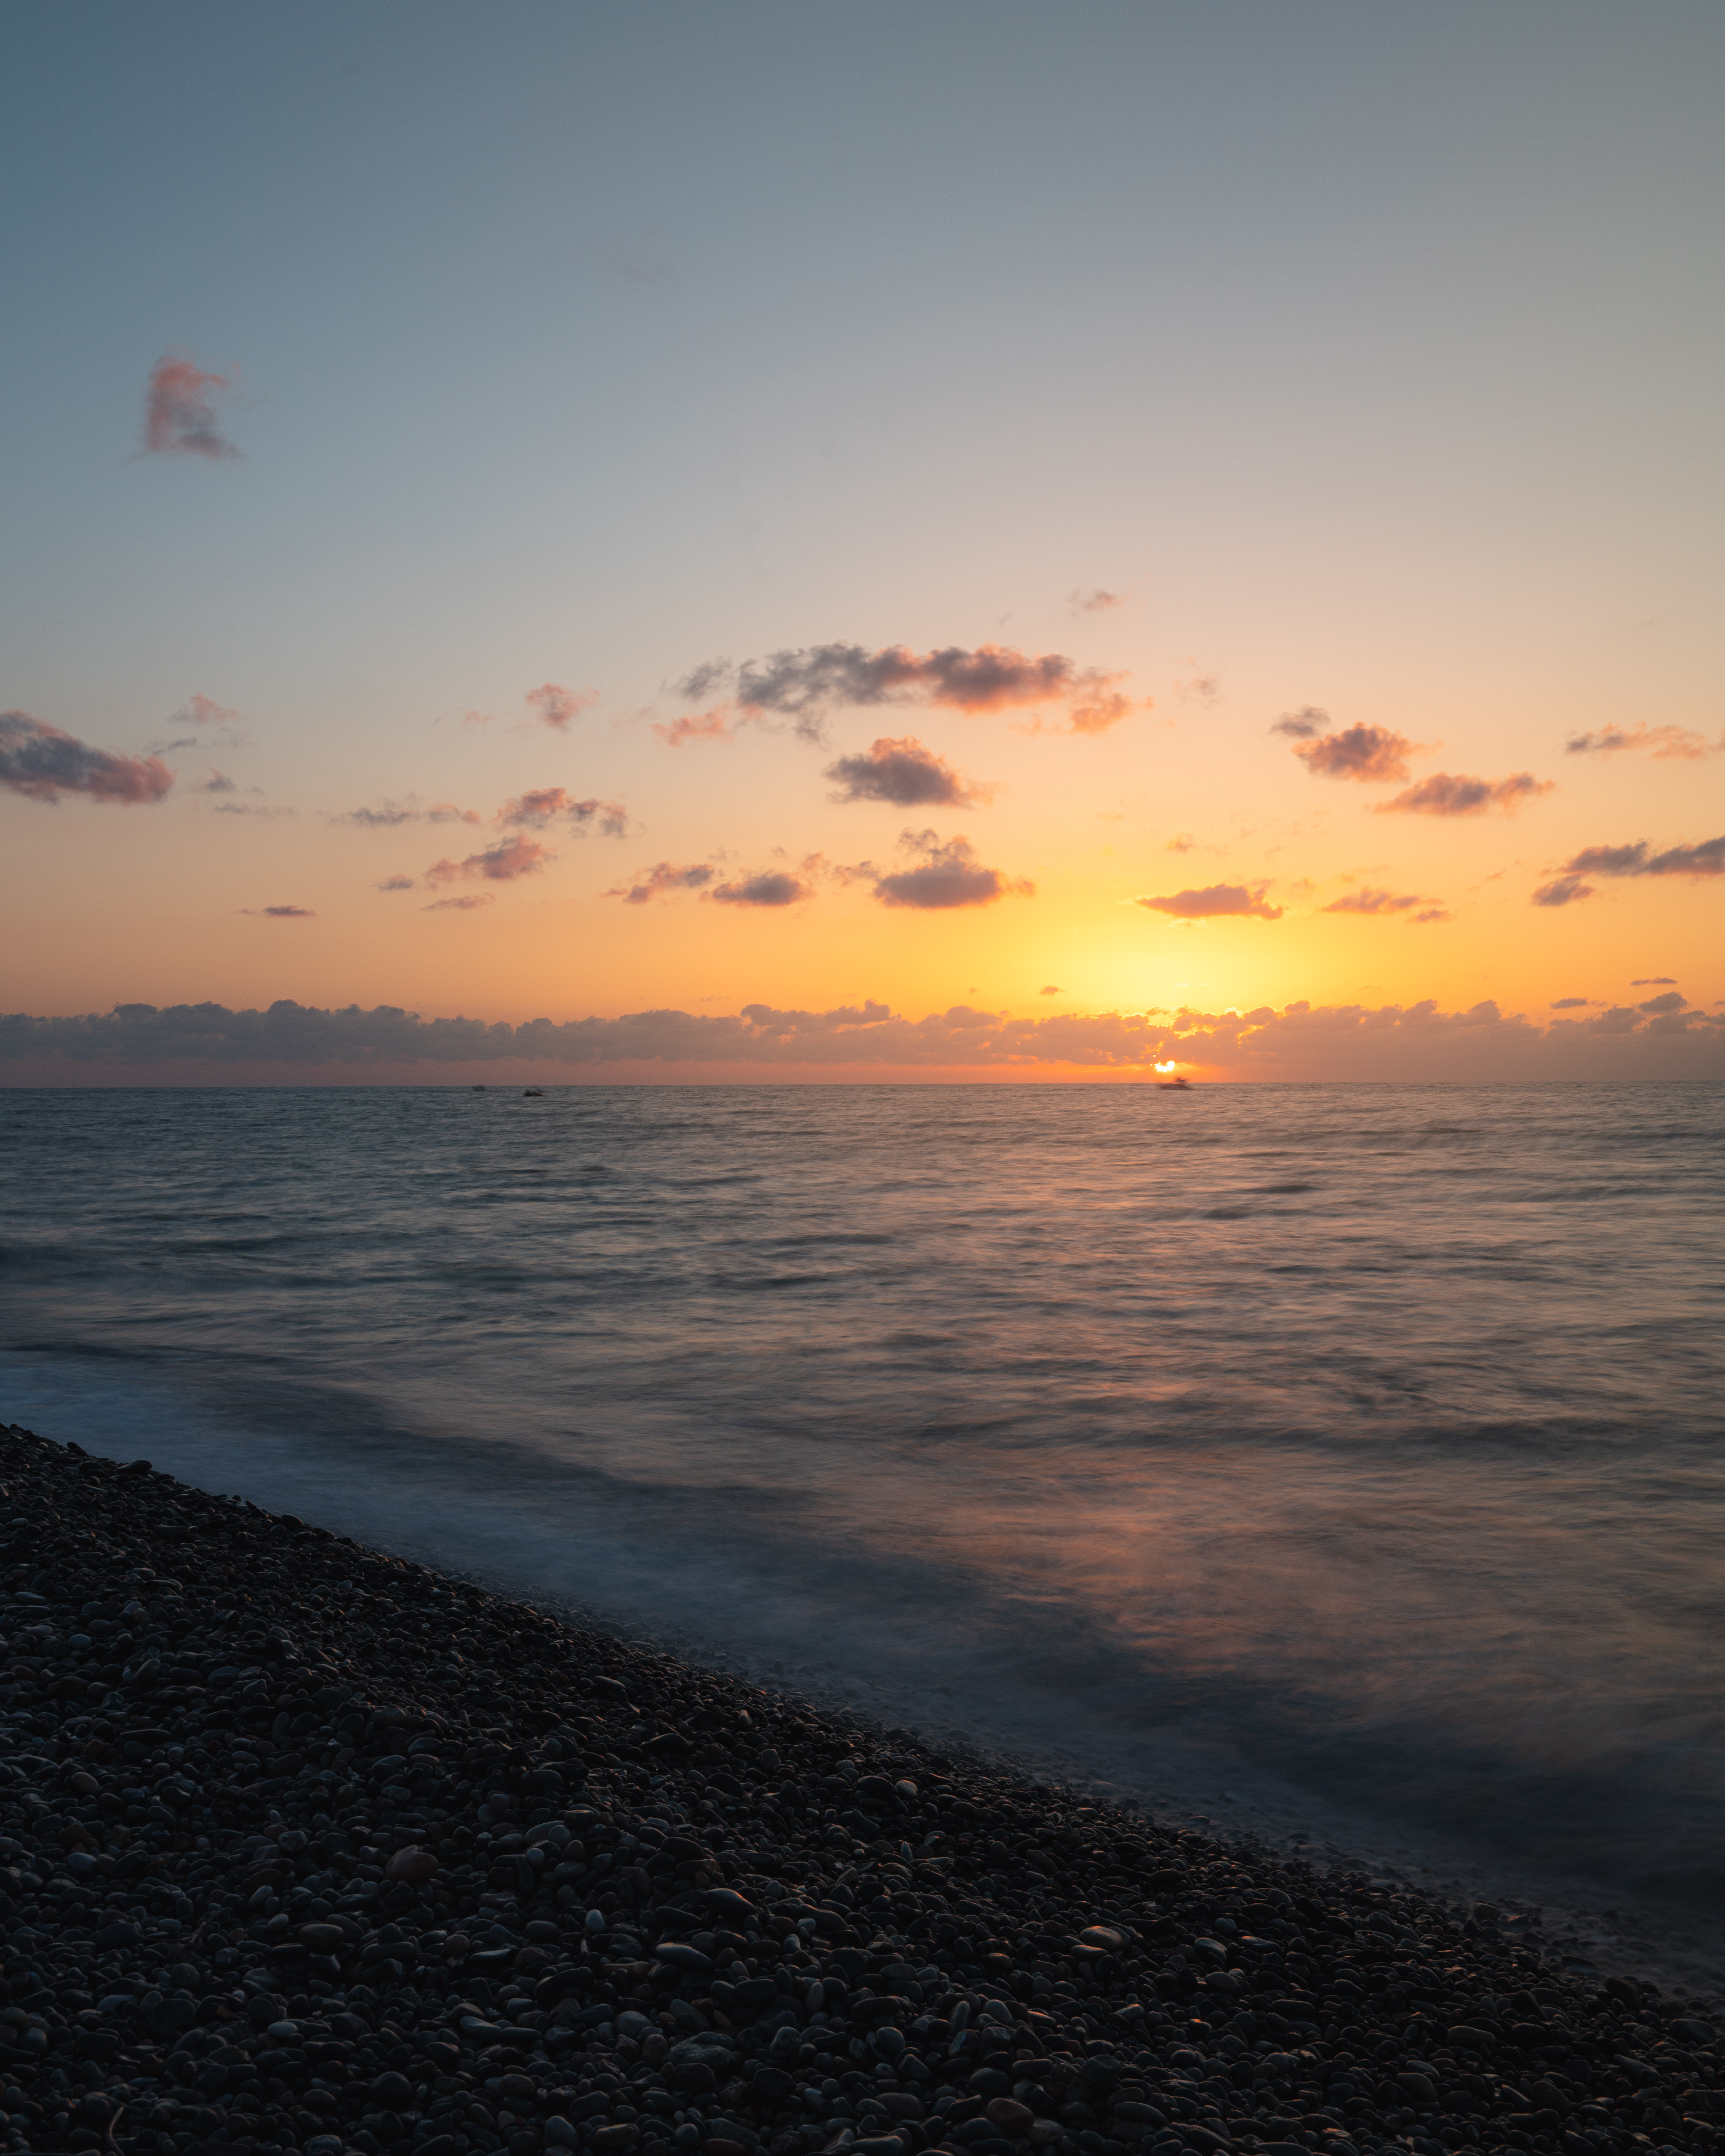
I set up my tripod and made the settings for the aperture and exposure time. For the photo above, I exposed for 1.6 seconds, giving me a softer water surface. I later enhanced the soft, dreamy look of the shot in post-processing. But this was just a test run, because the real trick came into play with the following images.
Ich stellte mein Stativ auf und nahm die Einstellungen für die Blende und Belichtungszeit vor. Für das obige Foto belichtete ich für 1,6 Sekunden und erhielt somit eine weichere Wasseroberfläche. Den weichen, verträumten Look der Aufnahme verstärkte ich später noch in der Nachbearbeitung. Doch dies war nur ein Testlauf, denn der eigentliche Trick kam erst bei den darauffolgenden Bildern zur Anwendung.
35mm - F11.0 - 2,0 sec. - ISO100
35mm - F11.0 - 1,6 sec. - ISO100
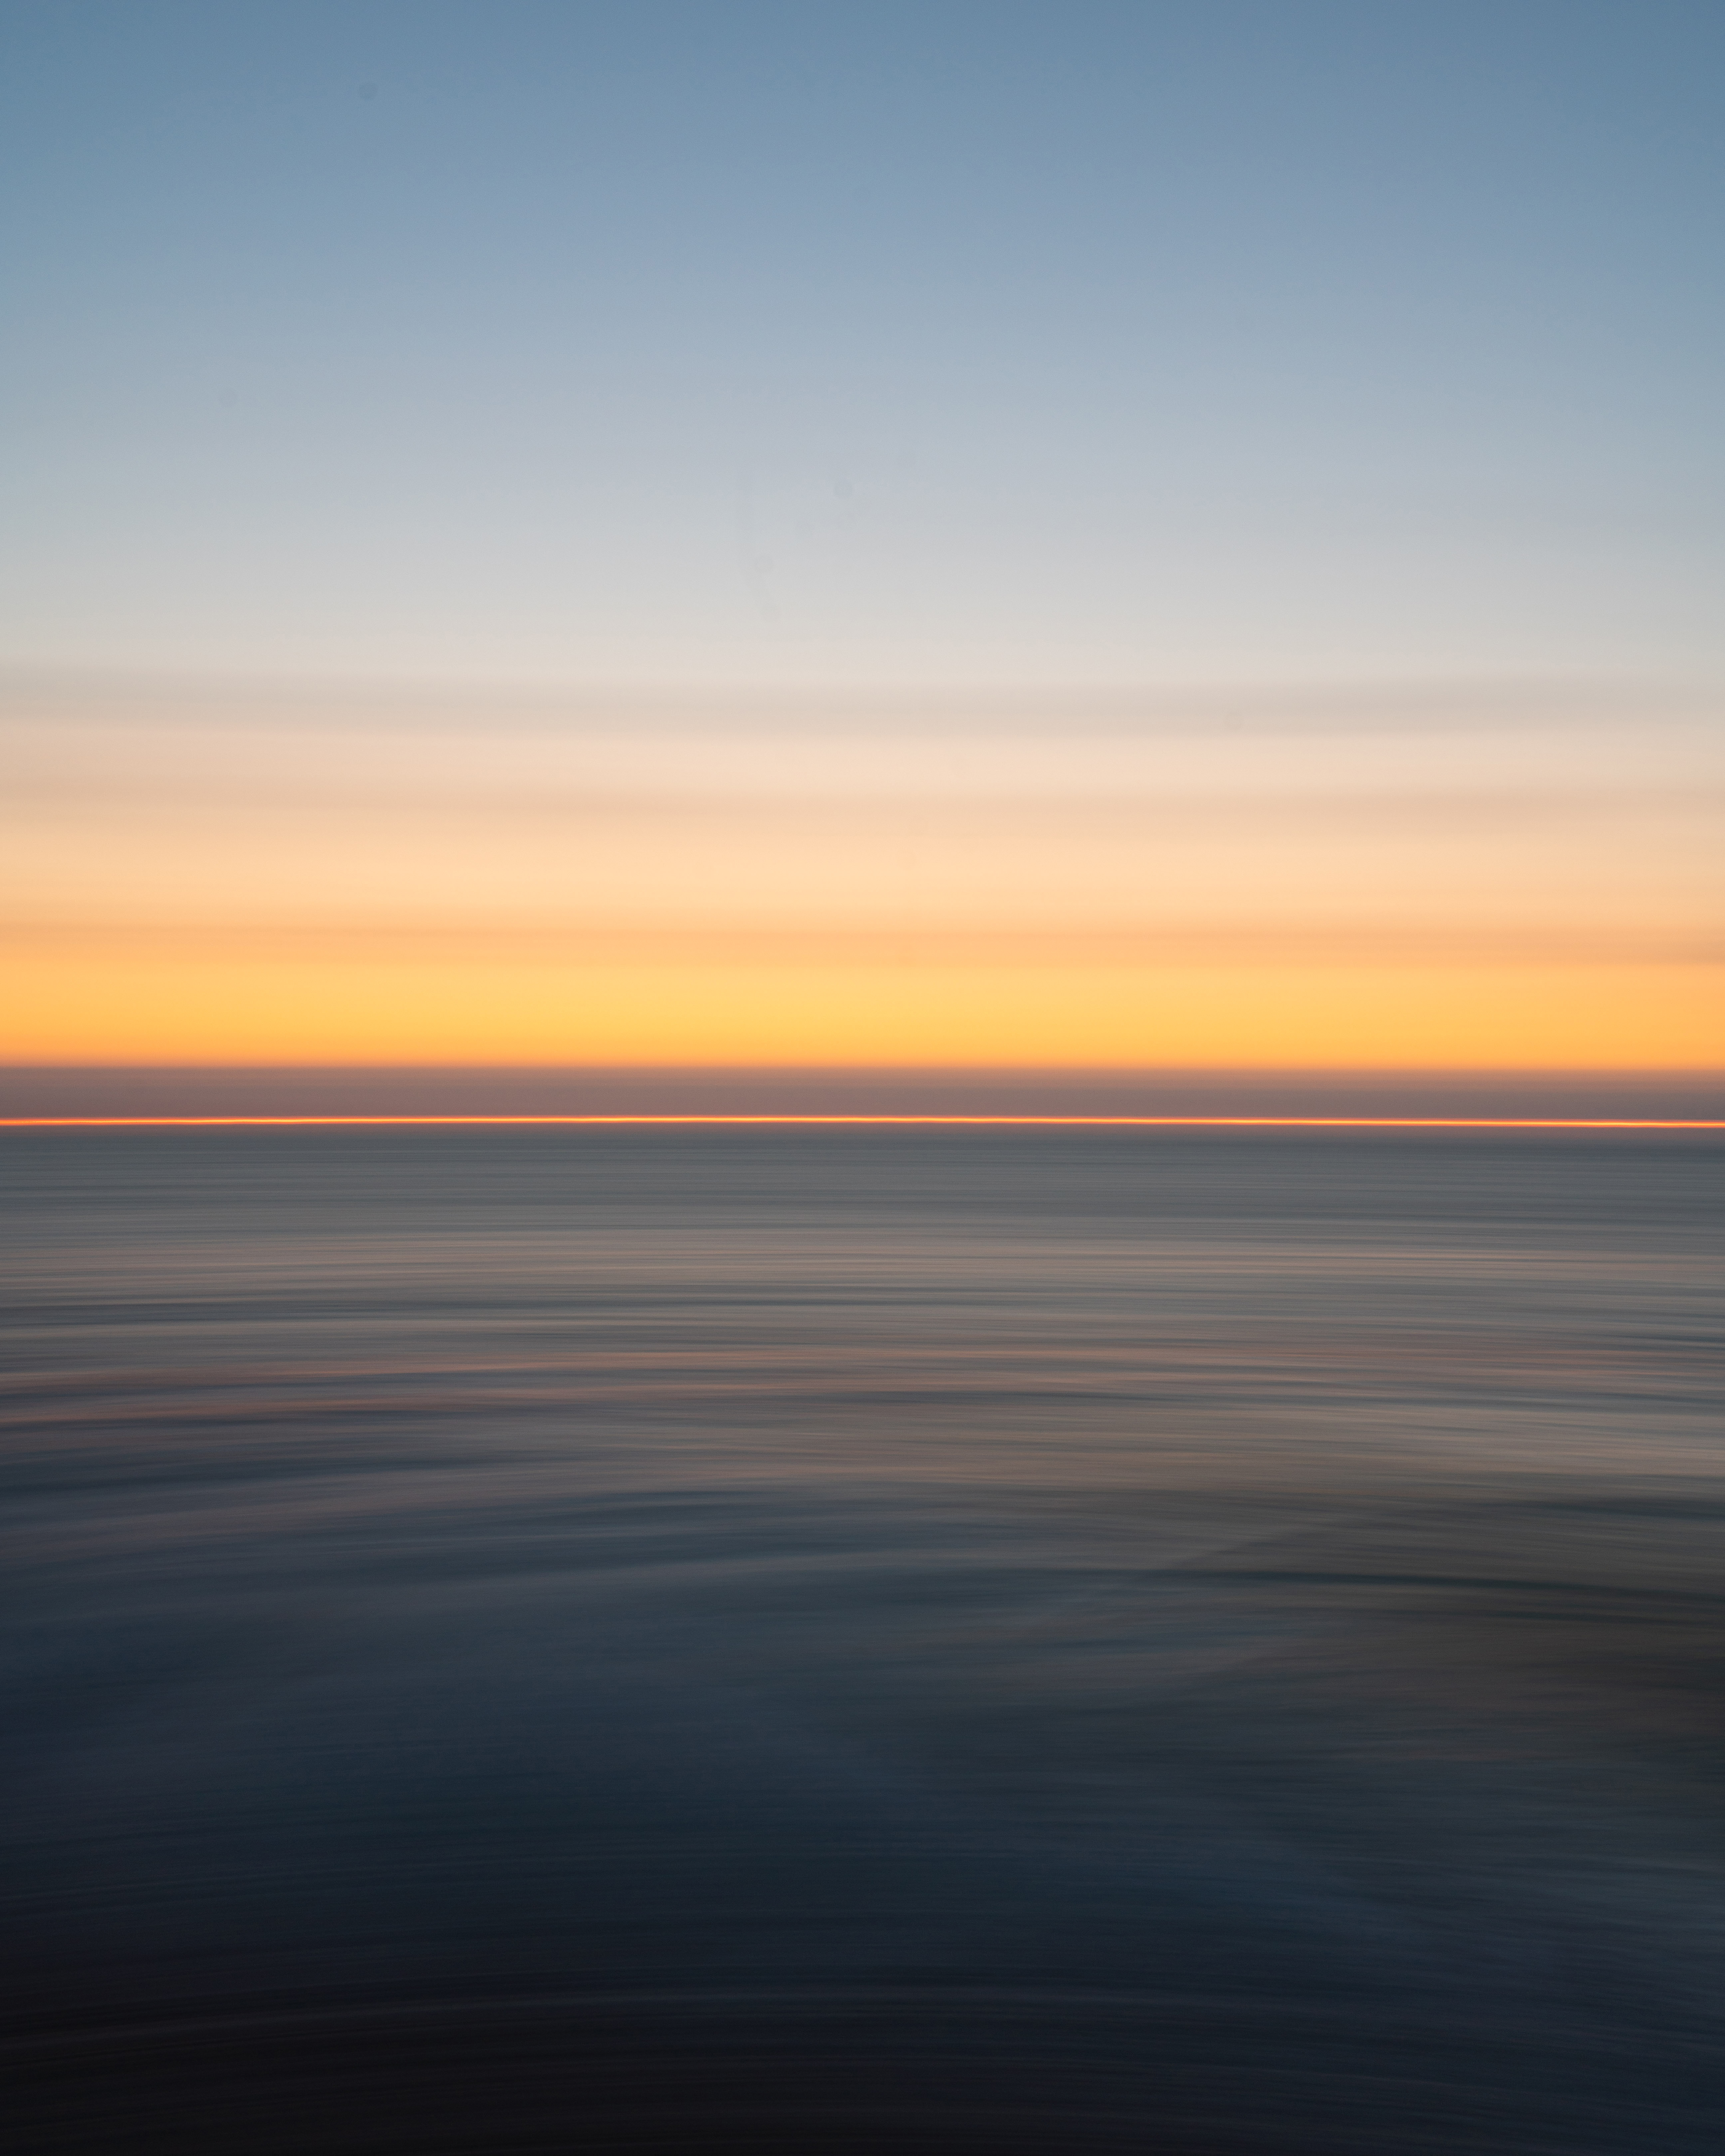
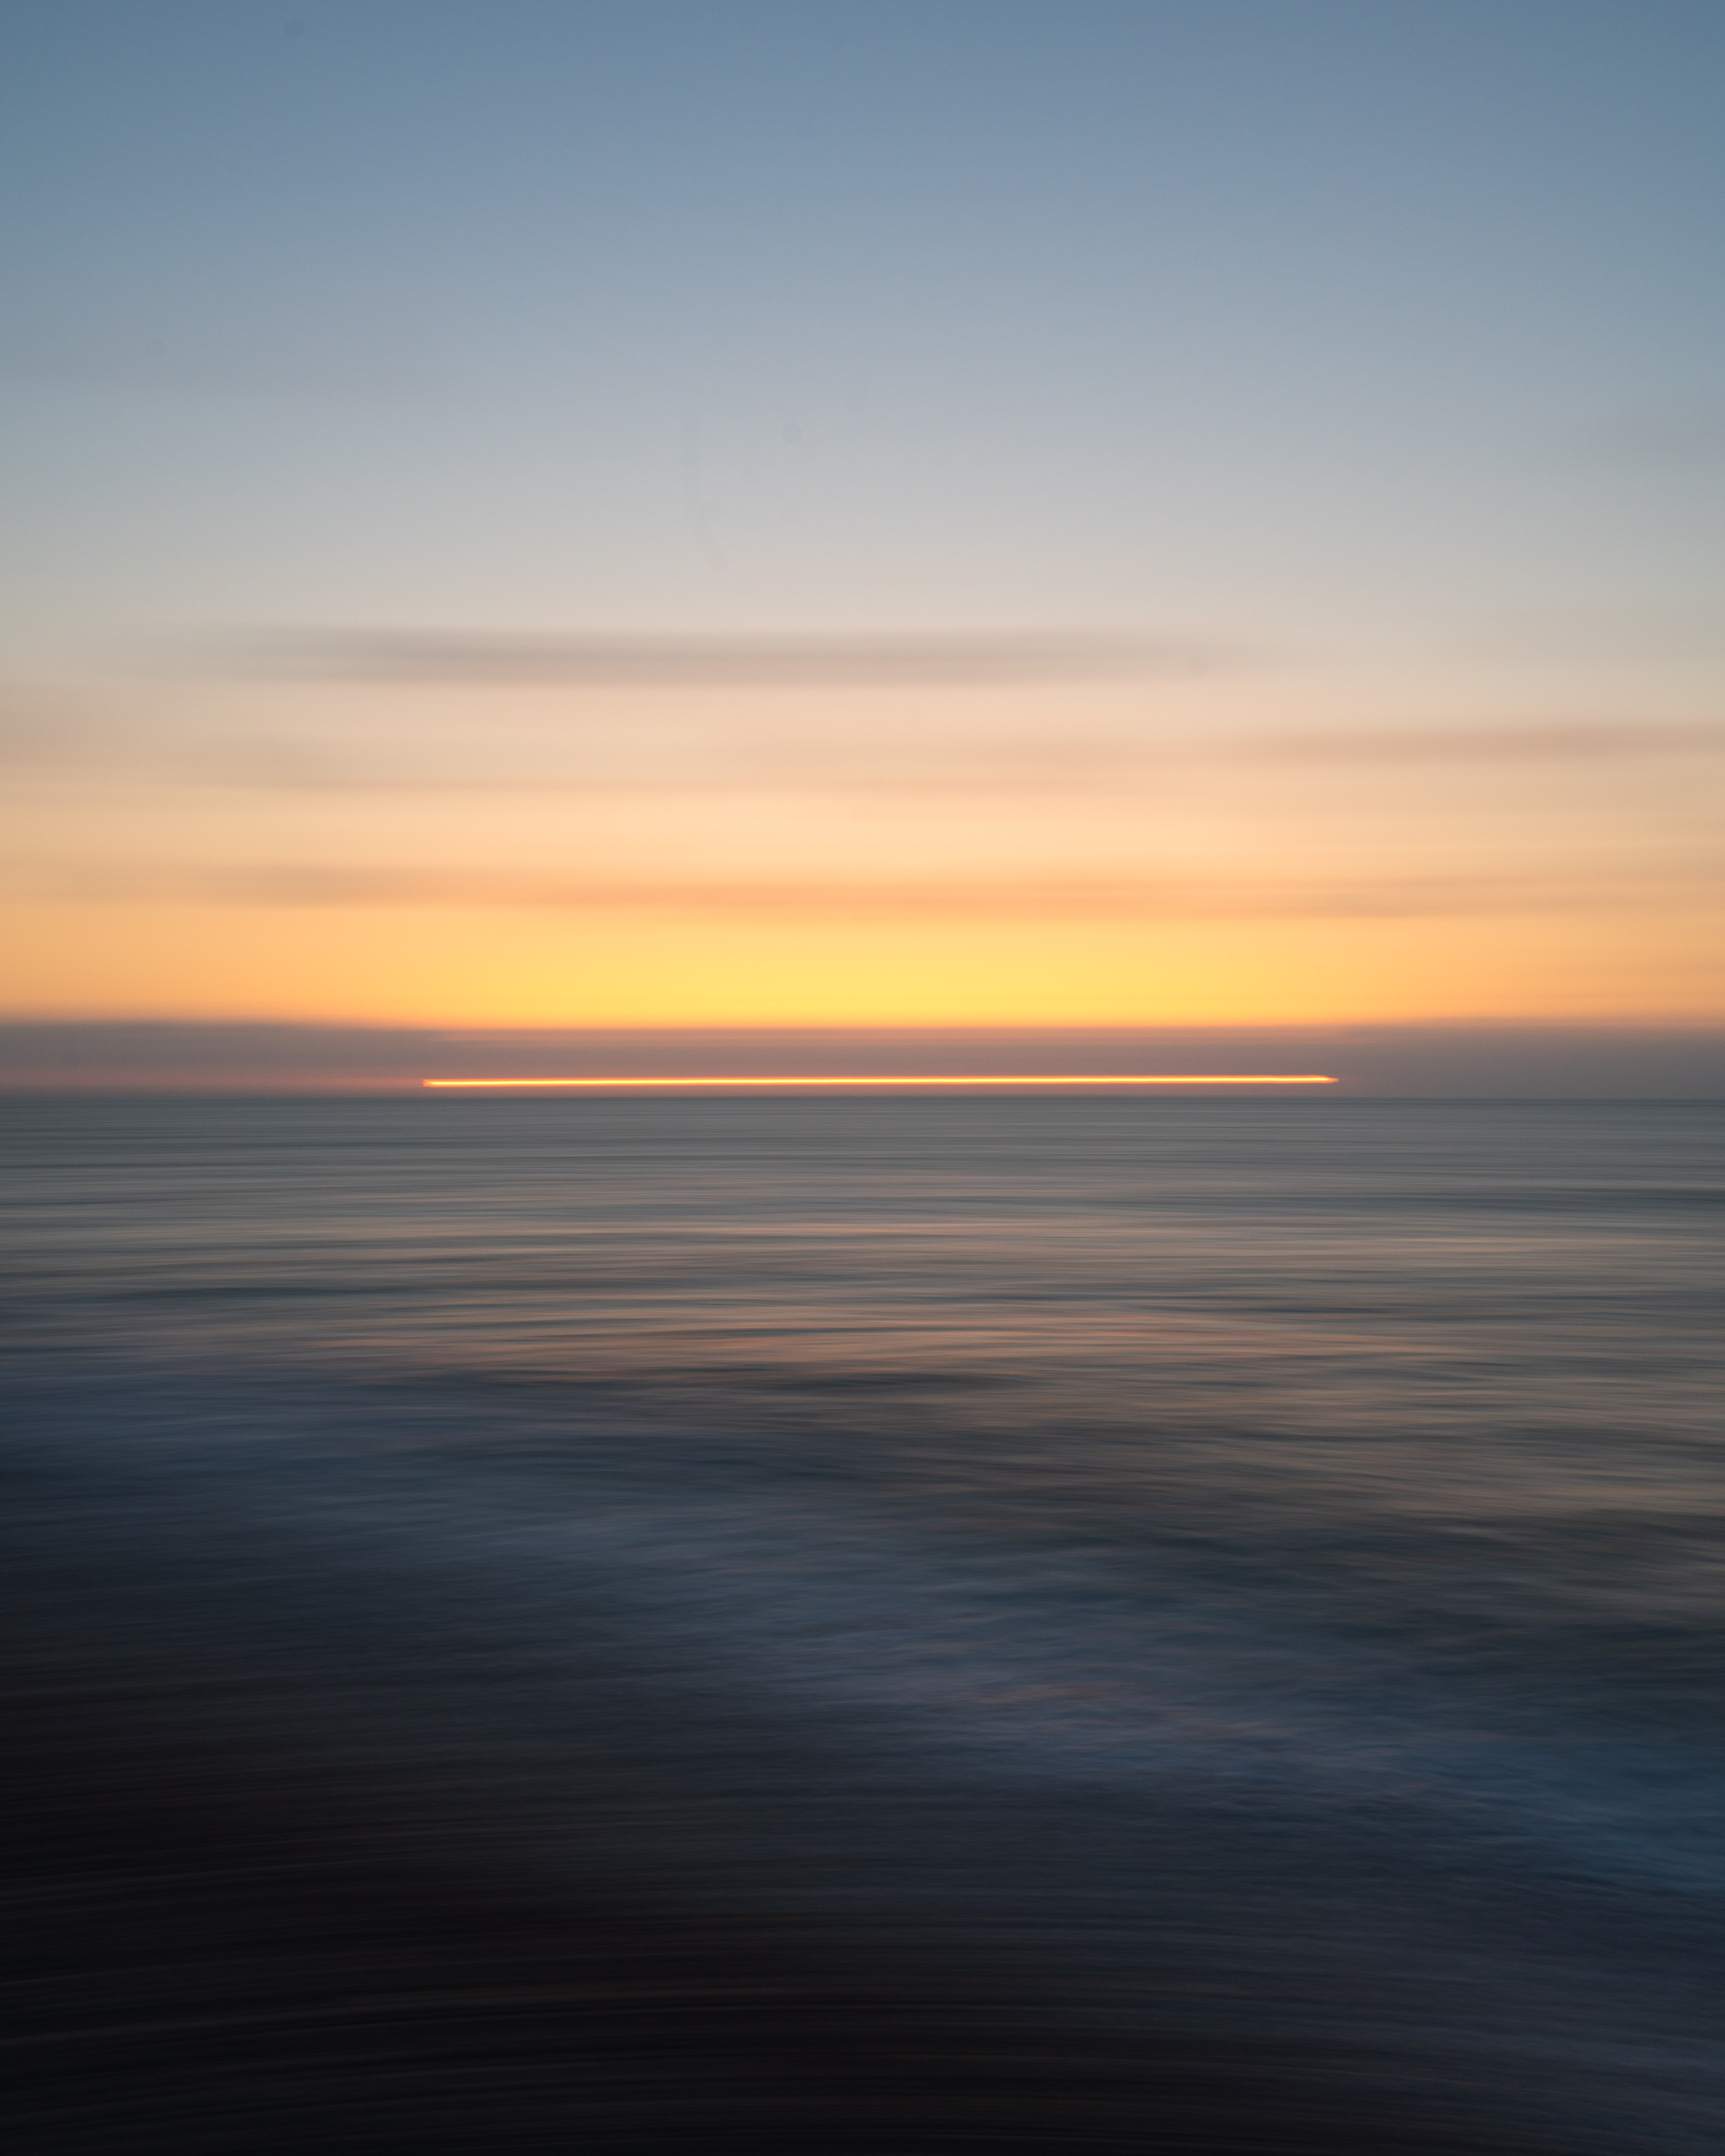
Now I fixed my camera on the tripod only on the vertical axis by loosening the screw for panning the camera on the horizontal axis. I now panned my cam from left to right and pressed the shutter release while panning. I repeated this several times, at different speeds. As you can see above, the sun can easily be depicted as a line with this method. It is just important that you align the camera horizontally exactly straight, in order to pan exactly along the horizon.
Nun fixierte ich meine Kamera auf dem Stativ nur noch auf der vertikalen Achse, indem ich die Schraube für das Schwenken der Kamera auf der horizontalen Achse löste. Ich schwenkte die Kamera nun von links nach rechts und betätigte während des Schwenkens den Auslöser. Dies wiederholte ich mehrmals, mit verschiedenen Geschwindigkeiten. Wie ihr oben seht, kann man die Sonne somit ganz einfach als Linie abbilden. Wichtig ist dabei, dass ihr die Kamera horizontal exakt gerade ausrichtet, um genau entlang des Horizonts zu schwenken.
35mm - F11.0 - 1,6 sec. - ISO100
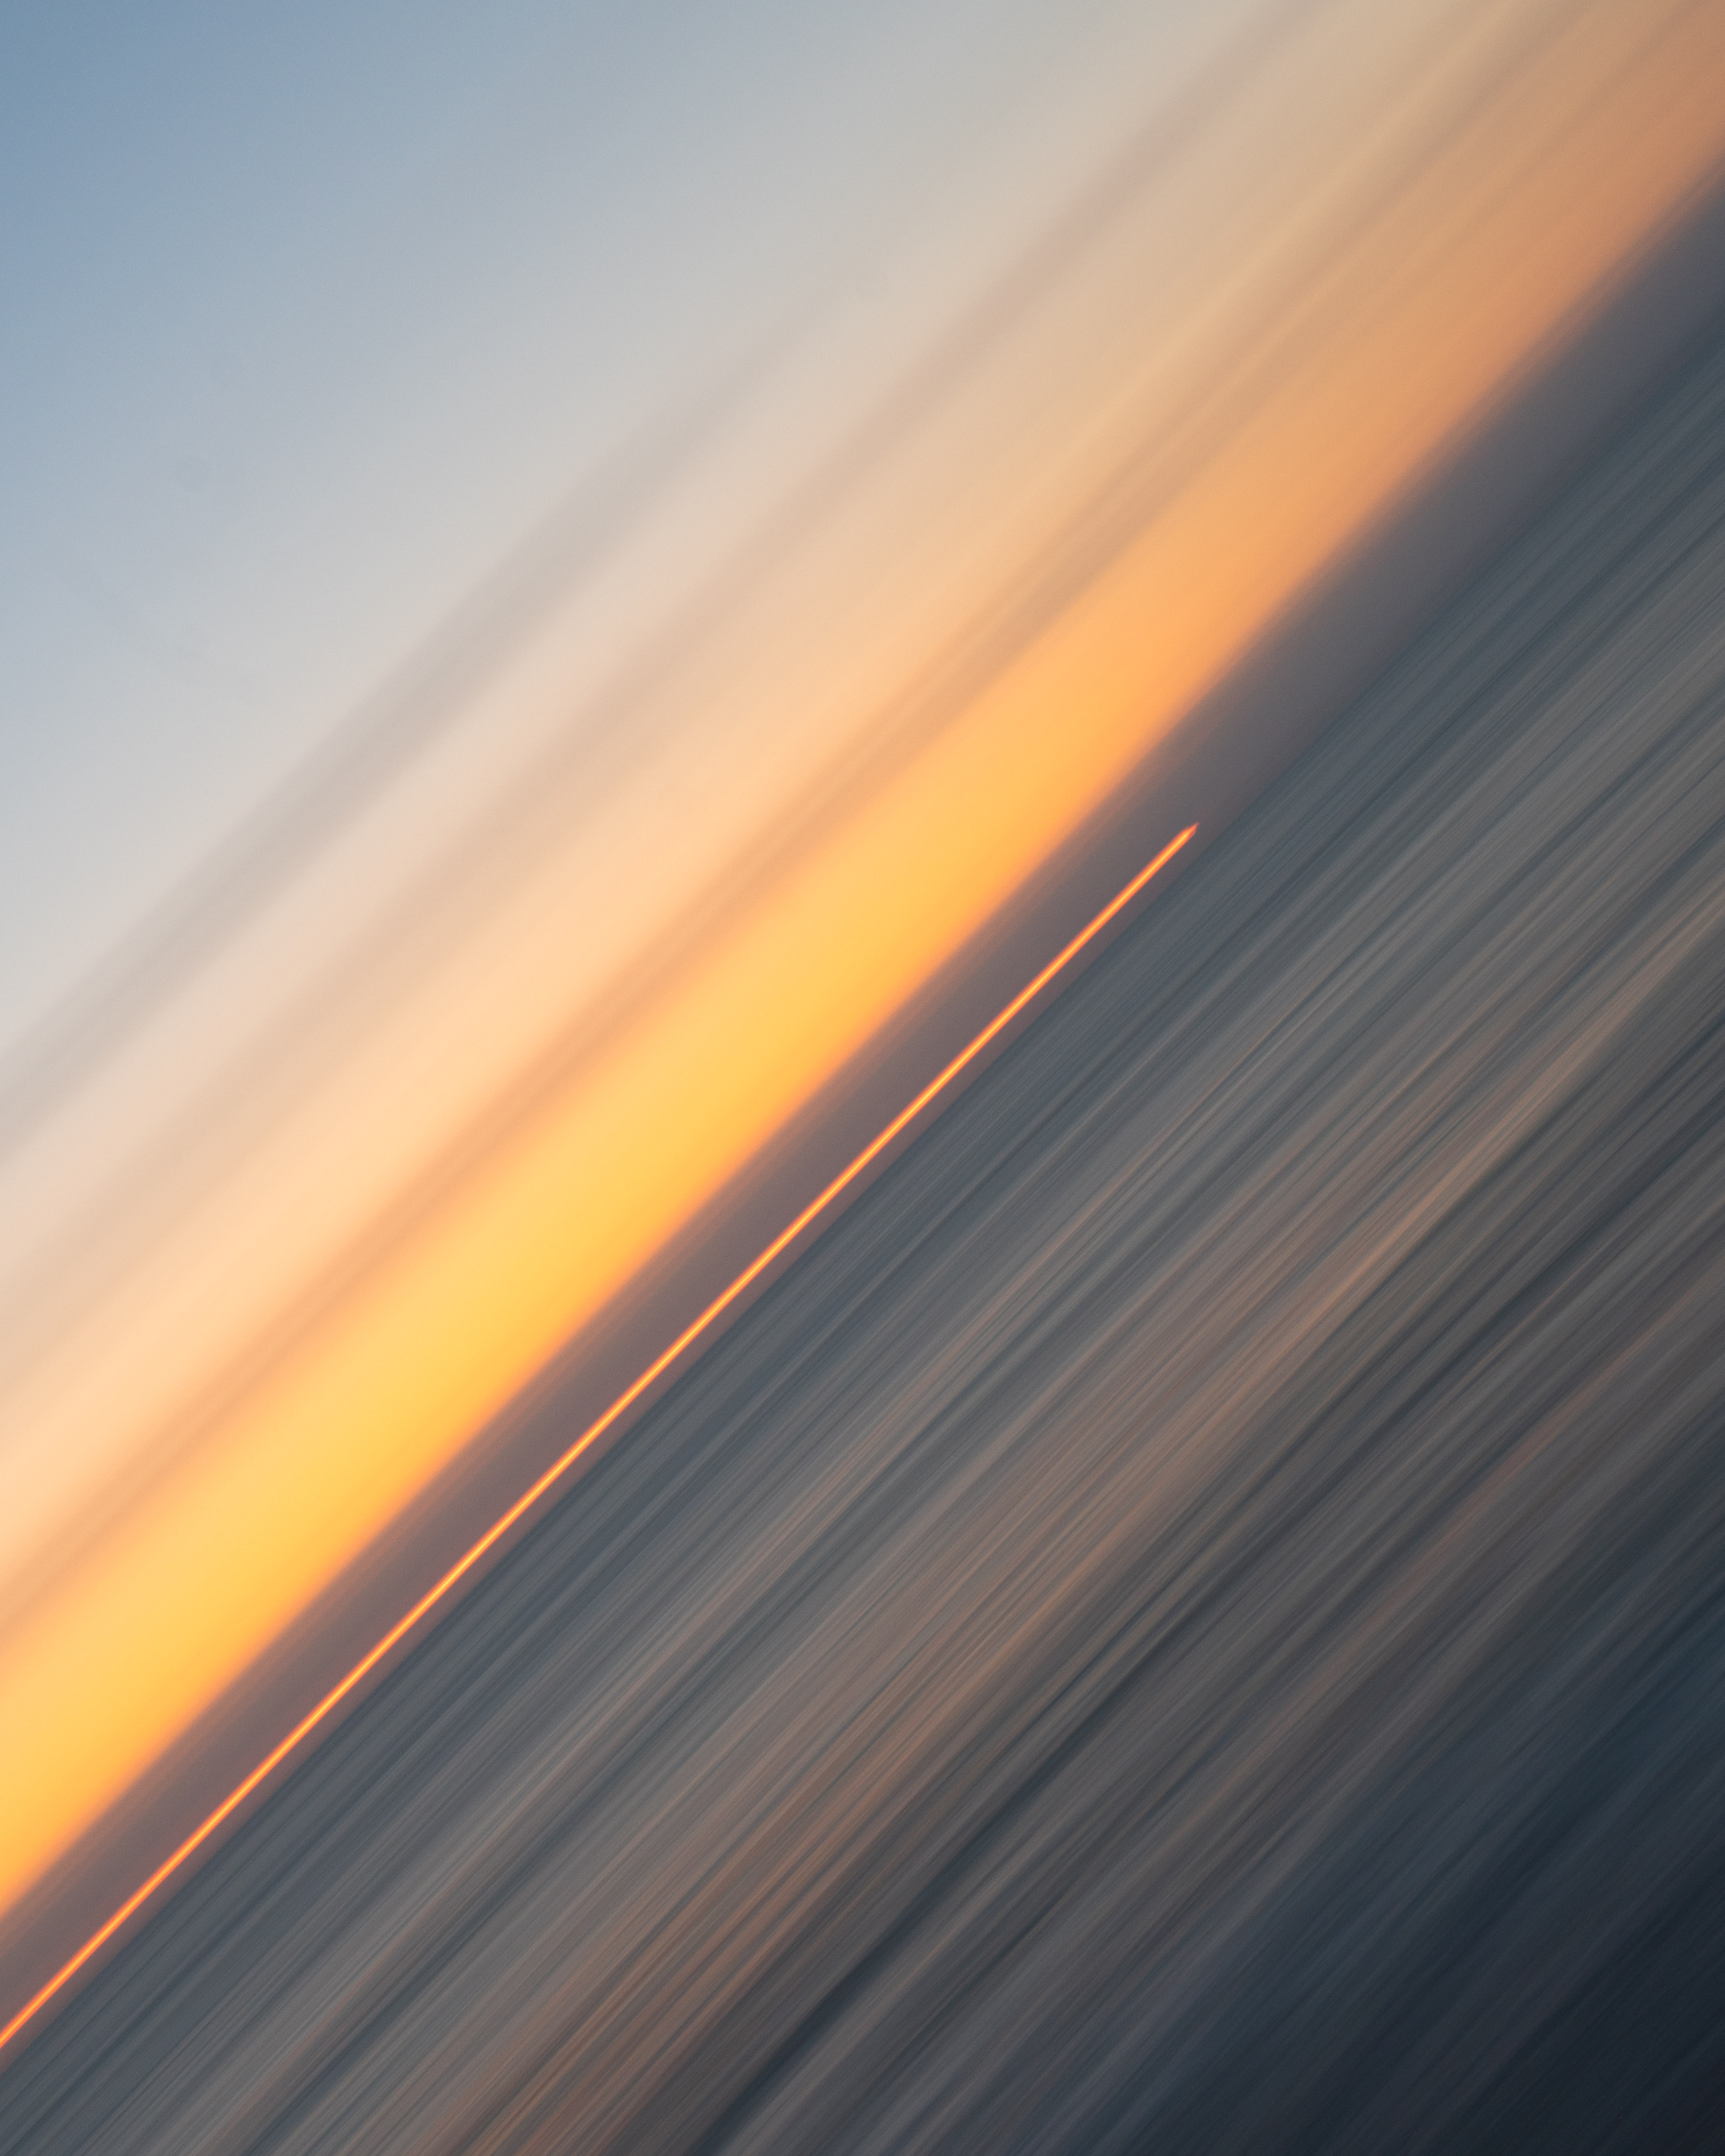
In post-processing in Lightroom, I made only a few minor adjustments, but experimented with cropping the images. For example, I liked having the lines run diagonally through the image. I then switched to Photoshop to finalize the artwork.
In der Nachbearbeitung in Lightroom nahm ich nur einige kleinere Anpassungen vor, experimentierte aber mit den Bildausschnitten. So gefiel es mir auch gut, die Linien diagonal durch das Bild laufen zu lassen. Anschließend wechselte ich zu Photoshop, um das Kunstwerk zu finalisieren.
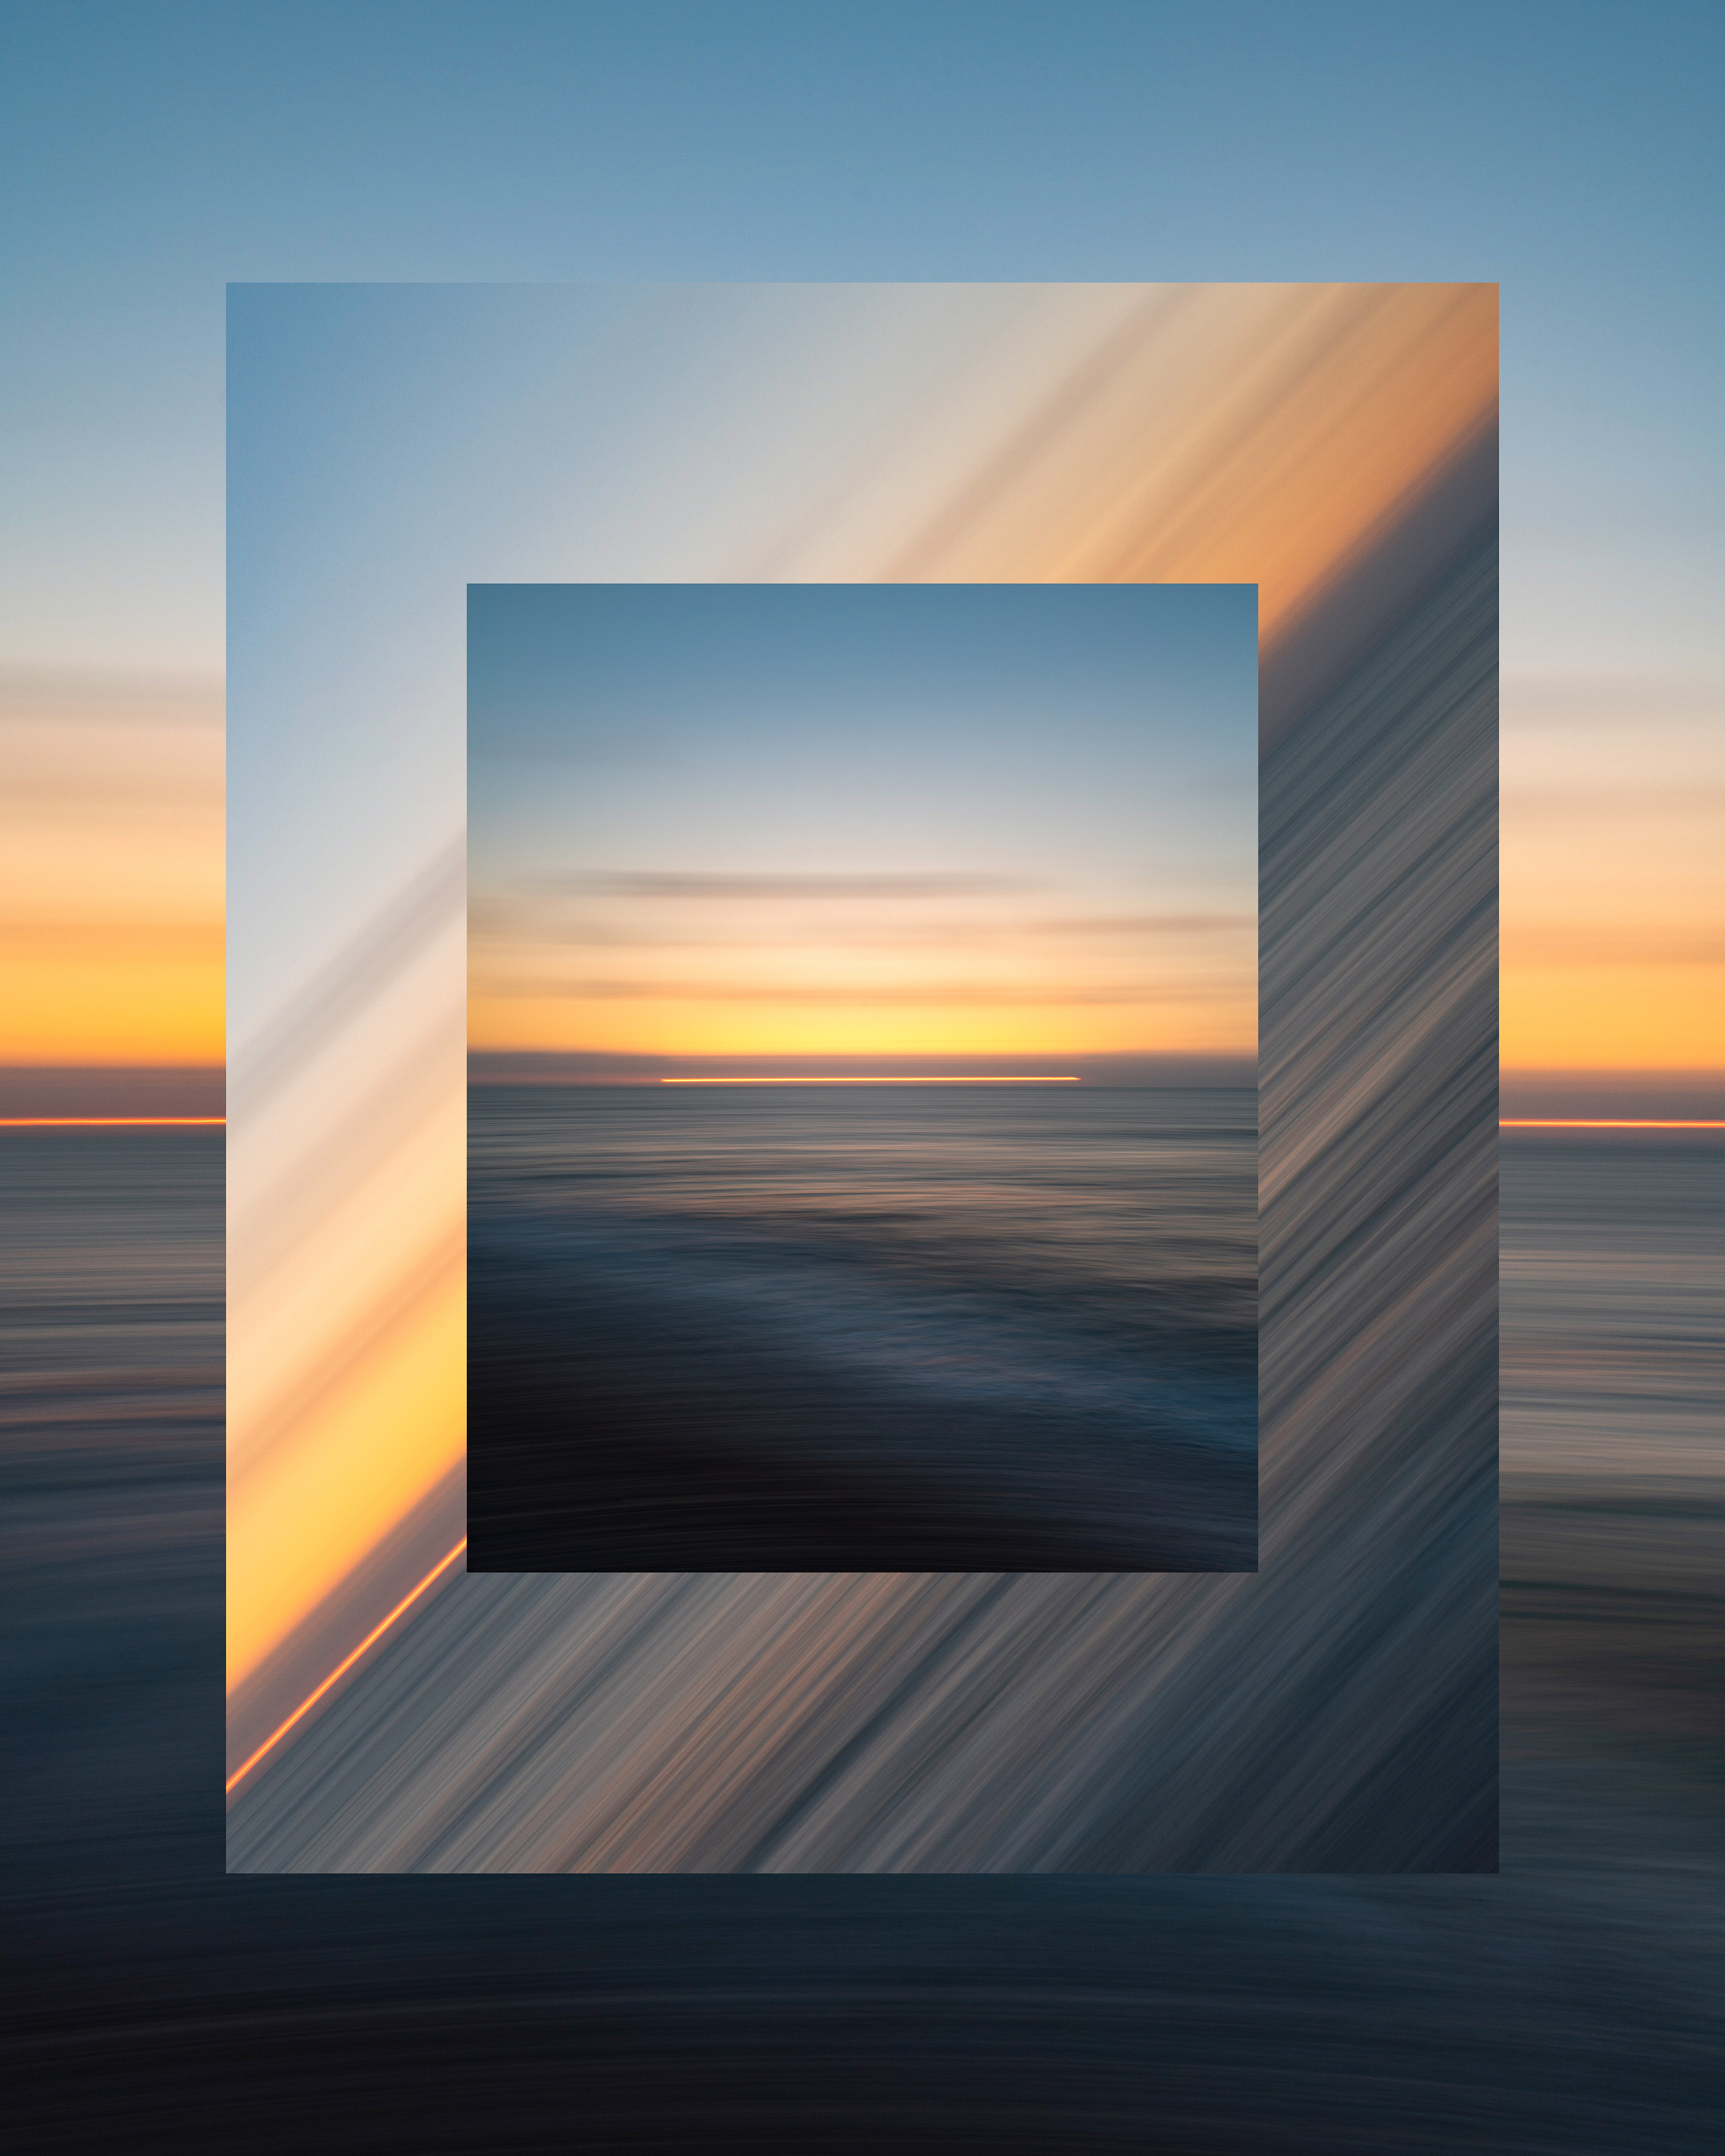
And here you can see the final result. I simply stacked my three favorite shots in different sizes and that was it. How do you like the result? I hope I could inspire you to try something similar yourself.
Und hier seht ihr das Endergebnis. Ich stapelte einfach meine drei Lieblingsaufnahmen in verschiednen Größen übereinander und das wars auch schon. Wie gefällt euch das Ergebnis? Ich hoffe, ich konnte euch dazu inspirieren, etwas ähnliches einmal selbst zu versuchen.
Camera: Sony A7RIII
Lens: Sony 16-35mm F2.8 GM
More about this topic?/Mehr zu diesem Thema?
You want to learn more about taking photos with long exposure times? Then my book "Long Exposure Photography quick and easy" might be interesting for you. Under the following link you can read the complete description to see what exactly awaits you:
Ihr wollt mehr über das Fotografieren mit langen Belichtungszeiten erfahren? Dann könnte mein Buch "Langzeitbelichtungen leicht gemacht" interessant für euch sein. Unter dem folgenden Link könnt ihr die komplette Beschreibung lesen, um zu sehen, was euch genau erwartet:
*: affiliate link
See you soon!/Bis bald!
Stefan

Really nice technique. I can try in the future.
Thank you! 😊
This is very helpful specially to all photographers here. Thank you for sharing this technique on how to captured good photos.
Many thanks! 😊
Youre welcome..