
As a teacher, I managed my teaching methods in different approaches, whether in traditional or modern ways. Every single day is precious because every experience is another lesson to learn. I can recall how I was called by my teachers on their class records on my elementary days and high school but when I stepped into college, I discovered a lot of things that I never expect. As an Education student before, we are taught how to make detailed lesson plans, visual aids, and strategies in teaching.
My creativity was fully practiced every time we had reporting and demonstration. I've been their bet as a representative to deliver the lessons. I love the way how I was so confident before in my college years. My classmates were used to impress with my colorful and creative presentation and of course my teachers too.
Last 2019, I was able to include myself in R.Q.A (Registry of Qualified Applicants) for teachers in Public school. I was part of the top ten English Majors in the whole Cebu Province but sad to say it was affected due to Covid-19 but I am still hoping for a greater opportunity this year and the years may come.
One of the qualifications is to have An NC2 Certificate and conduct a demo with the specific training you were attended. I did in Computer Servicing, so tonight, I will teach you how to make this colorful wheel that can help you and your kids make learning more interesting.
The following are the benefits of making this:
Attractive to the eyes of your kids or students.
Create a feeling of excitement whenever their names are called.
It is a fun activity to enjoy and learn.
Help to organize your ideas or topics.
This is an easy way to access.
Helps to manage your time because it is less consuming.
Improves your computer skills and develops them.
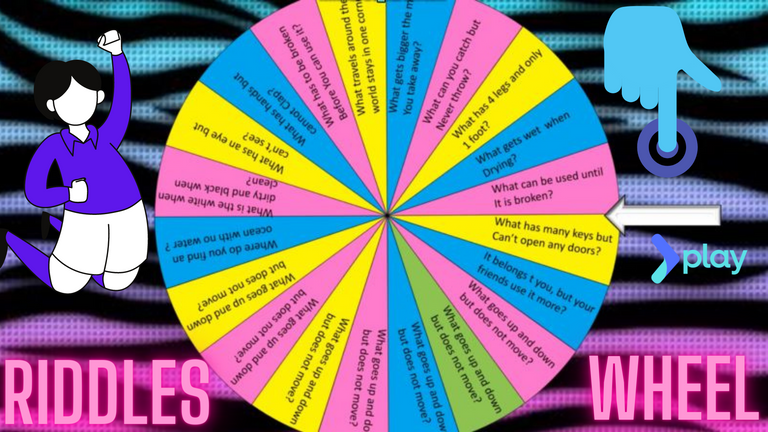
I decided to make a Riddle Wheel today because I love riddles. In our country, we called it "Bugtong". This is a fun game to play and challenging too. This really tests your knowledge. There are many ways to choose a topic, you can make Names wheel, Adverbs wheel, and so on.
STEPS TO FOLLOW:
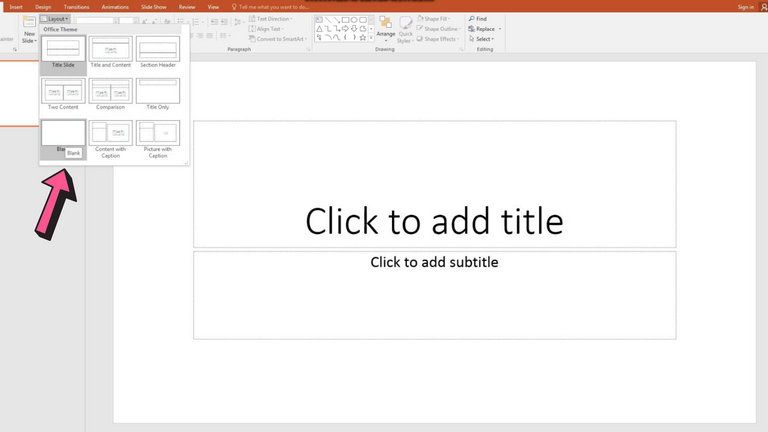
In the PowerPoint presentation, you have to go to the layout and choose the Blank page. This will show an empty and plain white page.
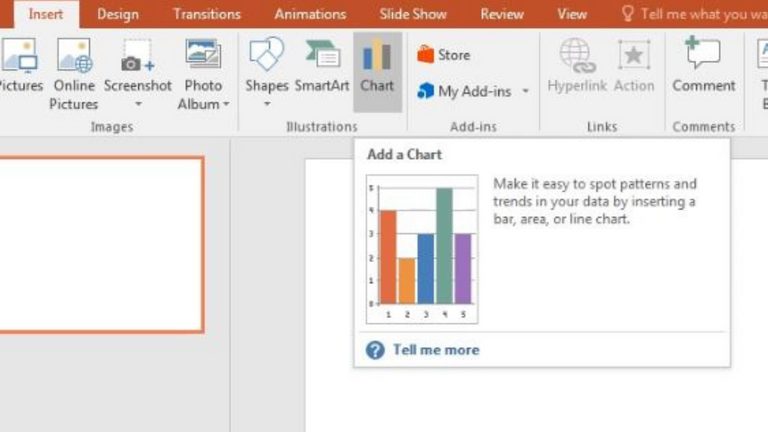
Second, we are going to insert a chart for our blank page so click the Chart icon.
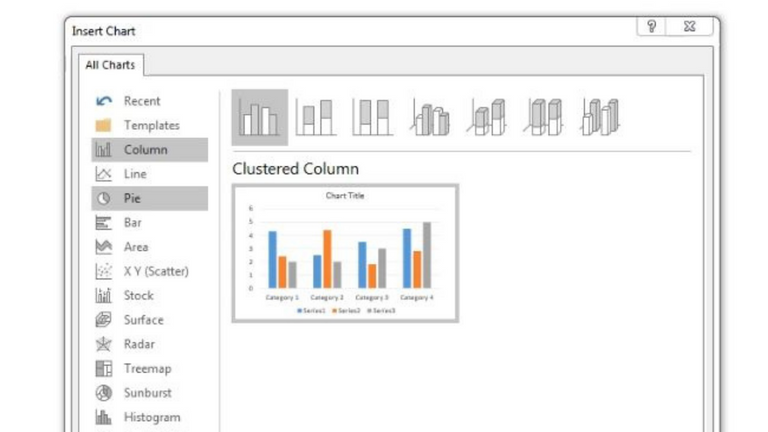
There are a set of charts that you can choose on the left side corner. You just have to choose a type of chart that applies to our main goal for tonight.
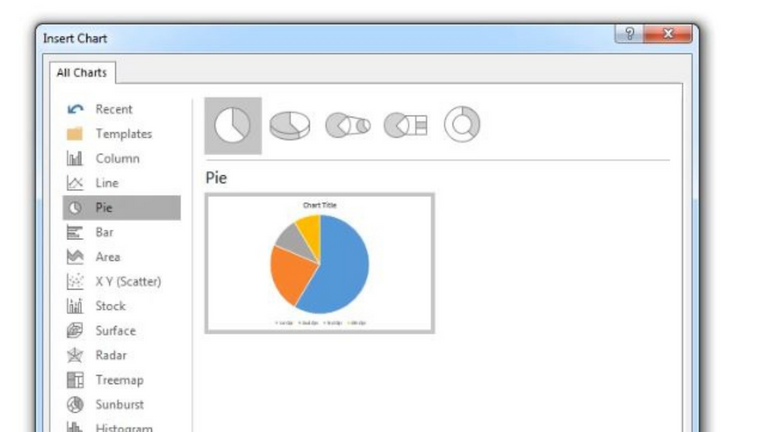
Since we are making a wheel, we have to choose the Pie chart and click ok.
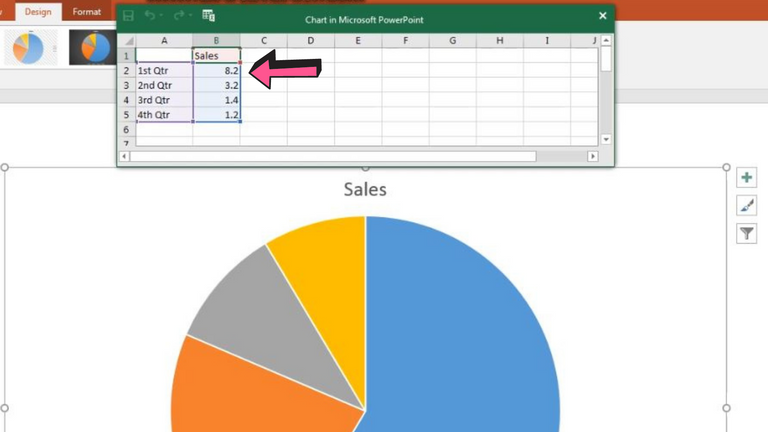
As you can see on the top, it shows columns and rows. We are going to change those numbers into appropriate ones to make this wheel successful. Let's be guided with the pink arrow.
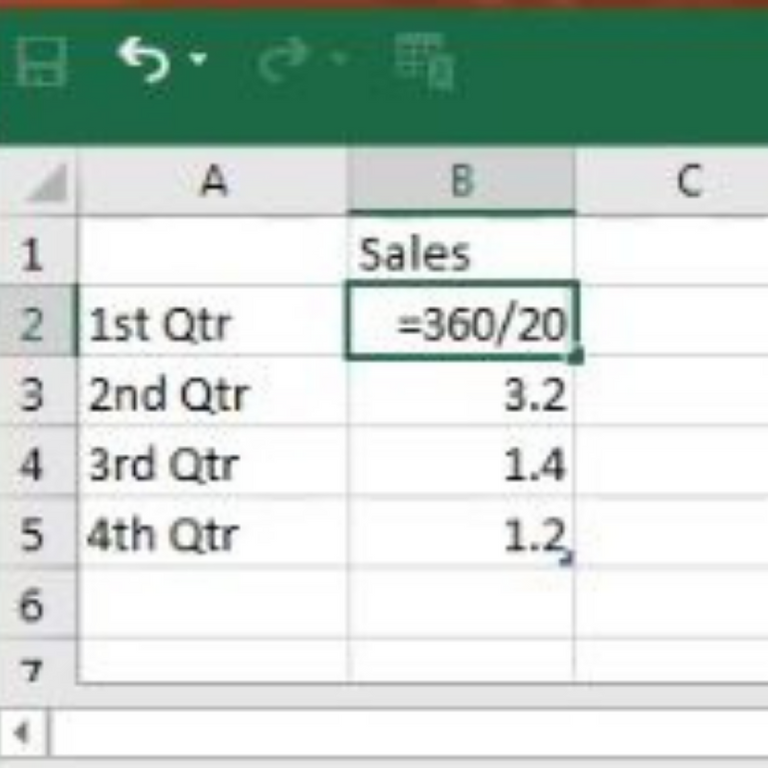
This is the risky part, you have to be extra careful because a single mistake can ruin everything, and possibly it won't work out. In B2 which was, 8.2 before will be changed into =360/20. You may wonder why do we need to do that. This will help you create every slice of your pie.360 means the complete edge of a circle and 20 will be the number of riddles I will ask for the students.
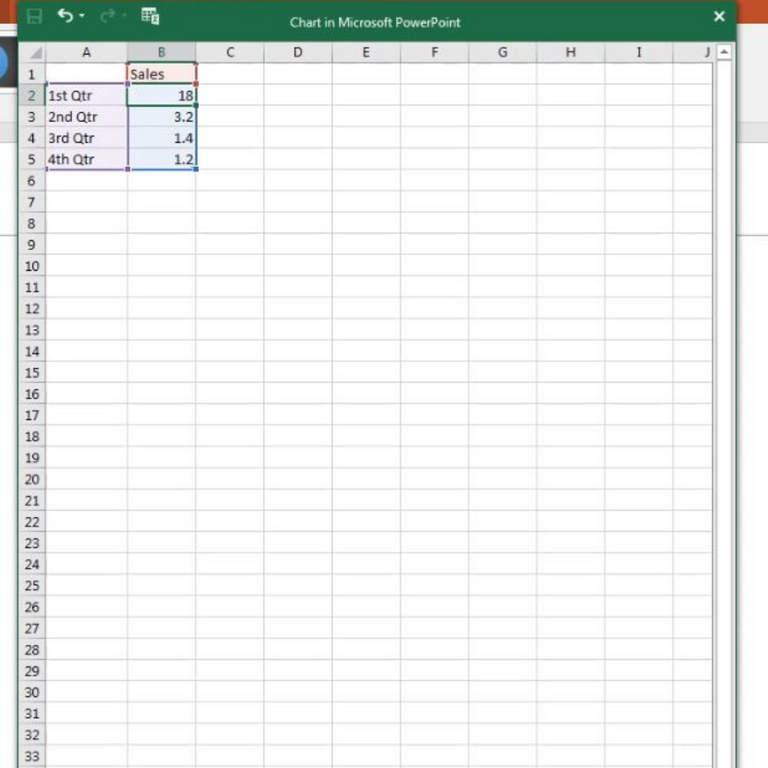
This time, you can see the correct answer if we are going to divide 360 in 20 so the answer is 18. Please take note of this number because we can use it later.

Kindly drag down from number 2 (18) until number 21. It should be 20 right? but we have to give an extra one to make it complete.
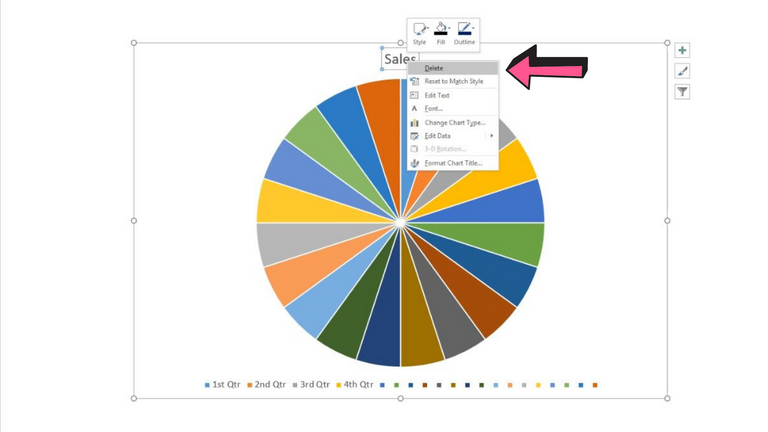
If you wish not to include the Title on the top and another extra from the bottom, Just right click and press Delete.
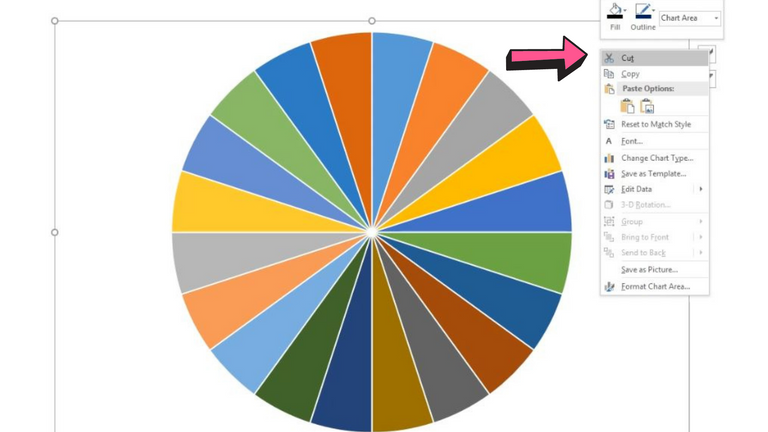
Now, we are about to start the proper main point, right click and press cut. Don't get surprised if you will see nothing and turns to an empty plain white page again. Don't worry, it's part of the process.
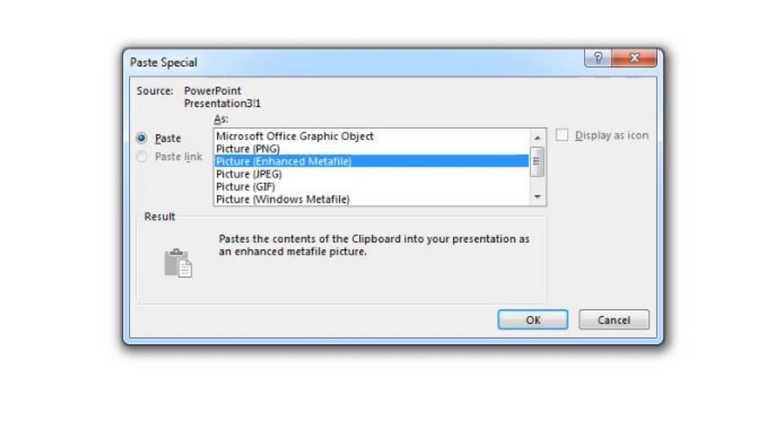
Find the word Paste and click the paste special and this will appear on your screen, There are options to choose but select Picture(Enhanced Metafile).
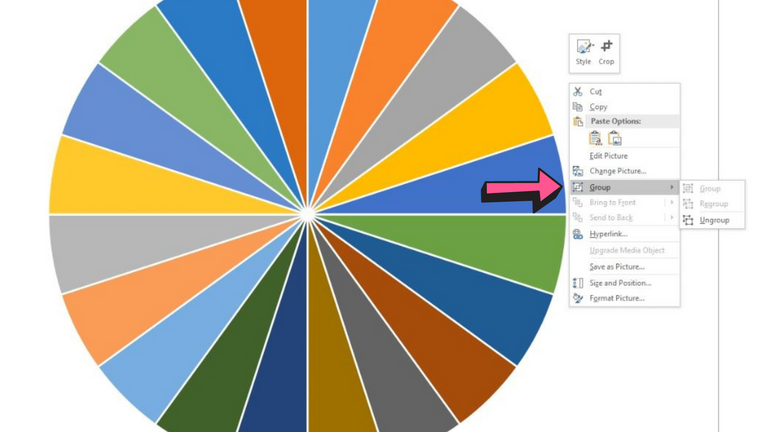
Press Control A to select all and right click. Find the word Group and press Ungroup.
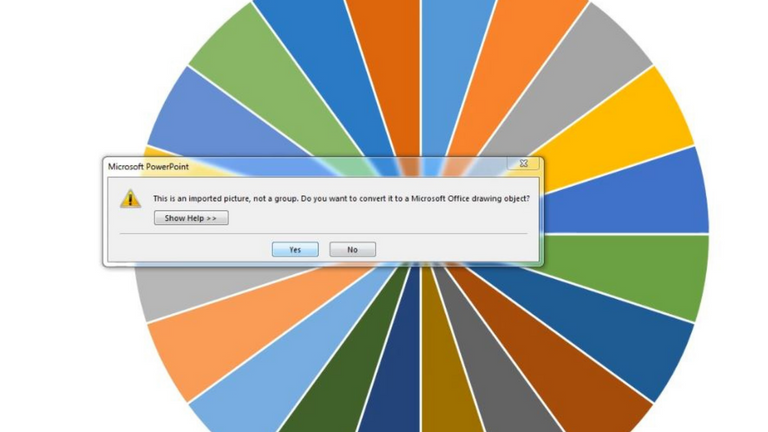
This question will pop up and simply click Yes.
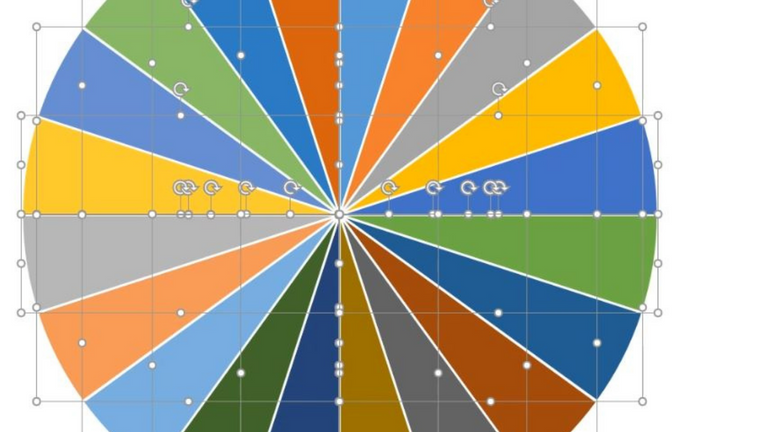
We are going to repeat the same process twice which is to Group and Ungroup.
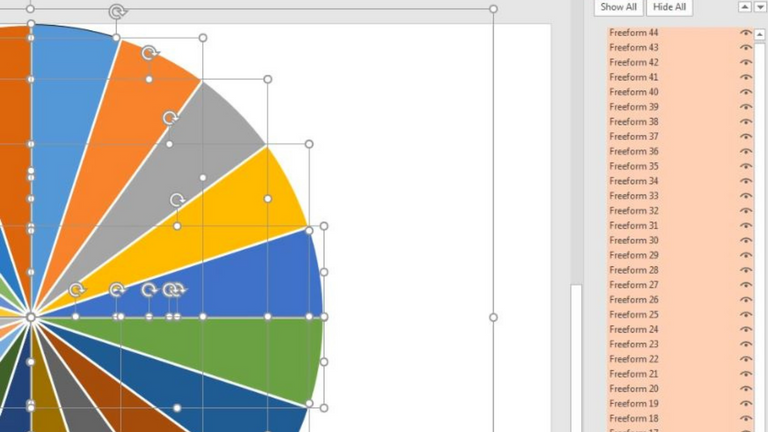
We are about to remove slices of pie that we can't include in our wheel. You can see a list of Freeform on the right side. How can we identify it? Simply go to the bottom and click the look like eye button to show and hide. If you can see on your pie with a bold black line, it means that is where you will start. You can see that it started in the color blue.

Press control and click all the even numbers and click Delete.
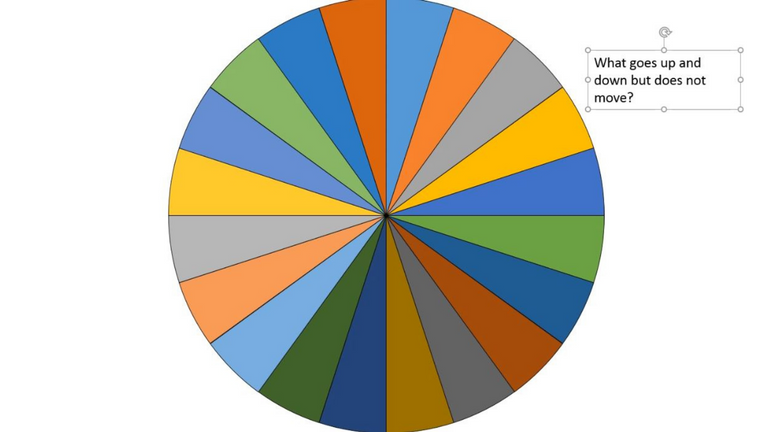
Next, we will insert a caption. Go to the text box and start typing the questions.
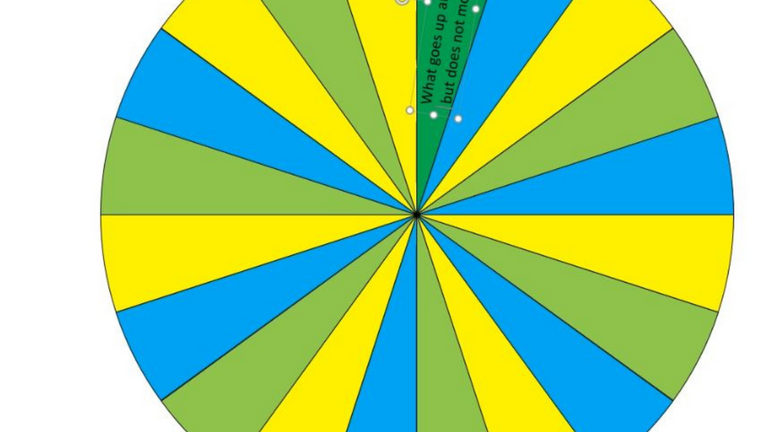
Make sure that they are visible and the sizes of the letters fit on each slice of pie. You can adjust it by dragging and rotating it.
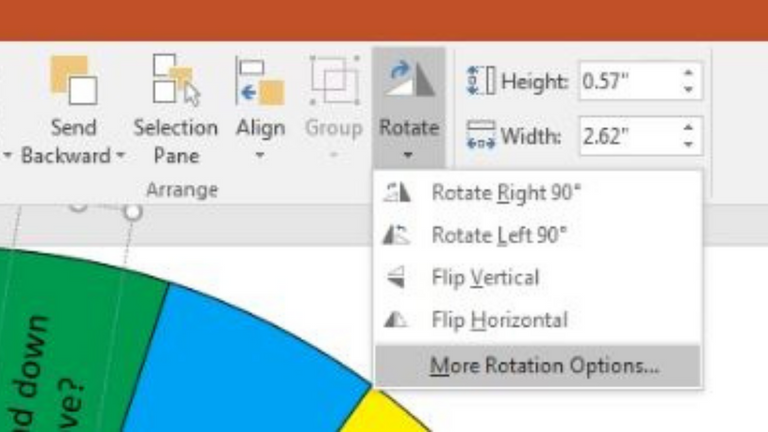
To make them all align and functional, we are going to rotate and click the More Rotation Options.
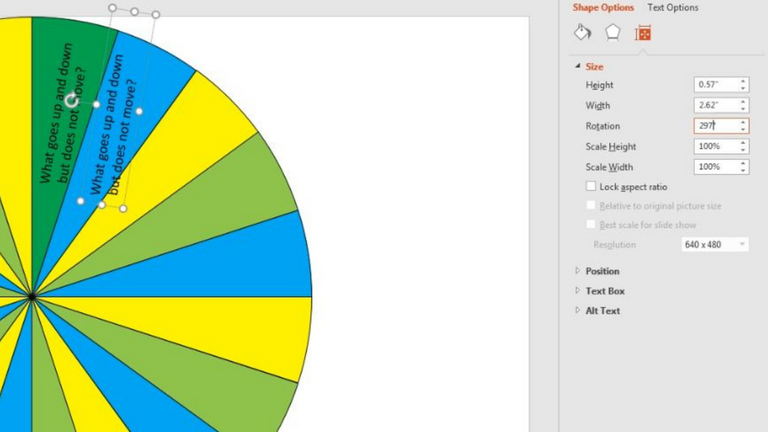
This can be done in one by one process. **Copy the first question and paste then rotate. You can see on the right side there is a rotation it was written there 297 now as you can remember on the first part which is number 18, you have to use it, to sum up, so 297+18=315. Continue adding 18 to every current answer until you will fill all slices with your questions.

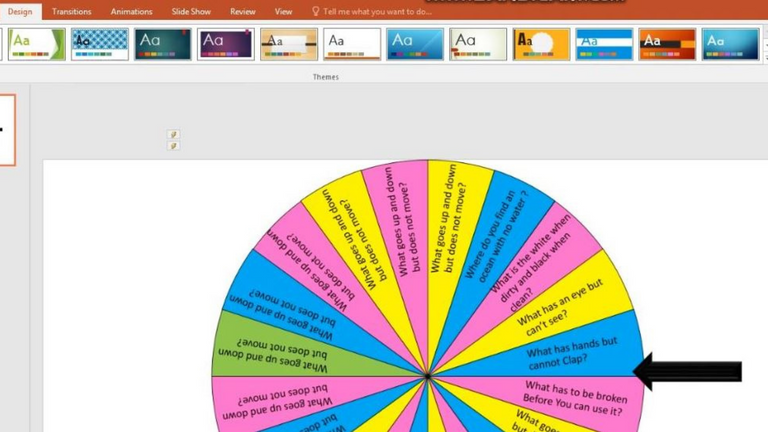
This is the result after inserting questions and rotating it.
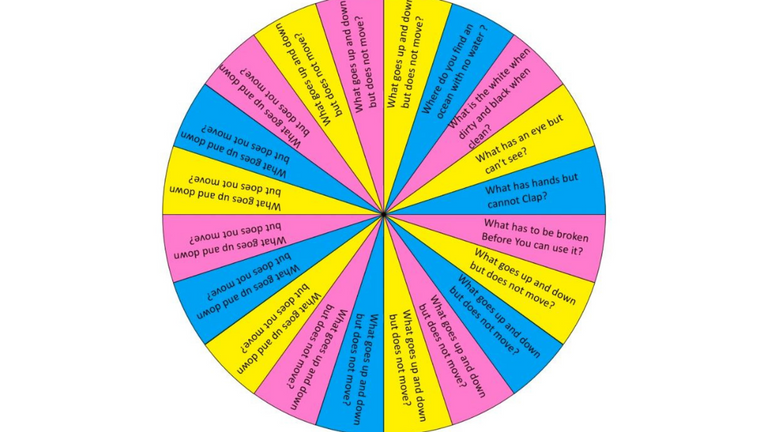
You can change the colors of each slice according to your choice.
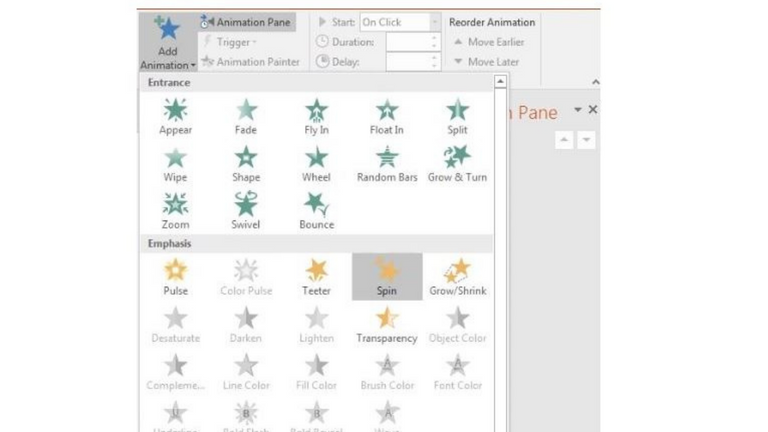
In this part, we are about to make movement for our wheel. Let's go to Animation pane, Emphasis, and choose Spin.
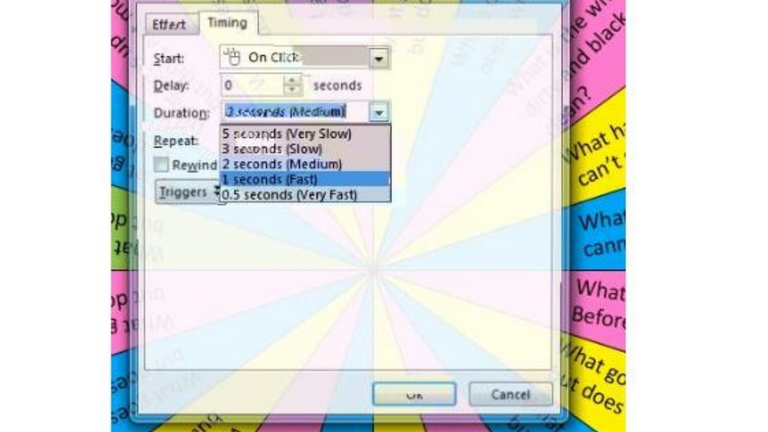
On your animation pane, we have to adjust first the Timing in the duration of 1 second (fast).
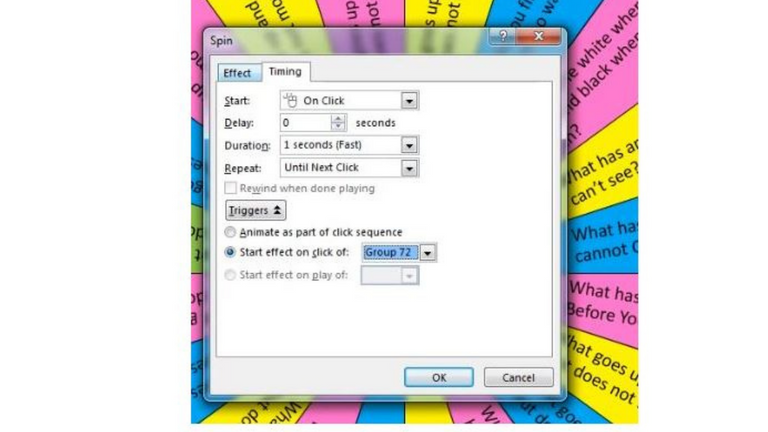
Then in Triggers, tick the Start effect on click.
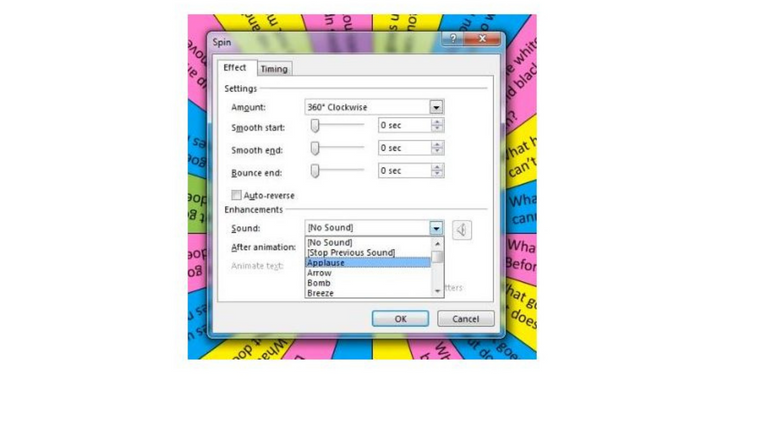
For the Effect, you can choose your sounds, if you have your own sounds effect then click to more options.
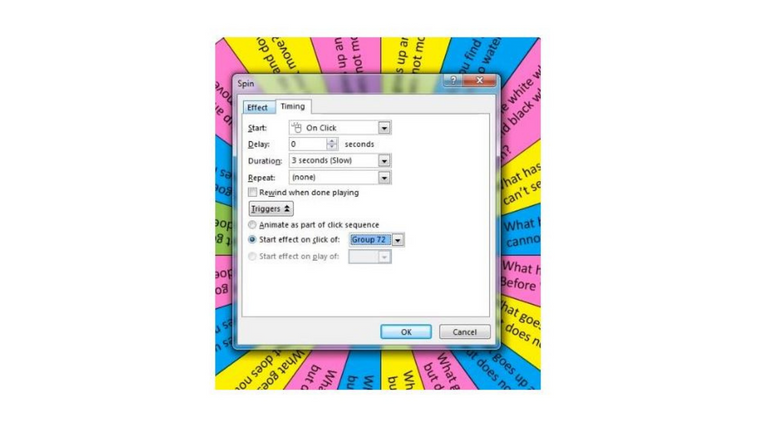
Back to the same process, choose again the Spin and adjust the Timing this time with a duration of 3 seconds(slow) and Triggers will remain as it is.
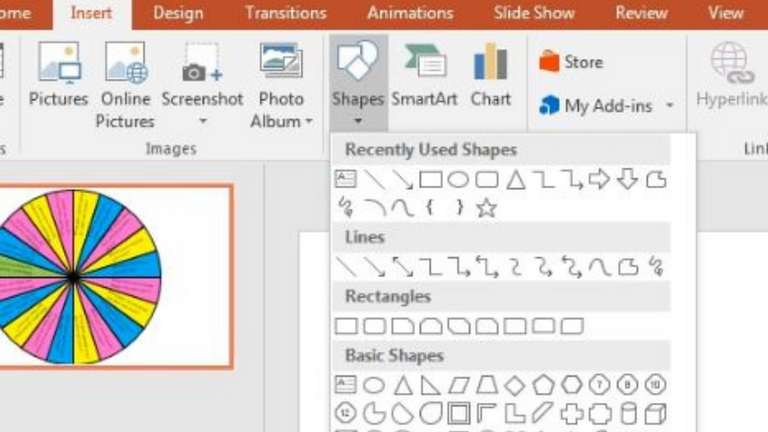
Go to insert and find shapes. We are looking for an arrow shape this time.
You can adjust the arrow by rotating and dragging it and fill the shape with your preferred color.
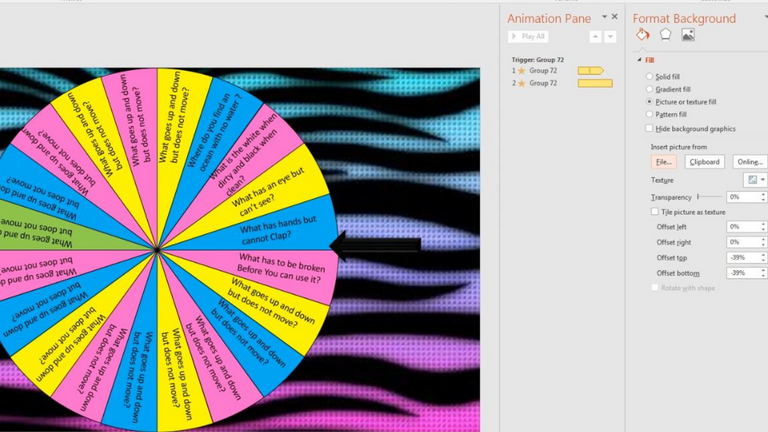
Lastly, If you wish to add a background, go to Format and click Format Background. Tick picture or textile fill and insert pictures from a File and here it is the final output of the colorful wheel.
If you have any questions to learn more about this, just let me know. I hope you can try this with your students, friends, and kids. Good night everyone.
Congratulations @missdonna! You have completed the following achievement on the Hive blockchain and have been rewarded with new badge(s) :
Your next target is to reach 4000 upvotes.
You can view your badges on your board and compare yourself to others in the Ranking
If you no longer want to receive notifications, reply to this comment with the word
STOPCheck out the last post from @hivebuzz:
Support the HiveBuzz project. Vote for our proposal!
Interesting! This will help on teachers having online classes. !discovery 15
Precisely @juecoree. Based on my experience, I found this very effective for my students.
This post was shared and voted inside the discord by the curators team of discovery-it
Join our community! hive-193212
Discovery-it is also a Witness, vote for us here
Delegate to us for passive income. Check our 80% fee-back Program
What goes up and down and doesn’t move?
Volume?
The sun?
Yes, it can be the sun. Thanks @kikicat
@curangel thank you for the good news
A very complete strategy. Thanks for sharing it, I didn't remember it.