Disclaimer!
I am in no way an expert in any software I would mention in this series. Anything I mention in this post and the following posts would only be how I see/do things :> As much as I did this series to help fellow artists, I would also love to learn! So, if there's anything you would like to share to correct or improve anything in this post, I would greatly appreciate it ^^
Hey guys! I'm back with more stuff to share :> In my previous post, I talked about modelling and share a quick overview of the different ways to model. Now, lets go a little more in detail! :>
Since I am more experienced in Blender than in any other software, I will be using Blender for most, if not all, parts of the guide. It's completely free and relatively lighter (compared to other 3D software) to use! I will start to get more technical and specific because as important concepts are to me, I think it's also important to know the tools of the software :> Generally, different 3D software have common tools that have similar uses so learning what you can do in 3D is so useful because it's translatable to other 3D software. Simply knowing what you can do in 3D makes it easier to look up tutorials on how to do it on specific preferred 3D software.
In this guide you will learn how to:
Move around the 3D space
Add objects
Modify the properties of a primitive object
Navigate through the different modes of display
Scale, move, and rotate
Proportional Editing
Loop cut
Select loop
Manipulate vertices/edges along the surface of the shape
Let's start with the simplest one, box modelling. As we've mentioned before it's more on using existing shapes to create your desired shape!
So, in Blender, there are several primitive shapes that you can use starting out.
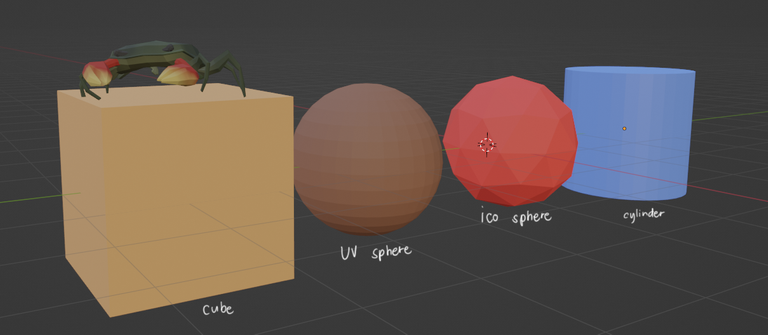
Let's see... for this box modelling guide, let's try to make a cute low-poly hot-air balloon! A hot-air balloon generally consists of a sphere and a box.
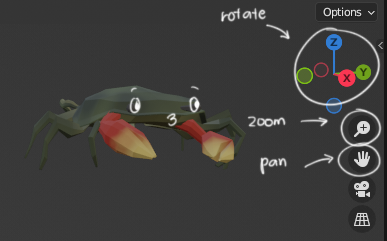
Before anything else! Here are the shortcut keys you need to remember to move around and navigate in the 3D space :>
Scroll to zoom in and out
Middle mouse button to rotate
Shift + middle mouse button to pan
I highly suggest remembering these 3 as you will live and breathe these functions >u< But in case you forget, you can find these on the top right of your screen :>
Now that we have that aside, let's start making our hot-air balloon! Let's start with the biggest shape that you can form, the balloon!
Press Shift + A to prompt the add function.
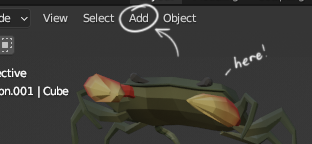
With this, a bunch of option pops up and you can see so many things you can add in your space! If you forget the shortcut key to bring out this pop-up, you can always go to the top left of the screen and find the 'Add' button.
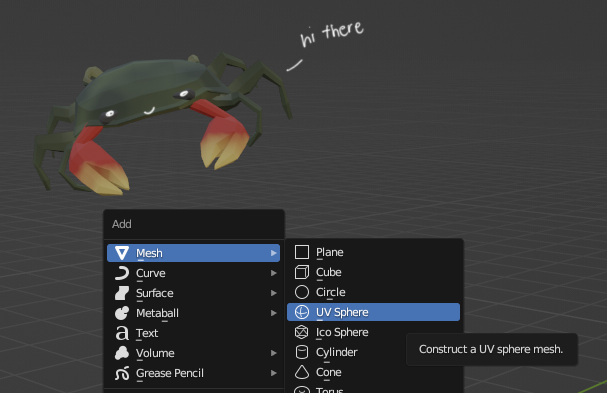
You can explore the other stuff but for this specific guide, let's go ahead and add mesh>UV Sphere.
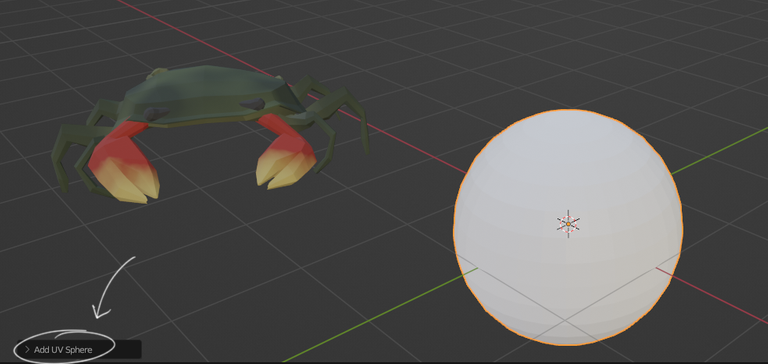
Once your UV sphere appears in your 3D space, there's a tiny tab that says 'Add UV Sphere' on the lower left of the screen that would also pop-up.
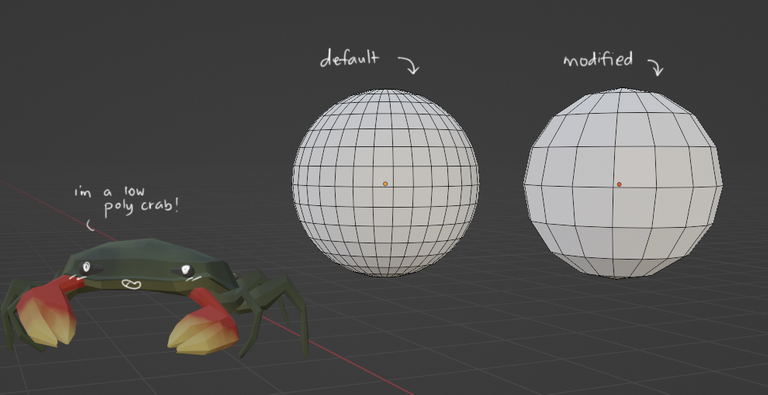
Click on the tab and you can see some properties of the object you just added. Through here, you can change the number of polygons your UV sphere would have. By default, it's 32 segments and 16 rings. For this low-poly hot-air balloon, let's chop that value down in half, 16 segments and 8 rings.
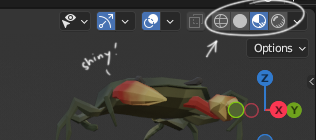
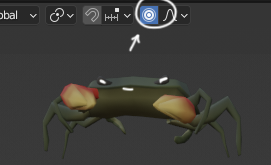
Before we go to the next step, let's have a quick overview on the different previews you can view your 3D object in. If you look to the upper right of the screen, you would see 4 balls icons. Each ball is a different preview mode!

The first one is wireframe; it's like an x-ray mode so you could see the individual vertices and edges. Next one is the one we generally use when we model, the solid preview. This mode removes all the texture and lighting to show the very basic form of your 3D. Next is the material preview. In this preview, you will be able to see the textures without the lighting. Generally, this is the preview we use when we texture so we could see the colors without the effects of the lighting. Lastly, the rendered preview is essentially what the final render would look like. A quick peep on the finished output!
Now, we that have a nice little spherical balloon! Let's start to modify its shape to look more like a hot-air balloon!
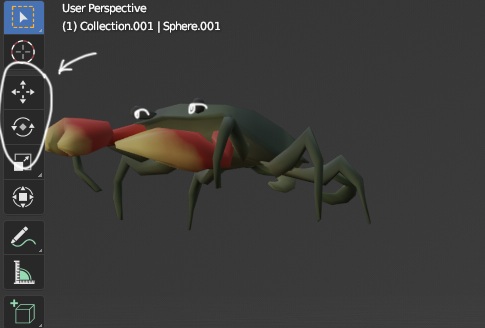
By default, you would be in object mode. This is where you can see your 3D models as an object rather than a bunch of vertices and faces. In object mode, you can scale, move, and rotate your object.
Press S to scale
Press G to move
Press R to rotate
These shortcuts work across the different modes but if you forget the shortcuts (please don't. this one in particular is super important) you can find it in the left side of your screen.
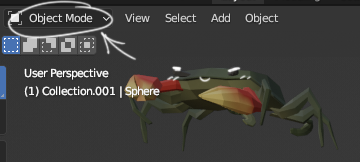
Once you are happy with the shape of your object, let's proceed to manipulate the individual vertices that compose your object! To do this, let's go to edit mode
Press Tab to go to edit mode
There are different modes wherein you can modify your 3D object but for now let's focus on the edit mode. If you forget the shortcut, you can go to the upper left part of your screen and you'd find a tab with a drop-down icon. You can also access different modes through here :>
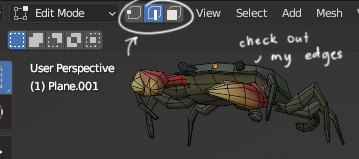
Ok so, in edit mode is where you can manipulate the shape of your object by manually adjusting the vertices, edges, or faces. You can choose which mode of selection you can have by clicking these icons:
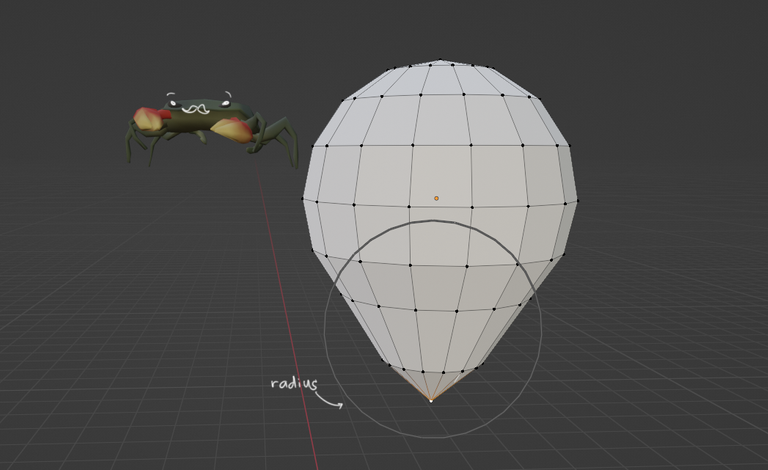
Now, a hot-air balloon usually isn't a perfect round balloon, right? So, what we want to do next is modify our primitive shape into our desired shape! Box modeling woohoo! Once you are at the edit mode, you can click on any vertices and move them around to modify your shape :> For this one, particularly, you can use proportional editing! I'm not sure what the shortcut key for this one but let's just click on the icon the good ol' way >u<
With proportional editing, the changes you make on your selection now affect the surrounding vertices. You can change the radius of the area affected by scrolling up or down after you have started to move things around. This is convenient for our hot-air balloon so we can drag the bottom down a bit, and have the entire shape of the balloon follow naturally. I made the radius of proportional editing a little big so I could make big changes by scrolling up.
Make sure to turn proportional editing off once you're done! If you find the surrounding elements to be moving even when they're unselected, check if you have the proportional editing is on
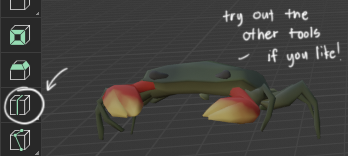
Now our balloon is slowly taking shape! I want to add a little more emphasis on the curve of the tail of the balloon. So, in edit mode, let's add a loop cut.
Press Ctrl + R to add a loop cut.
If you forget the shortcut, you can find all the tools used to modify your object on the left panel in edit mode.
I'm gonna add a loop cut right here and modify it to my liking :>
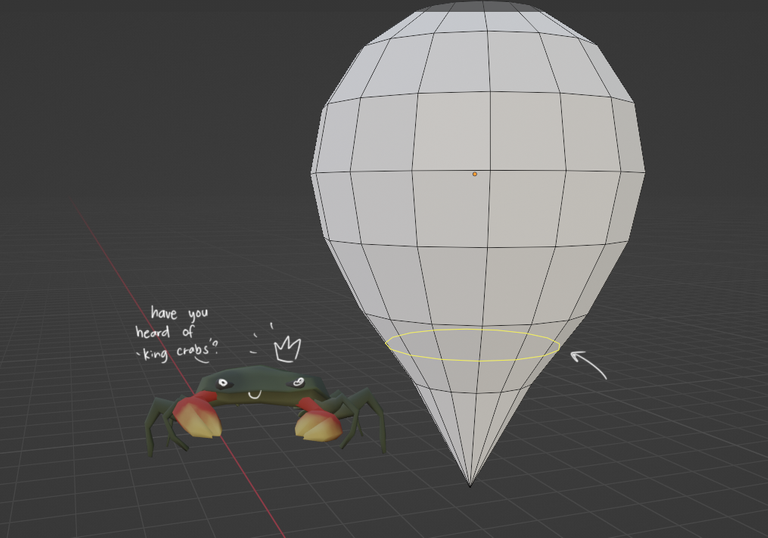
You can scale, move, and rotate any and every vertex, edge, and face until you get your desired shape!
For the next few steps, I'm not sure where to find these functions so you're gonna have to remember the shortcuts >u<
Alt + click on an edge to select a loop.
I selected the loop and scaled it down to have a more defining curve.
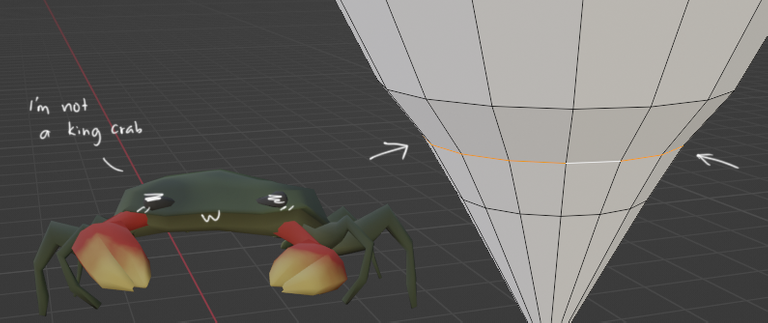
Now I want to move the loop a bit down but I want the segments to follow the shape still.
Press Shift + V to move the selected vertex/edge along the object.

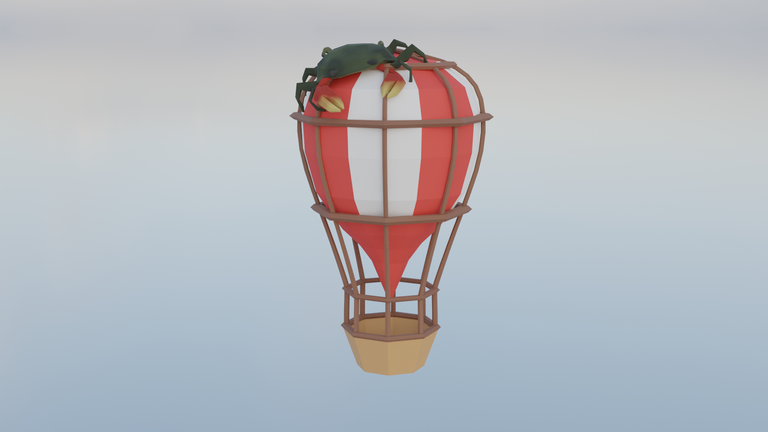
A couple more adjustments and I'm done with the balloon!!! Woohooo!
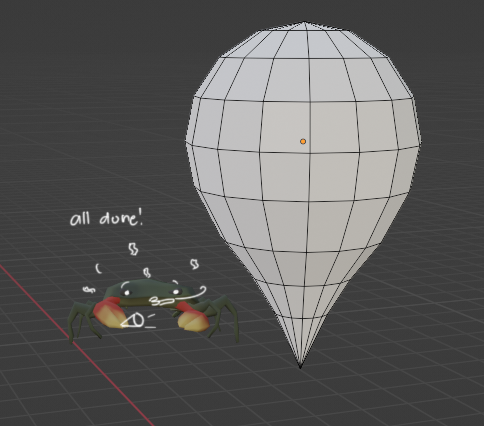
We finished the balloon! Let's texture it once we are done with everything :> But for now, that's it for this guide! For part 2, let's talk about the body of the balloon and how to make the ropes that connect the balloon to the body :>
I hope you learned something from this guide! ^^
How to 3D! From a fellow beginner's perspective ♥
Intro to 3D
Box Modelling Part 1
That's about it!
If you wish to have an amazing companion through your drawing journey, feel free to join our discord! It's full of amazing artists, both new and old, who are willing to share their experiences. I learned a lot from them, I hope you will too n_n
I also have artstation and twitter! You can check em out here:
https://www.artstation.com/kothy
https://twitter.com/kothyyyy
Thank You!
Feel free to comment any tips or suggestions. It will be greatly appreciated! If you liked the content, please leave an upvote. For more, please follow @kothy.
All images were made by @kothy
All rights reserved
If you think there's going to be a lot (there is going to be a lot, have you seen everything along these lines XD) perhaps consider making a collection for them?
Love the crab mascot XD
I feel like I bit way more than I can chew but I do plan to make this a guide series! >u<
You may have done depending on how in-depth you want to go with how much stuff. There's reasons a lot of guides and manuals tend to either focus on a specific area or cover things very generically XD
Good luck :D
I'm planning to make the guide series progressive so I'm imagining it's only too detailed on the first few guides because the UI needs to be introduced as well. Hopefully, the succeeding guides wouldn't be too specific because the basic features have already been discussed in the early guides hehe ;w;
Thank you, I think if I'm planning to continue this guide series, I'm gonna need all the luck I can get >u<
My blender knowledge expands!
It's working!