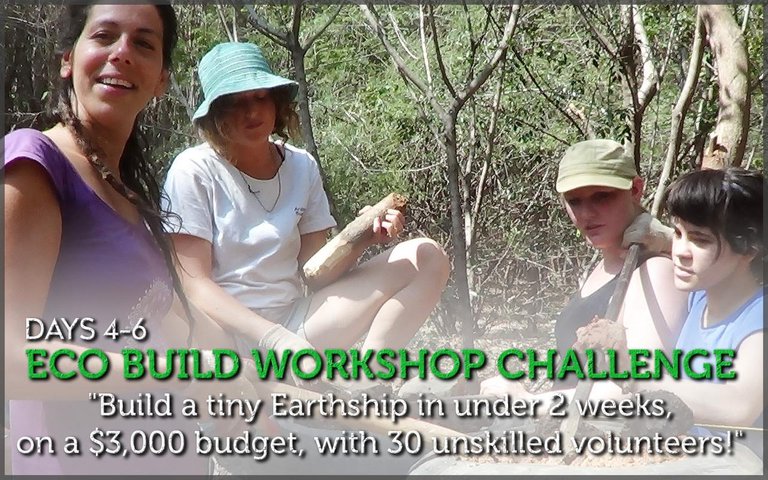
Welcome back to the build! It's day 4 and it is amazing to see how much we had done in less than a week! The combined energy of this group was a lot, and together we were able to keep a respectable pace of tyre ramming going. Tyre ramming is hard, and when the climate is hot, it becomes even harder! I am familiar with the tapering off effect that I see with volunteers on the third or fourth day, it is just normal unless you are fit and used to working hard. So people rolled in a bit later than normal, but once they arrived they were keen to keep going.
If you want to understand what Earthships are all about and why we are doing this, here is a brilliant 10 minute movie with Michael Reynolds, the Father of Earthships talking about why he invented them
One of the joys of building something tiny is that you can watch it grow and see significant progress in just one day. On day 4 the tyre wall was nearly 3 foot tall, and we had a total of 8 feet to reach. Well, we would have if we had enough tyres! As I wrote last time, we couldn't get enough and so I bought 1,000 glass bottles that we were going to finish the final 1/3 with. I had a lovely idea in mind for how to layout the bottles and make a nice design feature out of it. It would also be a bit quicker than tyres since the wall is much thinner and its more of a concrete and stone job than a tyre pounding job.
Day 4
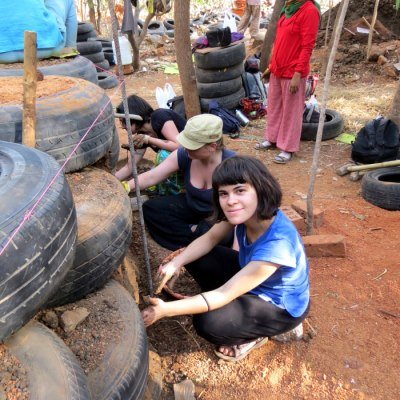
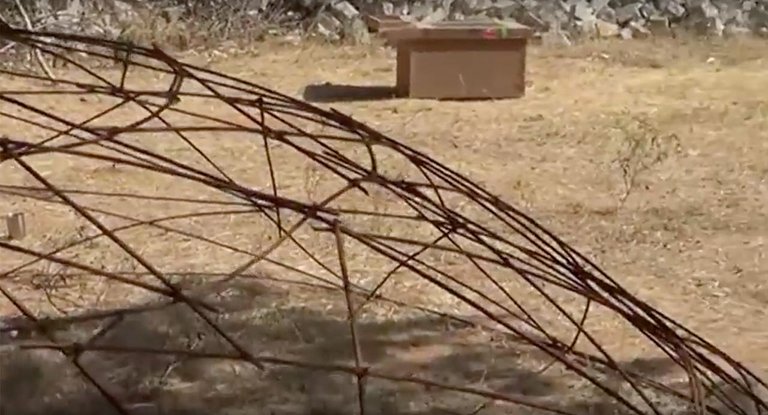
So we were on schedule! Now I had to start on this roof! This was something that i was excited to try out. I was trying out a ferro-cement roof for the first time and was hoping that we could make it in just a few days. The final cement work would have to happen afterwards as we need drying time etc, and so the goal was to have the basic frame up with a rough cement plaster on it. The metal roof frame that I was going to make would sit and be anchored directly to the tyre walls, or in this case the bottle walls. The only way to reliably size and shape it was to size up the base of the roof frame on the wall, and then move it to ground level so I could then turn that base into the entire dome shaped structure. In theory, it would have to fit since we sized it on the wall, but I was aware of the ease by which we could make a mistake. I think i checked the size about 10 times before I was confident that it was the right size for the roof. Since the walls are thick, we also had a few inches of margin of error. In the image below you can see a few volunteers holding the steel re-bar in position. Once sized we moved it to open ground ready to turn into a dome shaped roof shape!

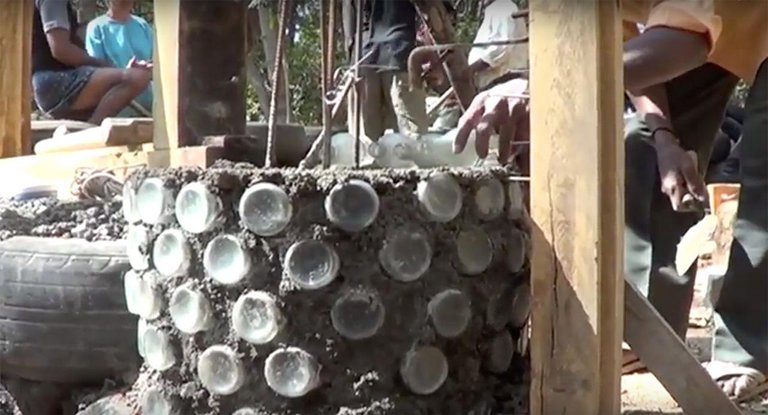
The Little Bottle Wall Fireplace
Our fireplace project was complete! We had all had a lot of fun making it and it looked quite good considering there was very little monitoring of people having a go at it. The final finish was a bit rough, but i like that rustic look. It was solid, and had dried well and could already be touched.

Mud Plastering / Tyre Covering
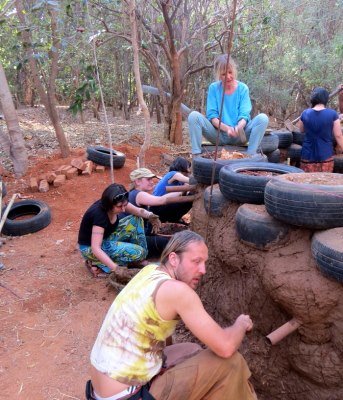
You can start covering the tyres with a cob or mud plaster very early on. It is the perfect job for people who are tired and want to do some mud mixing or filling the gaps between tyres with stones and mud. Its a very satisfying job as you get to start the transition of the building into something beautiful. Once those tyres are covered up and we have a nice finish plaster on, I could see the potential for it to look very nice!
Making a plaster that is suitable for plastering or filling gaps is something of an art-form to perfect. There are ways to make it much easier for yourself, especially if you don't have the right type of soil. On this occasion I had endless amounts of almost 100% clay, and lots of sandy dirt that was the general soil of the area. In order to make a good plaster that is strong and also resistant to cracking we need a mix that is not too much clay, and not too much sand. The only way to really get it right is to make a few tests. This is easy and quick to do and we had already prepared a few samples to see how they would hold up after drying. In the end i went with a mix that was around 40% clay and 60% dirt. Since we were mainly filling voids and performing the most basic cover on the tyres we didn't need to do any sifting, and small stones and grit are totally fine.
There were many tyres that had some gaps between them. This can happen intentionally where you leave space for pipes to enter and exit the building. It can also just happen when you don't have the same sized tyres to work with. Either way it is very easy to fill even quite large gaps with stones and mud.


Day 5: Evicted From The Hotel
I never did go to meet the hotel manager to discuss the situation after I received a complaint, and then suddenly I got a call at 8am from the hotel manager. He was even more upset than the time before and basically told me to come immediately and get everyone to leave. I guess I could see it coming, and could tell that people had been up late. Apparently they had been on the rooftop restaurant all night drinking and making loads of noise. I tried to act shocked, but wasn't really too surprised, and I assured the hotel we would all leave that day.
It was actually fine with me as they were charging quite a lot for the group and were not really looking after us very well. So I told everyone to just grab their stuff and they could all choose from a few places that I knew were cheap and also nice and people all found their own way. I should have probably done that from the start, but I really wanted the group to connect and make friends.. I guess I over succeeded on that mission!
Glass Bottle Supporting Pillars
We needed a pillar on each side of the door frame to both support the frame itself as well as the roof . Making pillars can be quite fun when you use bottles, and i had made square pillars with glass bottles before. These needed to be quite strong, so just to be safe we use concrete and re-bar with the glass bottles facing out. Light wont pass through, but the bottles will look nice once the pillar is plastered.
We continued with tyre ramming, and it was clear that some people were much quicker than others at it. The thing about tyre pounding is that its only the last 10 minutes that is really hard. When you start you are just filling the tyre with dirt and hardly need any force to pound them. Its only when they are getting really full that you have to really whack them hard with a big sledge hammer to get them rock solid. Therefore I let many people just do the first part, and then used either local labour or the toughest of the boys to finish them off. That saved a lot of time, since some people could spend an hour trying to finish off a tyre because they aren't hitting it hard enough.
The three main things you have to keep checking when building a tyre wall are:
- The line of the wall. It needs to rise straight up without leaning out or in.
- Each tyre also needs to be the same height as the one next to it.
- Each should be fully pounded with no soft spots.
My job was constantly checking these three things. I had a good eye to see if a tyre was out of place and would walk around nudging them into position whilst being pounded. I also had a marker string all the way around the wall to show everyone the height of that course. This was very helpful and made it easy for me to check if the course was level or not. When there is an issue it is possible to add several inches of height to a tyre by pounding more dirt into it. If you need to reduce the height you tamp the tyre down with a heavy metal tamper. Since all the tyres were different sizes, there was occasions when the height was too out far out to fix it, and in those cases we swapped them out for more suitable sized tyres. We also had to ad a little water to the dirt since it was SO dry and hard to compress.

Its good to make it clear that the strength of a compacted tyre comes from the retention of highly compressed dirt by the steel belted rubber tyre. We do not make a wet mix that dries out and sets, but instead rely on compaction to create a solid infill. This is the MAGIC of tyres and one of the reasons why Earthship walls perform so well, and in so many ways. Without the rubber tyre casing there would be no way to beat dirt to that level of compaction. Nor would there be a way to contain it indefinitely without any degradation. Since the tyres provides such a durable skin, we are able to use any kind of dirt with tyre walls. Earthships have been made using limestone, sand, clay, and aggregates. You can easily pound small and even larger stones into a tyre wall, and this just helps to make them even stronger.
Watch a 2 minute Highlight Video of Day 5
Day 6 - The roof framing
I was feeling nervous this morning! I woke up knowing that today I would make the frame of the roof, with no experience of doing it before, and no one who had a clue about it nearby. I felt confident in the sense that it was a simple job to make the frame, and I was good at measuring things and checking that the size was correct. The hard part of the roof would be the maisoner job of plastering it with cement, especially at first when it was still quite flexible and vulnerable.
I decided to do it myself instead of inviting volunteers to help. I needed to be sure the size and shape was right, and felt that too many hands may well spoil the job! There would be plenty of reinforcing work to do and that was something that everyone could help out with. Luckily I have a good sense of structure vs strength and made a pretty respectable looking dome. It had a nice curve on it, and after I had put in a few pieces of metal it was starting to become stable. The way I attach two pieces of metal together is by using flexible binding wire. It is tied very tightly around two pieces of metal and holds them firmly together ready for plastering over. Once the frame was ready we would finally add a chicken mesh which could then be plastered over.
Once I had a the basic shape It was just a matter of inserting many small reinforcing rods. This was the perfect job for volunteers and just about everyone had a go.

Watch a 30 second video to see a bit more
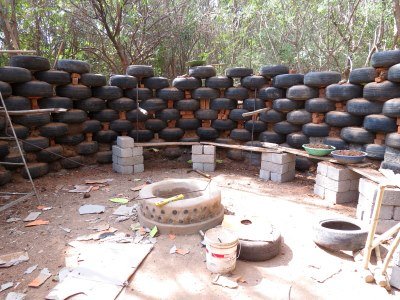
It took most of the day for me to do this, and whilst that was happening the tyre work continued. By the end of day 6 we needed 'scaffolding' to reach the top of the wall, which was now about 4 foot tall. As you can see in the image below the wall looks pretty decent! We have the last two courses and then will be starting on the glass bottle walls to reach the final height of 8ft.
Thanks for being here with me and the ecoTrain!
We are a small community that support each other because we love what we write.

check our our ecoTrain magazine at @ecotrain
If you love to write, and would like to join the ecoTrain community as an official passenger please email me on [email protected]
** Click Here For More Information on the ecoTrain **
Really an awesome work..big challenge and i think that you suceeded to do this had labour..Thanks
thanks a lot! yes big challenge ;-)!!
Information and images in the plane
Lovely idea
great post
Congratulations @eco-alex! You have completed some achievement on Steemit and have been rewarded with new badge(s) :
Click on any badge to view your own Board of Honor on SteemitBoard.
For more information about SteemitBoard, click here
If you no longer want to receive notifications, reply to this comment with the word
STOPI had a feeling they would get evicted ;) Also, I love the fireplace!
I Like it this
This post has received a 11.01 % upvote from @booster thanks to: @eco-alex.
What would happen to the wall over time if there were a lot of soft spots in the rammed tyres? Assuming that the outside is plastered and protected against the weather. Just wondering. Great post and a lot of useful information as well.
it would probably be fine, especially if its just a few tyres, and they are not too soft. If you are building on the something bermed in the dirt, the wall even leans back a bit into the dirt so it is well supported and would never fall down. You can get a way with a lot actually, but to be safe I do full..
When you do retaining walls you can miss out the packing totally and can have way more soft spots.. retaining walls lean back right into the slope so they just never move!
Thank you. Of course it's better to be on the safe side. I was wondering if it would slowly come down if these soft spots would turn into cavities or something. I'm learning as much as possible from your posts for the future. I'm very interested in alternative building styles. The sloth centre here is build using sea containers. I find that very cool.
You did it again! I can not stop being amazed how many amazing things you did in your life. Big respect from me! And thank you for including videos to the post - I guess they give us more understanding! You are the one who leads by an example both in life in ecoTrain! Much love

Image Source
thank you @shashagenji ! its always nice to hear such positive feedback ;-) what a life!