Hola!
Here is the continuation of the cabin construction as promised!
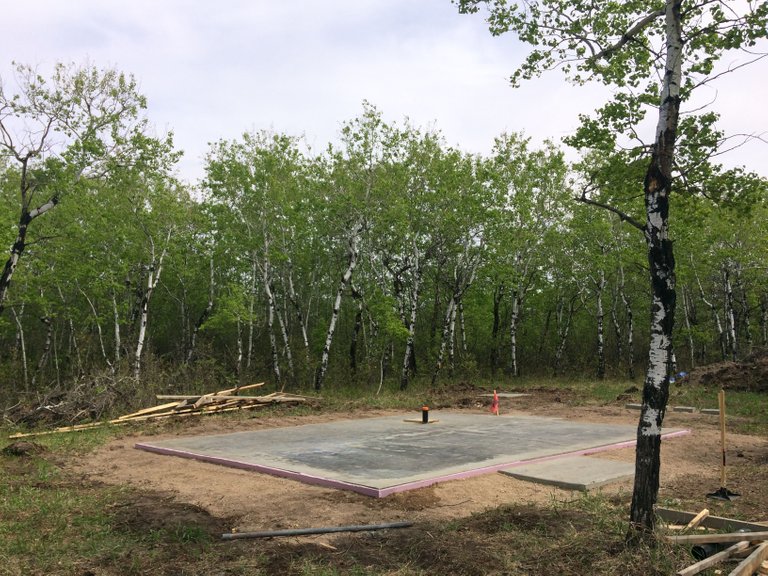
Here is the pad curing day after the pour. Did I forget to mention the floor footprint is roughly 24'x20'? The cabin will be just under 500 square feet with a loft half that size. I decided on such a size and shape for a couple of reasons. Firstly I wanted the cabin to be nearly square in shape to keep heating with wood heat more efficient ( stove near centre of building and heat it more evenly). Secondly I wanted a shelter big enough to live in but not big enough for forever.. This will one day be the guest house as I plan on creating an even more eco, green, passive house in the future down the road.
.JPG)
My partner and I spent Canada day weekend measuring,cutting and erecting the outer (north and south) 8"x 8" posts. We also went a step further and lifted the 8"x 8"x 14' girts into place with the help of a friend's scaffolding. We then started cutting the ridge posts 8"x 8"x 15' and the ridge pole in two pieces of 8"x 8"x14'... heavy stuff.
.JPG)
And on the rainiest day of the summer we had all plans in motion and we erected the huge posts with help from many of my good buddies..we also had to lift them onto 4" pins sticking out from the concrete to hold them in place. The rain kept coming.
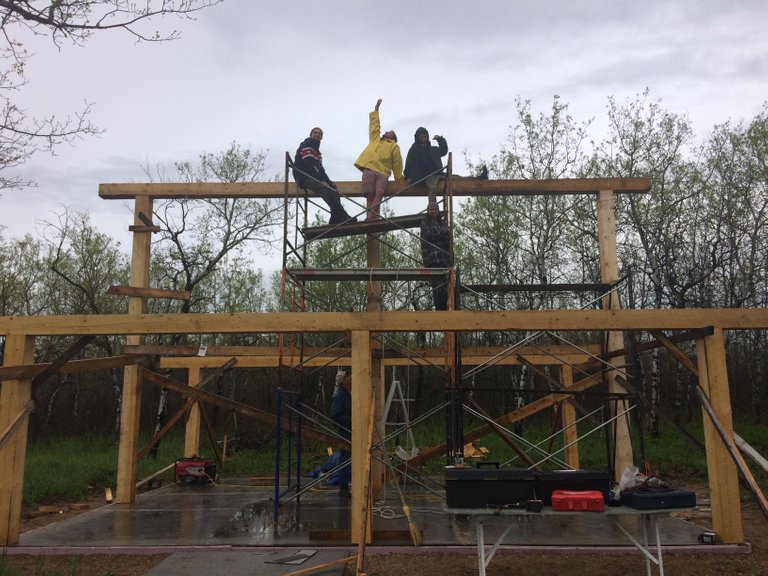
This is where the scaffolding came in handy, I'm not sure how we managed it but we got the ridge posts up! We then focused on bracing and I connected all the lumber with 12" timber-lock GRK screws. The weather ironically cleared shortly after and we had a very rewarding night in the wild.
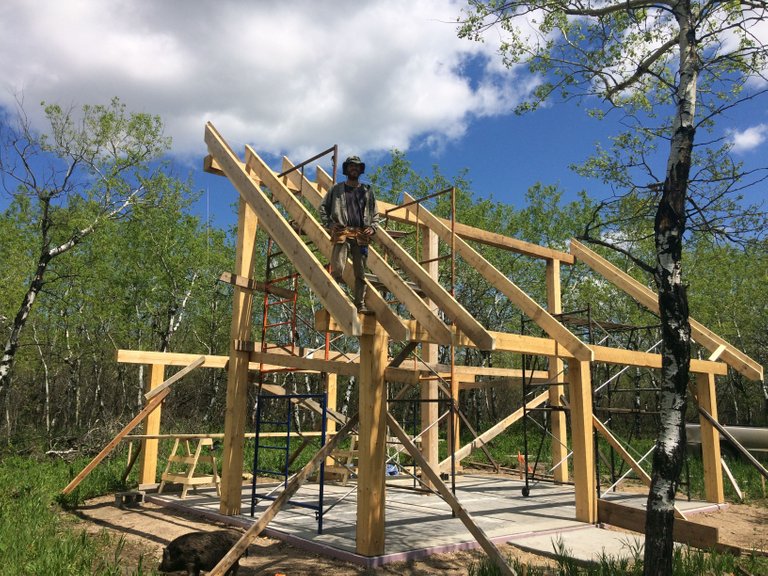
The next weekend was spent figuring out rafter details: overhangs, pitch, facia... it all had to be thought out before I started cutting up my rough cut 2"x 8" rafter lumber. As I started putting up the rafters it started to look like the cabin that I had envisioned and planned to build..a very rewarding feeling! (notice the little piggy in the picture trying to find shade near the growing structure)
Now that the rafter part was over I spent a couple weekends working on snow blocking (the gaps above the girts between the rafters), and blocking between the rafters halfway up their lengths. The structure was becoming more rigid with every day of work.
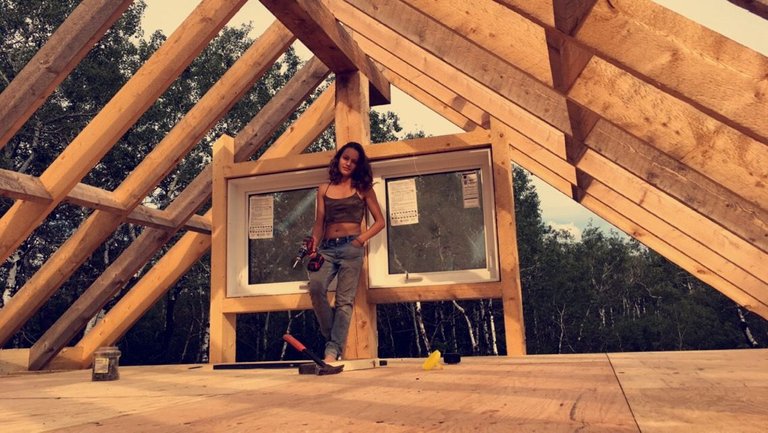
Next we tackled the loft! With 2"x 8" floor joists and plywood we cruised along. With Gen's help it went up fast and we even went ahead and framed-in and installed some windows! In this picture the loft bedroom windows face East to bring in the beautiful morning sun.
.jpg)
The West windows framed-in and installed to capture light and bring in the sunset!
.jpg)
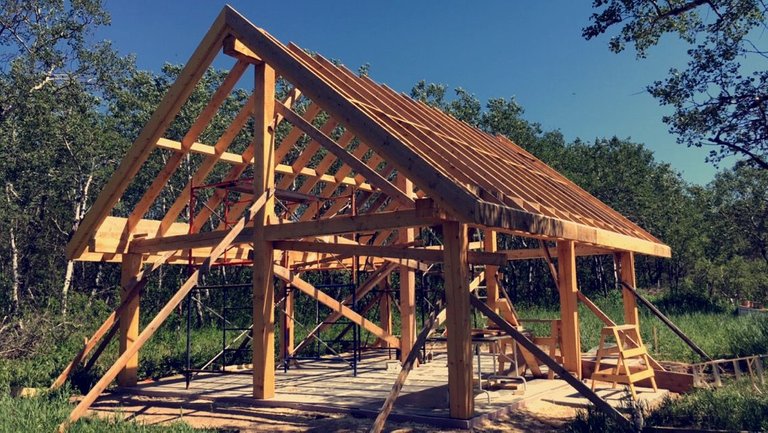
August weekends were spent finishing up the little things and preparing for the metal roof. I decided to insulate the exterior of the roof system in order to enjoy the rough cut lumber from the interior of the cabin, its beautiful! We used two layers of rigid foam staggered to get a good seal. I then added 1"x 4" strapping for the metal roof to be screwed onto.
.JPG)
On the first weekend of September we had another construction party with my father, family and friends. I spent all day on the roof and everyone had fun! I was very happy with the results, I now had a weather proof roof!!
Continued in Part 3!