This post talks about what I do when I'm making voice recordings at home for productions where the speaker won't be visible in the finished product - like most of my animated videos. If you're planning to make similar media you might find this useful.
My gear

I use a bunch of semi-pro audio equipment to record and to clean the recordings:
| Item | Approximate cost today |
|---|---|
| Izotope RX Audio Editor (Audio 'rescuing' software) | $249 |
| Røde NT1A condenser microphone | $230 |
| Tascam DR100 (Hard disk recorder) | $160 |
| K & M Microphone stand with Telescopic Boom Arm | $60 |
| One XLR cable | $10 |
| Total | $709 |
If you can easily stretch to this amount with money to spare, you might be interested in this list which includes higher-end vocal microphones.
Can you do it cheaper?
If this is too much for you to invest, the biggest savings can be made by finding alternatives for the microphone, recorder, and cleaning software.
!
Here's a comparison of some different microphone and recorder combinations I've tried. The recordings have been normalized to give similar playback levels, but no other processing has been applied. YouTube's compression has degraded the quality a little too, but the differences should still be clear if you listen on decent headphones.
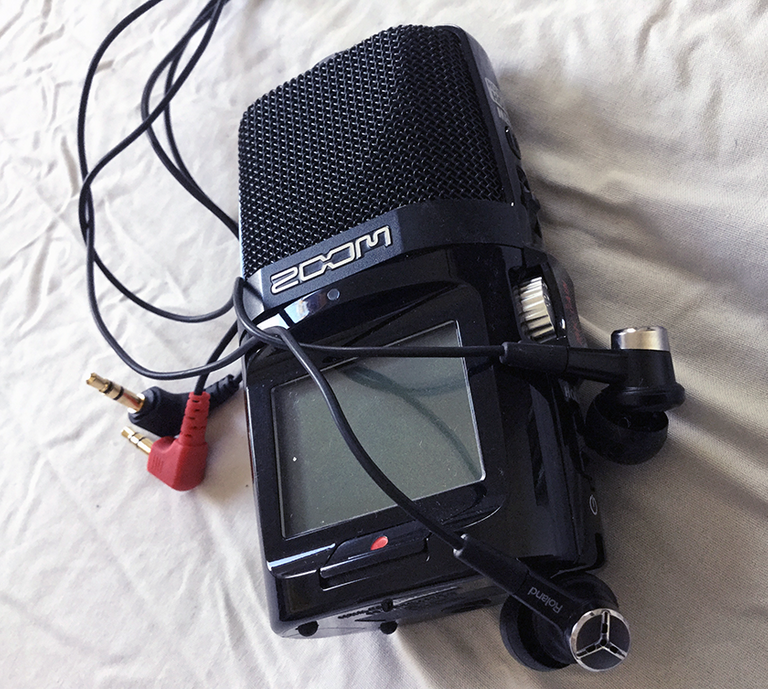
Notice how terrible the iPad's internal microphone sounds. To my ear the Roland CS-10EM and Zoom H2N combination sounds noticeably worse than the Røde too, but certainly not terrible.
I use these binaural microphones primarily for sound design work and recording ambiences. I noticed that they work okay for voice recording too. The Roland and Zoom combination is about $260 instead of $390 for the Røde and Tascam. You might prefer to forgo the extra quality and save money. And if you are ever going to be doing sound design work it's useful that the Rolands are a stereo pair, and the Zoom can record at 96Khz, 24 bit - the older Tascam can't do that.
Disappointments
I've tried other alternatives but most other setups I've experimented with haven't given me a sound I was happy enough with to use in my videos.
Specifically for this article I ordered the Røde Smartlav+. I hoped that this would be a good enough entry level mic for people getting started. It's a tiny lavalier mic that conveniently plugs into the mini jack input of an iOS device (means you don't need the expense of a dedicated hard disk recorder). But it sounded bad to my ears.
There's a similar story with Audacity (free) as a replacement for RX; I use RX to clean my recordings. Denoising them, removing unwanted sounds (a distant door slam in an otherwise perfect take). But I couldn't get a useable result from Audacity's denoising tool - it introduced very noticeable artefacts while RX gives really excellent results with very little effort.
The Room: Dead (and) quiet
The ideal room in your house to record voice in has two characteristics:
- It's naturally quiet, meaning little or no noise coming from internal sources (like airco) as well as external ones (street sounds).
- It's should be the most acoustically dead room in your home.
Very often, the rooms furthest away from a road are naturally the most quiet. And the rooms with the most (heavy) fabrics, and fewest large hard surfaces are the deadest. Carpeted rooms are preferable to ones with hard floors. If you have rugs hung on the walls that helps too. As do cupboards filled with clothing, and mattresses.
In my home, my bedroom is the most dead. You can test for yourself quickly by making a loud single clap sound in each of your rooms and listening for a subtle 'ringing' tail of the sound. An unfurnished house with a hard floor will have a very pronounced ringing sound when you do that. The room in which that tail is least audible is the deadest.
A completely dead room is probably not desirable, but outside of specially designed recording studios you don't usually need to worry about that. So the rule of thumb 'as dead as possible' will work fine for you.
The 'Tent'
Inside the recording room you'll build a small enclosure; a fort or tent with fabric 'walls' that can accommodate the person speaking, a printed script and a small lamp. The exact way you build this will depend a lot on what you have available in your house.
Aim for at least four vertical 'walls' of fabric. If you're recording in your bedroom, see if you can construct something on top of your mattress, on the bed. That way you benefit from a 'floor' of heavy fabric.
Consider hanging mattresses or heavy blankets from the ceiling if you can.

My preferred solution at the moment is to create a lean-to on top of my bed using an extendable ladder as a support. One mattress is pinned up against the wall by the leaning ladder. The other lays on top of the ladder. A heavy duvet and sleeping back are clipped to the top, draping down over the two remaining sides.
Dry run
I print out the script. Read through it out loud a few times. At that point I often catch some last minute changes that need making.
Instructing the speaker
Professional voice artists won't need the following instructions, but your friend with the nice voice who's helping you out as a favour will.
Have your speaker repeat each sentence or paragraph multiple times in a row before moving to the next. Emphasise that they should repeat it as many times as necessary until they're happy that they did a handful of good takes.
Aim for at least three or four good takes - meaning no flubs, no mispronunciations - per passage before moving on to the next. Instruct your speaker to try alternate ways of speaking each section so you have more to choose between later.
Inexperienced speakers will want to apologise for each mistake they make. This can be a problem.
Apologies create significantly more work for whoever's editing the audio! So ask your speaker not to apologise but just to start again as often as necessary and repeat each section until they're comfortable with their performance.
- Let them know that if they have trouble articulating any section, they shouldn't be afraid of slowing down their speech as much as necessary in order to speak it fluently.
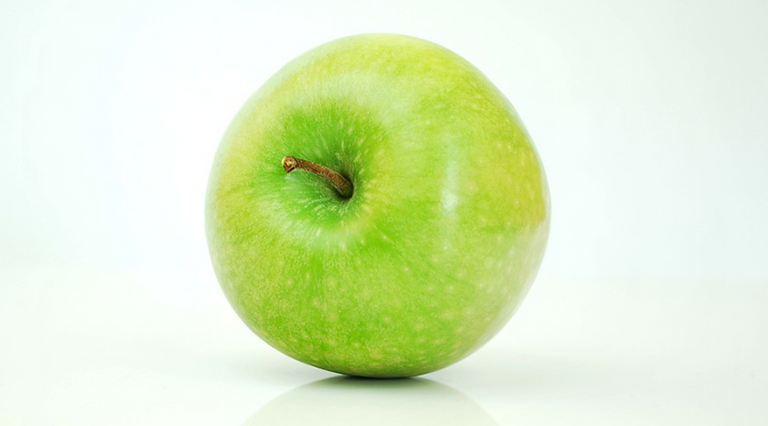
Have drinking water nearby and a green apple. Word is that the apple can help avoid clicky mucus sounds making their way into the recording - but if they do, it's not the end of the world. Have your speaker avoid eating any dairy, which contributes to mucus production.
Keep a print out of the script yourself, and a pen to make notes on it. Mark up any passages you want to go back to at the end and do some more takes on.
Many speakers (me included) tend towards speech that is too monotonous unless they're given specific instruction. So consider having your speaker exaggerate the dynamism in their voice (more voice modulation), err on the side of the delivery being too dynamic. And then do a slightly more reserved take at the end if you think it's necessary.
Often the vocal quality at the end of the session is quite different from at the start (either in a negative or positive way). Bearing this in mind, you might want to have your speaker repeat the very first could of passages right at the end of the session. That way, if the vocal quality at the end of the session is noticeably better, you can make use of that and give your piece a strong opening.
The recording

The mic, stand and recorder are in place. The script and a little light is inside the tent. Then I do this:
Close all the windows.
Turn off any air conditioning, and any other fans.
Turn off the fridge if I could otherwise hear it.
Put my phone(s) on airplane mode.
Turn off my doorbell.
Have the speaker get into the tent and make themselves comfortable.
When they're ready, have them begin speaking one of the louder passages (if there are any). Set the input level on the recorder to get a fairly high signal while avoiding clipping. Then press record and give the go ahead!
Next?
Was this rundown useful and/or interesting? Let me know in the comments. If there's sufficient interest I could follow this up with a post talking about the editing process.
If you're interested in making a talking head video on the cheap, do take a look at Andrew Levine's video: How to create GOOD ENOUGH Video With ONLY Your Smartphone.
Here are some other things I wrote that you might appreciate:
I'm Tomasz Kaye. I made George Ought To Help and other pro-liberty propaganda films. You can support my work on Patreon.com. I'm also on Twitter and Facebook.
Dude great information for us film geeks.. thanks for sharing
Good to see you posting again!
The girl who did George ought to help, You can always leave, & Edgar the exploiter, was fantastic. Very sincere, polished and warm.
Yes i think so too. Will pass on the compliment!
I like your article. You might try http://reaper.fm as an audio editor. I use it for music production and podcast editing.
It seems pretty capable. I'm so used to Ableton Live that it's unlikely I'd switch though, even though it's not perfect for editing. Does Reaper do OMF import do you know?
How do you do timing on your videos? Do you record audio first and match graphics to it?
I've experimented with voice recording before, and the one mistake I discovered that I was making was in having the microphone too far away, I had to increase volume to hear my voice and that increased background noise (computer fans). This was because I was recording tutorials, and I was recording audio and video live.
I always begin with the script, record that. Then use the edited narration track as the timing reference for everything else (Occasionally I'll make small timing changes later to facilitate some visual treatment I want to do).