Multiwallet/Delegate Server #LISK / #RISE / #DLISK using reverse Proxy from scratch on Debian8
Hi All,
because my rented VPS are running Debian8 by default I had some troubles with LISK/RISE/DLISK Node setup and decided to write the needed steps down.
This way you should be able to install a (delegate) node or online wallet for LIKS/RISE/DLISK from a scratch om a rented LAMP Debain 8 VPS.
These are the Steps :
Check if System is up to date and install needed packages
apt-get update
apt-get upgrade
apt-get install curl build-essential gzip python tar wget libssl-dev libpq-dev git sudo ntp
PostgreSQL
Install
First we need PostgreSQL but we need a newer version (> 9.5.2) as Debian has bundled in their default repository.
source : http://wiki.postgresql.org/wiki/Apt
Add the needed repository as own file
nano /etc/apt/sources.list.d/postgresql.list
add
deb http://apt.postgresql.org/pub/repos/apt/ jessie-pgdg main
save
get the PGP Key for the repository and add it:
wget --quiet -O - https://www.postgresql.org/media/keys/ACCC4CF8.asc | apt-key add -
Update packagelist and install PSQL
apt-get update
apt-get install postgresql-9.5
after install you can check the version with:
psql --version
psql (PostgreSQL) 9.5.3
Creating Databases and Users
User
sudo -i -u postgres psql -c "CREATE USER lisk WITH PASSWORD 'lisk';"
sudo -i -u postgres psql -c "CREATE USER rise WITH PASSWORD 'rise';"
sudo -i -u postgres psql -c "CREATE USER dlisk WITH PASSWORD 'dlisk';"
Databases
sudo -i -u postgres createdb lisk_main -O lisk
sudo -i -u postgres createdb rise_mainnet -O rise
sudo -i -u postgres createdb dlisk_main -O dlisk
Restrictions
sudo -i -u postgres psql -c "GRANT ALL PRIVILEGES ON DATABASE lisk_main TO lisk;"
sudo -i -u postgres psql -c "GRANT ALL PRIVILEGES ON DATABASE rise_mainnet TO rise;"
sudo -i -u postgres psql -c "GRANT ALL PRIVILEGES ON DATABASE dlisk_mainnet TO dlisk;"
Nonprivileged User to Run the Wallets (oner for each Wallet)
The way I prefere it, please check this Post : https://steemit.com/witness/@hagie/howto-create-a-witnessnode-on-a-fresh-rented-debian-8-linux-box
adduser lisk --disabled-login
adduser rise --disabled-login
adduser dlisk --disabled-login
answer all questions and create the user.
NodeJS and Wallets
Next we are going to install NVM and NodeJS in every user for the Wallets. NVM is a lifesaver in situations were you need different versions of nodejs on your system. With NVM you can start applications with a defined version without interfere with other.
This way we are independent of the Node Version the wallet requires.
The easiest Way to install NVM ist via the setup script. But of course you may visit git and download the source there and compile it by hand. https://github.com/creationix/nvm
Taken from the git repository:
To install or update nvm, you can use the install script using cURL (preferred):
curl -o- https://raw.githubusercontent.com/creationix/nvm/v0.31.4/install.sh | bash
or Wget:
wget -qO- https://raw.githubusercontent.com/creationix/nvm/v0.31.4/install.sh | bash
The script clones the nvm repository to ~/.nvm and adds the source line to your profile (~/.bash_profile, ~/.zshrc, ~/.profile, or ~/.bashrc).
Now logoff and logon again to your system and check if nvm is installed correctly
Do this step prior to every Wallet installation for the User 'lisk', 'rise' and 'dlisk'
LIKS / RISE / DLISK Wallet
LISK
switch to the #LISK user:
su - lisk
To install the recommended Version of NodeJS use the 0.12 branch
nvm install 0.12
Now using node v0.12.15 (npm v2.15.1)
Creating default alias: default -> 0.12 (-> v0.12.15)

wget https://downloads.lisk.io/lisk/main/lisk-source.tar.gz
tar -zxvf lisk-source.tar.gz
cd lisk-source
npm install --production
We use 'forever' as a background task launcher.
npm install -g forever --no-optional
edit the config.json:
change bind address to 127.0.0.1 (only local loopback)
"address": "127.0.0.1",
and add the database authentication information:
"host": "localhost",
"port": 5432,
"database": "lisk_main",
"user": "lisk",
"password": "lisk",
After saving the config file you can start the wallet with the command
node app.js' in the lisk-source directory.
You will see messages about the creation of the psql database and after same seconds it will start synchronizing the blockchain :
info 2016-08-05 07:43:21 Blockchain ready
info 2016-08-05 07:43:21 Peers ready, stored 5
info 2016-08-05 07:43:22 Checking blockchain on 121.42.181.194:8000
info 2016-08-05 07:43:22 Loading blocks from genesis from 121.42.181.194:8000
info 2016-08-05 07:43:33 Loading 1439 blocks from 121.42.181.194:8000
info 2016-08-05 07:43:33 Block 13332666788283026871 loaded from 121.42.181.194:8000 at 2
info 2016-08-05 07:43:34 Block 7234275607611561282 loaded from 121.42.181.194:8000 at 3
Cancel ctr-c and start it with forever:
forever start app.js
warn: --minUptime not set. Defaulting to: 1000ms
warn: --spinSleepTime not set. Your script will exit if it does not stay up for at least 1000ms
info: Forever processing file: app.js
forever list
info: Forever processes running
data: uid command script forever pid id logfile uptime
data: [0] H9VT /home/lisk/.nvm/versions/node/v0.12.15/bin/node app.js 8750 8753 /home/lisk/.forever/H9VT.log 0:0:1:34.795
with 'forever logs 0 (-f)' you can see the output generated by the wallet.
Now switch to the next user/wallet.
RISE
switch to the #RISE user:
su - rise
To install the recommended Version of NodeJS use the 6.x branch
nvm install 6
Now using node v6.3.1 (npm v3.10.3)
Creating default alias: default -> 6 (-> v6.3.1)
git clone https://bitbucket.org/risevisionfoundation/rise-core.git
cd rise-core
npm install --productive
cd public
npm install --production --no-optional
npm install -g forever --no-optional
change bind address to 127.0.0.1 (only local loopback)
"address": "127.0.0.1",
and add the database authentication information:
"host": "localhost",
"port": 5432,
"database": "rise_mainnet",
"user": "rise",
"password": "rise",
Same procedure like before, test by 'node app.js' and wait for blocksync to begin, ctrl-c and start in background by 'forever start app.js'
DLISK
With to the #DLISK user:
su - dlisk
To install the recommended Version of NodeJS use the 0.12 branch
nvm install 0.12
Now using node v0.12.15 (npm v2.15.1)
Creating default alias: default -> 0.12 (-> v0.12.15)
git clone https://github.com/DLiskProject/dlisk.git
cd dlisk
git submodule init
git submodule update
npm install --productive
npm install grunt-cli -g
npm install bower -g
cd public
For some reason the package.json File contains a ssh link to the git.
To get this running until the bug is fixed change in the public/package.json both occurrences of
"url": "[email protected]:DliskProject/dlisk-ui.git"
to
"url": "https://github.com/DliskProject/dlisk-ui.git"
npm install
bower install
grunt release
cd ..
npm install -g forever
change bind address to 127.0.0.1 (only local loopback)
"address": "127.0.0.1",
and add the database authentication information:
"host": "localhost",
"port": 5432,
"database": "dlisk_main",
"user": "dlisk",
"password": "dlisk",
Same procedure like before, test by 'node app.js' and wait for blocksyncc to begin, ctrl-c and start in background by 'forever start app.js'
APACHE
Since I was going the lazy way I rented a VPS with LAMP pack.
L- Linux
A- Apache
M- mysql
P- php
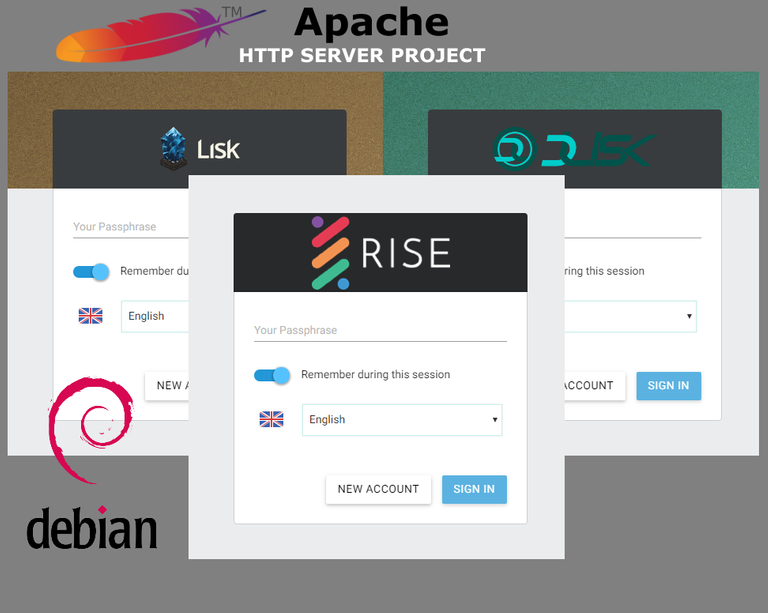
In this case we want to use Apache as reverseproxy to our wallets, make the wallets accessible by a unique URL without any ports.
We use the domain delegates.space to map the wallets to the URLS:
https://lisk.delegates.space
https://rise.delegates.space
https://dlisk.delegates.space
since we don't need (in this case>) phpMyAdmin we should completely disable the configuration for it :
a2disconf phpmyadmin.conf
Virtual Hosts
First we must enable 3 virtual hosts for the Incoming URLS:
Create 3 Files for the virtual hosts for the wallets
nano /etc/apache2/sites-available/lisk.delegates.space.conf

<VirtualHost *:80>
 ServerAdmin [email protected]
 ServerName lisk.delegates.space
 DocumentRoot /var/www/lisk.delegates.space/public_html/
 ErrorLog /var/www/lisk.delegates.space/logs/error.log
 CustomLog /var/www/lisk.delegates.space/logs/access.log combined
</VirtualHost>

sudo mkdir -p /var/www/lisk.delegates.space/public_html
sudo mkdir /var/www/lisk.delegates.space/logs
repeat for rise and dlisk accordingly
enable all sites in apache :
a2ensite lisk.delegates.space.conf
a2ensite dlisk.delegates.space.conf
a2ensite rise.delegates.space.conf
create dummy files to easier test the server
touch /var/www/dlisk.delegates.space/public_html/dlisk
touch /var/www/lisk.delegates.space/public_html/lisk
touch /var/www/rise.delegates.space/public_html/rise
If you restart the apache service 'service apache2 reload' and point your browser to one of the domains/hosts you should see the created dummy file.
Reverse Proxy
For Apache to act as a reverseproxy we have to enable additional modules:
a2enmod proxy_http
Considering dependency proxy for proxy_http:
Enabling module proxy.
Enabling module proxy_http.
To activate the new configuration, you need to run:
service apache2 restart
Now add two additional lines to the vhost configuration files which redirect traffic from the vhost to the wallet daemon on the system. For example LISK:
<VirtualHost *:80>
 ServerAdmin admin@lisk.delegates.space
 ServerName lisk.delegates.space
 DocumentRoot /var/www/lisk.delegates.space/public_html/
 ErrorLog /var/www/lisk.delegates.space/logs/error.log
 CustomLog /var/www/lisk.delegates.space/logs/access.log combined
 **ProxyPass / http://127.0.0.1:8000/**
 **ProxyPassReverse / http://127.0.0.1:8000/**
</VirtualHost>
If you now point your browser to http://liks.delegates.sapce your liskwallet should appaer.
Do the same accordingly for RISE and DLISK.
RISE: (for some strange reason the configured port (4242) is not used - istead 4444)
ProxyPass / http://127.0.0.1:4444/
ProxyPassReverse / http://127.0.0.1:4444/
DLIKS:
ProxyPass / http://127.0.0.1:8050/
ProxyPassReverse / http://127.0.0.1:8050/
SSL
To secure the System and encrypt traffic from outside to the wallets we have to enable SSL on the apache System.
We use letsencrypt free ssl certificates to accomplish that.
Go the their website @ https://letsencrypt.org/ read and maybe sponsor their project.
From there go to https://certbot.eff.org/ and choose Apache and Debian 8 and follow the instructions:
Switch to root if not already.
First add this line
deb http://ftp.debian.org/debian jessie-backports main
to your sources.list in /etc/apt/
apt-get update
apt-get install python-certbot-apache -t jessie-backports
certbot --apache
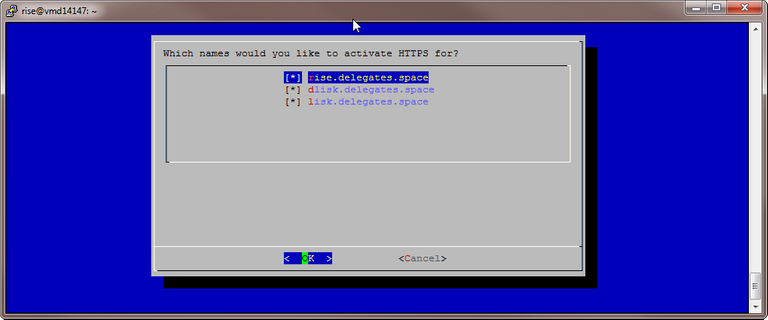
and follow the Instructions in the GUI
Choose the Names you want a cerificate for:
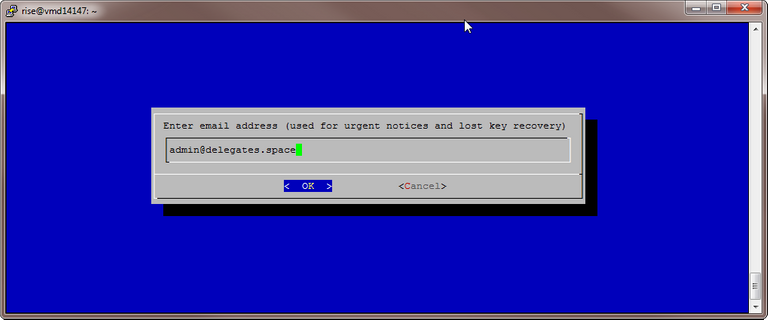
Enter email and accept term (go and read them !!)
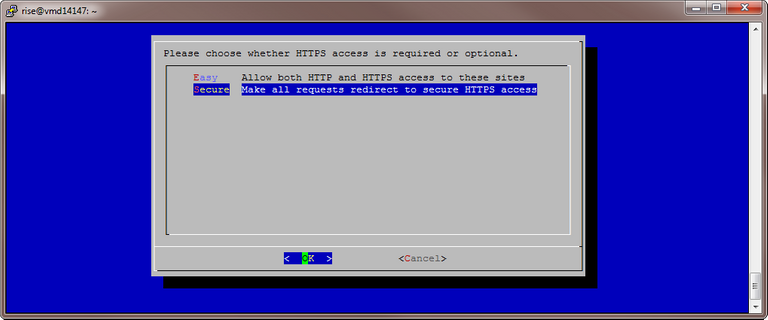
Choose the secure way with redirect to "https://"
THAT'S IT !!!!
Optional you could create a portal page on the host name (http://delegate.space) which kicks in every time a HOST is entered which is not configured. At the moment there should appear the default apache page.
Using your favorite firewall to close all ports except 80 & 443 for http/https
HINTS & TIPPS
Stuck Blockchain
It may happen that the blockchain stuck and isn't downloaded anymore. First you should try to restart the wallet.
If this doesn't help you may have to drop (delete) the content of the database and let the blockchain do a fresh sync.
Drop a database after stooping the wallet with the following command :
dropdb dbname from root and then recreate it as stated above under -> Creating Databases and Users
Control access and forging
there is a section in the config.json to controll who is allowed to use the wallet:
"api": {
        "access": {
            "whiteList": []
        }
If this is empty everyone may access the wallet. if it is filled with ip's you can controll who is allowed to access it.
Additional there is a forging section:
 "forging": {
        "secret": [],
        "access": {
            "whiteList": [
                "127.0.0.1",
                "192.168.1.2"
            ]
        }
    },
In this section you allow to switch the node in forging mode. Since only one account should forge on one node this should only be one person.
If you restart the node you have to restart forging from the GUI.
If you like to start forging automatically you can also put the private key (password / secret) into the secret field.
Thanks
That's all. Thanks for reading. if you have questions I like to answer. Leave comments or contact me here or over at BTCT.
If you like it or it helps you in any way please upvote.
If you still have room on your voting list I would be happy to receive your vote as witness.
See here my application as witneess : https://steemit.com/witness-category/@hagie/witness-application-hagie
or go directly to https://steemit.com/~witnesses and hit the up arrow in front of my name (currently #49).
I upvote U
thanks following you!
just transfered you SMD
https://steemit.com/giveback/@knozaki2015/paging-all-fellow-steemians-let-s-give-back-part-of-our-earnings-to-make-steemit-better
Transfer 2.500 SBD to hagie Nicht aufgeben! immer weiter so!
please keep posting in german!
Very nice tutorial you have here @hagie.
Great tutorial @hagie!