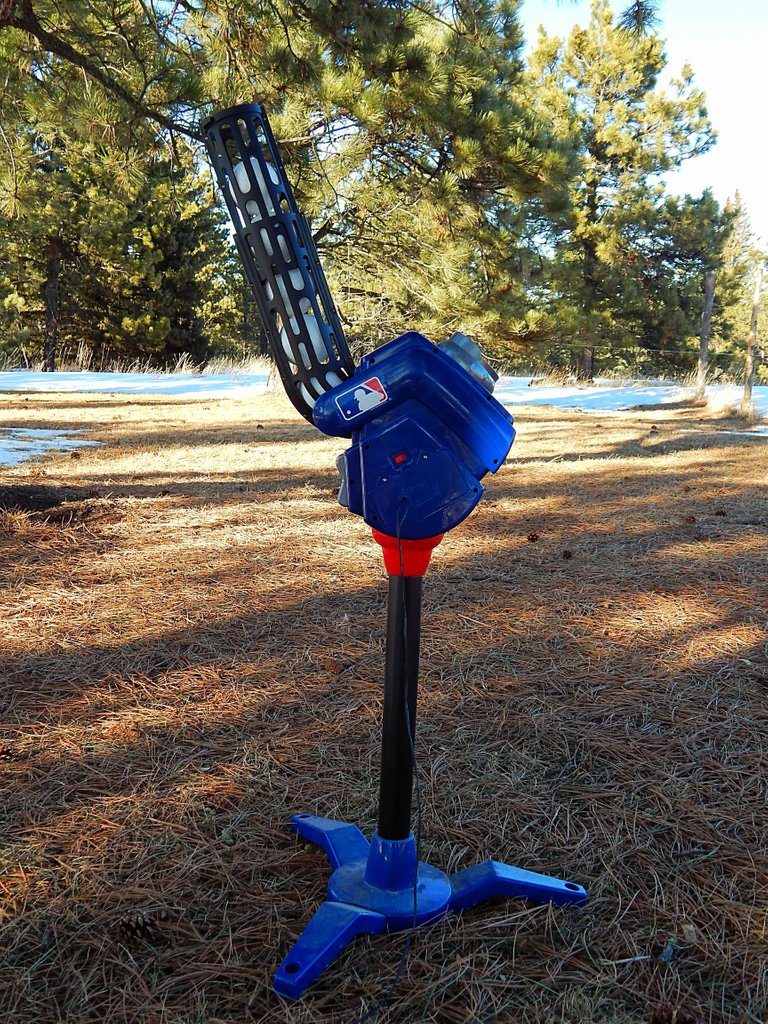
 We all have those devices that suck the life out of batteries, especially if you have kids. I mean look at this wonderful toy as an example, it requires (4) C batteries to function and you only get about 15 minutes out of the thing before it starts losing power. Have you seen the price of C batteries or any others for that matter? After a couple of uses, you have spent more on the batteries to run the device than you paid for it. So what can you do? Simple, hack it.
Now, I would bet that most of you, like myself have one of these lying around…
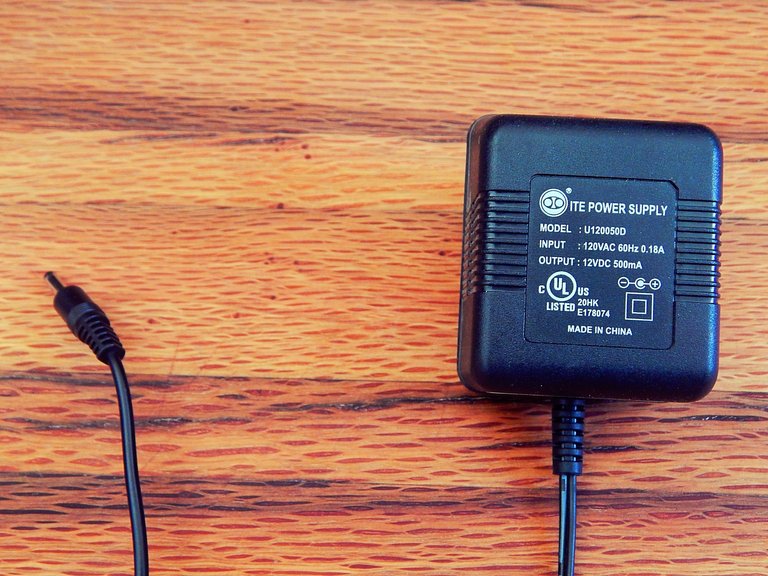 A “switching adapter” or power pack, it essentially changes AC to DC at different voltage depending on what you are trying to take power to. They come with almost every single electronic, even your cell phone charger would qualify as one. Most people have one of these laying around somewhere. If not you should be able to find them very cheaply online or in a local thrift store. You can simply covert this pack into a plug in for your device.
What You Will Need
- Power pack with similar voltage as the device you are trying to power
- Multi Meter (not required but does make the process easier)
- Soldering Iron and solder
The Process
Step One
Calculate the voltage of the devise you are trying to hack. If you have a device with either “AAA”, “AA”, “C” or “D” each battery has 1.5volts. These devises typically run each battery in series with means just add the voltage of each battery together. So, if you want to change a device with 4 batteries you will need a minimum of 6 volts. Another consideration is the amperage of the ac/dc converter you chose. For things like small motors you will want to choose one with a higher amperage, like above 400ma.
Step Two
Cut the end plug off the adapter (the part that plugged into the old device). Split the wires and strip each of them. Now you can plug it in and test with the multimeter to determine which end is positive. If you have the multimeter connected correctly there won’t be a negative symbol.
Step Three
Solder in two leads, one each to the first and last connections in the battery box. This way when testing your power pack you can switch the negative or positive wires easily.
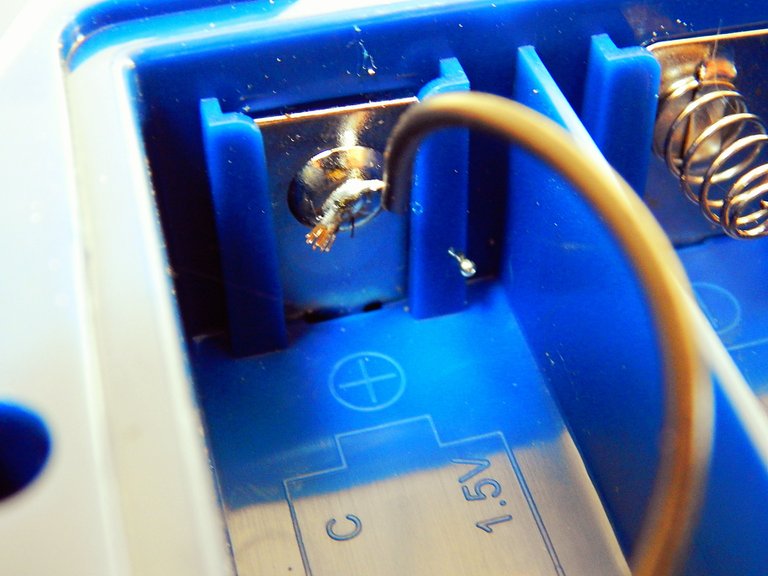
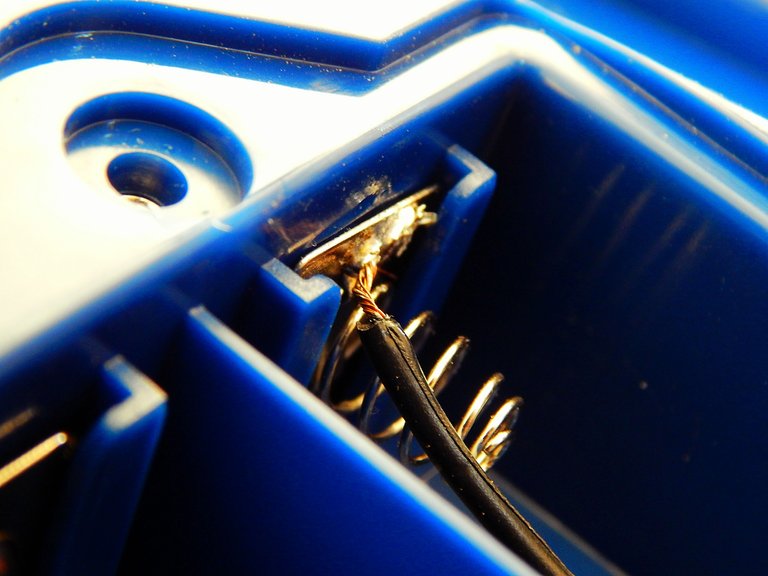
Just simply use a wirenut to connect these to your power pack wires. You are essentially looking for the negative and positive section that runs to the device you want to power. Depending on how many batteries are required and their layout the order of the first and last in the series plates, this may be a bit more difficult to figure out.
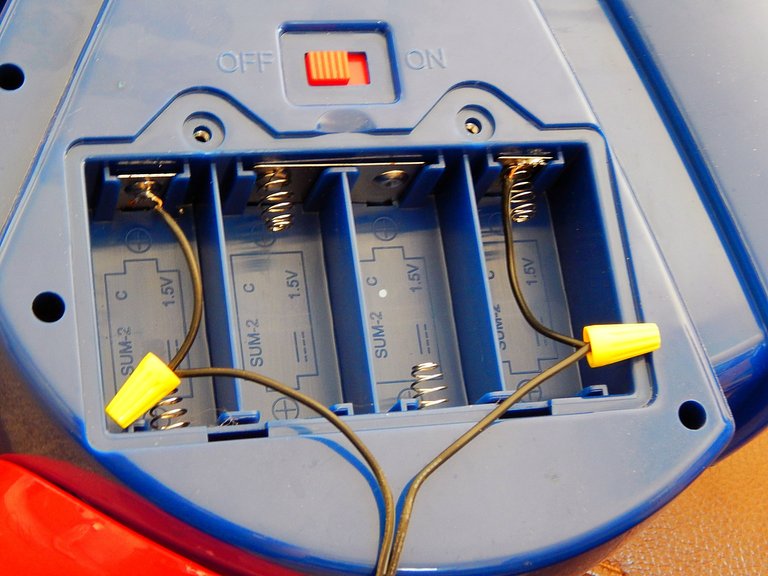
You can simply look and see if you can spot the “jumper” plates versus the ones actually delivering the power or test the different sections until the device powers up. Also the end with the spring is almost always the negative and the end with the bump is almost always the positive end. Be sure not to touch the two exposed wire ends to each other while plugged in or it will ruin the power pack.
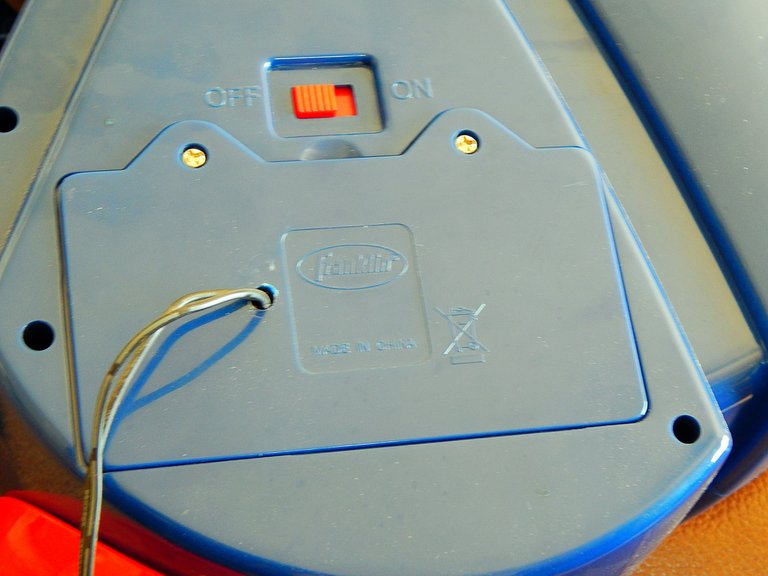
Then just simply drill a hole into your battery cover and the wire through, before connecting to the soldered ends.
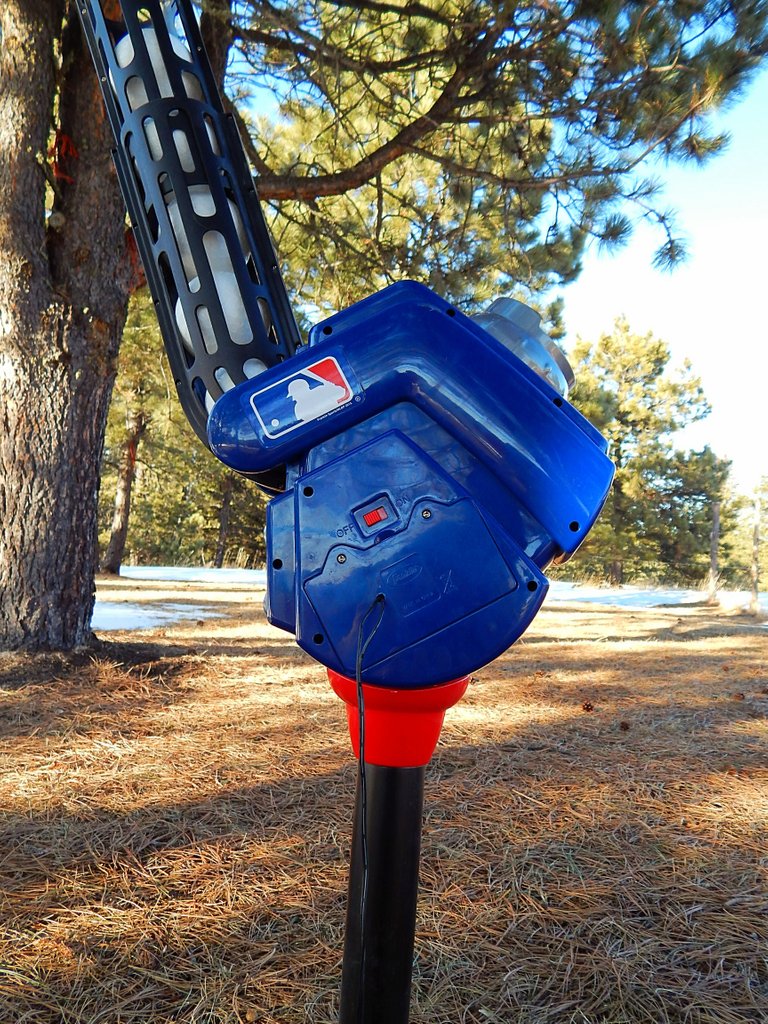
Of course this method should not be done with high end electronics, but for your cheaper electronics, if done correctly, can replace those costly batteries. We have found that with an item like this pitching machine that we actually get better performance due to the slight increase in voltage, as well as saving money on not having to buy batteries.
Please use caution when doing anything with electricity… use your head and practice common sense
We hope you found this post helpful,
Thank you for reading.

Nice life hack. Now I can power my robots forever ever and i'll never be alone again ;)
Haha...the robots will be thrilled 😉
You might get tangled a bit :)
great thinking.
Thank you!
Great tutorial!!!
Never thought about that trick....going to do the same to my iphone ;)
😄
Great post im only a bit surprised about battery usage :D.
Only my DSLR, laptop and my makita has rechargable batteries. I don't even have batteries at home!
Good for you! Thats amazing! I guess this isn't really the post for you then 😉😉😉
You brought me the idea to recycle a old battery drill. I can just make a cord on it.
YES! This totally works, I've done it. I used to do it when I was a kid. I even attached a tiny solar panel from a Radio Shack kit to a toy once. I've replaced some of our batteries with rechargeables in recent years although I know those are ultimately destined for landfills too. I will be doing this from now on. I've certainly got plenty of chargers laying around. Thanks you. Keep up the good work.
Thank you! We always seem to have chargers laying around. Speaking of solar...have you seen our solar kids cars??
https://steemit.com/diy/@llfarms/solar-powered-power-wheels-you-never-have-to-plug-in-w-trailer-hitch-how-we-did-it
Great life hack. I used to do this when I was in school and had sense completely forgot about it. Thanks
Thank you! It's old trick...but a good one. Perfect for the kids pitching machine!
Have done this before
Great post thanks for sharing
Thank you!
I've done the same with my kids bed carousel after the second time I heard the music it played on low power. Within a week.
I any case always think about safety (maybe the cord can be a hazard?) make sure that the cord is fixed to something and won't be picked up by the baby user. I fixed it to a bed bar using tighteneres and something I no longer remember to get the cable hidden from their hands on all length.