ATTENTION: This article does not include all the hyperlinks, photos, and videos. Please visit the following link for the full article: http://pieceofwanderland.com/zion-in-3-days/
ZION NATIONAL PARK X SUBWAY TRAIL VIDEO:
Zion is very unique compared to other National Parks in America. The combination of walking through flowing water and gazing upon colorful rock structures provides an experience like no other. Three days not enough time to spend at Zion, but if that is all you have, then this is what I would recommend doing.
Entrance Fee for 7 days: $30 per Vehicle. More prices here
NOTE: DO NOT throw away your receipt! You need it to re-enter the park.
What To Bring
Here is a list of important items to bring that you initially might not think to bring to Zion. Since some of the park’s hikes are in the water, make sure you are prepared for those situations.
• Two Pairs of Shoes - Your regular hiking/tennis shoes and water shoes or old tennis shoes with a lot of traction
• Extra Socks
• Swim Suit – If you don’t get wet while hiking, you’re going to want to cool off in the river afterwards.
• Hat/Sunglasses – The sun is blazing.
• Waterproof Phone/Camera Case/Zip Lock Bags/Disposable Waterproof Camera
• Hiking Stick – If you have one. They are inexpensive to rent.
Where to Camp
Watchman’s Campground (Reservation): $20 per tent site; $30 per RV site
South Campground (First Come, First Serve): $20 per individual campsite; $50 per group campsite; No RV hookups
If you have the option, book your camping early and camp at Watchman’s Campground. However, if you’re like me and decide to go last minute, you’ll have to try to get a spot at the first come first serve campground, South Campground.
We got lucky and were able to book our first night at Watchman’s Campground. If you’re coming late in the day, you won’t get a spot in the first come first serve camp ground. Even though doors don’t open until 7:00am, you should really try to get there by 5:30am to ensure a spot. We got there at 6:30am on Thursday and were able to get a spot, but keep in mind that it was Thursday and the weekends might be busier.
Both campsites have access to the Virgin river where you can swim and relax in after a long day of hike (see video).
TIP: Get to South Campground as early as possible and get comfortable. The wait could be 1-3 hours. Post up, make some breakfast, and prepare for the day. While you wait, send someone over to the visitor’s center (10 minute walk) for information and guide books for your hikes.
Getting Around
Most of the National Park is off limits to personal vehicles, but there is an efficient shuttle system that takes you everywhere you need to go. The shuttle can even take you into town for food and supplies, although it is just a quick drive or bike ride away. Don’t let the long lines deter you, the lines move relatively fast as shuttles come every few minutes during peak season. Click here for the shuttle schedule and map.
DAY 1: Hike The Subway Trail or Angels Landing
If you had to choose between The Subway Trail or Angels Landing, you should pick The Subway Trail. Angel’s Landing is a well worth it hike with 360 degree breathtaking views of the canyons, but The Subway Trail is a unique, gorgeous oasis that is exclusive to only a select few people a day. Enter the lottery for The Subway Trail and if you don’t make it, then shoot for the heavens with Angel’s Landing.
The Subway Trail
The very first day you get there, you should try to hike The Subway Trail. It is recommended that you apply for the lottery a couple days before you want to go on the hike. You will have to pay a non-refundable fee of $5, but you can apply your whole group. If you “win”, then your group will have pay $15 for the permit. For more information on how to obtain a permit click here.
If you didn’t apply for the lottery in advance, don’t worry! You should check with the visitor’s center to see if there are any empty spots left that day. We got there midday Thursday and were going to apply for the hike on Saturday. However, we were told that not many people applied for the lottery that day and we got a spot immediately.
Duration: 8 miles round trip; 6-8 hours
Difficulty: Strenuous
What to Bring: Subway Trail Permit (Important!), at least 3 Liters of water per person, snacks and lunch, hats/sunglasses, swimsuit (optional), water shoes or other shoes, waterproof camera or plastic bag (optional), hiking stick (optional), a detailed guide/description of the subway trail
TIP: A guidebook or description of the trail is essential to have as there is no real path and it can be confusing to navigate. If you don’t want to purchase one, then check out Joe’s description of the trail online here.
Where to Start: There are two ways to hike the Subway, but the easiest way is from the bottom up, starting at the Left Fork Trailhead. It is in another area of the park, about a 40 minute drive from South Campground. Get directions here.
Other routes through the Subway can require some repelling, swimming, and climbing over more obstacles, but provide some rewarding scenery. For more information on other routes, click here.
We started hiking down from Left Fork Trailhead a little past 12:00pm. This is the latest time you could start this hike as we barely made it back before sunset. I would recommend starting early in the day to ensure time to enjoy the nature. Pack a good lunch and lots of snacks as there are plenty of oasis spots with mini waterfalls and rocks to relax on.
Although, this hike is relatively cooler than Angels Landing, do not under estimate the amount of water you will need. BRING LOTS OF WATER. Seriously. If is wasn’t for this man with a water pump/filter tool, we would have died out there.
Once you get down to the river bank, the trail is pretty much non-existent. You have to make your way through areas that look the most clear.
TIP: Make sure to take a photo or mark the area where you descended from the canyon and reach the river. It can be easy to miss your exit on the way back.
We ended up zig zagging through the creek until we got to the first red falls. Now, there are TWO red falls so do not get confused when you pass the first one and are not at the subway yet. After you pass the second red falls, you will see the opening to the subway.
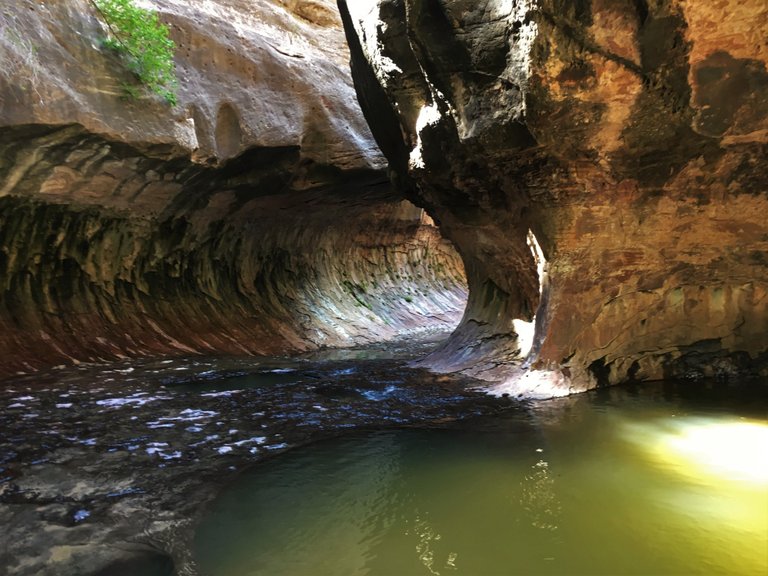
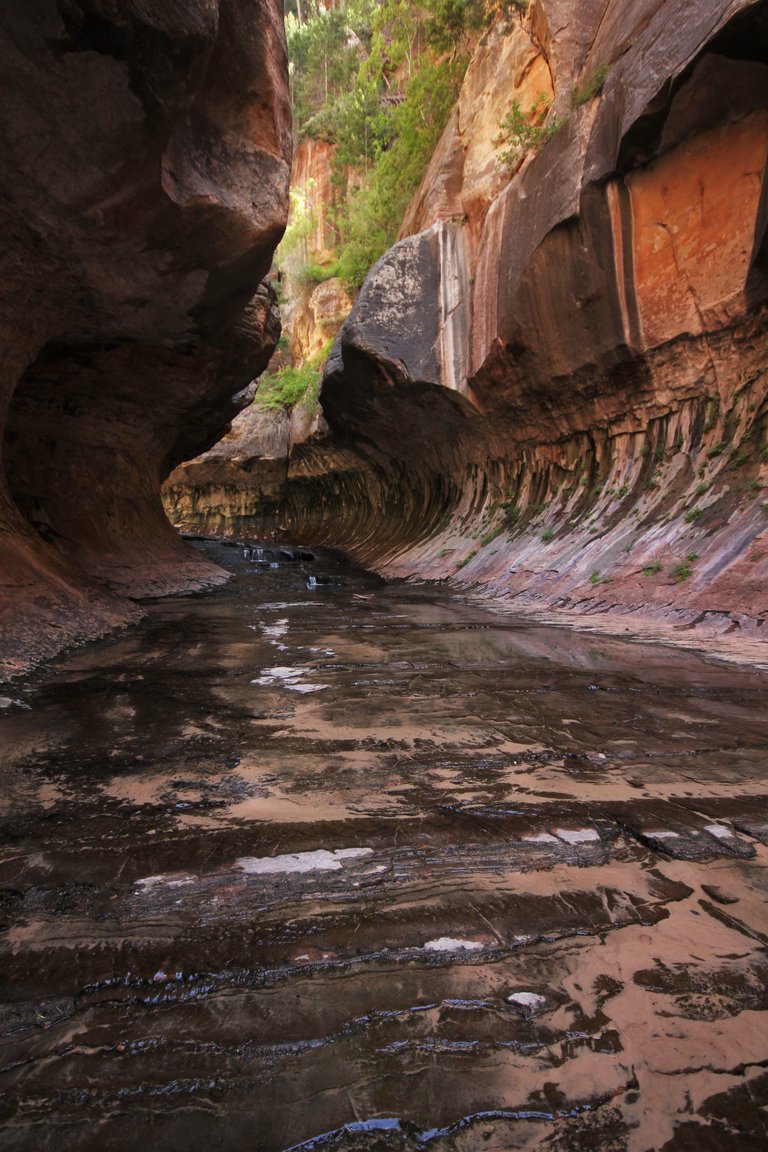
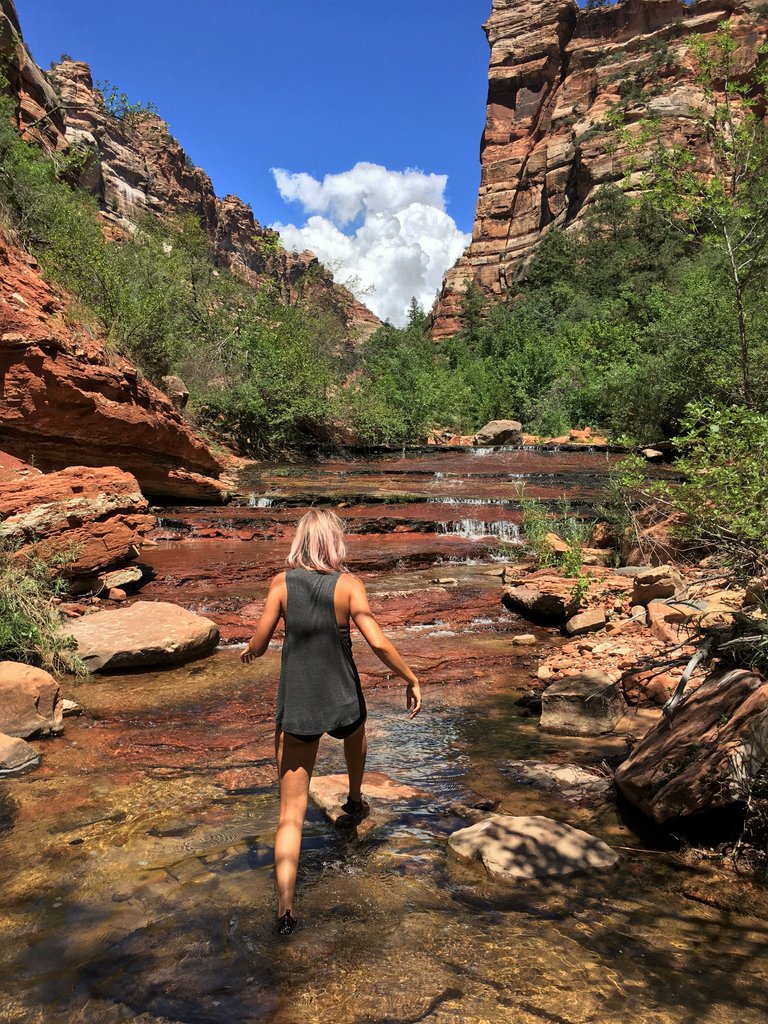
Once you get to the Subway, you will know. It is spectacular. If you want to cool off, take a dip in the variety of emerald pools. It is very slippery and you can even slide down the rocks into the pools (or fall on your butt and throw your phone in the air, like me).
TIP: Through the end of the subway there is a narrow area with lots of water that gets a little deeper. Make your way through and turn the corner to find a little waterfall cave hide out that most people do not know about.
Besides the fact that I almost died of dehydration and was attacked by a swam of spiders, this hike was definitely one for the books. If you are lucky enough to go on this hike, you will be one of the few people in the world to be able to experience this and that is truly special.
Angel’s Landing
Duration: 5 miles round-trip; 4-5 hours
Difficulty: Strenuous
What to Bring: at least 3 Liters of water per person, snacks and lunch, hats/sunglasses, hiking shoes with good traction, hiking stick (optional)
Legend has it, that this peak is so high, that only angels could land there. With an elevation change of 1,488 feet, you end up taking in sights that only angels are capable of seeing. Make sure to start early in the day. The more crowded and hot it gets, the harder the hike becomes.
Be aware that this hike is not for people who have an extreme fear of heights (unless you’re trying to face your fears). The terrain is difficult, there are some very narrow paths and steep drop offs during the last half mile of the trip. There are chains available in those sections, but you will be hanging on for your dear life.
TIP: If you are feeling a little nervous finishing the whole hike, stop at Scout’s Lookout for a decently satisfactory view of the canyon. Have a little picnic and wait for the rest of the crew to finish the hike.
Angel’s Landing was high on my list, but we didn’t end up hiking that this trip. All the more reason to come back right? Until then, find out more information on the Angel’s Landing hike here.
LOCAL TIP: “Look into the Observation Point trail for a less traveled hike and more amazing view. It’s a little bit more challenging, but there is higher elevation gain and the view is definitely worth it.” – Jack (Waitor at MeMe’s Café)
Relax in the River
After a long days hike you’re going to want to relax and unwind. Throw off your muddy hiking shoes, grab a beer (yes, you deserve it), and jump into the virgin river near the campground. The cool water really feels good on that sunburn. You’ll find all sorts of people floating around and rope swinging into the river. Tiny little frogs and fish also playfully enjoy the river bank. Don’t forget to throw away your trash afterwards!
DAY 2: Stroll Through the Park and Explore the Town
For us, day 2 was rest day. The Subway Trail kicked our butt. We decided to explore the cute little town of Springdale, then spend the afternoon roaming around some more mellow trails in the park.
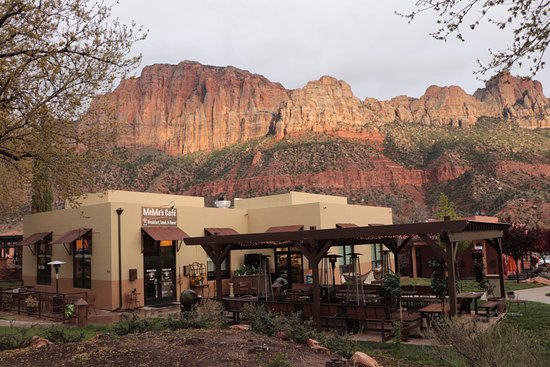
Breakfast at MeMe’s Cafe
We started with breakfast at MeMe’s Café. They caught our eye with their ambient outdoor seating with views of the canyon. Make sure to check out their quiche of the day. They are constantly switching it up with unique daily homemade quiches. Their caprese quiche was AMAZING.

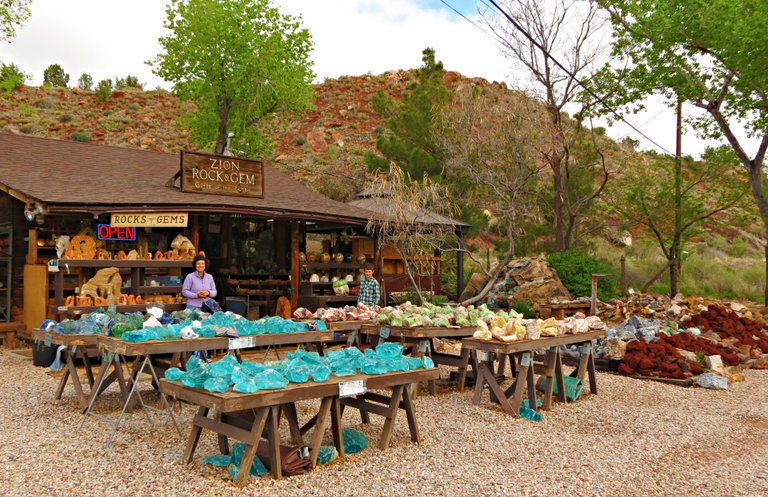
Shopping
Check out the numerous rock and gems stores that line the streets of the zion town with endless tables of giant stones. The variety is amazing and the prices are very fair.
Zion Human History Museum
Take a moment to visit the Zion Human History Museum to learn about how the national park was formed and the history of the people that initially lived there. It will really make you appreciate your surroundings at Zion. The exhibits are always changing, but they can include everything from preserved critters, geology replicas, cultural artifacts, and modern art.
TIP: There is a free 22 minute video available for visitors to watch. Take a seat and get an informative overview of the park.
Canyon Overlook
For a panoramic view of the canyons without the sweat of Angel’s Landing, take a scenic drive and go through the tunnel to reach the Canyon Overlook trail. It’s a quick 1 mile round trip hike with an elevation gain of about 1,000 feet.
The path is mostly paved and easy to get up to. After passing a cool shaded alcove lined with lush ferns embedded in the walls, you will climb up a few more steps and reach the main canyon viewpoint. Make sure to check out the plaque as it points out several prominent landmarks. Click here for the trail head’s location.
Pa’rus Trail and Canyon Junction Bridge for Sunset
Right before sunset, take a stroll along the virgin river on the Pa’rus trail starting from South Campground. It is about 3 miles round trip and will take you about 1-2 hours. The trail is well paved and contains many wildlife and flowers.
This trail will take you to Canyon Junction Bridge, which is where you want to be for sunset. This is a popular spot for photographers at sunset and you will get some truly amazing shots of the Virgin River and Watchman’s.
TIP: Don’t forget your flash light for the way back!
Interpretive Talk at Watchman Campground
In the evening, walk on over to Watchman’s Campground Amphitheater for a ranger led talk about Zion. The topics change each day and you can check out the schedule online before you go if you want. The talks start at 8:30pm and go on for about an hour.
We took some beers (hey, we still deserved it, walking is exercise too) and snacks over there and posted up with a blanket. The ranger led a half signing, half informative talk about the animals in Zion and it was fun to follow along.
DAY 3: The Narrows Trail
The Narrows
Duration: 8 Miles roundtrip; 6-7 hours
Difficulty: Moderate – Strenuous 6 minutes
What to Bring: at least 2 Liters of water per person, snacks and lunch, jacket (depending on season), swimsuit, water shoes or an old pair of tennis/hiking shoes, waterproof camera or plastic bag, hiking stick (optional), trail map (Click for free trail map)
TIP: Some stores might try to upsell you on renting equipment (water socks, water shoes, walking sticks etc.), but most of the time you won’t really need it. This guy convinced me that if I needed anything, it was water socks to avoid soggy feet. However, I ended up never using them and my feet were wet, but they were perfectly fine.
The Narrows is the most popular hike in Zion. Most people start the hike from the Temple of Sinawava and hike up stream, but you can also hike from the top down if you are looking for something more adventurous. The hike is done almost all in the water of the Virgin River through canyons that get more narrow the further you go.
TIP: Go as early as possible. The shuttle wait lines get longer throughout the day and there ends up people more people on the trails.
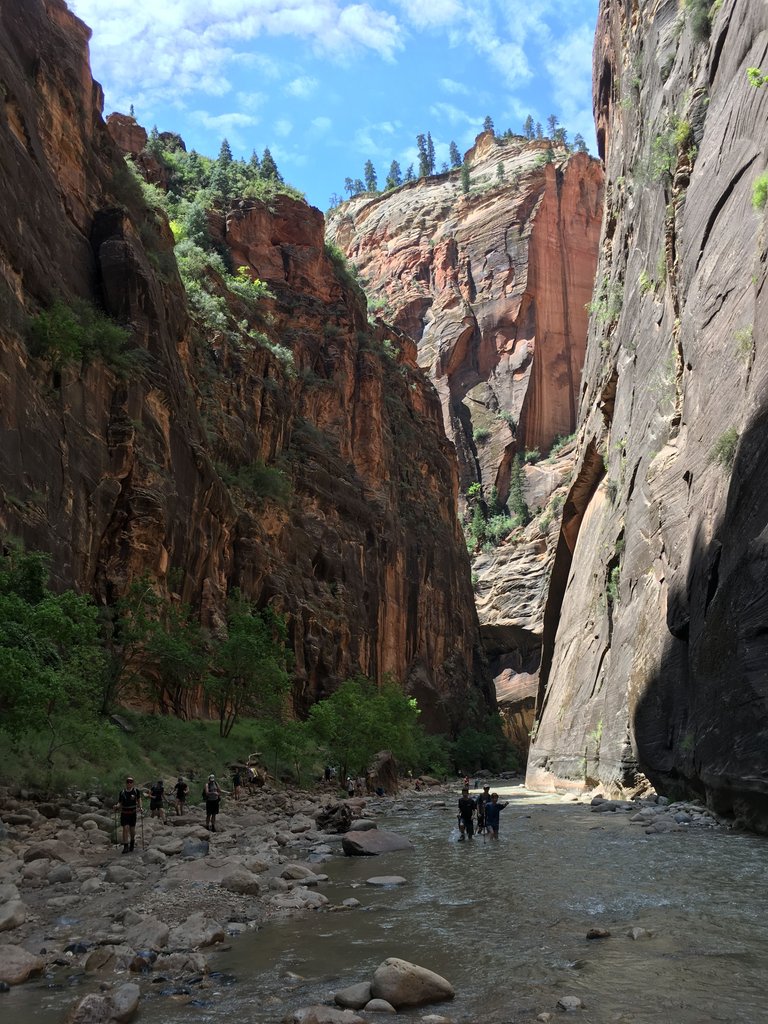
The hike starts with the lovely, paved Riverwalk trail for 1 mile until you hit the river bank. There, people put on their water shoes and put their phones in zip lock bags. It is recommended you have a walking stick since it is hard to see how rocky or deep the water is below. You can rent one for about $7, but I decided not to rent one and I only fell once!
In the beginning, there are various little islands along the river bank to stop and have a snack, but the further you go, the less you see of these. Water is usually calf or knee deep, but there are some areas that get to nipple deep. It is hard to tell how deep it is since the water is so murky, but trust me. You. Will. Get. Wet.
Even though the total hiking time is about 7 hours round trip, this time could vary as you can turn back at any point. Take a look at the trail map to see how far you want to go. Wall Street is famous for being the most narrow sections of the river so I would recommend making it at least to the start of Wall Street. It takes about 2-2.5 hours to get there.
Unfortunately, we did not get a chance to go to wall street. It started raining an hour and a half into our hike and we had to turn back due to flash flood warnings. Luckily there was no flash flood, but we found out they closed the trail once we got back to land.
TIP: Make sure to check the probability of a flash flood before you hike that day. You can check online here or at the Visitor’s Center. Study the warning signs and know what to do if you encounter flash flood warnings.
Overall, the hike is not one to miss. The experience you have at the narrows is like no other. Being at the bottom of the canyon, you can really see the history in all the layers of the rocks that surround you.
Stargazing
Don’t forget to look up at night while in Zion. National Parks are one of the few places you can see so many stars in America. After a long day of hiking, grab a blanket and a beer (yes, you’re on vacation) and gaze upon the Zion night sky.
Although you can see the stars from anywhere in the park, the visitor’s center patio is a great option for a wide, clear view of the sky. Sometimes, there might be a “Zion Night Sky Special Events” led by the rangers who will interpret wondrous night sky for you. Check if there are any special events here.
TIP: Nerd out and get a star chart to identify constellations and even planets. I just got the “Star Chart” application on my phone and it’s free! Download the app here.
After three days in Zion, all I can say is I will be back! The magic of this place is unexplainable and you really have to be there to experience it. Expect an updated guide with more details and new hikes in the near future. Until next time, Zion!
NOTE: Please keep in mind that this is my recommendation for what to do at the park. Adjust this itinerary to fit your needs and weather conditions. Always check the weather conditions before you plan on going on a hike as trails might be closed due to bad weather and flash flood warnings.
Hey @alisonj808, welcome to Steemit!
Welcome to Steem @alisonj808 I have upvoted and sent you a tip
Hello and Welcome! Nice to meet you! Thanks for join
Welcome to Steemit. Thanks for sharing.
Nice to meet you, @alisonj808! Welcome to the Steemit Community, wish you good luck and a good start, ive send you a small tip and followed you, hope you have an amazing day! :)
Congratulations @alisonj808! You have completed some achievement on Steemit and have been rewarded with new badge(s) :
Click on any badge to view your own Board of Honor on SteemitBoard.
For more information about SteemitBoard, click here
If you no longer want to receive notifications, reply to this comment with the word
STOPWelcome to steemit @alisonj808. Great post.
Please do not use the #introduceyourself tag on posts that are not introductions.
Hi! Sorry. It was my first post. I didn't know.
Congratulations @alisonj808! You have completed some achievement on Steemit and have been rewarded with new badge(s) :
Click on any badge to view your own Board of Honor on SteemitBoard.
For more information about SteemitBoard, click here
If you no longer want to receive notifications, reply to this comment with the word
STOPCongratulations @alisonj808! You have received a personal award!
Click on the badge to view your Board of Honor.
Congratulations @alisonj808! You received a personal award!
You can view your badges on your Steem Board and compare to others on the Steem Ranking
Vote for @Steemitboard as a witness to get one more award and increased upvotes!