Who says beginners can’t create cool design projects? Play with these features and you’ll be surprised how easy it is to use Adobe Photoshop CC.
Improve your skills by leaps and bounds

WHAT YOU WILL NEED
http://learndownload.adobe.com/pub/learn/photoshop/photoshop-for-beginners.zip
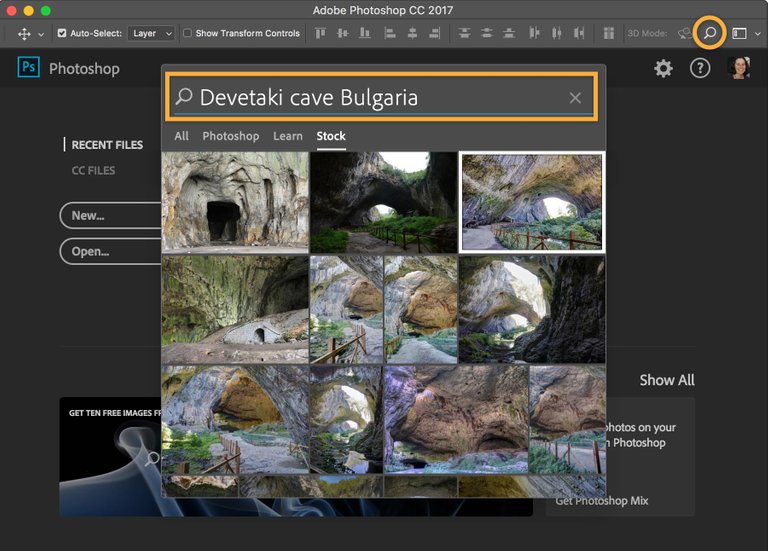
1.Find the perfect image for your project with Adobe Stock
Open Photoshop and click the Search icon (magnifying glass). In the Search field, type a search term. Click the image you wish to use and the Libraries panel will open with a watermarked preview of the image.
Double-click the image in the Libraries panel to open it in your document.

Choose File > Save.
See more information on https://helpx.adobe.com/ie/stock/how-to/adobe-stock-creative-cloud-libraries.
2. Change the feel of an image using an Adjustment layer
To change the feel of the original photo in the upper left corner, choose Window > Adjustments and select Hue/Saturation (circled).
In the Properties panel, adjust the values for Hue, Saturation, and Lightness, and then select Colorize to create a duotone-like, single color cast.

3. Create a cool type effect with a clipping mask
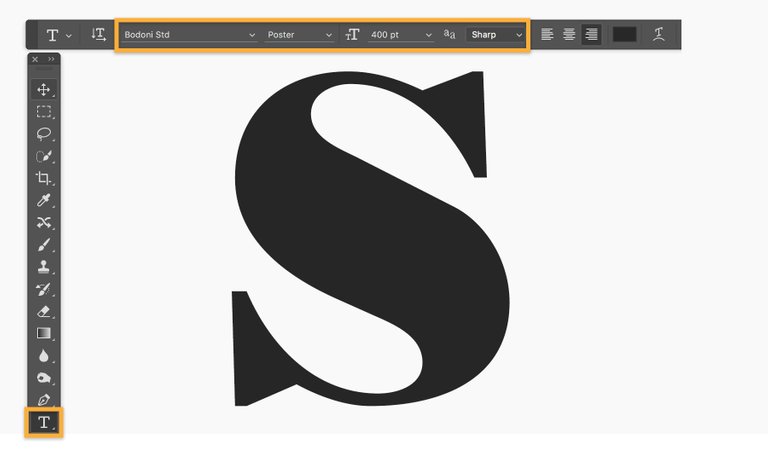
Create a new document. Select the Type tool and type a letter or word on the screen. We used Bodoni Poster at 400 pt.
Click anywhere on the canvas to place the type
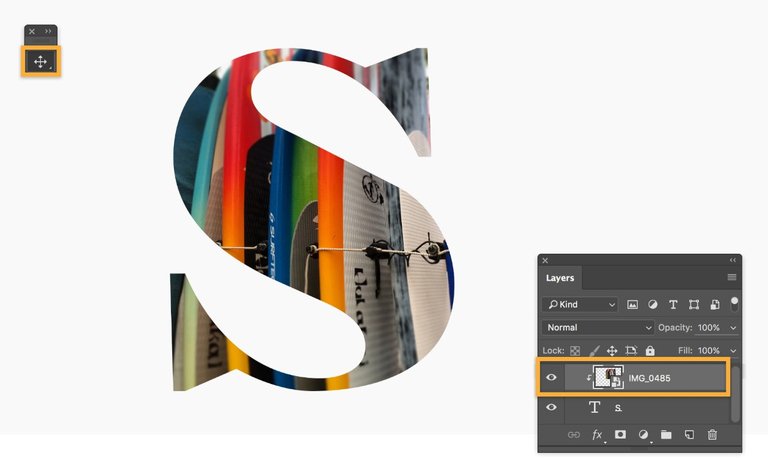
Drag an image from your computer or place an image from Adobe Stock over the entire letter.
Open the Layers panel (Window > Layers).

In the Layers panel, select the photo layer, and then choose Layer > Create Clipping Mask to clip your photograph to the type. With the image layer still selected, use the Move tool to move the image under the type until you get the ideal composition.
Now you can add other elements to the composition to complete your design.

Who says beginners can’t create cool design projects? Play with these features and you’ll be surprised how easy it is to use Adobe Photoshop CC.
WHAT YOU'LL NEED
Get files Sample files to practice with (ZIP 5.5 MB)
- Find the perfect image for your project with Adobe Stock
Open Photoshop and click the Search icon (magnifying glass). In the Search field, type a search term. Click the image you wish to use and the Libraries panel will open with a watermarked preview of the image.
Double-click the image in the Libraries panel to open it in your document.
Choose File > Save.
See more information on licensing Adobe Stock images.
Change the feel of an image using an Adjustment layer
To change the feel of the original photo in the upper left corner, choose Window > Adjustments and select Hue/Saturation (circled).
In the Properties panel, adjust the values for Hue, Saturation, and Lightness, and then select Colorize to create a duotone-like, single color cast.Create a cool type effect with a clipping mask
Create a new document. Select the Type tool and type a letter or word on the screen. We used Bodoni Poster at 400 pt.
Click anywhere on the canvas to place the type.
Drag an image from your computer or place an image from Adobe Stock over the entire letter.
Open the Layers panel (Window > Layers).
In the Layers panel, select the photo layer, and then choose Layer > Create Clipping Mask to clip your photograph to the type. With the image layer still selected, use the Move tool to move the image under the type until you get the ideal composition.
Now you can add other elements to the composition to complete your design.
4. Select part of an image and add it to another
To follow along, download the two images located in the What you’ll need section at the top of this page.
Open the SunnyPath image in Photoshop, and then add the FloatingWoman image, which will appear on a separate layer. If you’re not sure how to get two images on separate layers, see this super-quick tutorial on
https://helpx.adobe.com/ie/photoshop/how-to/composite-add-move-images.html
Choose Window > Layers to open the Layers panel. Click the Eye icon to hide the SunnyPath image from view.

Choose Select > Select and Mask from the main menu.
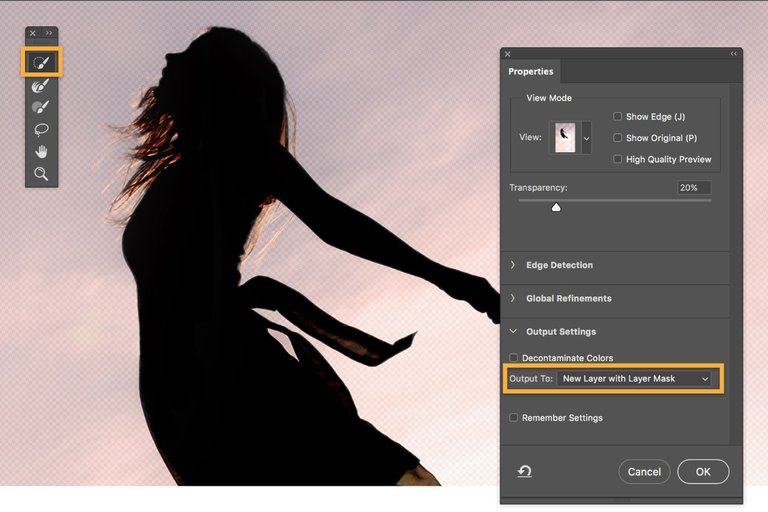
Use the Quick Selection tool to select just the woman, without the background.
When you’re satisfied with the mask you’ve created, go over to the Properties panel and choose Output To: New Layer with Layer Mask. Click OK to return to the regular page view.
In the Layers panel, click the Eye icon to hide the original FloatingWoman layer, and reveal the SunnyPath layer.
With the Move tool selected, select the FloatingWoman layer with the layer mask that you just created, and position it so that the woman appears to be floating above the path.
Choose File > Save.

Source
Plagiarism is the copying & pasting of others work without giving credit to the original author or artist. Plagiarized posts are considered spam.
Spam is discouraged by the community, and may result in action from the cheetah bot.
More information and tips on sharing content.
If you believe this comment is in error, please contact us in #disputes on Discord
Hi! I am a robot. I just upvoted you! I found similar content that readers might be interested in:
https://helpx.adobe.com/photoshop/how-to/photoshop-for-beginners.html
Thank you...