지갑 생성부터 CPU 채굴기 셋팅까지...
Wallet generation to CPU miner setting
안녕하세요.
밀린게임하는 남자입니다.
가끔 회사나 집컴으로 잡코인을 캐곤하는데 나노렛져S 글을 읽다가 NIMIQ라는 코인을 알게되어 채굴하는 방법에 대해서 적어볼까 합니다. (CPU가 x64 지원해야 가능합니다.)
우선 지갑부터 만들어 보겠습니다.
홈페이지에 접속 합니다. - https://nimiq.com/
Hello.
I'm a guy who buys and plays games that I couldn't stack up.
Sometimes, I use computer to mining and I know the coin called NIMIQ and write about how to mining. (This is possible only if the CPU supports x64.)
First, I will make a wallet.
Access the homepage. - https://nimiq.com/
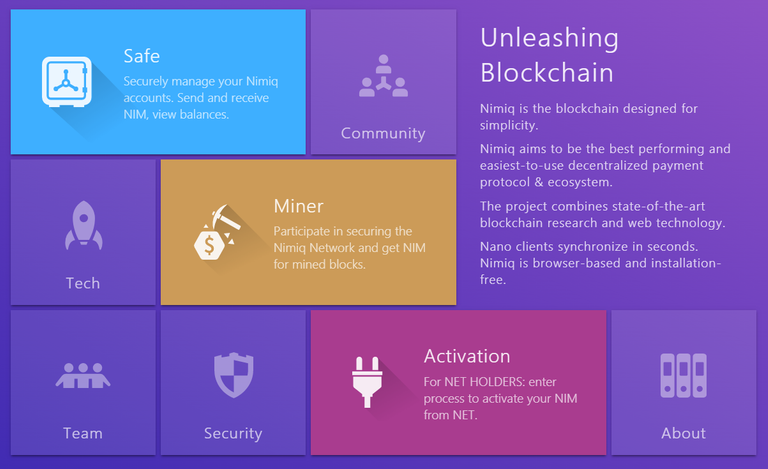
세이프를 클릭합니다.
Click Safe.
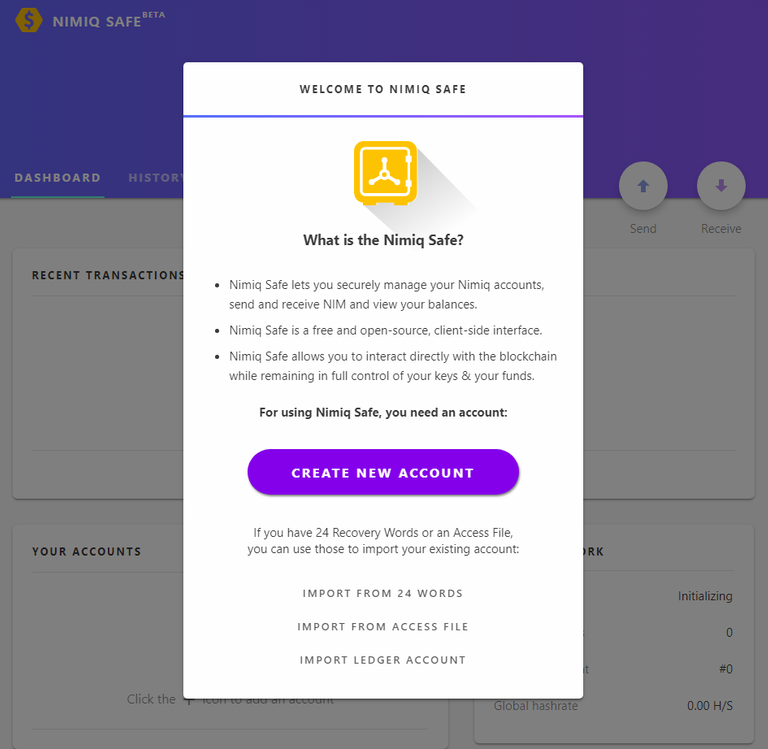
그러면 잠시 로딩 후 계정 생성 화면이 올라옵니다.
Then, after loading for a while, the Create Account screen appears.
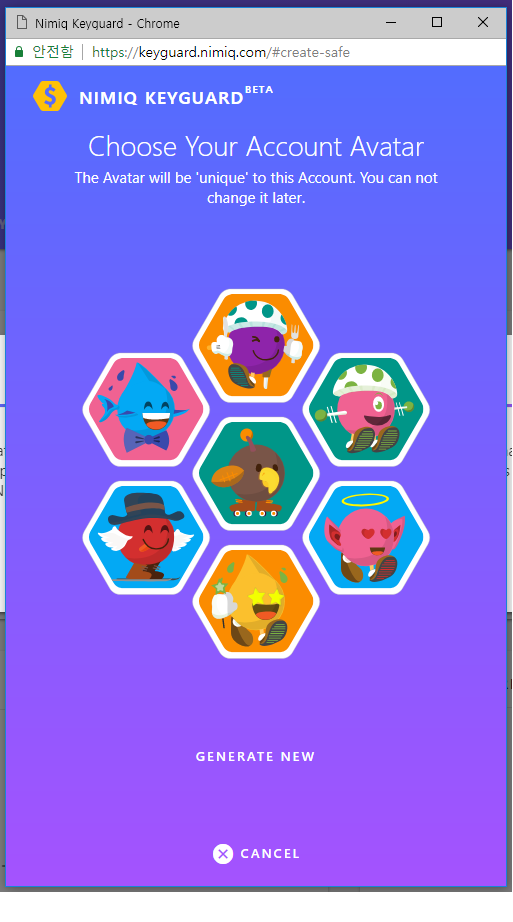
계정 생성을 클릭
그러면 아이콘이 뜨는대 적당한 것을 하나 선택해 줍니다.
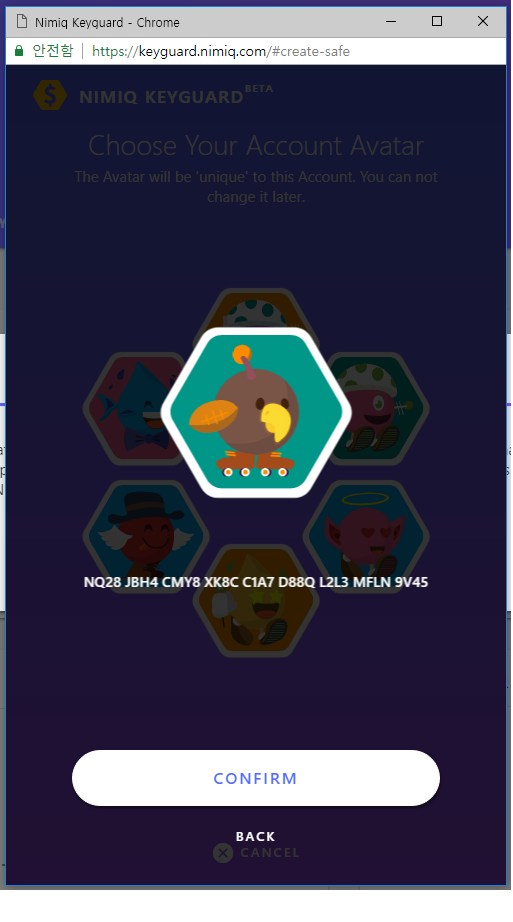
그러면 하단에 자동적으로 공개 지갑주소가 보일것입니다.
일단 여기서 하단의 진행을 선택합니다.
Click Create Account
The icon then pops up and selects the appropriate one.
You will see the public wallet address automatically at the bottom.
Select the bottom run here.
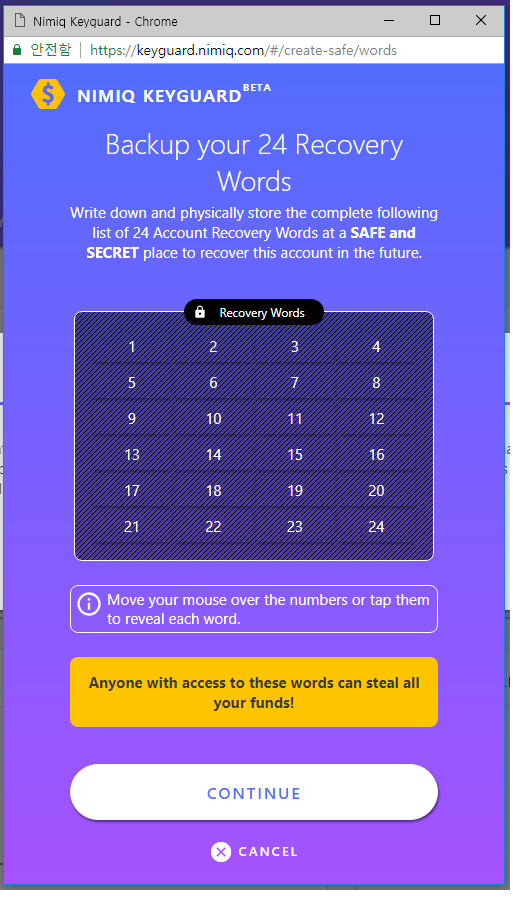
이제 핵심인 암호창이 뜰껍니다.
nimiq 코인지갑은 자신이 암호를 만드는 방식이 아닌 은행의 보안카드 같은것을 발급받아 사용하는 방식입니다. 숫자 위에 마우스를 가따대면 암호가 뜰껍니다. 이것을 메모장이나 스크린샷이나 폰으로 찍어서 보관해야 합니다.
암호를 모두 저장하였으면 하단의 진행을 선택합니다.
And now, you'll see the key rock protection window.
A nimiq coin wallet is not a way of making a password, but a way of issuing and using something like a bank security card. Move your mouse over the number and the password will appear. This should be taken and stored with a notepad, screen shot or phone.
When you have saved all your passwords, select Progress at the bottom.
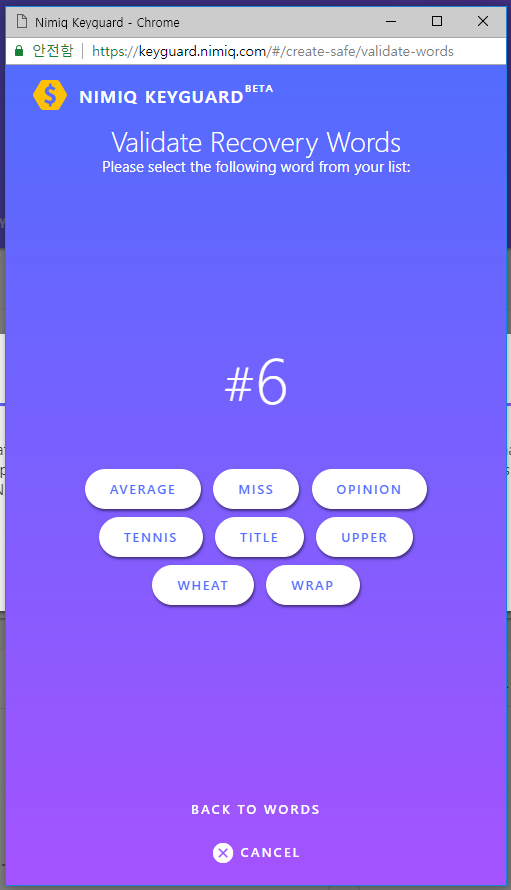
총 3번의 암호 확인 과정을 거치게 됩니다.
암호를 모두 넣으면....
You will go through 3 password verification procedures.
If I put all the passwords ...
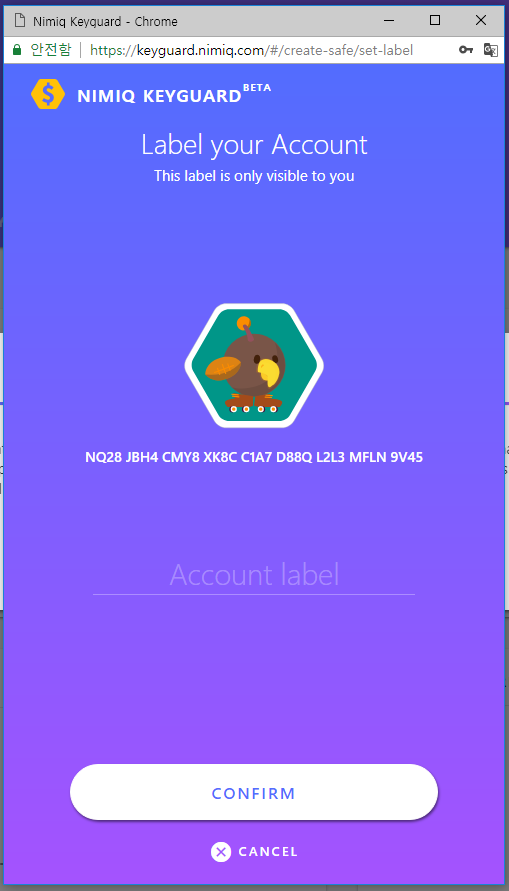
계정명을 지정하면 됩니다.
이것으로 지갑생성은 완료!!
You can specify the account name.
This completes the wallet creation !!
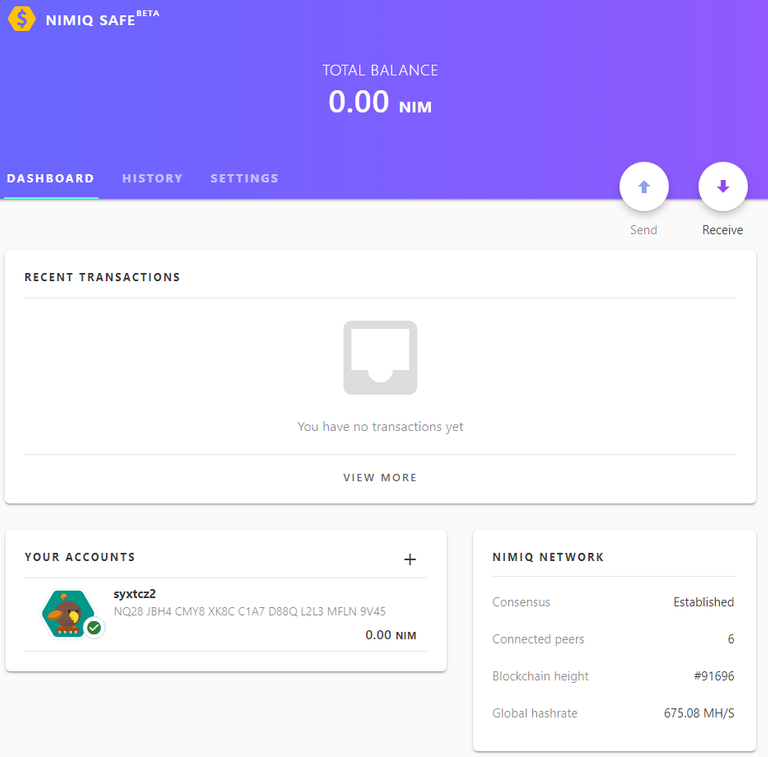
잘 생성되었군요.
그럼 이제 채굴을 해봅시다.
That's a good creation.
So let's do some mining.
기본 브라우저 채굴도 가능하지만 명령어를 통한 채굴이 더 효과가 좋기 때문에 이 방법으로 설명하겠습니다. 추천되는 풀도 몇몇있지만 역시 제가 사용중인 스카이풀을 기준으로 설명하겠습니다.
We can mine a basic browser, but I'll explain that in this way because it's better to mine with commands. There are some pool recommendations, but I'll also explain that based on the Sky Pool I'm using.
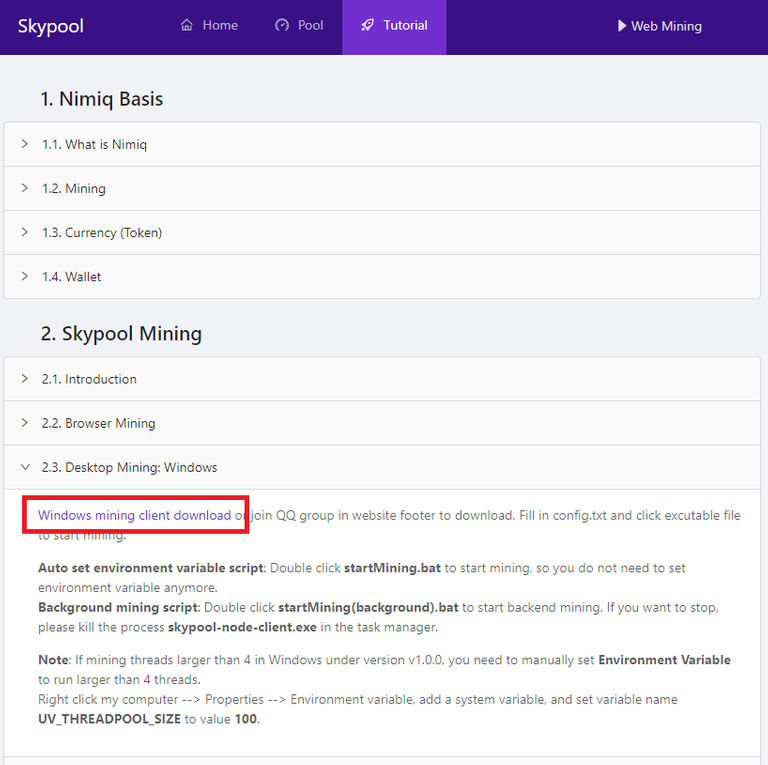
사이트에 접속 후 튜토리얼을 누르고 2-3 윈도우 마이닝 항목을 클릭 후 빨간 박스 안의 링크를 클릭합니다.
After accessing the site, click Tutorial, click 2-3 window mining items, and click the link in the red box.
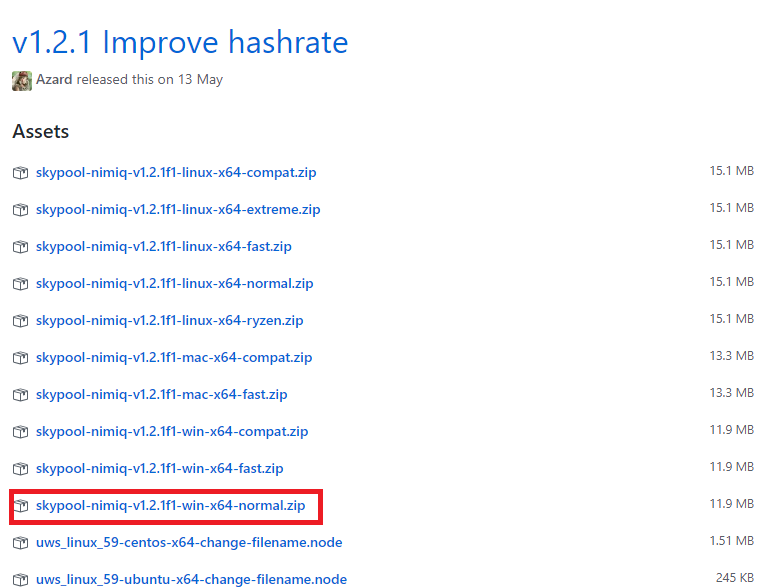
일단 저는 노멀 버전으로 받았습니다.
다운을 받고 압축을 풀어줍니다.
그리고 config.txt 파일을 열어줍니다.
First, I got it in a normal version.
It receives downdowns and uncompresses them.
It opens the config.txt file.
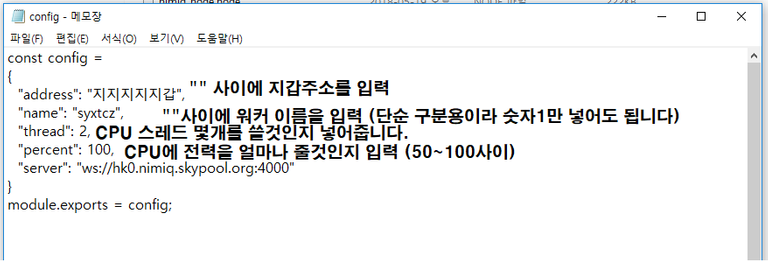
다른것은 바꿀 필요 없이 딱 4군데만 손보면 됩니다.
첫번째는 지갑주소입니다.
두번째는 워커 이름으로 2개 이상의 PC에서 채굴하는 경우 구분해주면 좋습니다.
세번째는 CPU 스레드의 몇개를 채굴에 할당할지를 정해주는 부분입니다. 저는 8스레드중 2개만 할당했습니다. 이정도면 다른 작업을 하며 무리없이 돌아가더군요.
네번째는 위에 할당된 CPU에 얼마만큼의 전력을 줄것이냐 입니다. 최소 50, 최대 100인데 편한데로 셋팅하시면 됩니다.
추가로 다섯번째는 풀 주소입니다. 다른 풀 가고 싶으시면 이 주소만 바꾸시면 됩니다.
위 과정이 끝나면 저장 후 startMining.bat 파일을 실행하시면 됩니다.
You only need to do four repairs without having to change anything else.
The first is the wallet address.
The second is Walker's name, and if you're digging from more than one PC, you can tell.
Third, how many CPU threads are allocated for mining.
Fourth, how much power will you give to the CPU allocated above? You can set it to a minimum of 50 and a maximum of 100.
In addition, the fifth is the full address. If you want to go to another pool, just change this address.
After you finish the above process, simply save and run the startMining.bat file.
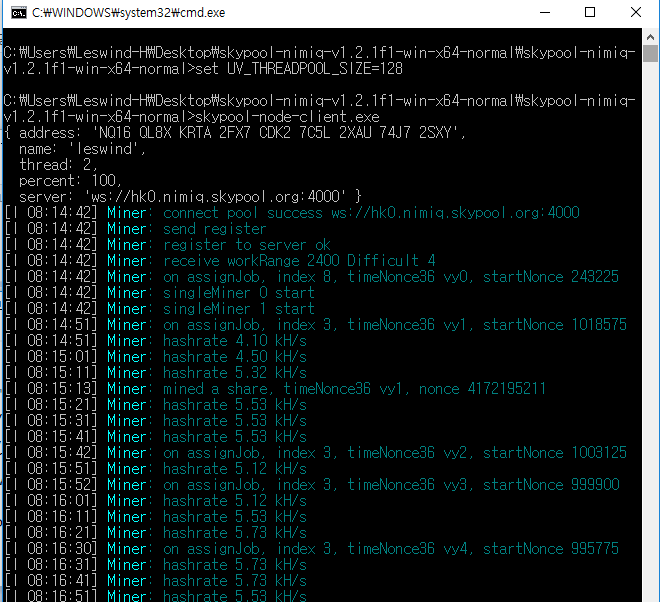
그러면 도스창이 뜨면서 채굴을 시작할것입니다.
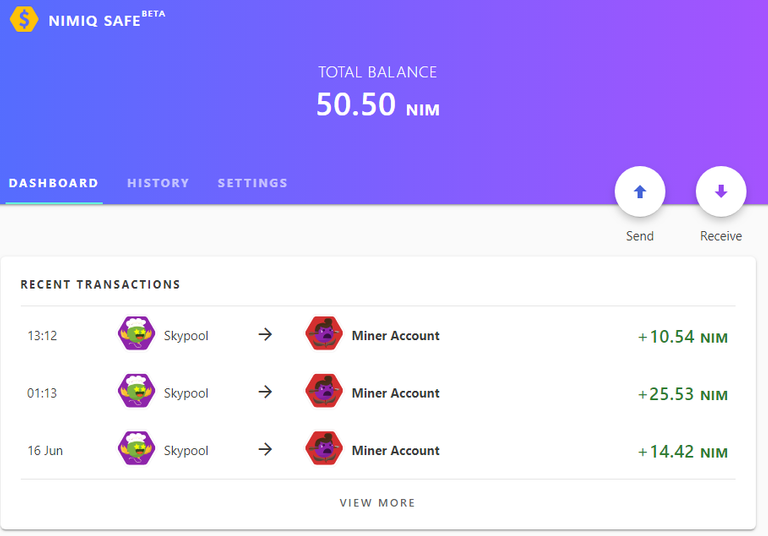
스카이 풀은 하루 2번 10개 이상을 채굴하면 지갑으로 코인을 자동발송해줍니다.
This will bring up the CMD screen and start extraction.
Skypool automatically sends coins to your wallet if more than 10 coins are extracted twice a day.
개당 6~8원정도하는 코인이지만 재미로 채굴하고 있습니다.
나중에 커피값 정도는 되겠지 하고 모아볼랍니다.
It costs about 6 to 8 won each, but it is mining for fun.
We're going to collect some coffee.
(jjangjjangman 태그 사용시 댓글을 남깁니다.)
호출에 감사드립니다! 즐거운 스티밋하세요!
항상 감사합니다 ㅠㅠ