LINUX
BASIC INSTALL GUIDE OF
LinuxMINT20_64bit-Cinnamon "Ulyana" on the laptop LENOVO-IdeaPad_L340
PRELIMINARY STATEMENT
This is a very basic guide, including only the first steps of a standard Linux installation in a given hardware. Not a so much complicated process but very helpfull for many average not-skilled Linux users. This guide is specifically targeted for the Lenovo IdeaPad laptop but only ragarding the UEFI-bios stuff, so I guess this basic guide could be useful to help for the installing of others distros in other hardware.
So let's go and good luck to everyone!! :)
TWO INSTALLATION STEPS
STEP 1: Retrieve the ISO file and burn it.
$ sha256sum -c sha256sum.txt 2>&1 | grep OK
Now is it possible to burn the iso image. Once plugged in the usb stick be sure that it is unmounted before to burn the iso file. The command to burn the iso image should be something like that:
# umount /dev/sdb in case...# dd if=linuxmint-20-cinnamon-64bit.iso of=/dev/sdb bs=4M && syncSTEP 2: BIOS & HD setup.
Install Ununtu in a given partition.
As any average Linux user your hard drive (from now "hd") should be partitioned in many partitions, at least in two considering the mandatory requirement of the swap partition. Here below a 10 partitions snapshot of 1tb hd in the targeted laptop: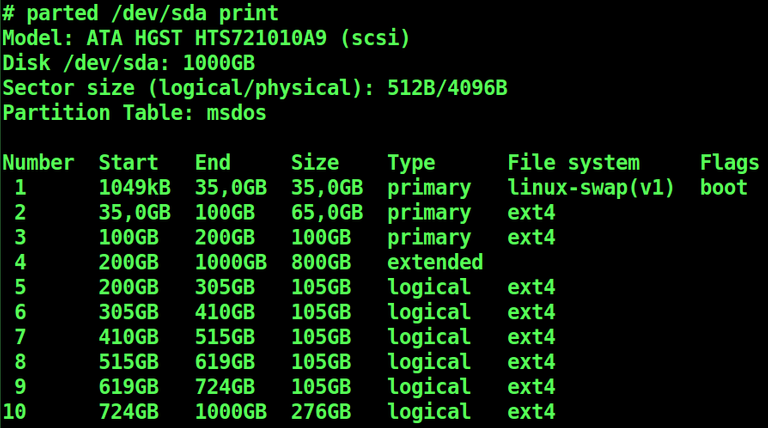
UEFI-bios Configuration
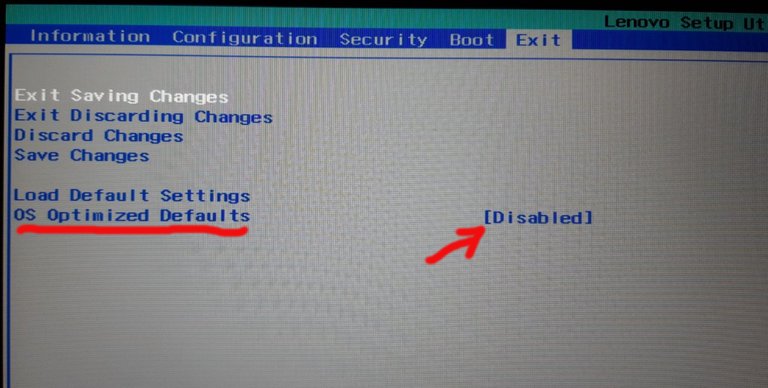
The pre-requisite to load the iso-burned usb stick at boot is a properly configured UEFI-bios (from now U-bios). So first of all at boot type at the same time and keep pressed the keys[Fn] and [F2] to access the bios settings.Now go to the Exit tab and set OS Optimized Defaults as [Disabled]. Also be sure that the Load Default Settings option is settled as yes.
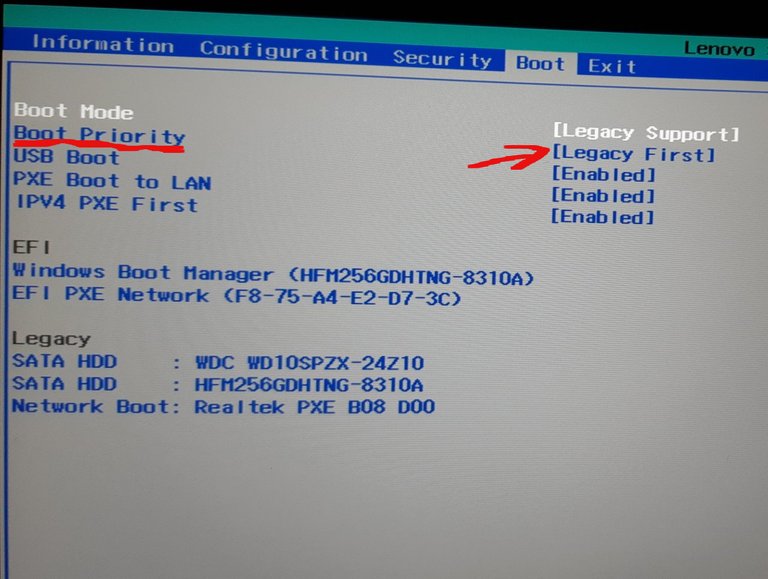
Now under the Boot tab set the Boot Priority to [Legacy First].
AND NOW... HERE WE GO!! :)
This below is the screenshot of what you should see once properly loaded the burned usb key.