Today I thought I'd share an unusual part of my life: my microbiology lab work! (For those that are keeping up with my major, yes I am an English major, but before I switched I applied and was chosen to receive a microbiology scholarship and I couldn't say no, so now I'm an English major working in a microbiology lab, I know it's confusing)
The overall goal of my project is to remove a gene (the rpoN gene) in E. coli and then test the mutant strain of E. coli to see if it responds differently to stress without the rpoN gene.
The process of removing a gene from E. coli is not a short one. First, primers have to be made with PCR, but we're not talking about the prep today, we're talking about deleting genes!!!
So I'll walk you through the procedure I completed today and show you all of the cool equipment that I get to use in the microbiology lab!
Preparing
Okay I lied, you do need some context. Two days ago, I took some of the E. coli that the lab has stored in the -80℃ freezer that we have. I streaked it in quadrants onto an agar plate that had ampicillin antibiotic in it:
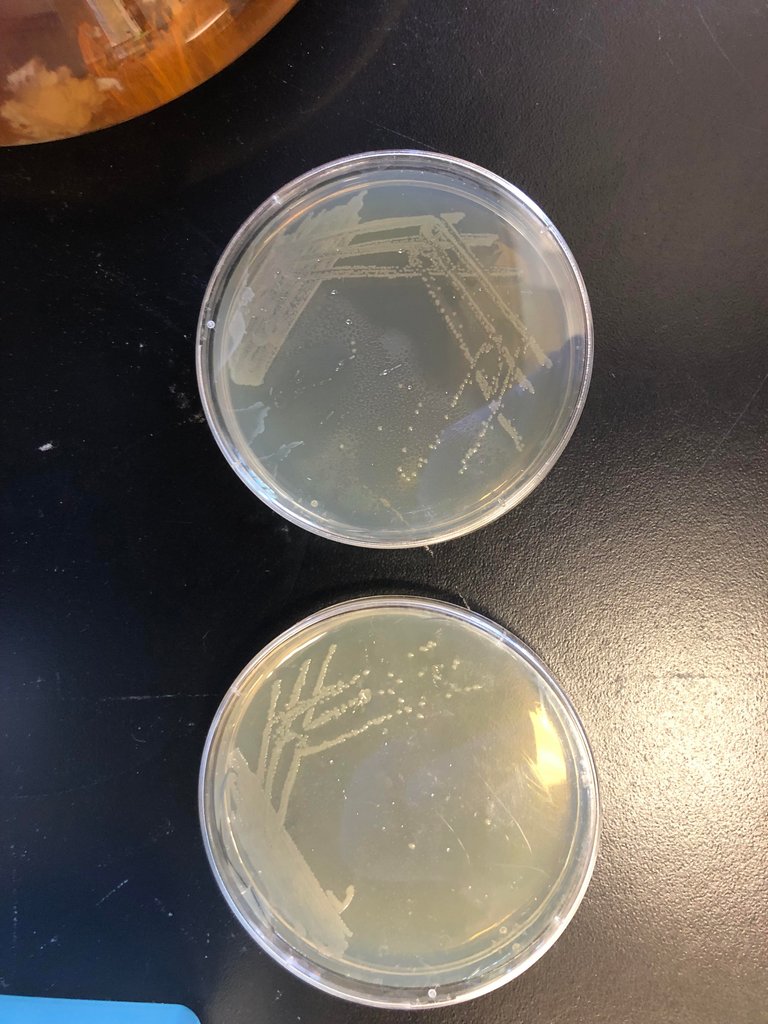
The way you do a quadrant streak is to take a nephron loop (a thing like a pencil with metal in the shape of a small loop at the end of it) and you run it across one side of the plate (that's where you see the most growth). Then you put the nephron loop that is now covered in bacteria in a flame to kill the bacteria, then let the loop cool, then pull out three times from the original area that you streaked. You repeat this twice so that you can get isolated colonies. The colonies are the isolated little dots that you see in the middle of the plate. Those are the ones we have to use for experiments because they have their own DNA, whereas the groups of colonies all might have slightly different DNA.
So! I streaked these plates out two days ago, let them grow overnight into these beautiful usable colonies and then took one of those colonies and put it in the liquid form of agar (which is called broth) and let THAT grow overnight too!

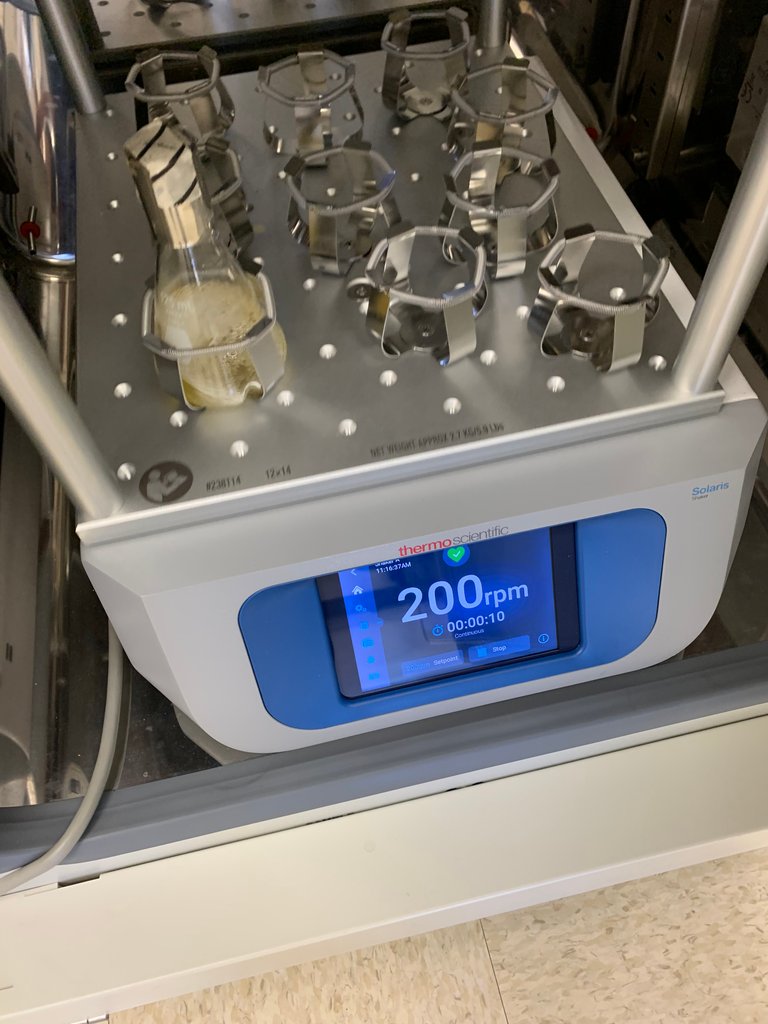
Here's a picture of the test tube that I inoculated (that's what it's called when you put bacteria into broth or agar for the first time) and me waving at you! It is inside an incubator which kept it at 30℃ and it is in a rack attacked to a shaker that shakes the tubes at any rotations per minute that you want (for this sample I shook it at 200 rpm overnight).
The Complicated Process of Step 2
The next step in the process was to start the actual Gene Deletion procedure, but that includes getting the cells ready for the actual moment that the gene is going to be deleted (and I promise, it is just as exciting as it sounds).
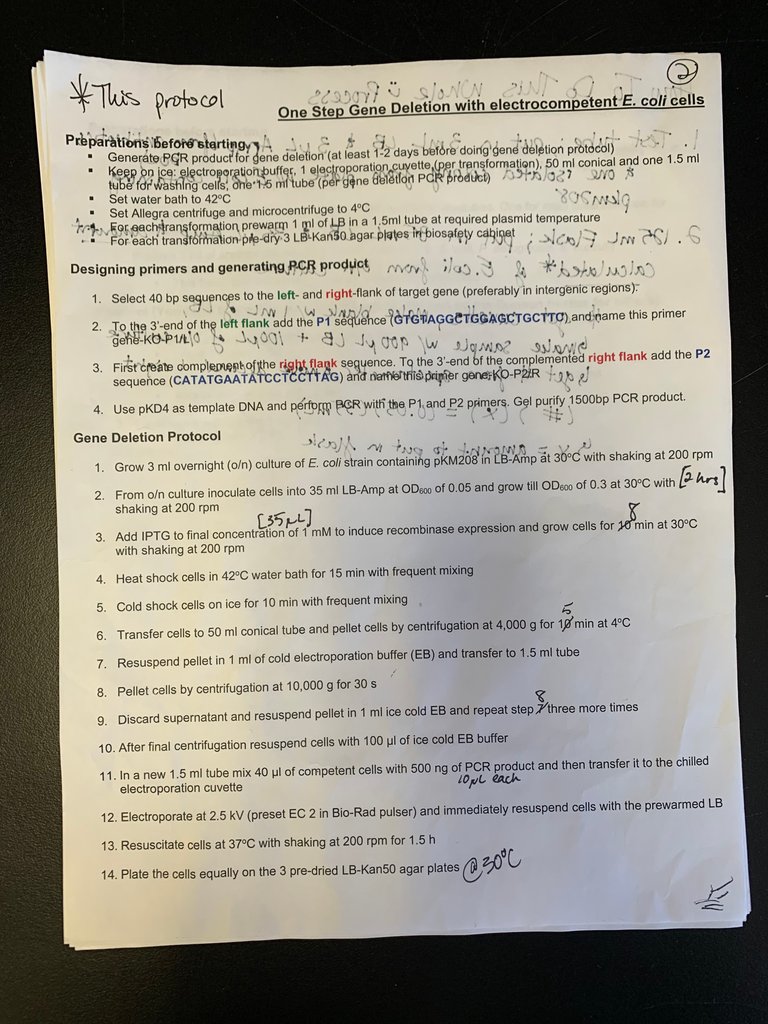
Here is a picture of the procedure that I use as a guide each time I complete this process.
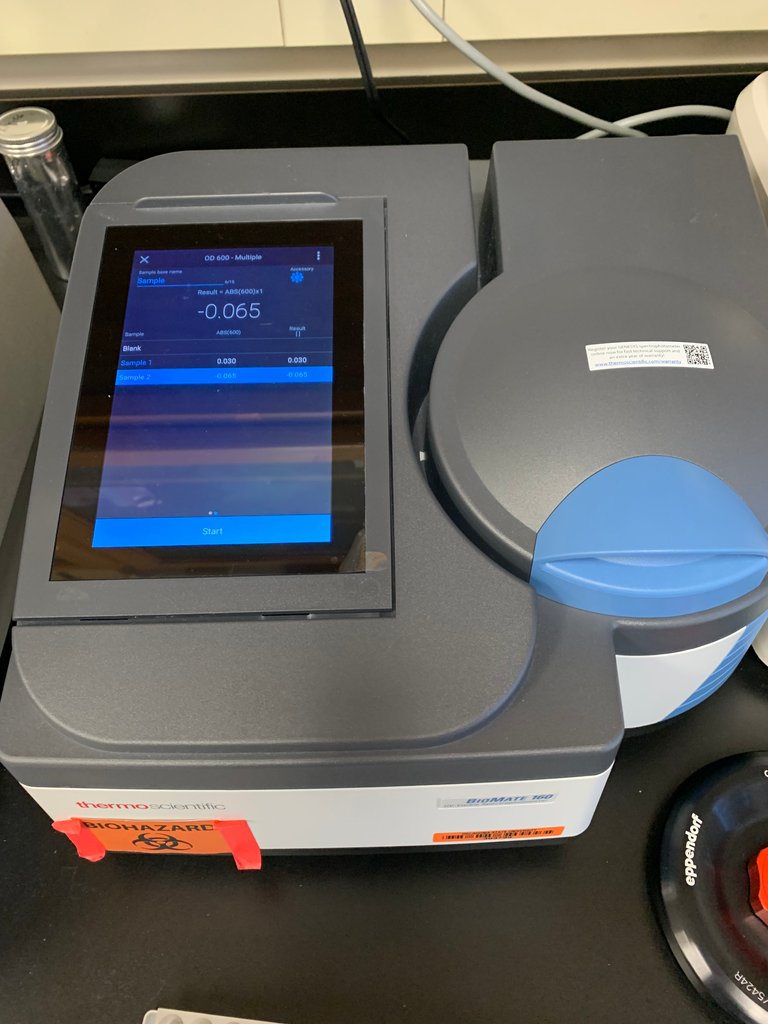
So, I already walked you through Step One that you can see under the Gene Deletion Protocol section. Next, I had to inoculate a new flask with the E. coli that I had grown overnight. However, I had to put just enough of the overnight liquid sample into the new one for it to start with an Optical Density of 0.05 so that it could grow to an Optical Density 0.30. In order to measure the optical density of a sample, you have to use a spectrophotometer:
You have to take a cuvette that looks like this:
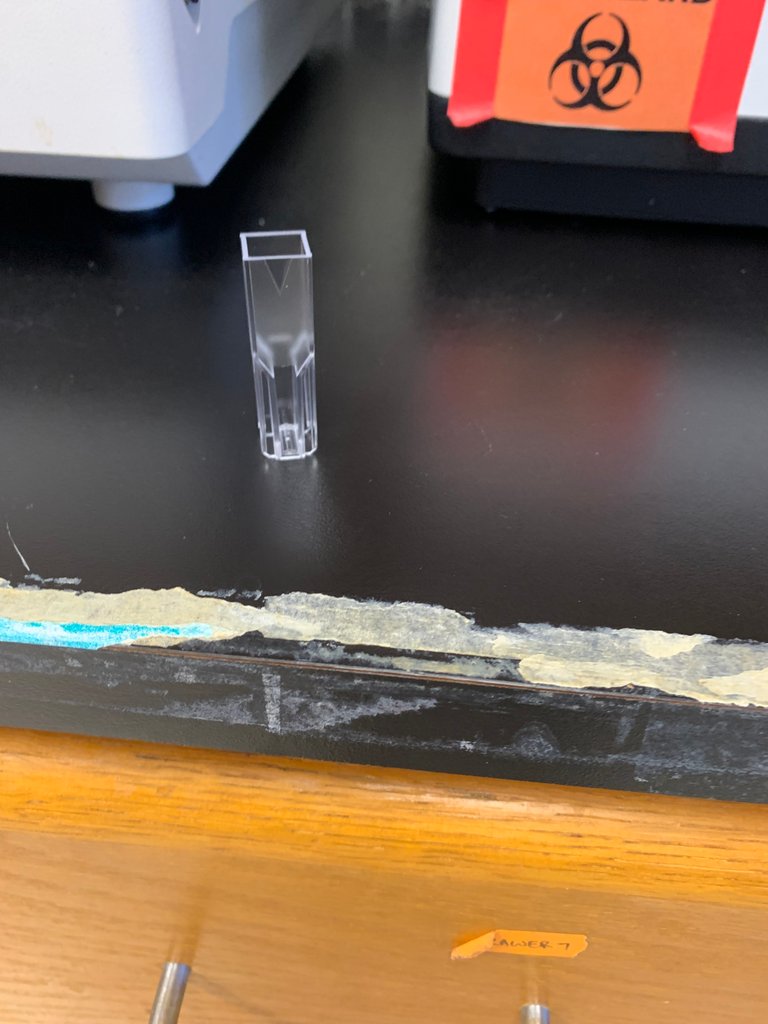
And put the same broth in it that you used for your bacteria sample (I used LB broth). You have to make two different cuvettes, one with just LB broth and the other with your sample. This is so that the spectrophotometer can have a blank to base its measurements off of.
Once you make the two cuvettes, you put them into the machine like this:
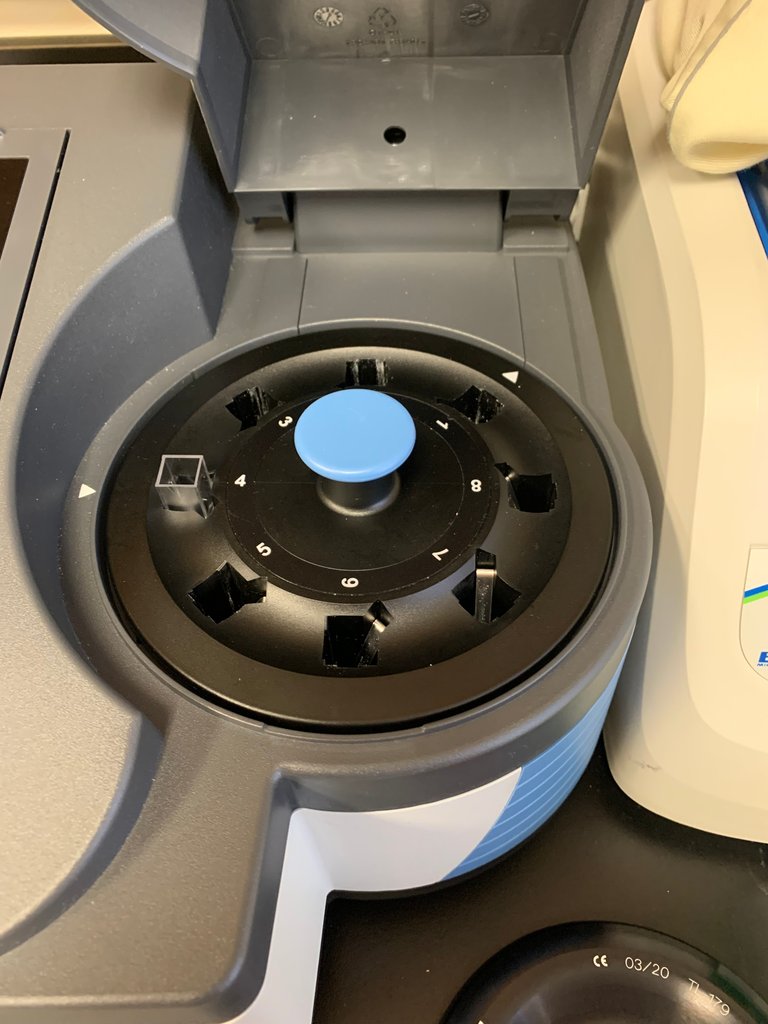
and hit start so then it can read the samples. Then you calculate how much to put into the new flask and voila!
Now you let that freshly inoculated sample grow in the incubator shaking at 200 rpms for two hours:
With that I will leave you on the edge of your seats waiting for what happens after the two hours are over!! (Hint: it including shocking the cells so much that they loosen their DNA and then the shocking actual deletion process!)
I apologize if I did not explain anything enough! Thank you for reading! Stay tuned for part two and then for part three where you find out if I actually successfully made a mutant today or not (which even I don't know the answer to yet)!
Mutant.......! Oh I am so afraid of this word after the covid arrival 😉
Your content has been curated by vyb.Thanks for using the vyb tag