Inspired by the amazing work that DMScotty showcases on the regular at his YouTube channel, I decided to dust off my soldering iron and start doing some tabletop props using LEDs!
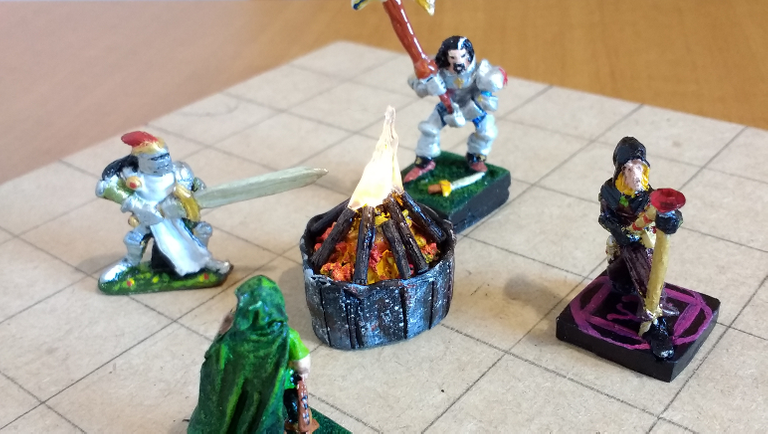
Working off ideas Scotty-senpai showed in his video, aptly named: Craft tea lights into light sources for D&D, I made a cozy campfire, so I can put it on the table whenever the characters are taking a full rest.
Unfortunately I didn't take pictures during the the craft, so you'll just have to trust me ;)
Parts List
- CR 2032 batteries - These are easy to find and provide enough voltage to light up most LEDs
- 5mm Round Top Flickering LED, Amber - From LighthouseLeds
- A coin-type battery mount - Bought this at my local electronics store but you could order from Digikey
- A 100 Ohm resistor - I had it lying around, but if possible you should follow the seller's recommendation (56 Ohm)
The Mounting
Even though you can mount a 5mm LED directly on a CR2032 battery, due to it's high internal resistance (add a magnet and you have a throwie), you should add in a resistor, because it really helps to to make the battery last longer, with no noticeable light intensity drop.
I opted for getting the LEDs and mounts directly, instead of trying to repurpose the Dollar Tree tealights (don't have those where I live), I also wanted to give it a smaller footprint on the table, so it only used as much space as it was necessary to house the battery. I do admit that using the ready-made tea lights would save a lot of work though. If you're going the DIY route, make sure to test the polarity of the LED before soldering (just test it, connecting it wrong won't harm the LED or the batteries).
If you need a soldering primer, check out Hankerin's video and just remember the mantra my trade school teacher told us back in the day:
Iron in
Solder in
Solder out
Iron out
Decorating and Painting
I closed off the base with a strip of cardboard, scored between the corrugations.
For coals, I added some actual charcoal I salvaged from a broken water filter, painted them yellow and then drybrushed orange and then topped off with a little red.
For the logs I used toothpicks, stained with bitumen.
As for the fire, I used my glue gun and while holding the piece upside down, teasing the glue down with the heated tip.
The Result
I really like the effect that the flickering LED gives, our brains are really wired to pay attention to changes, so the flicker really traps our attention.
Sorry for the focusing issues and not using a tripod
The great thing about integrating electronics into your projects is that it opens up a whole new dimension or possible interaction and effects, and lighting up LEDs with coin batteries is safe and easy enough to get anybody started.
Let me know if you have any other cool ideas!
Have fun crafting =)
A very subtle touch, but it seems to go a long way. No suggestions from me this time, but know that your efforts do not go unappreciated!
Thanks for the kind words!
Sometimes I feel like I'm my worst critic.
Yada yada, best thing I did was frame my own criticism as excuses to not do more new stuff. Doing new stuff is hard, but so much worth it, f* excuses.
This reminds me, I need to try out your Aglio & Oglio recipe =)