Hello steemains!
In these series I'll present techniques that are a little bit more complex, so these are not neccessarily the first things you wanna be doing when you're just getting started, but it doesn't mean that you can't try it out.
On today's menu: Macros
So what are macros? why should you make custom macros? What are they good for?
Macros can facilitate the producing process and they help hell a lot when you're performing live action. Setting up a macro will allow you to manipulate multiple switches on different control panels while touching only one switch.
For a certain example I'll present one of the transition effects I used in one of my recent tracks, and show you how I set up a macro for that.
You can listen to the song here.
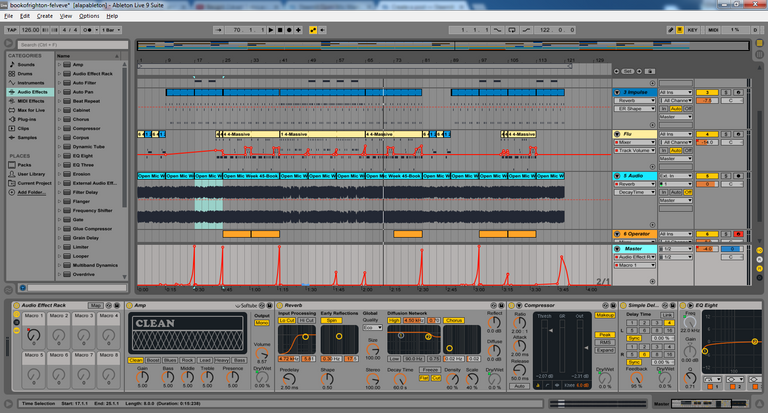
I used Amp, Reverb, Compressor, Simple Delay, Flanger and EQ8, but the spine of this transition is created by only three of these audioeffects: Reverb, EQ and Simple delay, so for the sake of simplicity we'll set the macro for these three, and you may experiment with the others.
(Note: this effect is kinda universal, I guess it works even better with house, edm or techno tracks so don't be afraid to try it out)
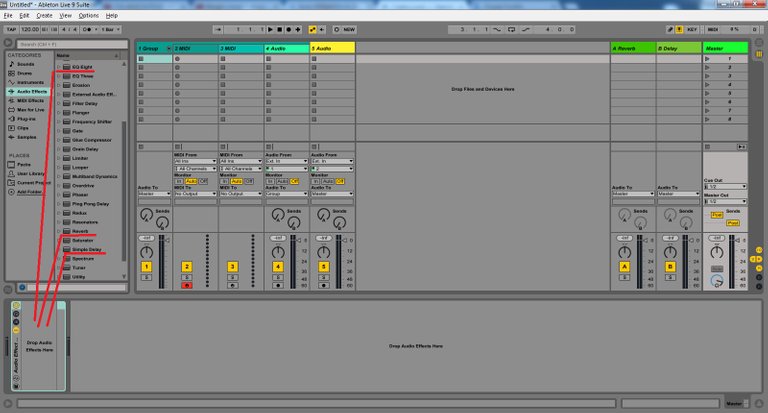
First things first, we'll need an Audioeffect Rack to contain all of our audioeffects that we are going to use.
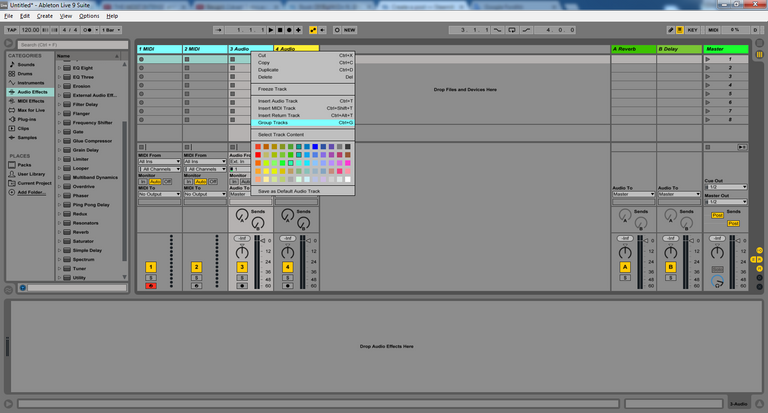
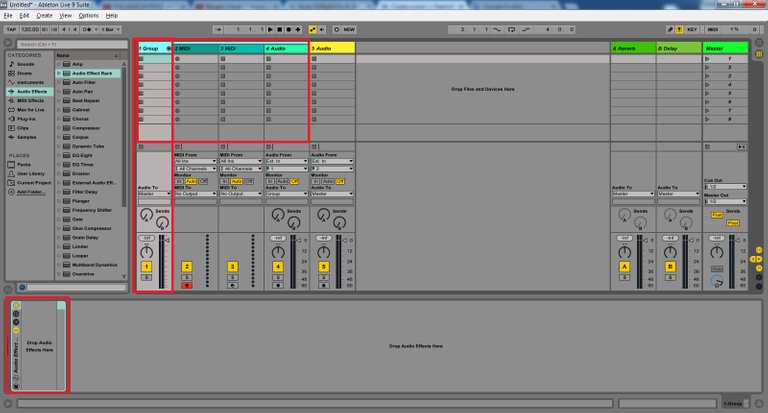
I applied the rack to the Master Track, that means the effects are manipulating each and every one of my tracks, but if you want your macro to apply only to 2-3-4..... you can group the tracks of your choice by selecting them and hitting the Ctrl+G, group tracks command, and then you can apply an Audioeffect rack to that group section.

Grouping:
Now we can put the audioeffects INTO (not next to) our rack, if you put them next to the rack our macro settings won't apply to them.
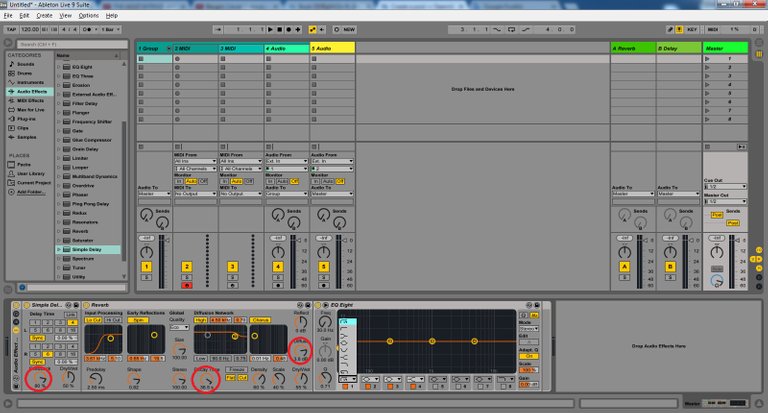
Let's make adjustments on some switches that are going to stay fixed and won't be manipulated/automated by our macro switch, but are essential to achieve the desired effect.
- give some feedback on the simple delay
- set a high decay time and diffuse on reverb
- select the lowcut filter mode on EQ8's filter 1
I won't go into details of all the other options on these audioeffects, you can experiment with different delay times, setting high/low cut on reverb, changing the scale etc. explore and customize things to suit your needs.
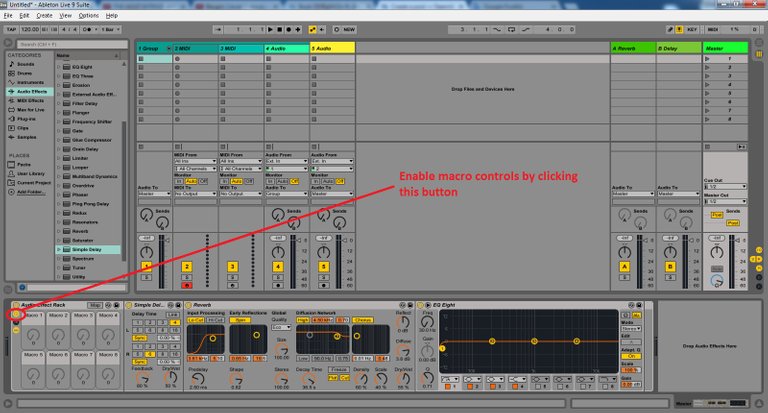
Enable macro controls by clicking the first button on the title bar of the Audioeffect Rack :
To neutralize the changes these effects would make on our track, without turning them off, set the Dry/Wet amounts all the way down. These are the switches we're going to apply to our macro, and the filter 1 frequency of the EQ for a lowcut.
Right click on all these three switches and select "Map to macro 1".
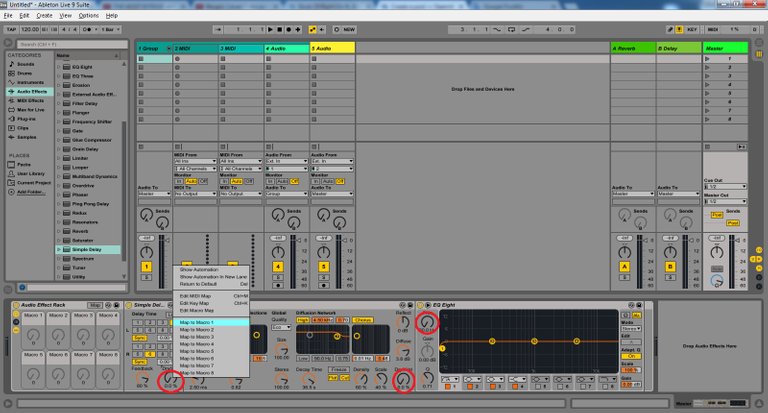
Now we have 3 different modulations alligned to our Macro 1 switch (which you can rename any time btw).
But wait..It's all clear for the Dry/Wet switches.. If I turn my macro switch all the way up, they go all the way up too..... but what about EQ's filter frequency??? I don't want to filter out all the frequencies so I'll end up with complete silence.. right?
Right.
We can adjust the Min/Max. amount for all the switches alligned to our macro switch. To do that enter macro map mode by clicking the "Map" button on the macro panel, then here you can lower the maximum amount for EQ's filter frequency. Now If you turn your switch all the way up, the Dry/Wet amounts will go to 100% and the filter won't go any further than the set amount.
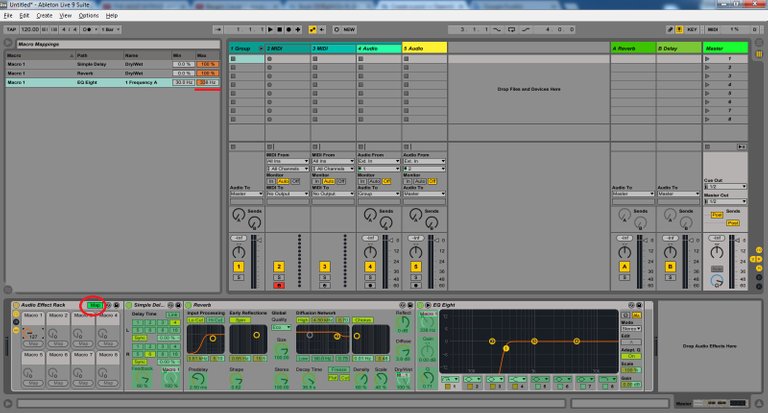
There we have it: a macro ready to use for some live action! But not only for that... If you are recording, now you have to draw only 1 envelope instead of 3.
You can create macros for anything, you can set up much more complex things without limitations.
So once again:
Macros are the unmissable elements of Live performing and they also can simplify some exhaustive parts of the producing process.
Ask.Request.Suggest.
STEEM ON!
(edit: I've been calling the "knobs" "switches" consequently, pretty similar term, but knob is a more correct expression in english, sorry.)
I think it´s great what you´re doing dude.
One must give out his knowledge to others.
Very detailed and helpful post!
Wooo Very good post :)
Nice post, beautifully presented and explained. detail oriented with nice pics. thank you for sharing this with us, Upvoted
@ionescu @djnoel @kingjan @amedeo @uchefrancis
Thanks peeps,
the pleasure is mine!
You are a master. I have a dj friend who will surely be happy when I show him this
Wow this is amazing, I look forward to practicing with this post I just followed and upvoted thanks for this post once again
WOW ! Really a great initiation. Appreciated...
Thanks for these techniques but I think it's a bit complicated
yeeea
thanks man