I finally have a tutorial for making toes and heels on the knitting machine.
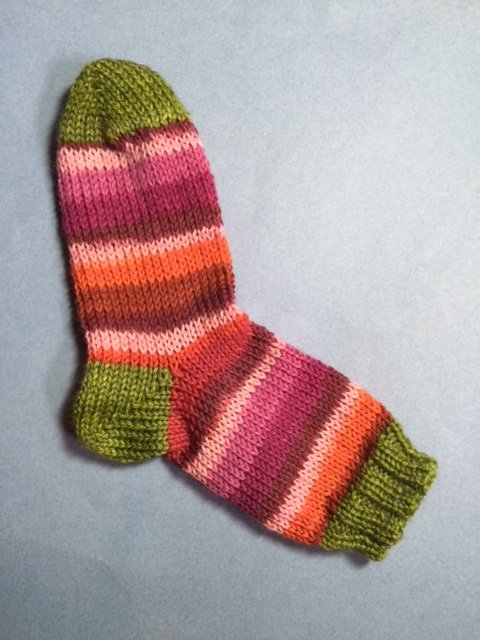
I began by doing the top of the sock's ribbing with my ribber. If you don't have a double bed machine, you can choose a hand tooled rib or perhaps a picot hem. Of course, you could cast on with waste yarn and finish off the ribbing by hand knitting it at the very end. There are so many solutions and variations for those of you with single bed machines, but in this post, I'm going to try to shed some light on how I use short rows to create the heels and toes of socks.
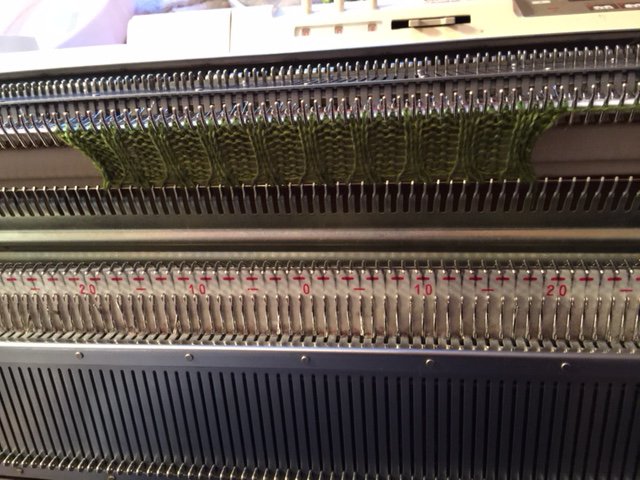
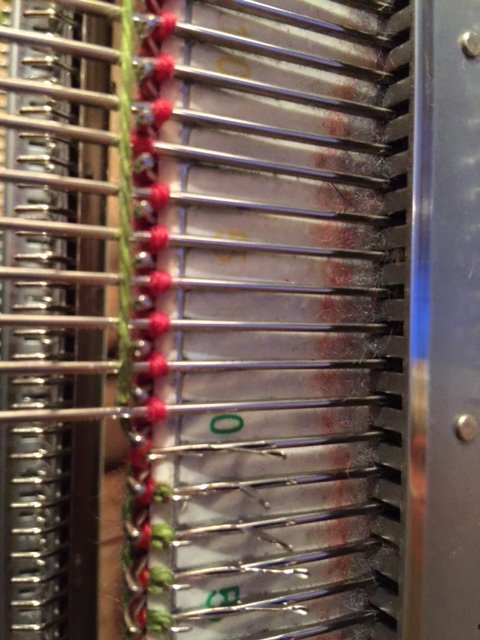
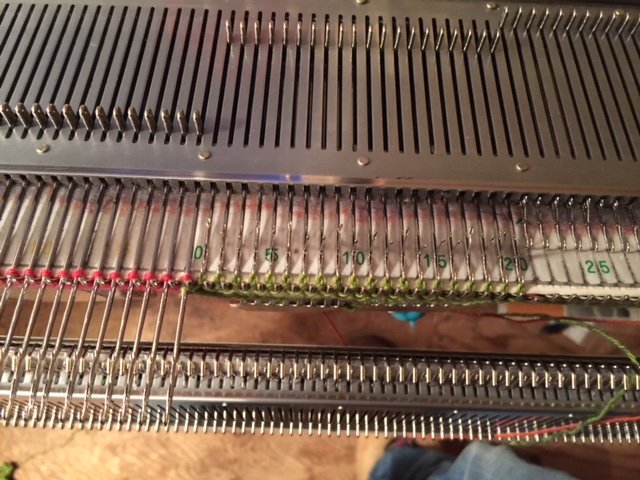
I begin working back and forth until have the desired length of the sock's leg. Now, it's time for me to turn the heel. I pull forward half of my needles. In the photo, that is 20 needles. These will stay out of work during the heel shaping. I will just be working the remaining half.
I have a vintage Brother machine, and need to change the settings on my carriage so that the needles that I have pulled out on the left will stay out of work while I shape the heel. I change to H for holding stitches. Now, I can pass the carriage over the needles, and it will only knit the ones on the right which are in working position (not pulled far out, like those on the on the left).

I do know for Silver Reed machines, this stitch holding function is achieved by the Russel levers on the carriage. Those with other brands may have to consult their manuals for holding stitches out of work.
Now, that I have made my first pass with my carriage from left to right, you see that the needles I wanted to keep out of work have remained out of work. Yay! Now, I will have to tuck that yarn under the end needle before I go back in the other direction. This will prevent a hole from forming.
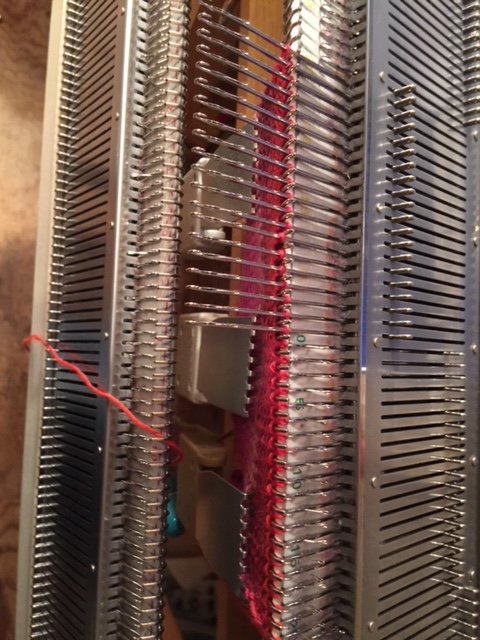
And before I pass that carriage back on to the second row of this heel, I am going to pull one needle out of work on the opposite end, the right side.
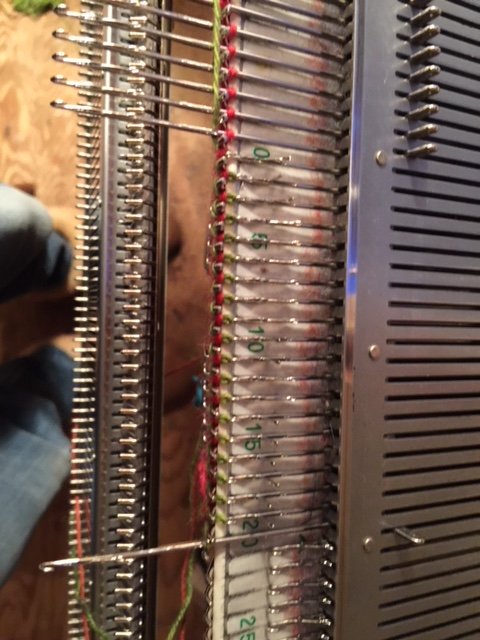
Now, I am going to go back and forth, but each time I am going to remember to tuck the yarn under the first needle in work on the carriage side, and also to slip one more needle out of work on the opposite side. I keep doing this until I have 7 stitches left. I probably could have chosen 8 and it would have worked out okay. Let's say that around 1/5th of your total number of stitches would be okay, but this is not a well-thought out approach. See what seems right for you.
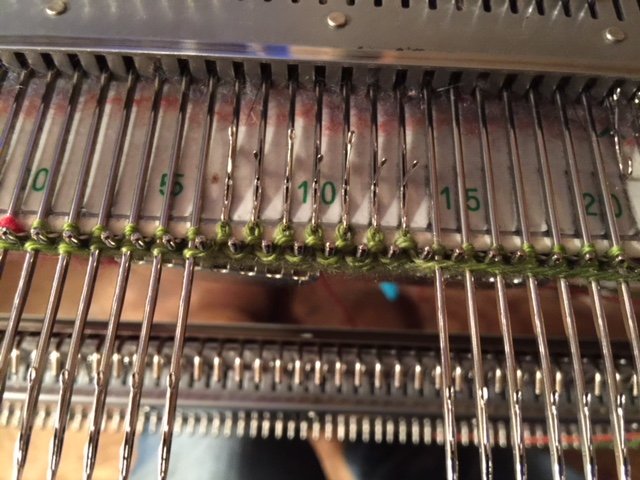
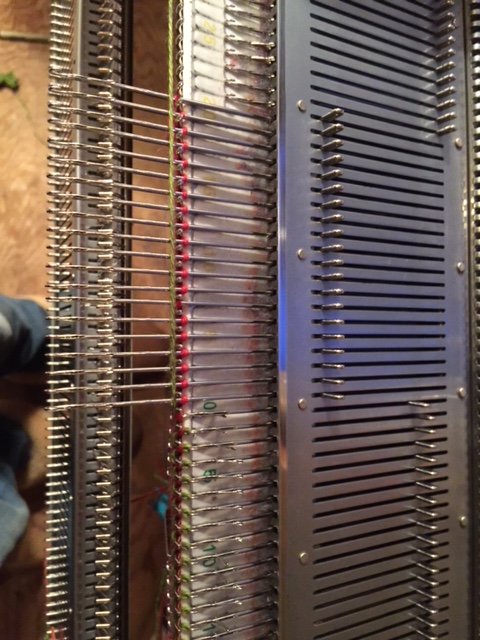
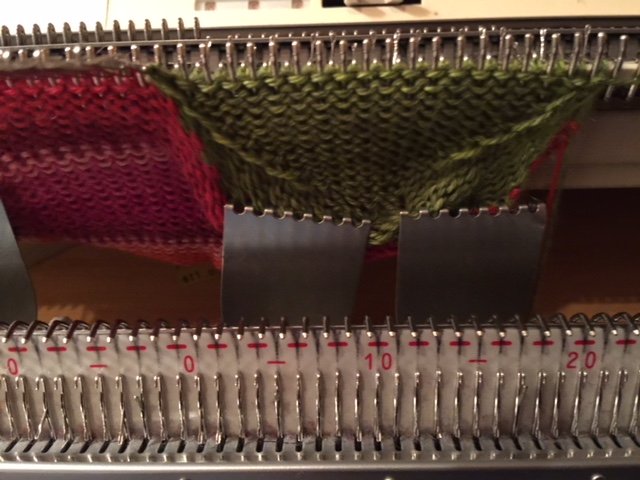
Here, I am continuing on, but now I am INCREASING the number of stitches I am working on, one by one. I am still tucking that yarn around the first working needle on the carriage side, but I will now be moving one needle on the opposite side of the carriage into work by pushing it back enough, so that it gets knitted. See how the needle on the left has been moved back. It will get knitted when I pass the carriage over it.
After I have the 20 needles back in work, I will move the hold button on my carriage back to N because my heel is now finished, and I'm going to work the foot on all 40 of my needles.
I work the number of rows to get close to my desired foot length, and then I make another heel just the way I did before, but (surprise!) it will really be a toe.
Now, I will take the sock of the machine by picking up stitches and sliding them off with some double-pointed needles.
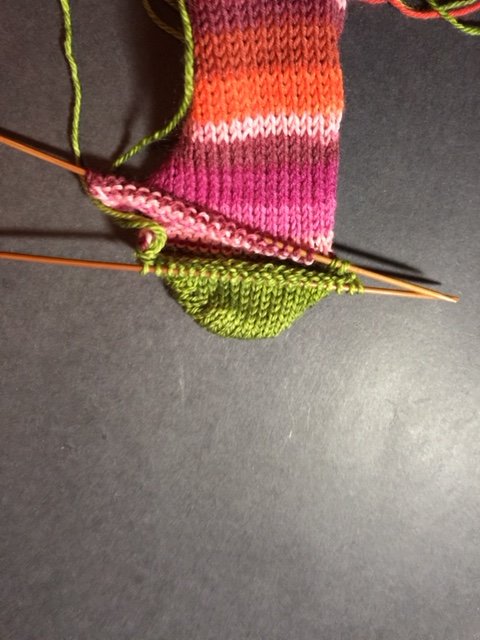
I use a kitchener stitch to graft my toe together.
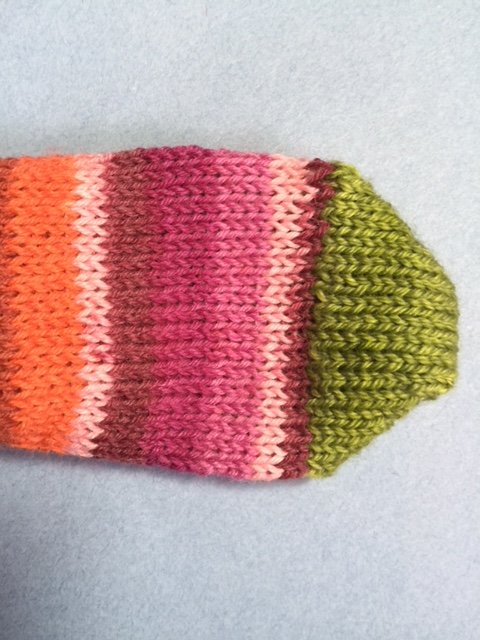
I just need to sew the side seam with a mattress stitch, and after I weave in the ends, I am done.
I reverse the shaping for the second sock to mirror the first, so I will have the seams on the inside of each foot.
This is only one method of making socks on a machine. I'm happy with the results, so I continue on without exploring more.
Also, there is a no wrap (or no tuck) way of short rowing on the machine. It's easier, but I just stick with what I started with. Maybe you'll want to explore that before you get stuck like me.
This is a great way to show how your machine works! I was very curious and you used enough photos to explain things very well! Beautiful socks too!
Glad that you got the idea of how it's done! Sometimes video is better, but I haven't tried that yet.
This post was shared in the Curation Collective Discord community for curators, and upvoted and resteemed by the @c-squared community account after manual review.
@c-squared runs a community witness. Please consider using one of your witness votes on us here
Thank you so much, @kimmac ! I do appreciate the time and effort involved in posting the detail; video is great but it does add an additional layer of effort to it all.
I shall be studying your explanation and see whether I can manage it - years ago we got a second hand ribber attachment for my knitting machine but haven't got round to assembling it (it looks like a jigsaw to me)
I was so intimidated by the ribber! I finally forced myself and it wasn’t that hard really. I still have attachments and assessories that I haven’t figured out how to use yet though.
Glad this helped a bit though. 🙂
The one thing I didn’t mention was the constant repositioning of the weights to help keep the short rows on the needles. It becomes more like second nature once your body gets a sense of what works, but I probably repositioned the weights every two or three rows when doing the heel and toe.
Wow this looks complicated. I don’t fully understand the techniques of knitting in general so this looks like rocket science to me lol. I really appreciate the time you put into this tutorial with the photos along the way. Looks like this will be useful to our knitters!
The socks are beautifully btw ;)
Thanks @crocheille! It seems more complicated than it is. Just a lot of simultaneous tasks, but I struggled to learn most of what I have. Hope that it takes some of the confusion out of the equation for machine knitters or future machine knitters.