A Dollar Tree Made from Styro Foam?

Aside from music, cooking and arts I am avid fan of DIY's. I really admired those people who are talented and creative on doing some stuff with just themselves. I've watched a lot of tutorials about DIY's and some of them can be done using just few recycled materials available at home. That's the beauty of arts and crafts, you can help the environment by recycling.
Anyways, as I shared before that I will look for another studio set up but one of my problem about was designing the wall. I needed to looked for some alternative ways that I, myself can do it alone. I have already place some acoustic foam panels on the right side of my chosen wall so the back side wall was empty. I decided to make my own hanging design rack or a dollar tree using just a Styro foam.
I have some stocks of styro foams that's why I planned to make out of it a design that can be displayed on my wall. As a typical look of a dollar tree, it has a rope or using any strings that can hold up it's weight and some used an old card boxes and painted them. It really looks gorgeous and natural looking wood but this time, can a styrofoam can be attractive as it is?
Here are the things that I used:
A pc. of styro foam (that can be cut and divided into 4 pcs.)
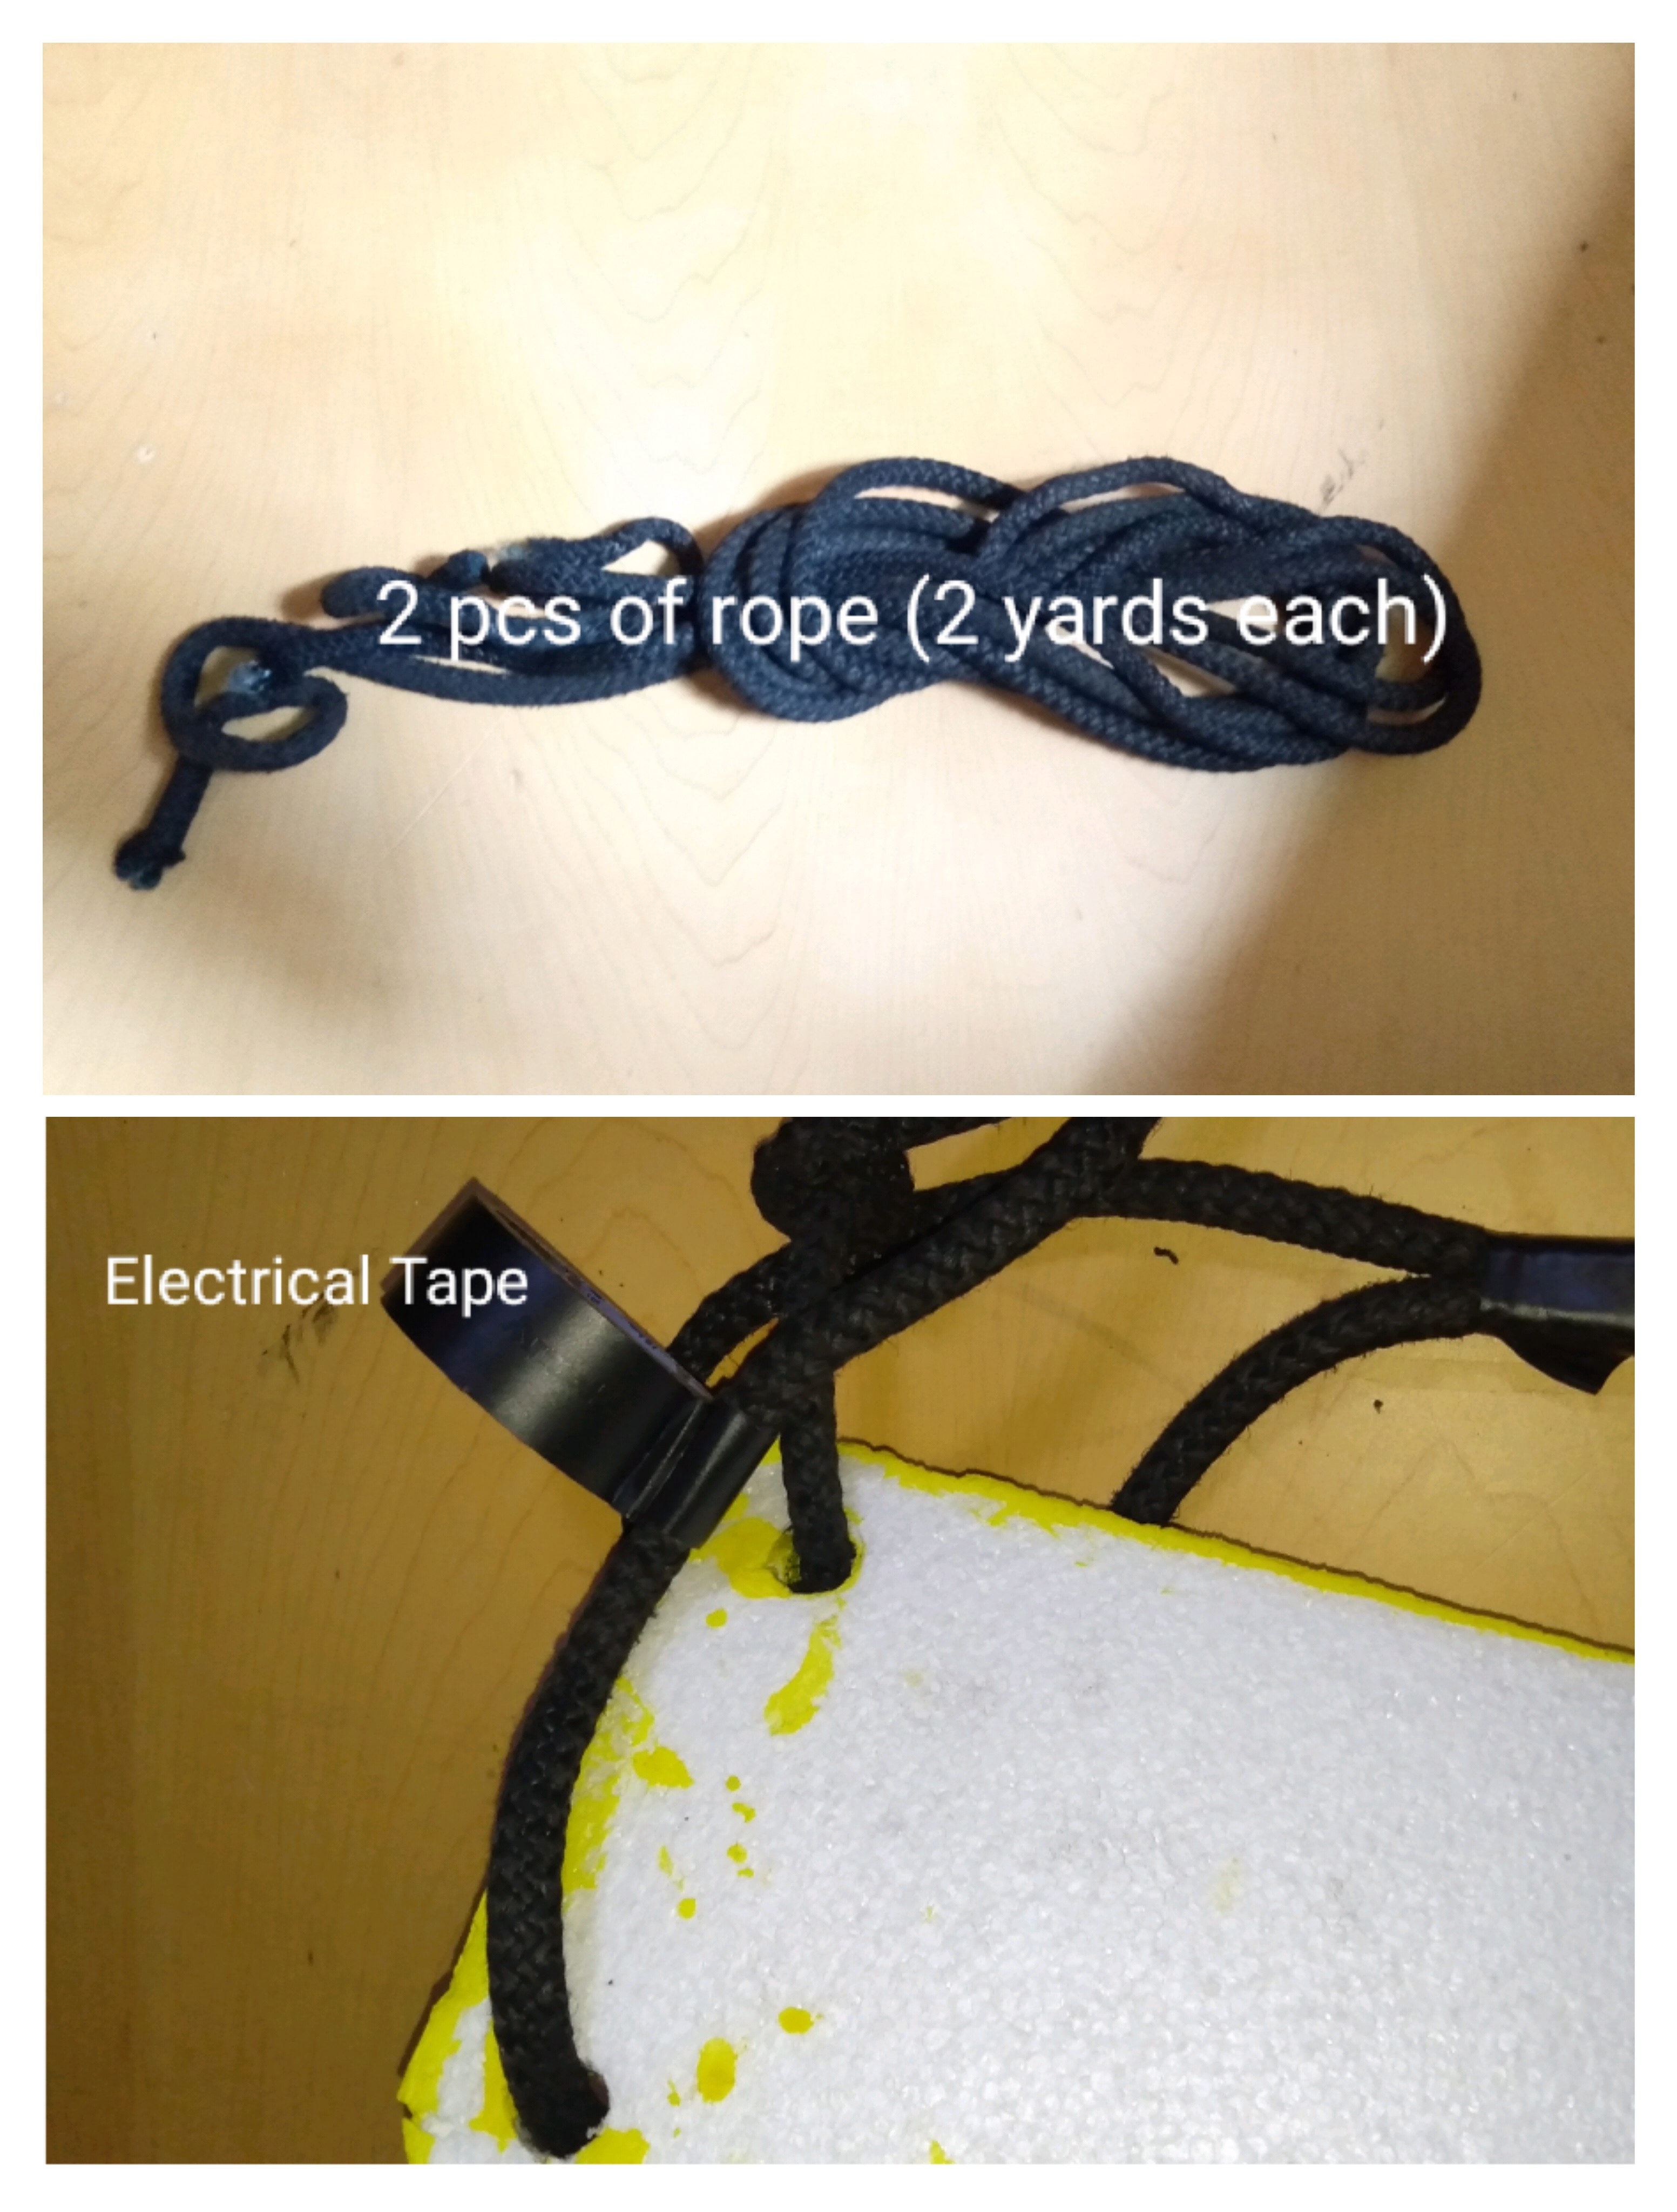
2 yards of rope (I used a black one)
Acrylic Paint (Yellow)
Cutter
Candle and thick round shape end metal
How to do:
1.Mark the styro foam: cut according to your choice if how long and wide it would be. I can't give you the size that I used here 'cause honestly I don't used any measurement on doing this craft. Don't be lazy and don't do what I did :p
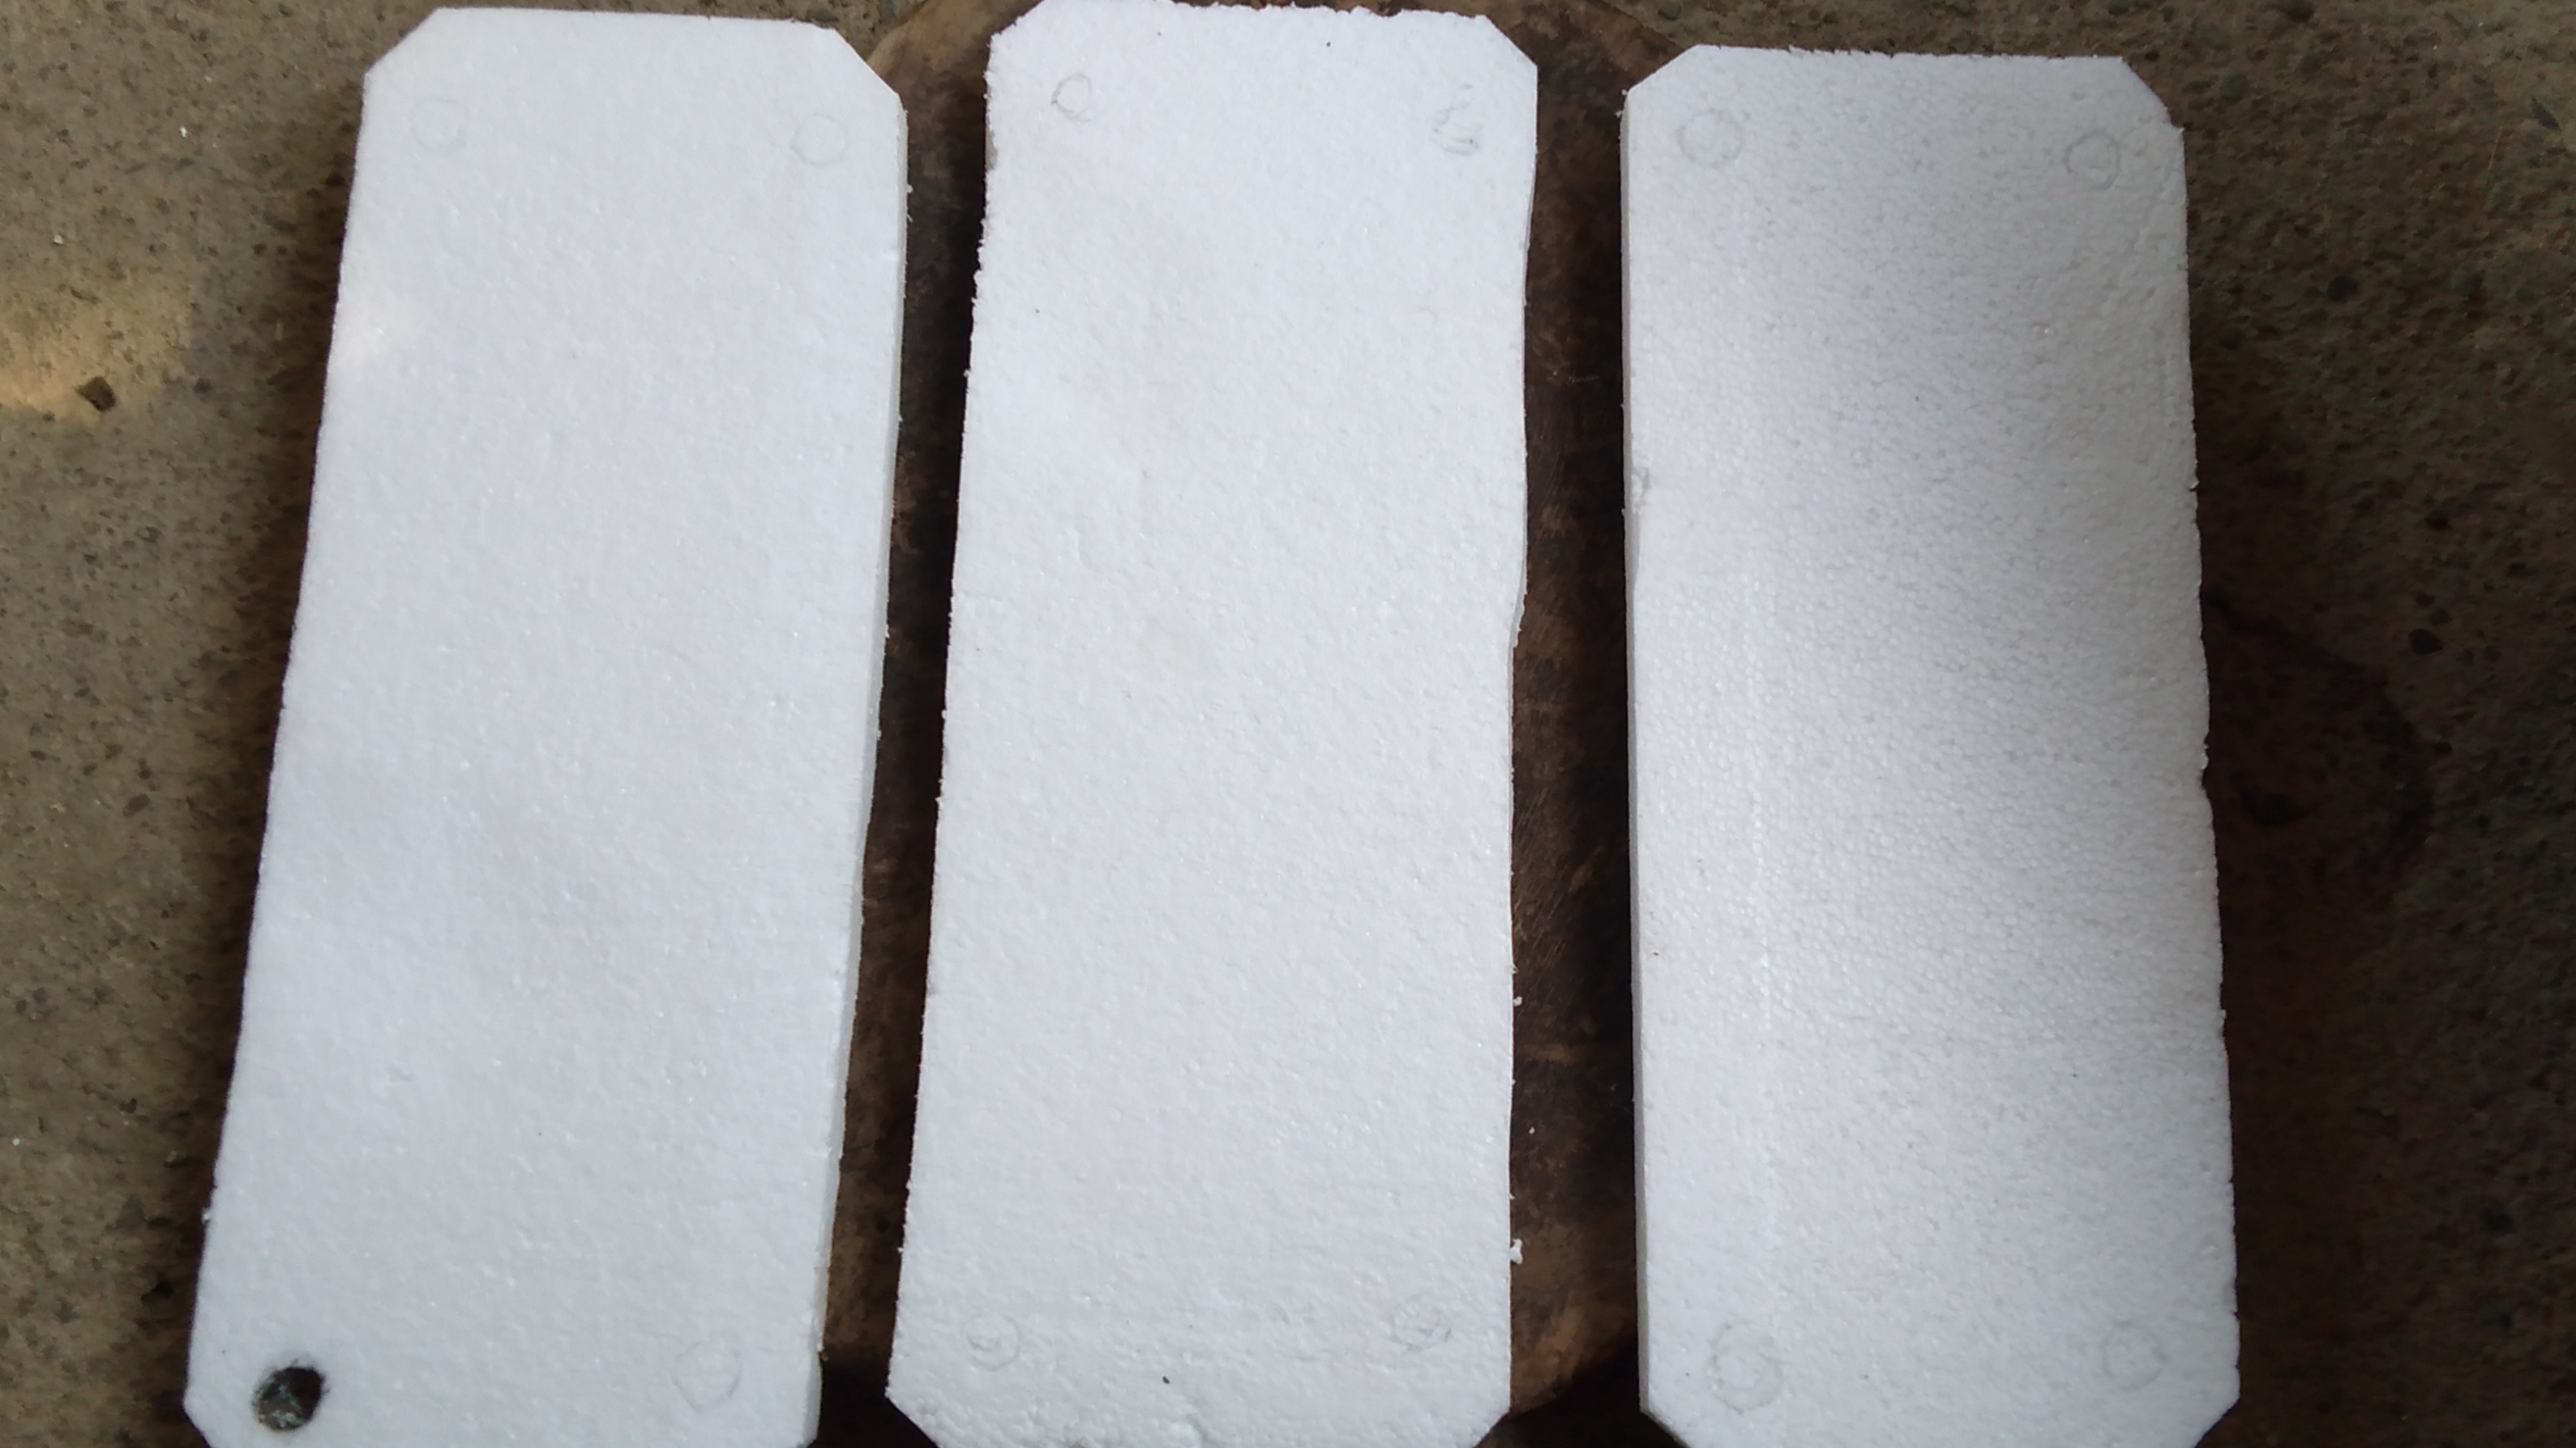
2.Carefully cut the styro foam using a sharp cutter. Make sure you to cut the edges clean so when you paint them it will be smooth finished.
3.Mark 4 small holes each side and make sure that is even on both sides.
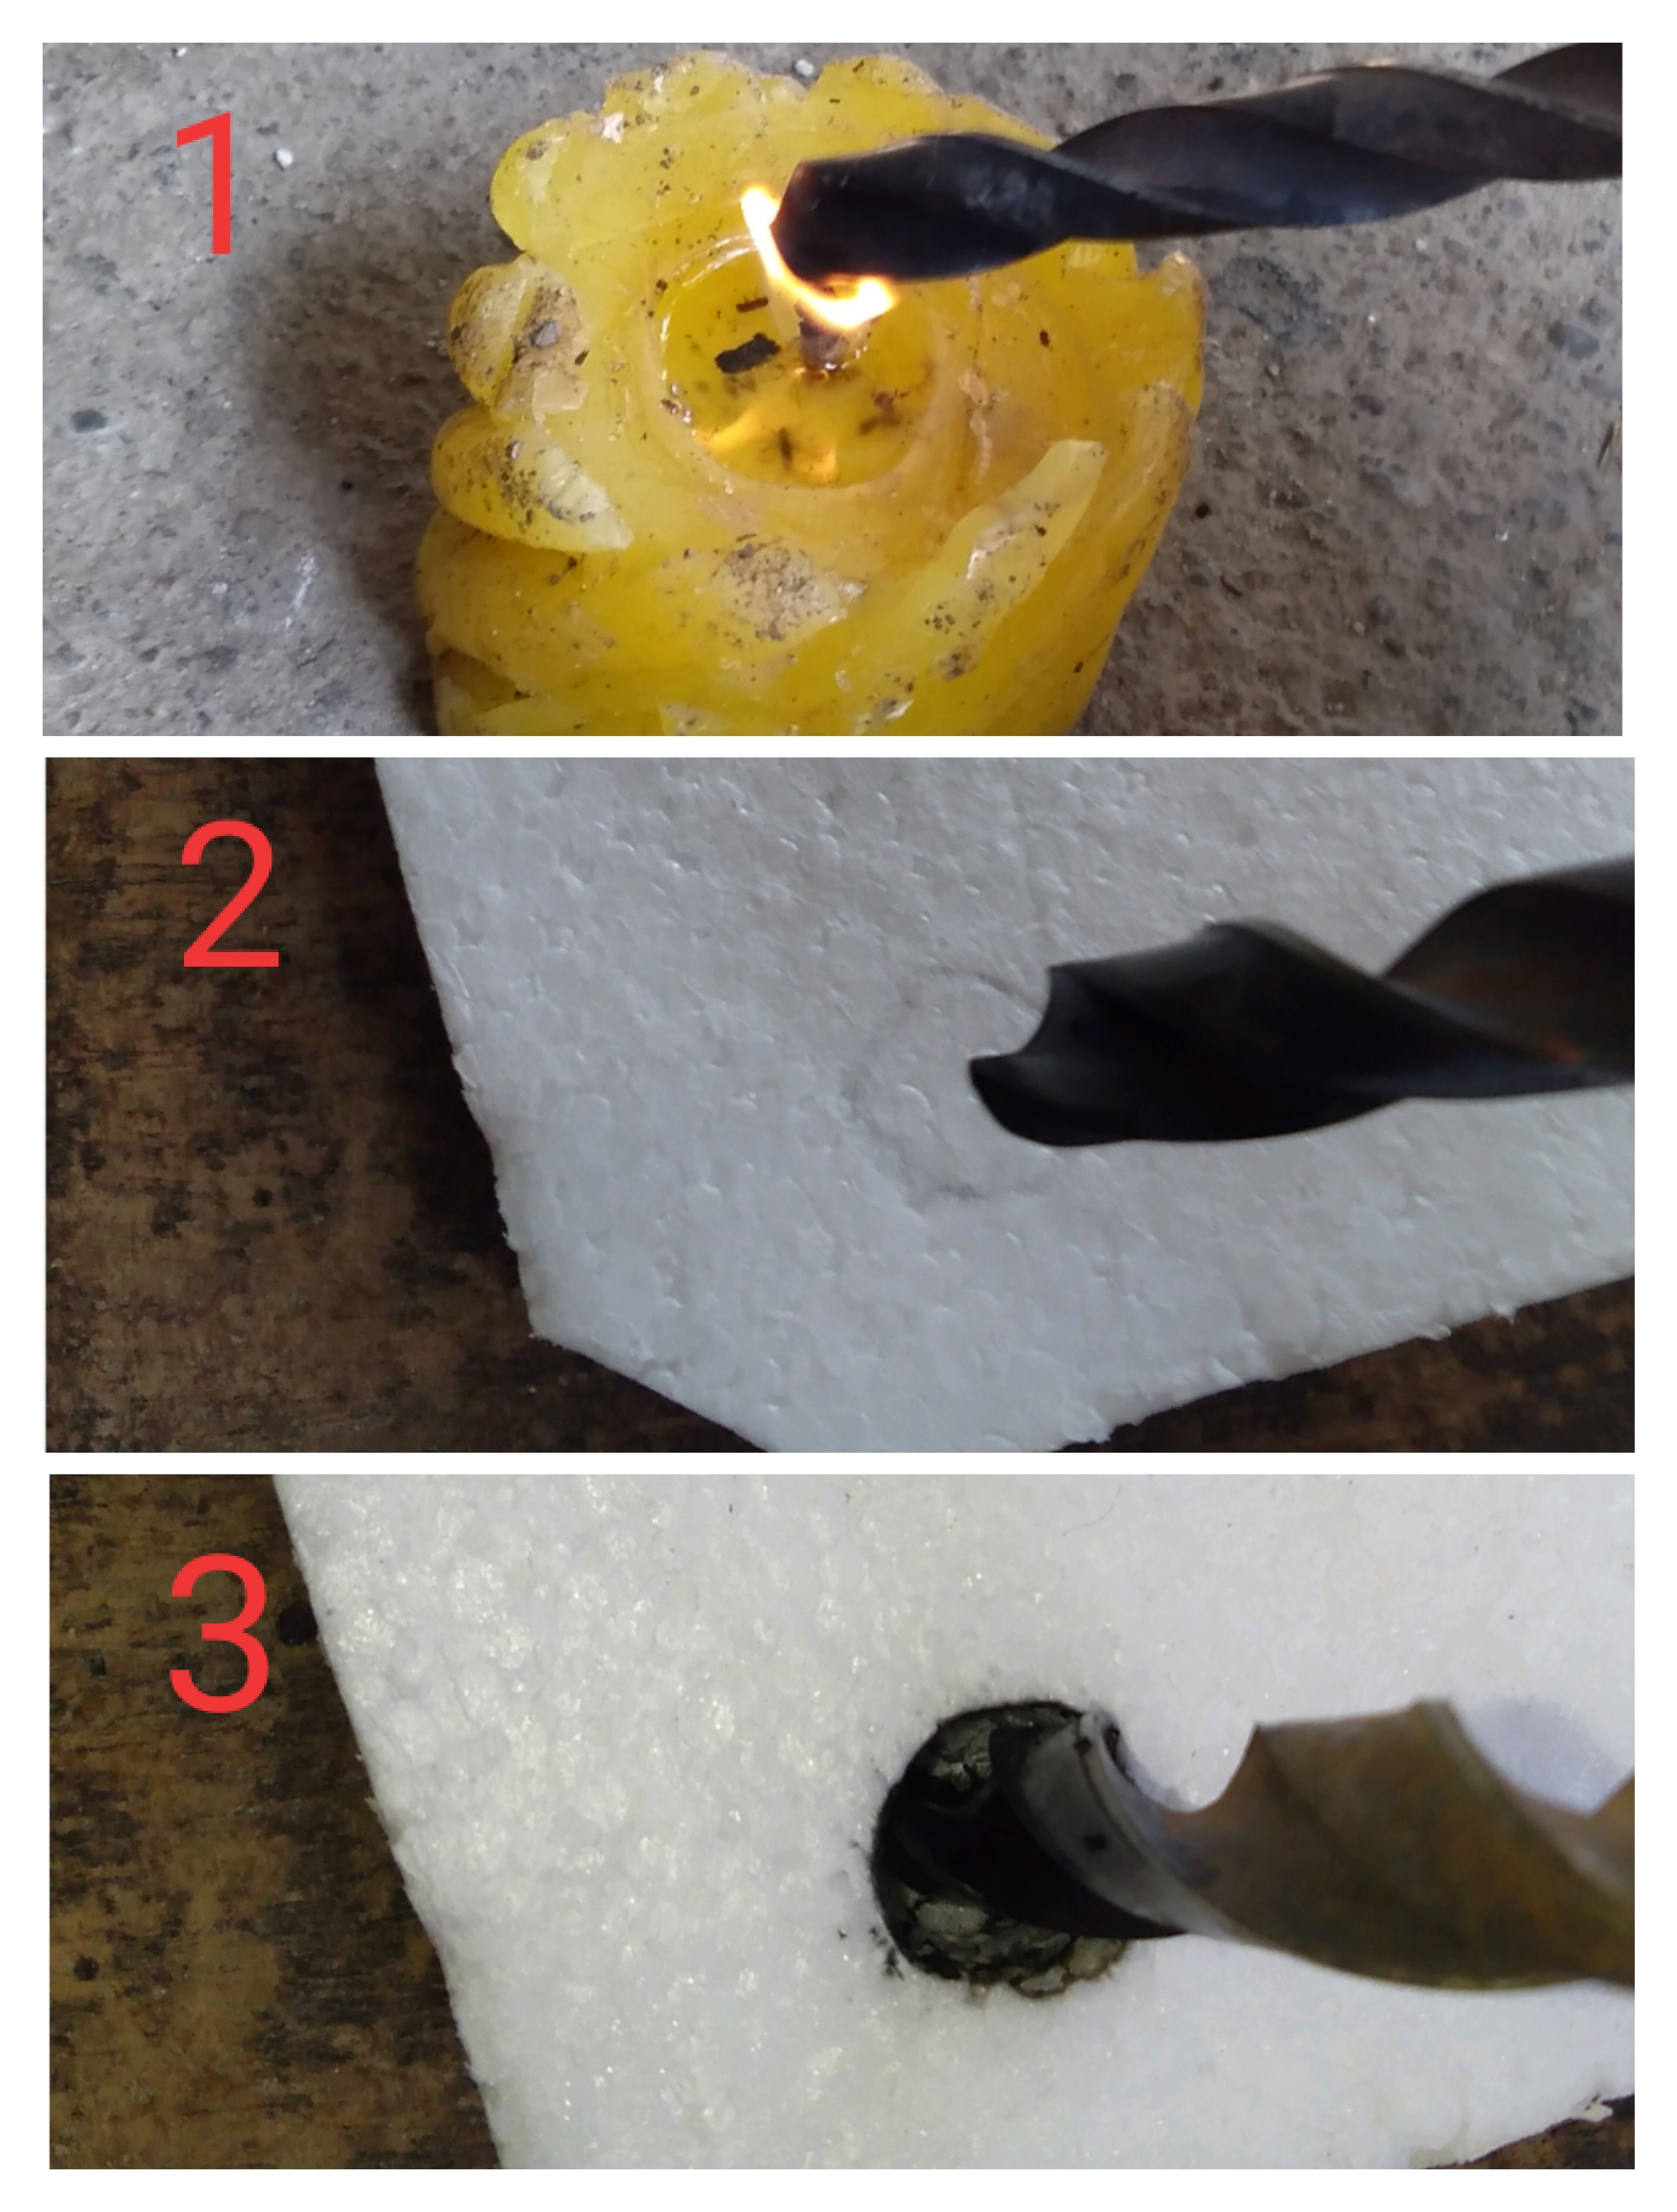
4.Using a candle, start to heat up the metal for you to make holes. If you have a soldering iron at home you can use it without any hassle.
5.Prepare your desire colored paint. The only paint that I have here is yellow. Brush with paint on top and the edges. You can paint also the bottom but I skip this part.
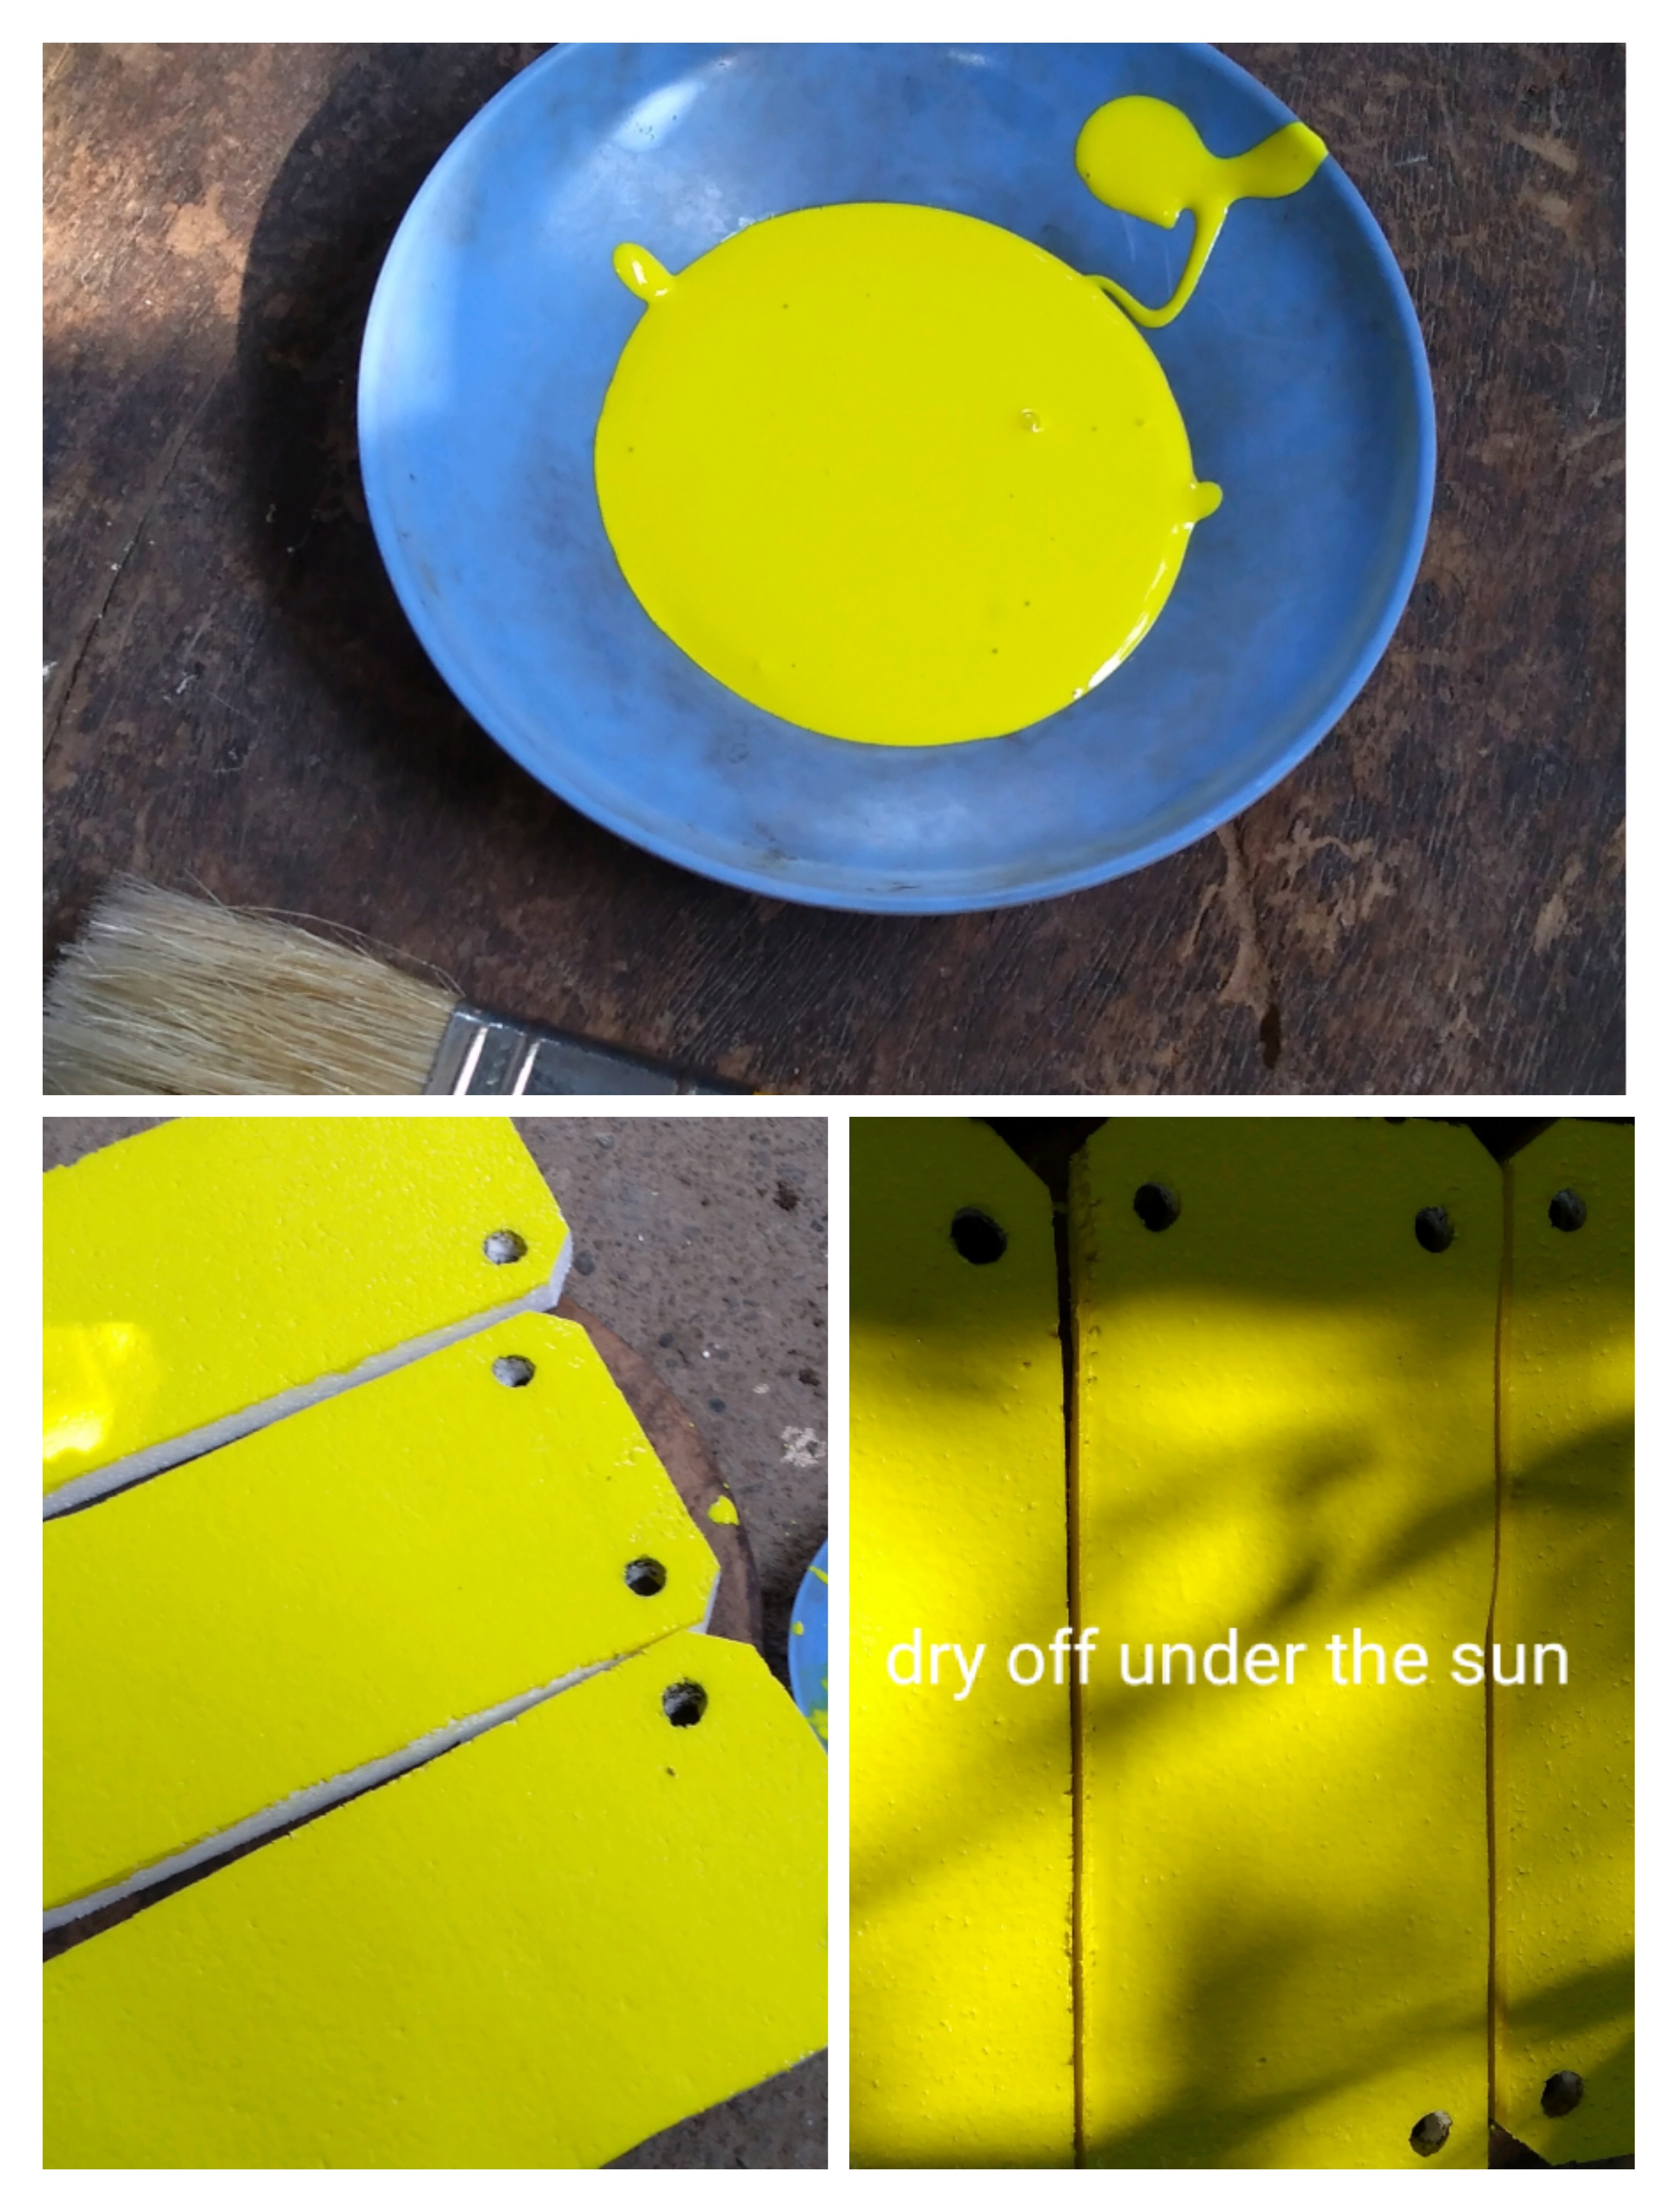
6.Dry them completely before proceeding to put in the rope.
7.Get your first rope and carefully put it in the holes. Secure the bottom on both sides. I didn't tie these but I just rolled some electrical tape and I liked how it looks.
8.Make it sure that it is even on height. Put all the four styro foams. After that get the second rope and do the same procedure and again make sure it is even on height for both sides.
9.Now your done! Decorate it with just a lightweight toys like cute stuff toys, miniature stuff and some cute cactus. Remember it is a styro foam not wood so don't expect that it can hold a heavy weight items.
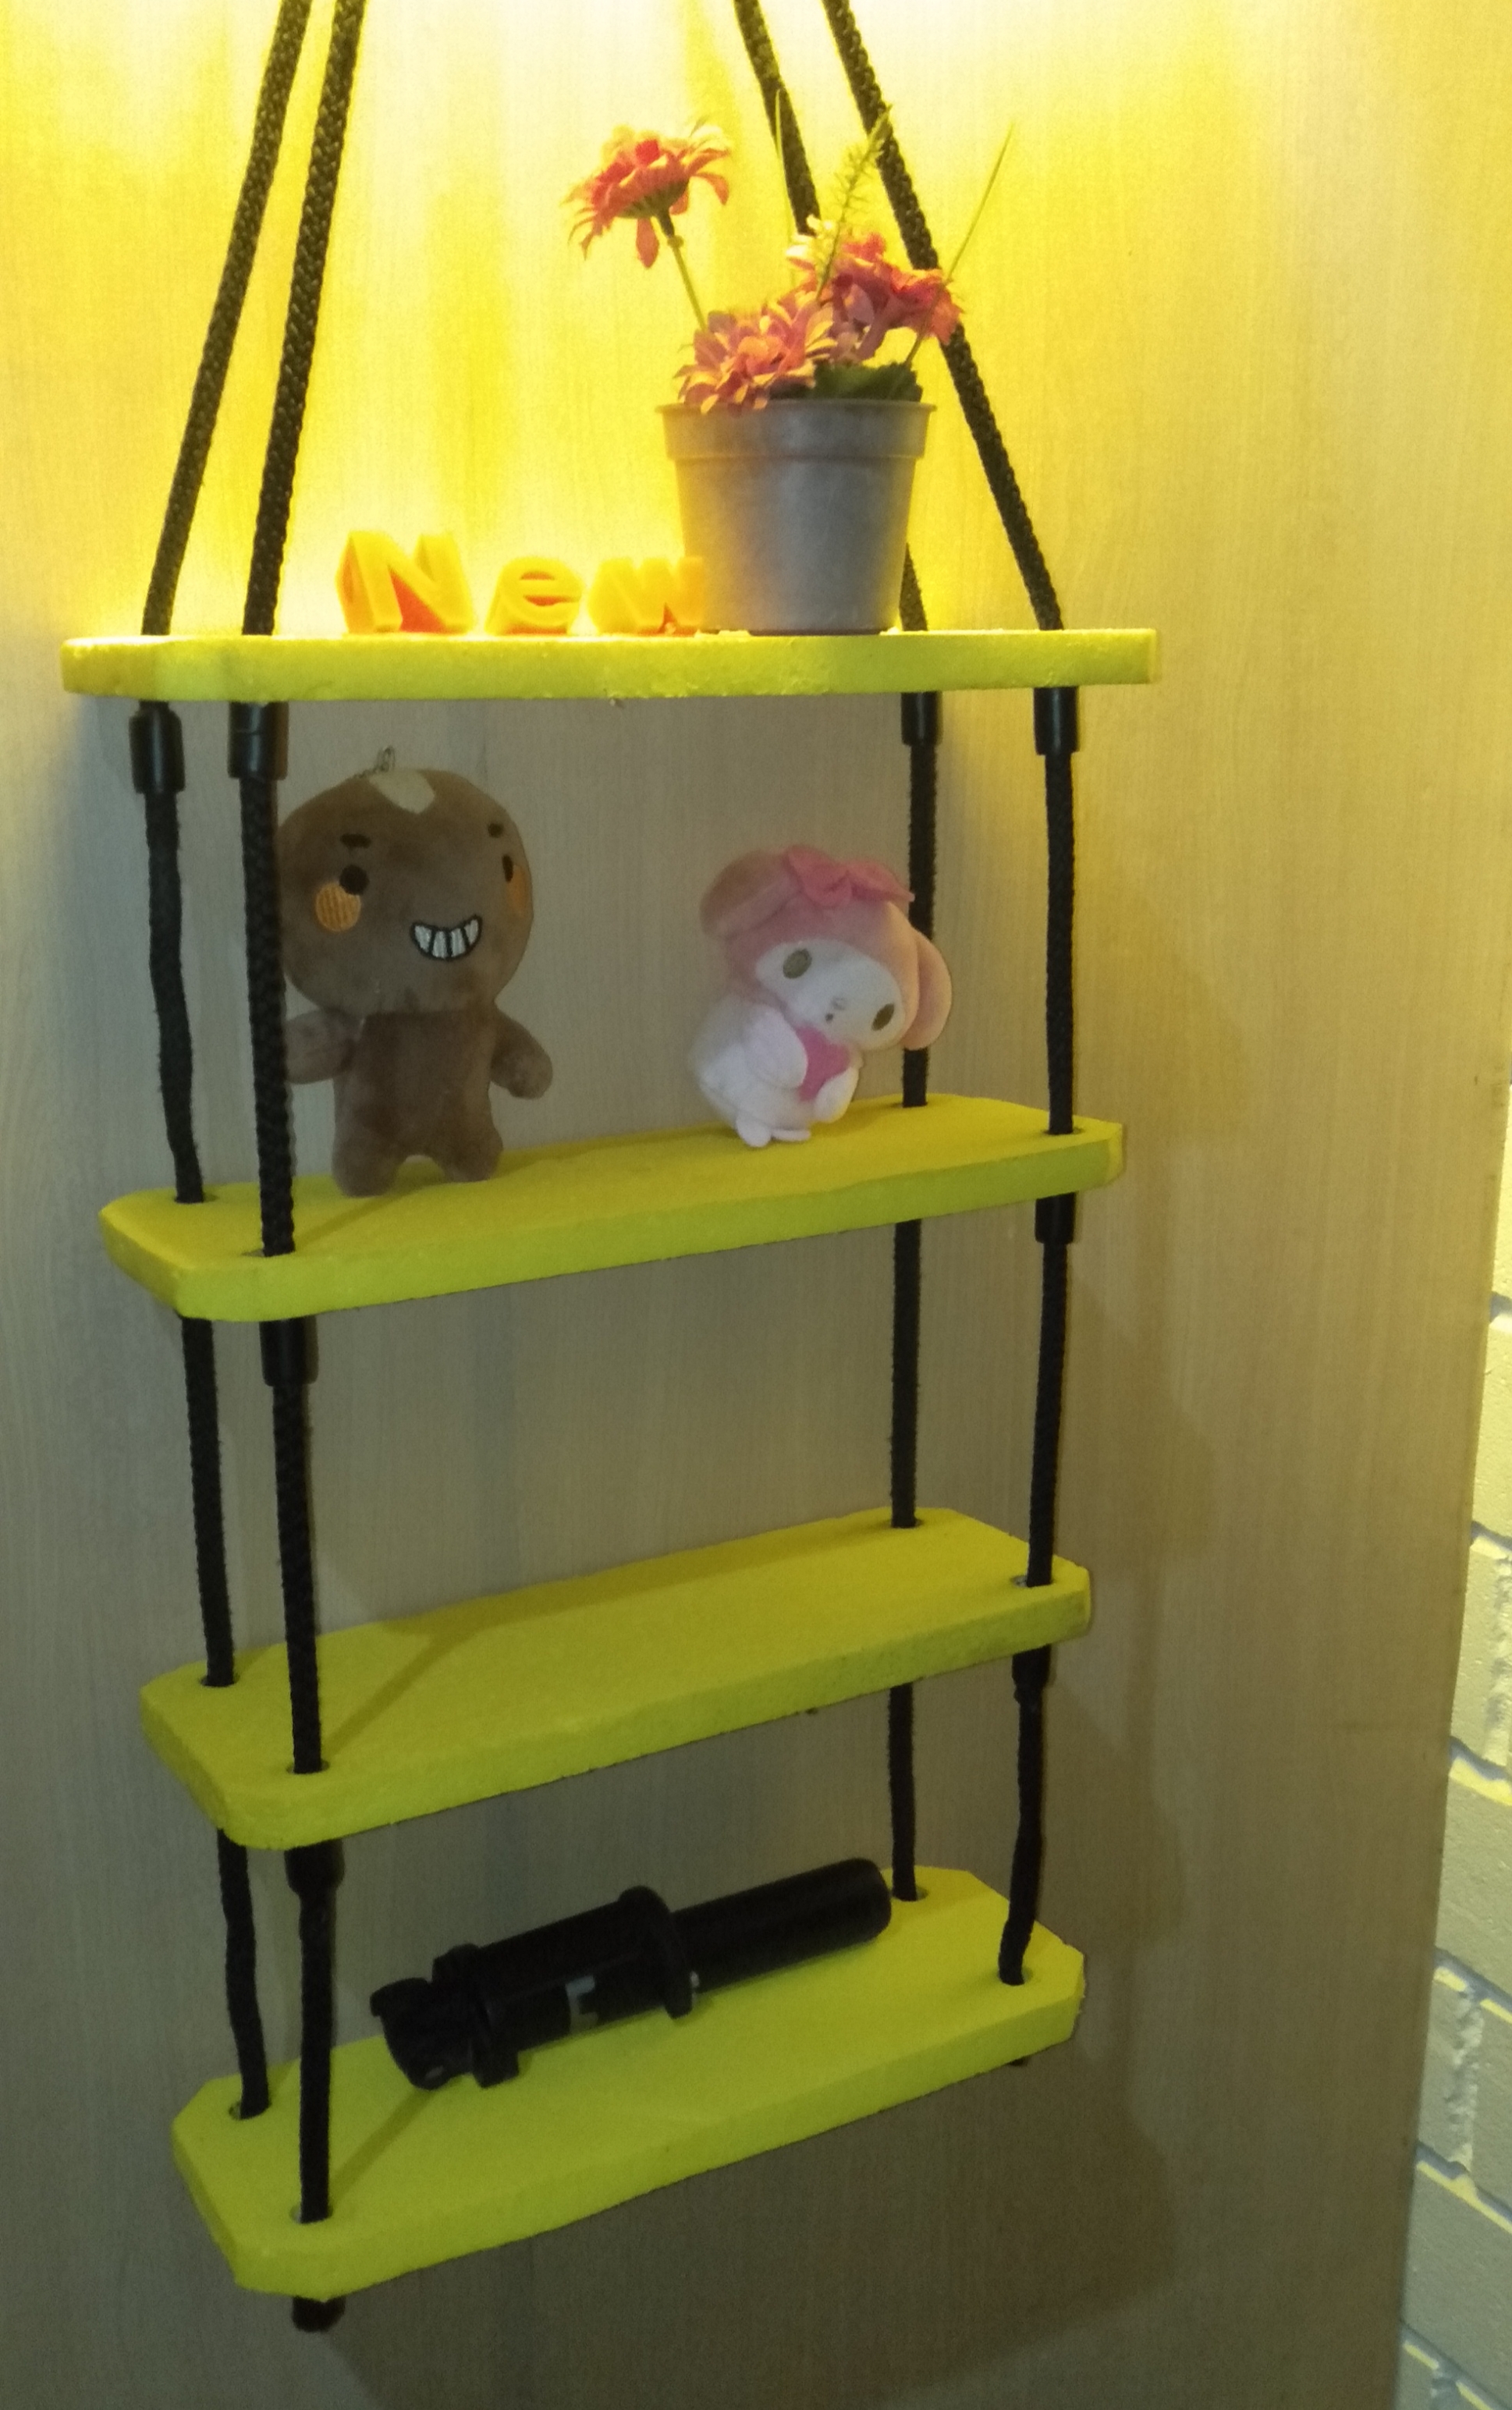
It's a successful craft for me today, I can say that it was my original concept of a dollar tree using a styro foam rather than the basic needed was wood. If I have a good quality wood, I will definitely do it again and place more rack for more displays. Hope you like it and try this at home. See you on my next Do It Yourself Stuff.
What a cute hanging/swinging shelf for a child!
LOVE your creativity!
Yeah! it's look like for a child but actually I'm gonna used it lol:D
Thank you @qurator team!