This month @elamental & I have been working on a project that is very near and dear to my heart. In this post, I will share with you a little about our process, for those of you who are interested. Herbal dyeing is a labor of love, especially when you forage for your own ingredients to make your dye bath. Connecting with Gaia through the gathering of our materials was fulfilling from start to end.
Before I decided to dip my toes in the water, the whole idea of botanical dyeing was a bit intimidating in my eyes. It would have been much easier to go the route of working with the low-impact dyes. However, our vision was not so simple. It was our goal all along to produce the most eco-friendly garments which have the least harmful impact to our skin and our environment...so the choice to us was clear!
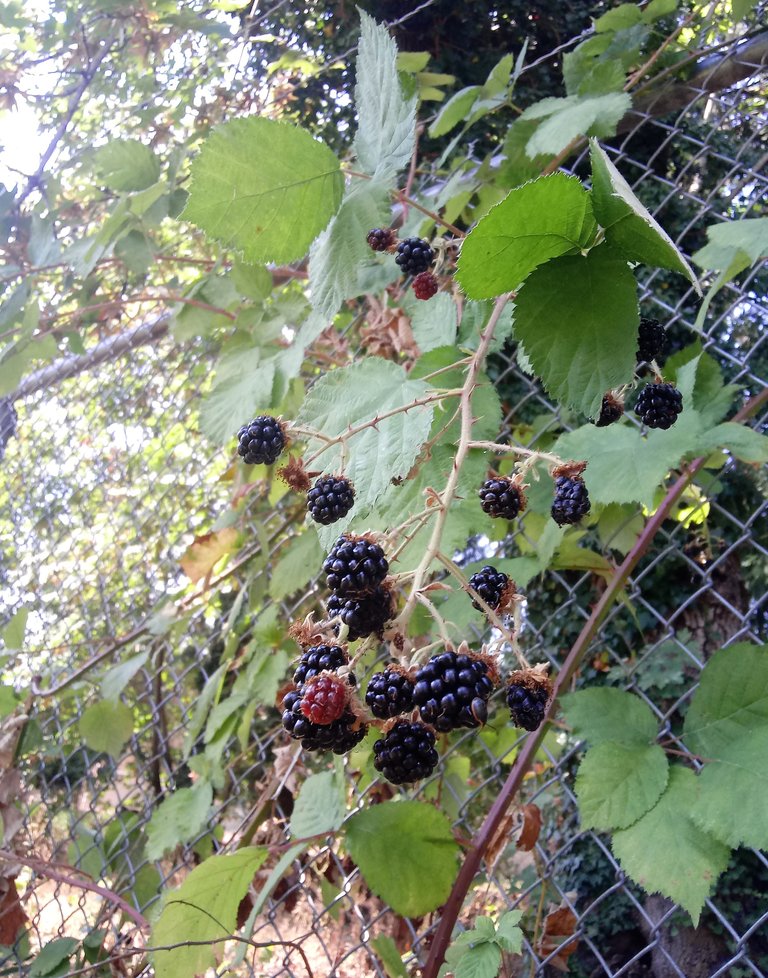
We started by doing some research to figure out which plant would be best to create the colors we were looking for. After going back and forth on a few options, we decided on the blackberry plant. I looked online to figure out where the berries could be found locally and was provided with a ton of good suggestions, but we ended up visiting a location that was suggested to us by a friend. It happened to be quite close by and wasn't a far drive at all. After trekking through some thick thorny brush, I tackled collecting the berries while @elamental took on the harder job of collecting the thorny stems and leaves- all without gloves mind you. (Yes, the leaves had spikes too!) Hand protection is definitely something to think about when working with this plant.

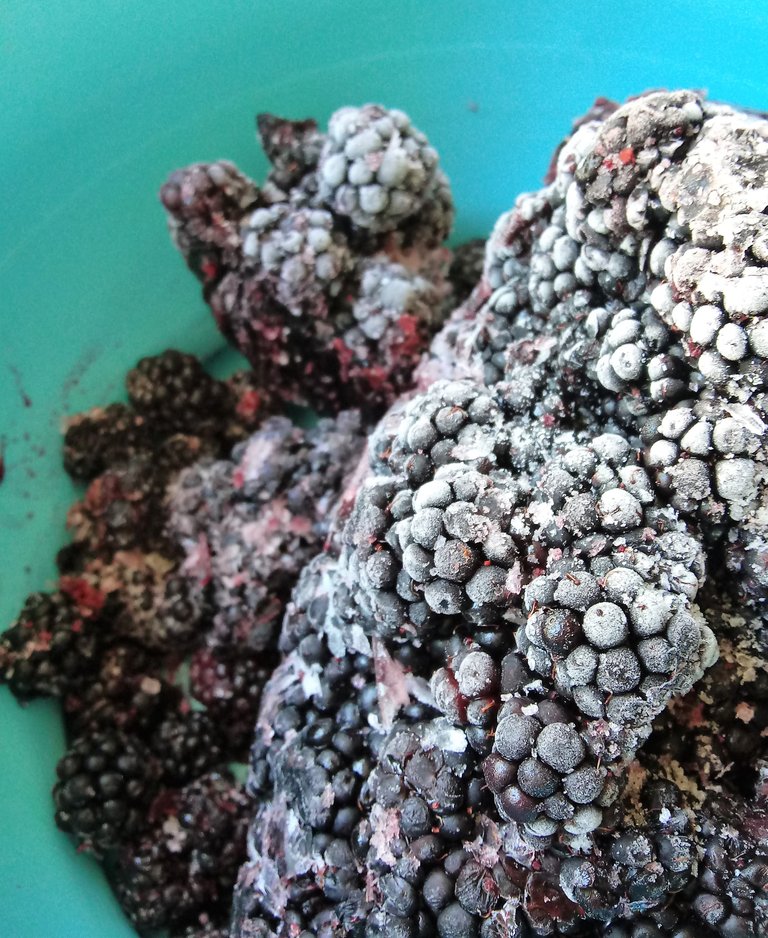
We brought the berries home and put them in the deep freezer. There was quite a bit of berry juice at the bottom of the bag, and when I got a little on me it definitely stained. This was a good sign! I'm in love with the frosty look of the berries here. This was after being frozen for a day or so - and at this point they were being thawed in the sun in preparation of creating our dye bath. If you aren't working with your berries right away it is a good idea to freeze them for when you're ready.
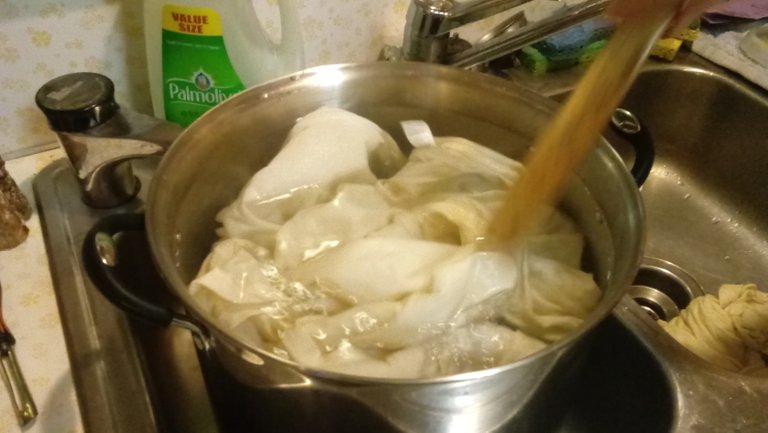
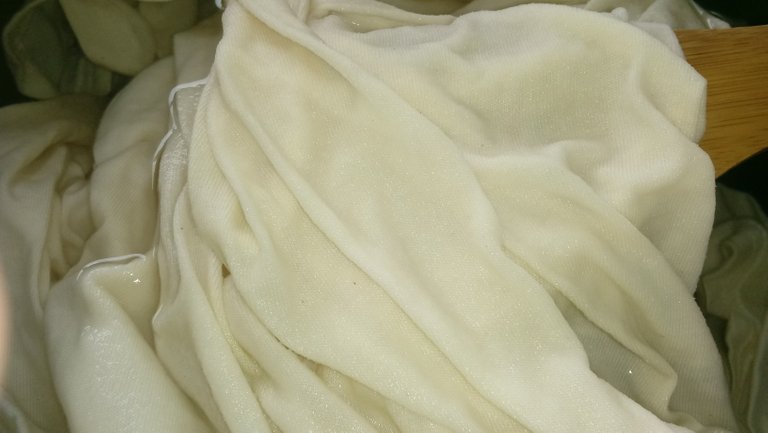
Before working with any botanical dye, you will need to prepare your fiber to be fixed with color. To start you will need the largest stock pot you can find. Remember not to reuse this pot for cooking once you have finished - it will need to be dedicated solely for dyeing /mordanting in. The first part of the process is soaking your fiber in a soda ash bath. This is what is referred to as scouring and removes any dirt or waxy build up that may be on your fabric. You don't want anything getting in the way of your color when you begin dyeing. This method can be done with or without heat. I have seen ladies do their scouring in a bathtub, and I have seen others set their cloth on racks to be sprayed with a hose, but personally, I choose to use my pots for this. I bring my bath to a simmer and hold it for two hours, but you can also boil for about an hour. Some sources will suggest using a ph neutral detergent along with soda ash, but I have found it is honestly not necessary. Rinse your fibers before moving on to mordanting.
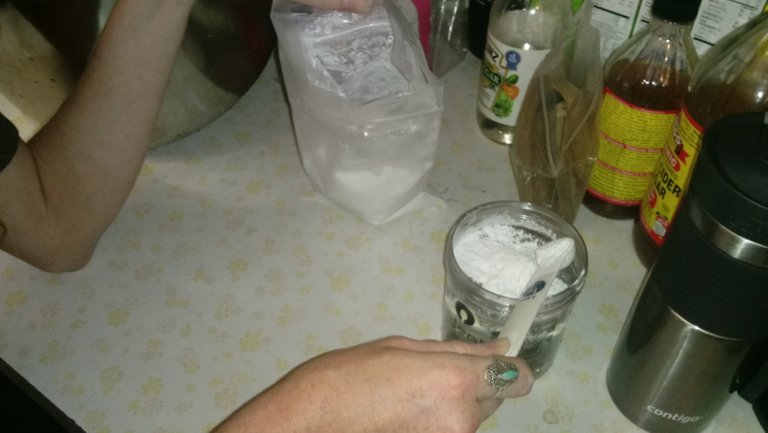
For both the scouring and mordanting processes, you will need to wet out your material in cool water and dissolve with boiling water. Dissolve in a smaller bowl or pot and if you are using alum acetate, be sure to wear gloves and a mask.
Mordanting can also be done in a myriad of different ways. Each dyer has their own way of doing things and a lot of it takes personal trial & error. If you are using aluminum acetate, you will need to pair it with a dyer's chalk to help fix the color. These steps can be done together or separately - personally, I do a chalk afterbath before I move onto dyeing when working with aluminum acetate. How long you leave your fabric in the mordant solution is up to you but I would suggest letting it soak for at least 4-8 hours if you can manage. I find it difficult to do all parts of the process in just one day, so letting my fabric sit in the mordant overnight makes for a nice break before moving onto dyeing. If you are using a tannin then you can move directly onto dyeing once you've finished mordanting. If you are interested in seeing visuals of the mordanting and dyeing process using Cutch extract, see the video below. Dyeing with extracts is very different from using fresh plant material and I will go into that further in another post, but I wanted to give you an idea of what the mordanting process looks like.
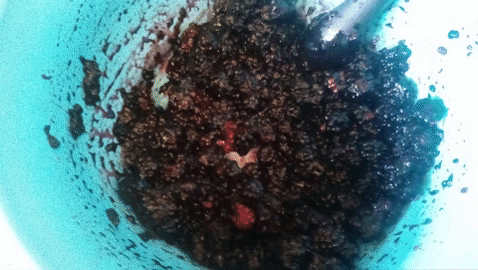
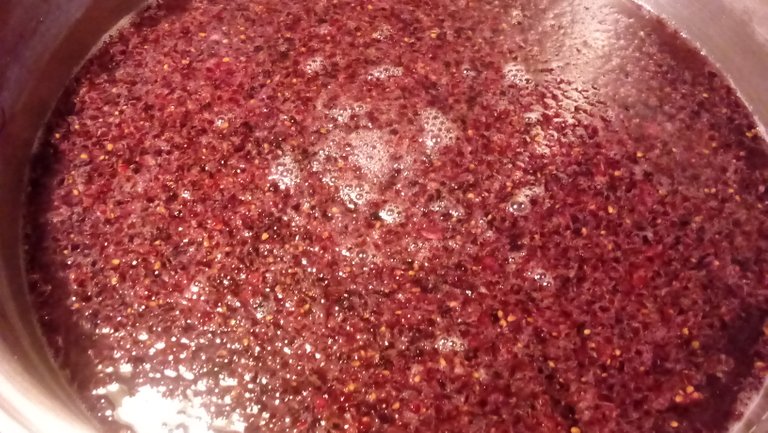
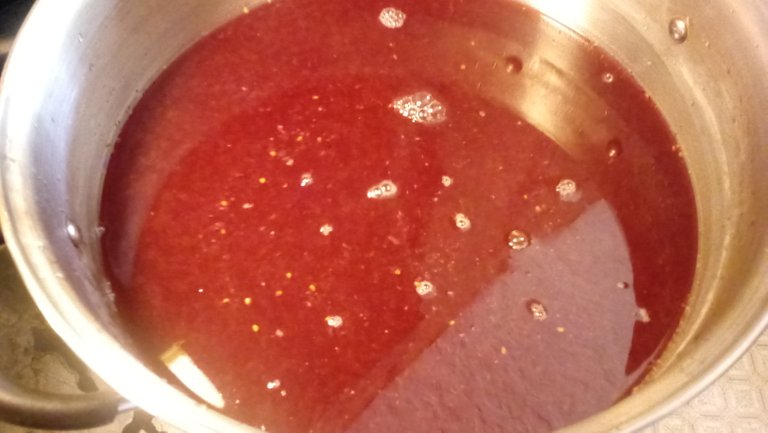
Getting back to the blackberry dye...we crushed the berries up really well once they were thawed out enough. From there we placed them in our dye pot and covered them with enough water to cover our shirts. We then simmered the solution until we got the desired color, and strained off the blackberry parts. The latter is essential to achieving a consistent color. What you are left with at this point is your dye bath, which the shirts are added to and brought to a simmer once again. When using plant fibers it is recommended to leave your fibers in the bath overnight to be sure all of the color is taken up, but you can remove them whenever you are happy with the color - keeping in mind that your fabric will lighten as it dries.
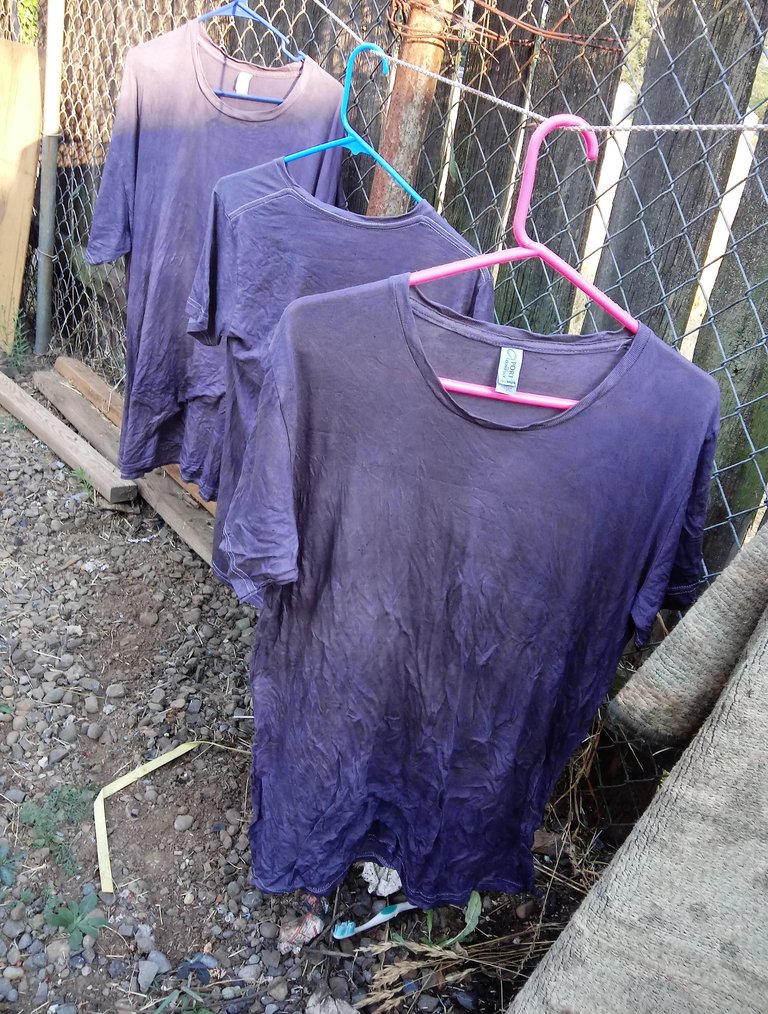
Here are the results of the berry dye bath. This photo was taken shortly after pulling them from the bath and hanging them to dry. Once they dried, they proved to be a much lighter shade - more of a silver than purple. The hues that can be produced from what mother earth gives us alone are truly magical, and I cannot wait to share with you all our adventures in using a natural mordant. I hope you enjoyed reading about this living color project. Until next time! ~@hempress

Well done comprehensive article about our natural berry dying process, complete with original photography and videos that have detailed instructions. This is a great example of content that @earthtribe seeks to support. I would love to see more Steemians dying fabric like this.
I love you to pieces and could not ask for a better partner to be by my side throughout this entire thing. thank you for being here for me every step of the way ♡
Ditto, I love you cakes!
super awesome post.......I actually read this at a time that I needed to read something positive and natural and about good things, thank you

thank you!! ♡♡♡
wow these turned out really well, thanks for taking us through the process step by step, I have never used blackberries to dye with, I have used onion skins and beetroot. Really love the end result, great job @hempress
That's lovely! Onion skins are something I have been wanting to try. Would love to hear more about your experiences. Endless thanks for your support ~ sending my love ♡
Nice! Well written! Thanks for the effort of explaining it step by step! Cheers
Posted using Partiko Android
Glad you enjoyed! Hope you can find this to be of use if you decide to dip your own toes in the water (dye) :-)
Blessings!
That color is beautiful. How do I see more of your work? Do you have Instagram?
@masscollective Thank you kindly for your interest ♡ You can find my work on instagram here: https://www.instagram.com/totaleclipsethreads/
(@totaleclipsethreads)