Let’s add another dimension to your Light Painting photos.
Let us dive into the topic of textures.
One of the most important aspects of a photograph, to make it more interesting, is to create a feeling of plasticity. Its a powerful artistic tool to be used for expressing what you think is important to the image. The artist leads the viewer to areas in the image that he or she considers relevant to the story to tell or simply to “shed the light and interest” to a feature or subject. This can be achieved by the means of depth of field or creating a strong texture by allowing shadows to cast. Since this blog is mainly about long exposures and night photography I will show you how to create dramatic texture in Light Painting Photos.
In architecture, photographers would normally wait for the sun to have a specific low angle to hit the facade of a building in the right way. The idea is to give the facade the plasticity and portrait curves and edges and show the shape of a subject. In my opinion, the Light Painting technique allows the artist like no other technique to create a unique way of lighting a subject/object.
The human brain automatically tries to interpret the shadows cast by light onto a surface to understand the 3D properties of it. Shadows tell us what dimensions, shapes, and forms an object has. For that, we would normally expect the sun coming from an angle somewhat above us and from the side to cast shadows. Today we see how we can use that for us to create dramatic lighting in our Light Painting photographs.
Texture is all about how to work with Shadows.
The moment you would like to light up the floor in front of your camera you need to know how you like your shadows. Depending on which direction you shed the light you can cast the shadows in different directions and create shadows that the sun could never create. So the important message here is: try to apply the light from a far angle in relation to the camera orientation. That will create shadows for the vantage point. Depending on how strong you let the shadows be the viewer gets to see dramatic texture and shapes arise in your photos.
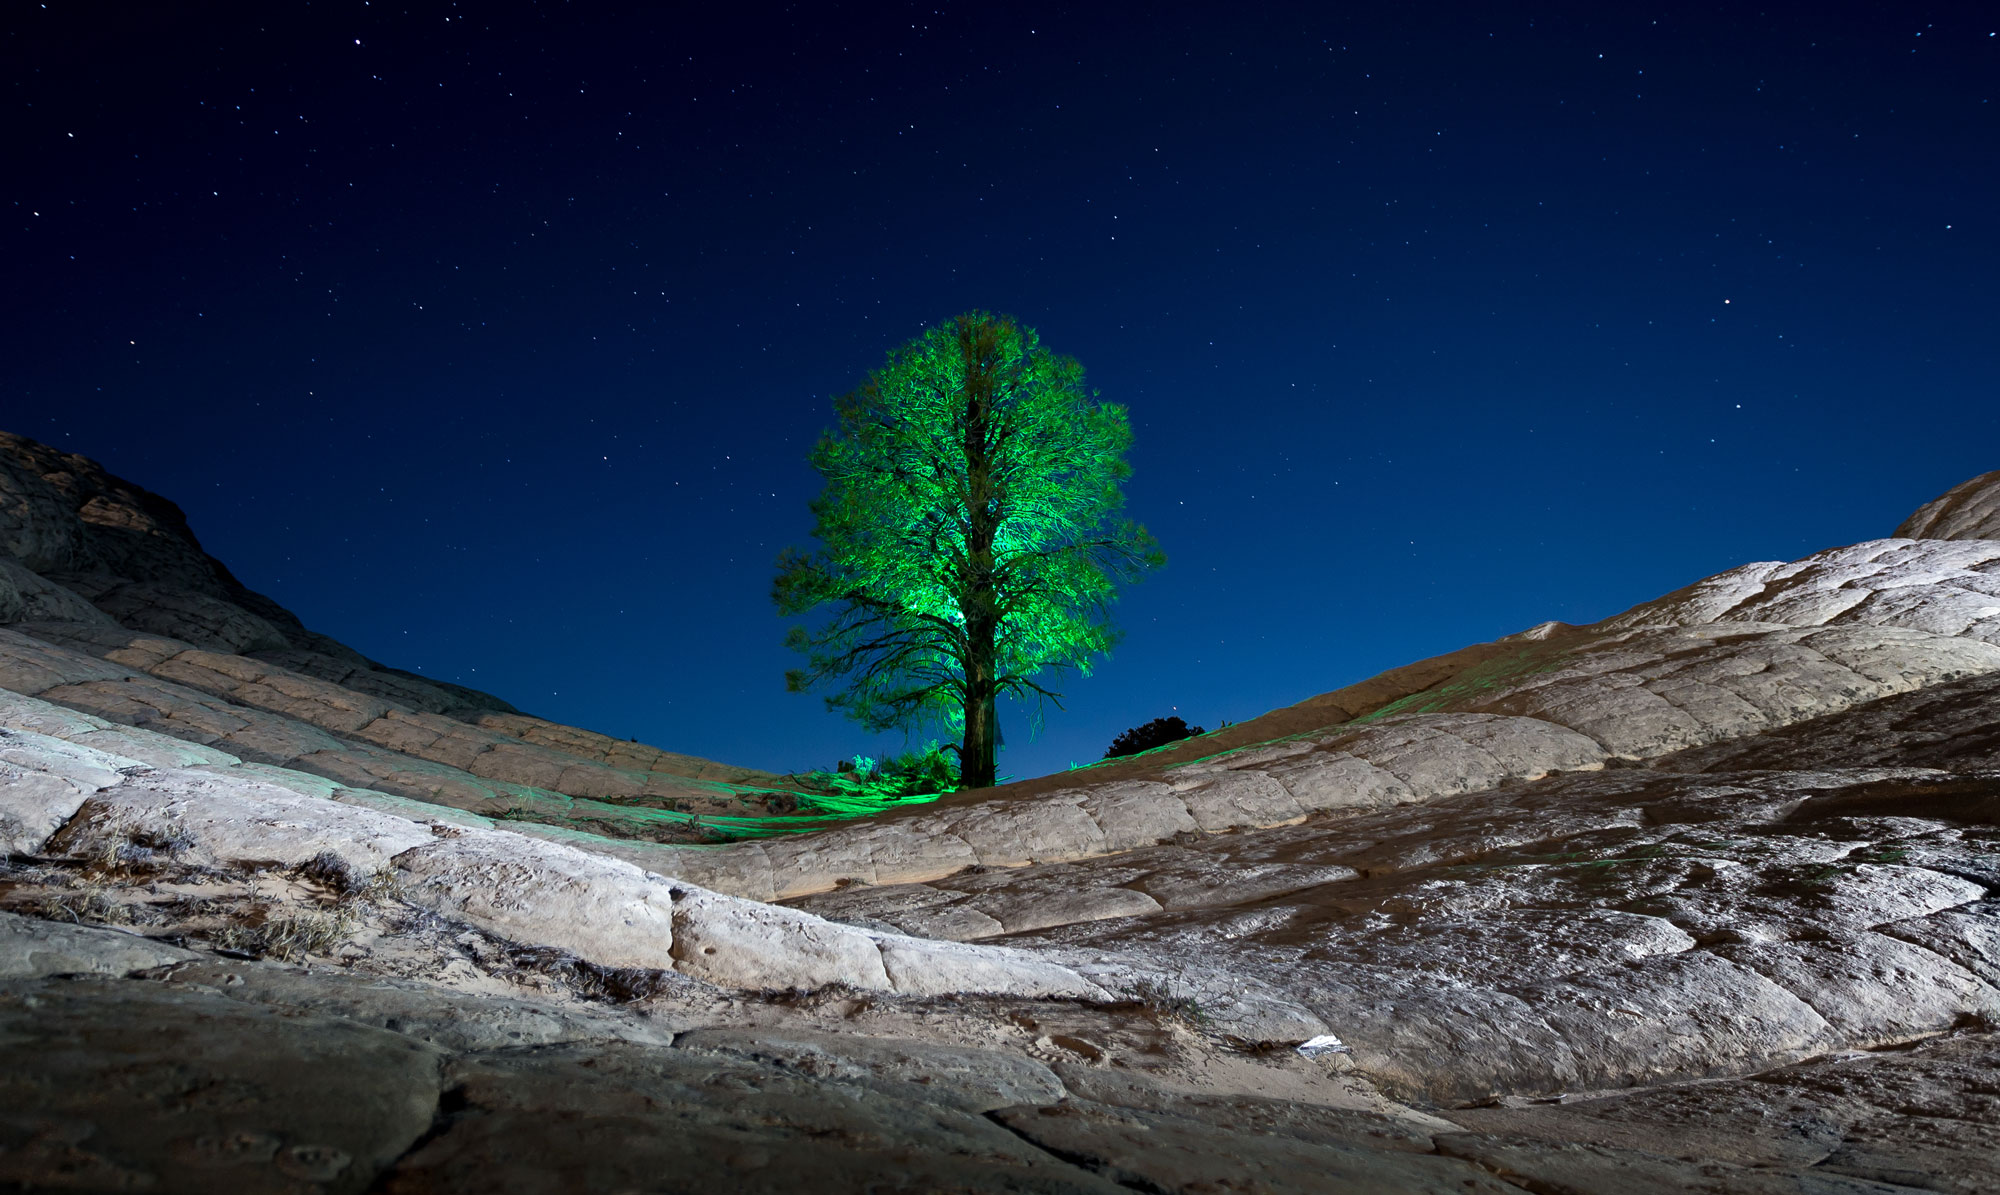
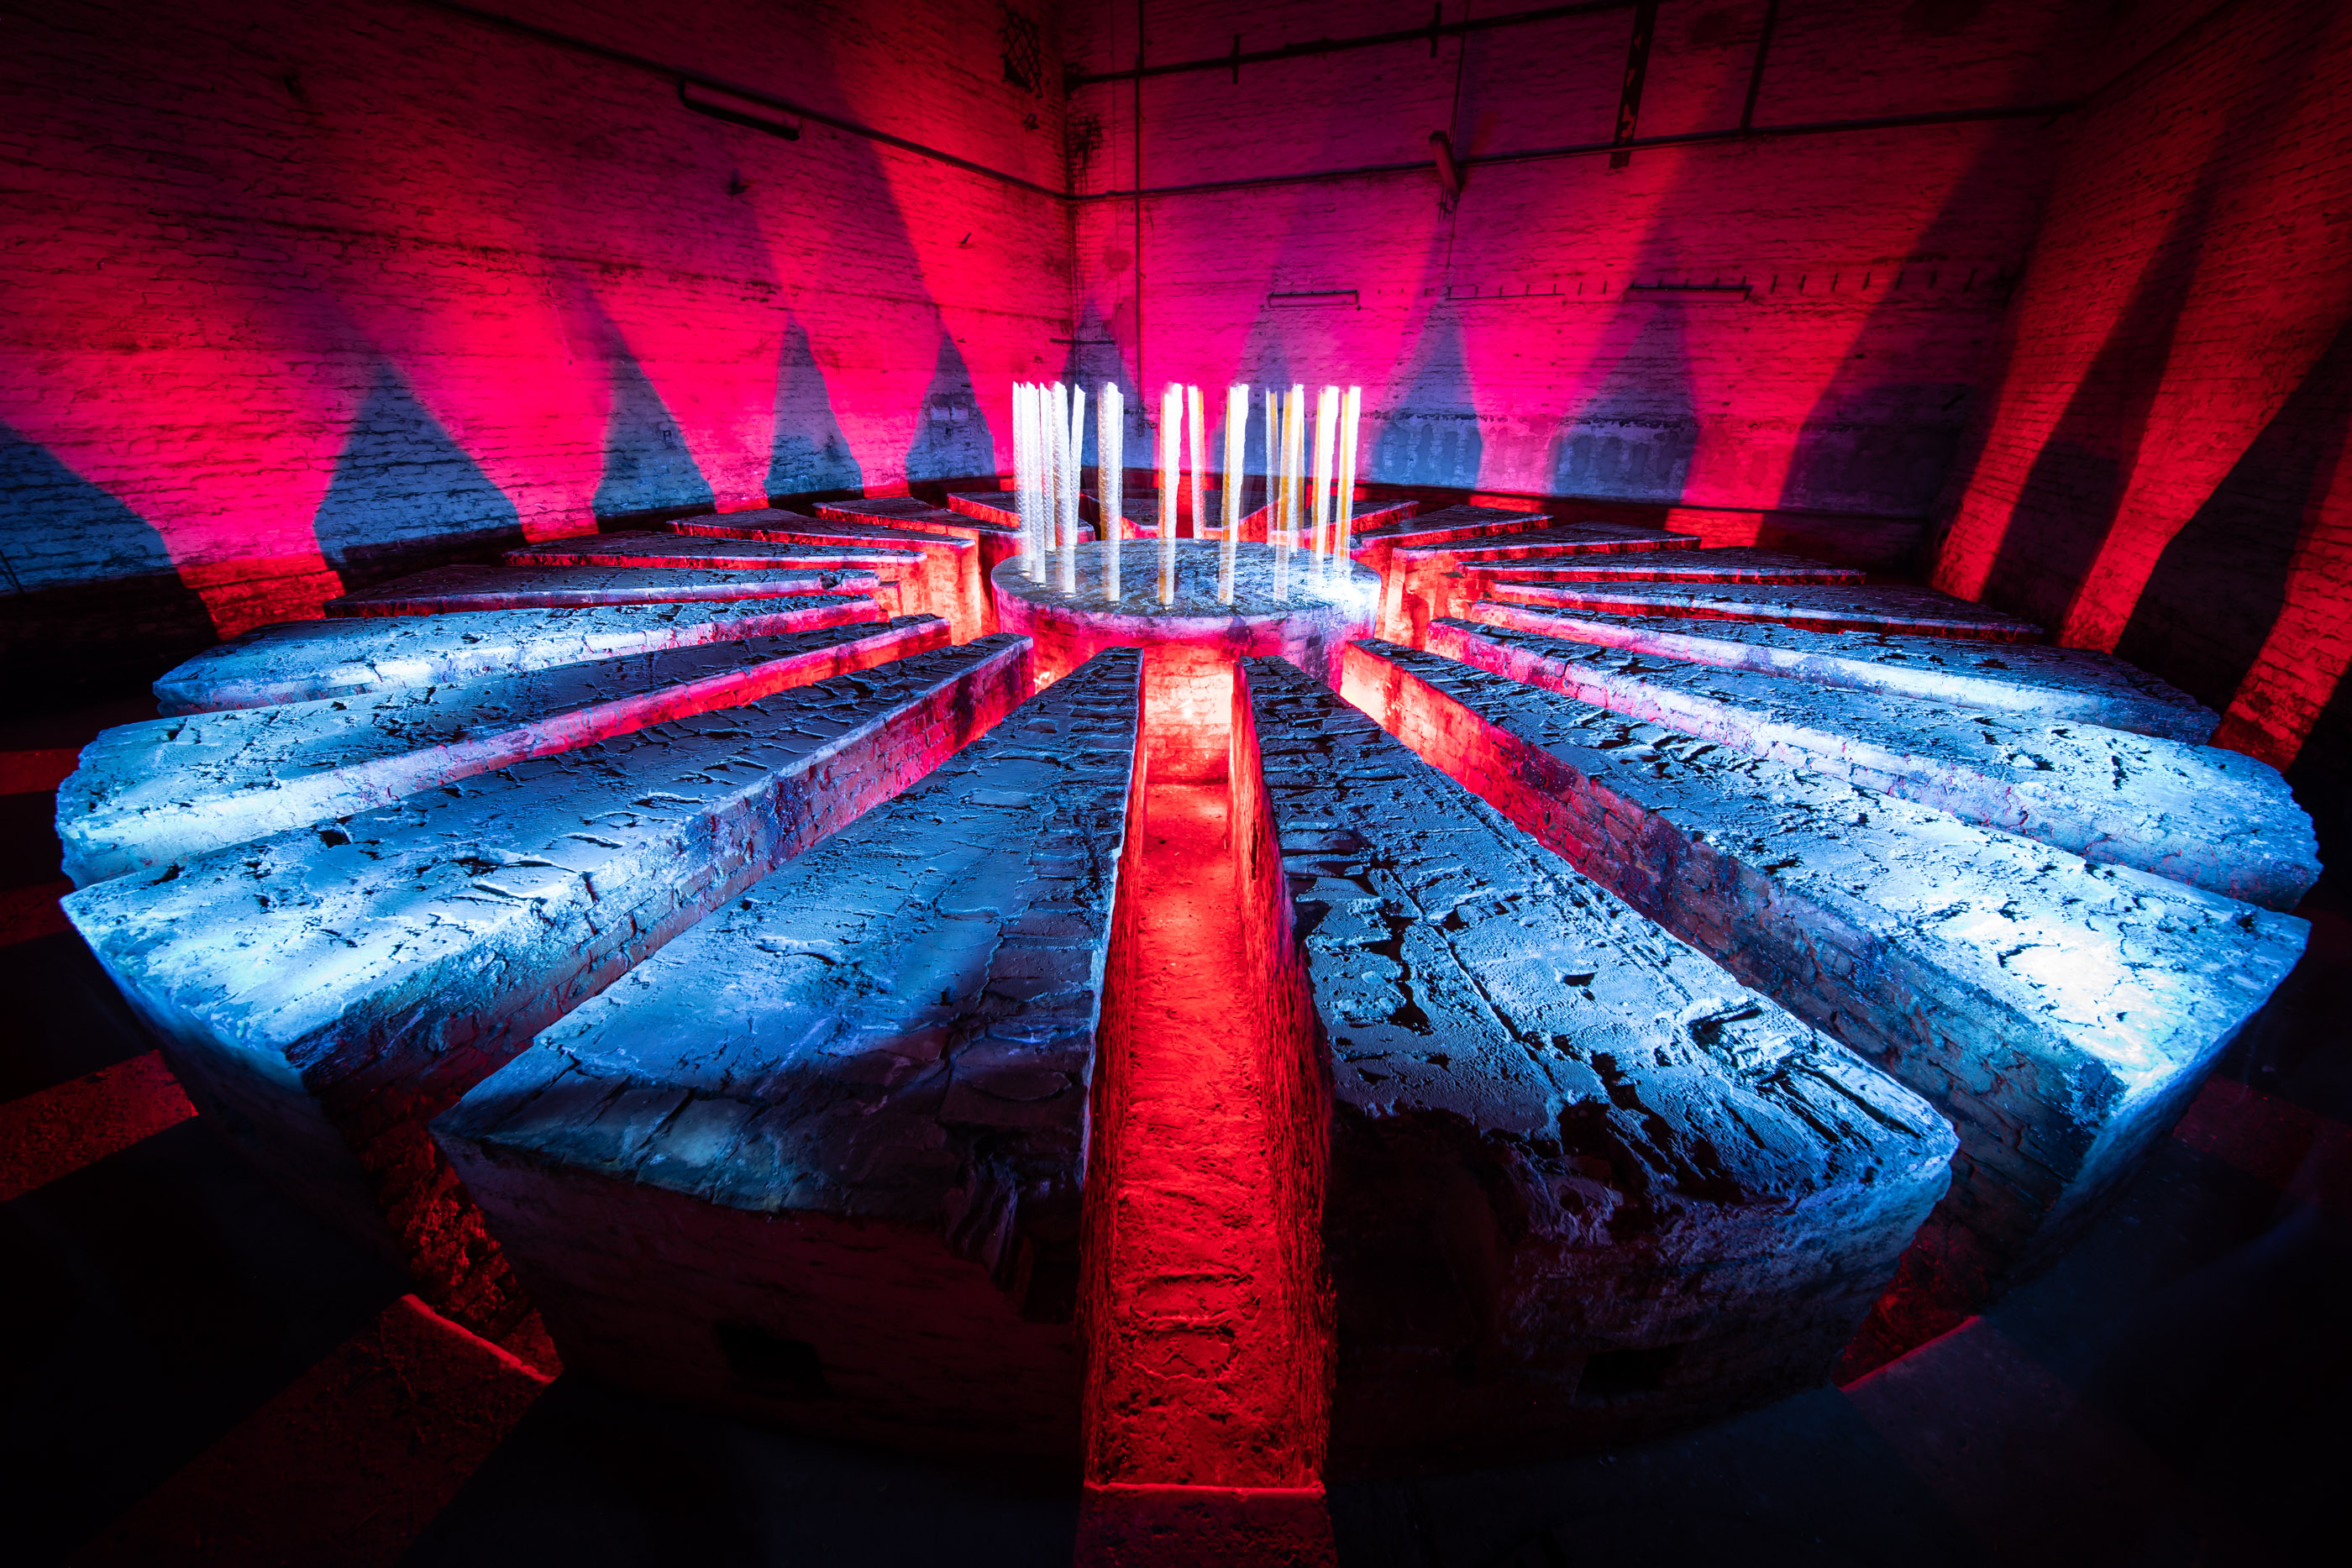
This particular example shot shows the light coming from a very low angle from above, almost parallel to the surface and 90° angle to the Camera orientation. As you see the light is creating very nice shadows. You can almost feel that the surface is rough.
In this case, the light is hitting the surface from almost the same angle as the camera looks at it. The surface looks flat and gives you little to none texture. In some cases that might be what you want. See my post on Light Painting on White background.
Extra play: A lamp post can now have 12 shadows so the base looks like it has roots. Try that looks awesome.
Extra Tip
Make sure your Light Source does not shine directly into the camera from where you are. In order to avoid that you can take some cardboard and tape it around the edges. Sometimes I use my other hand or a blackboard to shade the light source in-camera direction.
Considerations to create Dramatic Texture for Light Painting Photos
1.On what surfaces and how do you apply this technique?
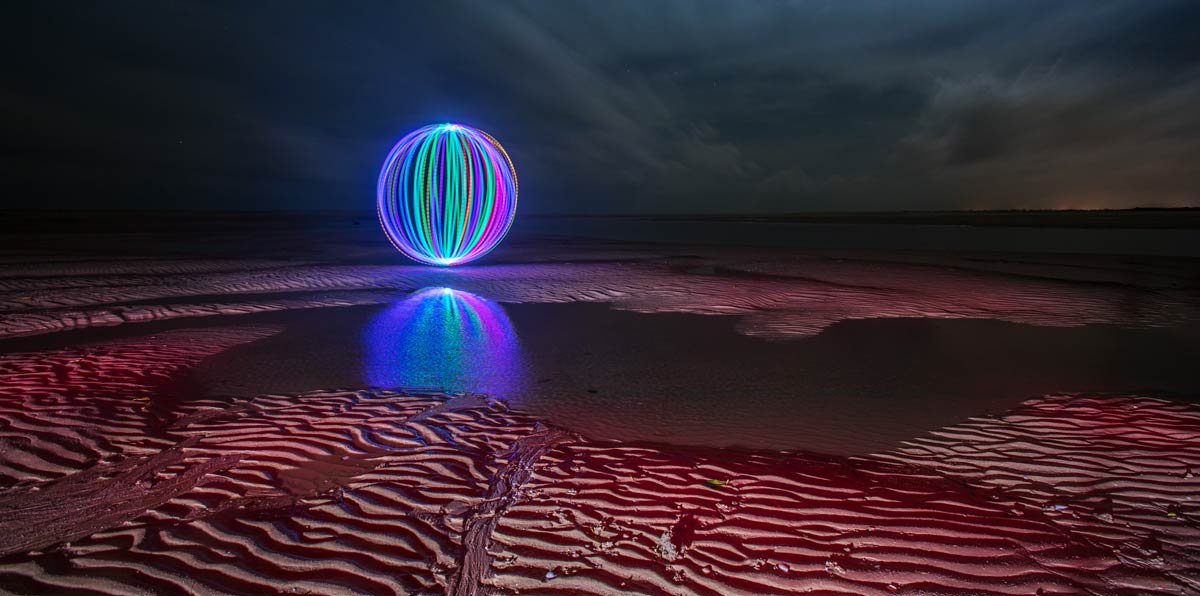
In many cases, the foreground/floor is always something that is forgotten. When you have a beach and you have these beautiful wavy tiny sand dunes the water created its almost a must to feature the floor. If you are in an old abandoned warehouse even the trash can look very interesting and fascination if you shed the light in the right way.
The walls of a castle or the grass on a meadow are also great examples where the play with the shadows can make your features be more eye-catching.
Pro Tip: you can also shed two different colors from two different sides.
2.From where and what angle do you apply the light?
Well, I could just simply say it’s your artistic consideration. But let us discuss this here for a moment. If you have some features that actually stick out of the surface that is in your frame you can ask that question. Let’s say flowers stick out of the ordinary grass. That would be the moment when you can consider heading the light from two different angles only. Creating shadows that cross at a 90° angle can then look super interesting.
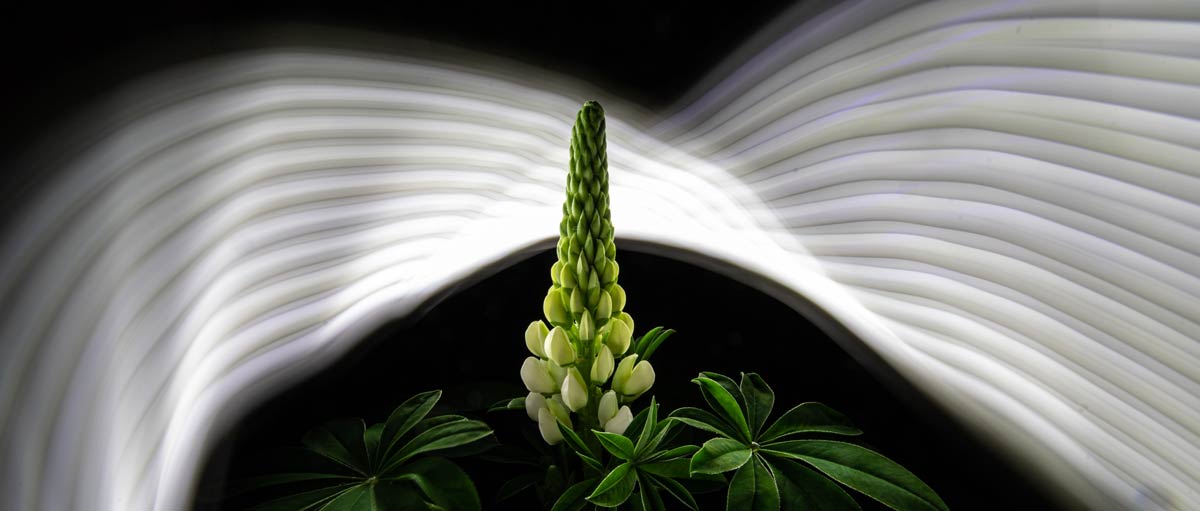
The light can also be applied from different angles as a continuous stroke or in a waving manner. As an example, I show you here a Light Painted Flower and swept around with a preference again of 60° – 90° angle from the camera orientation. The scanner became also a light painting feature not only a tool.
3.How important is my flashlight?
The flashlight is for you shadows not super important when you have a small scene. When it comes to a huge landscape or cityscape you may need a flashlight that has a narrow beam or is focusable. Most of the LED Lenser flashlights used to do that. That will ensure you that you can also create a texture high up the walls of a castle not just 5m from where were standing.
Some time ago I created a vides about features that I look for in a flashlight – if you interested see it here.
In some cases, it’s interesting to use a scanner like a light source. There some LED Strips that you can repurpose as such a scanner. You would use it just like a flatbed scanner you remember from the 90ies. The principle is just the same. You would take your light source and brush over the surface you what to highlight in a very low angle preferably close to the subject. That way the Person could even move some parts of the face once the light source has passed that area.
Here is my collection. In the middle is a gift from Sven Gerard who took the one on the left and build it into a small 3D printed case with all its components. Thanx mate!

The Light on the left is a working light. Here is the Amazon link to it. The one on the right is recognizable I hope, its a Lume Cube. They are super cool, but totally overpriced.
Low angle rocks!
Always apply the light at a very low angle to the surface. That way you will get the shadow effect you may looking for so long. Don’t go too low then the shadows will look not natural. Unless that’s what you are after artistically.
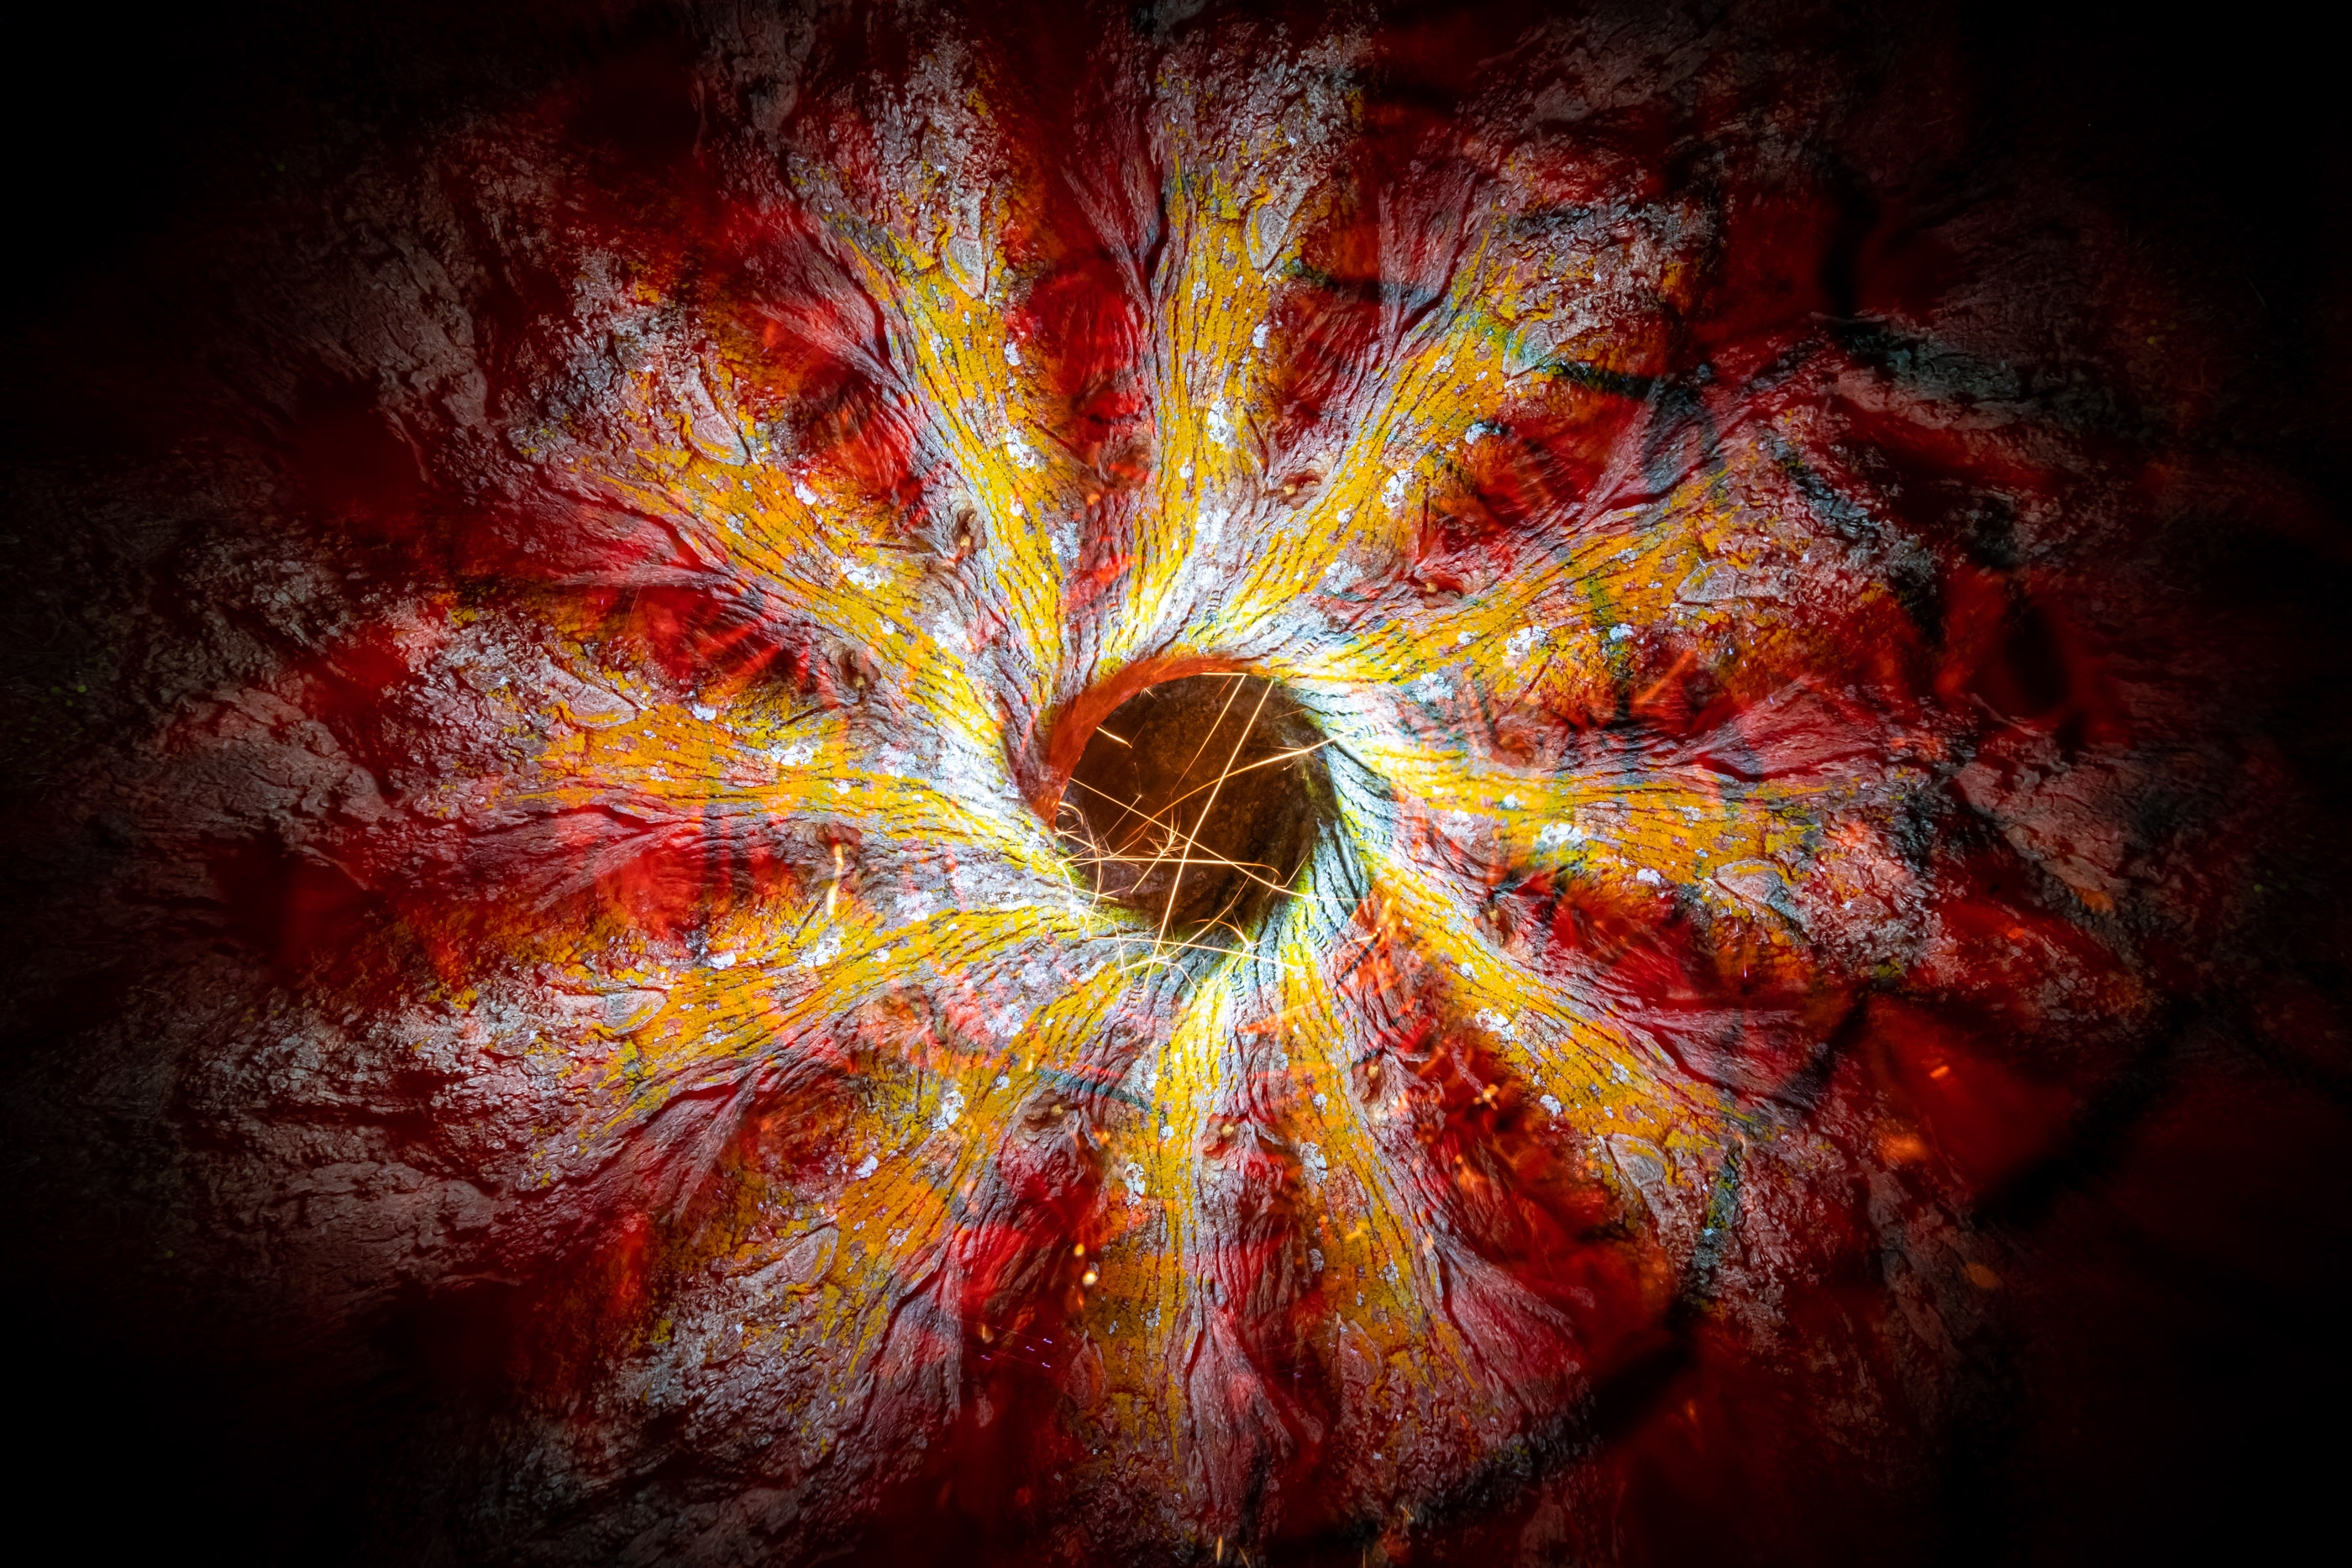
Here is an example of 12 step camera rotation. Here I lit the tree bark at a very low angle each time and then rotated the camera. The texture of the tree comes out really nice because of the angle I lit the tree in.
In the end, it’s your artistic eye that makes the decision.
You and you alone make the decision on how to use shadows. Your audience will judge what the like. And that is as always a matter of individual taste. No one will, can or should tell you what of and how to take your photos.
Here I am just trying to show how I work and you can then go end apply some of that knowledge and create just your art.
Share with me what you come up with.
Conclusion
To work out the texture of a surface means creating shadows. Shadows give the viewer a grasp for the shape of your subject. Lighting a surface from different angles can unveil the shape and the character of your subject. Work with shadows and Dramatic Texture for Light Painting Photos.
Exception!
If you use a flashlight or scanner in your model’s face (for instance in Fiber Optic Light Painting Portraits) you should be careful not to scan the face with a super low angle. Since this technique will create strong shadows, pimple and scars will show up extra strong. If you do so and the model has not the perfect skin ou may not do him or her a favor when you publish the photo unedited (which we normally do). Not sure if that’s what you want.
Now go and play with the Light. If this was of any help leave a comment or share it with someone you think could also benefit from this. Whatever you come up with share with me what you created. Tag me or send me a link.
Thank you for your attention.
Gunnar
I hope it was informative and maybe also inspirational. If you have more questions please do not hesitate. I am happy to share my knowledge.
Gunnar Heilmann Photogrpahy
If you are interested in more of my art please also see:
Website YouTube Facebook Page Instagram Feed
Since I am one of the cofounders of the LightPainters project, I also help and support the Light Painting community as a curator - not only on the Hive.
We are Light Painters

To help and support the LightPainters community here on Hive I would appreciate your delegation of HivePower. Any amount is appreciated. It does not require much to get started, we are happy for any gesture.
How to delegate?
Delegate 50HivePower, [50HP]
Delegate 250HivePower, [250HP]
Delegate 500HivePower, [500HP]
All the Hive Power will help to upvote the artist's contribution as part of the LightPainters community.
Thank you so much!
.JPG)
.JPG)