I will start with a warning:
⚠ Digital Infrared Photography it's not easy & this will get technical fast.
Backstory
It all started when I saw some awesome Instagram photos in infrared and I ordered an IR filter (an 88mm ice 760nm from B&H to be more precise) not knowing much about infrared. Filters usually range from 590 to 8-900 nm and usually, this kind of colored infrared shots are obtained with 590nm on a modded camera because it lets some visible light pass as well as infrared. But i had no modded camera and the wrong filter so I decided to try regardless and soon found out that my trusty DSLRs have quite good hot mirrors (the part of the DLSR that normally blocks IR from hitting the sensor) but later discovered that my phones sensor is quite sensitive to infrared and this is how my journey started
Gear
All my IR gear fits in a fanny pack! And it all adds up to around 25-30$ so it's quiet in the cheap part of the spectrum considering you already have a phone that can produce decent raw pictures.

Camera settings
shoot raw!
Iso
50 or 100 as low as possible with all the processing I will generate enough noise
Aperture
since I shoot on a phone I only get to pick between f1.5 and f2.8 this won't make much difference in terms of sharpness but it can help me get some more light and be able to shoot handheld
White balance
2000K the lowest my phone can go
Shutter speed
on a sunny day at noon I can go around 1/30 but it usually tends to go to the "hold your breathe and pray for a steady shot because you were too lazy to bring a tripod exposure time"
Post-processing
First of all, if you develop your infrared raw files in lightroom you will have to use the Adobe DNG Profile Editor to create so you will be able to pass the 2000k white balance.
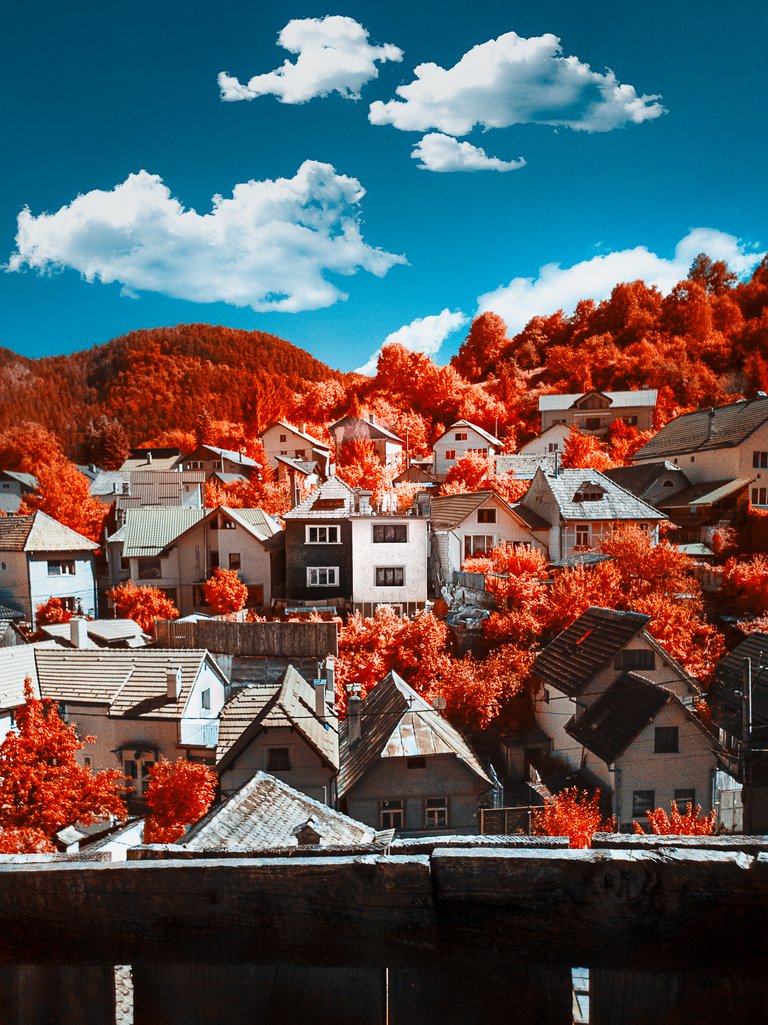
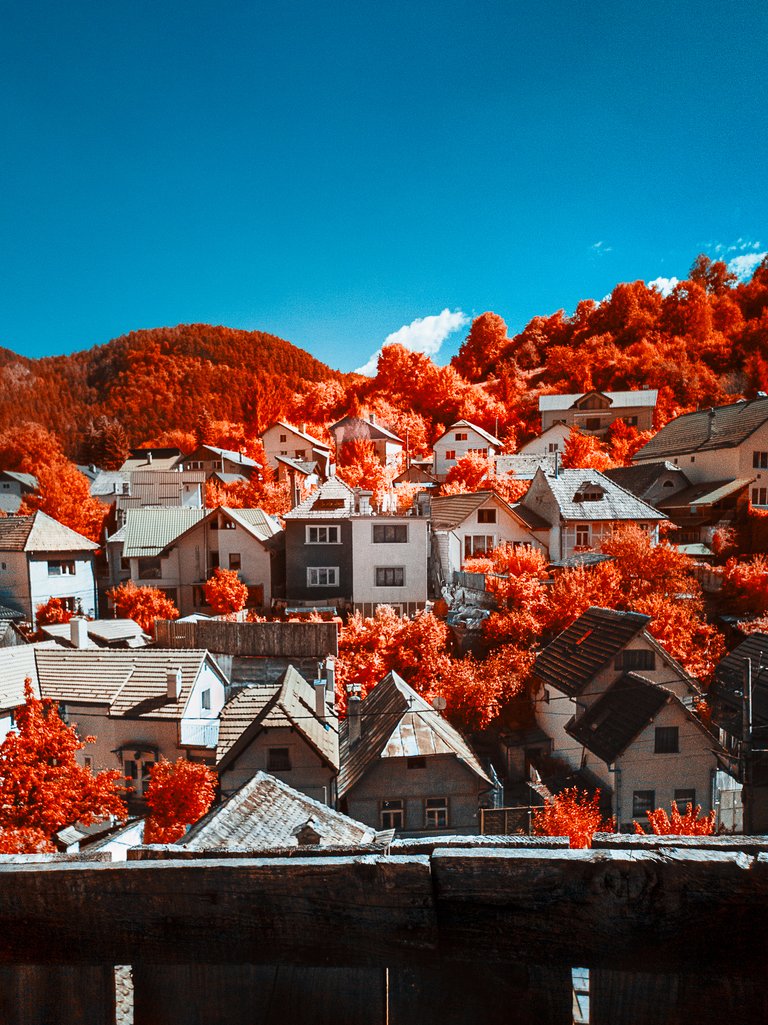
After I am able to get a proper white balance on my shot I'll go ahead and develop the raw image like any other landscape photo making sure to add some sharpness, noise reduction and add some contrast, then off to photoshop it goes. The common knowledge for channel swapping is replacing red by blue & blue by red. That cool, but you will get way better colors if you also split the green channel 50-50 between red and blue and in the blue channel sometimes it is nice to do +100 red, +95 green and -95 blue in the blue channel for more vivid colors and less of a washed-out look.
Now that the channel swapping is done it time to chase that aerochrome look while adding some light flare and some clouds to round out the image for this I used a hue sat adjustment layer to nagg the yellows intro red and the blue intro a more cyan look
| SooC JPG | WB fixed & dng processed | Channel swapped | Hue adjustments | Add some clous for extra flair |
|---|---|---|---|---|
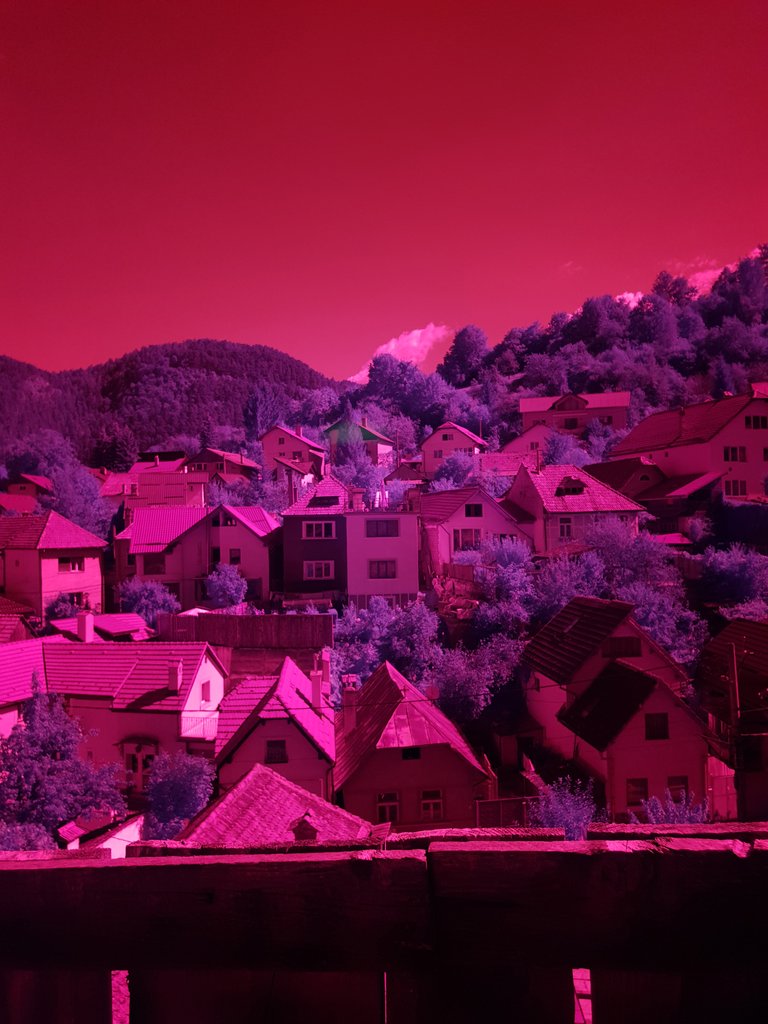 | 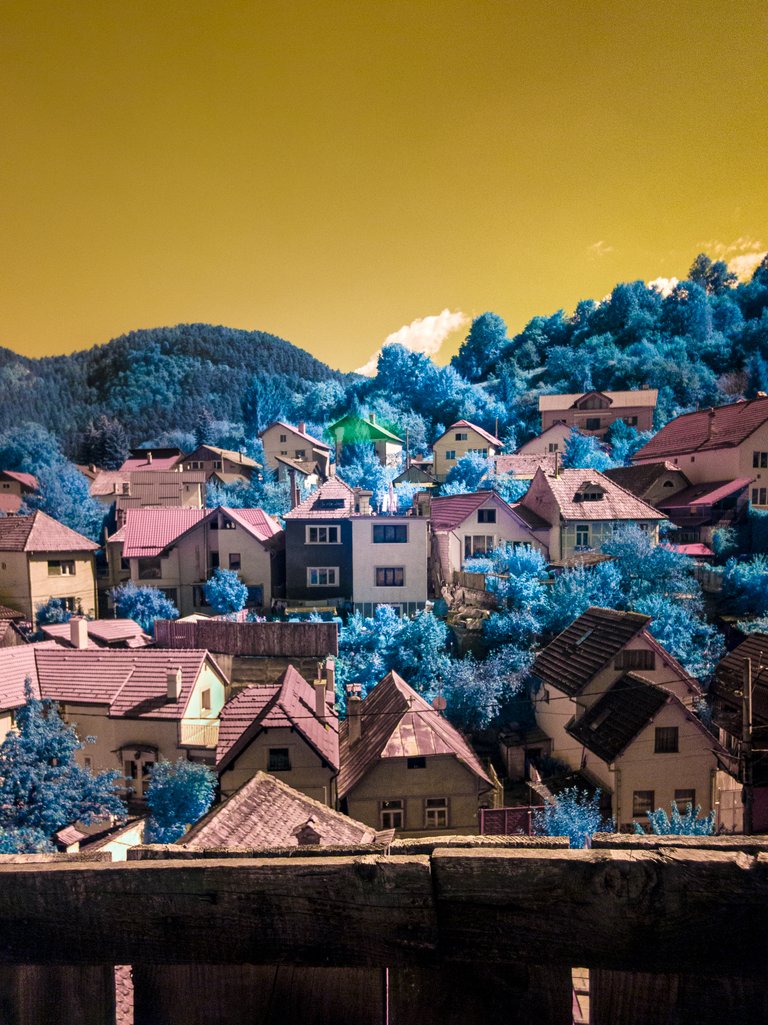 |  |  | |
Pros & Cons
While it is hard and frustrating to start working on infrared images I find it very rewarding. When I started to get a hang of it after hours and hours of trying to get the look I wanted I had a huge smile on my face. Shooting on a phone while editing so aggressive has a clear disadvantage in terms of image quality but the images tend to come out more than good enough for social media purposes and in 2019 that's fine by me. One big advantage is that instead of going out with a DSLR and a backpack full of lenses I can just grab my fanny pack and go for a walk, it made me rediscover photography just for fun, a thing that I lost in the process of being a pro photog for years.
Will this become my main gig probably no, Will I make money out of it probably no again but I'm sure I enjoy doing this for fun and it thought me a bunch about color management and manipulation.
In the end, if you want to see more of my infrared exploration make sure to follow my infrared only account on Instagram @vmoldo.ir and if you give it a try tag me in the posts I would love to know I've inspired someone to go out and have fun with photography
Excellent explanation.
In your case it is comfort, and that is very good.
But it is also wonderful for those who do not have economic possibilities to be able to achieve something of a high level at low costs.
Thank you for informing and teaching an accessible and comfortable method.
I will visit your page on instagram.
Stay great!
Thanks Curie for a practical selection
i was always on the diy part of photography mostly because i live in Romania and a lot of things are either not available or extremely expensive over here. For example to convert one of my old dslr cameras to IR i would have to ship it to Germany or UK
Hi vmoldo,
Visit curiesteem.com or join the Curie Discord community to learn more.
Manually curated by PhotoStreem: The Photography Tribe
Join Photostreem DISCORD
Follow the Trail
Great stumbling upon this post! Never thought it’d be possible to do infrared digitally. Reminds me of a roll of Ilford SFX infrared film I got many years ago when I was actively into analog photography. Thanks for sharing your tips!
Posted using Partiko iOS
Great and interesting post, simple in explanation, but I think a little hard to reproduce without the correct gears.
all you really need is an infrared filter and a phone that is capable of shooting raw. the rest is just for comfort. you ca just hold the filter in front of the camera with your hand
Ok... I'll give it a try. Tomorrow I'll look for a IR filter 👍
Posted using Partiko Android
Hello, @vmoldo.The Talent Club is a space of mutual collaboration, with reserved admission right, which puts the club's account at the service of its members and which grants them more than a 1500% daily benefit.We are constantly looking for talented users to offer them the possibility to enjoy our advantages.Currently we are more than 90 members and we help more than 10 different projects, having a total amount of more than 60.000SP, with our own trail.If you want to know more about how we work and be able to access the club, come by our Discord server, without any commitment.Regards.Congratulations @vmoldo! You have completed the following achievement on the Steem blockchain and have been rewarded with new badge(s) :
You can view your badges on your Steem Board and compare to others on the Steem Ranking
If you no longer want to receive notifications, reply to this comment with the word
STOPVote for @Steemitboard as a witness to get one more award and increased upvotes!
Hello @vmoldo, thank you for sharing this creative work! We just stopped by to say that you've been upvoted by the @creativecrypto magazine. The Creative Crypto is all about art on the blockchain and learning from creatives like you. Looking forward to crossing paths again soon. Steem on!