1: Master the basics
Take the time to read this guide on the basics to learn how to control the shutter speed of the camera, the opening of the diaphragm and the focal length of the lens, the ISO sensitivity of the sensor, as well as the depth of field . With these few parameters, the photographer perfectly masters the aspect he wants to give to an image, so it is essential to acquire these few simple theoretical notions.

exemple 1
exemple 2
exemple 3
Example 1: A high shutter speed, here 1/800 of a second, makes it possible to freeze the movement of the wrestler. With a low speed (less than 1/400 of a second), the wrestler would be fuzzy.
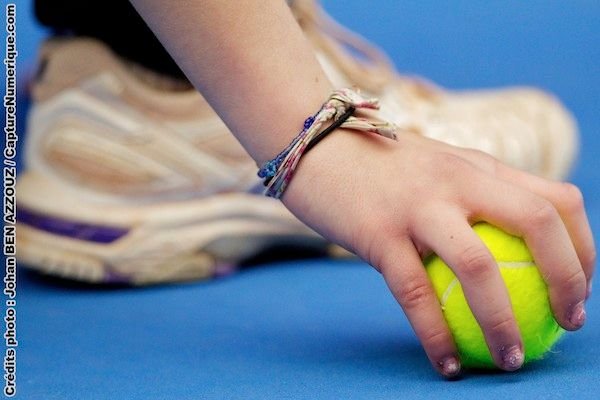
Example 2: A large aperture of the diaphragm, here f / 2.8, and a long focal length of 300 mm can isolate the tennis ball and hand by making the background blurry.
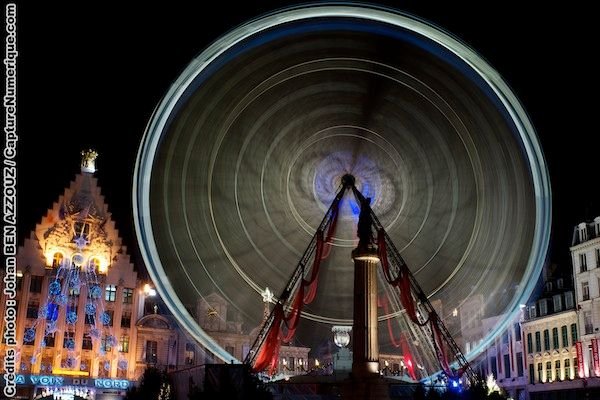
Example 3: A long exposure (very slow shutter speed) using a tripod, in this case 9 seconds, allows to give a movement effect on the Ferris wheel and to use a low ISO sensitivity to reduce the noise (grain in the image that attenuates the details and quality).
2: Knowing his gear
Do not read the instructions at the last minute! Take a good time on your free time and learn "by heart" important features of your case: how to choose the mode: manual, priority speed, priority aperture? How to choose the white balance? How to choose the file format (RAW or JPEG)? How to choose the measurement mode (spot, weighted, evaluative)? Or how to format the memory card or choose the ISO sensitivity?
A good photographer can use his equipment in the dark without looking at the buttons: the eye in the viewfinder is sufficient since the latter indicates most of the parameters.
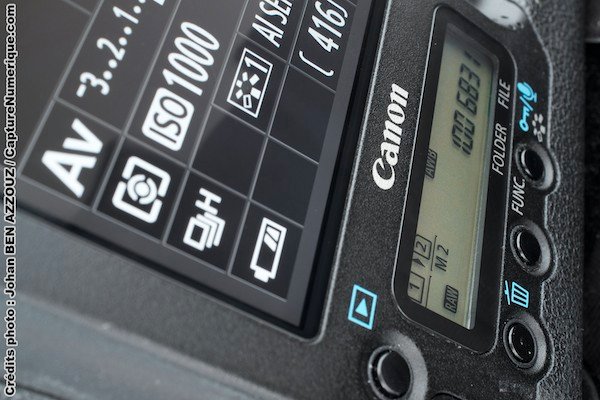
Control the settings of your camera: an essential rule to succeed your photos
3: Observe and be responsive
Ideally, a photo must tell a story: do not hesitate to include a specific element in your frame to provide information. Luck is also the best ally of the photographer: provoke it by anticipating things as much as possible.
Being reactive makes it possible to obtain a unique and alive picture.

exemple 1

exemple 2

exemple 3
Example 1: A photo must be aesthetic and can also provide information. On this image taken in May 2011 during the 37th day of Ligue 1 between Marseille and Valenciennes, the Marseille fans seem convinced that the second place in the Ligue 1 championship is a will of the leaders of the club ... the payment of bonuses to the players in case title costing almost ten million euros.
Example 2: By remaining focused and anticipating the reactions of a player, we obtain as on this shot a beautiful scene of joy after the opening of the score.
Example 3: Thousands of bikers who protest against the measures of the interministerial committee of road safety is pretty impressive, but include in the image the sign "Lesquin / Mall" can indicate the geographical area.
4: Approach your subject
The famous war photographer Robert Capa (1913-1954) said: "If your picture is missed, it is because you were not close enough". This quote is still relevant in 2012: get physically close to your subject to get a good photo. This does not mean that you have to ban the long focal length, on the contrary: getting closer and using a 135 or a 200 mm allows you to get a nice close-up (see tip number 5 on the tight framing). Note, however, that with a telephoto-zoom entry level: the dive at the maximum focal length (example 300 mm) is generally very poor. In this case, it is advisable to use a focal length a little shorter and therefore to get closer to the subject.
Of course, this Robert Capa philosophy is not applicable to sports or wildlife photography: in these two disciplines, shooting at a certain distance and using a very long focal length (300, 400 or 500 mm) are indispensable, since it is impossible to get close to the subject.
5: Tight framing
Like Olympique de Marseille, you have to go straight to the point! Do not be afraid to use a tight framing and show the essentials. Of course this is not a mandatory rule: it's up to you to find your own style.

6: Excenter your subject
By default the AF point of a SLR is in the center, but a good image is an image with an off-center subject: it is the rule of thirds. When shooting, imagine that the image is divided into three vertical parts and three horizontal parts. The 4 points intersections constitute the strong points of the image: do not hesitate to change the AF point of your case to avoid that your subject is centered. Apply to compose your image: is the arrangement of the elements aesthetic? You must absolutely ask yourself this question before pressing the shutter button.
7: Beware of the background
If you take a family picture in the street or park, avoid cars or bins in the background: it's ugly and it diverts the eye. Look for greenery or aesthetic background and isolate your subject using long focal length (85, 135, 200mm), shallow depth of field (f / 2.8 or f / 4 aperture) and staying close enough to the subject . A photo of your children with a blurry background (bokeh) and filled with greenery is much more aesthetic than a snapshot with a large depth of field and garbage in the background! Same thing with the sport photo: move to get spectators in the background, it's prettier than a fire extinguisher or a wall.
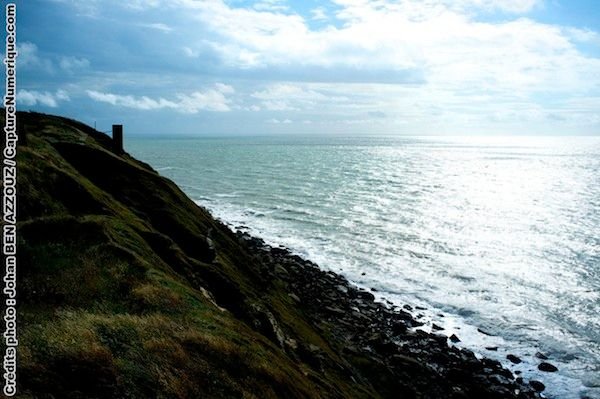
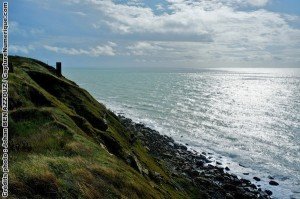
8: Watch out for the horizon
Do you take a picture of your loved ones on the beach? Be careful that the sea is not wobbly. This remark is also valid for the photo of a landscape and in most photographic disciplines, except voluntary effect to invigorate an image.

The horizon is not right: to avoid.

The horizon is perfectly straight.
9: Place yourself at the height of the subject
Do not hesitate to squat or lie down on the ground to photograph an animal or a child. This remark is also valid for sports photography: in general, photographing standing cuts the heads of players in the background.
10: Avoid direct flash
The use of a direct flash or worse the flash of a built-in entry level box is to be avoided: it flattens the image completely, causes red eyes, slightly cracks the foreground, and often projects a shadow on background. To avoid these disadvantages, it is necessary to use the indirect flash. This technique consists in directing the flash towards a white ceiling or a white wall: thus the light of the flash is diffused and seems natural.
Alas, this technique is not compatible with a built-in flash: an integrated flash is not adjustable as can be a good flash cobra.
11: Watch out for motion blur and motion blur
The motion blur is caused by the photographer's movements. When no tripod or image stabilizer is used, the shutter speed must always be at least the opposite of the focal length used. Example: With a 50mm lens, the minimum freehand shutter speed should be 1/50.
Some lenses offer image stabilization: IS at Canon, VR at Nikon, OS at Sigma, or VC at Tamron. These technologies work with sensors located inside the lens that detect and measure mechanical vibrations caused by the photographer. The system then compensates for these vibrations by moving a lens group that stabilizes the image.
Depending on the photographer, it is possible to win from 3 to 4 EV: for example with a 200mm, in theory it would be necessary to shoot at 1/200 so as not to have any motion blur, with the active stabilizer you can easily go down to 1 / 50 while being net. Of course this is only valid for photographing a static subject: it is therefore useless to acquire a stabilized objective for sports shooter for example.

The shutter speed, here 1/10, is too low with a focal length of 35mm: the picture is blurred.

The shutter speed of 1/100 is this time sufficient to prevent camera shake
Motion blur is caused by the speed of movement of the subject. To freeze a football player or an animal who runs on a green space, it is essential to use a large shutter speed: 1/500 to the very minimum, ideally 1/800 to 1/4000 depending on the speed of the subject.
12: Adopt the RAW format
The RAW format which means "raw" in English, is a file containing all the raw information coming from the sensor: it is basically a digital negative, like the film at the time of the film. On this "negative", the data has been losslessly compressed and no treatment is applied. Contrast, sharpness, white balance, or saturation should be applied during post-processing. A RAW photo is like a safety net: if the exposure is poor, the image is too bright or too dark, it is possible to limit the damage and correct your mistakes.
A highly contrasted scene in JPEG
The same scene, with RAW format
In a highly contrasted scene as above on the left with the sun facing, a JPEG image (8 bits) cracks the highlights and destroys the information: it is therefore impossible to recover them in post-processing with software like Aperture or Lightroom.
On the same scene, above right, a RAW image (12-bit, from a Fuji X100) also cracks the highlights by default, but it is possible to recover the information very easily during development. The RAW format therefore offers a much better dynamic with details in highlights and shadows.
13: Watch out for the white balance
The White Balance (WB) allows to calibrate the sensor of a digital SLR to obtain a truly white white and thus a balanced color rendering. A wrong white balance setting produces a shot that is too hot (orange / red) or too cold (blue). In general the automatic white balance is rather relevant, except with a tungsten type of lighting: a strong hot dominant appears, the image is "orange", or in the shade: the image becomes cold (bluish). A digital SLR adjusts the balance: AWB (automatic white balance), natural light, shaded, cloudy, tungsten, fluorescent, flash, or custom (see the white balance part of the tutorial on sports photography) .
If you use the RAW format, you can adjust the white balance during post-processing, but to save time consider adjusting the balance as soon as you shoot.

Bad white balance.

White balance correct.
14: Check your material before going to do your photos
Check that the battery is sufficiently charged before leaving. To avoid using a memory card that already contains 200 or 300 photos and that we often forget to erase before a report, make a habit of immediately formatting your card with the box once the images are on the screen. computer.
Also, set master settings on your case: low ISO, auto white balance (AWB), evaluative metering, inactive stabilizer, and your usual image format (RAW and / or JPEG).
For an experienced photographer, these settings are instinctive, but if you start you may forget some things: it is safe to do so.