


La prospettiva atmosferica nella post-production - Street photography
Era da tempo che volevo provare ad implementare nelle mie foto le regole di prospettiva atmosferica che utilizzo nella pittura. Per prospettiva atmosferica si intende la percezione di profondità in un lavoro 2D resa grazie ad uno stacco dei piani creato dall'aumento o diminuzione della luce, del contrasto e dei dettagli. A differenza di un dipinto, in una foto è già presente una prospettiva atmosferica (essendo una rappresentazione fedele della realtà), ma è comunque possibile esasperarla nella fase di post-produzione.
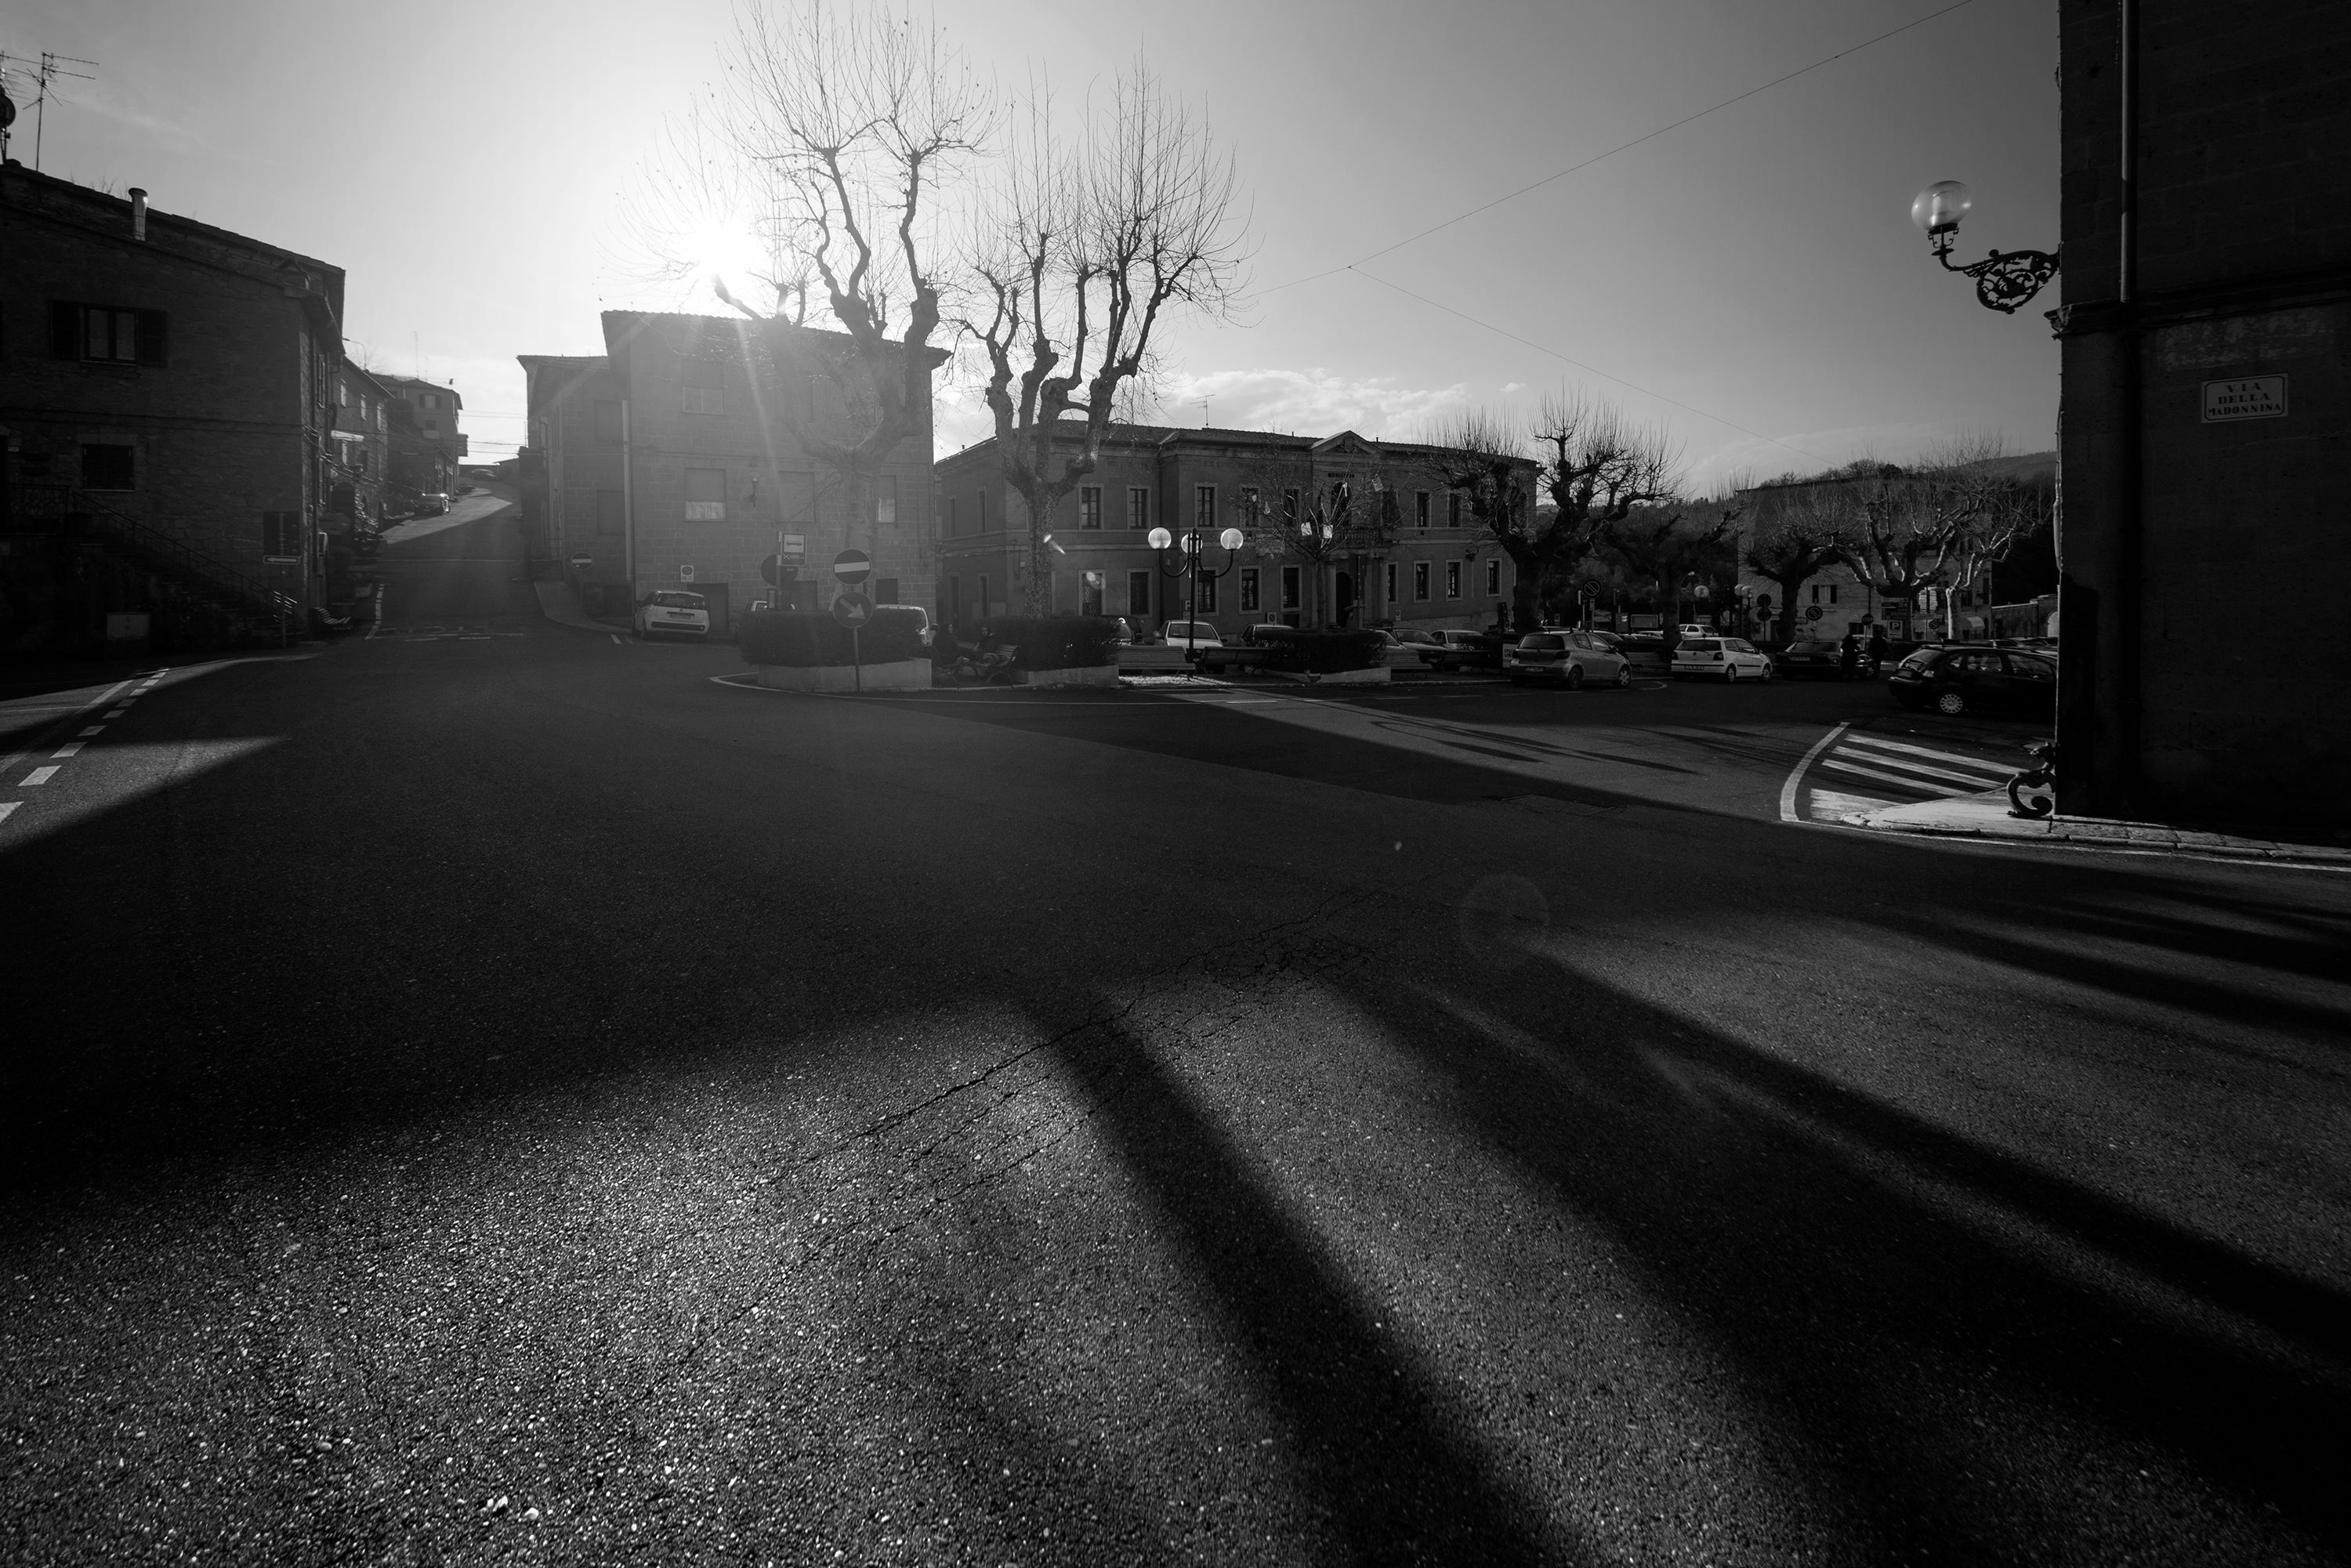
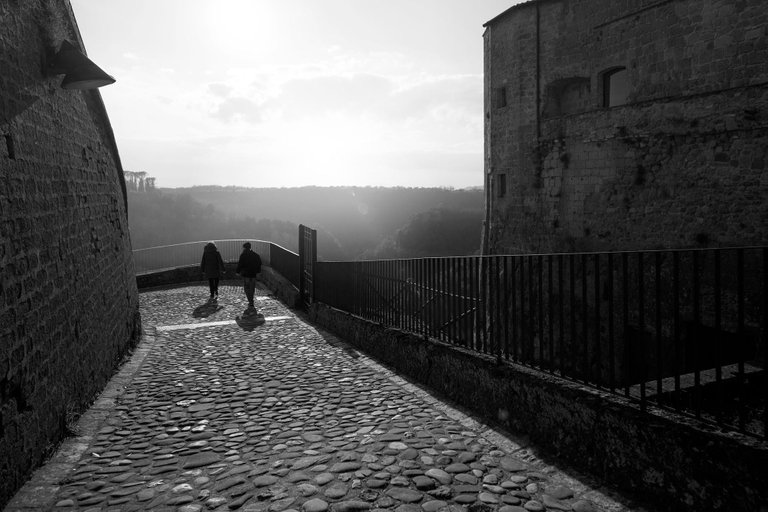
Per fare questo esperimento, ho cercato degli scatti che potessero essere interessanti non nel soggetto raffigurato, ma nella disposizione degli ingombri e delle luci: una luce forte nello sfondo, elementi di quinta, alberi o persone che potessero staccarsi rispetto ad uno sfondo.
Uso photoshop per la mia post-produzione, ma va benissimo qualsiasi software con la possibilità di correggere solamente aree selezionate.

Atmospheric perspective in post-production - Street photography
It was a long time since I wanted to try to implement for my photos the rules of atmospheric perspective that I use in painting. Atmospheric perspective is the perception of depth in a 2D work created by the increase or decrease of light, contrast and details to detach the different planes. Unlike a painting, atmospheric perspective is already present in a photo (being a faithful representation of reality), but it is still possible to exagerate it in post-production phase.
For this experiment, I looked for shots that could be interesting not for the subject depicted, but for the arrangement of volumes and lights: a strong light in the background, framing elements, trees or people that could stick out from the background.
I do my post-prod in Photoshop, but any software that lets you adjust selected areas of the image will work.


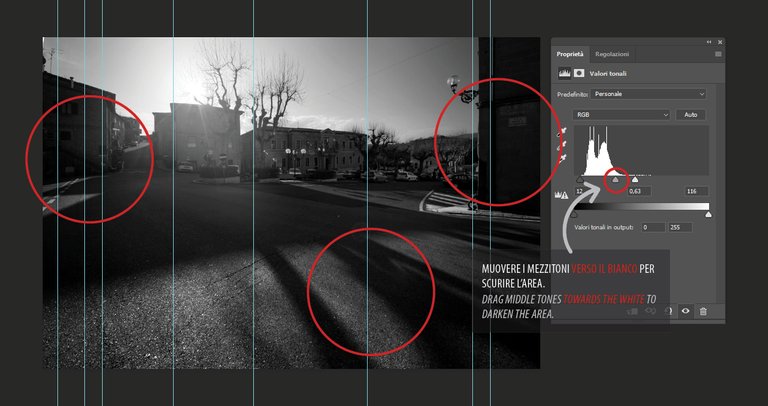
La primissima cosa che faccio quando apro una foto in Photoshop, è raddrizzare (ecco perchè le guide color ciano): soltanto dopo inizio con le regolazioni. Per questo genere di post-produzione, occorre scurire il primo piano. Ho usato un livello di regolazione Valori tonali tracciando sfumature sulla maschera di livello abbinata in modo che la regolazione avesse effetto solamente sugli elementi più vicini allo spettatore. Poi, come nell'immagine qua sopra, ho corretto l'istogramma e spinto il triangolo dei mezzitoni verso il bianco, in modo da scurire mantenendo lo stesso grado di dettagli.
The very first thing I do when I open a photo in Photoshop, is straightening (hence the cyan guides): after that, i start with the adjustments. For this kind of post-production, you need to darken the foreground. I used a Levels adjustment layer and traced gradients on its layer mask, so that the adjustment would only affect the elements closest to the viewer. Then, as in the image above, I corrected the histogram and pushed the midtones triangle towards the white, so to darken while maintaining the same degree of detail.

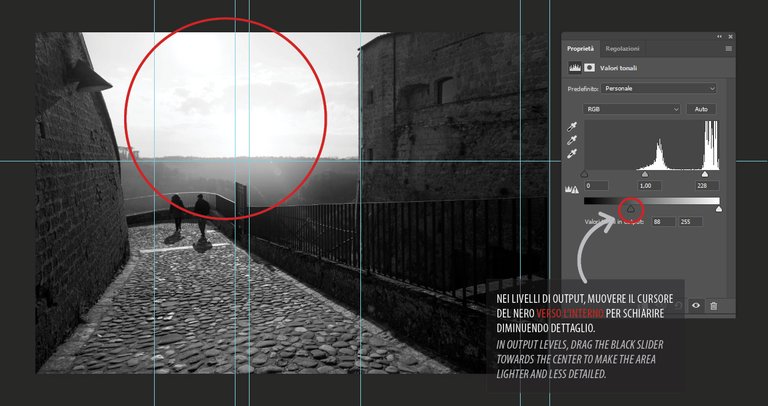
Per aumentare il senso di lontananza, è possibile attenuare il dettaglio dello sfondo fino a farlo apparire quasi nebbioso. Nella foto dell'immagine qua sopra, ho selezionato lo sfondo (con la bacchetta magica, aggiungendo poi una selezione fatta col lazo poligonale per escludere le sagome delle due persone) e poi ho di nuovo applicato il livello di regolazione Valori tonali, in modo che prendesse la selezione come maschera. Per schiarire diminuendo dettaglio, occorre usare, questa volta, i valori di output, trascinando il triangolo del nero verso destra.
To increase the sense of distance, you can soften the background details until it looks almost foggy. In the picture of the image above, I selected the background (with the magic wand, then adding a polygonal lasso selection to exclude the shapes of the two people) and then, again, a Levels adjustment layer, which automatically uses the selection as a mask. To lighten and flatten details, i used the Output levels, dragging the black triangle to the right.
Congratulations @onicreative! You have completed some achievement on Steemit and have been rewarded with new badge(s) :
Click on any badge to view your own Board of Honor on SteemitBoard.
To support your work, I also upvoted your post!
For more information about SteemitBoard, click here
If you no longer want to receive notifications, reply to this comment with the word
STOPWorld of Photography Beta V1.0
>Learn more here<
You have earned 5.05 XP for sharing your photo!
Daily photos: 1/2
Daily comments: 0/5
Multiplier: 1.01
Server time: 19:57:11
Total XP: 73.86/100.00
Total Photos: 5
Total comments: 2
Total contest wins: 1
Follow: @photocontests
Join the Discord channel: click!
Play and win SBD: @fairlotto
Daily Steem Statistics: @dailysteemreport
Learn how to program Steem-Python applications: @steempytutorials
Developed and sponsored by: @juliank
Congratulations @onicreative! You have completed some achievement on Steemit and have been rewarded with new badge(s) :
Click on any badge to view your own Board of Honor on SteemitBoard.
For more information about SteemitBoard, click here
If you no longer want to receive notifications, reply to this comment with the word
STOP