Create a gif file from your portfolio images.
I really wanted to display my photography in a carousel using steemit, but the functionality isn't there yet… so I turned my portfolio into a GIF!
https://steemit.com/photography/@satchmo/photography-portfolio-in-gif
If you want to make your own photography portfolio, gif, all you need for this tutorial are some images and Adobe Photoshop. I created this in Photoshop CC - earlier versions of Photoshop should be able to accomplish this task, though the compression quality may not be as good.
This is a Step-By-Step guide for creating a high quality gif with your photography portfolio.
Open a new document
Specify your dimensions. For this tutorial I chose 1200X800.

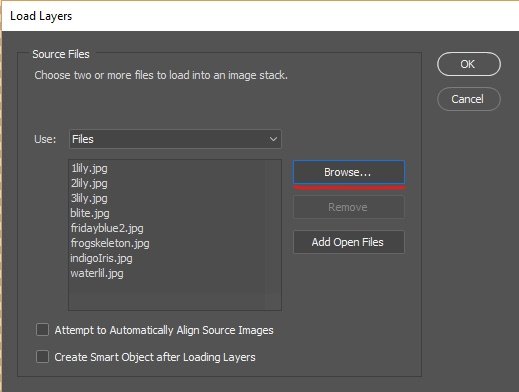
Load your images into a stack

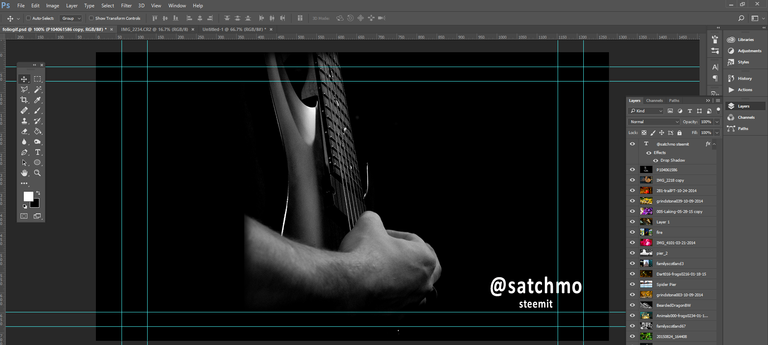
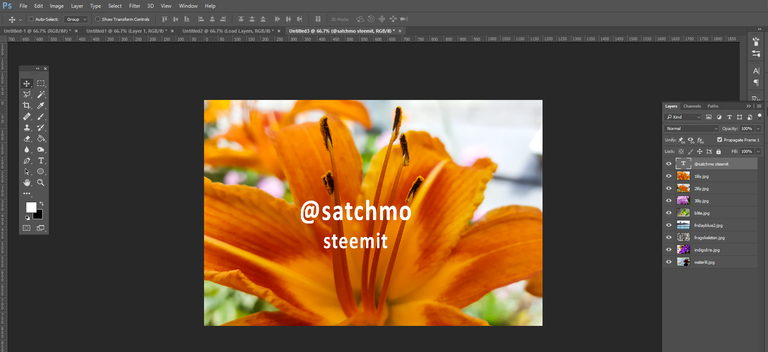
Adjust your images to fit and watermark
You may have to adjust some images to fit your dimensions. Create a new text layer and add watermark or brand.
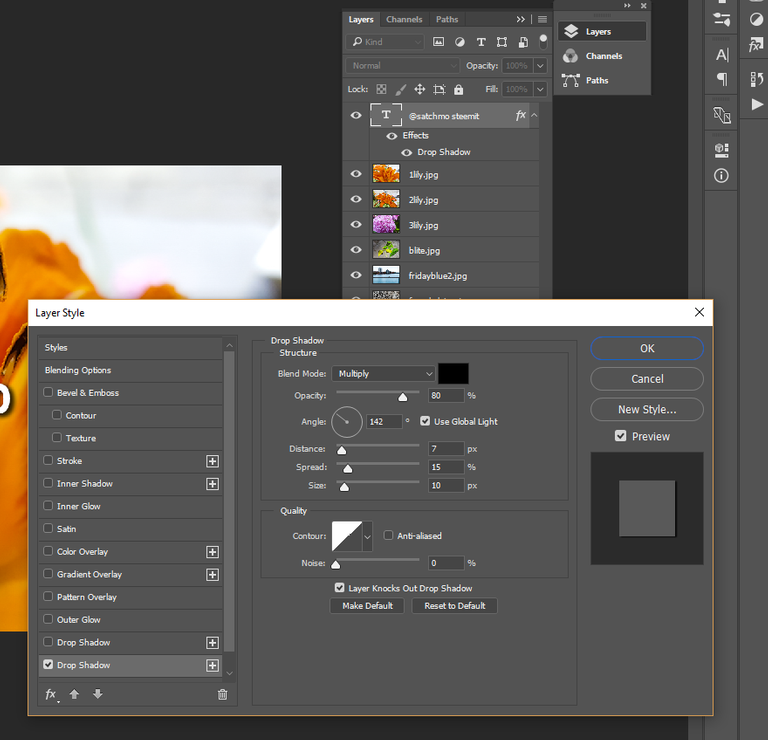
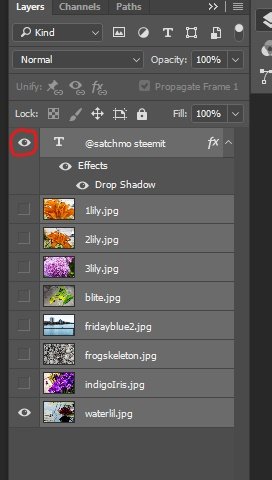
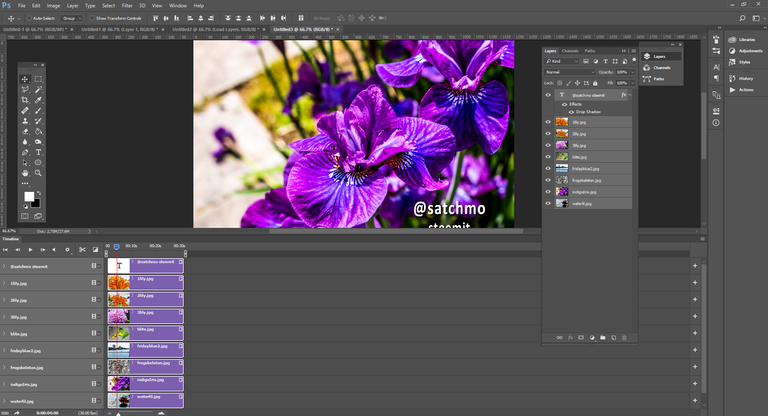
Add a drop shadow
Double Click the text layer to open the layer styles menu. Check and select Drop Shadow and adjust accordingly. The settings I used are contained within the screenshot.
Open the Animation Timeline

Use the timeline drop down menu to select Create Frame Animation

A timeline will be generated and will look something like this. 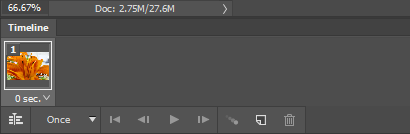
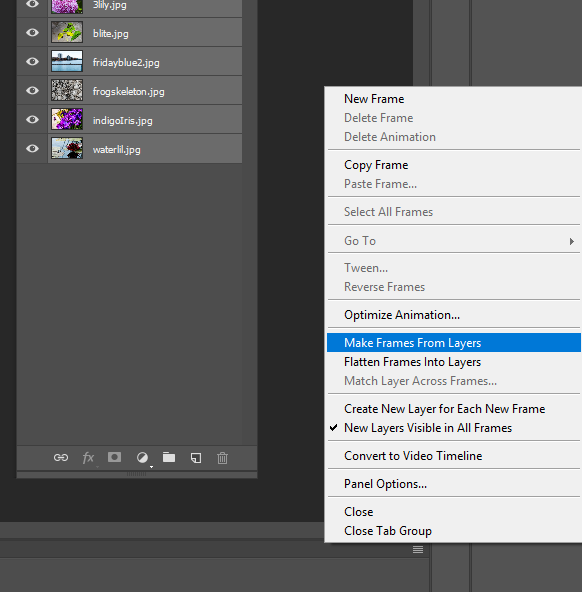
Select all of the layers and use the timeline menu button to select, Make Frames From Layers.
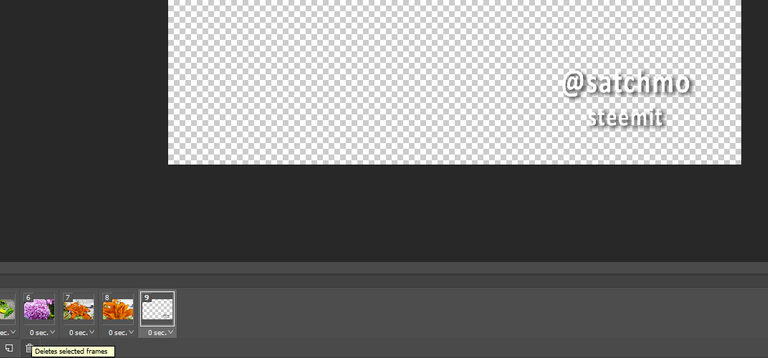
Clean up your timeline
When the timeline generates your watermark will be turned into a frame. Simply delete this.
Arrange your images on the timeline in the order you wish them to appear. Select the first image.
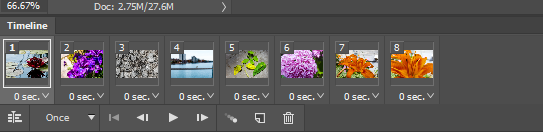
With the first image selected, in your Layers panel turn visibility back on for your watermark. It will apply the layer visibility globally to each frame in the timeline.
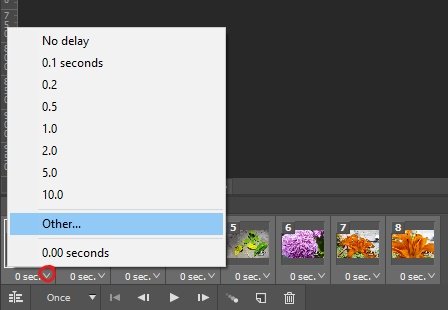
Now we can set the frame length
Select all of the images in the timeline and click the arrow next to the duration. I set my own duration through the other menu, 4.0 Sec - this is a matter of preference.
Don't Forget to loop it!
All of the images in our timeline are now set to the same length.
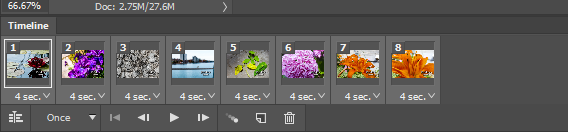
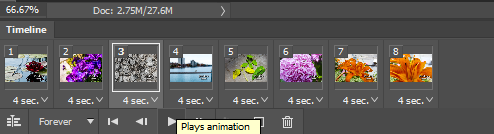
Click the arrow down next to where it says, Once. Select, Forever.

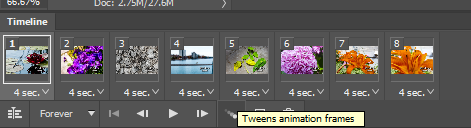
Finally, Review your animation thus far!
Transitions
If you want to explore animated transitions there is a button called tweening which will generate additional frames - Some times I like a dissolve, sometimes I like a hard cut.
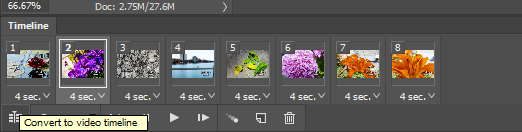
Adobe did add a visual timeline
Adobe added a timeline very similar to what you would get inside a video editor. I found it to be quite limiting, and slower than the above steps, but if you want to try it out...
Click the small button in the corner, Convert Video Timeline. Before you do this, save any work as this may disrupt what you have already accomplished.
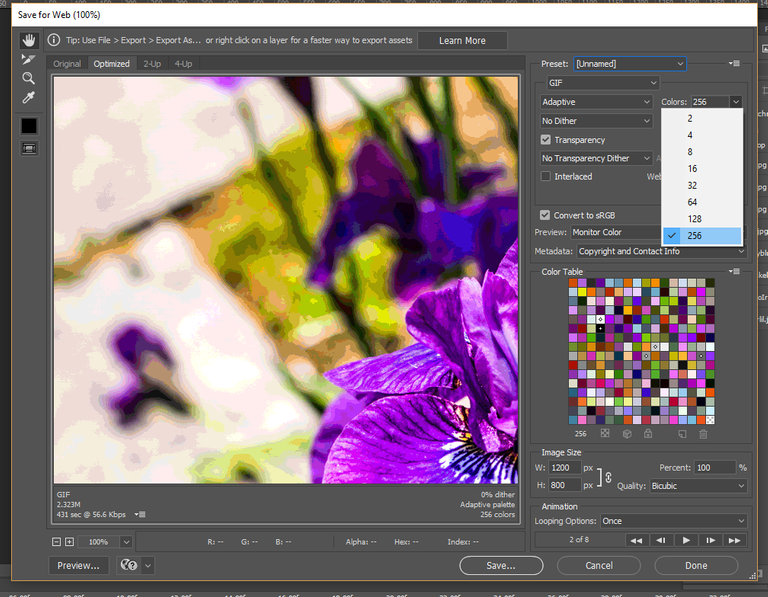
Saving your GIF
Open the file menu, go into Export and choose, Save For Web (Legacy)
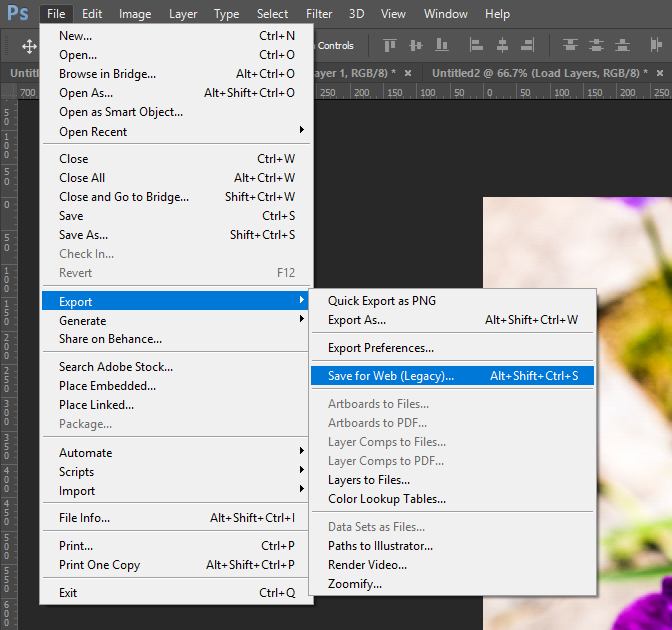
Select the preset GIF 128 No Dither
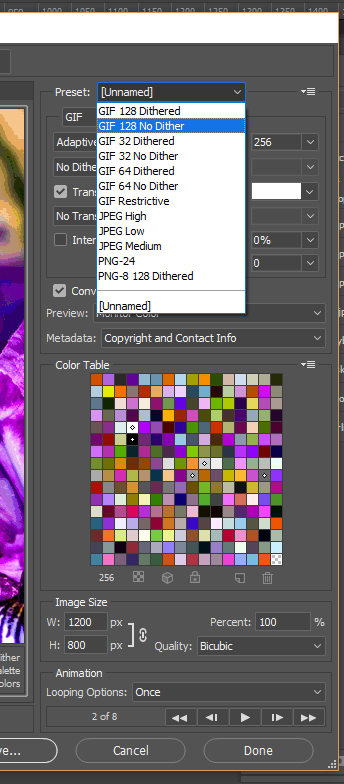 )
)
Select 256 colors. Ensure that the gif is adaptive. You have the option to adjust the dimensions and scale here. Ensure looping options are set to forever. Hit save....
Voila!

Very good tutorial. Me as a complete noob, need advice when it comes to photo-editing or doing anything like banners, GIFs etc! I try that out! I like this GIFolio really.
And I will mention this in my next #steempearls too. Maybe there are more people, who wants their own GIFolio!
Thanks! Glad I can help!
Very good tutorial friend.
Thanks very much!
woot woot! Totally want to make one of these today. You're just too awesome sometimes @satchmo you know that? "sometimes"
Sometimes?!?!?! .... UM ... Try always -- :)
Glad you like it Yunk, I will try and figure out how those without photoshop can do this too.
This post received a 4.7% upvote from @randowhale thanks to @satchmo! For more information, click here!
thanks Hunter! I mean randowhale!
I don't have much experience with photo shop but I will implement this method to show case all the photos I take out and about. Thanks for the tips.
Glad I could help! I could find an alternative for people without photoshop. Will tag you if I do.
Excellent tutorial @satchmo! This is actually useful for those that has CC versions. resteemed
Thanks -- It should work down to CS4 -- i recall doing this way back when, but the compression will be worse the further back we go! Glad you liked it!
Excellent guide @satchmo. Upvoted, resteemed & DPS.
Please state clearly how would you like to be featured in the “Daily Photo Selection”: with a linked photo, or with link only without a photo. We are making a list of photographers who are ready to improve the visibility of their work through the DPS. Thank you.
Hi! Thank you for this.
I just entered this image into the Tuesday #colorchallenge -
https://steemit.com/photography/@satchmo/bird-of-paradise-tuesday-orange-color-challenge
Thank you for your message!
You are welcome @satchmo. How about a decision on featuring? With or without a photo?
Darn right i'd like to be featured hahaha -- what about a link to the tutorial or to the image i listed above? Otherwise Im not quite sure what you are asking lol
Dear @satchmo, you can see that all photos at the DPS are linked to the original posts. You will have a link, question is do you want a link over your photo in the DPS, or you want a link only without a photo? See for example here…
Daily Photo Selection, July 10
...@littlenewthings has a link only, and @digitalis has a linked photo.
What would you like?
I would like to have the photo displayed in your post and I would like it to be this one.
https://steemit.com/photography/@satchmo/bird-of-paradise-tuesday-orange-color-challenge
Do you just download it from the post or I have to send you a copy?
No @satchmo, I don't download anyting, and you just choose a way of featuring, and I choose the picture. This post is most interesting for the DPS and your example .gif would be featured like this:
well done - as you can see these sorts of tuts are well received here! Keep up the good work.
Thanks! I will keep doing them, just don't want to give away all of our trade secrets hehehehe jk!
Upvoted for yunktag :D welcome new yunkers
Nice piece, you put a lot of work in it :)
thanks, ya, i figured step by step was the way to go for a tutorial on here.!