
Full tutorial code for previous lesson is available on my Github.
Previously On:
| DAY 1 | DAY 2 | Day 3 |
|---|---|---|
 |  |  |
Contents
- Run first transaction on Algorand testnet
- Others.
Run first transaction on Algorand testnet
Following this code, we need only the first 7 lines of code. You can comment out the rest code for the purpose of this section.
 1.  from algosdk import account, encoding, algod, mnemonic, kmd, wallet
 2.  from algosdk.future import transaction

 3.  algod_address = "https://testnet-algorand.api.purestake."
 4.  algod_token = "eVXi2wPlDE8uF15mkil5Z2........"
 5.  myProject_token = {"X-API-Key": algod_token}

 6.  algod_client = algod.AlgodClient(algod_token, algod_address, myProject_token)
day_4.py file. Add the following as in image: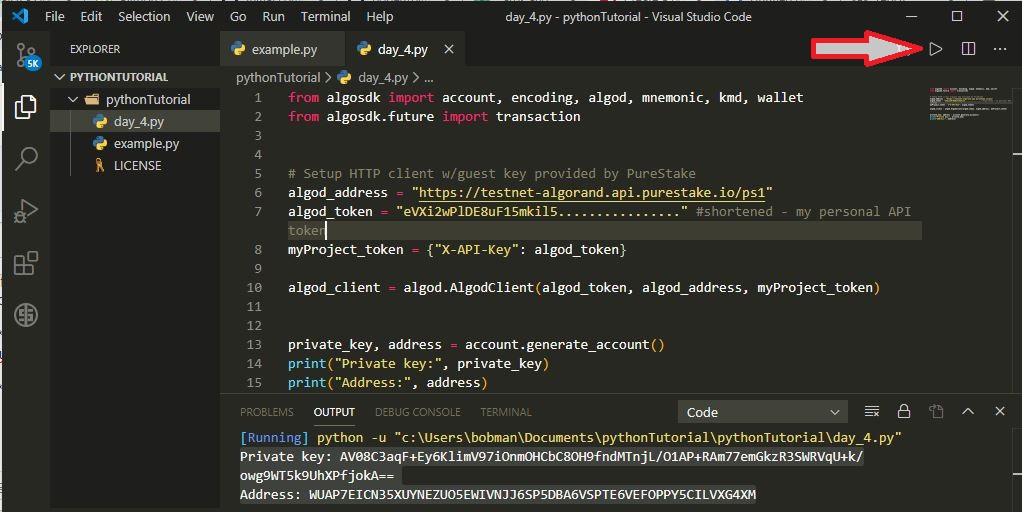
From
line 1, we importaccount,encoding,algod,mnemonic,kmd, andwalletfromalgosdk.Line 2, we importtransactionfromalgosdk.future.
For this section, we only need theaccountandalgodclasses to complete the transaction. The rest will be used for different purposes which I will explain later.Line 6: variablealgod_addressholds an API - URL containing an access.to Purestake with which we will make a request to Algorand testnet. Note that the Algod API is used for querying historical information from the blockchain, getting information about blocks and transactions, and sending transactions.Line 7: variablealgod_tokenis a placeholder for an access key(gotten from Purestake) required for the API to pass through.Line 8: variablemyProject_tokenholding a data in dictionary format which maps the key"X-API-KEY"to the secret key needed as the third argument we need to pass in to the AlgodClient.Line 10: variablealgod_clientis where the actual connection takes place. It takes in three variables and run a computation which connects us to the testnet.Line 13: variable names -private_keyandaddressare passed into a function calledgenerate_accountwhich is a method of the classaccount. The.sign is used for accessing methods/functions in a class. A wallet is created for us by invoking theaccount.generate_accountmethod and finally we print out the private and address to the wallet onlines14and15.In the terminal, you could see the result printed out for us as:
Private key : AV08C3aqF+Ey6KlimV97iOnmOHCbC8OH9fndMTnjL/O1AP+RAm77emGkzR3SWRVqU+k/owg9WT5k9UhXPfjokA==
Address: WUAP7EICN35XUYNEZUO5EWIVNJJ6SP5DBA6VSPTE6VEFOPPY5CILVXG4XM
Dictionary In Python
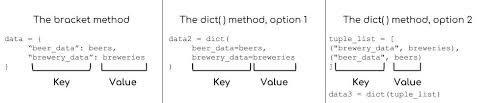 src
srcinverted comma or quotaion mark - " ".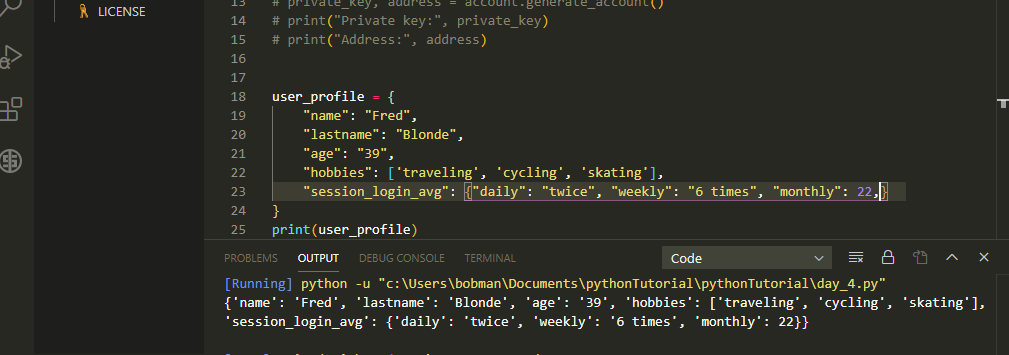
day_4.py file, user_profile is a variable/placeholder for dictionary containing 5 keys pointing to 5 values of types: string, string, integer, list(of 3 items) and a dictionary(of 3 items). A dictionary can be nested more deeper based on the nature and arrangement of data it is meant for. To access an item in a dictionary, you should refer to its key.name = user_profile["name"]Or
name = user_profile.get["name"]
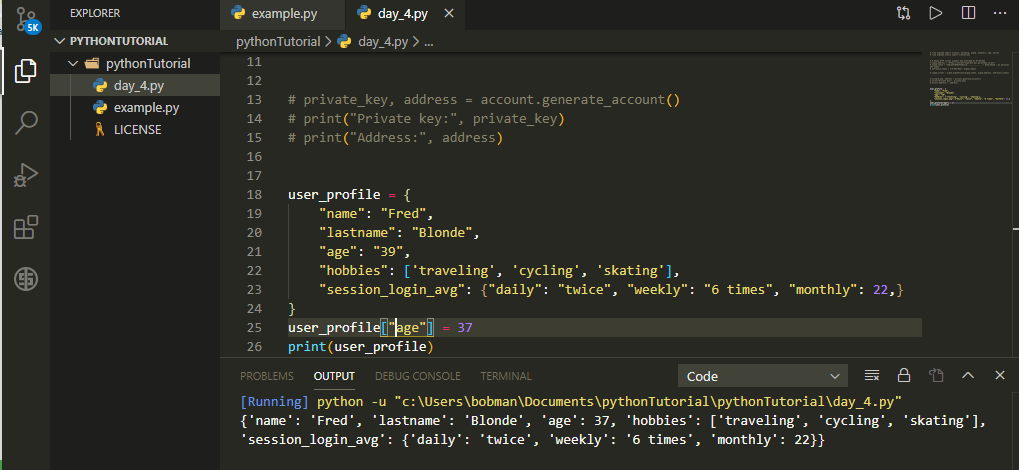
get property which can be invoked to extract a value provided the key enclosed in a square bracket.To change the value of an item in a dictionary, simply use the placeholder followed by the key to the value you wish to change enclosed in square brackets and assign it a new value of any type.
for loop to iterate over every items in the dictionary. Passing x and y into the for loop will by default assigns the first variable to the key and second to the value. I will expatiate more on for loop in the next lesson.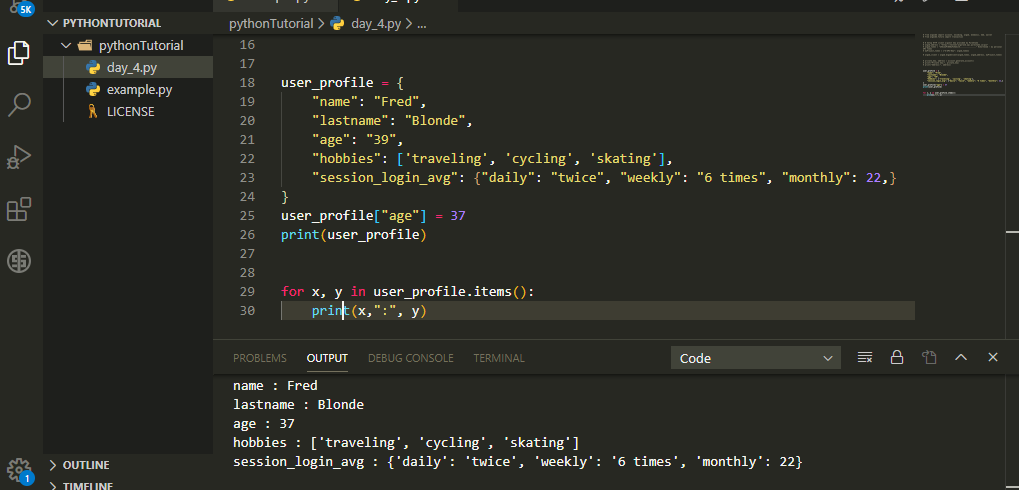
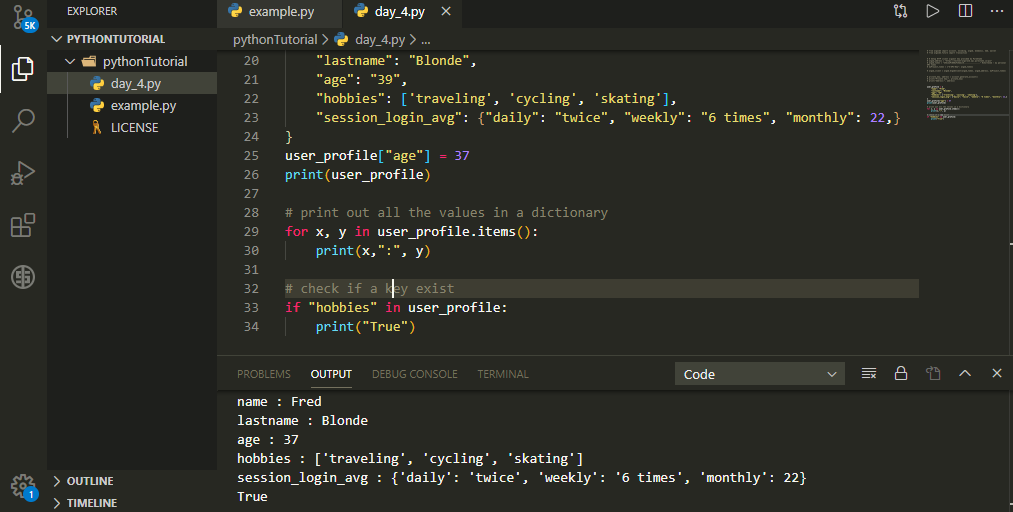
If statement in line 33 tests how true is the statement. Different from an ambiguous statement, python will return either yes or no. Ensure that the key you are trying to search is properly as alteration in the letters for instance, replacing h in "hobbies" with H will evaluate to false.user_profile dictionary.
len() function which is a readily available inbuilt function from python module..`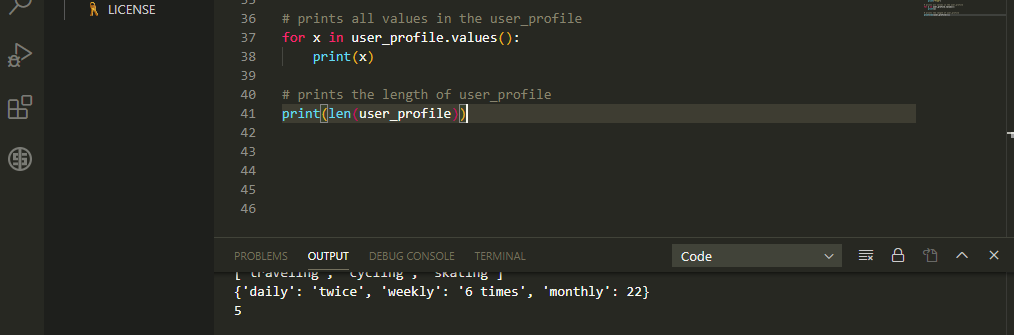
1 and 0. Condition is also used to test the genuineness of an expression or existence of a true value, result of which returns true or otherwise in the absence of it.