Introduction
If you feel like trusting your keys to external sites is not a great way to curate content, I've got a 35 dollar lifetime solution for you. Not that many people know that steemit curation bots can even be built on your mobile phones, since singing transactions takes little to no computational power.
In this tutorial, I'll be showing you how to set up a curation bot on a small arm processor machine, that takes up little to no power, so you can run it with almost no running costs. The specific machine that I'm going to use is Raspberry Pi 2 Model B however the same process applies to any other Raspberry Pi models, Arduino, BeagleBone or any other device that can run linux.
Needed programs/files/accessories
Raspberry Pi - https://www.amazon.com/Raspberry-Pi-RASP-PI-3-Model-Motherboard/dp/B01CD5VC92
Wifi dongle - https://www.amazon.com/FotoFo-USB-WiFi-Adapter-Raspberry/dp/B01I191N48
Micro SD card - https://www.amazon.com/SanDisk-microSD-High-Capacity-microSDHC/dp/B00488G6P8
Micro SD card reader - https://www.amazon.com/IOGEAR-MicroSD-Reader-Writer-GFR204SD/dp/B0046TJG1U
A copy of raspian(any other linux based operating system will work as well) - https://www.raspberrypi.org/downloads/raspbian/
Make sure to download the pixel version.
If you have larger than 8gb sd card I'd reccommend Ubuntu mate located here - https://ubuntu-mate.org/raspberry-pi/
You might even consider rokos OS if you want to stake your favorite altcoins meantime - http://rokos.space/core.html
SDFormatter - https://www.sdcard.org/downloads/formatter_4/index.html
etcher - https://etcher.io/
Bitwise SSH client - https://www.bitvise.com/ssh-client-download
Step by step tutorial
1. Format the Micro SD card
Get and install SDFormatter, when that is done insert your Micro SD card to the reader, open up SDFormatter and make sure format size adjustment is swiched on. Then format the SD card.

2. Burn raspbian on the SD card
We're going to use Etcher for this process. Burning the image on the SD card is fairly simple and straight forward.
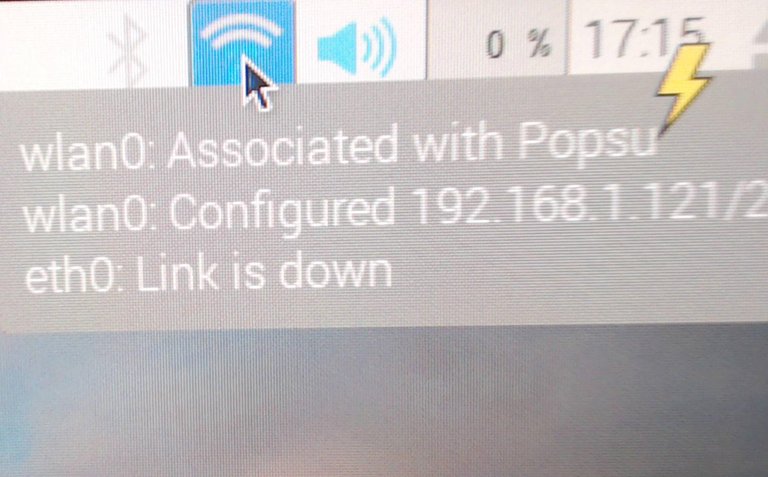
3. Install raspbian on your raspberry pi and log into your wifi
Installing rasbian is done automatically, you just have to wait until it boots up. After it's done booting, just log into your wifi and write down your local ip for the device. You'll be using this ip to ssh into the device.
4. SSH into your raspberry with bitvise
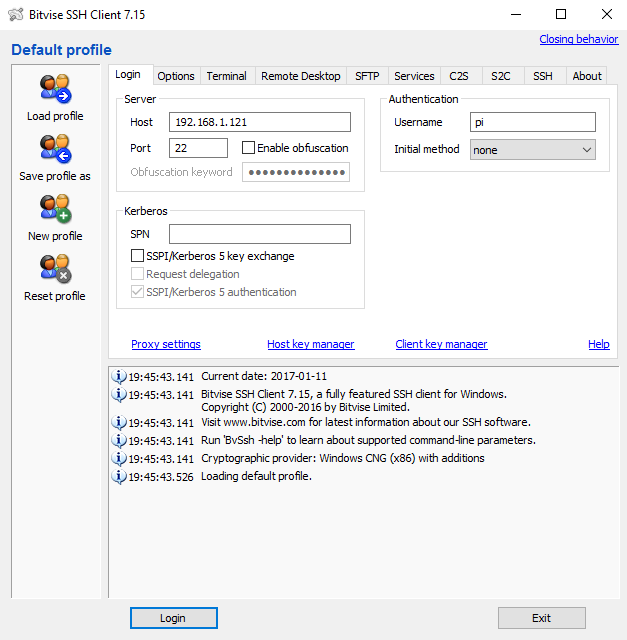
The default username is : pi
The default password is: raspberry
6. Install piston and all other prerequisites
bitvise will open up a terminal along with a ftp tunnel, paste the following commands into the terminal to install piston
Install screen
sudo apt-get install screen
Install python with all piston the prerequisites
sudo apt-get install python3
sudo apt-get install python3-dev
sudo apt-get install python3-pip

sudo apt-get install git make automake cmake g++ libssl-dev autoconf libtool
sudo apt-get install libboost-thread-dev libboost-date-time-dev libboost-system-dev libboost-filesystem-dev libboost-program-options-dev libboost-signals-dev libboost-serialization-dev libboost-chrono-dev libboost-test-dev libboost-context-dev libboost-locale-dev libboost-coroutine-dev libboost-iostreams-dev
sudo apt-get install doxygen perl libreadline-dev libncurses5-dev
install piston
sudo pip3 install steem-piston
Just paste all of theese commands into your terminal one by one to intsall piston with all of the prerequisites
7. Compile the curation bot script
Make a new folder on your desktop called bot, then create 2 files in that folder called bot.py and votelist.txt
so it would look like this

You can just create 2 text files and rename the extensions to get the .py extension.
Edit the bot.py file and paste the following code inside:
from steem.steem import Steem
from steem.steem import BroadcastingError
import threading
import time
import random
import csv

my_subscriptions = []


with open('votelist.txt', mode='r') as infile:
    reader = csv.reader(infile)
    for rows in reader:
        v = rows[0]
        my_subscriptions.append(v)

# accounts and passwords
account = ["account_goes_here"]
posting_key = ["password_goes_here"]
# delay in seconds when the bot votes
vote_delay = random.randrange(1200,1800)

upvote_history = []

def feed():
    print("Waiting for new posts by %s\n\n\nGo Oprah!\nGo Winfrey!" % my_subscriptions)
    steem = Steem(wif=posting_key[0])
    for comment in steem.stream_comments():

        if comment.author in my_subscriptions:
            # Comments don't have titles. This is how we can know if we have a post or a comment.
            if len(comment.title) > 0:

                # check if we already upvoted this. Sometimes the feed will give duplicates.
                if comment.identifier in upvote_history:
                    continue

                print("New post by @%s %s" % (comment.author, url_builder(comment)))
                workerThread = threading.Thread(name=comment.identifier, target=worker, args=(comment,))
                workerThread.start()


def url_builder(comment):
    return "https://steemit.com/%s/%s" % (comment.category, comment.identifier)

def worker(worker_comment):
     time.sleep(vote_delay)
     try:
       for (k,v) in enumerate(account):
         worker_steem = Steem(wif=posting_key[k])
         upvote_comment = worker_steem.get_content(worker_comment.identifier)
         # vote weight 100 full power vote -100 full power flag
         upvote_comment.vote(100, v)
         print("@%s====> ^Upvoted^" % upvote_comment.author)
         upvote_history.append(upvote_comment.identifier)
     except BroadcastingError as e:
       print("@%s<- failed" % upvote_comment.author)
       print(str(e))


if __name__ == "__main__":
    while True:
        try:
            feed()
        except (KeyboardInterrupt, SystemExit):
            print("Quitting...")
            break
        except Exception as e:
            traceback.print_exc()
            print("### Exception Occurred: Restarting...")
8. Add your account to the curation bot, also modify the the settings
add your account to "your_account_goes_here"
add your password to "your_password_goes_here"
you can also add multiple account by seperating the accounts and keys with a comma like so:
account = ["account1", "account2"]
posting_key = ["key1", "key2"]
You can modify the delay when the bot votes by altering this line (in seconds)
vote_delay = random.randrange(1200,1800)
You can also modify the vote weight by altering this line (100 being full power and -100 being full power flag)
upvote_comment.vote(100, v)
9. Add users to the curation list
open up your votelist.txt and add users you want to vote on, each line contains a new user for the bot to vote on
So the list would go like so
ubg
fyrstikken
furion
contentjunkie
xeroc
steempowertwins
10. Move the files from your desktop to raspberry
After you're done adding accounts to your curation list just via bitvise ftp tunnel like so
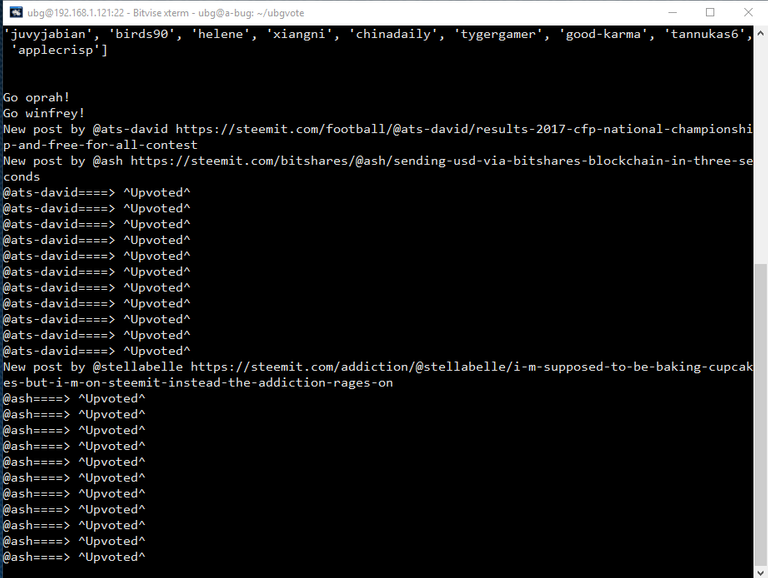
11. Run your bot
To run your bot, you first need to navigate to the bots folder
you do that by typing
cd bot
then you need to run your bot
screen python3 bot.py
By using that command you're attaching the python script to a screen. So you can close your terminal and log out.
Each time you want to know how the bot is doing you type
screen -r
If you want to detach the screen use keyboard shortcut ctrl+a+d
If you want to close the script use keyboard shortcut ctrl+c
Big thanks to @fyrstikken for releasing the source code for the winfrey bot.
You can find the original code for the winfrey bot here: https://steemit.com/socialist-bot/@fyrstikken/the-anonymous-winfrey-bot-upvotes-for-everyone-download-here-easy-steps-for-n00bs
Also if you have any questions regarding setting up your own bot, just ask in the comments or contact @ubg in rocket chat. Also a huge thanks to @noganoo for providing me the piston prerequisites.
Hello @ubg,
Congratulations! Your post has been chosen by the communities of SteemTrail as one of our top picks today.
Also, as a selection for being a top pick today, you have been awarded a TRAIL token for your participation on our innovative platform...STEEM.
Please visit SteemTrail to get instructions on how to claim your TRAIL token today.
If you wish to learn more about receiving additional TRAIL tokens and SteemTrail, stop by and chat with us.
Happy TRAIL!

Twist and shout!
noganoo !cheetah ban
Okay, I have banned @spin.
how the hell did you make 2000 accounts...
What a sizzling hot article.
noganoo !cheetah ban
Okay, I have banned @tinder.
Fine and good.
noganoo !cheetah ban
Okay, I have banned @tawnie.
Legit.
noganoo !cheetah ban
Okay, I have banned @steemville.
Carolina Reapers. Haha!
noganoo !cheetah ban
Okay, I have banned @snake-plissken.
will this work on a mac?
Yes, just paste the commands in the terminal.
Just to do steps 6, 7, 8, 9 and 11
what about the other steps?
Hmm....when I decide to tackle this, how can i reach you? are you in steemit chat a lot?
@ubg in steemit.chat
ah ok thanks
dude, there are problems with that piston. Does this code still works? I wrote a different bot in python with the selenium framework(browser automation framework).
That is boss level! Just think.....that little Raspberry Pi could curate and probably stake some other coins at the same time. I'm not going to have time for the project but I think it would be cool if someone built a miniature DIY Tesla power wall and had a solar panel hooked up and ran a setup like this just to curate and stake coins.
Yea, you can run rokos to stake the coins at the same time
http://rokos.space/core.html
I want to cry...😢 So proud of you @ubg 😋
💗
I'll be trying this with my Pi Zero. I plan to have that showing my notifications for Steemit on a scrolling LED display. I'll publish the code for that when I do. I'll put it on Github. Can use a separate file for passwords so they don't get shared in the code.
Try Felixes updated script, he has accounts and passwords separated from the code.
https://steemit.com/piston/@felixxx/learning-python-with-steem-the-winfrey-bot
Thanks for the detailed tutorial!
I am getting this error pls help :( :
Traceback (most recent call last):
File "bot.py", line 1, in module
from steem.steem import Steem
Nice. :-)
this is an amazing tutorial.
wait, so i have to be running linux, right? it won't work with a mac?
I love this tutorial. ..I have a pi that im not using im going to try it out. Upvoted, followed, resteemed
Nice job and I have all the parts needed.
Amazing information. Thank you for sharing it with us.
This post has been ranked within the top 80 most undervalued posts in the second half of Jan 11. We estimate that this post is undervalued by $5.98 as compared to a scenario in which every voter had an equal say.
See the full rankings and details in The Daily Tribune: Jan 11 - Part II. You can also read about some of our methodology, data analysis and technical details in our initial post.
If you are the author and would prefer not to receive these comments, simply reply "Stop" to this comment.
look at you! you got some whale love!
Awesome, thanks!
Awesome!!
This is great! :)
Not only do I now follow you but would you like work?
Thank you for posting such a helpful article.
@The-Steem-Store
What kind of work are you talking about?
Making a bot to help automate a middleman service.
The idea, would be to connect users who need things, to users who can ship them.
After an arrangement is made, users can pay @The-Steem-Store in STEEM to receive their item after delivery. When payment to this account is made, the bot would make a post calling for the delivery of the goods.
When the delivery is complete the payment will be past onto the user who delivered the goods.
Sorry for the late response,
Good info!
I have an issue. The BroadcastingError will no import.
Not sure what the problem is. I did this with the latest version of steem-piston. Could be that's broken now in the latest version.
Traceback (most recent call last):
File "bot.py", line 9, in module
from steem.steem import BroadcastingError
ImportError: cannot import name 'BroadcastingError'
instead of installing steem-piston, you may try to install python-steem with the following command:
I found that the 0.4 version of steem-piston broke all of my scripts, now I download version 0.3.1 of python steem. That does the job for me.
do you suggest uninstalling steem-piston?
hrmm..... had to uninstall the version I had of steem to get it to work.
pip3 uninstall steem=0.4.3
i think It's working noow
Glad you got it working!
I was going to suggest installing steem to a clean operating system with the prerequisites installed. Bot on!
late reply :D i saw your bot upvoting my post :D and yeah i run kinda the same bot (i own raspberry pi B+ and raspberry pi 2 B+) both of them are capable of curating i think :) nice post :)
Drphil?
?
https://steemit.com/radiator/@inertia/drphil-rb-voting-bot-update-voting-power-recharge
Really easy to set up and configure.
WELL DONE SIR!
This is so exciting. But I am completely lost. From my first reading I get this card is similar to an Arduino. So here goes my first question:
Can I use an old Arduino card for this purpose, with these instructions? I bought one once, and almost never used it. I did some childish tests with a breadboard.
Second question: Can I use a computer instead of a usb card like these? Why is this type of hardtware required? Or is it just that it is cheaper than a computer?
Thank you very much for the article and for any comments on simpler stuff I can read, more elementary things to get started.
And excuse the silly questions :-)
I need your help.. :( I cant connect to my rasperry pi 3 model b via SSH and i dont know why.
This is dope, I have a Pi 2B sitting around collecting dust. Time to put that joint back to work.
Amazing! )))))))))
Is this bot still a viable project? I haven't found any new posts on this . I love the idea and would love ti try it out if ut definitely still works.
Good idea, I have to try this, I've got Raspberry Pi 3 , really good information for me, cause I am new on steemit :)
Hi @ubg does this project is still working ? I do everything what you show in this article , but when I go to step 11 and I am writing commend "screen python3 bot.py" to run this bot, but it doesn't work. Tell me, do I need to use ssh bitvise, or can I enter these commands directly from step 6 in the raspbberry terminal, without using ssh bitvise from windows?
@ubg when I am entering the commad " screen python3 bot.py" in raspberry pi3 terminal it shows me " screen is terminating" and nothing goes on ? Tell me what should I do ?
Great tutorial, I loved the part about the marshmallow pie.
Try fyrstikkens original script, or felixes updated one. see if those work.
https://steemit.com/socialist-bot/@fyrstikken/the-anonymous-winfrey-bot-upvotes-for-everyone-download-here-easy-steps-for-n00bs
https://steemit.com/piston/@felixxx/learning-python-with-steem-the-winfrey-bot
Hit me up on rocket chat, I'm @ubg there
I'm glad you got it working, be sure to look out for updated scripts, because this one is pretty basic and far from perfect. However this gets the job done fairly well.