Lately, I made the decision to bake my own homemade bread. I thought that it wouldn’t be that difficult, since you only need a few ingredients, and basic equipment that it is usually available in most kitchens.
However, it wasn’t as easy as I thought it would be.
I have to admit that I am a complete newbie when it comes to making bread. Although I watched my mother in the past and my father gave me good advice, especially about oven temperatures and times, etc., I thought that a thorough online search on how to make homemade bread would help me more and provide me with insightful advice. After all, technology has advanced, hasn’t it?
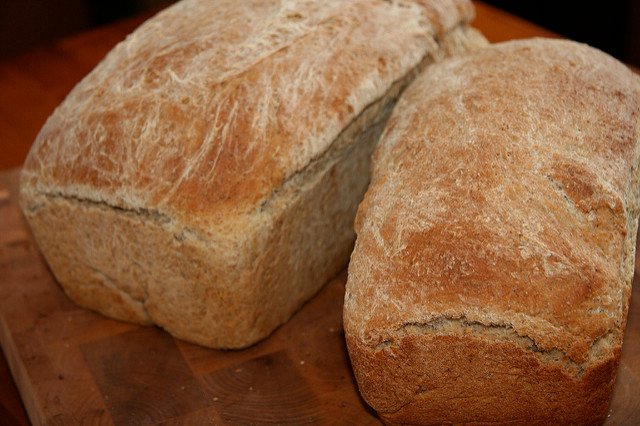
Image originally uploaded by Kate Ter Haar on Flickr.com and reused under Attribution 2.0 Generic (CC BY 2.0) Creative Commons License
So I visited YouTube to find relevant videos featuring homemade bread recipes. As you can imagine, there are plenty of them uploaded by all types of amateur cooks to professional chefs. Everyone who has made a video about baking bread has offered their own version, which matched their level of skill, experience, ingredients used, type of bread, equipment, etc.
Rather than making it easier for me to make my own homemade bread, these videos confused me at first. I mean, if there are so many steps, techniques, and details to follow, should I really bother at all making bread at home, when I can just buy a freshly-baked loaf from the local bakery?
There were all those things, like activating the yeast (since I used dry yeast), and proofing the dough and kneading it properly. And all those persons who uploaded videos on YouTube about bread making at home claimed that they had the best recipe that guaranteed ultimate bread baking success!
At that point, I realized that my bread making adventure would not be a straight line but rather a trial-and-error process that would require me to dedicate some time to learn the basics. I was determined to learn how to bake a semi-decent loaf of bread and I was prepared to pay the price to learn. Perhaps it would cost me some money to buy the ingredients and even waste them, if my first bread-making effort turned out to be a total failure. In this way, however, I would manage to gain valuable hands-on experience that no video about bread making could offer.
Using the right amounts of ingredients
I found out that, in order to successfully bake a nice loaf of bread, the first thing that I should remember to do was to use the right amounts of ingredients. So I discovered that if I used 1 kilo of flour, I would need 700 grams of water, 10 grams of fresh yeast, and 20 grams of salt.
Hold on. Fresh yeast? But I only had dry yeast. So I did an online search about how to convert dry to fresh yeast, and I found out that, in order to get the equivalent amount of dry yeast, I had to divide the amount of fresh yeast by three. So, dividing 10 grams of fresh yeast by three would give me 3 grams of dry yeast.
I shouldn’t forget to mention that I also used a tablespoon of sugar during the yeast activation stage, and one table spoon of olive oil, which I used with the other ingredients, along with salt, at the final point of mixing all the ingredients, and before giving the dough a second proofing.
In some recipes, it is stated that you can use other ingredients, as well, such as milk, for example, or you can use some other sweetener during the yeast activation stage, such as honey. Personally, I have never used milk in making bread, and I have used honey as a sweetener a couple of times, instead of sugar, with the same results.
Activating the yeast
As I said above, I made my bread with dry yeast, so I had to activate it in lukewarm water. First, I used a small pot to warm water up to the point that it was comfortable to the finger. I filled and warmed up the pot twice in total. It only took a couple of minutes to warm up water, and then I poured it into a big plastic bowl, adding the yeast and the sugar. Then I waited for 10-15 minutes for the yeast to start rising to the surface and increasing, which meant that it was activated.
I didn’t stir the lukewarm water for two reasons. First, if I stirred it, its temperature would drop, which would cause the yeast to stop multiplying. As a result, it wouldn’t activate as well as expected. Second, it’s generally better to leave the yeast as “calm” as possible, so it can take its time to grow and activate to its full potential.
I’ve watched some videos and read some recipes online where people add salt at this stage. I believe that this hinders the yeast’s growth, so it’s better to leave salt to be added at a later stage.
At the same time that I poured the lukewarm water into the plastic bowl, I turned the oven on to 60o Celsius, and left it at this temperature for the 10-15 minutes required for yeast to activate. I did this to create a warm place, where I would put my dough to rise.
I also used the same pot as above. This time, I filled it up with water and brought it to boiling point. Then, I placed the hot water in the warm oven (which I had warmed up to 60o Celsius, as above), in order to moisturize the air inside the oven, creating, in this way, the perfect conditions for the activated yeast to work on the dough and raise it.
Applying more than two proofings
Most people who make their own homemade bread apply two proofings at most. That is, they apply the first proofing, usually in a bowl, after they have kneaded the dough, and the second proofing after they have placed the dough inside the baking tray(s), and that’s it.
However, I tried this approach, and I can say that the results weren’t as good as expected, in terms of raising the dough to a satisfactory level. In fact, when I used only two proofings, my dough didn’t rise at all.
After I did a search on YouTube, I discovered an excellent video, which is actually about how to prepare your own whole wheat bread.
In this video, after the most of the flour was mixed with water and the mixture was left to proof, while the rest of the flour was left to be added later on.
I was amazed by that, so I decided to do exactly the same thing. I poured slowly most the flour into the plastic bowl while I was stirring the mixture. Then I covered the bowl with a dishcloth and left the mixture to proof in the warm oven for 30 minutes. I followed the instructions given in the video, so I didn’t add any salt or olive oil at this stage, because this would prevent the dough from rising really well.
Congratulations @castleirwell! You have completed the following achievement on the Steem blockchain and have been rewarded with new badge(s) :
Click on the badge to view your Board of Honor.
If you no longer want to receive notifications, reply to this comment with the word
STOPDo not miss the last post from @steemitboard: