This Saturday I went to a field to launch my freshly assembled model rocket. I bought the starter kit off a specialized website. The total cost including shipping from the UK to my hometown in Romania was about 46 pounds. I did have some shipping issues initially – I was not notified by the vendor that the package had arrived and, apparently, it was returned by DHL - although I was never called or notified by any carrier. It took more than a month, but I did eventually get my complete kit, it was kind of a nice surprise, as I was still waiting for a refund from the vendor, as we discussed. But, I did tell them I preferred to get the product and it was nice to finally obtain it.
The rocket had to be assembled from several different parts, but nothing too complicated. Just needed some glue, sandpaper, ruler and scissors, in addition to the supplied parts. The most annoying part of the whole process was tying knots, especially for the parachute, which requires 2 overhead knots for every hole, so 12 in total. It was also not that clear to me how to tie the parachute to the rocket and fold it correctly. However, now that I fired the rocket a few times, I wouldn’t worry too much about folding the parachute perfectly, as it will open at least partially, unless you really mess up or the parachute disconnects from the rocket.

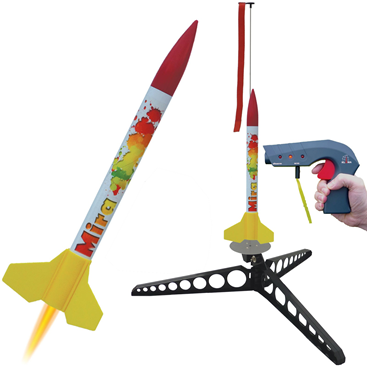
In the figure above, you can see the assembled rocket standing on the supplied launchpad (attached to the metal rod), which is easy to setup. They recommend putting an empty rocket engine beneath the rocket, so there is some distance between the pad and the actual engine.
The engines came with both fuses and igniters. I used igniters, and the supplied ignition gun to set off the rockets. The gun required two 9V batteries, which I got from a gas station. The instructions for the igniter were in German, but it is not a complicated process. You need to take the igniter, put it with the black head in the engine all the way, and then make sure it stays in place by pushing the plastic cap on top, so that only the two wires (or legs) protrude. Next, you just need to move them apart a bit and connect the ignition gun’s red and black heads to the wires, while making sure that the wires do not touch each other or any other metal parts. Finally, place the gun in “Arm” mode and fire.
The rocket engines that come with this particular starter kit can propel the rocket to an altitude of up to 55 meters (A6-4 engines). You can buy more powerful engines if you so desire, which can propel the rocket to altitudes of several hundred meters. As a reminder, make sure you don’t forget to place protective wadding between the parachute and the engine. Otherwise, the heat from the engine may burn the parachute (the kit also included wadding).
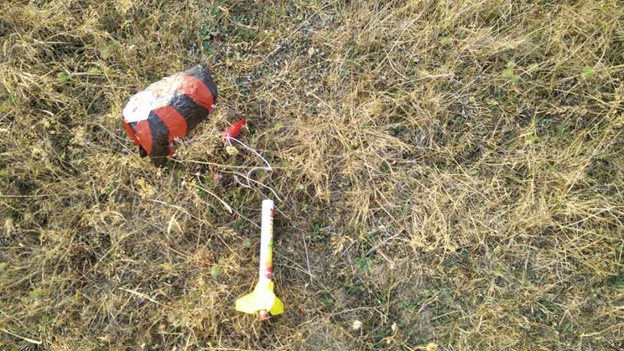
Here is the result after the rocket has landed:
It was a fun experience! And you also learn from it.
I also have some videos, but I haven't learned how to embed videos in steemit posts, without uploading to an external website first.
UPDATE: Launch Video
looks like an interesting experiment
you can use dtube for videos
Nice, thanks for mentioning dtube, didn't know about it, but found a post on steem it which explains how it works.
This brings back memories. I grew up with these. I wrecked a few because I was putting over sized engines in them to see if they would fly higher. I had many hours of fun. Just one cautions - don't fly them on real windy days. Have fun.