
This is the second post in a series where I perform simple musical instrument repairs and talk about the basic scientific concepts behind them. It is written with beginners and people who are unfamiliar both subjects in mind, but can be enjoyed by anyone
A Brief Lesson on Electromagnetic Interference and Faraday’s Cage.
The Problem
AC power is transmitted to your home at 60 cycles per second or 60 Hertz. This just happens to be in the audible frequency range. In fact, the note it produces would be somewhere between the low B flat and B on a standard keyboard. In addition to this, electronic devices in your home often contain transformers and all sorts of other components that can create electrical signals at different frequencies and cause electromagnetic interference which, if it is in the audible frequency spectrum, presents itself as noise in your amplifier.
I currently live in a tiny single-wide trailer (these are very similar to the ‘tiny houses’ that you see that have become popular with certain crowds, except without the compliments and looks of adoration, or the price tag for that matter). It was built in 1969 and does not have the ‘cleanest (low noise)’ power. In addition to this, I have all sorts of electronic devices throughout the house and there is really no escaping the humming noise when I try to play my guitars with single coil pickups.
Why does this happen?
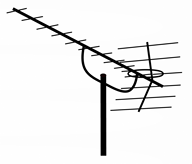
Well, if you have ever looked at antenna, it is simply a conductor in a field that is attached to an amplifier. There is nothing really special about the antenna and in fact, any conductor can act as one. This includes the wires and conductive components in your guitar, such as potentiometer cases. Even your bridge and whammy bar can act as an antenna. It just so happens that this collection of little antennas in your guitar can pick up signals and send them straight to your amplifier.
Single coil pickups are especially susceptible to this phenomenon. Humbuckers, on the other hand, are designed with two coils connected in such a way that the noise ‘cancels’ out making them almost impervious to such effects. This process is beyond the scope of this article but is not as complicated as you might think.
The Solution(ish): the Faraday Cage
It is not possible to eliminate all of the hum from single coil pickups. The pickups themselves will still be susceptible to it. You can, however, do a few things to reduce it. One of these solutions is to turn your guitar cavities into a Faraday cage. This is also known as ‘shielding.’
I would love to talk a bit more about the man the cage was named after: Michael Faraday (who was one of Einstein’s heroes, despite NOT being a classically trained scientist), but that is not for this post. You should check out Wikipedia/Michael_Farady or other resources on this scientist if you get a chance.

Now remember earlier, when we were talking about antennas? The concept behind Faraday cages is basically to put the thing you want shielded inside a big, weird-shaped, hollow antenna that is connected to ground. That way stray signals come in contact with the shielding, and the signals are immediately diverted to ground leaving the cages contents untouched.
To put it in the simplest terms, you are making a box out of metal to protect your components from stray signals and connecting that box to ground. We can accomplish this easily on many items with copper foil tape or shielding paint. In this example I am going to use the tape.
The Mythology
Now, some people (including Paul Reed Smith, founder of PRS Guitars) claim that the copper shielding somehow interferes with the magnetic field of the pickups and alters their tone. As someone who has designed and built equipment for use in experiments involving magnetic fields in a research setting, I can attest that those claims seem to be rubbish and are just another piece of musical equipment folklore. While it is possible to induce a current in a conductor in a changing magnetic field, the magnetic field itself is only disrupted by materials with ferromagnetic properties. Non-magnetic conductors like copper, brass, or aluminum leave the field unaltered. Back before I was disabled, and still worked directly for the university, I would use these metals when constructing items that would be placed inside magnetic fields to ensure that my data was not being corrupted.
There are plenty of myths out there about ‘tone’ and what makes an instrument or amp sound great. Many of these myths have no real scientific support and are just that; myths. Hell, I have even seen a man play a shovel as a guitar and it got amazing tone. My saying is “If you can’t see the difference on an oscilloscope, then it isn’t there.”
Justin Johnson
Anyway, enough with the science lesson. Let’s get to work.
Gettin’ down to it.
I recently purchased a used Butterscotch Blonde G&L Legacy from a guitar shop on reverb.com. I will be working on this guitar today.
Shielding a strat-style guitar with copper foil tape.
Difficulty: Easy, but kinda annoying at parts.
Time to complete: Depends on how fast you are
Can be done in under an hour if you are well prepared
What you will need…
- screwdrivers appropriate to remove the pickups and pickguard on your model of guitar
- a ratchet and most likely a ½ inch socket, or a wrench (size may vary).
- soldering iron and solder
- a drill and a small wood screw (both optional)
- Helping hands (recommended)
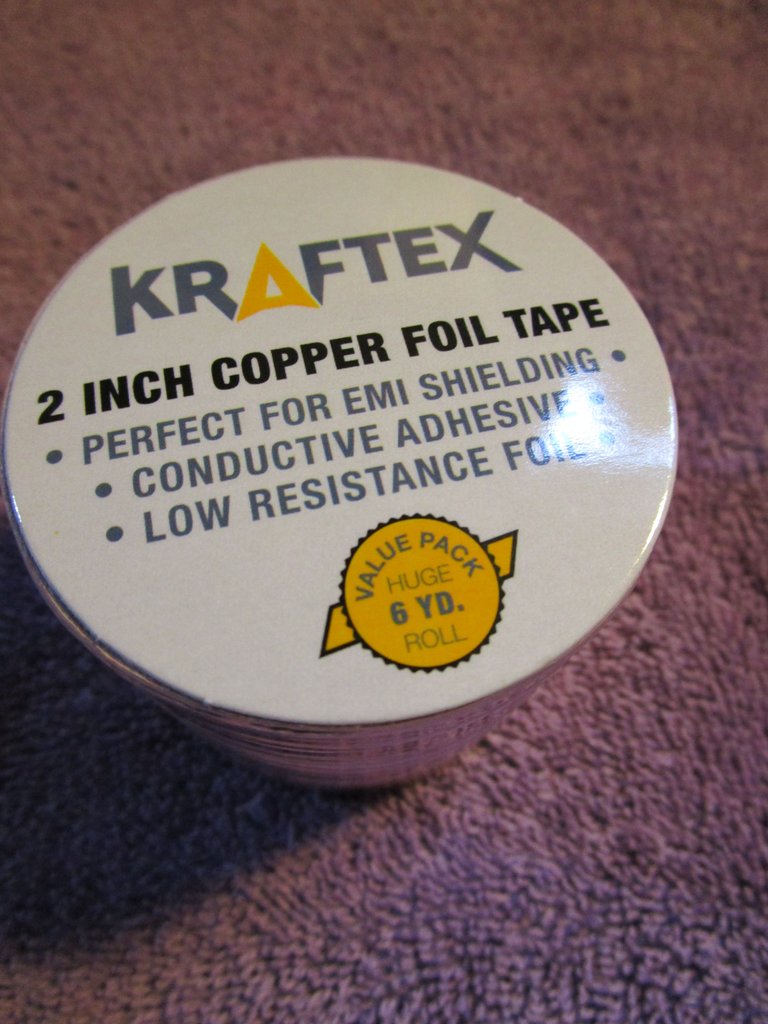
- copper foil tape
You will want the stuff that has conductive adhesive. If it smells like it might be hazardous to your health, it is probably the right stuff.
Step 1: Disassembly
First you will want to remove the strings so you can get the pickguard assembly off.
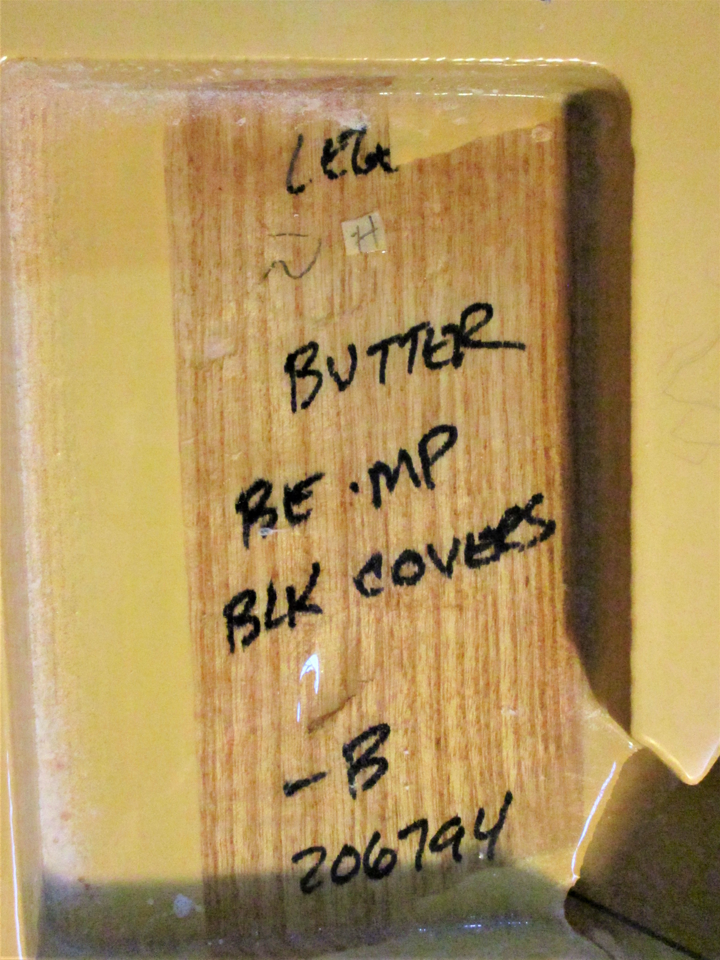
Since I had the strings off, I decided to take off the neck (Please note, this is not necessary for this project). Many guitars have Information stamped or written on the neck heel or in the neck pocket. For many guitars, this is the only way to accurately date them. The shop I bought the guitar from said it was a late ‘90’s model G&L Legacy. Once I got the neck off it was evident that it was actually a 2000 model. The dates indicate that the neck and body were built in August, and the guitar was assembled on September 11, 2000. The BE and LEG handwritten on the neck heel likely stand for Birds Eye maple (the neck material) and Legacy (the model).

September date barely visible in photo
The next step is to remove all of the plastic knobs and the tip of the selector switch. You will want to do this before you remove the pickguard. Once the pickguard is removed this step is very difficult to do. I actually almost forgot about this and had two pickguard screws off before I remembered. If you take the pickguard off first by accident, put it back on to remove the knobs properly. Trust me.
The knobs and switch cover may be a little stubborn to pull off. But, they will come off. You can use something to help pry them from underneath if you find it necessary.
Once the knobs are off you can use your ratchet to remove the nuts on the potentiometers. Afterwards, you can remove the pickup screws, switch selector screws, pickguard screws and remove the pickguard. Keep an eye out for the pickup springs. They are likely stuck to the pickup magnets but may come loose and you don’t want to lose them (note the correct usage of ‘loose’ and ‘lose’. I know some people have trouble with that one).
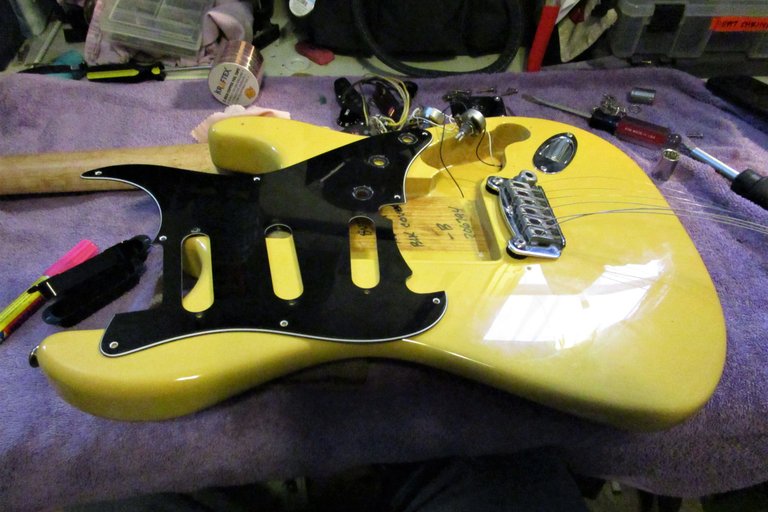
I took pictures of everything inside as a reference for reassembly, should I need it. Also, I marked the pickups with a paint marker before I removed them to make sure I would put them back correctly when I was done.
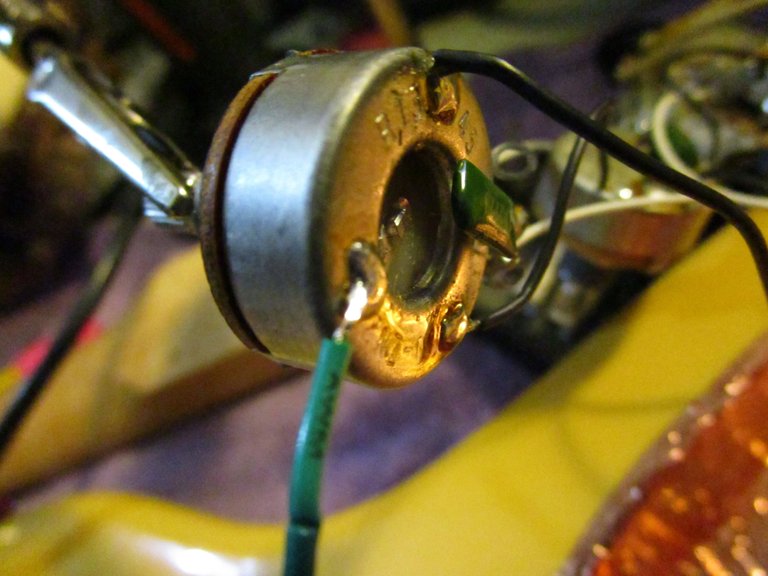
Some Deep Shit Right Here
Inside the pickup cavity, you can see a bunch of handwritten information about the guitar. To be honest finding these little bits of writing in the cavities and the neck heel is my favorite part about working on a guitar. It is like buried treasure. When you see these little gems written in another human’s hand, at that moment the guitar stops being just an instrument and you can really see it as someone’s life work. You somehow feel connected to the person who made it. I can’t really explain it, but it will change the way you look at your guitar.
Step 2: Shielding
Once we have the pickguard assembly removed and dis-assembly-ed. We begin the laborious process of lining the cavities with the copper tape. Try to work in as big of chunks as is possible. I started with two vertical strips in the pickup cavity and went from there.
Make sure the pieces of copper tape overlap when you are placing them. That is the whole point of having the conductive adhesive. Also, notice in the second picture that I am creating a little bit of a fold-over onto the ‘top’ of the guitar when I do the sides of the cavity. I will do this the whole way around. This is so the copper in the cavity will make contact with the copper that will be on the bottom of the pickguard. You want the entire copper surface to have continuity to create your ‘metal box.’

The control cavity will be the most difficult. At this point, maybe take a break if you want. Check your discord, maybe have a smoke if that is your sort of thing. Some of you may want to enjoy some popcorn and lemonade. I know I would.
NOW GET BACK AT IT!!
Important…This step of the shielding process is not depicted in the photographs. Do not forget it.
After you finish the control cavity, remove the jack-plate and do that cavity as well. Don’t forget to overlap and fold-over like we did above
Shielding The Pickguard
Now we can move on to the pickguard. I usually just cover the whole bottom of the pickguard in strips of tape and then cut away the excess with an exacto knife. This does take just a little bit of finesse to avoid the pickguard, but I have faith in you. Besides, even if you nick the pickguard it is still okay. You earned that nick. Remember it. Cherish it. What’s important is that you are spending some time with your guitar. Building a relationship. Learning to love it. Letting it learn to love you.


Grounding
Now, if your guitar is wired properly, there should be wires soldered to the bodies of the potentiometers (these are your volume and tone controls; aka, pots). These wires connect the pots, the jack and the bridge/tremolo system to a common ground. We need to connect our Faraday cage to this ground as well so that it can filter away the unwanted signals.
Ultimately you need to connect a wire from one of the grounded components to the copper shield. I accomplished this by drilling a very small pilot hole into the body. I then wrapped one end of the wire to the screw and screwed it into the wood. The best spot to do this will vary by guitar. Just look for somewhere where there is no danger of drilling through the guitar.
I know I am probably losing some people with this step. You have probably never had anyone tell you to drill a hole in your guitar and you think it sounds like a bad idea. I assure you it is perfectly safe. As long as you don’t mess it up. Hahahahahaha (maniacally). Your guitar already has all sorts of holes drilled in it.
There is also an alternative. You can solder the wire directly to the copper tape surface. You are going to want to make sure and use some rosin and get a really decent solder joint so it does not break when you reassemble the guitar. I think the screw method is easier and more reliable, but either is acceptable.
The other end of the wire should be soldered to the back of one of the pots. It does not matter which one (assuming they are all connected to ground). Just make sure that your wire is long enough. Soldering to pots can be challenging. If you have a set of helping hands (those little stands with the alligator clips) you can use one claw to hold the pot and a claw to hold the wire and you can just focus on the soldering.
Once you have the shielding grounded, you are just about good to go. You just need to reassemble the instrument. Reassembling the instrument shouldn’t give you too much trouble. The trickiest part is probably the pickups and pickup springs, but even that isn’t bad.
And that’s it. Remember, this is not an all-out cure for noise, but it should reduce it a bit. And if you live in a house like mine, every little bit helps. If you find you are still having an unacceptable level of noise, there are other steps you can take, such as power conditioning, pickup shielding or even replacing the pickups with mini or stacked humbuckers (replacing the pickups will change the tone).
Thanks for looking. I hope you enjoyed my post. If you would like to see the first part of this series where I mix simple equipment repairs with basic electronics concepts you can find it here…
Best wishes,
@veckinon
All repair and guitar photos by @veckinon. All other photos labeled for reuse, wikimedia commons
Crankin' up the 3-string shovel guitar video by Justin Johnson
I never really thought about using copper foil on the inside of the guitar for shielding, But then, I've never attempted to modify the shielding on a guitar. I have see pictures of copper foil on the inside of a guitar in the past, but that was probably back in the 1990s.
My Peavey bass is a bit noisy, more so than my 6 string or my old Gibson bass, but that bass has good humbuckers in it.
Shielding is still somewhat common. I learned how to do it from my dad originally. Some guitars come with it already. My Carvin came completely pre-shielded with copper foil from the factory. Some Fenders have fully shielded pickguards (but they use another type of conductor). My G&L had some shielding on the pickguard around the pots, but nowhere else.
I figured this was a good project to introduce people to takin' some stuff apart and getting them familiar with some really basic concepts. So many people are afraid of taking stuff apart that they really miss out on how fun it is and how many problems you can solve all while saving money.
Of course, I don't need to tell you this. Haha
Thanks for stopping by, Amber. Always a pleasure.
Congratulations, your post was discovered and featured by @OCD in its daily compilation 245!
You can follow @ocd – learn more about the project and see other Gems! We strive for transparency.
If you would like your posts to be resteemed by @ocd to reach a bigger audience, use the tag #ocd-resteem. You can read about it here.
@ocd now has a witness. You can vote for @ocd-witness with SteemConnect or on Steemit Witnesses to help support other undervalued authors!
Thanks a lot @ocd. I really appreciate it.
There's a gem in every piece. Besides the amazing amount of detail and lesson in electromagnetism: musical equipment folklore? It's a delightful turn of phrase. A universe of people who know so much about musical instruments that a musical equipment culture exists.
Thanks for the reference to Faraday. I had done some research on Marie Curie and I knew she and Pierre studied magnetism before they began looking at radioactivity. The nexus between them and Faraday ( just learned) was Becquerel, who communicated with both Faraday and the Curies. Before you made the reference, I had no idea. While it seems like a bit of trivia, it actually throws light on the kind of intellectual climate and cooperation that existed between scientists at the time. This may turn into a blog--one nobody will read :)
Just resteemed. Slow getting my next blog out--room for good material there.
One of the best examples of this that I know of is the Fender Guitar and Amp Society on Facebook. It is a Fender fan club, of sorts, that currently has over 70,000 members. You have to answer Fender trivia questions to join like, "what is the most common preamp tube used in fender amps? " and stuff like that. Our friend @amberyooper, above would probably have no trouble with their questions.
Its members, collectively, likely hold every bit of trivia, folklore, and technical info about fender guitars and amps that exists. It is a pretty cool group. They also have a no bullshit/negativity policy so it is pretty much just populated with friendly and helpful people. I have learned and seen so much there.
I would love to read something like that. One of my favorite genres is science history and biographical readings on classical and early modern scientists. Here are a couple of my favorites :
As an aside, the other day after watching the live performances of music from the Good the Bad and the Ugly and The Godfather, a live performance of Tubular Bells from the seventies came on on YouTube autoplay. A lot of people are familiar with the creepy intro from the original Excorcist film but the piece is really so much more than that. And while it may not have been the eye candy that the good the bad and the ugly was to watch, it was still great to see it performed 'live.'
Thanks for the reading list--one of my favorite genres too. For someone without technical training, it's a gentle way to learn science.
As for the highly specialized niche of musical equipment folklore--boy do I love the Internet. For all of us who felt a bit odd growing up (because we were odd), the Internet offers validation. It's a big world, with lots of different people. Sometimes you have to leave home to find someone who shares your interests--even if you only do it virtually. Thanks for that.
I'm going to relax now by listening to Tubular Bells.
Congratulations @veckinon! You have completed some achievement on Steemit and have been rewarded with new badge(s) :
Click on any badge to view your own Board of Honor on SteemitBoard.
To support your work, I also upvoted your post!
For more information about SteemitBoard, click here
If you no longer want to receive notifications, reply to this comment with the word
STOP