Desktop Publishing software is a computer program that is used to create layouts and designs for printed materials. It’s different from word-processing software like MS Word or LibreOffice Writer because you can arrange all elements of your design very precisely, which is impossible in the abovementioned programs. The most known program of this kind is Adobe InDesign which is very pricey, and you have to pay each month for using it. That’s why many people turn to Scribus – free and Open Source desktop publishing software that is as powerful as InDesign. With this tool, you can make your own designs, and you even can make some money selling them. It’s worth to acquire at least the basic knowledge of Scribus.
Scribus compared to other desktop publishing programs
As I mentioned earlier, Scribus is as powerful as Adobe InDesign, but its interface is entirely different. It looks outdated, and you don’t expect great features when you launch this software the first time, but it’s a common feature of all Open Source programs – possibilities are more important than the interface.
Scribus is available in multiple languages – you can switch the interface to one of many languages fast. On the everyday basis I use the Polish localization of the program, but for writing this series of tutorials I switched it to English
Scribus could be used by many designers as their main tool, and some of them use this software this way, but clients usually want designers to prepare files in Adobe InDesign. The problem lies not in Scribus and its features, but in customer’s expectations.
Freelancers and other people who use this kind of software to make money have more freedom of choice, and Scribus is getting more and more popular among them. It’s also a great software for people who are keen to learn the graphic design principles without the necessity to spend money for the software.
Scribus – the overview of the interface and the first launching
When you launch Scribus, you can see the start window first when you can choose the overall properties of your document. You can decide its dimensions, margins, units (centimeters, millimeters, inches, points etc.), bleeds, etc.

For now, I've chosen the default settings, which means A4 page with default values. As you can see, now the document is created and the interface is similar to word-processing programs, although it looks archaic. Don't be misled by this interface – the program is mighty!

What may be strange for you, you can't just start typing. That's because Scribus doesn't enforce any kind of layout on you. In MS Word, or in LibreOffice Writer, you'd be able to start writing, and the cursor would appear in the left upper corner. But desktop publishing software is made to prepare much more complex stuff, so it gives you possibility to declare your layout. In Scribus you have to create appropriate space for all your elements. For text, you create text boxes, and for images, image boxes must be created first. I'll discuss those elements in more detail in next parts of this series. Now I just show you how it works.
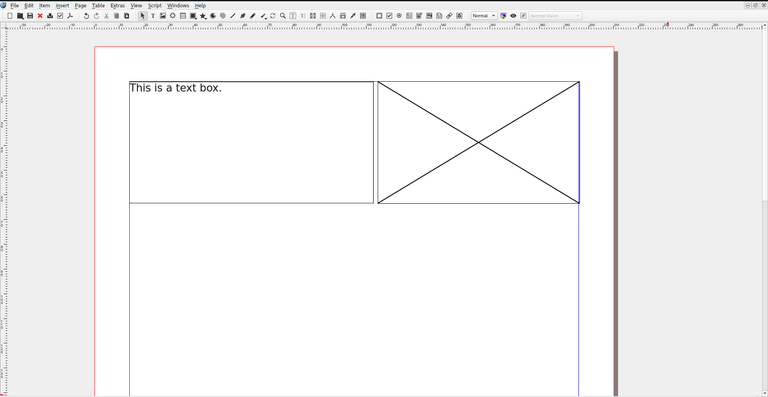
As you can see. I created a text box on the left, and the second box is an image box. You're not limited to rectangles – you can create text and image boxes of any shape, and I'll show you how to do this in the following tutorials.
If you left-click on the boxes, and you choose "Properties" or "Content Properties", additional windows will open. You can set both the properties of text and image, as well as the properties of text boxes themselves. The number of options is overwhelming, and I will discuss them in my next tutorials.
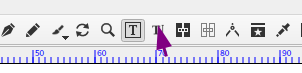
For now, the most important thing for you to remember is that you don't need to click much in Scribus because it's much easier to use shortcuts, and you can:
- press T to insert a text box,
- press I to insert an image box,
- press F2 to open the Properties window of the selected box,
- press F3 to open the Content Properties window of the selected window.
When you double-click on your image box, you'll be able to choose the image file you want it to be added to your document. You just insert the image this way.

For text you just type it, or you can use a Story Editor. If you used another software to write your text, just left-click on a text box and choose Content > Get Text. After this, you can choose any text file on your computer which will be imported to a text box.


Of course, you can import even lengthy documents to a text box this way. Don't worry, I'll show you how this works in my next articles.
For now, I just introduced Scribus to you a little, and you know its philosophy which is different from word-processing software. Soon I'll add next tutorial showing you how to insert and format text to your documents.
Follow me if you want to be up-to-date with my blog and my tutorials. I plan to write tutorials for other design software, too! :)
Yay! 🤗
Your content has been boosted with Ecency Points, by @creatinvoker.
Use Ecency daily to boost your growth on platform!
Support Ecency
Vote for new Proposal
Delegate HP and earn more