Description:
Up to now, the latest version of CentOS 6.x is CentOS 6.6, and the detailed installation and configuration process of CentOS 6.6 is described below
Server related Settings are as follows:
Operating system: CentOS 6.6 64-bit
IP address: 192.168.21.129
Gateway: 192.168.21.2
DNS: 8.8.8.8 8.8.4.4
Remark:
CentOS 6.6 system image has 32-bit and 64-bit versions, and there's a minimal version optimized for the server
If the production server is large memory (more than 4G memory), it is recommended to install centos-6.5-x86_64-water.iso
Download address:
32-bit and 64 - bit version: http://www.linuxdown.net/CentOS/2014/1029/3417.html
- The computer memory of CentOS 6.6 system must be equal to or greater than 628M (minimum memory 628M) to enable the graphical installation mode;
- CentOS 6.6 system installation mode is divided into: graphic installation mode and text installation mode;
- CentOS 6.6 text installation mode does not support custom partitions. It is recommended to use the graphical installation mode.
5, CentOS 6.6 system operation mode is divided into: with a graphical interface, can use the mouse to operate graphical methods, and without a graphical interface, direct use command line mode of text (CentOS minimal version is the default text works, in the process of system installation without system operation mode of the custom option). - Install CentOS 6.6
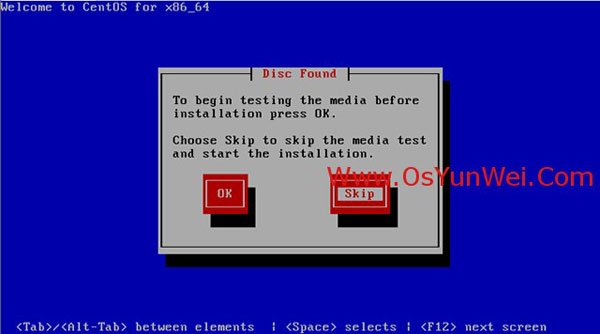
Successfully boot the system with a CD and the following interface will appear
Interface description:
Install or upgrade an existing system to Install or upgrade an existing system
The install system with basic video driver adopts basic video card driver during installation
Rescue installed system enters system repair mode
Boot from local drive exits the installation and starts from the hard drive
Memory test Memory detection
Select the first option here, install or upgrade the existing system, and return.
If there is a question about testing CD media, select Skip to Skip the test.
The following interface appears
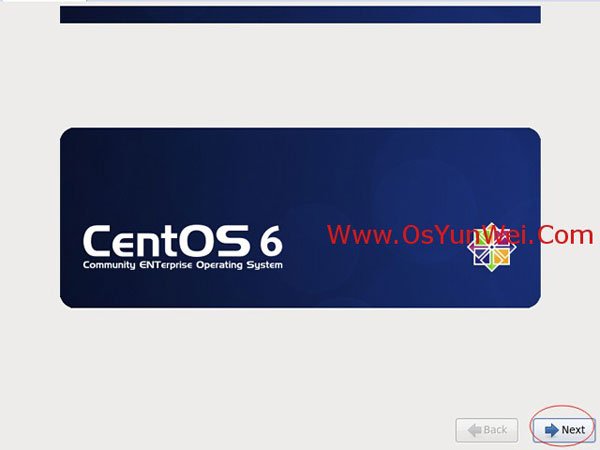
Next
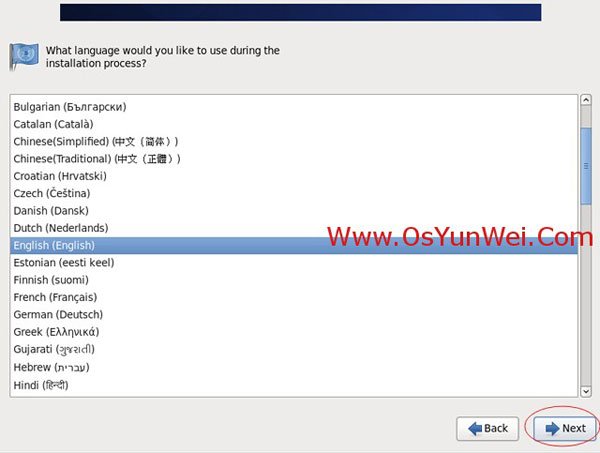
The production server of English (English) # is recommended to install the English version
Next
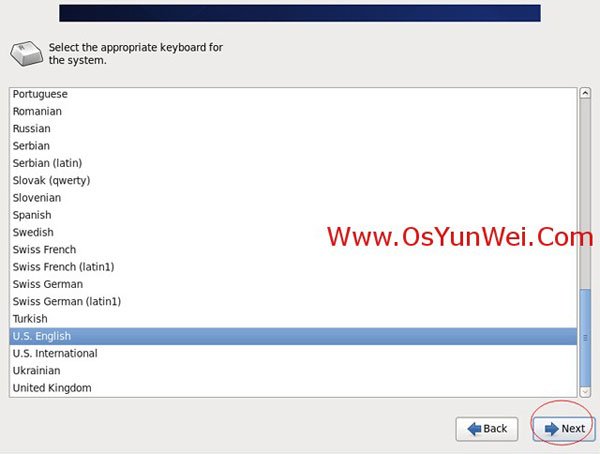
Keyboard option: u.s.glish
Next
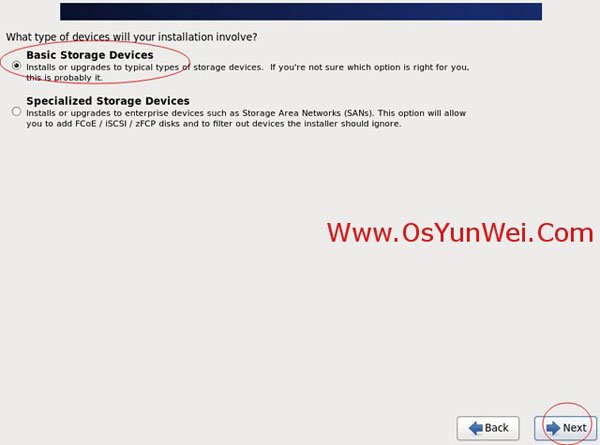
Select the first item, the basic storage device
Next
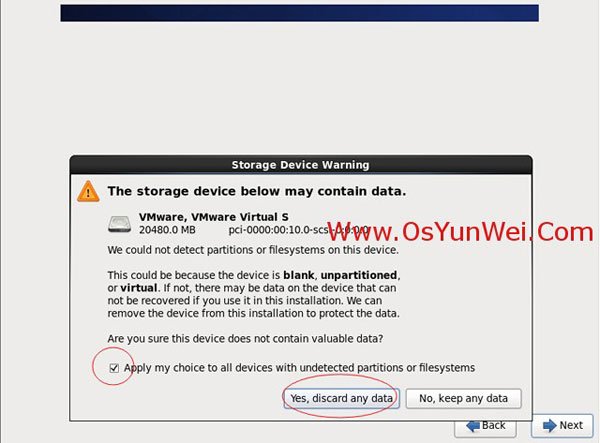
Select item 1: Yes, ignore all data
Next
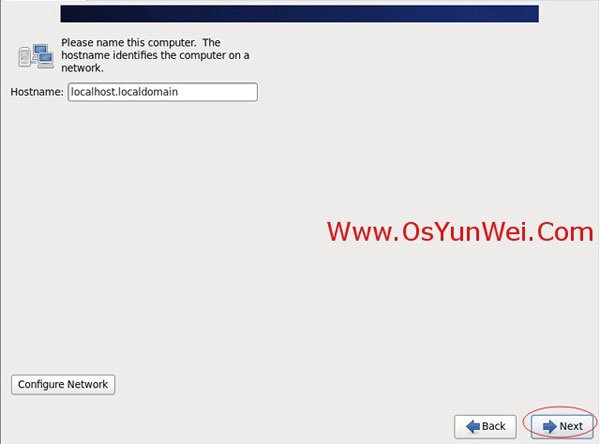
Set the host name, which is the default, and modify it when the installation is complete
Next
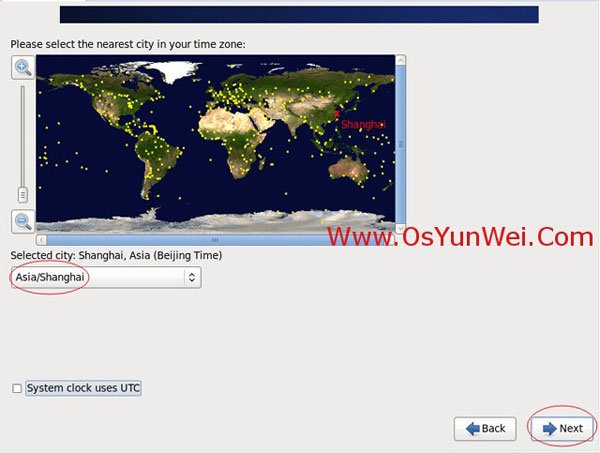
Time zone selection: Asia/Shanghai
"System clock user UTC" # cancels the previous tick and does not use UTC time
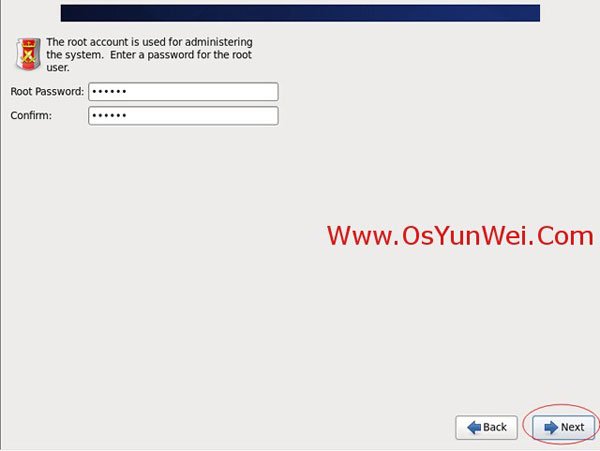
Set the root password
Next
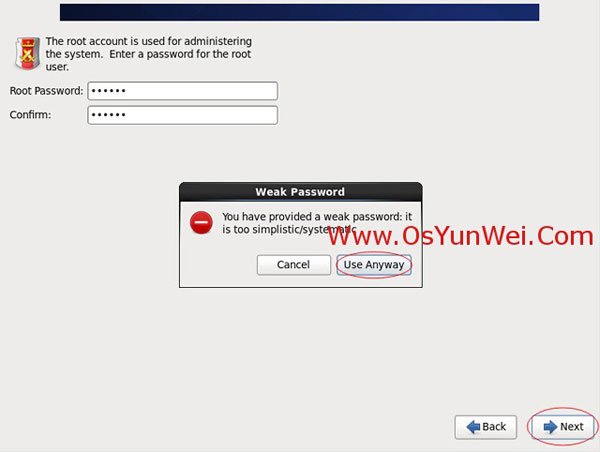
Note: if your password is too simple, the system will automatically prompt: your password is not secure enough, too simple/systematized
Here, select "Use Anyway" and Use it Anyway
The production environment must have strong and complex passwords
Next
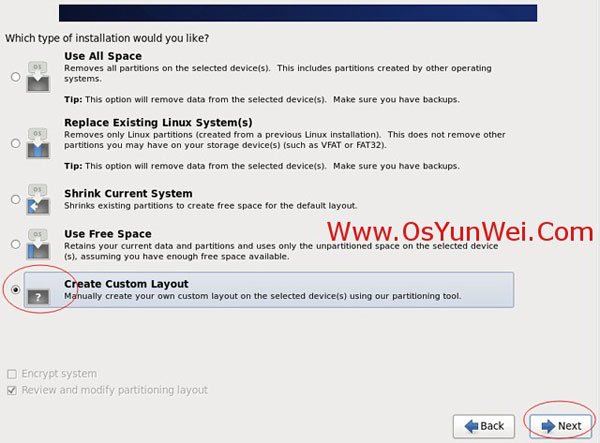
Select the last item, Create Custom Layout to Create Custom partitions
Next
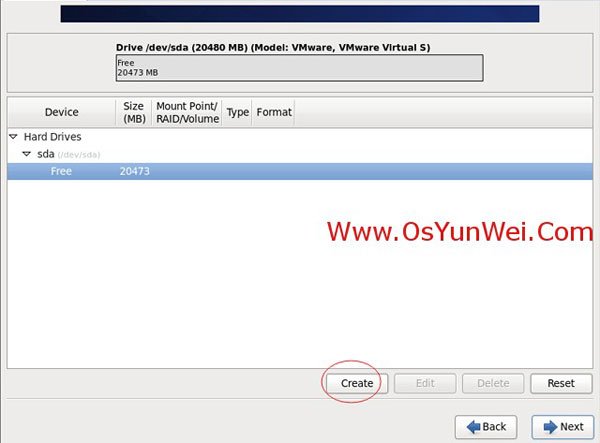
You can see the capacity of the hard drive, which I'm showing here is 20 gigabytes, now custom partition.
Note: before partitioning, you need to plan your own partition. How do you do it
My partition here is as follows:
20 gigabytes of hard disk
Swap #2048M, usually set to twice memory
/ # all space left
Special instructions:
For formally produced servers, it is important to partition the data disks separately to ensure data integrity in case of a system failure. Let's say I divide it by another one
/data is dedicated for storing data.
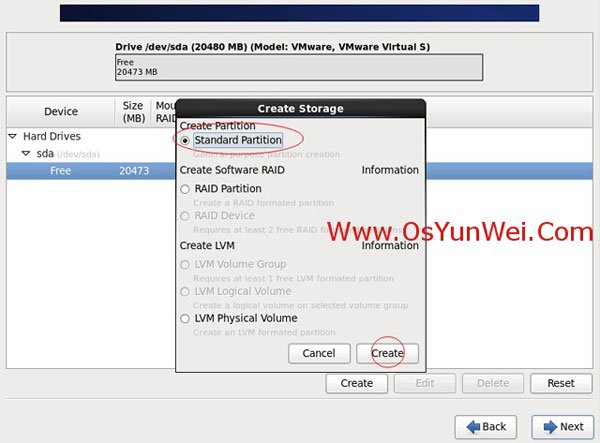
Select the Free Free partition and click Create
Select the Standard Partition of the Standard Partition and click Create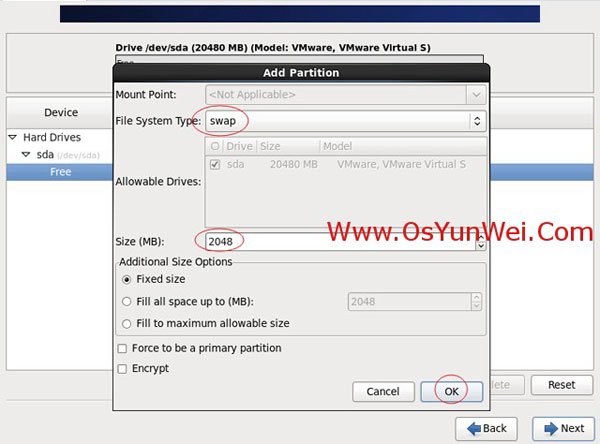
File system type: swap
Size: 2048
Other options are available by default
Sure OK
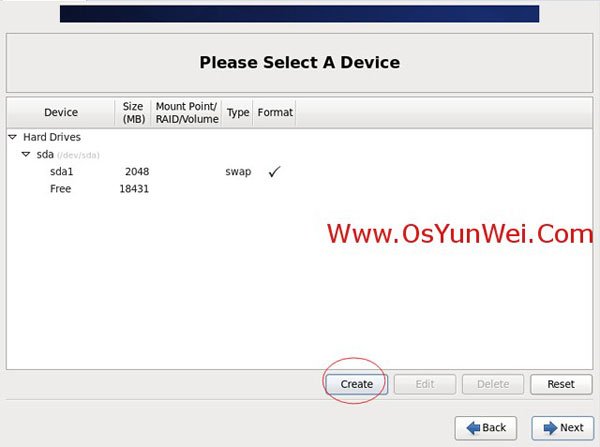
Continue to select the Free Free Free partition and click Create
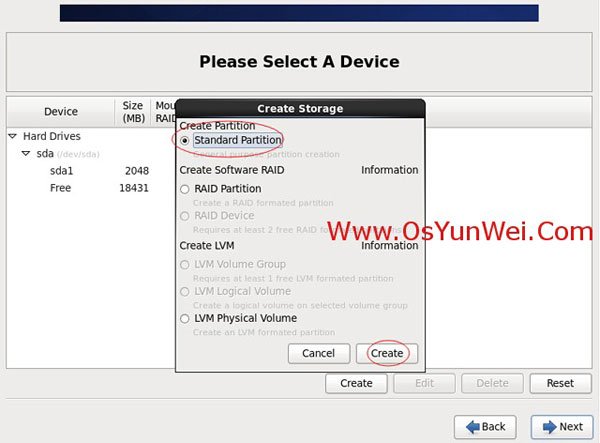
Select the Standard Partition of the Standard Partition and click Create
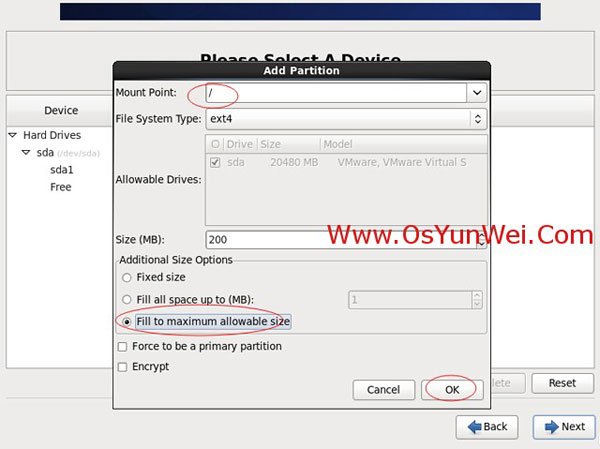 Mount point: /
File system type: ext4
Select use all available space
Other options are available by default
Sure OK
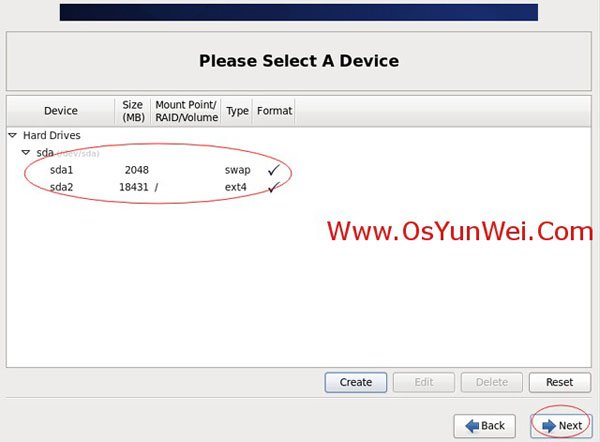
After the partition is created, as shown above, click Next
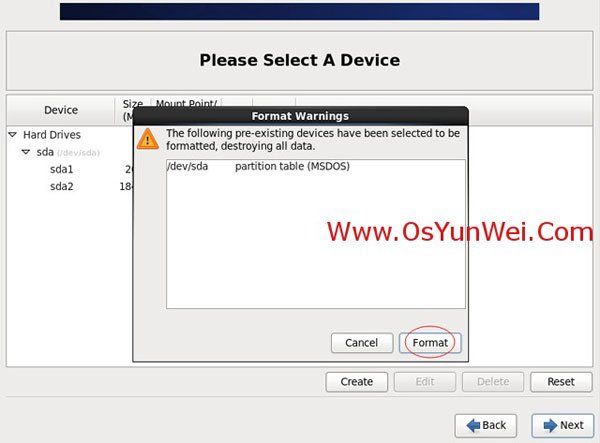
Click Format to Format

Select "Write changes to disk" to Write the changes to disk
Select "Write changes to disk" to Write the changes to disk
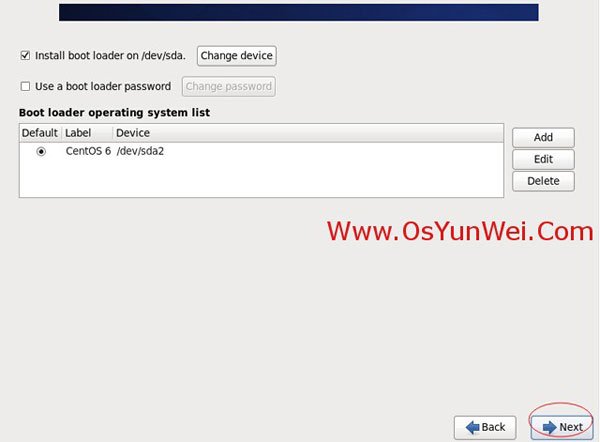
The default
Next
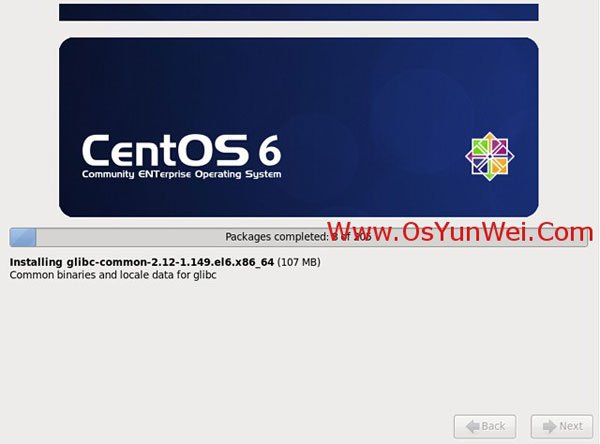
Start the installation
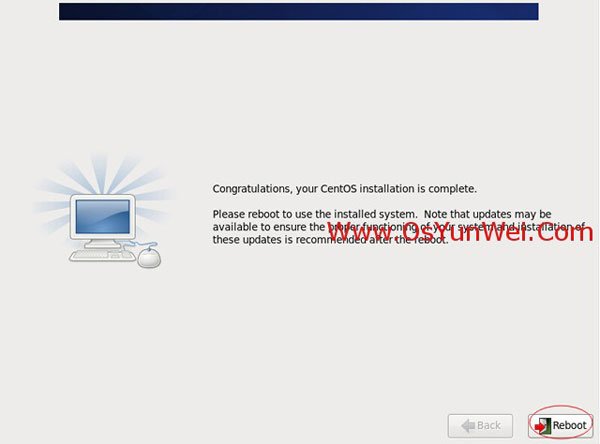
The installation is complete
Reboot at Reboot, Reboot at Reboot

After restarting, the following login screen appears
Enter the root and password of the account and log in the system successfully, as shown in the figure below:
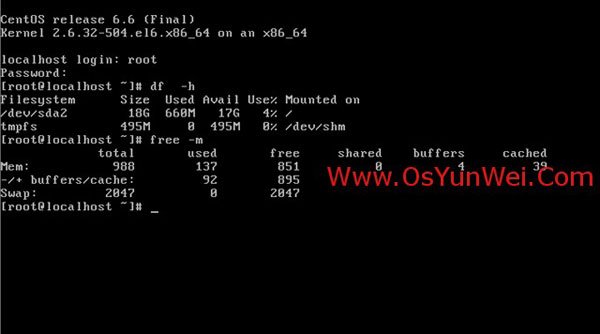
System installation completed
Set IP address, gateway and DNS
Convention:
The first network card is the external network
The second network card is an internal network (a machine without an external network also has to configure the internal network on the second network card).
Explanation: after the default installation, CentOS 6.6 does not automatically open the network connection!
Enter the account root
Enter the password set during the installation process and log in to the system
Vi /etc/sysconfig/network-scripts/ifcfg-eth0 # edit the configuration file to add and modify the following
BOOTPROTO=static # enables static IP addresses
ONBOOT=yes # opens automatic network connection enablement
IPADDR=192.168.21.129 # set IP address
Set subnet mask = 255.255.0 #
GATEWAY=192.168.21.2 # setup GATEWAY
DNS1=8.8.8 # setting the primary DNS
DNS2=8.8.4.4 # setup standby DNS
IPV6INIT=no # forbid IPV6
: wq! # save exit
Service ip6tables stop # IPV6 service
Chkconfig ip6tables off # disables IPV6 startup
Service yum-updatesd stop # shutdown system automatically updates
Chkconfig yum-updatesd off # disables startup
Service network restart # restart network connection
Ifconfig # looks at the IP address
Set the host name
Convention:
Host name naming specification: business. Computer room. Main and standby. Domain name
The host is set to bbs.hz.m.osyunwei.com
1, the hostname "bbs.hz.m.osyunwei.com"
Set the host to bbs.hz.m.osyunwei.com
- Vi /etc/sysconfig/network # edit configuration file
The HOSTNAME = bbs.hz.m.osyunwei.com
Change the localhost-localdomain to bbs.hz.m.osyunwei.com
: wq! # save exit - Vi /etc/hosts # edit the configuration file
127.0.0.1 localhost at bbs.hz.m.osyunwei.com
Change the localhost-localdomain to bbs.hz.m.osyunwei.com
: wq! # save exit
Shutdown -r now # restart the system
So far, CentOS 6.6 system installation and configuration has been completed
Congratulations @hahapp9174! You received a personal award!
Click here to view your Board
Congratulations @hahapp9174! You received a personal award!
You can view your badges on your Steem Board and compare to others on the Steem Ranking
Vote for @Steemitboard as a witness to get one more award and increased upvotes!