Introduction
I often come across account profiles on Steemit where there is no profile image set, or where the image is unavailable because it is not hosted in a public location. For the second case, the user probably doesn't even know that the rest of the world cannot see their profile image because it likely appears in their browser for them when they load Steemit.com on their computer.
There's a simple solution to the hosting problem that may even be useful for other web sites: Gravatar.
Gravatar was created in order to automatically give you an avatar image that you could use throughout the internet. It hashes your email address, and uses that as the filename for the image hosted on their server. In this way, nobody can figure out what your email address is given the image filename, but if you provide your email address to a web site or forum, it can automatically fetch the avatar image for you (no need to upload a picture).
Steemit doesn't use Gravatar, but since you can provide any image URL when editing your profile, you can just create a Gravatar and then use that image's address.
Create a Wordpress Login
Gravatar is owned by WordPress, so in order to manage your Gravatar(s), you will need a WordPress login.
Go to the URL: https://en.gravatar.com/

Click on the "Create Your Own Gravatar" button
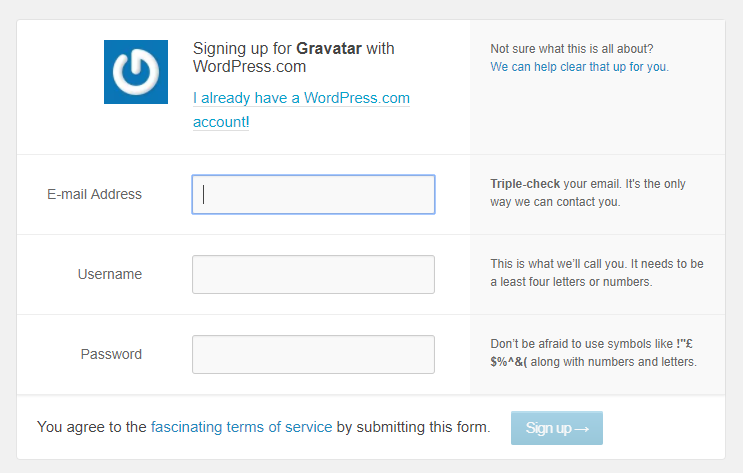
Enter your email address and pick a username and password to use for your WordPress account:
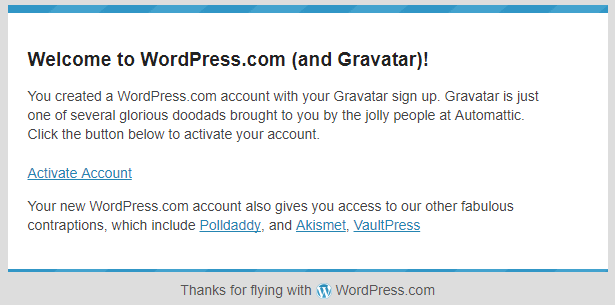
Gravatar will tell you to check your email in order to activate the new account:

Inside the email, click on the "Activate Account" link:
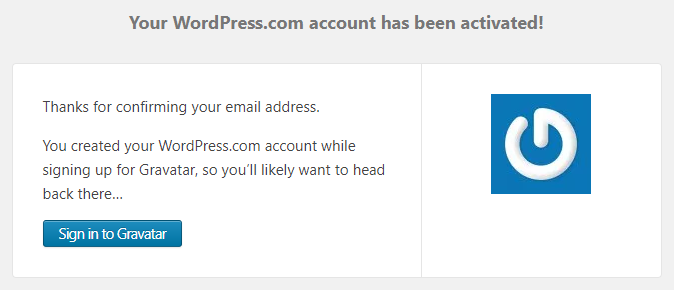
You will be told that the account was successfully activated:
Add a Gravatar
Click on the "Sign in to Gravatar" button from the account activation page, or navigate to the Gravatar login page and sign in: https://en.gravatar.com/connect/
This is where you can manage which Gravatars are associated with various email addresses. For your very first Gravatar, click on the "Add a new image" link at the bottom:

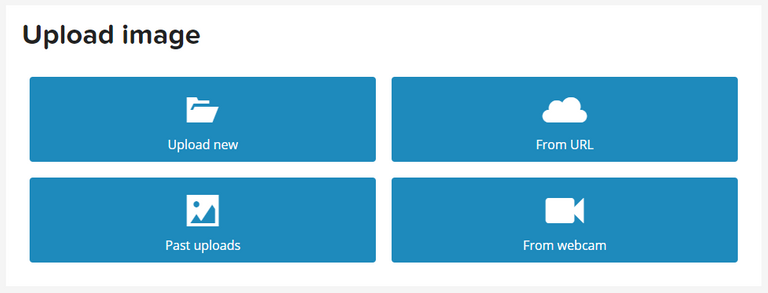
You can choose to upload a new image, take a picture with your webcam, provide the URL of an existing image, or use a past upload (if you've used Gravatar before):
If you upload a new image, be aware that they limit it to 1MB in size:
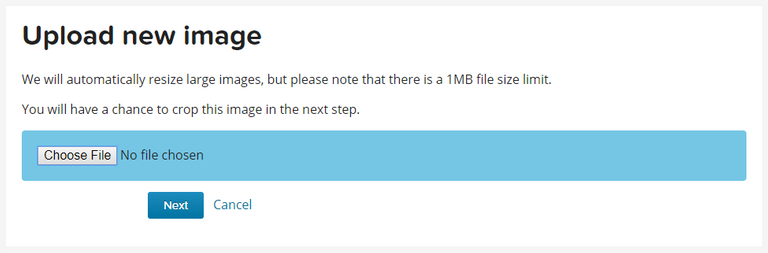
Gravatar images are square, so crop as necessary for the best looking image:

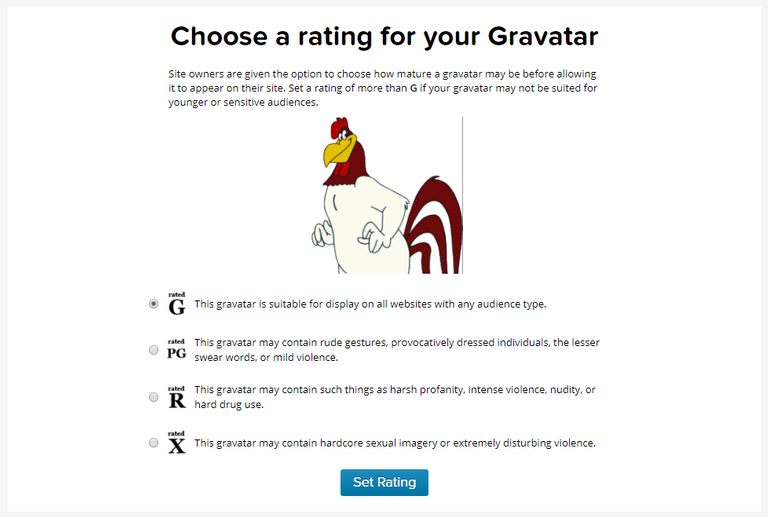
You can set a rating (and use different Gravatars for different ratings). I recommend a G-rated Gravatar, especially for your first one, that is appropriate for anyone to view (including the children of Steemit users who may be looking over their shoulder at the screen):
But, what's the URL?
One thing Gravatar doesn't make that easy to discover is the URL of the Gravatar image itself.
There are many sites that are only a Google Search away that will allow you to input an email address and it will provide the image URL (and a preview of the Gravatar itself).
For example, one site is: http://www.asaph.org/p/gravatar.html
![]()
Once you have your Gravatar URL copied to the clipboard, head over to Steemit.com, click on your profile image, and choose "Settings" from the menu. Note: If you don't have a profile image already, then click on that empty circle at the top where your profile image is supposed to go.
Provide the Gravatar URL in the textbox labeled "PROFILE PICTURE URL", and then click the "UPDATE" button.
That's it! You should see your image now in the upper right of Steemit.com, and you can rest assured that the rest of the world can see your image, too, when they view your posts and/or profile.
If you ever need to change your image, then just head back to Gravatar to make the edits. The URL will not change, so Steemit (and any other site that uses Gravatar) will automatically show your modifications.
sounds interesting. Thank you for the detailed step by step tutorial! I'd simply uploaded my profile pic in steemit maybe that's a alternative.
terribly underrated post thanks for the help, man!
That was such a detailed tutorial. Thank you, @jfollas. Needed it so much.
Thank you so much!!! I have been trying to get my Gravator to show for months to no avail. Finally I have a profile pic. How do you create URL for background image?